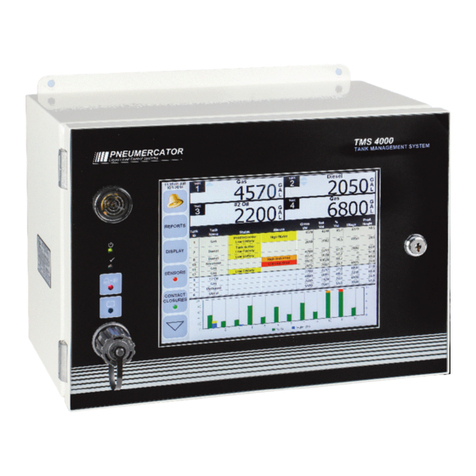
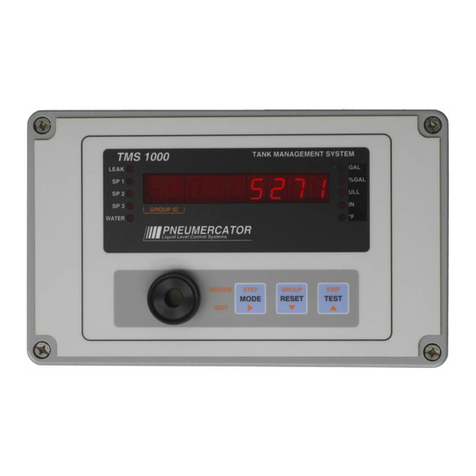
Pneumercator LDE740 User manual

Multi Tank
Monitoring
System
© COPYRIGHT 2017 PNEUMERCATOR CO.
1785 EXPRESSWAY DRIVE NORTH, HAUPPAUGE, NY 11788
(631) 293-8450 Phone
(631) 293-8533 Fax
(800) 209-7858 Product Support
http://www.pneumercator.com
PNEUMERCATOR
Liquid Level Control Systems
INSTRUCTION MANUAL
MODEL LDE 740
(Revised July 8, 2017)
PeterSinkiwskij
DigitallysignedbyPeterSinkiwskij
DN:cn=PeterSinkiwskij,o=PneumercatorCo.,Inc.,
Date:2017.08.0313:07:38-04'00'


PNEUMERCATOR CO., INC. LDE-740 System
Operation and Installation Manual
Page 3 of 104
NOTICE: PNEUMERCATOR CO., INC. reserves the right to make improvements to the
product described in these instructions at any time and with no notice.
WARNING: This equipment generates, uses, and can radiate radio frequency energy and
if not installed and used in accordance with the instruction manual, may cause interference to
radio communications. It has been tested and found to comply with the limits for a Class A
computing device pursuant to Subpart B of Part 15 of FCC Rules, which are designed to provide
reasonable protection against such interference when operated in a commercial environment.
Operation of this equipment in a residential area is likely to cause interference in which case the
user at his own expense will be required to take whatever measures may be required to correct
the interference.
IMPORTANT: Installation of this equipment must be in accordance with these instructions
as adopted from the following codes:
ISA RP12.6, "Installation of Intrinsically Safe Instrument Systems in Class I Hazardous
Locations".
NFPA 70, "National Electrical Code".
Alteration, modification or replacement with non-factory components could impair the
intrinsic safety of this equipment.

PNEUMERCATOR CO., INC. LDE-740 System
Operation and Installation Manual
Page 4 of 104
Table of Contents
Section 1 Introduction 6
Section 2 Specifications 9
Section 3 Installation 11
Section 3.1 Mechanical Installation 11
Section 3.2 Transmitter/Sensor Installation 11
Section 3.2.1 Tank Level Transmitters 11
Section 3.2.2 Switch Sensors 12
Section 3.2.3 Leak Detection Sensors 13
Section 3.3 Electrical Installation 16
Section 3.4 Installation Checklist 17
Section 3.4.1 System Map and Setup 18
Section 4 Operation 19
Section 4.1 Normal Operation 19
Section 4.1.1 Display Mode 19
Section 4.1.2 Tank / Channel Selection 20
Section 4.1.3 System Defaults 20
Section 4.2 Leak Detection 21
Section 4.3 Theft Mode 22
Section 4.4 The Horn 23
Section 4.5 The Relay Contacts 23
Section 4.5.1 Latching Relays 25
Section 4.6 System Tests 25
Section 4.7 Maintenance 26
Section 5 Keypad Commands 27
Section 5.1 How to Enter Keypad Commands 27
Section 5.2 Keypad Commands - Grouped by Function 29
Section 5.3 Keypad Commands - Numerical Order 33
Section 5.4 Keypad Command Entry 35
Section 6 RS-232 Communications 52
Section 6.1 RS-232 Command Format 52
Section 6.2 How to Enter RS-232 Commands 53
Section 6.3 RS-232 Commands - Grouped by Function 54
Section 6.4 RS-232 Commands - Numerical Order 57
Section 6.5 RS-232 Command Entry 59
Section 6.6 Packed Data Format 72
Section 7 Troubleshooting & Servicing 74
Figure 1 Tank Level Transmitter Wiring - TB2 12
Figure 2 Switch Sensor Wiring - TB3 13
Figure 3 Leak Sensor Wiring - TB4 14
Figure 4 9-901 Cable Lengths 14
Figure 5 Relay Contact Wiring - TB5 24

PNEUMERCATOR CO., INC. LDE-740 System
Operation and Installation Manual
Page 5 of 104
Figure 6 Relay Contact Wiring - TB6 24
Figure 7 Key Definitions 27
Figure 8 RS-232 Special Characters 53
Figure 9 2-412 Installation 79
Figure 10 2-501 Installation 81
Figure 11 9-901 Installation 83
Figure 12 9-902 Installation 84
Figure 13 9-903 Installation 85
Figure 14 Main Circuit Board Layout 86
Figure 15 Display Circuit Board Layout 87
Figure 16 System Wiring Diagram: LDE-740 88
Figure 17 Program Chip Replacement 89
Figure 18 Printer Paper and Ribbon Replacement 90
Figure 19 LS600 LD Installation 91
Figure 20 RSU-800 Installation 92
Appendix A Keypad Error Codes 94
Appendix B Relay and Horn Alarm Conditions 95
Appendix C Tank Product Codes 97
Appendix D RS-232 Connector 99
Appendix E RS-232 Setup 100
Warranty 101

PNEUMERCATOR CO., INC. LDE-740 System
Operation and Installation Manual
Page 6 of 104
Section 1: Introduction
The Pneumercator LDE-740 is an advanced inventory management and
control system. Drawing upon Pneumercator's more than 99 years of experience in
liquid level controls and measurement systems, the LDE-740 is designed to help
simplify the inventory process, and to be extremely easy to operate.
This 16-bit microprocessor controlled system continuously monitors the level
of product in up to 4 storage tanks. The product level is available on the daylight
visible display in units of either inches of product height, or in gallons.
The LDE-740 easily accommodates different sizes of underground and
aboveground storage tanks, and is suitable for all types of fluids. Some of the fluids
that are suitable for monitoring with the LDE-740 are petroleum products, waste oil,
conductive fluids, water, alcohols, solvents, lubricants, and corrosive chemicals. The
gauge offers conversion of level to volume pre-programmed to match the geometry
of the storage tank used. Pneumercator's many years of experience help guarantee
an accurate conversion of height to gallons for all types and configurations of storage
tanks.
The gauge provides audible, visible and (optional) printed outputs for high
(overfill), critical and low level alarms, and 8 switch input alarms. Alarms are also
provided for theft detection, and high water (if the optional water detection is ordered
with the model 2-412 tank level transmitter only). The LDE-740 also provides 8
channels of precision leak detection. Visible alarms are continuously on until the
conditions are corrected. The audible alarm may be silenced for a particular condition
by pressing the HORN RESET pushbutton on the front panel and may be
programmed from the integral keypad to automatically shut off after a specified
period of time. The audible alarm may be disabled for all conditions, by using a
command in programming mode.
The gauge has 8 relays with dry contacts that will activate on programmed
conditions. The relay contacts are available at the terminal block as Form C contacts
that may be programmed for normally energized or normally unenergized states. The
relay contacts are rated at 5 amps at 120 VAC.
Printed hard-copy inventory reports of product level and volume in the tanks
may be requested at any time by pressing the PRINT pushbutton on the front panel
if the optional printer is present. Hard-copy records of alarms and deliveries are
automatically printed on occurrence.

PNEUMERCATOR CO., INC. LDE-740 System
Operation and Installation Manual
Page 7 of 104
The system features self-diagnostics that test the audible alarm, visual
alarms, clock, relay operation, and data storage memory. These tests are available
from the keypad, and help to ensure reliable and trouble-free operation of the
LDE-740.
Set-up parameters for the storage tanks, and for the system as a whole may
be printed at any time by a keypad command. This allows for hard-copy verifications
and records of the conditions that the system is operating under.
Variations in tank installations, fitting tolerances, and tank tilts may be
compensated for by entering an installation offset adjustment. This allows the
system to maintain maximum accuracy in its measurements.
The LDE-740 can take inputs from 8 leak detection sensors designed to monitor
collection sumps and the annular spaces of double wall tanks for leakage of
hydrocarbons. The system provides indications for detection of dry, water, and
hydrocarbons. Detection of air (dry condition) is indicated by a Green light. Detection
of hydrocarbons is indicated by a Red light. Detection of water is indicated by an
Amber light. The leak detection capabilities meet EPA requirements for annual
testing and monthly monitoring.
The LDE-740 will retain memory of a hydrocarbon or water alarm even if the
alarm condition later disappears. The alarm memory is battery backed up, so the
memory will remain in the event of a power failure. The alarm memory may be cleared
by using the Clear Leak Detection Latch keypad command.
The adjustable volume system horn will sound an audible alarm when the
selected alarm conditions are present. Audible alarm silencing may be done manually
by pressing the HORN RESET button on the cover of the console, or may be
automatically timed for a selectable automatic time delay reset. Time delay periods
of 1 to 7 minutes in 1-minute increments are available. Relay outputs may be
programmed to actuate on selected conditions and may be programmed to shut off
after time delays of from 1 to 15 minutes, or be programmed to manually shut off by
pressing the HORN RESET button on the cover of the console.
Sensors may be tested and calibrated by keypad programming. The switch
inputs may be programmed to accept normally open or normally closed mechanical
contacts. The LDE-740 can also be programmed to accept switch inputs at any leak
detection inputs. Sensors for both sump and annular space detection may be mixed
in a system with no limitations. Switch inputs may also be programmed to act as
standby generator inputs, which notify the system when a standby generator is in
operation. Standby generator-run reports are then automatically generated.

PNEUMERCATOR CO., INC. LDE-740 System
Operation and Installation Manual
Page 8 of 104
The system console may be mounted in any non-hazardous area where it can
be provided with 120 VAC ±10% at 60 Hz. The standard enclosure is NEMA 1 with
a NEMA 4 console optionally available (printer not available with NEMA 4 option).
The system level transmitters and sensors are designed for intrinsically safe
operation in Class I, Division 1, Group A, B, C, D areas. The level transmitters may
be separated from the console by 3 wire #18 AWG runs of up to 2200 feet. Leak
sensors may be separated from the console by 3 wire #18 AWG runs of up to 1000
feet. Switch sensors may be separated from the console by 2 wire #18 AWG runs of
up to 2200 feet.
The system is designed to provide safe and reliable operation when installed
as instructed in the Installation section of this manual. All requirements of the
National Electrical Code (NEC) as well as local electrical and fire codes should be
followed in the installation procedures. It is recommended that the user read and
understand ANSI / ISA RP12.6, "Installation of Intrinsically Safe Instrument Systems
in Class I Hazardous Locations”.
If additional information is needed concerning equipment selection, system
planning, installation, operation, servicing or maintenance, please contact:
PNEUMERCATOR CO., INC.
1785 Expressway Drive North
Hauppauge, New York, 11788
Phone (631) 293-8450
Fax (631) 293-8533
http://www.pneumercator.com

PNEUMERCATOR CO., INC. LDE-740 System
Operation and Installation Manual
Page 9 of 104
Section 2: Specifications
Power - 120 VAC ± 10%, 60 hertz, 50 Watts, MOV differential and common-mode surge
protection, under voltage detection and protection.
Fuse - 3 A.G. SLO-BLO, 1/4 Amp, 250 VAC or equivalent.
Operating Temperature - -40º F to 122º F (-40º C to 50º C).
Enclosure - NEMA 1 standard, NEMA 4 optional.
Installation - Wall mount.
Calibrations - Alarm points and programming set by keypad maintained for 10-year data
retention on power failure.
Gauging Resolution - 0.1% of tank height.
Gauging Accuracy - ±0.12% of tank height or ±1/8" w/2-412 or ±1/4" w/2-501, whichever
is greatest.
Gauging Repeatability - ±0.1% of tank height.
Displays – Red, 0.8 inch high, seven segment displays. Display mode, Tank / Channel
select, Theft mode and Data Recall switches.
Alarm Indications - Tank Level Alarm and Leak Alarm Channel indications always
visible while alarm condition is present. Individual level alarm indications for selected
tank and Individual leak alarm Indications In leak status display mode.
Horn - Min. 85 dB at 3 meters on axis, manual horn reset (silence) pushbutton,
automatically timed horn silence.
Relay Outputs - 8 SPDT dry relay contacts, rated at 5 Amps at 120 VAC, individually
keypad programmable for actuating condition(s) and normally energized or normally
unenergized.
Clock - The clock maintains the time and date and year for (optional) printer functions. It
automatically compensates for Leap Year corrections and Daylight Savings Time. The
time is maintained with an accuracy of ±11 sec / day. 10-year data retention on power
failure.
Level Transmitters - Standard: 2-412 or 2-501. Intrinsically safe for Class I, Division 1,
Groups A, B, C, D, 5 VDC @45 mA.
Optionally from isolated self-powered 4 to 20 mA transducer capable of driving 500 (not
intrinsically safe).

PNEUMERCATOR CO., INC. LDE-740 System
Operation and Installation Manual
Page 10 of 104
Switch Inputs - 8 from any mechanical switch input.
Intrinsically safe for Class I, Division 1, Groups A, B, C, D, 5 VDC @25 mA. Individually
programmable for normally open or normally closed switch inputs.
Output Signals - standard RS-232 Port.
Optional 20-column dot matrix printer.
Leak Detection Sensors - 8 from 9-901, 9-902, and 9-903 sensors.
Intrinsically safe for Class I, Division 1, Groups A, B, C, D, 5 VDC @45 mA. Can be
individually programmed to alternately accept normally open or normally closed
mechanical switch inputs.
Leak Detection Testing - Meets EPA requirements for annual testing and monthly
monitoring.
Hydrocarbon Detection -
Products that are to be detected must be non-conductive fluids having a dielectric value of
between 2 and 12.
9-901: 0.33”, 100% pfd, 0% pfa @ 0.1 gph.
9-902: 0.35", 100% pfd, 0% pfa @ 0.1 gph.
9-903: 0.68", 100% pfd, 0% pfa @ 0.1 gph.
Leak Detection Response Time - Less than 1 second for detection, 1 minute for alarm latch.
Leak Detection Indicators -
Red led indicates oil detection.
Amber led indicates water detection.
Green led indicates dry (normal condition).
Level Transmitter/Sensor Operating Temperature -
2-412, 2-501 Level Transmitters: -20 ºF to 180 ºF (-29 ºC to 82 ºC).
9-901, 9-902, 9-903 Sensors: -40 ºF to 130 ºF (-40 ºC to 55 ºC).
LS600 Switch Sensors: -20 ºF to 180 ºF (-29 ºC to 82 ºC).
LS600LD Leak Sensors: -40 ºF to 160 ºF (-40 ºC to 71 ºC).
Level Transmitter/Sensor Operating Pressure -
2-412 Level Transmitter: to 50 psi.
2-501 Level Transmitter: to 15 psi.
9-901, 9-902, 9-903 Sensors: ambient (vented).
LS600 Switch Sensors: to 150 psi.
LS600LD Leak Sensors: to 100 psi.
Level Transmitter/Sensor Cable -
2-412, 2-501, 9-901, 9-902, 9-903: Standard 3 conductor #18 AWG,
2-412 and 2-501 up to 2200 feet. 9-900 sensors up to 1000 feet.
Switch sensors: Standard 2 conductor #18 AWG, up to 2200 feet.

PNEUMERCATOR CO., INC. LDE-740 System
Operation and Installation Manual
Page 11 of 104
Section 3: Installation
NOTE: INSTALLATION MUST BE DONE BY QUALIFIED PERSONNEL,
FAMILIAR WITH LOCAL WIRING CODES AND EXPLOSION HAZARD
ELECTRICAL SAFETY PRACTICES.
Section 3.1: Mechanical Installation
The LDE-740 console is a NEMA 1 enclosure intended for indoor installation.
An optional NEMA 4 enclosure intended for indoor or outdoor installation is available
and offers protection against splashing water, seepage of water, falling of hose
directed water, and severe external condensation. The NEMA 4 enclosure is also
sleet resistant. Either enclosure has mounting flanges, which allow permanent
fastening to wells, panels, etc.
The console should be located in an area that is easily accessible to the
personnel responsible for operating the system. This is to allow easy maintenance
access, and access to the console for operation and testing. The console must be
located in a non-hazardous area, as close as possible to the demarcation point of the
hazardous area, with available 120 VAC power brought to the console through a
dedicated metal wiring conduit. The metal conduits for level transmitters, sensors, and
power should be weather tight. Bottom entrance holes are provided for 1/2" NPT pipe
or rigid metal conduit, with level transmitters and sensors entering on the bottom left
and power entering on the bottom right.
Consult the local electrical codes for specific requirements.
Section 3.2: Level Transmitter/Sensor Installation
Section 3.2.1: Tank Level Transmitters
There are two different tank-level transmitters available for the LDE-740. The
model 2-412 is designed for installation in 4" minimum tank openings. The model
2-501 is designed for installation in 2" minimum tank openings and is designed for use
with heavy viscous fluids like #6 oil. Self-powered transducers that provide an isolated
4 to 20 mA output may be used for tank gauging if the LDE-740 is ordered from the
factory with this option. If a 4 to 20 mA transducer is used, two (2) 18 AWG wires are
required.
Three (3) 18 AWG wires are required for each model 2-412 and model 2-501
level transmitter. The wiring should be run through NEMA 4 or better junction boxes
and 1/2" weatherproof liquid tight metal conduit. All splices should be waterproofed.
The metal conduit and junction boxes should be sealed against entry of water. If
required, vapor seals may be installed to prevent gas vapors from propagating back
to the console. The transmitter wiring to the console should be run in a dedicated
metal wiring conduit. No non-intrinsically safe wires should be in the same conduit

PNEUMERCATOR CO., INC. LDE-740 System
Operation and Installation Manual
Page 12 of 104
unless a metal barrier is provided. All Pneumercator level transmitters and sensors
may be run in the same conduit.
The tank level transmitters are wired to TB2 on the circuit board. The Red wires
are connected to position R, the White wires are connected to position W and the
Black wires are connected to position B. If a 2 wire transducer is used, the (+) wire is
connected to position W and the (-) wire is connected to position B. Position R is not
used with a 2 wire transducer. If the optional water detection is present (2-412 only),
the 2 water detection wires are run to the W+ and W- positions for the respective tank.
Figure 1 - Tank Level Transmitter Wiring - TB2
Terminal # Water
Tank R W B W+ W-
1 1 2 3 4 5
2 7 8 9 10 11
3 13 14 15 16 17
4 19 20 21 22 23
The wiring and terminal block (TB2) are intrinsically safe and are physically
separated from the AC power and relay contact wiring and terminal blocks on the right
side (TB5, 6, 7). This separation must be maintained.
See Figure 16, System Wiring Diagram: LDE-740, Page 89.
2-412 Installation (see Figure 9, Pages 80, 81)
2-501 Installation (see Figure 10, Pages 82, 83)
Section 3.2.2: Switch Sensors
Pneumercator makes a number of different LS600 series switch sensors, which
may be used with the LDE-740. See the appropriate LS600 bulletins for details on
these. Any other mechanical switch closure may also be used as switch inputs. The
LDE-740 may also be programmed to accept switch inputs at any LEAK input. If this
feature is used, the two (2) wires of the switch are connected to TB4 positions R and
W of that LEAK input.
Two (2) 18 AWG wires are required for each switch sensor. The wiring should
be run through NEMA 4 or better junction boxes and 1/2" weatherproof liquid tight
metal conduit. All splices should be waterproofed. The metal conduit and junction
boxes should be sealed against entry of water. If required, vapor seals may be
installed to prevent gas vapors from propagating back to the console. The switch
sensor wiring to the console should be run in a dedicated metal wiring conduit. No
nonintrinsically safe wires should be in the same conduit unless a metal barrier is
provided. All Pneumercator level transmitters and sensors may be run in the same
conduit.

PNEUMERCATOR CO., INC. LDE-740 System
Operation and Installation Manual
Page 13 of 104
The switch sensors are wired to TB3 on the circuit board. Each switch sensor
is wired to positions + and – for that switch.
Figure 2 - Switch Sensor Wiring TB3
Terminal #
Switch + –
1 1 2
2 3 4
3 5 6
4 7 8
5 9 10
6 11 12
7 13 14
8 15 16
The Wiring and terminal block (TB3) are intrinsically safe and are physically
separated from the AC power and relay contact wiring and terminal blocks on the right
side (TB5, 6, 7). This separation must a maintained.
See Figure 16, System Wiring Diagram: LDE-740, Page 89.
Section 3.2.3: Leak Detection Sensors
There are three leak detection sensors available for the LDE-740. The model
9-901 is designed for installation in a horizontal position in the annular space of F.R.P.
double wall tanks or piping. The model 9-902 and 9-903 are designed for installation
in a vertical position in collection sumps, monitoring pipes and steel double-wall tank
sumps.
Three (3) 18 AWG wires are required for each sensor. The wiring should be run
through NEMA 4 or better junction boxes and 1/2" weatherproof liquid tight metal
conduit. All splices should be waterproofed. The metal conduit and junction boxes
should be sealed against entry of water. If required, vapor seals may be installed to
prevent gas vapors from propagating back to the console. The sensor wiring to the
console should be run in a dedicated metal wiring conduit. No non-intrinsically safe
wires should be in the same conduit unless a metal barrier is provided. All
Pneumercator level transmitters and sensors may be run in the same conduit.

PNEUMERCATOR CO., INC. LDE-740 System
Operation and Installation Manual
Page 14 of 104
The sensors are wired to TB4 on the circuit board. The Red wire is connected
to position R, the White wire is connected to position W, and the Black wire is
connected to position B.
Figure 3 - Leak Sensor Wiring - TB4
Terminal #
Sensor R W B
1 1 2 3
2 4 5 6
3 7 8 9
4 10 11 12
5 13 14 15
6 16 17 18
7 19 20 21
8 22 23 24
The wiring and terminal block (TB4) are intrinsically safe and are physically
separated from the AC power and relay contact wiring and terminal blocks on the right
side (TB5, 6, 7). This separation must be maintained.
9-901 Installation (see Figure 11, Page 83 for drawing)
Figure 4 - 9-901 Cable Lengths
Tank size Measurement length
4’ 81"
6' 118"
8’ 149.5"
10’ 193.5"
12’ 222"
1. Use the chart above to determine the cable measurement length for the size of the
tank being monitored.
2. Unroll the sensor / cable assembly and measure from the sensor bottom to the
cable measurement length. Mark the cable at that point.
3. Feed the cable through the bottom of the mounting bushing and cord connector
until the mark on the cable is even with the top of the mounting bushing. Insert the
sensor and cable through the 2” NPT opening and into the annular space.
4. Screw in the mounting bushing and connector.
5. Tighten the connector with the cable mark in the correct position.

PNEUMERCATOR CO., INC. LDE-740 System
Operation and Installation Manual
Page 15 of 104
6. Wire the sensor cable end to three 18 AWG wires in a NEMA 4 or better junction
box or in an optional splice kit, part number 10585-3.
9-902 Installation (see Figure 12, Page 84 for drawing)
1. Measure the distance from the top of the 2" opening to the bottom of the area being
monitored. This is the mounting height.
2. Add 2 and 3/16 inches to this dimension to find the cable length measurement.
3. Unroll the sensor / cable assembly and measure from the sensor bottom to the
cable measurement length. Mark the cable at that point.
4. Feed the cable through the bottom of the mounting bushing and cord connector
until the mark on the cable is even with the top of the mounting bushing. Insert the
sensor and cable through the 2" NPT opening.
5. Screw in the mounting bushing and connector.
6. Tighten the connector with the cable mark in the correct position.
7. Wire the sensor cable end to three 18 AWG wires in a NEMA 4 or better junction
box or in an optional splice kit, part number 10585-3.
9-903 Installation (see Figure 13, Page 85 for drawing)
1. Measure the distance from the top of the opening to the bottom of the area being
monitored. This is the mounting height.
2. If using the optional Pneumercator leak monitor tube assembly for Convault tanks
(assembly #900379-1), add 1 inch to this dimension to find the cable length
measurement.
3. Unroll the sensor / cable assembly and measure from the sensor bottom to the
cable measurement length. Mark the cable at that point.
4. Feed the cable through the bottom of the tube cover and cord connector until the
mark on the cable is visible. Insert the sensor and cable through the monitoring
opening.
5. Screw the cord connector into the tube cover and place back on the tube.
6. Tighten the connector with the cable mark in the correct position.

PNEUMERCATOR CO., INC. LDE-740 System
Operation and Installation Manual
Page 16 of 104
7. Wire the sensor cable end to three 18 AWG wires in a NEMA 4 or better junction
box or in an optional splice kit, part number 10585-3.
Section 3.3: Electrical Installation
WARNING: Do not connect 120 VAC or turn on 120 VAC until all other
connections have been made, all equipment has been installed, and final inspection
has been completed.
The LDE-740 requires a power input of 120 VAC, ±10%, 60 Hz. The unit is
fused with a 1/4 Amp, 3AG Slo-Blo fuse. Total power usage is less than 60 Watts.
The power input is protected against common and differential-mode power surges
with 3 metal oxide varistors (MOVs). The power line for the alarm console should not
share a breaker circuit with any motors, compressors, or other sources of power
surges or voltage sags. The power wiring to the alarm console should be run in a
dedicated metal wiring conduit. No other wires should be in the same conduit unless
a metal barrier is provided. Three wires make up the power input to the LDE-740:
Black (hot), White (neutral), and Green (ground). If power surges or lightning are local
problems, the 120 VAC power line should be protected with an external (not supplied
by Pneumercator) surge protector or lightning arrestor.
The A.C. power wires run to the terminal block labeled TB7, to positions 1, 2
and 3. Position 1, labeled HOT is the hot lead. Position 2, labeled N is the neutral
lead. Position 3, labeled GND is the ground lead. The terminal blocks will accept wire
sizes up to 14 AWG stranded wire. The wiring and terminal block on the left side (TB1,
2, 3, 4) are intrinsically safe and are physically separated from the AC power and relay
contact output wiring and terminal blocks on the right side (TB5, 6, 7). This separation
must be maintained.
IMPORTANT
Connect a 12 AWG copper wire from the terminal block TB1 (labeled Earth
Ground) to a good earth ground. The ground connection must be within 1 OHM of true
ground and must be made at only one point for the system to maintain intrinsic safety.
Properly dress all wires inside the wiring sections and securely clamp down the
enclosure door and tighten all conduit entrances to seal the system watertight. Install
vapor seals in accordance with local codes for hazardous locations if applicable.

PNEUMERCATOR CO., INC. LDE-740 System
Operation and Installation Manual
Page 17 of 104
Section 3.4: Installation Checklist
Do not apply power to the LDE-740 until its installation has been checked and
found to be in accordance with the instructions in this manual; the National Electrical
Code; federal, state and local codes; and other applicable safety codes.
1. Check to be sure that the level transmitter and sensor wires are contained in a
dedicated, separate metal wiring conduit. No wires other than Pneumercator level
transmitter and sensor wires should be in the conduit.
2. Verify that all conduits enter the alarm console through the proper conduit openings
on the bottom of the console. Do not make any other openings in the console.
3. Verify that a 12 AWG copper wire has been connected between TB1 (labeled Earth
Ground) and a good earth ground.
4. Verify that the power supply terminals are correctly wired.
5. Verify that system power is properly wired to a separate, dedicated circuit breaker.
6. Verify that all level transmitters and sensors have been properly wired with
color-coded or marked 18 AWG wires and that the proper color-coding or marking has
been maintained throughout the wiring runs.
7. Verify that all wiring splices are waterproof. Pneumercator part #10585-3 (splice
kit) or equivalent or NEMA 4 or better junction box should be used for all wiring splices.
8. The probe map located on the inside cover of the LDE-740 console should be filled
out to indicate the location of level transmitters and sensors and usage of the various
tank gauging, aux / switch and leak inputs.
9. The system map and setup sheet on the next page should be filled out to indicate
the location of level transmitters and sensors and usage of the various tank gauging,
aux / switch and leak inputs.
10. Securely clamp down the enclosure door.

PNEUMERCATOR CO., INC. LDE-740 System
Operation and Installation Manual
Page 18 of 104
Section 3.4.1: System Map and Setup
Tank Product High Low Critical Offset
1
2
3
4
Chnl
A
ux / Switch Input Usage Senso
r
1
2
3
4
5
6
7
8
Chnl Leak Input Usage Senso
r
1
2
3
4
5
6
7
8
Relay
A
larms Usage
1
2
3
4
5
6
7
8

PNEUMERCATOR CO., INC. LDE-740 System
Operation and Installation Manual
Page 19 of 104
Section 4: Operation
IMPORTANT: Before operating the system, make sure that all items on the installation
checklist in the Installation section of this manual have been checked out and
complied with.
Main Circuit Board layout (see Figure 14, Page 87)
Section 4.1: Normal Operation
The system will continuously monitor the levels of product in all tanks and the
operation of all leak and switch inputs no matter what display mode the system is
operating in. Alarms will actuate the appropriate lights and relays and the horn (if a
relay or horn is programmed for that alarm). Alarm conditions and levels may be
individually programmed from the keypad or the RS-232 communications port.
The Tank Level Alarm and Channel Leak Alarm lights will indicate alarms for
any tank or channel no matter what display mode is selected. Tank Level Alarm lights
can indicate high (overfill), low, critical, and high water alarms for a tank. The critical
alarm may be programmed to act as a high-high or low-low level alarm with a field
programmable setpoint. The default setting for a critical alarm is as a high-high alarm.
Channel Leak Alarm lights can indicate hydrocarbon leak, water leak and Aux / Switch
alarms for a channel.
The system map located on the inside cover of the LDE-740 console should be
filled out to indicate the location of level transmitters and sensors and usage of the
various tank gauging, aux / switch and leak inputs.
Section 4.1.1: Display Mode
The DISPLAY button on the cover of the LDE-740 is used to cycle through the
four display modes - Volume, Inches, Water, and Leak Status. Pressing the DISPLAY
button will shift the display mode to the next lower display mode indication. If the
DISPLAY button is pressed in the Leak Status mode, the display mode will shift to
Volume mode.
The display may be set to indicate Volume, Inches, Water, or Leak Status.
Volume mode indicates the product level in gallons for the selected tank. Inches mode
indicates the product height for the selected tank. Water mode indicates the water
level, if any, in the product for the selected tank. Leak status mode will indicate the
status of the Aux / Switch and Leak inputs for the selected channel. Aux / Switch and
Leak input channels do not necessarily have to be associated with any particular tank.

PNEUMERCATOR CO., INC. LDE-740 System
Operation and Installation Manual
Page 20 of 104
In Volume, Inches, and Water display modes the High, Low, Critical, and Water
lights at the lower right of the display indicate the status of those particular alarms for
the selected tank. The Tank Level Alarm lights at the bottom of the display will indicate
a fault with a particular tank no matter what display mode is selected, or tank is
displayed.
In Leak Status display mode the Dry, Oil, Water, and Aux Alarm lights at the
upper right of the display indicate the status of those particular leak and switch alarms
for the selected channel. The Channel Leak Alarm lights at the top of the display will
indicate a fault with a particular channel no matter what display mode is selected, or
channel is displayed.
Leak and Aux / Switch input channels are independent in usage of each other,
and are independent of any particular tank. They may be used in any groupings, and
may be used for sensors not associated with any tank in the system.
Section 4.1.2: Tank / Channel Selection
The TANK / CHANNEL button on the cover of the LDE-740 is used to cycle
through the tanks and channels installed in the system. Pressing the
TANK / CHANNEL button will shift the display mode to the next tank or channel.
In Volume, Inches, or Water display mode the TANK / CHANNEL button will
cycle through the installed tanks in the system, starting with Tank 1 and going to the
highest numbered installed tank (Tank 4 maximum). Pressing the button while
displaying the highest numbered tank will cycle the display to Tank 1.
In Leak Status display mode the TANK / CHANNEL button will cycle through
channels 1 to 8. Pressing the button while displaying Channel 8 will cycle the display
to Channel 1. Leak Inputs and Aux / Switch inputs are both displayed in Leak Status
display mode.
Section 4.1.3: System Defaults
The LDE-740 has default settings that apply when the system is shipped from
the factory, and when a cold reset command has been performed. If these settings
are suitable for the application, no field programming of these functions has to be
done.
System Settings
Header Lines 1, 2, 3 Blank
Alarm Actuation Delay 10 Minutes
Automatic Inventory Printouts 1,2,3 Disabled
Table of contents
Other Pneumercator Measuring Instrument manuals
Popular Measuring Instrument manuals by other brands

Flowtrecs
Flowtrecs Mini user manual

Argo-Hytos
Argo-Hytos OPCom operating manual

CS Instruments
CS Instruments FA 410 instruction manual

PCB Piezotronics
PCB Piezotronics IMI SENSORS 608A11/020BZ Installation and operating manual

Spectra Precision
Spectra Precision 5.2XL user guide

Abtus
Abtus ABT4640 instruction manual