Polar Electro Connect User manual
INSTRUCTIONS
FOR POLAR PANEL
2022
POLARVAGNEN.COM
MADE
IN
NORR
LAND
POLAR. MADE IN NORRLAND.
2
POLAR. MADE IN NORRLAND.
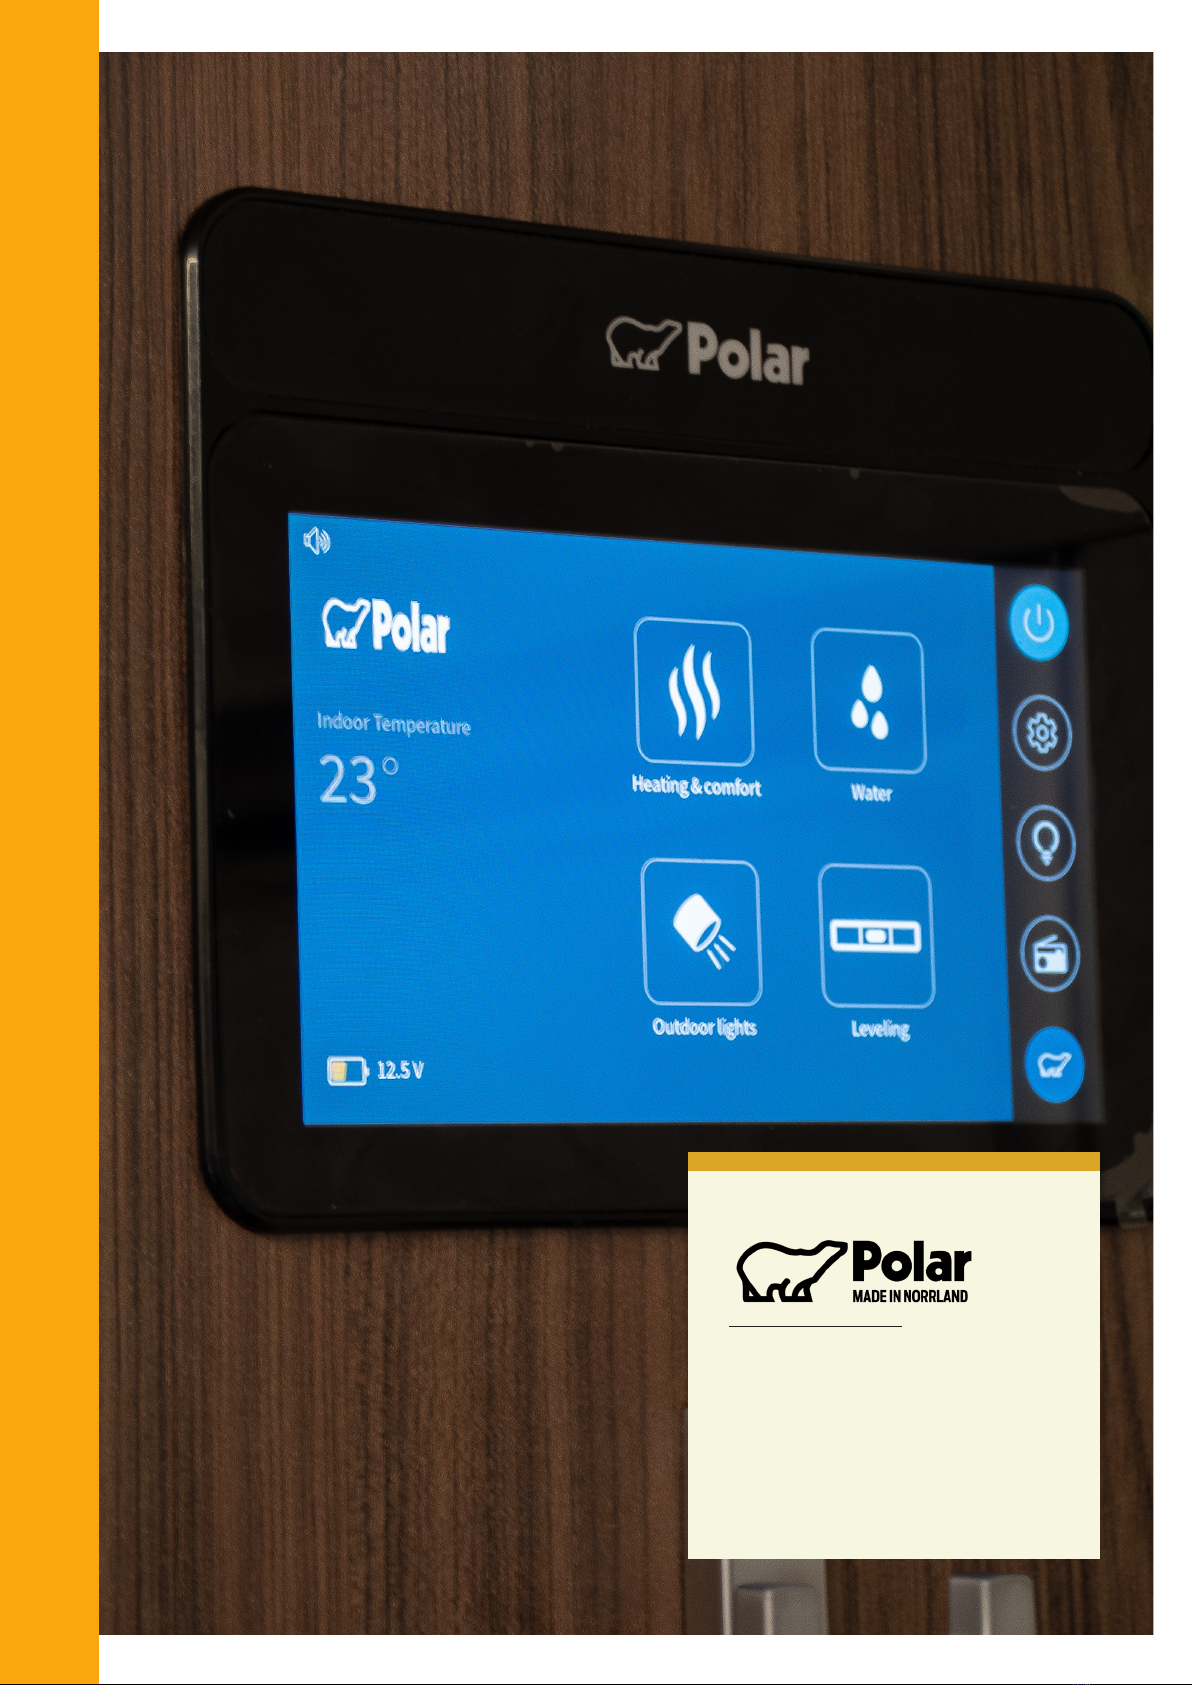
POLAR CONNECT
There are different control systems depending on
which year model they apply to.
For the 2013-2018 model year, the system is called
Remote.
2019 - 2022 Polar Connect.
This instruction applies to Polar connect 2020-2022
and is included in each caravan.
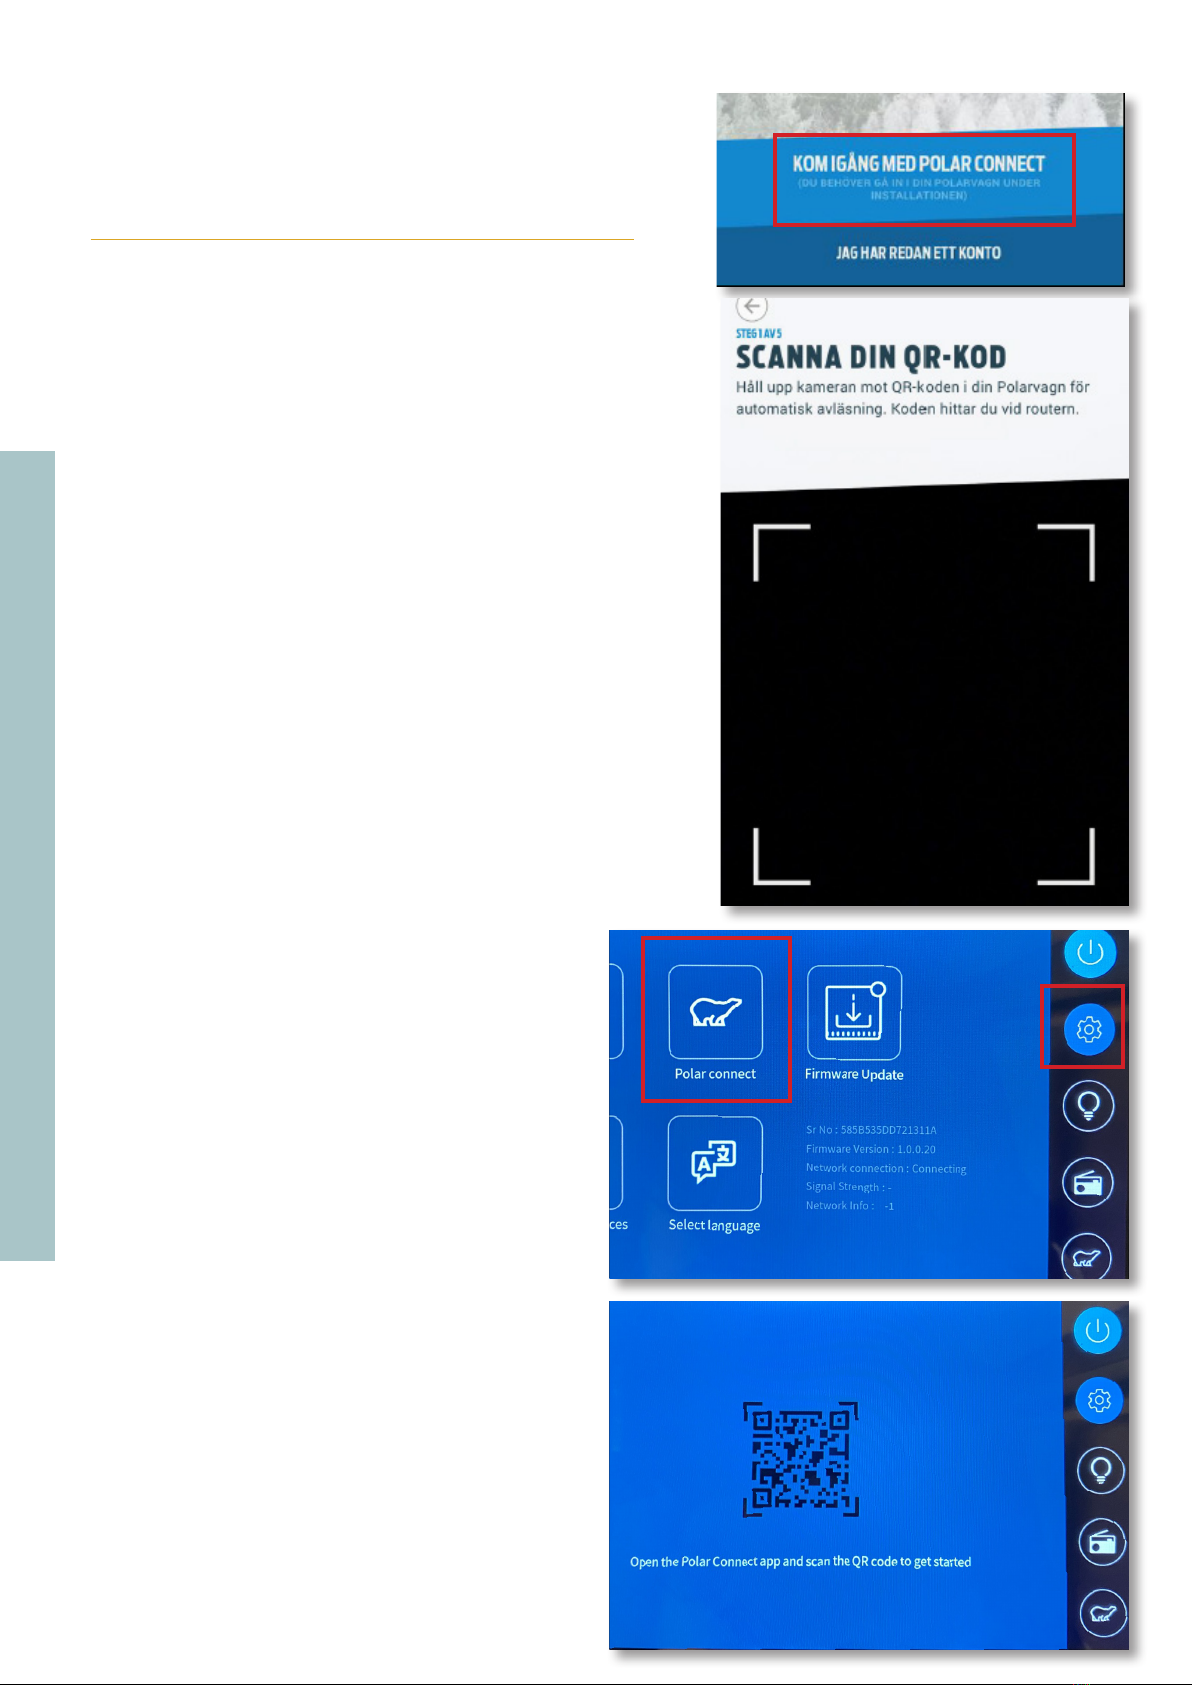
Start by downloading the Polar Connect app from the
Appstore or Google Play Store.
Open the app to start the installation.
Click on ”get started with polar connect”.
The app opens the camera.
Go to settings in the Polar Panel - click on Polar con-
nect to get the car’s QR code. Enter the customer’s
email address. After this, the customer receives a veri-
fication email to the registered e-mail address.
After you have scanned the QR code, you have 30 mi-
nutes to complete the registration of the subscription.
If it takes longer than 30 minutes, the system locks and
you need to contact your dealer to unlock it.
Remember that if the caravan changes owners, you
also need to terminate the Polar connect agreement.

3
POLAR. MADE IN NORRLAND.
Check the tab ¨I accept the terms of use¨ and then click on
”continue”.
Fill in your email address and then click
¨Create an account¨

4
POLAR. MADE IN NORRLAND.
You will now receive an email to your e-mail. Click on
email and Verify address and select subscription.
Select subscription and then continue.
Enter First and Last Name, then press
approve.
5
POLAR. MADE IN NORRLAND.
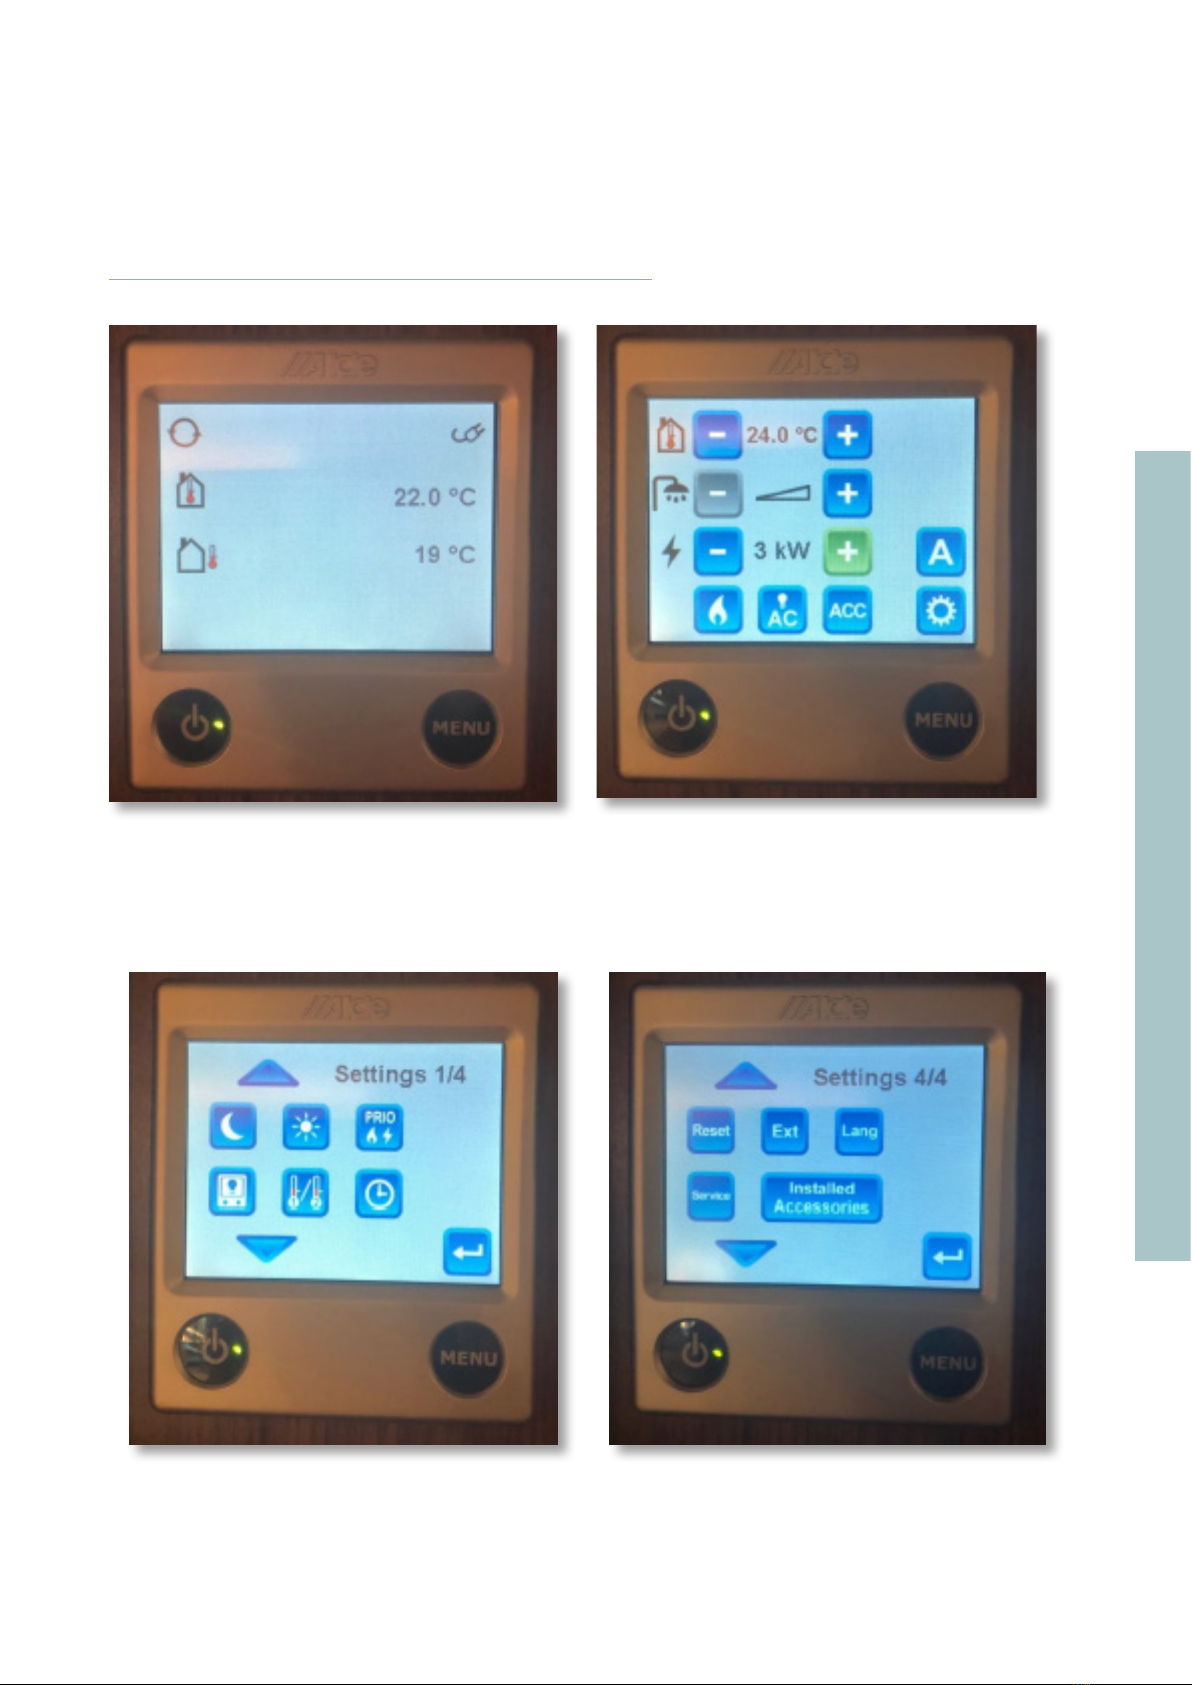
EXTERNAL START OF ALDEPANNAN
Raise and lower the temperature
Start the alde panel and press MENU.
Scroll down until a box named EXT shows.
Choose the desired temperatur and effect and
the gas off. Press the gear at the bottom right
corner.
Click on EXT.
6
POLAR. MADE IN NORRLAND.
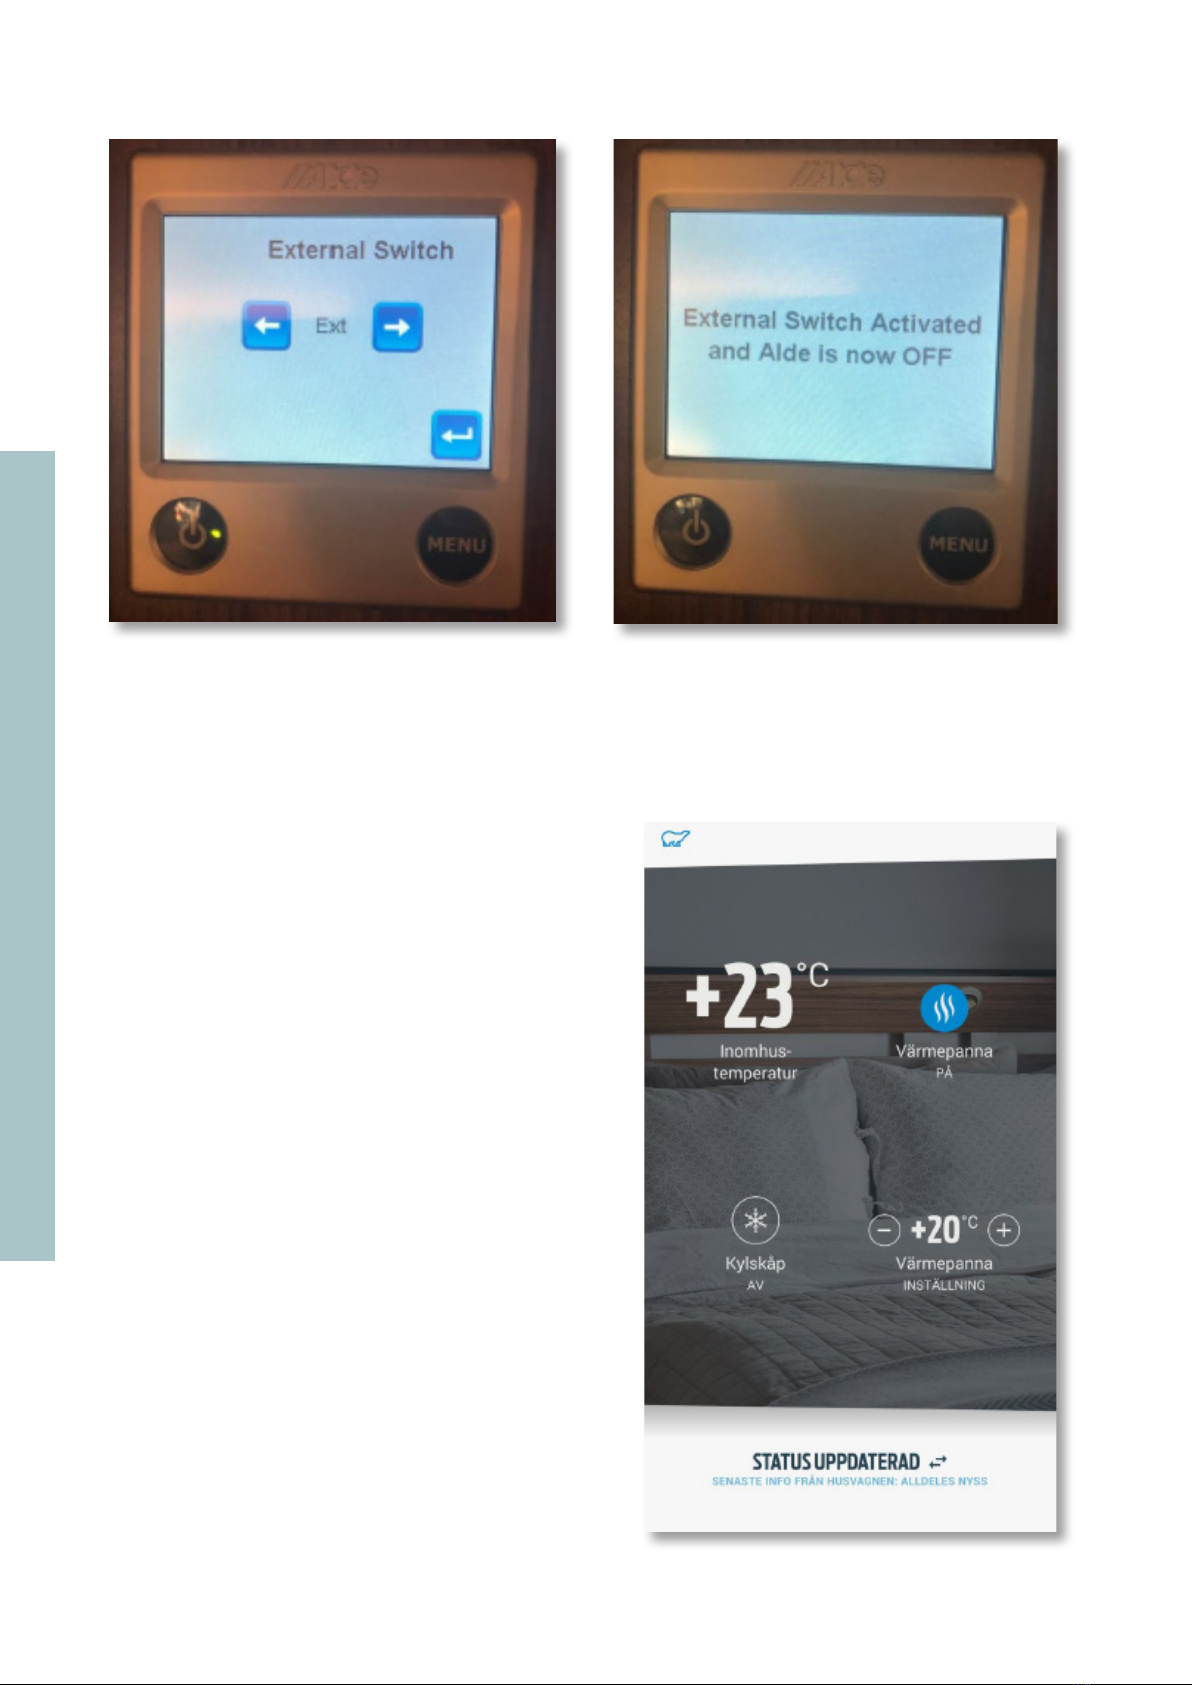
Scroll to the right or left until it says EXT and then
hit the return arrow.
Open Polar connect and make sure that heaster
is on and then set the desired temperature down
below.
Note! It’s not possible to change the temperature
over the value you put in the aldepanel. For ex-
ample, if the Alde display is set on 24 degrees, you
cannot go over 24 degrees in the application.
Turn off the Aldepanel and this text should show,
and after a few seconds the display will become
dark.
7
POLAR. MADE IN NORRLAND.
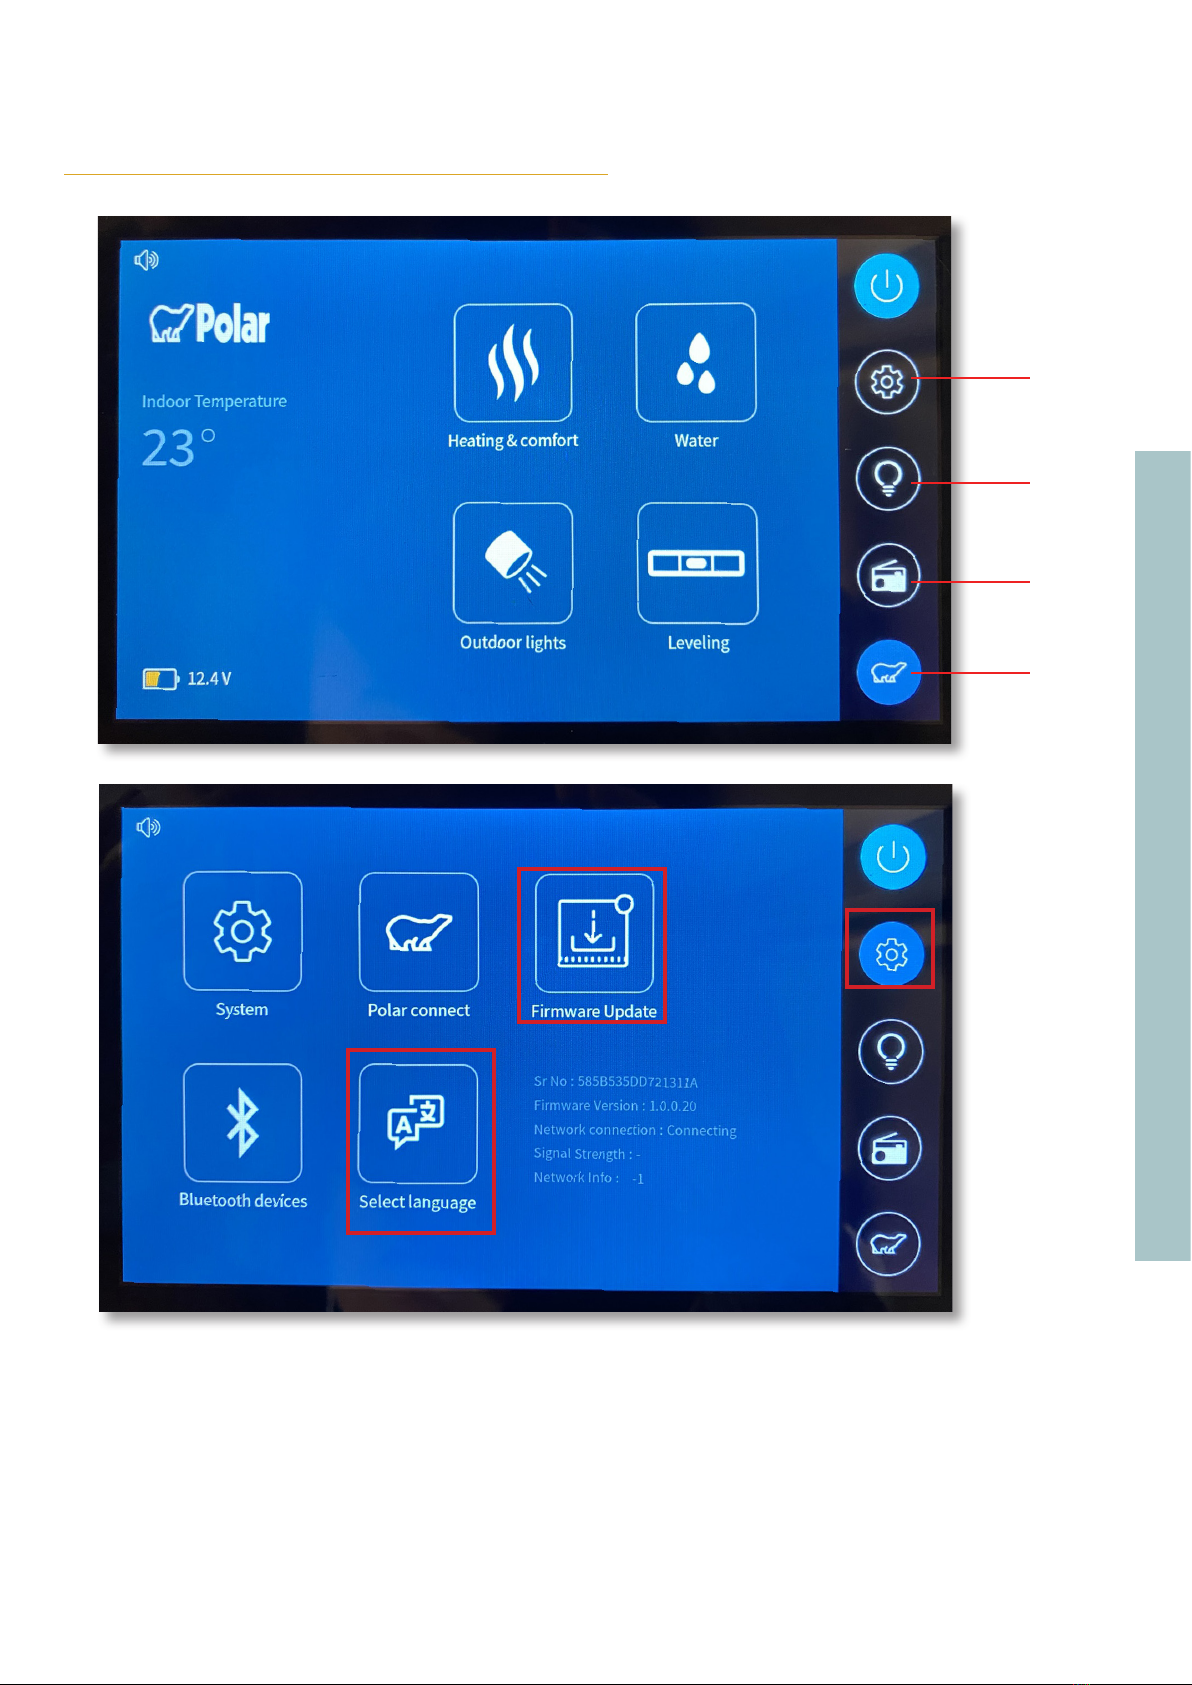
Change the language
Start by changing the language of the panel under the icon settings Select language.
There is no save button. Once you have selected your language, click on the Polar Bear
symbol at the bottom right of the panel to return to the home page.
Software update
Each caravan has a built-in SIM card. When a new software / firmware is available for down-
load, you can find it and download it on the ”firmware update” icon under settings.
GET STARTED WITH THE POLAR PANEL
Settings
Lightning
Radio
Back to main
page
8
POLAR. MADE IN NORRLAND.
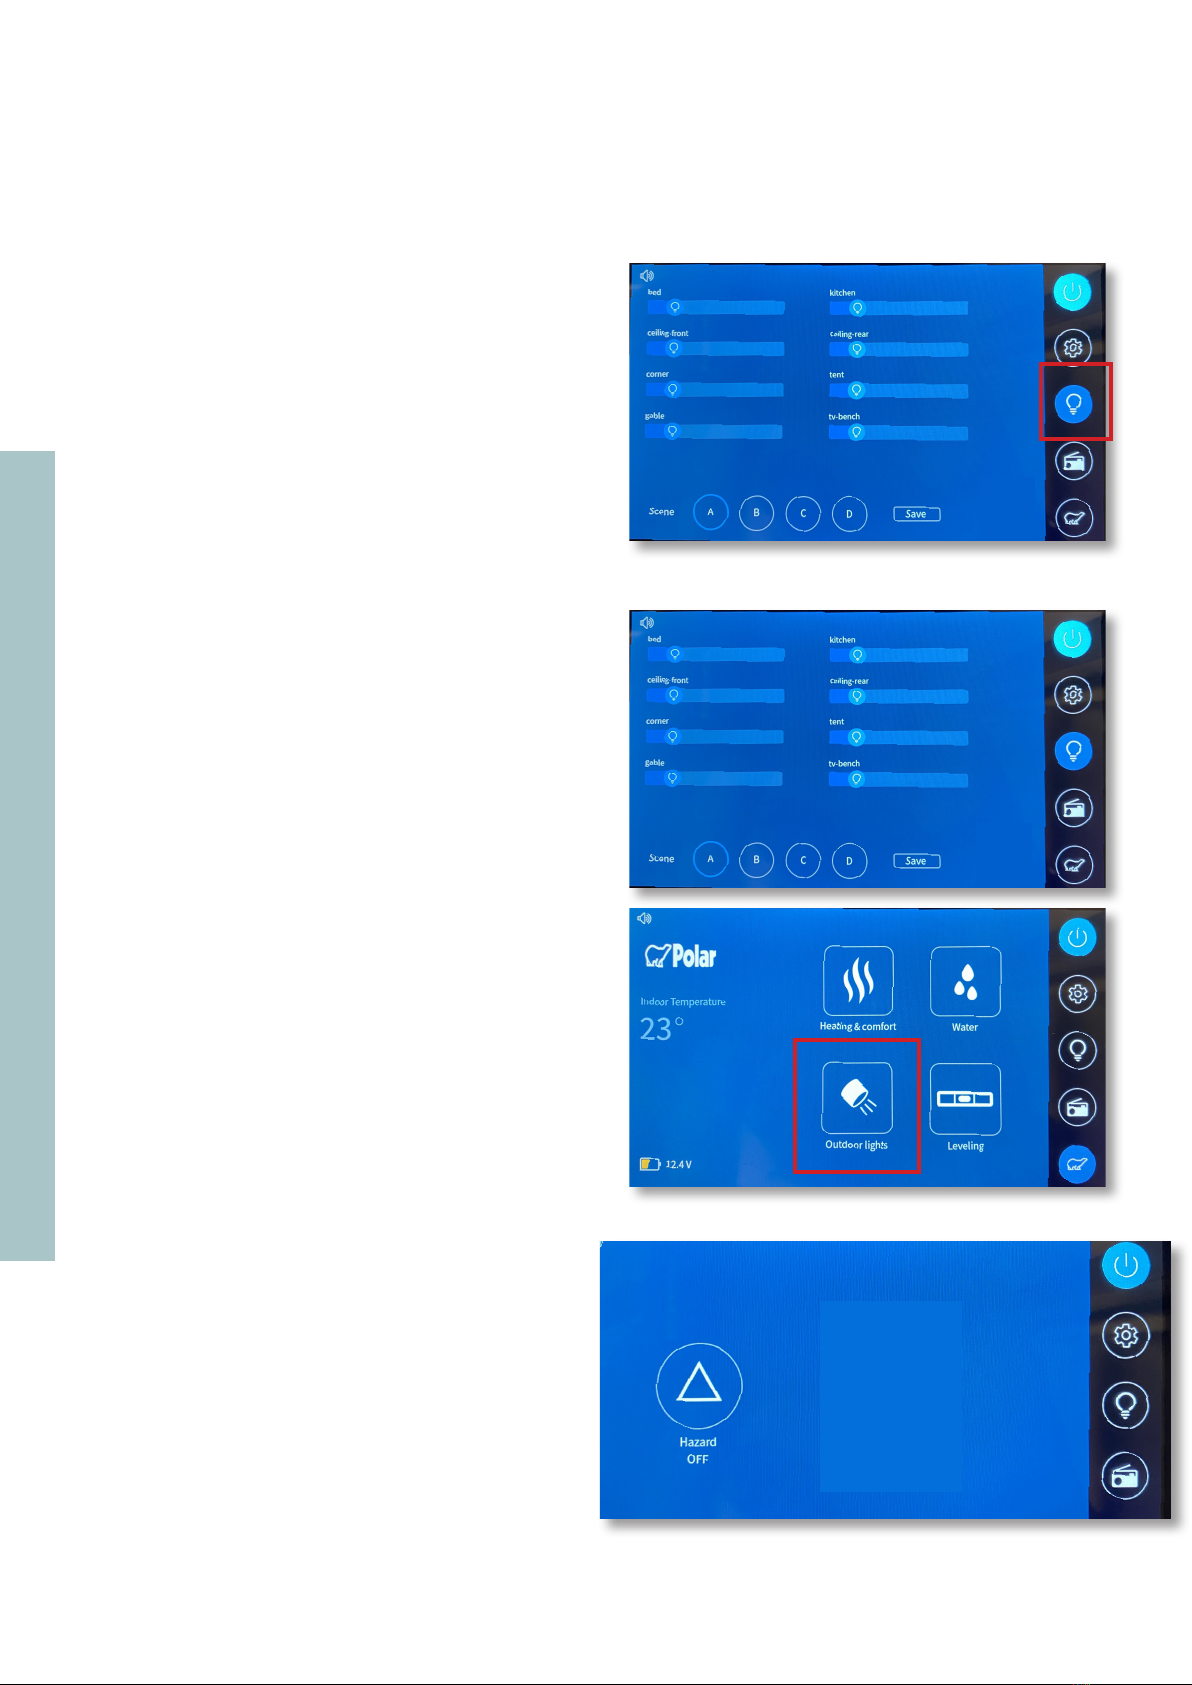
Change light settings
Click on indoor lighting Here are several different
ones options to set the lighting in the carriage exactly
as you want it.
Drag the bars under each heading to adjust
the lighting.
Save scenario
It is possible to save up to 4 different ones
scenario.
Click on the letter you want to save your scenario in
adjust the bars as you want it click save changes.
To turn hazard on and off. Click on outdoor
lighting in the start menu.
Click on the icons to turn the lighting on and off.

9
POLAR. MADE IN NORRLAND.
Climate
Click on the climate icon to start the alde pan,
refrigerator and underfloor heating.
Here you start, among other things, the boiler, the re-
frigerator, electronics and the floor heat pump.
Water levels
Click on the Water icon to bring up the trolley
water level bars.
Leveling of trolley
To see how the caravan is tilted, click on the icon
Level meter. Here you can see how the caravan stands
horizontally and vertically.
The adjustment is done with the help of the support
legs.
10
POLAR. MADE IN NORRLAND.
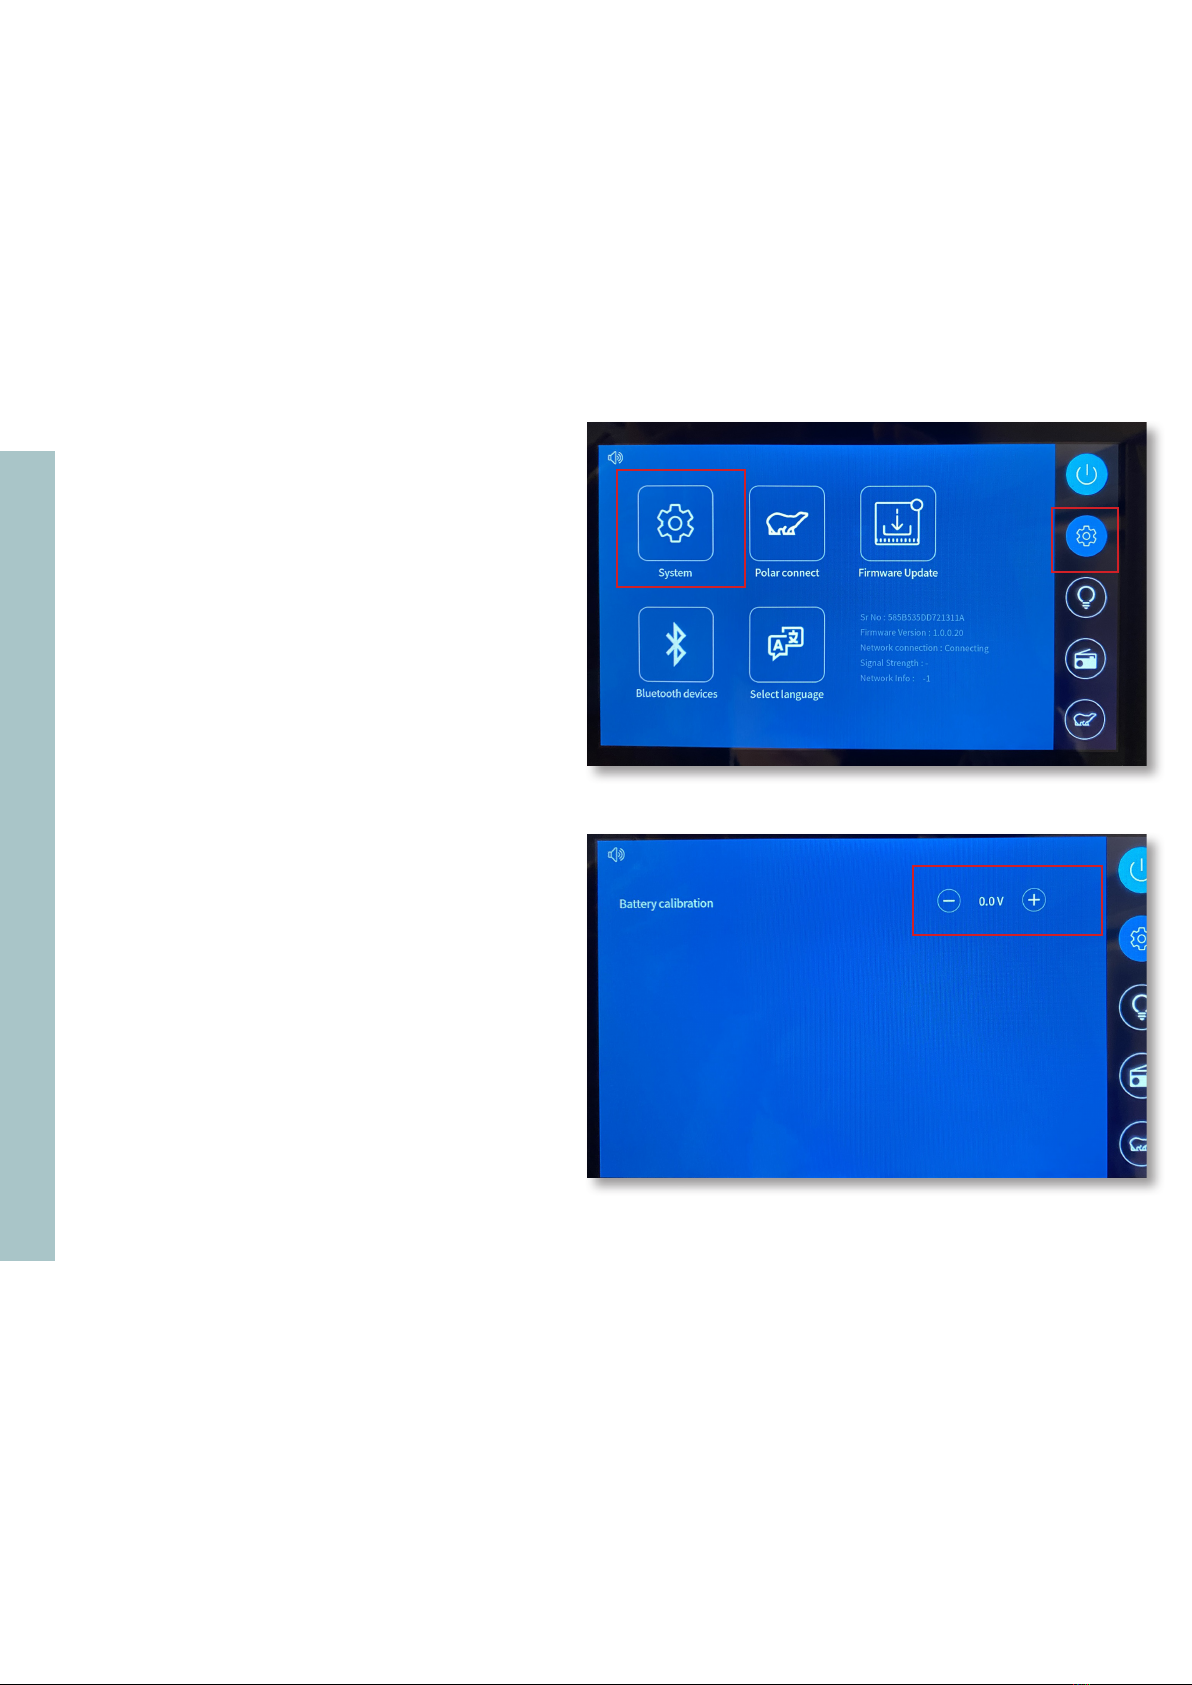
Voltmeter
Calibrable voltmeter in the panel.
To calibrate the voltmeter, you must first measure the
voltage across the battery terminals.
Click Settings System.
Here you calibrate the voltage difference between it
value you got from the battery and that
is down in the panel.


