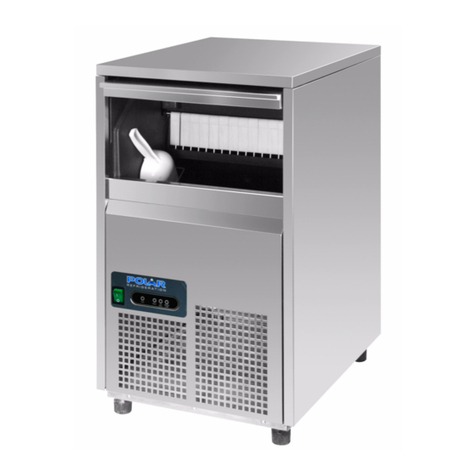
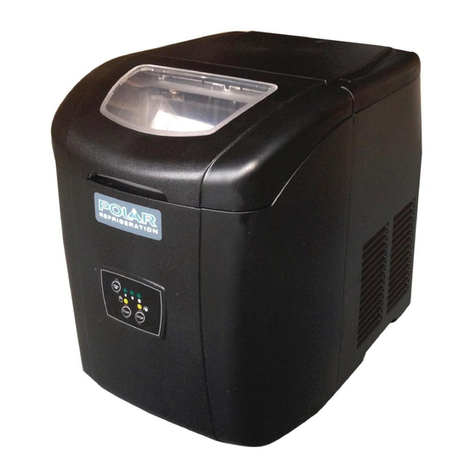
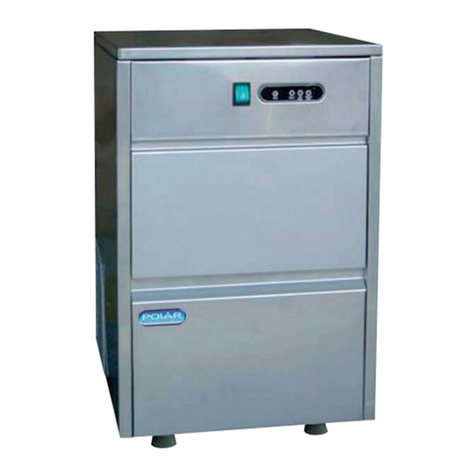
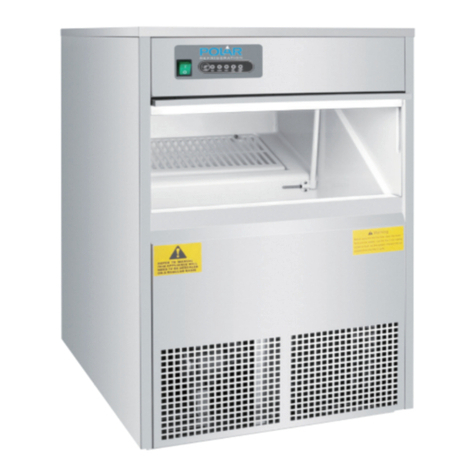
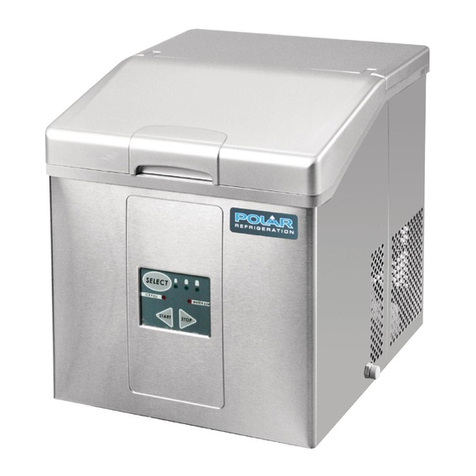
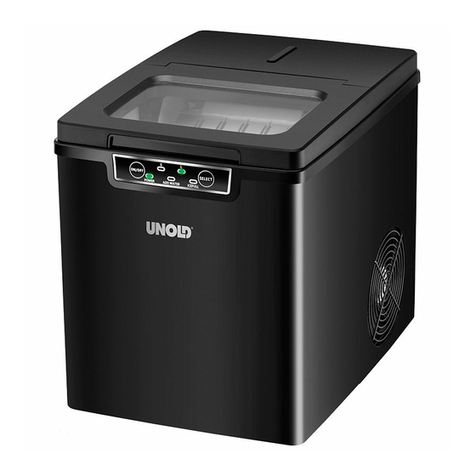
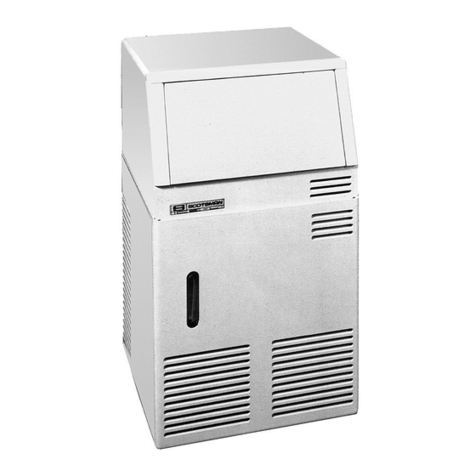
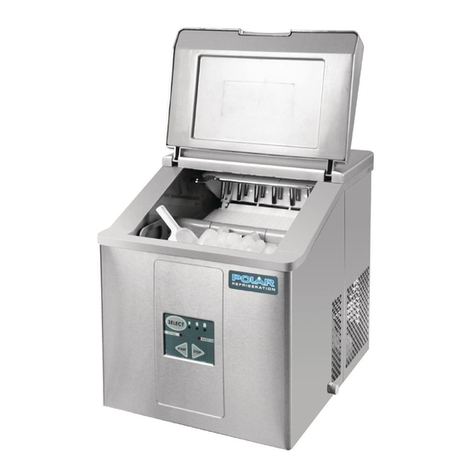
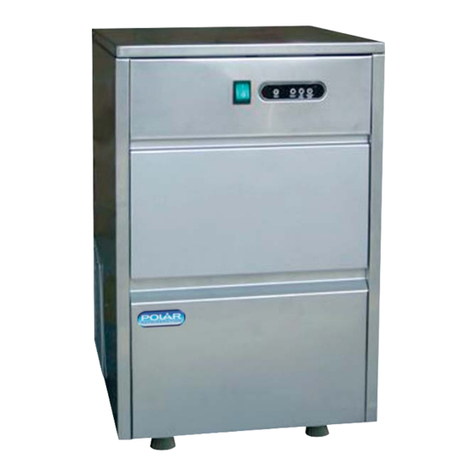
Polar Refrigeration T316 User manual

IJsblokjesmachine
Handleiding
Machine à glaçons
Mode d'emploi
Eismaschine
Bedienungsanleitung
Fabbricatore di ghiaccio
Manuale di istruzioni
Máquina de Hielo
Manual de instrucciones
Máquina de fazer gelo
Manual de instruções
Ismaskin
Bruksanvisning
Ismaskin
Instruktionsvejledning
Isterningemaskine
Brukerhåndbok
Jääpalakone
Ohjekirja
NL
FR
DE
IT
ES
PT
S
DK
N
FIN
Ice Maker
Instruction manual
Model • Modèle • Modell • Modello • Modelo • Malli:
T316/GL192

Table of Contents
Safety Tips . . . . . . . . . . . . . . . . . . . . . . . . . . . . . . . . . . . . . . . . . . . . . . . . . . . . . . . . .1
Introduction . . . . . . . . . . . . . . . . . . . . . . . . . . . . . . . . . . . . . . . . . . . . . . . . . . . . . . . . .2
Pack Contents . . . . . . . . . . . . . . . . . . . . . . . . . . . . . . . . . . . . . . . . . . . . . . . . . . . . . . .2
Installation . . . . . . . . . . . . . . . . . . . . . . . . . . . . . . . . . . . . . . . . . . . . . . . . . . . . . . . . .2
Operation . . . . . . . . . . . . . . . . . . . . . . . . . . . . . . . . . . . . . . . . . . . . . . . . . . . . . . . . . .3
Control Panel . . . . . . . . . . . . . . . . . . . . . . . . . . . . . . . . . . . . . . . . . . . . . . . . . .3
Making Ice . . . . . . . . . . . . . . . . . . . . . . . . . . . . . . . . . . . . . . . . . . . . . . . . . . . .3
Cleaning, Care & Maintenance . . . . . . . . . . . . . . . . . . . . . . . . . . . . . . . . . . . . . . . . . .3
Troubleshooting . . . . . . . . . . . . . . . . . . . . . . . . . . . . . . . . . . . . . . . . . . . . . . . . . . . . .4
Technical Specifications . . . . . . . . . . . . . . . . . . . . . . . . . . . . . . . . . . . . . . . . . . . . . . .5
Electrical Wiring . . . . . . . . . . . . . . . . . . . . . . . . . . . . . . . . . . . . . . . . . . . . . . . . . . . . .5
Disposal . . . . . . . . . . . . . . . . . . . . . . . . . . . . . . . . . . . . . . . . . . . . . . . . . . . . . . . . . . .5
Compliance . . . . . . . . . . . . . . . . . . . . . . . . . . . . . . . . . . . . . . . . . . . . . . . . . . . . . . . . .5
Inhoudsopgave
Veiligheidstips . . . . . . . . . . . . . . . . . . . . . . . . . . . . . . . . . . . . . . . . . . . . . . . . . . . . . .6
Inleiding . . . . . . . . . . . . . . . . . . . . . . . . . . . . . . . . . . . . . . . . . . . . . . . . . . . . . . . . . . .7
Verpakkingsinhoud . . . . . . . . . . . . . . . . . . . . . . . . . . . . . . . . . . . . . . . . . . . . . . . . . . .7
Installatie . . . . . . . . . . . . . . . . . . . . . . . . . . . . . . . . . . . . . . . . . . . . . . . . . . . . . . . . . . .7
Bediening . . . . . . . . . . . . . . . . . . . . . . . . . . . . . . . . . . . . . . . . . . . . . . . . . . . . . . . . . .8
Bedieningspaneell . . . . . . . . . . . . . . . . . . . . . . . . . . . . . . . . . . . . . . . . . . . . . .8
IJsblokjes maken . . . . . . . . . . . . . . . . . . . . . . . . . . . . . . . . . . . . . . . . . . . . . . .8
Reiniging, zorg & onderhoud . . . . . . . . . . . . . . . . . . . . . . . . . . . . . . . . . . . . . . . . . . .8
Oplossen van problemen . . . . . . . . . . . . . . . . . . . . . . . . . . . . . . . . . . . . . . . . . . . . . . .9
Technische specificaties . . . . . . . . . . . . . . . . . . . . . . . . . . . . . . . . . . . . . . . . . . . . . . .10
Elektrische bedrading . . . . . . . . . . . . . . . . . . . . . . . . . . . . . . . . . . . . . . . . . . . . . . . . .10
Afvalverwerking . . . . . . . . . . . . . . . . . . . . . . . . . . . . . . . . . . . . . . . . . . . . . . . . . . . . .10
Productconformiteit . . . . . . . . . . . . . . . . . . . . . . . . . . . . . . . . . . . . . . . . . . . . . . . . . .10
Sommaire
Conseils de sécurité . . . . . . . . . . . . . . . . . . . . . . . . . . . . . . . . . . . . . . . . . . . . . . . . . .11
Introduction . . . . . . . . . . . . . . . . . . . . . . . . . . . . . . . . . . . . . . . . . . . . . . . . . . . . . . . . .12
Contenu de l'emballage . . . . . . . . . . . . . . . . . . . . . . . . . . . . . . . . . . . . . . . . . . . . . . . .12
Installation . . . . . . . . . . . . . . . . . . . . . . . . . . . . . . . . . . . . . . . . . . . . . . . . . . . . . . . . .12
Fonctionnement . . . . . . . . . . . . . . . . . . . . . . . . . . . . . . . . . . . . . . . . . . . . . . . . . . . . .13
Panneau de configuration . . . . . . . . . . . . . . . . . . . . . . . . . . . . . . . . . . . . . . . .13
Pour produire des glaçons . . . . . . . . . . . . . . . . . . . . . . . . . . . . . . . . . . . . . . . .13
Nettoyage, entretien et maintenance . . . . . . . . . . . . . . . . . . . . . . . . . . . . . . . . . . . . . .13
Dépannage . . . . . . . . . . . . . . . . . . . . . . . . . . . . . . . . . . . . . . . . . . . . . . . . . . . . . . . . .14
Spécifications techniques . . . . . . . . . . . . . . . . . . . . . . . . . . . . . . . . . . . . . . . . . . . . . .15
Raccordement électrique . . . . . . . . . . . . . . . . . . . . . . . . . . . . . . . . . . . . . . . . . . . . . . .15
Mise au rebut . . . . . . . . . . . . . . . . . . . . . . . . . . . . . . . . . . . . . . . . . . . . . . . . . . . . . . .15
Conformité . . . . . . . . . . . . . . . . . . . . . . . . . . . . . . . . . . . . . . . . . . . . . . . . . . . . . . . . .15
UK
NL
FR

Inhalt
Sicherheitshinweise . . . . . . . . . . . . . . . . . . . . . . . . . . . . . . . . . . . . . . . . . . . . . . . . . .16
Einführung . . . . . . . . . . . . . . . . . . . . . . . . . . . . . . . . . . . . . . . . . . . . . . . . . . . . . . . . .17
Lieferumfang . . . . . . . . . . . . . . . . . . . . . . . . . . . . . . . . . . . . . . . . . . . . . . . . . . . . . . .17
Montage . . . . . . . . . . . . . . . . . . . . . . . . . . . . . . . . . . . . . . . . . . . . . . . . . . . . . . . . . . .17
Betrieb . . . . . . . . . . . . . . . . . . . . . . . . . . . . . . . . . . . . . . . . . . . . . . . . . . . . . . . . . . . . .18
Bedienfeld . . . . . . . . . . . . . . . . . . . . . . . . . . . . . . . . . . . . . . . . . . . . . . . . . . . .18
Eisherstellung . . . . . . . . . . . . . . . . . . . . . . . . . . . . . . . . . . . . . . . . . . . . . . . . .18
Reinigung, Pflege und Wartung . . . . . . . . . . . . . . . . . . . . . . . . . . . . . . . . . . . . . . . . .18
Störungssuche . . . . . . . . . . . . . . . . . . . . . . . . . . . . . . . . . . . . . . . . . . . . . . . . . . . . . . .19
Technische Spezifikationen . . . . . . . . . . . . . . . . . . . . . . . . . . . . . . . . . . . . . . . . . . . .20
Elektroanschlüsse . . . . . . . . . . . . . . . . . . . . . . . . . . . . . . . . . . . . . . . . . . . . . . . . . . . .20
Entsorgung . . . . . . . . . . . . . . . . . . . . . . . . . . . . . . . . . . . . . . . . . . . . . . . . . . . . . . . . .20
Konformität . . . . . . . . . . . . . . . . . . . . . . . . . . . . . . . . . . . . . . . . . . . . . . . . . . . . . . . . .20
Indice
Suggerimenti per la sicurezza . . . . . . . . . . . . . . . . . . . . . . . . . . . . . . . . . . . . . . . . . . .21
Introduzione . . . . . . . . . . . . . . . . . . . . . . . . . . . . . . . . . . . . . . . . . . . . . . . . . . . . . . . .22
Contenuto dell'imballaggio . . . . . . . . . . . . . . . . . . . . . . . . . . . . . . . . . . . . . . . . . . . . .22
Installazione . . . . . . . . . . . . . . . . . . . . . . . . . . . . . . . . . . . . . . . . . . . . . . . . . . . . . . . .22
Funzionamento . . . . . . . . . . . . . . . . . . . . . . . . . . . . . . . . . . . . . . . . . . . . . . . . . . . . . .23
Pannello di controllo . . . . . . . . . . . . . . . . . . . . . . . . . . . . . . . . . . . . . . . . . . . .23
Produzione del ghiaccio . . . . . . . . . . . . . . . . . . . . . . . . . . . . . . . . . . . . . . . . .23
Pulizia e manutenzione . . . . . . . . . . . . . . . . . . . . . . . . . . . . . . . . . . . . . . . . . . . . . . . .23
Risoluzione dei problemi . . . . . . . . . . . . . . . . . . . . . . . . . . . . . . . . . . . . . . . . . . . . . .24
Specifiche tecniche . . . . . . . . . . . . . . . . . . . . . . . . . . . . . . . . . . . . . . . . . . . . . . . . . . .25
Cablaggi elettrici . . . . . . . . . . . . . . . . . . . . . . . . . . . . . . . . . . . . . . . . . . . . . . . . . . . . .25
Smaltimento . . . . . . . . . . . . . . . . . . . . . . . . . . . . . . . . . . . . . . . . . . . . . . . . . . . . . . . .25
Conformità . . . . . . . . . . . . . . . . . . . . . . . . . . . . . . . . . . . . . . . . . . . . . . . . . . . . . . . . .25
Índice
Consejos de Seguridad . . . . . . . . . . . . . . . . . . . . . . . . . . . . . . . . . . . . . . . . . . . . . . . .26
Introducción . . . . . . . . . . . . . . . . . . . . . . . . . . . . . . . . . . . . . . . . . . . . . . . . . . . . . . . .27
Contenido del Conjunto . . . . . . . . . . . . . . . . . . . . . . . . . . . . . . . . . . . . . . . . . . . . . . .27
Instalación . . . . . . . . . . . . . . . . . . . . . . . . . . . . . . . . . . . . . . . . . . . . . . . . . . . . . . . . . .27
Funcionamiento . . . . . . . . . . . . . . . . . . . . . . . . . . . . . . . . . . . . . . . . . . . . . . . . . . . . .28
Panel de Control . . . . . . . . . . . . . . . . . . . . . . . . . . . . . . . . . . . . . . . . . . . . . . .28
Producción del hielo . . . . . . . . . . . . . . . . . . . . . . . . . . . . . . . . . . . . . . . . . . . .28
Limpieza, Cuidado y Mantenimiento . . . . . . . . . . . . . . . . . . . . . . . . . . . . . . . . . . . . .28
Resolución de problemas . . . . . . . . . . . . . . . . . . . . . . . . . . . . . . . . . . . . . . . . . . . . . .29
Especificaciones Técnicas . . . . . . . . . . . . . . . . . . . . . . . . . . . . . . . . . . . . . . . . . . . . .30
Cableado Eléctrico . . . . . . . . . . . . . . . . . . . . . . . . . . . . . . . . . . . . . . . . . . . . . . . . . . .30
Desecho . . . . . . . . . . . . . . . . . . . . . . . . . . . . . . . . . . . . . . . . . . . . . . . . . . . . . . . . . . . .30
Cumplimiento . . . . . . . . . . . . . . . . . . . . . . . . . . . . . . . . . . . . . . . . . . . . . . . . . . . . . . .30
DE
IT
ES

Índice
Conselhos de segurança . . . . . . . . . . . . . . . . . . . . . . . . . . . . . . . . . . . . . . . . . . . . . . .31
Introdução . . . . . . . . . . . . . . . . . . . . . . . . . . . . . . . . . . . . . . . . . . . . . . . . . . . . . . . . . .32
Conteúdo da embalagem . . . . . . . . . . . . . . . . . . . . . . . . . . . . . . . . . . . . . . . . . . . . . . .32
Instalação . . . . . . . . . . . . . . . . . . . . . . . . . . . . . . . . . . . . . . . . . . . . . . . . . . . . . . . . . .32
Funcionamento . . . . . . . . . . . . . . . . . . . . . . . . . . . . . . . . . . . . . . . . . . . . . . . . . . . . . .33
Painel de controlo . . . . . . . . . . . . . . . . . . . . . . . . . . . . . . . . . . . . . . . . . . . . . .33
Fazer cubos de gelo . . . . . . . . . . . . . . . . . . . . . . . . . . . . . . . . . . . . . . . . . . . . .33
Limpeza, cuidados & manutenção . . . . . . . . . . . . . . . . . . . . . . . . . . . . . . . . . . . . . . .33
Resolução de problemas . . . . . . . . . . . . . . . . . . . . . . . . . . . . . . . . . . . . . . . . . . . . . . .34
Especificações técnicas . . . . . . . . . . . . . . . . . . . . . . . . . . . . . . . . . . . . . . . . . . . . . . . .35
Cablagem eléctrica . . . . . . . . . . . . . . . . . . . . . . . . . . . . . . . . . . . . . . . . . . . . . . . . . . .35
Tratamento de lixo e resíduos . . . . . . . . . . . . . . . . . . . . . . . . . . . . . . . . . . . . . . . . . . .35
Conformidade . . . . . . . . . . . . . . . . . . . . . . . . . . . . . . . . . . . . . . . . . . . . . . . . . . . . . . .35
Innehållsförteckning
Säkerhetsråd . . . . . . . . . . . . . . . . . . . . . . . . . . . . . . . . . . . . . . . . . . . . . . . . . . . . . . . .36
Inledning . . . . . . . . . . . . . . . . . . . . . . . . . . . . . . . . . . . . . . . . . . . . . . . . . . . . . . . . . . .37
Förpackningsinnehåll . . . . . . . . . . . . . . . . . . . . . . . . . . . . . . . . . . . . . . . . . . . . . . . . .37
Installation . . . . . . . . . . . . . . . . . . . . . . . . . . . . . . . . . . . . . . . . . . . . . . . . . . . . . . . . .37
Drift . . . . . . . . . . . . . . . . . . . . . . . . . . . . . . . . . . . . . . . . . . . . . . . . . . . . . . . . . . . . . . .38
Kontrollpanel . . . . . . . . . . . . . . . . . . . . . . . . . . . . . . . . . . . . . . . . . . . . . . . . . .38
Göra is . . . . . . . . . . . . . . . . . . . . . . . . . . . . . . . . . . . . . . . . . . . . . . . . . . . . . . .38
Rengöring, omvårdnad och underhåll . . . . . . . . . . . . . . . . . . . . . . . . . . . . . . . . . . . . .38
Felsökning . . . . . . . . . . . . . . . . . . . . . . . . . . . . . . . . . . . . . . . . . . . . . . . . . . . . . . . . . .39
Tekniska specifikationer . . . . . . . . . . . . . . . . . . . . . . . . . . . . . . . . . . . . . . . . . . . . . . .40
Elektriska kablar . . . . . . . . . . . . . . . . . . . . . . . . . . . . . . . . . . . . . . . . . . . . . . . . . . . . .40
Avfallshantering . . . . . . . . . . . . . . . . . . . . . . . . . . . . . . . . . . . . . . . . . . . . . . . . . . . . .40
Tillmötesgående . . . . . . . . . . . . . . . . . . . . . . . . . . . . . . . . . . . . . . . . . . . . . . . . . . . . .40
Indholdsfortegnelse
Sikkerhedstips . . . . . . . . . . . . . . . . . . . . . . . . . . . . . . . . . . . . . . . . . . . . . . . . . . . . . . .41
Introduktion . . . . . . . . . . . . . . . . . . . . . . . . . . . . . . . . . . . . . . . . . . . . . . . . . . . . . . . .42
Emballagens indhold . . . . . . . . . . . . . . . . . . . . . . . . . . . . . . . . . . . . . . . . . . . . . . . . . .42
Installation. . . . . . . . . . . . . . . . . . . . . . . . . . . . . . . . . . . . . . . . . . . . . . . . . . . . . . . . . .42
Drift . . . . . . . . . . . . . . . . . . . . . . . . . . . . . . . . . . . . . . . . . . . . . . . . . . . . . . . . . . . . . . .43
Kontrolpanel . . . . . . . . . . . . . . . . . . . . . . . . . . . . . . . . . . . . . . . . . . . . . . . . . .43
Sådan laver du isterninger . . . . . . . . . . . . . . . . . . . . . . . . . . . . . . . . . . . . . . . .43
Rengøring, pleje og vedligeholdelse . . . . . . . . . . . . . . . . . . . . . . . . . . . . . . . . . . . . . .43
Fejlfinding . . . . . . . . . . . . . . . . . . . . . . . . . . . . . . . . . . . . . . . . . . . . . . . . . . . . . . . . . .44
Tekniske specifikationer . . . . . . . . . . . . . . . . . . . . . . . . . . . . . . . . . . . . . . . . . . . . . . .45
El-kabler . . . . . . . . . . . . . . . . . . . . . . . . . . . . . . . . . . . . . . . . . . . . . . . . . . . . . . . . . . .45
Bortskaffelse . . . . . . . . . . . . . . . . . . . . . . . . . . . . . . . . . . . . . . . . . . . . . . . . . . . . . . . .45
Overensstemmelse . . . . . . . . . . . . . . . . . . . . . . . . . . . . . . . . . . . . . . . . . . . . . . . . . . .45
PT
S
DK
Innhold
Sikkerhetstips . . . . . . . . . . . . . . . . . . . . . . . . . . . . . . . . . . . . . . . . . . . . . . . . . . . . . . .46
Innledning . . . . . . . . . . . . . . . . . . . . . . . . . . . . . . . . . . . . . . . . . . . . . . . . . . . . . . . . . .47
Pakkeinnhold . . . . . . . . . . . . . . . . . . . . . . . . . . . . . . . . . . . . . . . . . . . . . . . . . . . . . . .47
Installasjon . . . . . . . . . . . . . . . . . . . . . . . . . . . . . . . . . . . . . . . . . . . . . . . . . . . . . . . . .47
Bruk . . . . . . . . . . . . . . . . . . . . . . . . . . . . . . . . . . . . . . . . . . . . . . . . . . . . . . . . . . . . . .48
Kontrollpanel . . . . . . . . . . . . . . . . . . . . . . . . . . . . . . . . . . . . . . . . . . . . . . . . . .48
Making Ice . . . . . . . . . . . . . . . . . . . . . . . . . . . . . . . . . . . . . . . . . . . . . . . . . . . .48
Rengjøring, ettersyn og vedlikehold . . . . . . . . . . . . . . . . . . . . . . . . . . . . . . . . . . . . . .48
Troubleshooting . . . . . . . . . . . . . . . . . . . . . . . . . . . . . . . . . . . . . . . . . . . . . . . . . . . . .49
Tekniske spesifikasjoner . . . . . . . . . . . . . . . . . . . . . . . . . . . . . . . . . . . . . . . . . . . . . . .50
Elektrisk tilkopling . . . . . . . . . . . . . . . . . . . . . . . . . . . . . . . . . . . . . . . . . . . . . . . . . . .50
Deponering . . . . . . . . . . . . . . . . . . . . . . . . . . . . . . . . . . . . . . . . . . . . . . . . . . . . . . . . .50
Samsvar . . . . . . . . . . . . . . . . . . . . . . . . . . . . . . . . . . . . . . . . . . . . . . . . . . . . . . . . . . . .50
Sisällysluettelo
Turvallisuusvihjeitä . . . . . . . . . . . . . . . . . . . . . . . . . . . . . . . . . . . . . . . . . . . . . . . . . .51
Johdanto . . . . . . . . . . . . . . . . . . . . . . . . . . . . . . . . . . . . . . . . . . . . . . . . . . . . . . . . . . .52
Pakkauksen sisältö . . . . . . . . . . . . . . . . . . . . . . . . . . . . . . . . . . . . . . . . . . . . . . . . . . .52
Asennus . . . . . . . . . . . . . . . . . . . . . . . . . . . . . . . . . . . . . . . . . . . . . . . . . . . . . . . . . . . .52
Käyttö . . . . . . . . . . . . . . . . . . . . . . . . . . . . . . . . . . . . . . . . . . . . . . . . . . . . . . . . . . . . .53
Ohjauspaneeli . . . . . . . . . . . . . . . . . . . . . . . . . . . . . . . . . . . . . . . . . . . . . . . . .53
Jään valmistus. . . . . . . . . . . . . . . . . . . . . . . . . . . . . . . . . . . . . . . . . . . . . . . . . .53
Puhdistus, hoito & huolto . . . . . . . . . . . . . . . . . . . . . . . . . . . . . . . . . . . . . . . . . . . . . .53
Vianetsintä . . . . . . . . . . . . . . . . . . . . . . . . . . . . . . . . . . . . . . . . . . . . . . . . . . . . . . . . . .54
Tekniset tiedot . . . . . . . . . . . . . . . . . . . . . . . . . . . . . . . . . . . . . . . . . . . . . . . . . . . . . . .55
Sähköjohdot . . . . . . . . . . . . . . . . . . . . . . . . . . . . . . . . . . . . . . . . . . . . . . . . . . . . . . . .55
Hävitys . . . . . . . . . . . . . . . . . . . . . . . . . . . . . . . . . . . . . . . . . . . . . . . . . . . . . . . . . . . .55
Vaatimustenmukaisuus . . . . . . . . . . . . . . . . . . . . . . . . . . . . . . . . . . . . . . . . . . . . . . . .55
N
FIN

1
UK
Safety Tips
•Position on a flat, stable surface.
•A service agent/qualified technician should carry out installation and any repairs if required. Do not
remove any components or service panels on this product.
•Consult Local and National Standards to comply with the following:
• Health and Safety at Work Legislation
• BS EN Codes of Practice
• Fire Precautions
• IEE Wiring Regulations
• Building Regulations
•DO NOT immerse in water, or use steam/jet washers to clean the unit.
•DO NOT cover the appliance when it is operating.
•Always carry, store and handle the appliance in a vertical position.
•Never tilt the appliance more than 45° from the vertical.
•ONLY use drinking or potable water when making ice cubes.
•Ensure the water pressure of the connected water supply is between 101,352.97 Pa - 806,686.92 Pa
(14.7-117psi).
•For indoor use only.
• Keep all packaging away from children. Dispose of packaging in accordance to the regulations of local
authorities.
• If the power cord is damaged, it must be replaced by an POLAR agent or a recommended qualified
technician in order to avoid a hazard.
• This appliance is not attended for use by persons (including children) with reduced physical, sensory
or mental capabilities, or lack of experience or knowledge, unless they have been given supervision or
instruction concerning the use of the applaince by a person responsible for their safety
Caution Risk of Fire
•Do not store explosive substances such as aerosol cans with a flammable propellant in this
appliance
• Warning: Keep clear of obstruction all ventilation openings in the appliance enclousure or
in the structure for building-in
• Warning : Do not use mechanical devices or other means to accelerate the defrosting process, other
than those recommended by the manufacturer
• Warning: Do not damge the refrigerant circuit
• Warning: Do not use electrical applainces inside the food storage comnpartments of the appliance,
unless they are the type recommended by the manufacturer

2
UK
Telephone Helpline: 0845 146 2887
Introduction
Please take a few moments to carefully read through this manual. Correct maintenance and operation of
this machine will provide the best possible performance from your POLAR product.
Pack Contents
The following is included:
POLAR prides itself on quality and service, ensuring that at the time of packaging the contents are supplied
fully functional and free of damage.
Should you find any damage as a result of transit, please contact your POLAR dealer immediately.
Installation
1. Remove the appliance from the packaging and remove the protective film from all surfaces.
2. Remove the Scoop, Inlet/Outlet hoses and Sealing Washers from the ice bin.
3. When positioning the ice maker, maintain a distance of 20cm
(7 inches) between the appliance and walls or other objects for
ventilation. Increase this distance if the obstacle is a heat source.
4. If necessary, adjust the screw legs of the ice maker to make it
level. The efficiency of the ice maker can be reduced if the
appliance is unevenly located.
5. Connect one end of the corrugated outlet hose to the water outlet
on the rear of the ice maker.
6. Attach the other end of the hose to a plumbed-in stand waste
pipe or container suitable for collecting waste water.
7. Place the sealing washers on the water inlet at the back of the ice
maker and attach one end of the inlet hose.
8. Connect the other end of the inlet hose to the water supply.
Note: Only use the hoses supplied with the appliance. Other hoses are not suitable and
should not be used.
Note: If the appliance has not been stored or moved in an upright position, let it stand
upright for approximately 12 hours before operation. If in doubt allow the appliance to
stand.
Note: Ensure the end of the drainage pipe is situated lower than the Water Outlet valve
for efficient drainage.
•Ice Maker
•Ice scoop
•Inlet/Outlet hoses
• Sealing washers
•Instruction manual
Power cord
Water
inlet
Water
outlet

3
UK
Operation
Control Panel
Making Ice
1. Press the Power switch to the On position [I]. The RUN light illuminates and the appliance begins the
ice making process. Each ice making cycle takes approximately 25 minutes.
2. When the cubes reach the ice sensor ice production stops. Production resumes once ice has been
removed from the bin.
3. Press the Power switch to the Off position [O] at any time to halt the ice making process.
Cleaning, Care & Maintenance
•Always switch off and disconnect the power supply before cleaning.
• Warm, soapy water is recommended for cleaning. Cleaning agents may leave harmful residues. DO
NOT wash the base unit, instead wipe the exterior with a damp cloth.
• A POLAR agent or qualified technician should carry out repairs if required.
• Clean the water filter regularly with a small brush, particularly in hard water areas.
The water filter is located just inside the water inlet at the back of the appliance.
• If the Ice Maker is to be left unused for longer than 24 hours, loosen the drain screw and drain the
water from the tank.
Note: Before using for the first time (or after a period of inactivity), clean the water tank,
ice basket and ice basket shelf. Use the first ice making cycle to flush out the system.
Discard the water and ice created from the first cycle.
RUN FAULT ICE WATER
FULL LOW
I
O
Power switch

4
UK
Telephone Helpline: 0845 146 2887
Troubleshooting
Fault Probable Cause Action
The appliance is
not working The appliance is not
switched on Check the appliance is plugged in correctly and switched on
Plug and lead are
damaged Call POLAR agent or qualified technician
Fuse in the plug has
blown Replace the plug fuse
Power supply Check power supply
Internal wiring fault Call POLAR agent or qualified technician
Ambient temperature
below 10°C Move appliance to a warmer position
Water supply Check water supply is on and supply hoses are not blocked
Appliance is noisy
or works
intermittently
Power fluctuations Turn off the ice maker and restart after 3 minutes
Water
indicator is
lit
Water not connected Connect ice maker to water supply
Water filter is blocked Clean water filter and restart ice maker
Water pressure too
low Water pressure should be between 101,352.97 Pa -
806,686.92 Pa (14.7-117psi). Call plumber to check water
supply
Ice Full
indicator is
lit
Ice bin full Empty the ice bin
Room temperature is
too low Move the appliance to a warmer position
Water and Ice Full
indicators flash
together
Water box is blocked
and cannot tilt Disconnect from the power supply. Remove some of the ice
cubes and gently tilt the water box by hand. Restart the ice
maker after 3 minutes
Fault
indicator is
lit
Water tray not in
proper position Remove any ice blockage
Ice sensor is not
working Check sensor is not obstructed. If not blocked call POLAR
agent or qualified technician
Water tray does not
tilt Check water tank is not blocked. If motor is not working
then call POLAR agent or qualified technician
Compressor runs
but no ice is made Refrigerant leak or
block in the
refrigerant system
Call POLAR agent or qualified technician

5
UK
Technical Specifications
Electrical Wiring
This appliance is supplied with a 3 pin, moulded, BS1363 plug and lead, with a 3 amp fuse as standard.
The plug is to be connected to a suitable mains socket.
This appliance is wired as follows:
• Live wire (coloured brown) to terminal marked L
• Neutral wire (coloured blue) to terminal marked N
• Earth wire (coloured green/yellow) to terminal marked E
This appliance must be earthed, using a dedicated earthing circuit.
If in doubt consult a qualified electrician.
Electrical isolation points must be kept clear of any obstructions. In the event of any emergency
disconnection being required they must be readily accessible.
Disposal
EU regulations require refrigeration products to be disposed of by specialist companies who remove or
recycle all gasses, metal and plastic components.
Consult your local waste collection authority regarding disposal of your appliance. Local
authorities are not obliged to dispose of commercial refrigeration equipment but may be
able to offer advice on how to dispose of the equipment locally.
Alternatively call the POLAR helpline for details of national disposal companies within the
EU.
Compliance
POLAR parts have undergone strict product testing in order to comply with regulatory standards and
specifications set by international, independent, and federal authorities.
POLAR products have been approved to carry the following symbol:
All rights reserved. No part of these instructions may be produced or transmitted in any form or by any means, electronic,
mechanical, photocopying, recording or otherwise, without the prior written permission of POLAR.
Every effort is made to ensure all details are correct at the time of going to press, however, POLAR reserve the right to change
specifications without notice.
Model Voltage Power Current Bin
Storage
Max Ice
Making
Capacity
Refrigerant Dimensions
h x w x d mm Weight
T316 230V 50Hz 170W 1.1A 4 kg 20kg/24
hours
R600a 36g 590 x 380 x 480 28 kg
GL192 230V 50Hz 260W 2.2A 11 kg 50kg/24
hours
R290a 66g 831 x 498 x 604 43 kg

6
NL
Klantenondersteuning: 040 – 2628080 (Nederland)
Veiligheidstips
• Plaatsen op een vlakke en stabiele ondergrond.
•De installatie en eventuele reparaties zijn door een servicetechnicus/vaktechnicus uit te voeren.
Verwijder geen componenten of servicepanelen van dit product.
• Raadpleeg en volg de plaatselijke en nationale regelgeving op m.b.t. tot het volgende:
• Wetgeving van gezondheid en veiligheid op de werkplaats
• Werkregels
• Brandpreventie
• IEE bekabelingsnormen
• Bouwverordeningen
• NIET in water onderdompelen of stoom-/spuitreinigers gebruiken voor de reiniging van het apparaat.
• Apparaat NIET bedekken wanneer in gebruik.
• Apparaat altijd in verticale positie vervoeren, opbergen en gebruiken.
•Kantel het apparaat nooit meer dan 45° uit de verticale positie.
• Gebruik ALLEEN drinkwater voor het maken van de ijsblokjes.
• Zorg dat de waterdruk van de aangesloten watervoorziening tussen de
101,352.97 Pa - 806,686.92 Pa
(14,7-117psi) ligt.
• Men dient het ongebruikte water in de waterbak elke 24 uur te vervangen.
•Uitsluitend voor gebruik binnenshuis.
• Laat verpakkingsmateriaal niet binnen handbereik van kinderen. Verpakkingsmateriaal in
overeenstemming met de regelgeving van de plaatselijke overheden als afval laten verwerken.
• Indien de stroomkabel beschadigd raakt, dient men deze door een POLAR technicus of aanbevolen
vaktechnicus te laten vervangen om gevaarlijke situaties te verhinderen.
Voorzichtig Risico van Fire
•Laat explosieve stoffen niet opslaan: zoals spuitbussen met een ontvlambare drijfgas in dit
apparaat
• Waarschuwing: Houd vrij van obstakels alle ventilatie- openingen in het apparaat of in de
structuur enclousure voor de bouw - in
• Waarschuwing : Gebruik geen mechanische apparaten of andere middelen te gebruiken om het
ontdooien , andere dan de door de fabrikant aanbevolen versnellen
•Waarschuwing: niet damge het koelcircuit
•Waarschuwing : Gebruik geen elektrische applainces gebruikt in de opslag van voedsel van de
comnpartments applaince , tenzij ze zijn het type aanbevolen door de fabrikant

7
NL Klantenondersteuning: 050 – 609999 (België)
Inleiding
Neem de tijd en lees deze handleiding aandachtig door. Een correct gebruik en onderhoud van deze
machine waarborgt de beste prestatie van uw POLAR product.
Verpakkingsinhoud
De verpakking bevat een:
POLAR is trots op de haar productkwaliteit en dienstverlening en controleer de inhoud van de verpakkingen,
tijdens de verpakkingsfase, op functionaliteit en schade.
Mocht u product door transport zijn beschadigd, neem dan onmiddellijk contact op met uw POLAR dealer.
Installatie
1. Haal het apparaat uit de verpakking en verwijder de
beschermingsfolie van alle oppervlakken.
2. Haal de ijsschep, toevoer-/afvoerslangen en afdrichtringen
uit de ijsbak.
3. Voor een adequate ventilatie dient men bij het plaatsen van
de ijsblokjesmachine een afstand, tussen het apparaat en de
muren of andere objecten, aan te houden van 20cm.
Vergroot deze afstand indien het object en warmtebron is.
4. Indien nodig, verstel de stelvoetjes om de ijsblokjesmachine
volledig gelijk in te stellen. De efficiëntie van de
ijsblokjesmachine kan door een niet nauwkeurige afstelling
negatief worden beïnvloed.
5. Sluit één uiteinde van de gegolfde afvoerslang aan op de
waterafvoer, aan de achterzijde van de ijsblokjesmachine.
6. Sluit het andere uiteinde van de slang aan op een vaste afvoerleiding of een geschikte opvangbak voor
afvalwater.
7. Plaats de afdichtringen op de wateraanvoer aan de achterzijde van de ijsblokjesmachine en sluit één
uiteinde van de aanvoerslang aan.
8. Sluit het andere uiteinde van de aanvoerslang aan op de watervoorziening.
Opmerking: indien het apparaat niet in een rechtopstaande positie is opgeslagen of
vervoerd, dient men het product 12 uur vóór gebruik in de rechtopstaande positie te
plaatsen. Bij twijfel dient men het product in een rechtopstaande positie te plaatsen.
Opmerking: Opmerking: voor een efficiënte afvoer dient het uiteinde van de afvoerbuis
lager te liggen dan het waterafvoerventiel.
•IJsblokjesmachine
•IJsschep
• Inlaat-/uitlaatslangen
•Afdrichtringen
• Handleiding
Stroomkabe
Waterinlaat
Wateruitlaat

8
NL
Klantenondersteuning: 040 – 2628080 (Nederland)
Bediening
Bedieningspaneell
IJsblokjes maken
1. Zet de stroomschakelaar in de On (Aan) positie [I]. Het RUN lampje licht op en het apparaat start het
productieproces van ijsblokjes. Elke productiecyclus duurt ongeveer 25 minuten.
2. Zodra de ijsblokjes de ijssensor bereiken wordt de productie gestopt. Na het verwijderen van de
ijsblokjes uit de ijsbak wordt de productie hervat.
3. Zet de stroomschakelaar in de Off (Uit) positie [O] om de productie van ijsblokjes op elk moment te
stoppen.
Reiniging, zorg & onderhoud
• Alvorens het apparaat te reinigen dient men altijd de stroomvoorziening uit te schakelen.
•Eventuele reparaties moeten door een POLAR technicus of een vaktechnicus worden uitgevoerd.
• Voor het reinigen van het apparaat wordt warm zeepwater aanbevolen. Reinigingsmiddelen kunnen
schadelijke resten achter laten. Basiseenheid NIET wassen; buitenzijde van de eenheid met een
vochtige doek afvegen.
• Reinig het waterfilter regelmatig met een kleine borstel, vooral op plekken van hardwater.
De waterfilter bevindt zich in de wateraanvoer aan de achterzijde van het apparaat.
• Draai de aftapschroef los en laat het water uit de tank lopen indien u de ijsblokjesmachine voor meer
dan 24 uur niet gaat gebruiken.
•Men dient de interne verwijderbare componenten en de watertank regelmatig te reinigen.
Opmerking: Alvorens het apparaat voor de eerste keer te gebruiken (of na een
stilstandperiode) reinig de watertank, ijsbak en lade van de ijsbak. Gebruik de eerste
productiecyclus van ijsblokjes om het systeem te spoelen. Gooi het water en de
ijsblokjes van de eerste cyclus weg.
RUN FAULT ICE WATER
FULL LOW
I
O
Stroomschakelaar

9
NL Klantenondersteuning: 050 – 609999 (België)
Oplossen van problemen
Probleem Mogelijke oorzaak Handeling
Het apparaat werkt
niet Het apparaat staat uit Controleer of de stroomkabel van het apparaat is
aangesloten en of het apparaat is ingeschakeld
Steker en kabel zijn
beschadigd Laat een POLAR technicus of een vaktechnicus
komen
De zekering in de steker is
gesprongen Vervang de zekering in de steker
Stroomvoorziening Controleer de stroomvoorziening
Storing interne bedrading Laat een POLAR technicus of een vaktechnicus
komen
Kamertemperatuur onder 10°C
Verplaats het apparaat naar een warmere plek
Watervoorziening Controleer of de watervoorziening is
ingeschakeld en of de toevoerslangen niet
worden geblokkeerd
Het apparaat maakt
geluid of werkt soms
wel en dan weer niet
Stroomschommelingen Schakel de ijsblokjesmachine uit en herstart het
apparaat na 3 minuten
Waterindicator
is aan Water is niet aangesloten Sluit de ijsblokjesmachine op de
watervoorziening aan
Geblokkeerde waterfilter Reinig de waterfilter en herstart de
ijsblokjesmachine
Waterdruk is te laag De waterdruk moet tussen de
101,352.97 Pa -
806,686.92 Pa
(14,7-117psi) liggen. Laat de
watervoorziening door een loodgieter nakijken
IJsindicator
FULL (VOL) is
aan
IJsbak is vol Leeg de ijsbak
Kamertemperatuur is te laag
Verplaats het apparaat naar een warmere plek
Water- en
ijsindicators Full (Vol)
knipperen
Waterfilter is geblokkeerd en
kan niet kantelen Stroomkabel uit het stopcontact halen. Verwijder
een deel van de ijsblokjes en kantel de waterbak
voorzichtig met de hand Herstart de
ijsblokjesmachine na 3 minuten
Storingsindicat
or is aan Waterlade niet juist geplaatst Verwijder opgebouwde ijslagen
IJssensor werkt niet Controleer of de ijssensor wordt geblokkeerd.
Indien dit niet het geval is, neem dan contact op
met een POLAR technicus of een vaktechnicus
Waterlade kantelt niet Controleer of de watertank wordt geblokkeerd.
Neem contact op met een POLAR technicus of
een vaktechnicus indien de motor niet werkt
De compressor loopt
maar er worden geen
ijsblokjes gemaakt
Er lekt koelmiddel of het
koelsysteem wordt
geblokkeerd
Laat een POLAR technicus of een vaktechnicus
komen

10
NL
Klantenondersteuning: 040 – 2628080 (Nederland)
Technische specificaties
Elektrische bedrading
Men dient de steker op een geschikt stopcontact aan te sluiten.
De bedrading van dit apparaat is als volgt:
• Stroomkabel (bruin) naar de aansluitklem gemarkeerd met L
• Neutraalkabel (blauw) naar de aansluitklem gemarkeerd met N
•Aardekabel (groen/geel) naar de aansluitklem gemarkeerd met E
Dit apparaat moet worden geaard met behulp van een adequaat aardingscircuit.
Bij twijfels raadpleeg een vakkundige elektricien.
De elektrische isolatiepunten mogen niet worden geblokkeerd. In geval van een nooduitschakeling moeten
de isolatiepunten direct toegankelijk zijn.
Afvalverwerking
De EU-richtlijnen vereisen dat koelproducten door gespecialiseerde bedrijven wordt verwerkt die gassen,
metalen en plastic componenten verwijderen of recyclen.
Raadpleeg uw plaatselijke afvalverwerkingsbedrijf voor informatie over de
afvalverwerking van uw apparaat. De plaatselijke overheden zijn niet verplicht om
koelingsproducten van bedrijven als afval te verwerken maar kunnen uw informeren waar
u het apparaat kunt afgeven.
U kunt ook de POLAR helplijn bellen voor informatie over landelijke
afvalverwerkingsbedrijven in de EU.
Productconformiteit
De onderdelen van POLAR producten hebben strenge producttesten ondergaan om te voldoen aan
wettelijke regels en specificaties die door internationale, onafhankelijke en landelijke overheden worden
voorgeschreven.
POLAR producten zijn goedgekeurd en voorzien van het volgende symbool:
Alle rechten voorbehouden. Het is verboden om deze handleiding, hetzij volledig of gedeeltelijk, elektronisch of mechanisch te
reproduceren, kopiëren, op opslagmedia op te slaan of op enigerlei wijze over te dragen, zonder voorafgaande goedkeuring van
POLAR.
Wij hebben er alles aan gedaan om er zeker van te zijn dat op publicatiedatum van de handleiding alle details correct zijn,
desondanks, behoudt POLAR het recht voor om specificaties zonder aankondiging te wijzigen.
Model Voltage Vermogen Stroom Inhoud
bak Productie vermogen
ijsblokjes Koelmiddel Afmetingen
h x b x d mm Gewicht
T316 230V 50Hz 170W 1,1A 4 kg 20kg/24 uur R600a 36g 590 x 380 x 480 28kg
GL192 230V 50Hz 260W 2.2A 11 kg 50kg/24 uur R290a 66g 831 x 498 x 604 43 kg

11
FR Standard d'assistance téléphonique: 050 – 600006 (Belgique)
Conseils de sécurité
• Placez l'appareil sur une surface plane, stable.
• L'installation et les éventuelles réparations doivent être confiées à un dépanneur / technicien qualifié.
Ne retirez aucun composant ou cache de ce produit.
• Consultez les normes locales et nationales pour vous conformer aux :
• lois sur l'hygiène et la sécurité au travail ;
• codes de bonnes pratiques BS EN ;
• précautions contre le risque d'incendie ;
• réglementations sur les branchements électriques IEE ;
• règlements sur la construction.
•NE PAS immerger l'appareil ou le nettoyer à l'aide d'un nettoyeur vapeur / haute pression.
• NE PAS couvrir l'appareil en service.
•Veillez à toujours transporter, stocker et manipuler l'appareil en position verticale.
•Ne jamais incliner l'appareil à plus de 45° par rapport à la verticale.
•Utiliser UNIQUEMENT de l'eau potable pour produire les glaçons.
•Vérifier que la pression de l'arrivée d'eau est comprise entre 101,352.97 Pa - 806,686.92 Pa (14,7-117 psi).
•Changez l'eau résiduaire du réservoir au moins une fois toutes les 24 heures.
• Cet appareil est réservé exclusivement à une utilisation à l'intérieur.
•Gardez les emballages hors de portée des enfants. Débarrassez-vous des emballages conformément
aux règlements des autorités locales.
• Un cordon d'alimentation endommagé doit être remplacé par un agent POLAR ou un technicien
qualifié recommandé, pour éviter tout danger.
Attention Risque d' incendie
•Ne stockez pas de substances explosives : tels que les aérosols avec un propulseur
inflammable dans cet appareil
•Attention: Restez à l'écart de l'obstruction de toutes les ouvertures de ventilation dans
l'appareil ou dans le enclousure structure pour la construction en
• Attention: Ne pas utiliser de dispositifs mécaniques ou autres moyens pour accélérer le processus de
dégivrage autres que ceux recommandés par le fabricant
• Attention: Ne pas Damgé le circuit réfrigérant
• Attention: Ne pas utiliser applainces électriques à l'intérieur du stockage de la nourriture de l'
comnpartments applaince , sauf si elles sont du type recommandé par le fabricant

12
FR
Standard d'assistance téléphonique: 01 64 89 73 61 (Français)
Introduction
Nous vous invitons à consacrer quelques instants à la lecture attentive de ce mode d'emploi. L'entretien et
l'utilisation appropriés de cette machine vous permettront de tirer le meilleur de votre produit POLAR.
Contenu de l'emballage
Eléments fournis de série :
POLAR attache une grande importance à la qualité et au service et veille à fournir des produits en parfait
état opérationnel, parfaitement intacts au moment de l'emballage.
Nous vous prions de contacter votre revendeur POLAR immédiatement si vous constatez un dommage
quelconque survenu pendant le transport du produit.
Installation
1. Sortez l'appareil de l'emballage et décollez la pellicule de protection de toutes ses surfaces.
2. Retirez la pelle, les flexibles d'entrée/de sortie et les rondelles d'étanchéité du bac à glaçons.
3. Pour positionner la machine à glaçons, veillez à prévoir une
distance de 20 cm entre l'appareil est les murs ou autres
objets, pour laisser l'air circuler. Augmentez cette distance si
l'obstacle est une source de chaleur.
4. Si nécessaire, réglez les pieds à vis de la machine à glaçons
pour la mettre de niveau. Le positionnement irrégulier de la
machine à glaçons risque d'en compromettre l'efficacité.
5.
Raccordez une des extrémités du flexible de sortie ondulé à
l'orifice de sortie d'eau situé à l'arrière de la machine à
glaçons.
6. Raccordez l'autre extrémité du flexible à une colonne munie
d'un tuyau d'évacuation ou à récipient qui convient à la
récupération des eaux usées.
7. Placez les rondelles d'étanchéité sur l'orifice de remplissage,
à l'arrière de la machine à glaçons et raccordez une des extrémités du flexible d'entrée.
8. Raccordez l'autre extrémité du flexible d'entrée à l'arrivée d'eau.
Remarque : dans les cas où l'appareil a été stocké ou déplacé autrement qu'à la
verticale, placez-le en position debout pendant environ 12 heures avant de vous en
servir. En cas de doute, laissez l'appareil se reposer.
Remarque : pour une vidange efficace, veillez à placer l'extrémité du tuyau de vidange
plus bas que le purgeur d'eau.
• Machine à glaçons
• Pelle à glaçons
• Mode d'emploi
• Flexibles d'entrée / de sortie
• Rondelles d'étanchéité
Cordon d'alimentation
Orifice de
remplissage
Orifice de
sortie

13
FR Standard d'assistance téléphonique: 050 – 600006 (Belgique)
Fonctionnement
Panneau de configuration
Pour produire des glaçons
1.
Placez l'interrupteur de marche/arrêt sur On (Marche) [I]. La diode de fonctionnement RUN s'allume et le
processus de production des glaçons démarre. Un cycle de production de glaçons dure environ 25 minutes.
2. Quand les cubes atteignent le capteur de glaçons, la production de glaçons s'arrête. La production
redémarre une fois le bac à glaçons vidé.
3. Placez l'interrupteur de marche/arrêt sur Off (Arrêt) [O] à n'importe quel moment, pour interrompre le
processus de production des glaçons.
Nettoyage, entretien et maintenance
• N'oubliez jamais d'éteindre et de débrancher l'appareil avant de procéder à son nettoyage.
•Nous préconisons le recours à de l'eau savonneuse tiède. Les produits de nettoyage risquent de laisser
des résidus nocifs. NE PAS laver le châssis de l'appareil, mais en essuyer l'extérieur à l'aide d'un
torchon humide.
• Toute réparation éventuelle doit être confiée à un agent POLAR ou à un technicien qualifié.
•Nettoyez régulièrement le filtre à eau à l'aide d'une petite brosse, surtout dans les régions où l'eau est
très calcaire.
• Si la machine à glaçons doit rester inactive pendant plus de 24 heures, dévissez la vis de vidange et
vidangez l'eau du réservoir.
• Les pièces amovibles internes et le réservoir d'eau doivent être nettoyés régulièrement.
Remarque : Avant de mettre la machine en service pour la première fois (ou après une
période d'inactivité), nettoyez le réservoir d'eau, le panier à glaçons et l'étagère du
panier à glaçons. Servez-vous du premier cycle de production de glaçons pour rincer le
système. Jetez l'eau et les glaçons produits au premier cycle.
RUN FAULT ICE WATER
FULL LOW
I
O
Interrupteur de
marche/arrêt

14
FR
Standard d'assistance téléphonique: 01 64 89 73 61 (Français)
Dépannage
Dysfonctionnement Cause probable Intervention
L'appareil ne
fonctionne pas L'appareil n'est pas allumé Vérifier que l'appareil est bien branché et allumé
La prise et le cordon sont
endommagés Appeler un agent POLAR ou un technicien qualifié
Alimentation Vérifier l'alimentation
Problème de branchement
interne Appeler un agent POLAR ou un technicien qualifié
Température ambiante
inférieure à 10°C Placer l'appareil dans un endroit moins froid
Arrivée d'eau Vérifier que l'arrivée d'eau fonctionne et que les
flexibles d'alimentation ne sont pas bouchés
L'appareil fait du bruit
ou ne fonctionne que
par intermittence
Fluctuation de tension
d'alimentation Eteindre la machine à glaçons et la rallumer trois
minutes plus tard
Le témoin de
niveau d'eau st
allumé
Pas de branchement d'eau Raccorder la machine à glaçons à l'arrivée d'eau
Le filtre à eau est bouché Nettoyer le filtre à eau et refaire démarrer la
machine à glaçons
Pression d'eau trop faible La pression d'eau devrait être comprise entre
101352,97 Pa - 806686,92 Pa
(14,7-117 psi)
Appeler un plombier pour faire vérifier l'arrivée
d'eau
Le témoin de
bac à glaçons
plein est allumé
Bac à glaçons plein Vider le bac à glaçons
Température ambiante trop
basse Placer l'appareil dans un endroit moins froid
Les témoins d'eau et de
bac à glaçons plein
clignotent en même
temps
La boîte à eau est bloquée
et ne peut pas pivoter
Débrancher l'appareil de l'alimentation secteur.
Retirer une partie des glaçons et faire légèrement
pivoter la boîte à glaçons, à la main. Attendre trois
minutes et refaire démarrer la machine à glaçons
Témoin de
dysfonctionnem
ent allumé
Bac à eau mal centré Retirer tout blocage provoqué par des glaçons
Dysfonctionnement du
capteur de glaçons Vérifier que rien ne bloque le capteur. Si tout est
normal, appeler un agent POLAR ou un
technicien qualifié
Le bac à eau ne pivote pas Vérifier que le réservoir d'eau n'est pas bouché.
Si le moteur ne fonctionne pas, appeler un agent
POLAR ou un technicien qualifié
Le compresseur
fonctionne mais
l'appareil ne produit
aucun glaçon
Fuite de réfrigérant ou
obstruction du circuit de
réfrigérant
Appeler un agent POLAR ou un technicien qualifié

15
FR Standard d'assistance téléphonique: 050 – 600006 (Belgique)
Spécifications techniques
Raccordement électrique
La prise doit être reliée à la prise secteur qui convient.
Cet appareil est câblé comme suit :
• Fil conducteur (brun) à la borne marquée L
• Fil neutre (bleu) à la borne marquée N
• Fil de terre (vert / jaune) à la borne marquée E
Cet appareil doit être raccordé à la terre, par le biais d'un circuit de mise à la terre dédié.
En cas de doute, consultez un électricien qualifié.
Les points d'isolation électrique doivent être libres de toute obstruction. En cas de débranchement requis
en urgence, ils doivent être facilement accessibles.
Mise au rebut
Les règlements de l'UE exigent que les produits munis de réfrigérants soient mis au rebut par des entreprises
spécialisées, équipées pour extraire et recycler les composants à gaz, métalliques et en plastique.
Adressez-vous à votre autorité chargée de la collecte des déchets pour ce qui concerne la
mise au rebut de votre appareil. Même si rien n'oblige les autorités locales à se charger de
la mise au rebut du matériel de réfrigération commerciale, elles pourraient être en mesure
de vous conseiller sur les moyens disponibles localement pour s'en débarrasser.
Vous pouvez aussi appeler le standard d'assistance POLAR, qui saura vous renseigner sur
les entreprises de prise en charge nationales au sein de l'UE.
Conformité
Les pièces POLAR ont été soumises à des tests rigoureux pour pouvoir être déclarées
conformes aux normes et spécifications réglementaires définies par les autorités
internationales, indépendantes et fédérales.
Les produits POLAR ont été déclarés aptes à porter le symbole suivant :
Tous droits réservés. La production ou transmission, partielles ou intégrales, sous quelque forme que ce soit ou par n'importe
quel moyen, tant électronique que mécanique, sous forme de photocopie, d'enregistrement ou autre de ce mode d'emploi sont
interdites sans l'autorisation préalablement accordée par POLAR.
Nous nous efforçons, par tous les moyens dont nous disposons, de faire en sorte que les détails contenus dans le présent mode
d'emploi soient corrects en date d'impression. Toutefois, POLAR se réserve le droit de changer les spécifications de ses produits
sans préavis.
Modèle Tension Puissance Courant Contenance
T316 230V 50Hz 170W 1,1A 4 kg
GL192 230V 50Hz 260W 2.2A 11 kg
Modèle Cap. production de glaçons Réfrigérant Dimensions h x l x p mm Poids
T316 20kg/24 hours R600a 36g 590 x 380 x 480 28 kg
GL192 50kg/24 hours R290a 66g 831 x 498 x 604 43 kg
Other manuals for T316
3
This manual suits for next models
1
Table of contents
Languages:
Other Polar Refrigeration Ice Maker manuals

Polar Refrigeration
Polar Refrigeration T315 User manual

Polar Refrigeration
Polar Refrigeration GL193 User manual

Polar Refrigeration
Polar Refrigeration T316 User manual

Polar Refrigeration
Polar Refrigeration APPT316 User manual

Polar Refrigeration
Polar Refrigeration G620-A User manual

Polar Refrigeration
Polar Refrigeration T316 User manual

Polar Refrigeration
Polar Refrigeration G620 User manual

Polar Refrigeration
Polar Refrigeration T316 User manual

Polar Refrigeration
Polar Refrigeration GL192 User manual