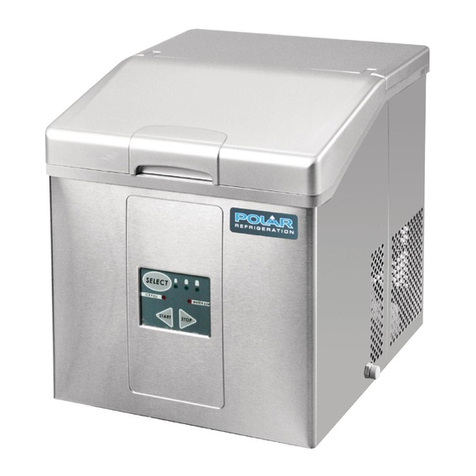
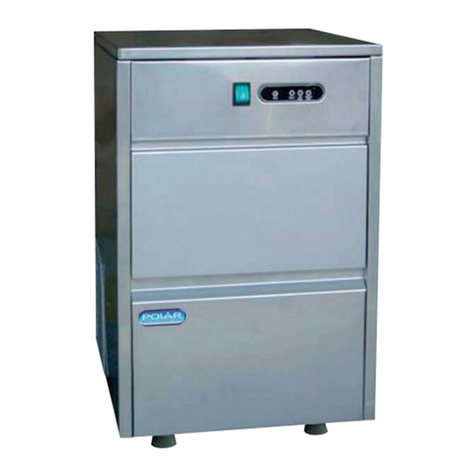
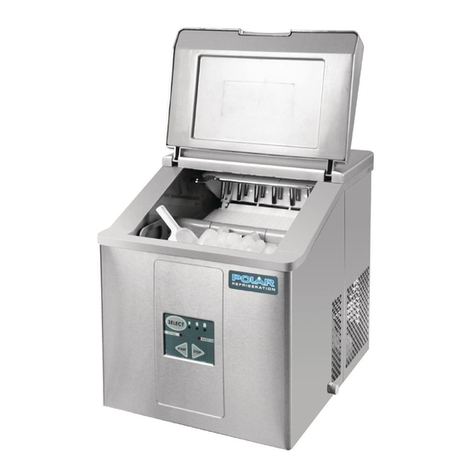
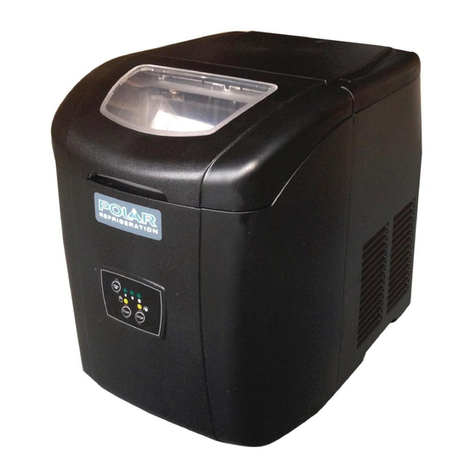
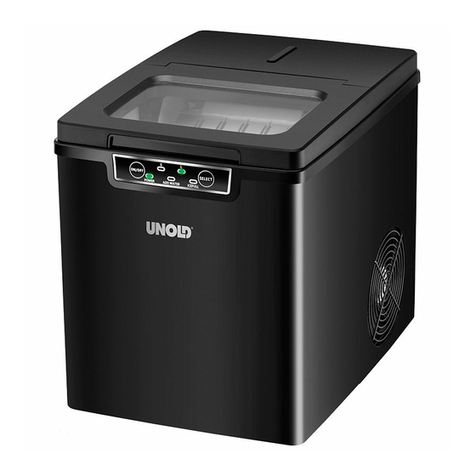
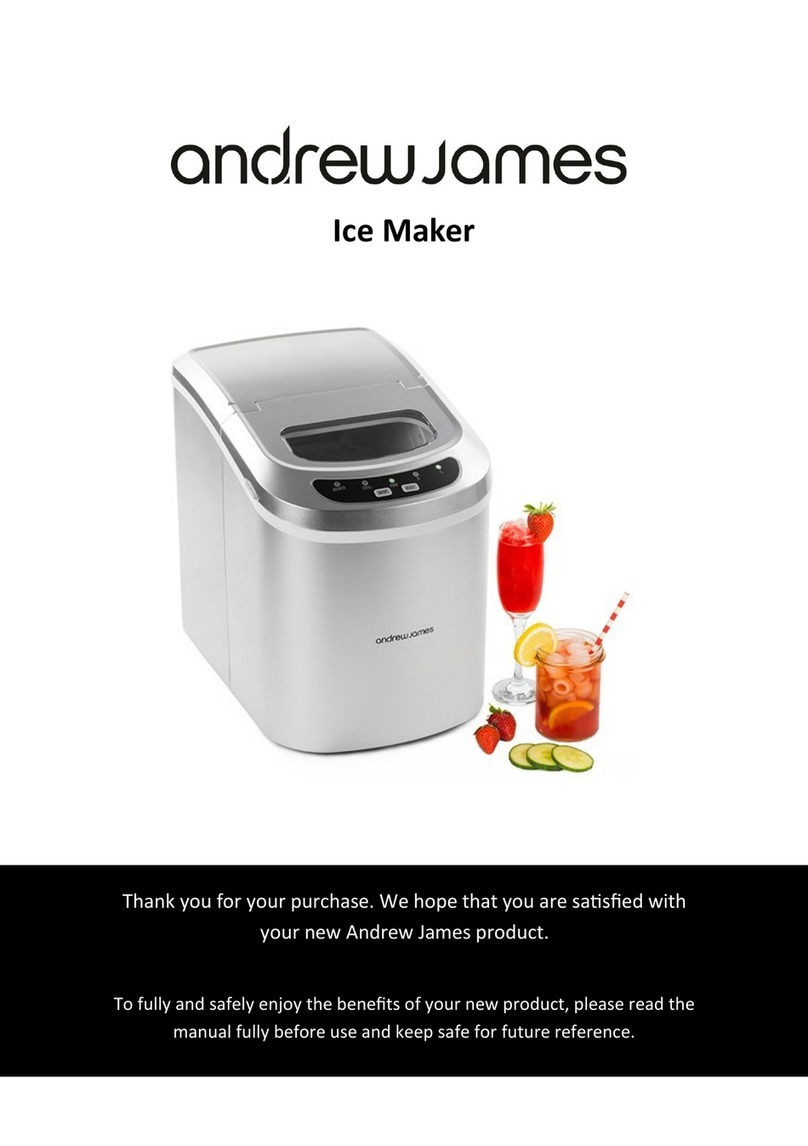
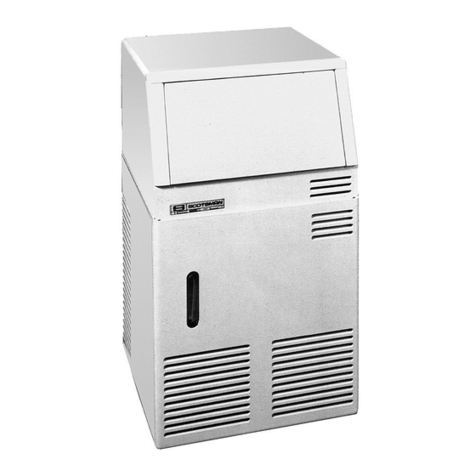
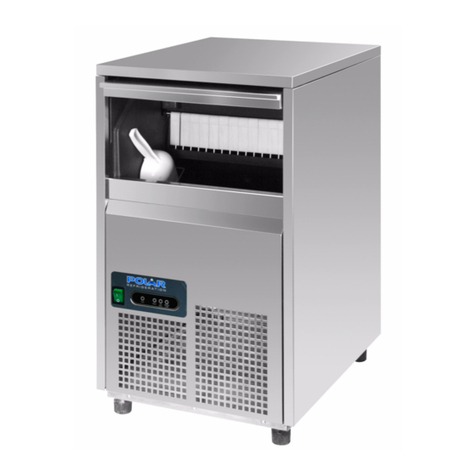
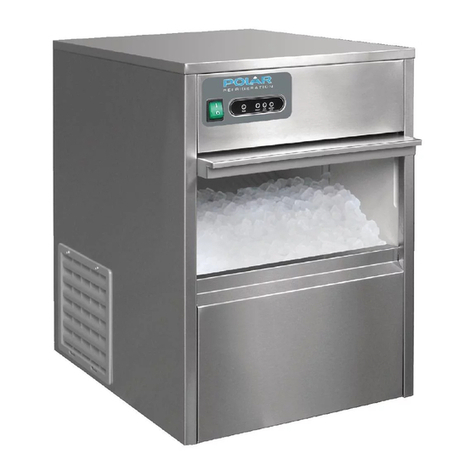
Polar Refrigeration GL192 User manual

Model • Modèle • Modell • Modello • Modelo • Malli:
T316 / GL192
NL IJsblokjesmachine
Handleiding
9IT Fabbricatore di ghiaccio
Manuale di istruzioni
30
FR Machine à glaçons
Mode d'emploi
16 ES Máquina de Hielo
Manual de instrucciones
37
DE Eismaschine
Bedienungsanleitung
23 PT Máquina de fazer gelo
Manual de instruções
44
Ice Maker
Instruction manual
T316_GL192_ML_A5_v6_20190814.indb 1 2019/8/14 15:40

2
UK
Safety Tips
• Position on a flat, stable surface.
• A service agent/qualified technician should carry out
installation and any repairs if required. Do not remove any
components or service panels on this product.
• Consult Local and National Standards to comply with the
following:
- Health and Safety at Work Legislation
- BS EN Codes of Practice
- Fire Precautions
- IEE Wiring Regulations
- Building Regulations
• DO NOT immerse in water, or use steam/jet washers to clean
the unit.
• DO NOT cover the appliance when it is operating.
• Always carry, store and handle the appliance in a vertical
position.
• Never tilt the appliance more than 45° from the vertical.
• ONLY use drinking or potable water when making ice cubes.
• Ensure the water pressure of the connected water supply is
between 101,352.97 Pa - 806,686.92 Pa (14.7-117psi).
• For indoor use only.
• Replace any unused water in the tank at least once every 24
hours.
• Keep all packaging away from children. Dispose of the
packaging in accordance with the regulations of local
authorities.
• This appliance can be used by children aged from 8 years and
above and persons with reduced physical, sensory or mental
capabilities or lack of experience and knowledge if they have
been given supervision or instruction concerning use of the
appliance in a safe way and understand the hazards involved.
T316_GL192_ML_A5_v6_20190814.indb 2 2019/8/14 15:41

3
UK
• Children shall not play with the appliance. Cleaning and user
maintenance shall not be made by children without supervision.
• If the power cord is damaged, it must be replaced by a POLAR
agent or a recommended qualified technician in order to avoid
a hazard.
• Polar recommends that this appliance should be periodically
tested (at least annually) by a Competent Person. Testing should
include, but not be limited to: Visual Inspection, Polarity Test,
Earth Continuity, Insulation Continuity and Functional Testing.
• This appliance is intended to be used in household and similar
applications such as:
- staff kitchen areas in shops, offices and other working
environments;
- farm houses;
- by clients in hotels, motels and other residential type
environments;
- bed and breakfast type environments;
- catering and similar non-retail applications.
Caution Risk of Fire
• Do not store explosive substances such as aerosol cans with a
flammable propellant in this appliance.
Warning: Keep all ventilation openings clear of
obstruction. Unit should not be boxed in without
adequate ventilation.
• Warning: Do not use mechanical devices or other means
to accelerate the defrosting process, other than those
recommended by the manufacturer.
• Warning: Do not damage the refrigerant circuit.
• Warning: Do not use electrical appliances inside the food
storage compartments of the appliance, unless they are the
type recommended by the manufacturer.
T316_GL192_ML_A5_v6_20190814.indb 3 2019/8/14 15:41

4
UK
Introduction
Please take a few moments to carefully read
through this manual. Correct maintenance and
operation of this machine will provide the best
possible performance from your POLAR product.
Pack Contents
The following is included:
• Ice Maker
• Ice scoop
• Inlet/Outlet hoses
• Sealing washers
• Instruction manual
POLAR prides itself on quality and service, ensuring
that at the time of packaging the contents are
supplied fully functional and free of damage.
Should you find any damage as a result of transit,
please contact your POLAR dealer immediately.
Note: Only use the hoses
supplied with the appliance.
Other hoses are not suitable and
should not be used.
Installation
Note: If the unit has not been
stored or moved in an upright
position, let it stand upright for
approximately 12 hours before
operation. If in doubt allow to
stand.
1. Remove the appliance from the packaging and
remove the protective film from all surfaces.
2. Remove the Scoop, Inlet/Outlet hoses and
Sealing Washers from the ice bin.
3. When positioning the ice maker, maintain
a distance of 20cm (7 inches) between the
appliance and walls or other objects for
ventilation. NEVER LOCATE NEXT TO OR
NEAR A HEAT SOURCE.
4. If necessary, adjust the screw legs of the ice
maker to make it level. The efficiency of the
ice maker can be reduced if the appliance is
unevenly located.
Installing the Drain
For T316 only:
• Please note: this model
drains via gravity - no drain
pump supplied. An optional
drain pump is required if
installing this unit lower
than the drain standpipe.
• Ensure the end of the
drainage pipe is situated
lower than the Water Outlet
valve for efficient drainage.
Gravity drain (For T316 only)
5. Connect one end of the corrugated outlet
hose to the water outlet on the rear of the ice
maker.
6. Attach the other end of the hose to a plumbed-
in stand waste pipe or container suitable for
collecting waste water.
T316_GL192_ML_A5_v6_20190814.indb 4 2019/8/14 15:41

5
UK
Installing the Cold Water Feed
7. Place the sealing washers on the water inlet at
the back of the ice maker and attach one end
of the inlet hose.
8. Connect the other end of the inlet hose to the
water supply.
Water inlet
Water outlet
Model: T316
Drainage valve
cap
Water inlet
Water outlet
(attach the drain
hose here)
Model: GL192
Sump drain
Drainage valve
cap
For Cleaning and maintenance
(GL192 only): you can remove
the cap on the sump drain to
drain all of the water from the
machine when the power is off.
Operation
Making Ice
Note: Before using for the
first time (or after a period of
inactivity), clean the water tank,
ice basket and ice basket shelf.
Use the first ice making cycle to
flush out the system.
Discard the water and ice
created from the first cycle.
1. Ensure the door is closed fully before use.
2. Press the Power switch to the On position [I].
The RUN light illuminates and the appliance
begins the ice making process. Each ice making
cycle takes approximately 25 minutes.
3. When the cubes reach the ice sensor ice
production stops. Production resumes once ice
has been removed from the bin.
4. Press the Power switch to the Off position [O]
at any time to halt the ice making process.
Note: Ensure metal rack is
pushed as far forward as
possible against plastic ice
curtain to allow ice to fall.
Cleaning, Care &
Maintenance
• Always switch off and disconnect the power
supply before cleaning.
• Warm, soapy water is recommended for
cleaning. Cleaning agents may leave harmful
residues. DO NOT wash the base unit, instead
wipe the exterior with a damp cloth.
• A POLAR agent or qualified technician should
carry out repairs if required.
• Clean the water filter regularly with a small
brush, particularly in hard water areas. The
water filter is located just inside the water inlet
at the back of the appliance.
• If the Ice Maker is to be left unused for longer
than 24 hours, loosen the drain valve cap and
drain the water from the tank.
• The inner removable parts and water tank
should be cleaned regularly.
T316_GL192_ML_A5_v6_20190814.indb 5 2019/8/14 15:41

6
UK
Filter for the drain system (for
GL192 only): Check the filter
monthly and clean if required.
Ensure the filter is repositioned
correctly after cleaning.
Automatic Cleaning Function
This Ice Maker is featured with an automatic
cleaning function. When the appliance has
completed up to 1500 ice-making cycles (roughly
after 3-month routine use), the “CLEAN” indicator
light will flash with audible alarm, indicating the
unit needs to be cleaned. It will keep flashing and
alarming until auto-cleaning is started, during
which ice can still be made.
1. Press and hold the “CLEAN” button for 3
seconds. The water box at the top will turn
down and up. When it returns to horizontal
position, press the power switch to O(OFF
position) and unplug the machine. Make sure
no water remains in the water box.
Power switch
CLEAN button CLEAN indicator light
2. Unscrew the drainage valve cap at the right
lower part at the rear. Let the water drain from
the water reservoir thoroughly. Afterwards,
re-locate the drainage cap and screw tight.
Drainage valve
cap
Model: GL192
Model: T316
Drainage valve
cap
3. Add around 3L dilute cleaner into the reservoir.
Note: Choose ice maker specific cleaner and
follow the manufacturer’s instructions.
Reservoir
4. Plug the unit and press the power switch to I
(ON position).
5. Press the “CLEAN” button. The “CLEAN”
indicator light turns on. The cleaner in the
water reservoir will be pumped into the water
box to start cleaning. After about 10 minutes,
the water box turns to vertical to drop the
cleaner. The appliance will repeat above
procedures twice. Then, the “CLEAN” indicator
light goes out, indicating auto-cleaning is
completed. Note: During cleaning, if the
“WATER LOW” indicator light illuminates, add
an extra 0.5L cleaner into the reservoir.
6. Turn the unit off and unplug. Remove the
drainage valve cap to empty the water
reservoir.
Note: After auto-cleaning, use
the first 3 ice making cycles to
flush out the system. Discard
the water and ice created from
these initial cycles.
T316_GL192_ML_A5_v6_20190814.indb 6 2019/8/14 15:41
7
UK
Troubleshooting
Fault Probable Cause Solution
The appliance is not
working The unit is not switched on Check the unit is plugged in correctly and
switched on
Plug and lead are damaged Call POLAR agent or qualified Technician
Fuse in the plug has blown Replace the fuse
Power supply Check power supply
Internal wiring fault Call POLAR agent or qualified Technician
Ambient temperature below 10°C Move appliance to a warmer position
Water supply Check water supply is on and supply
hoses are not blocked
Appliance is noisy or
works intermittently Power fluctuations Turn off the ice maker and restart after 3
minutes
Water
indicator is
lit
Water not connected Connect ice maker to water supply
Water filter is blocked Clean water filter and restart ice maker
Water pressure too low Water pressure should be between
101,352.97 Pa - 806,686.92 Pa (14.7-117
psi). Call plumber to check water supply
Ice Full
indicator is
lit
Ice bin full Empty the ice bin
Room temperature is too low Move the appliance to a warmer position
Water and
Ice Full
indicators
flash
together
Water box is blocked and cannot
tilt Disconnect from the power supply.
Remove some of the ice cubes and gently
tilt the water box by hand. Restart the ice
maker after 3 minutes
Fault
indicator is
lit
Water tray not in proper position Remove any ice blockage
Ice sensor is not working Check sensor is not obstructed. If not
blocked call POLAR agent or qualified
technician
Water tray does not tilt Check water tank is not blocked. If motor
is not working then call POLAR agent or
qualified technician
Compressor runs but no
ice is made Refrigerant leak or block in the
refrigerant system Call POLAR agent or qualified technician
Technical Specifications
Model Voltage Power Current Bin
storage Max Ice Making
Capacity Refrigerant Dimensions
H x W x D mm Weight
T316 220-240V 50Hz 178.5W 1.3A 3.5kg 20kg/24 hours R600a 38g 590 x 380 x 477 24.8kg
GL192 220-240V 50Hz 295W 1.8A 10kg 50kg/24 hours R290 66g 831 x 498 x 604 42kg
T316_GL192_ML_A5_v6_20190814.indb 7 2019/8/14 15:41

8
UK
Electrical Wiring
POLAR appliances are supplied with a 3 pin, moulded, BS1363 plug and lead, with a 13 amp fuse as
standard.
The plug is to be connected to a suitable mains socket.
POLAR appliances are wired as follows:
• Live wire (coloured brown) to terminal marked L
• Neutral wire (coloured blue) to terminal marked N
• Earth wire (coloured green/yellow) to terminal marked E
This appliance must be earthed.
If in doubt consult a qualified electrician.
Electrical isolation points must be kept clear of any obstructions. In the event of any emergency
disconnection being required they must be readily accessible.
Disposal
EU regulations require refrigeration product to be disposed of by specialist companies who remove or
recycle all gasses, metal and plastic components.
Consult your local waste collection authority regarding disposal of your appliance. Local authorities are
not obliged to dispose of commercial refrigeration equipment but may be able to offer advice on how to
dispose of the equipment locally.
Alternatively call the POLAR helpline for details of national disposal companies within the EU.
Compliance
The WEEE logo on this product or its documentation indicates that the product must
not be disposed of as household waste. To help prevent possible harm to human
health and/or the environment, the product must be disposed of in an approved and
environmentally safe recycling process. For further information on how to dispose of
this product correctly, contact the product supplier, or the local authority responsible for
waste disposal in your area.
POLAR parts have undergone strict product testing in order to comply with regulatory
standards and specifications set by international, independent, and federal authorities.
POLAR products have been approved to carry the following symbol:
All rights reserved. No part of these instructions may be produced or transmitted in any form or by any means, electronic,
mechanical, photocopying, recording or otherwise, without the prior written permission of POLAR.
Every effort is made to ensure all details are correct at the time of going to press, however, POLAR reserve the right to
change specifications without notice.
T316_GL192_ML_A5_v6_20190814.indb 8 2019/8/14 15:41

9
NL
Veiligheidstips
• Plaatsen op een vlakke en stabiele ondergrond.
• De installatie en eventuele reparaties dienen door een
servicemonteur/vakman uitgevoerd te worden. Verwijder geen
onderdelen of servicepanelen van dit product.
• Raadpleeg en volg de plaatselijke en nationale regelgeving op
m.b.t. tot het volgende:
- Wetgeving inzake gezondheid en veiligheid op het werk
- Nen-praktijkrichtlijnen
- Brandpreventie
- IEE-bedradingsvoorschriften
- Bouwvoorschriften
• NIET in water onderdompelen of stoom-/spuitreinigers
gebruiken voor de reiniging van het apparaat.
• Apparaat NIET bedekken wanneer in gebruik.
• Apparaat altijd in verticale positie vervoeren, opbergen en
gebruiken.
• Kantel het apparaat nooit meer dan 45° uit de verticale positie.
• Gebruik ALLEEN drinkwater voor het maken van de ijsblokjes.
• Zorg dat de waterdruk van de aangesloten watervoorziening
tussen de 101,352.97 Pa - 806,686.92 Pa (14,7-117psi) ligt.
• Men dient het ongebruikte water in de waterbak elke 24 uur
te vervangen.
• Uitsluitend voor gebruik binnenshuis.
• Laat verpakkingsmateriaal niet binnen handbereik van kinderen.
Verpakkingsmateriaal in overeenstemming met de regelgeving
van de plaatselijke overheden als afval laten verwerken.
• Dit apparaat mag worden gebruikt door kinderen vanaf 8 jaar
oud en personen met beperkte fysische, visuele of mentale
mogelijkheden, of die een gebrek aan ervaring en kennis
hebben indien ze gepaste instructies hebben gekregen zodat
ze het apparaat op een veilige manier kunnen gebruiken en
op de hoogte zijn van de gevaren die het gebruik van het
apparaat met zich meebrengt.
T316_GL192_ML_A5_v6_20190814.indb 9 2019/8/14 15:41

10
NL
• Laat kinderen niet met het apparaat spelen. Laat kinderen het
apparaat niet zonder toezicht schoonmaken en onderhouden.
• Indien de stroomkabel beschadigd raakt, dient men deze
door een POLARmonteur of een aanbevolen vakman te laten
vervangen om gevaarlijke situaties te voorkomen.
• Polar beveelt aan dat dit apparaat periodiek (minstens
jaarlijks) door een bevoegde persoon wordt getest. Tests
moeten omvatten, maar zijn niet beperkt tot: visuele inspectie,
polariteit, aardings continuïteit (klasse I-apparatuur), isolatie
continuïteit en functionele test.
• Dit apparaat is geschikt voor huishoudelijk gebruik en
gelijksoortige toepassingen zoals:
- kantines voor personeel, kantoren en andere werkruimten;
- boerderijen;
- door klanten in hotels, motels en andere types van
huisvesting;
- bed & breakfasts;
- catering en soortgelijke niet-retailtoepassingen.
Voorzichtig brandgevaar
• Heeft explosieve stoffen zoals spuitbussen niet slaan met een
brandbaar drijfgas in dit apparaat.
Waarschuwing:
Hou alle ventilatieopeningen vrij
van obstakels. Het apparaat mag niet ingesloten
worden zonder adequate ventilatie.
• Waarschuwing: gebruikt geen mechanische apparaten of
andere middelen om het ontdooien te versnellen, anders dan
welke aanbevolen worden door de fabrikant.
• Waarschuwing: het koelcircuit niet beschadigen.
• Waarschuwing: Gebruik geen elektrische apparaten in de
bewaarruimte voor voedsel van het apparaat, tenzij ze het een
type betreft welke wordt aanbevolen door de fabrikant.
T316_GL192_ML_A5_v6_20190814.indb 10 2019/8/14 15:41

11
NL
Inleiding
Neem de tijd om deze handleiding aandachtig door
te lezen. Met het correcte gebruik en onderhoud
levert dit product van POLAR de beste resultaten
op.
Verpakkingsinhoud
De verpakking bevat het volgende:
• IJsblokjesmachine
• IJsschep
• Inlaat-/uitlaatslangen
• Afdrichtringen
• Handleiding
POLAR is trots op de haar productkwaliteit en
dienstverlening en controleert de inhoud van de
verpakkingen, tijdens de verpakkingsfase, op
functioneren en schade.
Mocht uw product door transport zijn beschadigd,
neem dan onmiddellijk contact op met uw POLAR-
dealer.
Opmerking: Gebruik alleen de
slangen die bij het apparaat
zijn geleverd. Andere slangen
zijn niet geschikt en mogen niet
worden gebruikt.
Installatie
Opmerking: indien het apparaat
niet rechtopis opgeslagen
of vervoerd, dient men het
product 12 uur vóór gebruik
in rechtopstaande positie
te plaatsen. Bij twijfel dient
men het product ook in
rechtopstaande positie te
plaatsen.
1. Haal het apparaat uit de verpakking en
verwijder de beschermingsfolie van alle
oppervlakken.
2. Haal de ijsschep, toevoer-/afvoerslangen en
afdrichtringen uit de ijsbak.
3. Voor een adequate ventilatie dient men bij het
plaatsen van de ijsblokjesmachine een afstand,
tussen het apparaat en de muren of andere
objecten, aan te houden van 20cm.
NOOIT
NAAST OF DICHTBIJ EEN HITTEBRON
PLAATSEN.
4. Indien nodig, verstel de stelvoetjes om de
ijsblokjesmachine volledig gelijk in te stellen.
De efficiëntie van de ijsblokjesmachine kan
door een niet nauwkeurige afstelling negatief
worden beïnvloed.
Installatie van de afvoer
Alleen voor T316:
• Let op: dit model loopt af
via de zwaartekracht - er
wordt geen afvoerpomp
meegeleverd. Een optionele
afvoerpomp is vereist als
dit toestel lager dan de
afvoerstandpijp wordt
geïnstalleerd.
• Voor een efficiënte afvoer
dient het uiteinde van de
afvoerbuis lager te liggen
dan het waterafvoerventiel.
Zwaartekracht afvoer (Alleen voor T316:)
5. Sluit één uiteinde van de gegolfde afvoerslang
aan op de waterafvoer, aan de achterzijde van
de ijsblokjesmachine.
6. Sluit het andere uiteinde van de slang aan
op een vaste afvoerleiding of een geschikte
opvangbak voor afvalwater.
T316_GL192_ML_A5_v6_20190814.indb 11 2019/8/14 15:41

12
NL
Koudwatervoedsel installeren
7. Plaats de afdichtringen op de wateraanvoer
aan de achterzijde van de ijsblokjesmachine en
sluit één uiteinde van de aanvoerslang aan.
8. Sluit het andere uiteinde van de aanvoerslang
aan op de watervoorziening.
Waterinlaat
Wateruitlaat
Model: T316
Dop afvoerklep
Waterinlaat
Wateruitlaat
(hier de
afvoerslang
bevestigen)
Model: GL192
Opvangput
Dop afvoerklep
Voor reiniging en onderhoud
(alleen GL192): u kunt de dop
van de carterafvoer verwijderen
om al het water uit de machine
te laten lopen wanneer de
stroom is uitgeschakeld.
Stroomschakelaar
Opmerking: Alvorens het
apparaat voor de eerste
keer te gebruiken (of na een
stilstandperiode) reinig de
watertank, ijsbak en lade van
de ijsbak. Gebruik de eerste
productiecyclus van ijsblokjes
om het systeem te spoelen. Gooi
het water en de ijsblokjes van
de eerste cyclus weg.
1. Zorg ervoor dat de deur volledig gesloten is
voor het gebruik.
2. Zet de stroomschakelaar in de On (Aan) positie
[I]. Het RUN lampje licht op en het apparaat
start het productieproces van ijsblokjes. Elke
productiecyclus duurt ongeveer 25 minuten.
3. Zodra de ijsblokjes de ijssensor bereiken wordt
de productie gestopt. Na het verwijderen van de
ijsblokjes uit de ijsbak wordt de productie hervat.
4. Zet de stroomschakelaar in de Off (Uit) positie
[O] om de productie van ijsblokjes op elk
moment te stoppen.
Opmerking: Zorg ervoor dat
het metalen rek zo ver mogelijk
naar voor werd geduwd, tegen
het plastieken ijsgordijn zodat
het ijs kan vallen.
Reiniging, zorg &
onderhoud
• Alvorens het apparaat te reinigen dient men
altijd de stroomvoorziening uit te schakelen.
• Eventuele reparaties moeten door een
POLAR technicus of een vaktechnicus worden
uitgevoerd.
• Voor het reinigen van het apparaat wordt warm
zeepwater aanbevolen. Reinigingsmiddelen
kunnen schadelijke resten achter laten.
Basiseenheid NIET wassen; buitenzijde van de
eenheid met een vochtige doek afvegen.
• Reinig het waterfilter regelmatig met een kleine
borstel, vooral op plekken van hardwater. De
waterfilter bevindt zich in de wateraanvoer aan
de achterzijde van het apparaat.
• Draai de aftapschroef los en laat het water uit
de tank lopen indien u de ijsblokjesmachine
voor meer dan 24 uur niet gaat gebruiken.
• Men dient de interne verwijderbare
componenten en de watertank regelmatig te
reinigen.
T316_GL192_ML_A5_v6_20190814.indb 12 2019/8/14 15:41

13
NL
Filter voor het afvoersysteem
(alleen voor GL 192): controleer
het filter maandelijks en reinig
het indien nodig. Zorg ervoor
dat het filter na het reinigen
correct wordt geplaatst.
Automatische reiniging Functie
Opmerking: Deze ijsmachine is uitgerust met
een automatische reinigingsfunctie. Als het
apparaat 1500 ijsbereidingscycli heeft voltooid (na
circa 3 maanden regelmatig gebruik), knippert
het indicatielampje „CLEAN” en klinkt een
geluidssignaal, wat aangeeft dat het apparaat
moet worden gereinigd. Het lampje blijft knipperen
en het signaal blijft klinken totdat de automatische
reiniging is gestart. Tijdens het reinigen kan er nog
steeds ijs worden gemaakt.
1. Druk en houd de “CLEAN”-toets gedurende
3 seconden ingedrukt. Het waterreservoir
bovenaan zal omlaag en omhoog gaan. Druk,
wanneer het terugkeert naar de horizontale
positie, de schakelaar naar de O (UIT-positie)
en ontkoppel de machine. Zorg ervoor dat er
geen water resteert in het waterreservoir.
Schakelaar
CLEAN onderzijde CLEAN aanduidingslicht
2. Draai de dop van de afvoerklep achteraan,
rechts onderaan, los. Laat het water grondig
afvloeien uit het waterreservoir. Plaats de dop
van de afvoer nadien terug en schroef het vast.
Dop afvoerklep
Model: GL192
Model: T316
Dop afvoerklep
3. Voeg ongeveer 3 L. verdund reinigingsmiddel
toe aan het reservoir. Opmerking: Kies het
reinigingsmiddel, specifiek voor de ijsmaker, en
volg de instructies van de fabrikant.
Reservoir
4. Koppel de eenheid aan en druk de
schakelaarstoets in naar I(AAN-positie).
5. Druk de “CLEAN”-toets in. Het “CLEAN”
aanduidingslicht blijft bestendig branden. Het
reinigingsmiddel in het waterreservoir zal in
het waterreservoir gepompt worden om te
beginnen reinigen. Na ongeveer 10 minuten
draait het waterreservoir zich in verticale positie
om het reinigingsmiddel te laten druppelen.
Het toestel zal de bovenvermelde procedures
tweemaal herhalen. Dan wordt het “REINIGEN”
aanduidingslicht uitgeschakeld, aangevend dat
auto-reiniging voltooid werd. Opmerking: Voeg,
tijdens het reinigen, wanneer het “WATER
LOW” aanduidingslicht oplicht, extra 0,5 L
reinigingsmiddel toe aan het reservoir.
6. Schakel de eenheid uit en ontkoppel ze.
Verwijder de dop van de afvoerklep om het
waterreservoir te ledigen.
Opmerking: Gebruik, na de auto-
reiniging, de eerste ijsmaak-cycli
om het systeem te spoelen. Gooi
het water en het ijs, gemaakt
tijdens deze initiële cycli, weg.
T316_GL192_ML_A5_v6_20190814.indb 13 2019/8/14 15:41

14
NL
Oplossen van problemen
Probleem Mogelijke oorzaak Handeling
Het apparaat werkt niet Het apparaat staat uit
Controleer of de stroomkabel van het apparaat is
aangesloten en of het apparaat is ingeschakeld
Steker en kabel zijn beschadigd Laat een POLAR-monteur of een vakman komen
De zekering in de steker is
gesprongen Vervang de zekering in de steker
Stroomvoorziening Controleer de stroomvoorziening
Storing interne bedrading Laat een POLAR-monteur of een vakman komen
Kamertemperatuur onder 10°C
Verplaats het apparaat naar een warmere plek
Watervoorziening
Controleer of de watervoorziening is ingeschakeld
en of de toevoerslangen niet worden geblokkeerd
Het apparaat maakt
geluid of werkt soms wel
en dan weer niet
Stroomschommelingen Schakel de ijsblokjesmachine uit en herstart het
apparaat na 3 minuten
Water-
indicator is
aan
Water is niet aangesloten Sluit de ijsblokjesmachine op dewatervoorziening
aan
Geblokkeerde waterfilter Reinig de waterfilter en herstart de
ijsblokjesmachine
Waterdruk is te laag De waterdruk moet tussen de 101,352.97 Pa
- 806,686.92 Pa (14,7-117psi) liggen. Laat de
watervoorziening door een loodgieter nakijken
IJsindicator
FULL (VOL)
is aan
IJsbak is vol Leeg de ijsbak
Kamertemperatuur is te laag Verplaats het apparaat naar een warmere plek
Water- en
ijsindicators
Full (Vol)
knipperen
Waterfilter is geblokkeerd en
kan niet kantelentilt Stroomkabel uit het stopcontact halen. Verwijder
een deel van de ijsblokjes en kantel de
waterbak voorzichtig met de hand Herstart de
ijsblokjesmachine na 3 minuten
Storings-
indicat or is
aan
Waterlade niet juist geplaatst Verwijder opgebouwde ijslagen
IJssensor werkt niet
Controleer of de ijssensor wordt geblokkeerd.
Indien dit niet het geval is, neem dan contact op
met een POLAR technicus of een vaktechnicus
Waterlade kantelt niet Controleer of de watertank wordt geblokkeerd.
Neem contact op met een POLAR technicus of een
vaktechnicus indien de motor niet werkt
De compressor loopt
maar er worden geen
ijsblokjes gemaakt
Er lekt koelmiddel of het
koelsysteem wordt geblokkeerd
Laat een POLAR-monteur of een vakman komen
Technische specificaties
Model Voltage Vermogen Stroom Inhoud
bak Productie vermogen
ijsblokjes Koelmiddel Afmetingen
(h x b x d mm) Gewicht
T316 220-240V 50Hz 178,5W 1,3A 3,5kg 20kg/24 uur R600a 38g 590 x 380 x 477 24,8kg
GL192 220-240V 50Hz 295W 1,8A 10kg 50kg/24 uur R290 66g 831 x 498 x 604 42kg
T316_GL192_ML_A5_v6_20190814.indb 14 2019/8/14 15:41

15
NL
Elektrische bedrading
Men dient de stekker op een geschikt stopcontact aan te sluiten.
De bedrading van dit apparaat is als volgt:
• Stroomkabel (bruin) naar de aansluitklem gemarkeerd met L
• Neutraalkabel (blauw) naar de aansluitklem gemarkeerd met N
• Aardekabel (groen/geel) naar de aansluitklem gemarkeerd met E
Dit apparaat moet worden geaard.
Raadpleeg bij twijfel een vakkundige elektricien.
De elektrische isolatiepunten mogen niet worden geblokkeerd. In geval van een nooduitschakeling
moeten de isolatiepunten direct toegankelijk zijn.
Afvalverwerking
De EU-richtlijnen vereisen dat koelproducten door gespecialiseerde bedrijven wordt verwerkt die gassen,
metalen en plastic componenten verwijderen of recyclen.
Raadpleeg uw plaatselijke afvalverwerkingsbedrijf voor informatie over de afvalverwerking van uw
apparaat. Plaatselijke overheden zijn niet verplicht om commerciële koelapparatuur als afval te verwerken
maar kunnen u wellicht informeren waar u het apparaat kunt afgeven.
U kunt ook de POLAR-helpdesk bellen voor informatie over landelijke afvalverwerkingsbedrijven in de EU.
Productconformiteit
Het WEEE-logo op dit product of bijbehorende documentatie geeft aan dat het product
niet onder huisvuil valt en als zodanig ook niet mag worden verwerkt. Ter preventie
van mogelijke gevaren voor de gezondheid van personen en/of voor het milieu,
dient men dit product in overeenstemming met het voorgeschreven en milieuveilige
recyclingproces als afval te verwerken. Raadpleeg uw productleverancier of uw plaatselijk
afvalverwerkingsbedrijf voor meer informatie over de juiste verwerking van dit product.
De onderdelen van POLAR producten hebben strenge producttesten ondergaan om te
voldoen aan wettelijke regels en specificaties die door internationale, onafhankelijke en
landelijke overheden worden voorgeschreven.
POLAR-producten zijn goedgekeurd en voorzien van het volgende symbool:
Alle rechten voorbehouden. Het is verboden om deze handleiding, hetzij volledig of gedeeltelijk, elektronisch of mechanisch
te reproduceren, kopiëren, op opslagmedia op te slaan of op enigerlei wijze over te dragen, zonder voorafgaande
goedkeuring van POLAR.
Wij hebben er alles aan gedaan om er zeker van te zijn dat op publicatiedatum van de handleiding alle details correct zijn.
POLAR behoudt zicht echter het recht om zonder voorafgaande kennisgeving de specificaties te wijzigen.
T316_GL192_ML_A5_v6_20190814.indb 15 2019/8/14 15:41

16
FR
Conseils de sécurité
• Placez l’appareil sur une surface plane, stable.
• L’installation et les éventuelles réparations doivent être
confiées à un dépanneur / technicien qualifié. Ne retirez aucun
composant ou cache de ce produit.
• Consultez les normes locales et nationales pour vous
conformer aux :
- lois sur l’hygiène et la sécurité au travail ;
- codes de bonnes pratiques BS EN ;
- précautions contre le risque d’incendie ;
- réglementations sur les branchements électriques IEE ;
- règlements sur la construction.
• NE PAS immerger l’appareil ou le nettoyer à l’aide d’un
nettoyeur vapeur / haute pression.
• NE PAS couvrir l’appareil en service.
• Veillez à toujours transporter, stocker et manipuler l’appareil
en position verticale.
• Ne jamais incliner l’appareil à plus de 45° par rapport à la
verticale.
• Utiliser UNIQUEMENT de l’eau potable pour produire les glaçons.
• Vérifier que la pression de l’arrivée d’eau est comprise entre
101,352.97 Pa - 806,686.92 Pa (14,7-117 psi).
• Changez l’eau résiduaire du réservoir au moins une fois toutes
les 24 heures.
• Cet appareil est réservé exclusivement à une utilisation à l’intérieur.
• Gardez les emballages hors de portée des enfants.
Débarrassez-vous des emballages conformément aux
règlements des autorités locales.
• Cet appareil peut être utilisé par des enfants de 8 ans et plus
et des personnes ayant des capacités physiques, sensorielles
ou mentales réduites ou manquant d’expérience et de savoir-
faire sous réserve qu’elles soient sous la surveillance d’une
personne ou aient reçu des instructions concernant l’utilisation
de l’appareil en toute sécurité et qu’elles comprennent les
dangers que l’appareil présente.
T316_GL192_ML_A5_v6_20190814.indb 16 2019/8/14 15:41

17
FR
• Les enfants ne doivent pas jouer avec l’appareil. Le nettoyage
et l’entretien ne doivent pas être effectués par des enfants
sans surveillance.
• Un cordon d’alimentation endommagé doit être remplacé par
un agent POLAR ou un technicien qualifié recommandé, pour
éviter tout danger.
• Polar recommande de faire tester régulièrement cet appareil
(une fois par an au minimum) par une personne compétente.
Le test devrait inclure, entre autres : inspection visuelle, test
de polarité, la continuité de masse (équipement de classe I),
test d’isolation et test de fonctionnement.
• Cet appareil est conçu pour un usage domestique et d’autres
applications similaires. Il peut ainsi être utilisé :
- dans les espaces cuisine dans les magasins, bureaux et
autres environnements de travail ;
- dans les fermes ;
- par les clients d’hôtels, motels et d’autres types de résidences ;
- dans les types de résidences logement et petit déjeuner
continental ;
- Restauration et applications similaires non destinées à la
vente au détail.
Attention Risque d’ incendie
• Ne stockez pas de substances explosives telles que les
aérosols avec un propulseur inflammable dans cet appareil.
Attention : Ne bouchez pas les grilles d’aération.
Le meuble ne doit pas être encastré sans
l’aération adéquate.
• Attention : Ne pas utiliser de dispositifs mécaniques ou
autres moyens pour accélérer le processus de dégivrage,
autres que ceux recommandés par le fabricant.
• Attention : Ne pas endommager le circuit frigorifique.
• Attention : Ne pas utiliser d’appareils électriques à l’intérieur
des compartiments de stockage alimentaire de l’appareil, à
moins qu’ils ne soient recommandés par le fabricant.
T316_GL192_ML_A5_v6_20190814.indb 17 2019/8/14 15:41
18
FR
Introduction
Nous vous invitons à consacrer quelques instants à
la lecture attentive de ce mode d’emploi. L’entretien
et l’utilisation appropriés de cet appareil vous
permettront de tirer le meilleur de votre produit
POLAR.
Contenu
Eléments fournis de série :
• Machine à glaçons
• Pelle à glaçons
• Flexibles d’entrée / de sortie
• Rondelles d’étanchéité
• Mode d’emploi
POLAR attache une grande importance à la qualité
et au service et veille à fournir des produits en
parfait état opérationnel, parfaitement intacts au
moment de l’emballage.
Nous vous prions de contacter votre revendeur
POLAR immédiatement si vous constatez un
dommage quelconque survenu pendant le transport
du produit.
Remarque: N’utilisez que
les tuyaux fournis avec
l’appareil. Les autres tuyaux ne
conviennent pas et ne doivent
pas être utilisés.
Installation
Remarque : dans les cas où
l'appareil a été stocké ou
déplacé autrement qu'à la
verticale, placez-le en position
debout pendant environ 12
heures avant de vous en
servir. En cas de doute, laissez
l'appareil se reposer.
1. Sortez l’appareil de l’emballage et décollez la
pellicule de protection de toutes ses surfaces.
2. Retirez la pelle, les flexibles d’entrée/de sortie
et les rondelles d’étanchéité du bac à glaçons.
3. Pour positionner la machine à glaçons,
veillez à prévoir une distance de 20 cm entre
l’appareil est les murs ou autres objets, pour
laisser l’air circuler. ÉVITEZ DE PLACER CET
APPAREIL À PROXIMITÉ D’UNE SOURCE
DE CHALEUR.
4. Si nécessaire, réglez les pieds à vis de la
machine à glaçons pour la mettre de niveau.
Le positionnement irrégulier de la machine à
glaçons risque d’en compromettre l’efficacité.
Installation du drain
Pour T316 uniquement :
• Remarque : Ce modèle
s’écoule par gravité -
aucune pompe de vidange
n’est fournie. Une pompe
de vidange optionnelle est
nécessaire si l’unité est
installée plus bas que le
tuyau d’évacuation.
• Pour une vidange efficace,
veillez à placer l’extrémité
du tuyau de vidange plus
bas que le purgeur d’eau.
Drainage par gravité (Pour T316
uniquement)
5. Raccordez une des extrémités du flexible de
sortie ondulé à l’orifice de sortie d’eau situé à
l’arrière de la machine à glaçons.
6. Raccordez l’autre extrémité du flexible à une
colonne munie d’un tuyau d’évacuation ou à
récipient qui convient à la récupération des
eaux usées.
T316_GL192_ML_A5_v6_20190814.indb 18 2019/8/14 15:41
19
FR
Installation de l’alimentation en
eau froide
7. Placez les rondelles d’étanchéité sur l’orifice de
remplissage, à l’arrière de la machine à glaçons
et raccordez une des extrémités du flexible
d’entrée.
8. Raccordez l’autre extrémité du flexible d’entrée
à l’arrivée d’eau.
Orifice de
remplissage
Orifice de
sortie
Modèle : T316
Couvercle de
la vanne de
vidange
Orifice de
remplissage
Orifice de sortie
(fixez le tuyau
d’évacuation ici)
Modèle : GL192
Vidange
Couvercle de
la vanne de
vidange
Pour le nettoyage et la
maintenance (GL192
uniquement) : vous pouvez
retirer le capuchon de la vidange
pour vidanger toute l’eau de la
machine, quand l’appareil est
éteint.
Fonctionnement
Pour produire des glaçons
Remarque : Avant de mettre
la machine en service pour la
première fois (ou après une
période d’inactivité), nettoyez le
réservoir d’eau, le panier à glaçons
et l’étagère du panier à glaçons.
Servez-vous du premier cycle de
production de glaçons pour rincer
le système. Jetez l’eau et les
glaçons produits au premier cycle.
1. S’assurer que la porte est entièrement fermée
avant l’utilisation.
2. Placez l’interrupteur de marche/arrêt sur On
(Marche) [I]. La diode de fonctionnement
RUN s’allume et le processus de production
des glaçons démarre. Un cycle de production
de glaçons dure environ 25 minutes.
3. Quand les cubes atteignent le capteur de
glaçons, la production de glaçons s’arrête. La
production redémarre une fois le bac à glaçons
vidé.
4. Placez l’interrupteur de marche/arrêt sur Off
(Arrêt) [O] à n’importe quel moment, pour
interrompre le processus de production des
glaçons.
Remarque : S’assurer que
l’étagère en métal est
correctement serré contre le
rideau de glace pour permettre
à la glace de tomber.
Nettoyage, entretien et
maintenance
• N’oubliez jamais d’éteindre et de débrancher
l’appareil avant de procéder à son nettoyage.
• Nous préconisons le recours à de l’eau
savonneuse tiède. Les produits de nettoyage
risquent de laisser des résidus nocifs. NE PAS
laver le châssis de l’appareil, mais en essuyer
l’extérieur à l’aide d’un torchon humide.
• Toute réparation éventuelle doit être confiée à
un agent POLAR ou à un technicien qualifié.
• Nettoyez régulièrement le filtre à eau à l’aide
d’une petite brosse, surtout dans les régions
où l’eau est très calcaire.
• Si la machine à glaçons doit rester inactive
pendant plus de 24 heures, dévissez la vis de
vidange et vidangez l’eau du réservoir.
• Les pièces amovibles internes et le réservoir
d’eau doivent être nettoyés régulièrement.
T316_GL192_ML_A5_v6_20190814.indb 19 2019/8/14 15:41
20
FR
Filtre pour le système de drainage
(pour GL192 uniquement) :
Contrôlez le filtre tous les mois
et nettoyez-le si nécessaire.
Assurez-vous de remettre le filtre
bien en place après le nettoyage.
Fonction de nettoyage automatique
Remarque : La machine à glaçons est dotée
d’une fonction de nettoyage automatique. Lorsque
l’appareil a effectué 1500 cycles de fabrication de
glace, (environ 3 mois d’utilisation régulière), la
lumière d’indication « CLEAN » clignotera avec
une alarme audible, indiquant que l’unité doit
être nettoyée. L’appareil clignotera et l’alarme
continuera de sonner jusqu’à ce que le nettoyage
auto démarre, pendant ce temps, la fabrication de
glace continue.
1. Appuyer et maintenir le bouton « CLEAN »
pendant 3 secondes. La boîte à eau qui se
trouve au dessus va monter et descendre.
Lorsqu’elle retourne à la position horizontale,
appuyer le commutateur d’alimentation à O
(Position d’arrêt) et débrancher la machine.
S’assurer que l’eau ne reste pas dans la boîte à
eau.
Commutateur
Bouton CLEAN Lumière d’indication CLEAN
2. Dévisser le bouchon de la vanne d’évacuation
au niveau de la partie inférieure à l’arrière.
Laisser l’eau couler du réservoir. Ensuite,
replacer le bouchon de vidange et visser
correctement.
Couvercle de
la vanne de
vidange
Modèle : GL192
Modèle : T316
Couvercle de
la vanne de
vidange
3. Ajouter environ 3 litres de mélange du
nettoyeur dans le réservoir. Remarque: Choisir
un nettoyant spécifique de machine à glaçons
et respecter les consignes du fabricant.
Réservoir
4. Brancher l’appareil et appuyer le commutateur
d’alimentation à I(Position de MARCHE).
5. Appuyer sur le bouton « CLEAN ». Le voyant
indicateur de « CLEAN » s’allume et est stable.
Le nettoyeur qui se trouve dans le réservoir d’eau
sera pompé dans la boîte à eau pour démarrer
le nettoyage. Au bout de 10 minutes, la boîte à
eau se tourne dans le sens vertical pour verser
le nettoyeur. L’appareil va répéter les procédures
suivantes deux fois. Ensuite, le voyant indicateur
de « CLEAN » s’éteint, pour signaler que l’auto
nettoyage est terminé. Remarque: Pendant le
nettoyage, si le voyant indicateur de « WATER
LOW » brille, ajouter 0,5L de nettoyeur
supplémentaire dans le réservoir.
6. Eteindre l’appareil et le déconnecter. Retirer le
bouchon de la vanne de vidange pour vider le
réservoir d’eau.
Remarque : Après l’auto
nettoyage, utiliser les 3
premiers cycles de fabrication de
glaçons pour rincer le système.
Jeter l’eau et les glaçons issus
de ces cycles initiaux.
T316_GL192_ML_A5_v6_20190814.indb 20 2019/8/14 15:41
This manual suits for next models
1
Table of contents
Languages:
Other Polar Refrigeration Ice Maker manuals

Polar Refrigeration
Polar Refrigeration T316 User manual

Polar Refrigeration
Polar Refrigeration T316 User manual

Polar Refrigeration
Polar Refrigeration G620-A User manual

Polar Refrigeration
Polar Refrigeration APPT316 User manual

Polar Refrigeration
Polar Refrigeration T316 User manual

Polar Refrigeration
Polar Refrigeration T315 User manual

Polar Refrigeration
Polar Refrigeration G620 User manual

Polar Refrigeration
Polar Refrigeration T316 User manual

Polar Refrigeration
Polar Refrigeration GL193 User manual