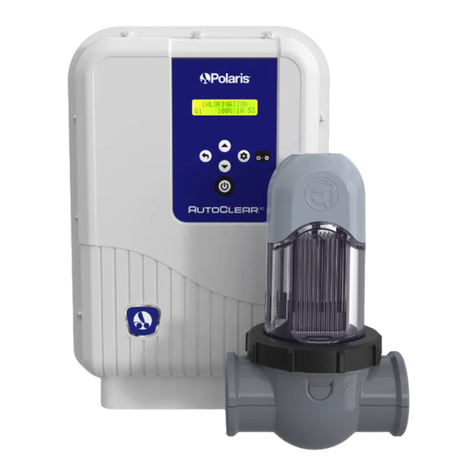
Polaris AutoClear SC User manual

PMRA Approved
2021-6492
2022-08-10
Carton label :
Cell Replacement Label :
Rating Label:
POLARIS
AUTOCLEAR
®SC
(PAGSC20K)
INPUT SWC: 120VAC, 60Hz, 2.5A
OUTPUT: 28V D.C., 8A
CHLORINE OUTPUT: See cell labelEPA
Est. No. 100761-MYS-1
4007539
Pump Receptacle: 120 VAC, 60 Hz, 10AMax CONFORMS TO UL STD 1081
CAN ICES-003 (B) / NMB-003 (B) Certified to CSA Std. C22.2 No. 218.1
Polaris®AutoClear SC (PAGSC20K)
Chlorine Generator
Controls bacteria and algae in Swimming Pool Water For Residential Pools
DOMESTIC
A maximum of 132,000 L (35,000 gallons) (132.0 m3) of water can be treated
with one Polaris®PAGSC20K unit.
Maximum output of hypochlorous acid equivalent to 0.400 kg of free available chlorine per day
For swimming pools, a range of 1-3 ppm of free available chlorine must be maintained.
READ THE LABEL AND THE INSTALLATION AND OPERATION MANUAL
BEFORE USING
KEEP OUT OF REACH OF CHILDREN
REG. NO. 34542 PCPA
WARNING: operating Polaris®PAGSC20K without water flow through the
cell can cause a build up of flammable gases which can result in FIRE OR
EXPLOSION.
WARNING: Do not use this device with bromide products
Zodiac Pool Systems LLC
2882 Whiptail Loop East #100 Carlsbad, CA 92010
1.800.822.7933 | www.ZodiacPoolSystems.com
Zodiac Pool Systems Canada, Inc.
2-3365 Mainway, Burlington, Ontario L7M 1A6
+ 1 (888) 647-4004 | www.ZodiacPoolSystems.ca
Polaris®AutoClear SC (PAGSC20K)
Chlorine Generator
Replacement electrode for the chlorine generating device Polaris®PAGSC20K
REG. NO. 34542, PCPA.
This cell must only be used on this model of chlorine generating device.
Read the Label, the Installation and Operation Manual of the chlorine generating device
Polaris®PAGSC20K before using.
Zodiac Pool Systems LLC
2882 Whiptail Loop East #100 Carlsbad, CA 92010
1.800.822.7933 | www.ZodiacPoolSystems.com
Zodiac Pool Systems Canada, Inc.
2-3365 Mainway, Burlington, Ontario L7M 1A6
+ 1 (888) 647-4004 | www.ZodiacPoolSystems.ca

Warning Label On The Back :
CAUTION:
READ THE INSTALLATION AND OPERATION MANUAL
WARNING:
Risk of electrical shock.
Connect only to circuit that is protected by a Ground-Fault Circuit-Interrupter (GFCI).
Disconnect the electric power before servicing.
CAUTION:
To reduce the risk of electric shock, do not install within 3 metres (10 feet) from the inside edge of the pool.
DO NOT MODIFY THIS EQUIPMENT FOR INDOOR/OUTDOOR USE
Warning Label On The Front :
WARNING
Disconnect the electric power before servicing.
H0769500_REVA

Cell Rating Label :
Pump Receptacle Label :
Filter Pump
120 VAC, 60Hz, 10AMax
H0770300_REVA
Output Rate: 16.9 g/hr
Input: 28VDC, 8 A
Required Salt Level:
3250 ppm
4007539
EPA Est. 100761-MYS-1
ELECTROLYTIC CELL FOR POLARIS AUTOCLEAR
®SC
(PAGSC20K)
ETL LISTED CONFORMS TO UL STD 1081CERTIFIED TO CAN/CSA
C22.2 NO. 218.1
CAN ICES-003 (B) / NMB-003 (B)
Zodiac Pool Systems LLC2882 Whiptail Loop East #100
Carlsbad, CA 92010
www.polarispool.com
H0769600_REVA

Above Ground
Salt Chlorinator
PAGSC20K
Installation and Operation Manual
English | Français | Español
H0770400_REVA

FOR YOUR SAFETY - This product must be installed and serviced by a qualified pool professional or personnel
who are knowledgeable with the standards and code requirements for above ground pool equipment. The
maintainer must be a qualified pool professional or personnel with sufficient experience in pool equipment
installation and maintenance so that all of the instructions in this manual can be followed exactly. Improper
installation and/or operation can create dangerous high pressure which can cause a catastrophic product
failure and/or cause the multi-port valve or cell housing to be blown off possibly causing death, serious injury or
property damage.
Improper installation and/or operation can create unwanted electrical hazard which can
cause serious injury, property damage, or death. DO NOT MODIFY THIS EQUIPMENT.
Before installing this product, read and follow all warning notices and instructions that accompany
this product. Failure to follow warning notices and instructions may result in death, serious injury
or property damage. Consult Polaris customer service at 1-800-822-7933 for assistance. Improper
installation and/or operation may void the warranty.
WARNING

Page 2
|
Polaris® AutoClear® SC (PAGSC20K) Salt Chlorinator - Installation and Operation
Manual
ENGLISH
Controls bacteria and algae in swimming pool water
For Residential Pools, DOMESTIC
REGISTRATION NO. 34542 PEST CONTROL PRODUCTS ACT
WARNING
READ THE LABELAND OPERATION MANUAL BEFORE USING. KEEP OUT OF REACH OF CHILDREN.
Maximum Overcurrent Protection - 15A
Use Copper Conductors Only
Disconnect Power before Opening Service Cover
For Outdoor or Indoor Use
Electrical Requirements: 120 VAC 60 Hz, 1.3 AMP
Maximum Output of Hypochlorous Acid is Equivalent to 0.400 kg of Free Available Chlorine Per Day
3,000 parts per million of salt
The maximum volume of water that can be treated with one unit of Polaris AutoClear SC (PAGSC20K) is 132,000
litres (35,000gallons) (132.0 m3)
For swimming pools, a range of 1-3 ppm of free available chlorine must be maintained.
Controls bacteria and algae in swimming pool water.
Do not use this device with bromide products.
ETL LISTED
CONFORMS TO
UL STD 1081
Certified to
CAN/CSA C22.2
NO 218.1
NOTICE TO USER
This pest control product is to be used only in accordance with directions on the label. It is an offense under the
Pest Control Products Act to use this product in a way that is inconsistent with the directions on the label.

Page 3
|
Polaris® AutoClear® SC (PAGSC20K) Salt Chlorinator - Installation and Operation
Manual
ENGLISH
Table of Contents
Section 1. Important Safety Instructions........4
Section 2. System Description........................7
2.1 Product Specifications.............................................7
2.2 Product Contents .....................................................7
Section 3. Installation Instructions.................9
3.1 Materials and Tools .................................................9
3.2 Installation Requirements.......................................9
3.3 Install the Power Pack and Cell...........................10
3.4 Bonding ...................................................................10
Section 4. Pool Water Preparation................12
4.1 Determining Pool Size (Gallons)..........................12
4.2 Determining Pool Size (Litres) .............................12
4.3 Chemistry................................................................12
4.4 Optimum Pool Water Conditions .........................13
4.5 Chlorine Testing.....................................................13
4.6 Salt (NaCl Sodium Chloride)................................14
Section 5. Operating Instructions.................16
5.1 Setting the Clock....................................................16
5.2 "Summer" and "Winter" Modes
and Setting the "Timers".......................................16
5.3 Chlorine Production Activated..............................17
5.4 Maintenance ...........................................................17
Section 6. Maintenance Instructions............17
6.1 Weekly.....................................................................17
6.2 Monthly....................................................................18
6.3 Cleaning the Cell....................................................18
6.4 Winterizing ..............................................................19
Section 7. Troubleshooting...........................20

Page 4
|
Polaris® AutoClear® SC (PAGSC20K) Salt Chlorinator - Installation and Operation
Manual
ENGLISH
Section 1. Important Safety Instructions
READ AND FOLLOW ALL INSTRUCTIONS
All electrical work must be performed by a licensed electrician and conform to all national, provincial, and local codes.
When installing and using this electrical equipment, basic safety precautions should always be followed, including the
following:
WARNING
EQUIPMENT UNDER PRESSURE: Always turn pump off prior to installing or servicing the power pack, pod,
or cell. Your pump/filter system is operated under pressure and the pressure must be released before you begin
work. Please see your pump/filter owner’s manual for further instructions.
WARNING
To reduce the risk of electric shock, fire or injury, service should only be attempted by a qualified pool service professional.
WARNING
To reduce the risk of injury, do not permit children to use this product unless they are closely supervised at all times.
WARNING
RISK OF ELECTRIC SHOCK, FIRE, PERSONAL INJURY, OR DEATH. Connect only to a branch circuit protected
by a ground-fault circuit-interrupter (GFCI). Contact a qualified electrician if you cannot verify that the circuit is
protected by a GFCI.
Such a GFCI should be tested on a routine basis. To test the GFCI, push the test button. The GFCI should
interrupt power. Push the reset button. Power should be restored. If the GFCI fails to operate in this manner, the
GFCI is defective. If the GFCI interrupts power to this equipment without the test button being pushed, a ground
current is flowing, indicating the possibility of an electric shock. Do not use this equipment. Disconnect this
equipment and have the problem corrected by a qualified service representative before using.
Installation must be done in accordance with the National Electrical Code® (“NEC®”or NFPA-70®) in the US, the
Canadian Electrical Code (“CEC” or C22.1) in Canada, and/or any other local and national installation codes.
WARNING
The power pack must be interlocked/interconnected with the pool pump motor power source to ensure that the
chlorinator only operates when the pool pump is operating. The flow switch feature of the Polaris AutoClear SC
(PAGSC20K) is intended to be used as a backup only and should not be used as the sole source of flow detection.
WARNING
Do not bury the cords. Locate cords to minimize abuse from lawn mowers, hedge trimmers, and other equipment.
To reduce the risk of electric shock, replace damaged cord immediately and do not use an extension cord to
connect unit to electric supply; provide a properly located outlet.
WARNING
The chlorine generating device is designed for above ground (residential) swimming pool use only. Contrary use
could affect performance, void warranty, and may result in property damage, serious injury, or death.
•
Operating a chlorine generator without water flowing through the cell maycause a build up of flammable gases,
resulting in FIRE OR EXPLOSION.
•
Keep equipment out of reach of children.
•
Do not use if supply cord is damaged.
•
A damaged supply cord should only be replaced by the manufacturer, service agent or electrician.
•
When installing and using this electrical equipment, always follow basic safety precautions.
•
Before performing installation, disconnect all power.
•
Connect to a circuit that is protected bya ground fault circuit interrupter (GFCI).
•
To reduce the risk of electric shock, replace damaged cord immediately.
•
Do not use this device with bromide products.
WARNING
•The power pack must be installed at least 60 cm (2 ft.) vertically off the ground.
•The power pack must be installed at least 3 metres (10 feet) from the inside wall of your swimming pool or spa.
WARNING
Should a lack of water be detected, the unit’s electronic flow switch is designed to turn off the system. Interfering
with the electronic flow switch could result in personal injury and/or damage to the cell.

Page 5
|
Polaris® AutoClear® SC (PAGSC20K) Salt Chlorinator - Installation and Operation
Manual
ENGLISH
WARNING
Operating Polaris AutoClear SC models without water flow through the cell can cause a buildup of flammable
gases which can result in FIRE OR EXPLOSION. READ THE LABEL AND OPERATION MANUAL BEFORE
USING. KEEP OUT OF REACH OF CHILDREN.
WARNING
This appliance is not intended for use by persons (including children) with reduced physical, sensory or mental
capabilities, or lack of experience and knowledge, unless they have been given supervision or instruction
concerning use of the appliance by a person responsible for their safety.
WARNING
PREVENT CHILD DROWNING: Do not let anyone, especially small children, sit, step, lean or climb on any
equipment installed as part of your pool’s operational system. Locate the components of your operational system
at least 3 metres (10 feet) horizontally from the pool so children cannot use the equipment to access the pool and
be injured or drown.
FCC Regulatory Compliance Statement
This device complies with Part 15 of the FCC Rules. Operation is subject to the following two conditions:
1. This device may not cause harmful interference, and
2. This device must accept any interference received, including interference that may cause undesired operation/
CAUTION: Changes or modifications not expressly approved by the party responsible for compliance could void
the user's authority to operate the equipment.
NOTE: This equipment has been tested and found to comply with the limits for a Class B digital device, pursuant to
Part 15 of the FCC Rules. These limits are designed to provide reasonable protection against harmful interference
in a residential installation. This equipment generates uses and can radiate radio frequency energy and, if not
installed and used in accordance with the instructions, may cause harmful interference to radio communications.
However, there is no guarantee that interference will not occur in a particular installation. If this equipment does
cause harmful interference to radio or television reception, which can be determined by turning the equipment off
and on, the user is encouraged to try to correct the interference by one or more of the following measures:
•
Reorient or relocate the receiving antenna.
•
Increase the separation between the equipment and receiver.
•
Connect the equipment into an outlet on a circuit different from that to which the receiver is connected.
•
Consult the dealer or an experienced radio/TV technician for help.

Page 6
|
Polaris® AutoClear® SC (PAGSC20K) Salt Chlorinator - Installation and Operation
Manual
ENGLISH
CAUTION
This device is intended for use with above ground, permanently installed swimming pools. Do not use with
storable pools. A permanently installed pool is constructed on the ground or in a building such that it cannot be
readily disassembled for storage. A storable pool is constructed so that it is capable of being readily disassembled
for storage and reassembled to its original integrity.
WARNING
•People with infectious diseases should not use a swimming pool, spa or hot tub.
•To avoid injury, exercise care when entering or exiting the swimming pool, spa or hot tub.
•Do not use drugs or alcohol before or during the use of a swimming pool, spa or hot tub to avoid
unconsciousness and possible drowning.
•Pregnant or possibly pregnant women should consult a physician before using a swimming pool, spa or hot tub.
•Water temperature in excess of 38°C (100°F) may be injurious to your health.
•Before entering a swimming pool, spa or hot tub measure the water temperature with an accurate thermometer.
•Do not use a swimming pool, spa or hot tub immediately following strenuous exercise.
•Prolonged immersion in a swimming pool, spa or hot tub may be injurious to your health.
•Do not permit any electric appliance (such as a light, telephone, radio, or television) within 3 metres (10
feet) of a swimming pool, spa or hot tub.
•The use of alcohol, drugs or medication can greatly increase the risk of fatal hyperthermia in swimming pools, hot
tubs and spas.
•Water temperature in excess of 38°C (100°F) may be hazardous to your health.
•CHILDREN SHOULD NOT USE SWIMMING POOLS, SPAS OR HOT TUBS WITHOUT ADULT SUPERVISION.
•MAINTAIN WATER CHEMISTRY IN ACCORDANCE WITH MANUFACTURER'S INSTRUCTIONS.
CAUTION
It is important to note that certain materials used in and around swimming pools may not be compatiblewith
chemicals commonly used to purify pool water (e.g. acids, chlorine, salt, stabilizers, etc.).
Zodiac Pool Systems LLC does not warrant or guarantee that the chlorinated water generated by the chlorine
generating device will not damage or destroy certain types of plants, decking, coping and other materials in and
around your pool. Before selecting materials to be used in and around your pool, please discuss all options with
your contractor to assess the compatibility of such materials and chemicals.
When mixing acid with water, ALWAYS ADD ACID TO WATER. NEVER ADD WATER TO ACID.
Some helpful considerations may include:
•
Choosing plants that can withstand splash out of pool water containing chlorine and/or salt and other water
purification chemicals.
•
All metal components used in and around a pool should be of a high grade, quality stainless steel.
•
Careful selection of masonry products. The porosity and hardness of natural stones varies greatly. Therefore we
recommend you consult with your builder or stone contractor on the best choice for stone materials around your
pool.
•
Sealing all masonry products. Professionals in the stone industry specify that even natural stone, especially
when used outdoors, be sealed to prevent weathering, staining, and premature degradation. Consult with your
stone or deck contractor for the proper sealer for the masonry products you have selected to use around your
pool.
•
For the optimal results, sealers should be reapplied on a regular basis. Reapply the protective sealer on a
schedule per the manufacturer’s instructions.
•
Use of chemicals other than those recommended may be hazardous. Follow the chemical manufacturers
instructions.
CAUTION
This device is intended for use with above ground, permanently installed (residential) swimming pools. Do not use
with storable pools. A permanently-installed pool is constructed on the ground or in a building such that it cannot be
readily disassembled for storage. A storablepool is constructed so that it is capable of being readily disassembled
for storage and reassembled to its original integrity.
SAVE THESE INSTRUCTIONS

Page 7
|
Polaris® AutoClear® SC (PAGSC20K) Salt Chlorinator - Installation and Operation
Manual
ENGLISH
Section 2. System Description
Figure 1. Example of Installation
2.1 Product Specifications
Maximum Operating Pressure: 35 psi
Output Voltage: 28V DC (max)
Minimum Flow Rate: 152 Lpm (40 gpm)
Output Current: 8ADC
Maximum Flow Rate: 348 Lpm (92 gpm)
Dimensions:
Power Pack (L x W x H):
25.4cmx11.4cm x33cm (10 in. x 4.5 in. x 13 in.)
Electrolytic Cell (L x W x H):
16.5 cm x 14 cm x 30.5 cm (6.5 in. x 5.5 in. x 12 in.)
Maximum water volume treated:
132,000 L (35,000 gal.)
Chlorine Output: 0.400 kg (1.08 lbs.) per day
Required Salt Level: 3,250 ppm (3.0 gpl)
Input Voltage: 120 V
Weight:
Power Pack: 3.2 kg (7 lbs.)
Electrolytic Cell: 0.9 kg (2 lbs.)
Input Current @ 120 VAC, 12A(pump connected)
Input Current @ 120 VAC: ~2.5 A (salt cell and
flow switch connected)
Input Freq: 60 Hz
The cell must be installed horizontally as the last piece of equipment
in the circulation plumbing system just before the pool.
Power Center
Flow Switch
Cell

Page 8
|
Polaris® AutoClear® SC (PAGSC20K) Salt Chlorinator - Installation and Operation
Manual
ENGLISH
2.2 Product Contents
A B F
D
C
G
E
Figure 2. Carton Contents
ITEM
DESCRIPTION
QTY
A
Power Pack
1
B
Cell
1
C
Power Pack Bracket
1
D
Winterizing Cap
1
E
Screw Set (includes wall plugs)
2
F
Locking RingTool
1
G
Flow Switch
1

Page 9
|
Polaris® AutoClear® SC (PAGSC20K) Salt Chlorinator - Installation and Operation
Manual
ENGLISH
Section 3. Installation
Instructions
WARNING
FOR YOUR SAFETY: This product must be serviced
by a professional pool service technician as
described on the front cover of this manual. The
procedures in this manual must be followed exactly.
Failure to follow warning notices and instructions may
result in property damage, serious injury, or death.
Improper installation and/or operation may void the
warranty.
EQUIPMENT UNDER PRESSURE: Always turn
pump off prior to installing or servicing the chlorine
generating device. Your pump/filter system is
operated under pressure and the pressure must be
released before you begin work. Please see your
pump/filter owner’s manual for further instructions.
WARNING
To reduce the risk of electric shock, do not use
extension cord to connect unit to electric supply;
provide a properly located outlet.
WARNING
Risk of Electric Shock. Connect only to a branch
circuit protected by a ground-fault circuit-interrupter
(GFCI). Contact a qualified electrician if you cannot
verify that the circuit is protected by a GFCI.
CAUTION
To reduce the risk of electric shock do not place the
power pack closer than 3 metres (10 feet) from the
pool.
Do not bury the cords. Locate cords to minimize
abuse from lawn mowers, hedge trimmers, and other
equipment.
Before you begin your installation, please check that
you have the right tools and a suitable location to install
the power pack and cell. Please ensure that you have
read and understood the Important Safety Instructions
section.
3.1 Materials and Tools
Installation Materials Furnished
•Pipe spacer - for 40 mm (1½ in.) pipe
•Screw set (includes wall plugs)
•Installation and Operation Manual
3.2 Installation Requirements
Figure 3. Installation Requirements
The installation requirements for the chlorine generating
device are as follows:
•
The power pack must be installed at least 0.6
m (2 ft.) vertically off the ground.
•
The power pack must be be installed at least 3
metres (10 feet) from the inside wall of your
swimming pool
•
The cell must be installed with the provided pipe
adapter.
•
The cell must be installed no more than 4.6m (15
ft.) from the power pack.
•
The power pack must be installed no more than
1 m (3 ft.) from an electrical outlet.
•
The flow pod must be installed upstream from the
cell.
•
It is recommended that the flow switch and cell be
installed 0.25 m (10 in.) from any 90° elbow.
WARNING
The chlorine generating device must be installed
horizontally with the cell above the pipe to avoid
buildup of flammable gases which can result in FIRE
OR EXPLOSION.
It is required that the water flow pod is installed in the
or diverters between them.
Power Pack
Cell
Pod
Flex Hose*
(*Not to scale)

Page 10
|
Polaris® AutoClear® SC (PAGSC20K) Salt Chlorinator - Installation and Operation
Manual
ENGLISH
3.3 Install the Power Pack and Cell
1. Ensure placement of the cell, the power pack, and
the cell will meet all the installation requirements
outlined in Section 3.2.
WARNING
We recommend that any procedure requiring potential
contact with live electrical wiring and/or parts other
than cords and plugs connected to electrical outlets be
completed by a contractor who is licensed and qualified
in pool equipment as described on the front cover of this
manual. Failure to follow warning notices and instructions
may result in property damage, serious injury, or death.
2. Screw the power pack bracket into position on a
wall surface or post where it will mount securely,
while ensuring it is no more than 4.6 m (15 ft.)
from the cell.
4.6 m (15 ft)
MAX
Figure 4. Installation Requirements
3. Position the power pack in place by aligning the
bracket with the corresponding thru-holes.
Thru-holes
Screws
Figure 5. Attaching the Power Pack
4. Unscrew the locking ring from the cell and the pod
in order to extract them from the lower clamp.
5. Press the two (2) push-buttons on either side of
the upper clamp to separate the upper clamp from
the lower clamp.
3.4 Bonding
WARNING
The National Electrical Code (NEC) and Canadian
Electrical Code (CEC) requires that pool equipment
be bonded to each other. Make sure to check your
local codes to determine if the NEC, CEC, and/
or other local installation codes are enforced by
the Authority Having Jurisdiction (AHJ) or the local
competent authorities in Canada. A solid copper
bonding conductor min. 8.37 mm² (8 AWG), 13.3
mm² (6 AWG) in Canada, shall be used for bonding
the power pack to a permanent bonding connection
that is acceptable to the AHJ or local competent
authority. A bonding conductor is included with this
product. Refer to your locally enforced codes for the
acceptable bonding wire gauge. Each piece of non-
related pool equipment requiring a ground should also
be bonded to the common, approved bonding point.
To avoid property damage, serious injury or death,
NEVER use the chassis backplate of the power pack
to ground any other equipment.
Attach the bonding point located on the bottom of the
chassis backplate to a common bonding point. Do not
use the power pack as the common bonding point.
Each piece of non-related pool equipment requiring a
ground should also be bonded to the common, approved
bonding point. There should be one bonding connection
to the power pack. In Canada, the Canadian Electrical
Code (CEC) dictates that the bonding conductor be,
minimum 13.3 mm2 (6 AWG).
National Electrical Code® (NEC®) requires bonding of
the Pool Water for Permanently Installed Pools. Where
none of the bonded pool equipment, structures, or
parts are in direct connection with the pool water; the
pool water shall be in direct contact with an approved
corrosion-resistant conductive surface that exposes not
less than 5800 mm² (9 in²) of the surface area to the
pool water at all times. The conductive surface shall be
located where it is not exposed to physical damage or
dislodgement during usual pool activities, and it shall be
bonded in accordance with the bonding requirements of
NEC Article 680. Refer to your locally enforced codes for
any additional bonding requirements.

Page 11
|
Polaris® AutoClear® SC (PAGSC20K) Salt Chlorinator - Installation and Operation
Manual
ENGLISH
Figure 6. Disassemble the Cell
Figure 7. Water Flow
Figure 10. Locking Ring Level
2. Install the flow switch making sure the arrow on
the flow switch points in the direction of the water
flow. Make sure the switch is in line with the pipe.
3. Securely connect the cell leads to the like colored
terminals.
4. Attach the terminal cap.
Figure 8. Locking Ring Alignment
1. Screw down the locking ring to the threaded clamp
using the locking ring tool.
Figure 9. Locking Ring Tool
NOTE: Ensure the locking ring is level when engaging the
threading housing.
Figure 11. Connecting Cell Leads
5. Plug the pod connector into the power pack (see
Figure 20).
6. Attach one end of the bonding wire to the bonding
lug located on the bottom of the chassis backplate
on the power pack (see Figures 21 and 22).
7. Attach the second end to a common bonding point
such as the pool pump or heater. Make sure to
refer to the pump or heater manual for the location
of the bonding lug connection prior to making this
connection.
NOTE: Do not use the power pack as the common bonding
point. There should only be one bonding connection
to the power pack. Each piece of non-related pool
equipment requiring a ground should also be bonded to
the common, approved bonding point.
8. Plug the power pack into the electrical outlet. Turn
Align the bump
with the high
thread on the
lower clamp.
NOTE: The
Upper Clamp
is not shown
in this diagram
but it should be
installed.
Locking Ring Tool
Black
Red
Red
Blue

Page 12
|
Polaris® AutoClear® SC (PAGSC20K) Salt Chlorinator - Installation and Operation
Manual
ENGLISH
the power pack on.

Page 13
|
Polaris® AutoClear® SC (PAGSC20K) Salt Chlorinator - Installation and Operation
Manual
ENGLISH
Figure 12. Pod Connector
Section 4. Pool Water
Preparation
4.1 Determining Pool Size (Gallons of
Water in Your Pool)
•
Rectangular Pools
Average length (feet) x average width (feet) x
average depth (feet) x 7.5 = gallon capacity.
•
Circular Pools
Diameter (feet) x diameter (feet) x average depth
(feet) x 5.9 = gallon capacity.
•
Oval Pools
Long diameter (feet) x short diameter (feet) x
average depth (feet) x 5.9 = gallon capacity.
•
Sloping Sides
Multiply total gallons by 0.85 = gallon capacity.
4.2 Determining Pool Size (Litres of Water
in Your Pool)
•
Rectangular Pools
Average length (metres) x average width
(metres) x average depth (metres) x 1000 = litres
capacity.
•
Circular Pools
Diameter (metres) x diameter (metres) x average
depth (metres) x 790 = litres capacity.
•
Oval Pools
Long diameter (metres) x short diameter (metres)
x average depth (metres) x 790 = litres capacity.
•
Sloping Sides
Multiply total litres by 0.85 = litres capacity.
4.3 Chemistry You Need to Know
•
Chlorine Stabilizer (cyanuric acid) is needed
to maintain proper levels of chlorine. Most
non-stabilized chlorine is destroyed bythe UV
radiation from the sun within two (2) hours.
Chlorine stabilizer should bemaintained between
10 - 50 ppm. For indoor pools, it is not necessary
to add chlorine stabilizer to the swimming pool
water.
•
Nitrates can cause extremely high chlorine
demands and will deplete chlorine from your
swimming pool. In some cases nitrates may even
lower your chlorine levels to zero. Your local
pool professional can test for nitrates. Make sure
nitrates are not present in your pool.
•
Metals (some metals) can cause loss of chlorine
stain your pool. Have your local pool professional
check for metals and recommend methods of
removal.
•
Chloramines should not be present in pool
water. When organic materials combine with free
chlorine, chloramines are formed. This ties up
the free chlorine in your pool and does not allow
the chlorine in your pool to disinfect. Chloramines
also cloud pool water and burn the eyes. Shock
to remove chloramines at the initial startup of
the pool.
Pod
Connector

Page 14
|
Polaris® AutoClear® SC (PAGSC20K) Salt Chlorinator - Installation and Operation
Manual
ENGLISH
•
Super Chlorination burns out the organic
material that has combined with chlorine
which frees the chlorine for sanitizing. This is
accomplished byraising the chlorine level quickly
and dramatically. To super chlorinate the pool
using the chlorine generating device, set the
chlorine production to 100% and then set the
pump and the cell to run for 24 hours.
•
Shocking (Superoxidation) is also a means
of burning out the organic material that has
combined with chlorine.This method involves
the manual addition of chemicals to quickly raise
the level of chlorine. When the chlorine level is
quickly raised to 5 - 15 ppm the pool water is said
to have been shocked.
NOTE: On initial startup of a pool, it is best to shock from an
alternate source, i.e., use a shock treatment available at
your local pool supplier.
•
The pH condition resulting from the operation
of a salt water chlorination system is close to
neutral. However, other factors usually cause the
pH of the pool water to rise. Therefore, the pH in
a pool chlorinated by a salt water system tends to
stabilize at approximately 7.6. If the pool pH rises
above 7.6 have a pool professional test to see if
other factors such as high calcium hardness or
total alkalinity are the cause and then balance
accordingly.
•
Total Dissolved
Solids
(TDS)
Adding
salt
to pool water will raise the TDS level. While
this does not adversely affect the pool water
chemistryor clarity, the pool water professional
testing for TDS must be made aware salt has
been added for the sanitizing system. The
individual performing the TDS test will then
subtract the salinity level to arrive at the correct
TDS level.
•
New pool water in a recently filled or newly
refinished pool may contain undesirable
matter which could interfere with the salt water
chlorinator’s ability to sanitize properly. Make
sure the water is tested by a pool professional
and properly balanced before turning on the
chlorinator system. New plaster pools have a
constant acid demand for six (6) months.Test
often and maintain a proper pH to avoid excess
scaling of the cell.
•
Sequestering Agents can be used to
compensate for source water which may have
unusually high calcium hardness. High calcium
hardness can contribute to scale formation in
the pool. Sequestering agents will help keep
minerals in solution and under some conditions
can prevent scaling from happening. Consult
your pool professional about the use of a
sequestering agent.
4.4 Optimum Pool Water Conditions
•
In accordance with Association of Pool and Hot
Tub Alliance (PHTA) standards, we recommend
the following water balance conditions be
maintained on an ongoing basis to protect the
pool finish and the equipment and to ensure the
pleasing appearance of the water. The chlorine
generating device is warranted to operate
properly only if the following conditions are met:
Free Chlorine
Pools: 1 - 3 ppm. Continuous
exposure to levels above 3.0
ppm may cause corrosion of pool
metals.
Combined
Chlorine
(Chloramines)
None
(Super chlorinate to remove all
chloramines.)
pH
7.4 - 7.6
(Use muriatic acid to lower pH and
soda ash to raise pH.)
Chlorine
Stabilizer
(Cyanuric
Acid)
10 - 50 ppm
(For outdoor pools only.)
Total
Alkalinity
80 - 120 ppm
Calcium
Hardness
Pools: 200 - 300 ppm
Metals (Iron,
Manganese)
None
Nitrates
None
Phosphates
None
4.5 Chlorine Testing
Use a home test kit or ask your pool professional to
test your water. It is recommended that chlorine test
samples be taken from two (2) places, described below.
Compare the two (2) samples. A higher level should be
found at the pool return line. The higher level at the pool
return line indicates the salt water chlorinator system is
producing chlorine.
1. At the pool return line.
2. 46 cm (18 in.) below the surface and well away
from the pool return line.
CAUTION
Never use dry acid to adjust pH in arid geographic
areas with excessive evaporation and minimal dilution
of pool water with fresh water. A buildup of by-
products can damage the electrolytic cell.

Page 15
|
Polaris® AutoClear® SC (PAGSC20K) Salt Chlorinator - Installation and Operation
Manual
ENGLISH
4.6 Salt (NaCl Sodium Chloride)
When to Add Salt
Add salt to the pool if the salt is too low (see Table
1) or if salt indicator light turns on. For a new pool or
newly resurfaced pool, it is recommended to wait at
least 30 days (surface should be completely cured)
before adding salt. Do not run the chlorinator at this
time. Manually chlorinate the pool. Contact your
dealer for recommendations. Follow the pool surface
manufacturer’s guidelines for your particular pool. For
vinyl and fiberglass pools, salt can be added at start up.
What Type of Salt to Use
•
The purer the salt, the better the life and performance
of the electrolytic cell. Use a salt that is at least 99.8%
pure NaCl. The salt is an evaporated, granulated,
food quality, non-iodized salt. Consult your salt
supplier.
•
Avoid using salt with anti-caking agents (sodium
ferrocyanide, also known as YPS or yellow prussiate
of soda) that could cause some discoloration of
fittings and surface finishes in pool.
•
Water conditioning salt pellets are compressed forms
of evaporated salt and may be used but will take
longer to dissolve.
•
Do not use calcium chloride as a source of salt. Use
sodium chloride only.
•
Do not userock salt because insoluble impurities
mixed with the rock salt can shorten the life of the unit.
How Much Salt to Use
Use salinity test strips, a TDS/salinity meter, or another
reliable method to test the salinity of the pool water.
Once the existing salinity has been established, use
Table 1 to determine the amount of salt to add to reach
the desired level. Be conservative when adding salt as it
is easier to add more if needed than it is to dilute if there
is too much salt.
•
3,000 ppm of salt is recommended for optimum water
conditions.
NOTE: In cooler water conditions (less than 18°C (65°F)), it
may benecessary to add more than 4,500 ppm of salt
to keep the “Check Salt” alarm from appearing on the
power pack.
•
Minimum salt level is 3,000 parts per million (ppm).
•
Low salt concentration below 2,500 ppm will cause
premature cell failure.
•
High salt concentration above 6,000 ppm may cause
corrosion damage to pool fixtures.
How to Add Salt to the Pool
1. Turn on pump to circulate pool water.
2. IMPORTANT - Turn the power pack off by pressing
the ON/Off button (OFF will be displayed on the
screen).
3. Test the water for salinity level using test strips,
electronic meter, or by your local pool professional.
4. Use the Table 1 to determine the amount of salt
to add. Be conservative when adding salt as it is
easier to add more if needed than it is to dilute if
there is too much salt.
5. Broadcast salt into pool. Do not add through
skimmer, main drain, or surge tank. Brush the
salt around the pool to facilitate dissolving.
Circulate filter system for 24 hours to ensure even
distribution.
6. After 24 hours, verify correct salt reading by
testing the water salinity level using test strips,
electronic meter, or by your local pool professional.
7. When the salinity level is correct, turn the power
pack on. Press the OUTPUT button to set the
desired production rate.
NOTE: For a new pool or newly resurfaced pool, it is
recommended to wait at least 30 days (surface should
be completely cured) before adding salt. Follow the pool
surface manufacturers guidelines for your particular pool.
For vinyl and fiberglass pools, salt can be added at start
up.
CAUTION
It is important to note that certain materials used
in and around swimming pools may notbe
compatible with chemicals commonly used to
purify pool water (e.g. acids, chlorine, salt,stabilizers,
etc.).
Polaris Pool Systems, Inc. does not warrant or
guarantee that the chlorinated water generated by
the chlorine generating device will not damage or
destroy certain types of plants, decking, coping and
other materials in and around your pool. Before
selecting materials to be used in and aroundyour
pool, please discuss all options withyour contractor
to assess the compatibility of such materials and
chemicals.
Some helpful considerations mayinclude:
Choosing plants that can withstand splash out of
pool water containing chlorine and/or salt and other
water purification chemicals.
All metal components used in and around a pool
should be of a high grade, quality stainless steel.
Careful selection of masonry products. The porosity
and hardness of natural stones varies greatly.
Therefore we recommend you consult with your
builder or stone contractor on the best choice for
stone materials around your pool.
Sealing all masonry products. Professionals
in the stone industry specify that even natural
stone, especially when used outdoors, be sealed
to prevent weathering, staining, and premature
degradation. Consult with your stone or deck
contractor for the proper sealer for the masonry
products you have selected to use around your pool.
For optimal results, sealers should be reapplied on
a regular basis. Reapply the protective sealer on a
schedule per the manufacturer’s instructions.
Use of chemicals other than those recommended
may be hazardous. Follow the chemical
manufacturer’s instructions.

Page 16
|
Polaris® AutoClear® SC (PAGSC20K) Salt Chlorinator - Installation and Operation
Manual
ENGLISH
Table 1. Approximate Pounds and Kilograms of Salt Needed to Obtain 3,000 ppm (4.0 gpl)
Current
Salt
Level
ppm
Pool Size –Litres (US Gallons)
38,000 L
(10,000 gal)
57,000 L
(15,000 gal)
76,000 L
(20,000 gal)
95,000 L
(25,000 gal)
114,000 L
(30,000 gal)
132,000 L
(35,000 gal)
0
114 kg
(250 lbs)
170 kg
(376 lbs)
227 kg
(501 lbs)
284 kg
(626 lbs)
341 kg
(751 lbs)
397 kg
(876 lbs)
250
104 kg
(229 lbs)
156 kg
(344 lbs)
208 kg
(459 lbs)
260 kg
(574 lbs)
312 kg
(688 lbs)
364 kg
(803 lbs)
500
95 kg
(209 lbs)
142 kg
(313 lbs)
189 kg
(417 lbs)
237 kg
(522 lbs)
284 kg
(626 lbs)
331 kg
(730 lbs)
750
85 kg
(188 lbs)
128 kg
(282 lbs)
170 kg
(376 lbs)
213 kg
(469 lbs)
256 kg
(563 lbs)
298 kg
(657 lbs)
1000
76 kg
(167 lbs)
114 kg
(250 lbs)
151 kg
(334 lbs)
189 kg
(417 lbs)
227 kg
(501 lbs)
265 kg
(584 lbs)
1250
66 kg
(146 lbs)
99 kg
(219 lbs)
132 kg
(292 lbs)
166 kg
(365 lbs)
199 kg
(438 lbs)
232 kg
(511 lbs)
1500
57 kg
(125 lbs)
85 kg
(188 lbs)
114 kg
(250 lbs)
142 kg
(313 lbs)
170 kg
(376 lbs)
199 kg
(438 lbs)
1750
47 kg
(104 lbs)
71 kg
(156 lbs)
95 kg
(209 lbs)
118 kg
(261 lbs)
142 kg
(313 lbs)
166 kg
(365 lbs)
2000
38 kg
(83 lbs)
57 kg
(125 lbs)
76 kg
(167 lbs)
95 kg
(209 lbs)
114 kg
(250 lbs)
132 kg
(292 lbs)
2250
28 kg
(63 lbs)
43 kg
(94 lbs)
57 kg
(125 lbs)
71 kg
(156 lbs)
85 kg
(188 lbs)
99 kg
(219 lbs)
2500
19 kg
(42 lbs)
28 kg
(63 lbs)
38 kg
(83 lbs)
47 kg
(104 lbs)
57 kg
(125 lbs)
66 kg
(146 lbs)
2750
9 kg
(21 lbs)
14 kg
(31 lbs)
19 kg
(42 lbs)
24 kg
(52 lbs)
28 kg
(63 lbs)
33 kg
(73 lbs)
3000
Optimum
Optimum
Optimum
Optimum
Optimum
Optimum
Table 2. Approximate Pounds and Kilograms of Stabilizer Needed to Obtain 50 ppm
NOTE: Minimum salt level is 3000 parts per million (ppm). Low salt concentration below 2,500 ppm will cause
premature cell failure.
Current
Cyanuric Acid
Level - ppm
Pool Size Litres (US Gallons)
38,000 L
(10,000 g)
57,000 L
(15,000 g)
76,000 L
(20,000 g)
95,000 L
(25,000 g)
114,000 L
(30,000 g)
132,000 L
(35,000 g)
0
1,9 kg (4,2 lbs)
2,9 kg (6,3 lbs)
3,8 kg (8,4 lbs)
4,8 kg (10,5 lbs)
5,7 kg (12,6 lbs)
6,7 kg (14,8 lbs)
10
1,5 kg (3,4 lbs)
2,3 kg (5,1 lbs)
3,1 kg (6,7 lbs)
3,8 kg (8,4 lbs)
4,6 kg (10,1 lbs)
5,4 kg (11,8 lbs)
20
1,1 kg (2,5 lbs)
1,7 kg (3,8 lbs)
2,3 kg (5,1 lbs)
2,9 kg (6,3 lbs)
3,4 kg (7,6 lbs)
4,0 kg (8,9 lbs)
30
0,8 kg (1,7 lbs)
1,2 kg (2,5 lbs)
1,5 kg (3,4 lbs)
1,9 kg (4,2 lbs)
2,3 kg (5,1 lbs)
2,7 kg (5,9 lbs)
40
0,4 kg (0,8 lbs)
0,6 kg (1,3 lbs)
0,8 kg (1,7 lbs)
1,0 kg (2,1 lbs)
1,2 kg (2,5 lbs)
1,3 kg (3,0 lbs)
NOTE: The above chart is for general reference only. The recommended stabilizer reading is between 10 - 50
ppm and will vary dependent on geographic climate. Warm, sunny climates will require a stabilizer reading
at the higher end of the given range. Consult your local pool professional for your optimum level. Always add
stabilizer according to manufacturer’s instructions. For indoor pools, it is not necessary to add chlorine stabilizer
to the swimming pool water.
This manual suits for next models
1
Table of contents
Other Polaris Swimming Pool Filter manuals
Popular Swimming Pool Filter manuals by other brands

Regal
Regal Smartvalve 7001 Instruction bulletin

BIO-LAB CANADA
BIO-LAB CANADA Mineral Springs Pool Pilot Soft Touch 48 Installation and operation manual

BIO-LAB CANADA
BIO-LAB CANADA Mineral Springs Pool Pilot Soft Touch 840C Installation and operation manual

Fox
Fox GALAXY Digital 60 Installation and operation manual

Oase
Oase SwimSkim operating instructions

XtremepowerUS
XtremepowerUS 90151 Owner's manual and safety instructions