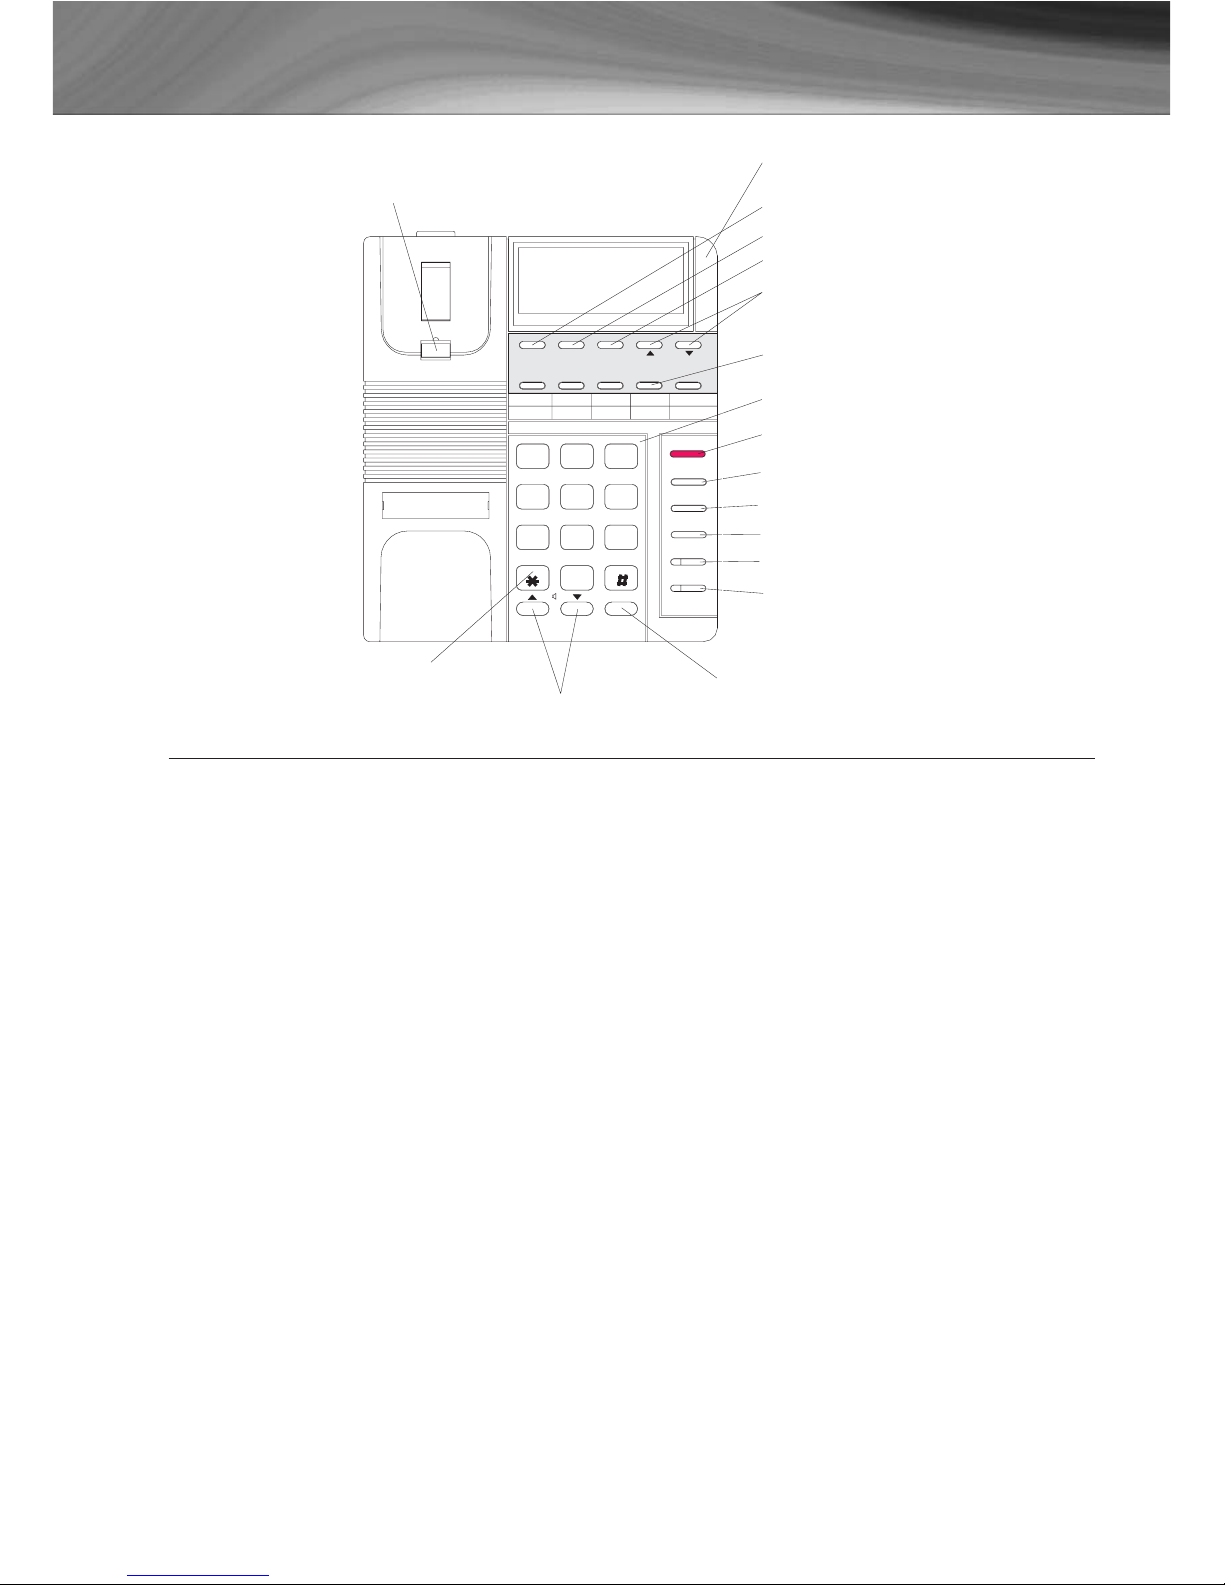
NRX-6 -Display Feature Phone
7
There are four different ways to dial a stored speed dial number, depending on
your preference.
1. Pick up the handset and press the desired memory button.
2. Press the HEADSET/OHD button and then press the desired
memory button.
3. Press the desired memory button and check the LCD shows the correct
information. Press the HEADSET/OHD button (Handsfree
Predialing Mode).
4. Press the desired memory button and check the LCD shows the correct
information. Pick up the handset (Handset Predialing Mode).
If the one-touch or two-touch memory button pressed has not been stored with
a number, the LCD will show ------------------- and EMPTY and no dialing action
will be made.
2.5 Phonebook
The NRX-6 can store up to 100 of your frequently used names and numbers.
2.5.1 To Add a Contact to the Phone Book
1. Press MENU button once and the display will show PHONE BOOK XX, where
XX denotes the number of phone book records stored.
2. Press the SELECT button once. The display will show ADD CONTACT?. Press
the SELECT button again to enter editor mode.
3. Enter the desired number using keypad. When number is displayed correctly
(up to 32 digits can be stored), press SELECT button to end the number entry
and start name entry.
4. Using the keypad letters to enter names, press the key until the correct letter
is displayed. When correct letter is displayed, move on to the next letter if it
is on another key. If you want to enter two successive letters that are on the
same key, you can press SCROLL key between letters or wait for 2 seconds
after the first letter has been shown to allow the cursor to move to the next
space. At the end of the name entry (maximum 16 letters), press SELECT
button to save this record. The display will show the editor mode again.
NOTE: If you want to add another record to the phone book, repeat steps 3
and 4. Up to 100 phone book records are allowed. If the entering action has
been completed, press CANCEL button twice.
If the total stored number of records has reached 100, the display will show
PHONE BOOK FULL. It will not be possible to add another record without delet-
ing existing records.