Polatrak Deep C Meter 300 AD User manual

Deepwater Corrosion Services Inc. | 13813 FM 529 Rd, Houston, TX 77041 USA +1 (713) 983 7117 | Email: [email protected] | polatrak.com
Corrosion testing probes
SMB-001 Deep C Meter 300 AD Manual
© 2015 Deepwater Corrosion Services Inc. Specications subject to change without notice
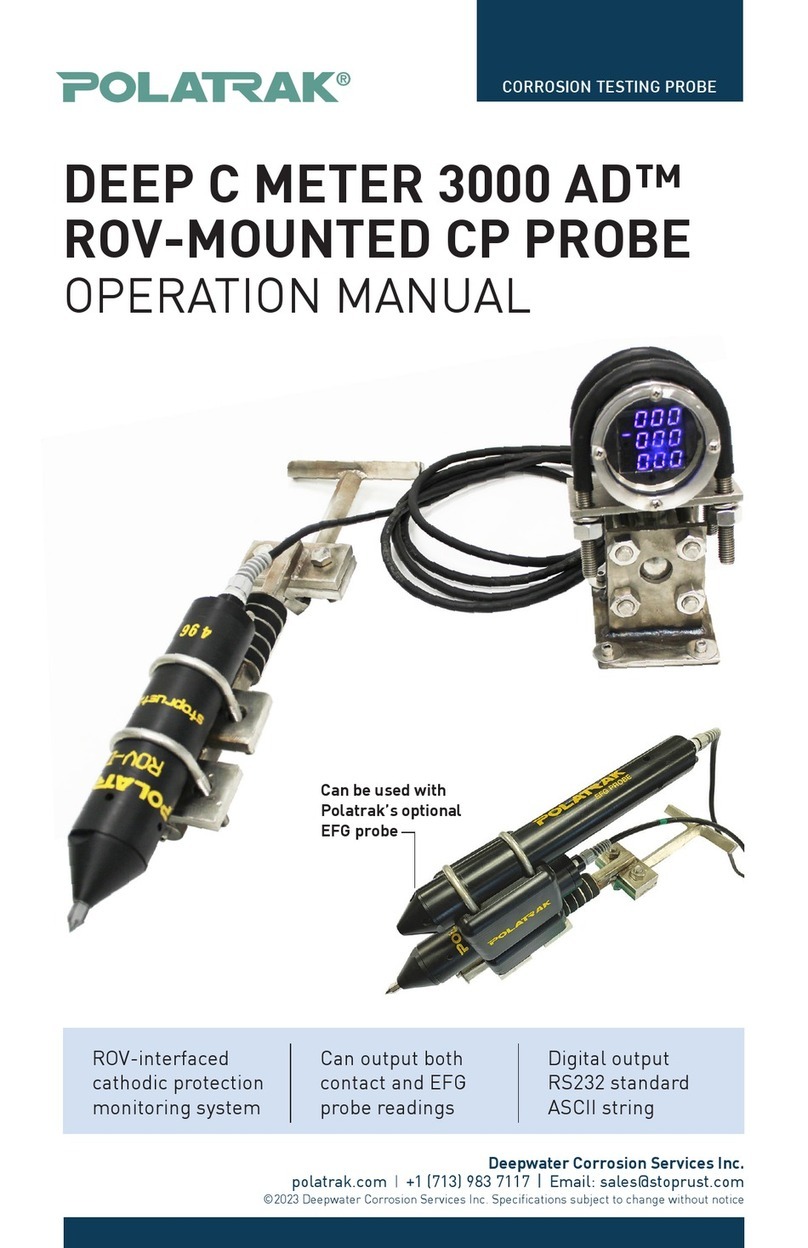
Deep C Meter 300 AD™
ROV-mounted CP probe
Operation manual
ROV-interfaced
cathodic protection
monitoring system
Can output both
contact and EFG
probe readings
Digital output
RS232 standard
ASCII string
No batteries;
ROV 24V DC
powered

www.polatrak.com | 13813 FM 529 Rd, Houston, TX 77041 USA | Telephone: +1 (713) 983 7117 | Email: [email protected]
© 2015 Deepwater Corrosion Services Inc. Specications subject to change without notice
Deep C Meter 300 AD™ operation manual
2SMB-001 Deep C Meter 300 AD Manual
Table of contents
1 Overview 3
2 Documentation 4
3 Health and safety 4
4 LED readout components 5
4.1 Deep C Meter 300 AD™ 5
4.2 Articulating mount 6
4.3 Flying leads 6
5 Probe unit components 7
6 ROV interface 8
7 Calibration 8
7.1 Deep C Meter AD calibration 8
7.2 Bucket calibration 9
7.3 Subsea calibrations 9
7.4 Online calibration 9
8 Operation 10
8.1 Mounting on ROV 10
9 Taking CP potential readings 11
10 Data interpretation 11
10.1 Removal from ROV 11
11 Maintenance and repair 12
11.1 Tip replacement 12
11.2 Electrode element replacement 12
12 RS232 functions 13
12.1 Data output 13
12.2 Control data input 13
13 Troubleshooting 14
13.1 General 14
14 Spare parts and accessories 15
List of gures
Figure 1 - Overview 3
Figure 2 – Rear of pressure housing 5
Figure 3 – Front of pressure housing 5
Figure 4 - Meter mount 6
Figure 5 - Flying leads 6
Figure 6 - SEA CON® RMG-3FS wiring diagram 12
Figure 7 - Calibration vs. zinc coupon 16

www.polatrak.com | 13813 FM 529 Rd, Houston, TX 77041 USA | Telephone: +1 (713) 983 7117 | Email: [email protected]
© 2015 Deepwater Corrosion Services Inc. Specications subject to change without notice
Deep C Meter 300 AD™ operation manual
3SMB-001 Deep C Meter 300 AD Manual
List of tables
Table 1 - ROV interface pin outs 8
Table 2 - CP equipment pin outs 7
Table 3 - Normal cathodic protection ranges for bare carbon steel in seawater 10
Table 4 - RS232 Communication settings 12
Table 5 - RS232 Command list 13
Table 6 - Troubleshooting quick guide 14
Table 7 - List of spare parts 15
1. Overview
The Deep C Meter 300 AD is a complete ROV-interfaced cathodic protection monitoring system.
The system comprises ve basic parts:
1.1 LED readout
Triple voltmeters housed in a Delrin pressure housing.
1.2 Contact probe
Twin element, tip contact CP probe (Polatrak® Model ROV-II™).
1.3 Flying lead
Three-meter-long umbilical that connects the probe to the readout.
1.4 Power whip
Two-meter-long umbilical that interfaces with the ROV for power and data output.
1.5 EFG probe (optional)
Can be added as an upgrade to the standard package.
Figure 1: Deep C Meter 300 AD™ components
ROV-II™
T-handle
mount
ROV-II™
contact
probe
EFG probe
(optional)
LED
readout
Power lead
(attaches to
rear of display)
Mount
Flying
lead

www.polatrak.com | 13813 FM 529 Rd, Houston, TX 77041 USA | Telephone: +1 (713) 983 7117 | Email: [email protected]
© 2015 Deepwater Corrosion Services Inc. Specications subject to change without notice
Deep C Meter 300 AD™ operation manual
4SMB-001 Deep C Meter 300 AD Manual
1.6 The Deep C Meter 300 AD™ has the following upgrades from previous versions:
• Smaller pressure housing
• Combines ROV-II™ and Polatrak EFG pressure housing
• Programmable ultra-bright LED displays with brightness adjustments
• Digital output (RS232 – standard ASCII string)
• ROV 24V DC powered, which eliminates the need to open the pressure housing to change batteries
2. Documentation
The following documents are contained in the appendix:
2.1 ROV-II Operations Manual (354-MN01-ENG)
2.2 EFG 1 Operations Manual (358-MN02-ENG)
2.3 RUSS Operation Manual (358-MN04-ENG)
2.4 Parker Seals - Parker O Lube MSDS – O-ring lubricant
2.5 Dow Corning – 4 Electrical Insulating Compound MSDS – connector sealant
PLEASE CONTACT YOUR DEEPWATER REPRESENTATIVE FOR ANY QUESTIONS AND/OR
ISSUES REGARDING THIS MANUAL.
3. Health and safety
It is the intention of Deepwater Corrosion Services that all procedures will be carried out in a safe
manner in accordance with the Health and Safety At Work Act and any other relevant legislation. If
required by the client, Deepwater personnel will attend any site safety induction courses before
carrying out work on site.

www.polatrak.com | 13813 FM 529 Rd, Houston, TX 77041 USA | Telephone: +1 (713) 983 7117 | Email: [email protected]
© 2015 Deepwater Corrosion Services Inc. Specications subject to change without notice
Deep C Meter 300 AD™ operation manual
5SMB-001 Deep C Meter 300 AD Manual
4. LED readout components
The readout unit has three major sub-assemblies: The pressure housing, articulated mount and ying leads.
4.1. Deep C Meter 300 AD™
4.1.1. Pressure housing - The pressure housing is made from Delrin and is rated for water
depths of 300 meters (1,000 feet).
4.1.2. Lens - One end of the housing contains an acrylic lens that seals on the pressure housing
with o-rings. Four stainless-steel screws keep the lens seated in the pressure housing. Access
to the inside of the pressure housing is gained by pulling the lens. Removing the lens in the eld
should be avoided wherever possible.
4.1.3. Bulkhead connector - The back end of the pressure housing is sealed with three bulkhead
connectors. These connectors thread into the back of the pressure housing and also seal with
o-rings. It should not be necessary to remove these connectors during normal maintenance. Blank
(dummy) plugs are provided and should be in place whenever the mating connector is removed.
4.1.4. Voltmeter module - The digital voltmeter module is located within the pressure housing.
The module contains three independent LED displays. Default factory range is ± 2499 mV DC on
the top two display lines. The lower display line is set to ± 199.9mV DC. The meter is powered by
24VDC nominal power but will function between 8-36VDC.
Figure 2: Front of pressure housing Figure 3: Rear of pressure housing
EFG ROV-II
Power,
24 VDC
and
RS232

www.polatrak.com | 13813 FM 529 Rd, Houston, TX 77041 USA | Telephone: +1 (713) 983 7117 | Email: [email protected]
© 2015 Deepwater Corrosion Services Inc. Specications subject to change without notice
Deep C Meter 300 AD™ operation manual
6SMB-001 Deep C Meter 300 AD Manual
4.2. Adjustable mount
4.2.1. The adjustable mount is designed to
secure the Deep C Meter 300 AD™ to the
ROV frame and provide angled adjustment
to optimize camera viewing of the displays.
The mount and all xing hardware are
made of Delrin.
4.3. Flying leads
4.3.1. There are three leads supplied per kit, each serving a unique function.
4.3.2. A full wiring diagram can be found in section 6.0.
Figure 4:
Meter
mount
Figure 5: Flying leads
ROV-II meter side
(Female 3 pin)
EFG probe side
(Male 3 pin)
EFG meter side
(Male 3 pin)
ROV-II probe side
(Male 3 pin)
Power lead
(Female 4 pin)
Pin 1 Black +24V
Pin 2 White GND
Pin 3 Red RX
Pin 4 Green TX

www.polatrak.com | 13813 FM 529 Rd, Houston, TX 77041 USA | Telephone: +1 (713) 983 7117 | Email: [email protected]
© 2015 Deepwater Corrosion Services Inc. Specications subject to change without notice
Deep C Meter 300 AD™ operation manual
7SMB-001 Deep C Meter 300 AD Manual
5. Probe unit components
The Deep C Meter 300 AD™ utilizes the popular Polatrak ROV-II™ tip contact probe.
More detailed information can be found in the ROV-II operation manual Doc. No. 354-MN01-ENG.
5.1. Housing - The housing provides protection to the reference electrode elements. It is made from
a rugged thermoplastic and is designed to t the compliant tee handle mount for convenient
manipulator mounting. The holes in the side allow the body to become free-ooding and are speci-
cally engineered to allow for accurate potential measurements.
CAUTION
Do not cover or modify the existing holes or add additional holes in the body.
5.2 Tail assembly - The tail assembly attaches to the main body section with two (2) stainless steel
¼”-20 allen head cap screws. The ROV-II ying lead passes through this unit and has a spiral strain
relief tting. The tail unit includes one male connector for the contact tip and two female connectors
for each of the reference electrodes.
5.3 Nose cone w/ tip - The nose cone assembly is screwed into the main body section. The cone
houses the replaceable contact tip; it also includes the female connector that attaches to the male
pin on the extension cable from the tail unit. Tips are made from stainless steel and plated with
nickel; the nose cone is fabricated from a rugged thermoplastic.
5.4 Reference electrode element - Two plug-in silver/silver chloride elements are included.
Electrode elements are accurate to ± 5 mV. See the operations and maintenance section for instruc-
tions on electrode replacement.
CAUTION
Never handle electrode elements with bare hands or expose elements to a liquid other
than fresh water or seawater, as permanent damage may result.
4-pin bulkhead - MCBH-4M
(MCIL-4F connector)
RS232 cable (serial)
DB9 female connector pin out
Pin Polarity Cable color
1+24 Power VDC Black
2Pwr/Signal GND White
3RX 232 Red
4TX 232 Green
Pin Polarity Cable color
2RX 232 Red
3TX 232 White
5Signal GND Black
Pin
1. Data carrier detect
2. Receive data
3. Transmit data
4. Data terminal ready
5. Signal ground
6. Data set ready
7. Request to send
8. Clear to send
9. Ring indicator
GND
DTR
TxD
RxD
DCD
RI
CTS
RTS
DSR
ROVII - MCBH-3M (Male bulkhead)
(MCIL-3F connector)
Pin Polarity Meter Cable color
1Tip White
2Element 1 Top Black
3Element 2 Middle Green
9
8
7
6
4
5
3
2
1
6. ROV Interface
Table 1: ROV interface pin outs
Table 2: CP equipment pin outs
EFG - MCBH-3F (Female bulkhead)
(MCIL-3M connector)
Pin Polarity Meter Cable color
1N/A White
2Element 1 Bottom Black
3Element 2 Bottom Green
(Female
connector)
(Male
connector)
(Female
connector)
1 3
2
13
2
42
3
1
CP equipment pin outs

www.polatrak.com | 13813 FM 529 Rd, Houston, TX 77041 USA | Telephone: +1 (713) 983 7117 | Email: [email protected]
© 2015 Deepwater Corrosion Services Inc. Specications subject to change without notice
Deep C Meter 300 AD™ operation manual
8SMB-001 Deep C Meter 300 AD Manual
7. Calibration tests
With all the parts connected, the probe(s) should be tested in a non-metallic bucket as described in section
7.2 to verify that all components are within calibration prior to deploying the ROV.
7.1. Deep C Meter 300 AD™ calibration
7.1.1 Power-on the unit and allow approximately 5-10 seconds for the automatic boot-up calibra-
tion process to complete.
7.1.2 Apply a known potential between 0.100V - 2.400V (battery or portable power supply).
Measure the potential directly with a multimeter.
7.1.3 Measure the potential reading with the Deep C Meter 300 AD™. These two potentials
should be within ± 3 mV. If the difference is greater, send the calibration command through the
RS232 interface. Please see section 12.2 for further details.
7.2. Bucket calibration check
Contact calibration check (see Figure 7)
7.2.1 Fill a clean, non-metallic bucket or container with seawater approximately 16 –18 inches
deep. Ensure that the bucket has been completely degreased and rinsed.
7.2.2 Place the probe in the bucket with the tip at an angle to ll the body with seawater. The
entire probe, including the tip, must be immersed. Ensure there is no trapped air in the unit.
7.2.3 Attach or stab the zinc coupon rmly onto the probe tip. The upper two display lines on the
LED readout should read between (-) 1.030V and (-) 1.070V and be within 0.005V of each other.
NOTE: If the probe has not been used in the past 24 hours, it may take 15-30 minutes for the
probe to reach equilibrium.
EFG calibration check (only applicable if using the EFG probe)
7.2.4 Ensure both sets of holes on the EFG probe are submerged. Ensure there is no trapped air
in the probe. If the bucket is too short, remove the tail assembly and place the electrode directly in
the water.
7.2.5 The bottom display line should be less than ± 2 mV. If not, one of the electrodes may need
replacing.
7.2.6 Activate the zinc coupon by removing a small section of oxide lm with a le or rasp.
7.2.7 Place the zinc coupon directly in front of the probe.
7.2.8 The bottom display line should become more negative.
7.2.9 Remove the zinc coupon. The bottom display line should return to the original value
in step 7.2.5.
7.3. Subsea calibrations
7.3.1 While approximately 30 feet away from surrounding structures / assets, stab the isolated
zinc ROV calibration coupon with the probe’s contact tip.
7.3.2 The upper two display lines on the readout should read between (-) 1.030V & (-) 1.070V and
be within 0.010V of each other. Make note of this difference for future readings.
7.3.3 If the EFG probe is connected, the bottom display line should go more negative as the
probe approaches the coupon and become more positive as the EFG probe moves away. If the
EFG probe is not connected, the bottom display line should be disregarded.
7.3.4 It is recommended that this test be performed at the beginning and end of each dive, every
two hours or at a pre-determined calibration period.

www.polatrak.com | 13813 FM 529 Rd, Houston, TX 77041 USA | Telephone: +1 (713) 983 7117 | Email: [email protected]
© 2015 Deepwater Corrosion Services Inc. Specications subject to change without notice
Deep C Meter 300 AD™ operation manual
9SMB-001 Deep C Meter 300 AD Manual
7.4. Online subsea check
7.4.1 While free-ying, the top and middle display lines are reading the potential of the stainless
contact tip. This number will vary depending on ROV speed, time of immersion and whether a
protected structure has been recently stabbed. Normally, the reading will be in the (-) 0.200V to (-)
0.400V range. However, both meters should be within 0.010V of each other. This number should
not be more negative than (-) 8.800V.
NOTE: If instrument fails calibration check, go to troubleshooting section 13 in this manual.
8. Operation
8.1 Mounting on ROV
8.1.1 Create the power lead from the 4 pin open-ended cable whip and splice on the required
connector to interface with the ROV MUX bottle. See section 6.0 for the correct pin outs.
8.1.2 Verify the whip has power and perform a loop-back test before attaching the unit directly to
ensure the data stream is not corrupted. See Table 6 if communication cannot be established.
8.1.3 Find a good location on the vehicle to mount the Deep C Meter 300 AD™ and attach the
articulated mount. Typically, the display unit should be in view at the same time as the probe unit
to maximize efciency. Alternatively, a second camera can be dedicated to the display unit. The
LED readout must be visible by the camera; also, having a light source directed at the lens for
optimal visibility is recommended.
8.1.4 If using zoom cameras, position the camera approximately 12” away from the edge of the lens.
8.1.5 If using xed-zoom cameras, physically position the camera approximately 0.5” to 3” away
from the edge of the lens.
8.1.6 Ensure that all fasteners are tightly secured and in good condition. Verify that all lock nuts
and washers are in place on the readout unit mount.
8.1.7 Connect and route the power lead.
8.1.8 Insert the probe unit into the T-handle and position in a manipulator or tool basket that is
manipulator accessible.
8.1.9 If the EFG probe has been purchased, the unit can be piggy-backed onto the ROV-II probe
using the supplied brackets.
8.1.10 Tying a safety lanyard to the T-handle is recommended.
8.1.11 Ensure that lock rings for the ying lead(s) connectors are properly mounted and secured.
8.1.12 Ensure that all fasteners are tight and the lock nuts are in place on the T-handle.
8.1.13 Route the ying lead(s) in such a way that they will not be stressed, entangled or pinched
during manipulator operation.
8.1.14 Using the provided connector sealant, apply a small amount to the shoulder of each ying
lead(s) connector, ensuring that no sealant is applied to the copper pin. Connect the ying lead to
the probe lead and tighten the connector lock ring. Please refer to the MSDS in the appendix be-
fore handling sealant. All appropriate Personal Protective Equipment (PPE) shall be worn including
safety glasses and gloves as a minimum precaution.
8.1.15 Mount a zinc ROV calibration coupon on the ROV’s front porch or manipulator in an area
the contact tip can easily reach during subsea calibrations.
8.1.16 Ensure the calibration coupon is electrically isolated from the ROV (Over 1MΩ).
8.1.17 Remove the lens cover from the instrument.
8.1.18 Perform a bucket calibration (see section 7.2).

www.polatrak.com | 13813 FM 529 Rd, Houston, TX 77041 USA | Telephone: +1 (713) 983 7117 | Email: [email protected]
© 2015 Deepwater Corrosion Services Inc. Specications subject to change without notice
Deep C Meter 300 AD™ operation manual
10 SMB-001 Deep C Meter 300 AD Manual
8.1.19 Using a 7/16” (or 10mm) wrench, ensure that the contact tip is tight on the nose cone.
8.1.20 Ensure that the tip is sharp.
9. Taking CP potential readings
9.1. Stab the contact probe onto the point on the structure where the reading is required; when a
good contact is made, the Deep C Meter 300 AD™ will show a steady reading.
CAUTIONS
• Avoid stabbing painted or coated surfaces; whenever possible, try to take readings on bare steel or
on spots specially designated for CP measurement. CP stab points are typically labeled with “CP”.
• Anodes can be stabbed if necessary; however, it is always best to stab the anode band where
possible, as it is typically grounded to the structure.
• Avoid trying to stab through heavy, hard marine growth if possible.
• The probe unit should be kept out of the mud to prevent contamination of the electrodes.
• If the readings are not steady or do not match the criteria in Table 3 below, the most likely cause
is a high-resistance contact. DO NOT RECORD THESE NUMBERS. Continue to stab until readings
stabilize and follow the recommended action. See troubleshooting section 13 if problems persist.
• NEVER immerse the system with any connectors un-mated unless the dummy plugs are installed.
10. Data interpretation
10.1 For carbon steel structures in seawater, the readings obtained should be within the ranges
specied in Table 3. Exceptions may occur if the probe is stabbed onto an isolated section of a
corrosion-resistant alloy such as stainless steel, copper or nickel. In these cases, Table 3 no longer
applies and readings less negative than indicated in the table may be noted. If this is the case, en-
sure that the readings are steady and the electrodes maintain the same potential difference between
each other during the last calibration check.
Table 3: Normal cathodic protection ranges for bare carbon steel in seawater
Range (mV) Interpretation Action
-500 or more positive Error
Remake contact & verify
Measure two other points around the
component
Abort & refer to troubleshooting section
-501 to -649 Isolated from cathodic protection
Remake contact & verify
Record data
-650 to -799 Not cathodically protected
-800 to -849 Marginal cathodic protection
-850 to -1049 Cathodically protected Record data
-1050 to -1149 Anode potential
-1150 or more negative Error
Remake contact & verify
Measure two other points around the
component
Abort & refer to troubleshooting section
10.2 Removal from ROV
10.2.1 When equipment is removed from the ROV, wash thoroughly with fresh water and allow to
dry. Soak the ROV-II and EFG probe units in fresh water for at least one hour. Replace lens cover
on Deep C Meter 300 AD™ and place it in the protective case provided.

www.polatrak.com | 13813 FM 529 Rd, Houston, TX 77041 USA | Telephone: +1 (713) 983 7117 | Email: [email protected]
© 2015 Deepwater Corrosion Services Inc. Specications subject to change without notice
Deep C Meter 300 AD™ operation manual
11 SMB-001 Deep C Meter 300 AD Manual
11. Maintenance and repair
This section covers general operational maintenance; attempting any tasks not described in this sec-
tion may result in damage to the system.
11.1 Tip replacement
11.1.1 From time to time, it will be necessary to replace the contact tip. Remove the old tip with
a 7/16” or 10mm wrench. Ensure that the new tip is tight, but do not over-tighten. (Max torque 50
in-lbs)
11.2 Electrode element replacement
11.2.1 Remove the probe from the ROV and un-mate the connector. Install the dummy plug pro-
vided onto the exposed ying lead connector.
11.2.2 Fill a clean, non-metallic bucket or container with seawater lled approximately 16 –18
inches deep. Ensure that the bucket has been completely degreased and rinsed.
11.2.3 Put the probe into the bucket and stab or attach the zinc to the contact tip.
11.2.4 The contact probe connector is a SEA CON® RMG-3FS and is wired as shown below.
Figure 6: SEA CON® RMG-3FS female socket connector pin diagram
11.2.5 Using a digital voltmeter set on 2.00 VDC range, stab the large pin socket (pin 1) with the
positive voltmeter lead and stab pin socket 2 (rst clockwise of large pin) with the negative lead
(note reading). Then repeat stabbing pin socket 3 with the negative lead and note the reading. The
faulty electrode will be the one that gives the lowest (least negative) reading.
11.2.6 Ensure that the probe is drained of seawater.
11.2.7 Take probe unit to a clean area. Do not handle the small electrode pellets with bare hands.
11.2.8 Remove the two screws that secure the tail unit and gently pull out the tail unit to expose
the electrode elements. Try to avoid un-mating the tip connector.
11.2.9 Visually inspect to ensure that the wire is not damaged and the connector is properly mated.
11.2.10 Remove the bad electrode and discard.
11.2.11 Take the new electrode and carefully place a small amount of silicone grease on the pin
and sealing section of the connector. Plug the new electrode into the connector.
11.2.12 Check that all connectors are fully mated and carefully put the electrodes back into the
housing and re-attach the tail unit and nose cone.
11.2.13 Repeat the calibration check as described above. Allow the probe to soak. (Note: A new
dry element may take up to 30 minutes to reach equilibrium)
CAUTION:
Never immerse the connector pin of an electrode element in water.
Pin socket 1: Contact tip
Pin socket 2: Reference electrode #1 (R1)
Pin socket 3: Reference electrode #2 (R2)

www.polatrak.com | 13813 FM 529 Rd, Houston, TX 77041 USA | Telephone: +1 (713) 983 7117 | Email: [email protected]
© 2015 Deepwater Corrosion Services Inc. Specications subject to change without notice
Deep C Meter 300 AD™ operation manual
12 SMB-001 Deep C Meter 300 AD Manual
12. RS232 Functions
12.1 Data output
12.1.1 Data string structure: Stab 1, Stab 2, EFG
For example:
-1034, -1035, -12.2
-1034, -1036, 12.2
12.1.2 After each data set there is a line feed and carriage return present. The rate is 2 data sets
per second.
Table 4: RS232 communication settings
Speed (Baud) : 9600
Data bits:8
Stop bits:1
Parity: None
Flow control:None

www.polatrak.com | 13813 FM 529 Rd, Houston, TX 77041 USA | Telephone: +1 (713) 983 7117 | Email: [email protected]
© 2015 Deepwater Corrosion Services Inc. Specications subject to change without notice
Deep C Meter 300 AD™ operation manual
13 SMB-001 Deep C Meter 300 AD Manual
12.2 Control data input
The following functions can be accessed by sending commands over the RS232 interface from
within RUSS or through a standard serial program.
Table 5: RS232 command list
Action Input command Modier Response Result Example
LED intensity SI<intensity>!
Where intensity
is a hex number
between 0
and F
Sets the intensity
of the LED display.
The brightness is set
according to the hexa-
decimal value placed
in the intensity value
location.
There is no
response for
this protocol
The display will
change intensity
in real time with
no effect on the
streaming data.
Lowest intensity
Command: SI0!
Half intensity
Command: SI8!
Full intensity
Command: SIF!
Data stream
delimiter
SD<delimiter>! Sets the output
delimiter in the data
stream to the user’s
preference. Separate
with commas or tabs:
(-1020, -1020, 0.1)
(-1020 -1020 0.1)
There is no
response for
this protocol
The delimiter char-
acter in the data
stream will change
to the Comma or
Tab character in
real time.
Comma separator
Command: SD,!
Tab separator
Command: SDHT!
Analog
polarity
command
SP<polarity>! Sets the polarity of
analog voltages being
measured by the ADC.
There is no
response for
this protocol
Positive character
sets the common
analog ground to
the negative side of
the converter.
Positive
Command: SP+!
Negative
Command: SP-!
Online
calibration
Cal! Re-calibrates the
internal AD, which
takes approximately
20 seconds
There is no
response for
this protocol.
The data stream
will be interrupted
during the calibra-
tion process.
Command: Cal!
NOTE: Do not include brackets <> when inputting commands.
13. Troubleshooting
13.1 General
13.1.1 If the top and middle display lines are not within 5 mV check the following:
• Repeat the bucket calibration check (section 7.2). The electrode with the more positive reading
is probably in error.
• Remove the reference electrode elements and replace with spares, being careful not to touch
the silver/ silver chloride pellet with bare or greasy hands. Please see section 11.2 for details. Soak
for 30 minutes with new elements.
13.1.2 If the tip wire is damaged, a temporary soft-splice repair can be made using ScotchKote®
sealant (not included) and splicing tape. However, prolonged operation in this manner is not rec-
ommended. Order a new nose cone assembly as soon as possible.
13.1.3 After any replacement or repair, recalibrate the instrument by performing a bucket test as
described in section 7.2.

www.polatrak.com | 13813 FM 529 Rd, Houston, TX 77041 USA | Telephone: +1 (713) 983 7117 | Email: [email protected]
© 2015 Deepwater Corrosion Services Inc. Specications subject to change without notice
Deep C Meter 300 AD™ operation manual
14 SMB-001 Deep C Meter 300 AD Manual
Table 6 - Troubleshooting quick guide
Symptom Possible problem Action
Instrument will not pass
calibration tests
(Section 7)
One electrode is bad See section 11.2.
Zinc coupon is passive (more
positive than (-) 1.000V)
Remove zinc coupon and clean with le or
sandpaper
Readings more positive than (-)
1.000V
Inspect the tip wire for any damage.
Electrodes are dry Allow to soak for 30 minutes and retry
Readings more negative than (-)
1.100V
Issue the Cal! command through the RS232
interface.
Both electrodes reading low Tip wire damaged Remove probe tail assembly, unplug tip wire,
remove nose cone, inspect tip wire and repair
with ScotchKote® as a temporary measure.
Order replacement nose cone.
Readings are not steady and
continue to change.
Poor structure contact Re-stab to ensure contact.
One reading suddenly goes
less negative
Connector is ooded. Check connectors.
Lead wire (ying lead) is nicked. Inspect and repair / replace as necessary.
Displays are blank Whip is cut or power polarity is
inverted.
Check cabling and wiring.
Displays are too dim or
blurry
Intensity is set too high or low for the
available camera.
Increase intensity of light shining on meter.
Adjust the intensity using the command line.
See Table 5 - RS232 Command List
Garbled data stream output Ground fault or improper shielding Ensure RS232 signal ground and power
ground are tied together subsea. Ensure
RS232 signal ground is connected topside.
No data stream output Broken wire in whip Perform a loop-back test to verify
communications. Visually inspect whip for
damage.
Incorrect port Perform a loop-back test to verify
communications.
Swapped transmit / receive Try swapping the transmit and receive wires on
topside connection.
Voltage on transmission line Insert a null modem between ROV and
computer
If problem persists or is not listed, please call our hotline at (713) 983-7117 and ask for Polatrak
technical support.
14. Spare parts and accessories
14.1 The Deep C Meter 300 AD is shipped in a waterproof transit case and contains the following
spares and accessories. Please contact your Deepwater representative to order additional spares if
required.
14.1.1 Zinc calibration block (1)
14.1.2 Contact tips (3)
14.1.3 Lens retaining screws (4)

www.polatrak.com | 13813 FM 529 Rd, Houston, TX 77041 USA | Telephone: +1 (713) 983 7117 | Email: [email protected]
© 2015 Deepwater Corrosion Services Inc. Specications subject to change without notice
Deep C Meter 300 AD™ operation manual
15 SMB-001 Deep C Meter 300 AD Manual
14.1.4 O-ring lube (1)
14.1.5 Silicone connector lube (1)
14.1.6 Bulkhead dummy plug (3)
14.1.7 Ag/AgCl electrode element (1)
14.1.8 Lens back-up ring (2)
14.1.9 Lens O-ring (4)
Table 7: List of spare parts
Part No. Description No. Required No. Spares
DCM0021 Pressure housing 1 0
DCM0023 Articulating mount 1 0
MLT0014 Lens 1 0
GSK0009 Lens - O ring 2 4
GSK0008 Lens - backup ring 1 2
FAS0107 Lens retaining screw 4 1
MFR0016 Lens cover 1 0
UWC0038 Power bulkhead dummy plug (female) 1 0
UWC0044 EFG bulkhead dummy plug (male) 1 0
UWC0045 ROV II bulkhead dummy plug (female) 1 0
UWC0041 ROV II ying lead 1 0
UWC0035 Power cable whip 1 0
UWC0061 EFG ying lead Optional Optional
MLT0042 EFG probe Optional Optional
MLT0026 ROV II probe nose cone 1 0
MLT0022 Contact tip 1 3
MLT0045 Replaceable silver / silver chloride element 2 1
MLT0054 Voltmeter module 1 0
DCM0033 ISO T-Handle 1 0
GSK0006 Tube O-ring lubricant 1 0
EOR0015 Tube connector sealant 1 0
ROV0018 Zinc calibration block 1 0
358-MN03-ENG 300 AD Instruction manual 1 0
Call Protective case 1 0
Call Protective case O-ring 1 0
Call Protective case foam pack 1 0

www.polatrak.com | 13813 FM 529 Rd, Houston, TX 77041 USA | Telephone: +1 (713) 983 7117 | Email: [email protected]
© 2015 Deepwater Corrosion Services Inc. Specications subject to change without notice
Deep C Meter 300 AD™ operation manual
16 SMB-001 Deep C Meter 300 AD Manual
Figure 7
Cell to Zn coupon
ROV-II™ calibration wiring schematic
Calibration
voltmeter display
at 2 Volts DC setting
Seawater solution
Non-metallic bucket
Step +VE —VE DC scale Expected result
01 Tip / Pin 1 Reference electrode 2 / Pin 3 2 V –1.030 to –1.070
02 Tip / Pin 1 Reference electrode 1 / Pin 2 2 V –1.030 to –1.070
Zn calibration coupon
(Readings should
be within 0.005V
of each other)
Table of contents
Other Polatrak Measuring Instrument manuals
Popular Measuring Instrument manuals by other brands

ADLINK Technology
ADLINK Technology PCIe-9834P quick start guide

Eagle Eye
Eagle Eye DM Series Field Calibration Guide

Rosemount
Rosemount 8800D Series Reference manual

Opsytec Dr. Grobel
Opsytec Dr. Grobel Radiometer RMD Pro manual

FTS
FTS Bubbler Installation and quick start guide

Leica Geosystems
Leica Geosystems DISTO D810 quick start