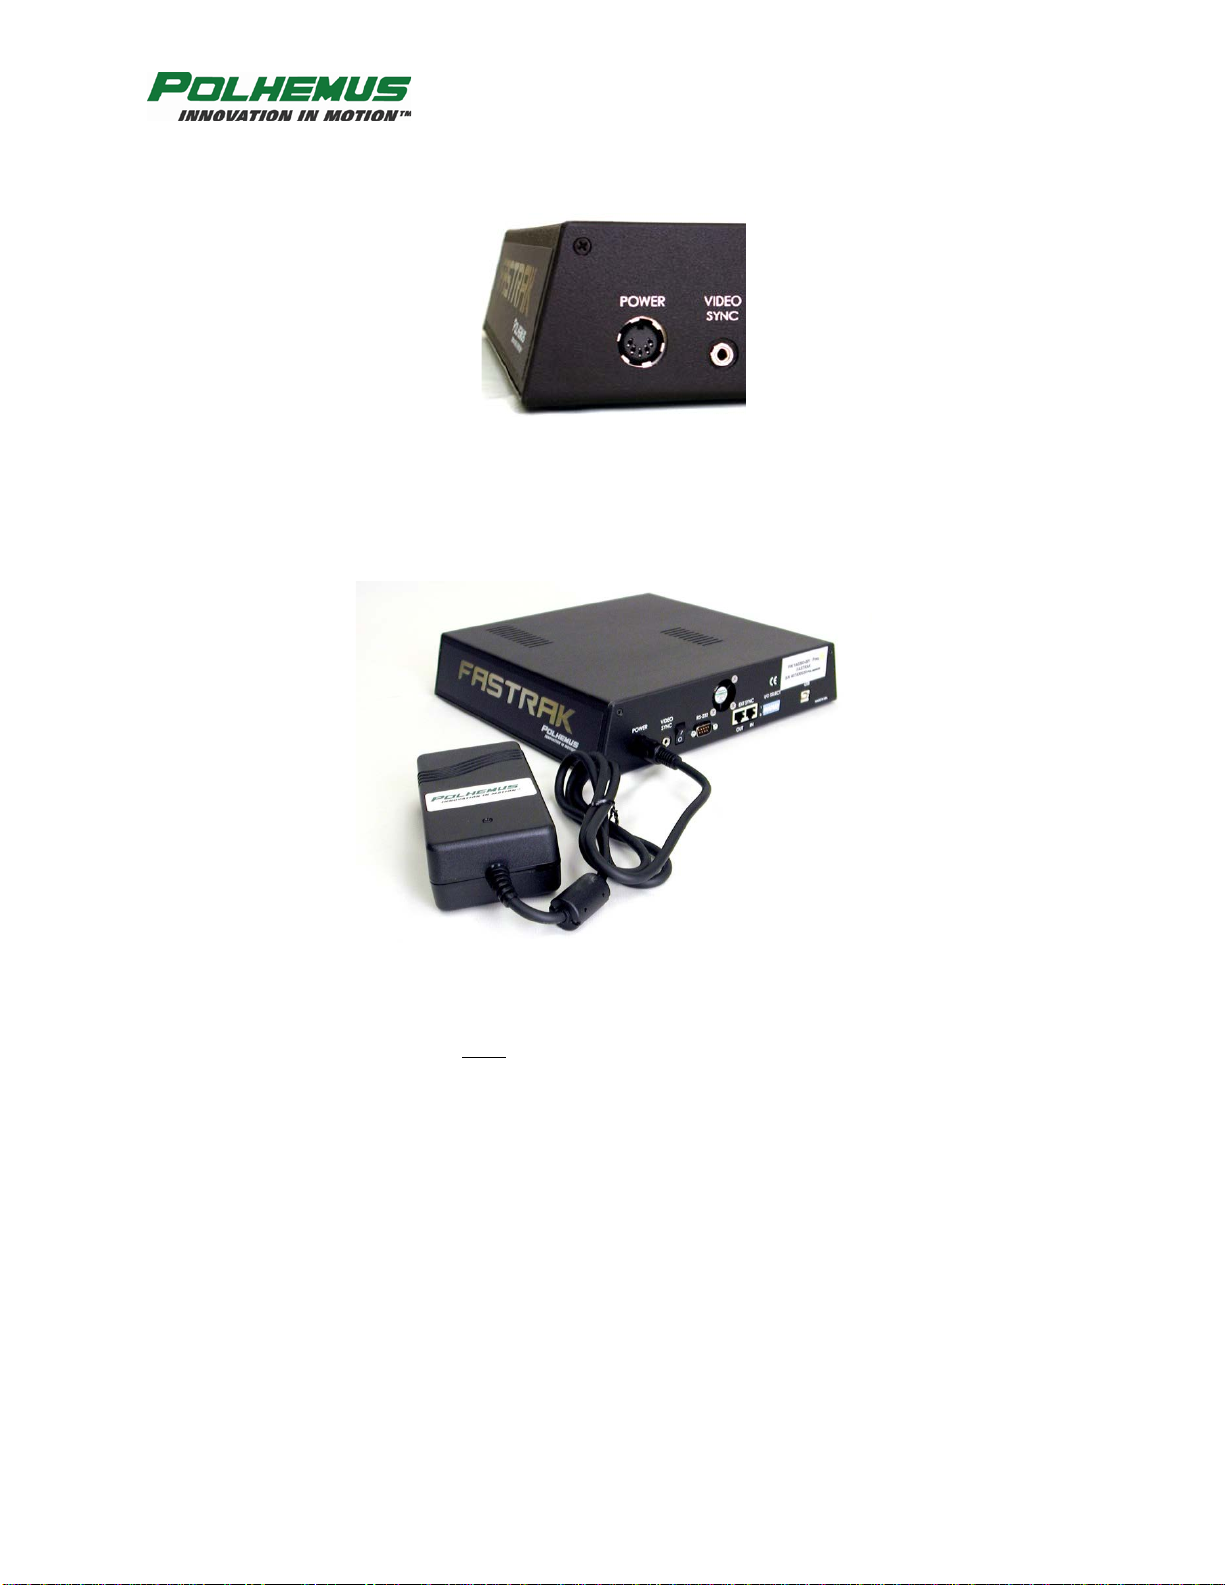
Polhemus 3SPACE FASTRAK User manual

3SPACE®
FASTRAK®
USER MANUAL
OPM00PI002 REV. G
JUNE 2012

FASTRAK MANUAL
Rev. G ii JUNE 2012
Copyright © 2000-2012 by Polhemus
Colchester, Vermont U.S.A.
All rights reserved. No part of this publication may be reproduced, stored in a retrieval system, or
transmitted, in any form or by any means, mechanical, photocopying, recording or otherwise, without the
prior written permission of Polhemus. No patent liability is assumed with respect to the use of the
information contained herein. While every precaution has been taken in the preparation of this book,
Polhemus assumes no responsibility for errors or omissions. Neither is any liability assumed for damages
resulting from use of the information contained herein.
3SPACE® and FASTRAK®are registered trademarks of Polhemus.
Polhemus is a Good Manufacturing Practices (GMP) Contract Manufacturer under U.S. FDA
Regulations. We are not a manufacturer of Medical Devices. Polhemus systems are not certified
for medical or bio-medical use. Any references to medical or bio-medical use are examples of what
medical companies have done with the Products after they have obtained all necessary or
appropriate medical certifications. The end user/OEM/VAR/Distributor must comply with all
pertinent FDA/CE regulations pertaining to the development and sale of medical devices and all
other regulatory requirements.
FCC Statement
This equipment has been tested and found to comply with the limits for a Class A digital device,
pursuant to part 15 of the FCC Rules. These limits are designed to provide reasonable protection against
interference when the equipment is operated in a commercial environment. This equipment generates,
uses, and can radiate radio frequency energy and, if not installed and used in accordance with the
instruction manual, may cause interference to radio communications. Operation of this equipment in a
residential area is likely to cause interference in which case the user will be required to correct the
interference at the user’s expense.
EC-Declaration of Incorporation
For all FASTRAK models produced as of January 2012, this product conforms to the following
European Community Directives:
EMC Directive 2004/108/EC
LVD 2006/95/EC
The following standards were used to verify compliance with the directives:
EMC: EN 61326-1:2006 EMC requirements
Class A (Emissions)
Class A (Harmonics)
EN 55011:1998/A1:1999/A2:2002 (Radiated & Conducted Emissions)
NOTE: The conducted emission here-in only applies if a Polhemus supplied power
supply is used with the FASTRAK electronics unit.
EN 61000-3-2:2000 (Harmonics)
EN 61000-3-3:1995/A1:2001 (Flicker)
EN 61000-4-2:1995/A1:1998/A2:2001 (ESD)
EN 61000-4-3:2002 (Radiated RF Immunity)
EN 61000-4-4:2004 (Electrical Fast Transient/Burst)
EN 61000-4-5:1995 (Surge Immunity)
EN 61000-4-6:1996 (Conducted RF Immunity)
EN 61000-4-11:2004 (Voltage Dips & Interruptions)

FASTRAK MANUAL
Rev. G iii JUNE 2012
Table of Contents
LIST OF FIGURES......................................................................................................................................V
1. GETTING STARTED........................................................................................................................1
2. CONTACTING POLHEMUS CUSTOMER SERVICE.................................................................8
3. CURRENT FASTRAK VS. PREVIOUS VERSIONS.....................................................................9
4. FASTRAK COMMANDS INDEX ..................................................................................................10
5. TECHNICAL OVERVIEW.............................................................................................................11
6. SPECIFICATION.............................................................................................................................12
Position Coverage ................................................................................................................................12
Angular Coverage.................................................................................................................................12
Static Accuracy.....................................................................................................................................12
Resolution vs. Range.............................................................................................................................12
Latency..................................................................................................................................................12
Output...................................................................................................................................................12
Update Rate..........................................................................................................................................12
Carrier Frequency................................................................................................................................13
RS-232 Interface...................................................................................................................................13
USB Interface........................................................................................................................................13
Operating Environment........................................................................................................................13
Operating Temperature ........................................................................................................................13
Physical Characteristics.......................................................................................................................13
Power Requirements.............................................................................................................................14
7. COMPONENT DESCRIPTION .....................................................................................................15
7.1 SEU...............................................................................................................................................15
7.2 TRANSMITTER PORT ......................................................................................................................15
7.3 RECEIVER PORTS (4)......................................................................................................................16
7.4 POWER INDICATOR ........................................................................................................................16
7.5 I/O SELECT SWITCH.......................................................................................................................16
7.6 EXTERNAL SYNC I/O .....................................................................................................................17
7.7 FREQUENCY SELECT MODULE.......................................................................................................18
7.8 RS-232 I/O ....................................................................................................................................18
7.9 USB I/O.........................................................................................................................................19
7.10 OPTIONAL RS-422 I/O.................................................................................................................19
7.11 VIDEO SYNC INPUT......................................................................................................................20
7.12 POWER INPUT RECEPTACLE .........................................................................................................20
7.13 TRANSMITTER..............................................................................................................................20
7.14 RECEIVER(S)................................................................................................................................22
7.15 STYLUS ........................................................................................................................................24
7.16 VIDEO SYNC DETECTOR ..............................................................................................................25
7.17 LONG RANGER TRANSMITTER .....................................................................................................26
7.18 4” TRANSMITTER .........................................................................................................................26
7.19 SHORT RANGER TRANSMITTER....................................................................................................26
7.20 MINI RECEIVER............................................................................................................................26
8. SYSTEM OPERATION...................................................................................................................27
8.1 I/O CONSIDERATIONS ....................................................................................................................27
RS-232................................................................................................................................................27
RS-422................................................................................................................................................27
8.2 POWERING UP FASTRAK.............................................................................................................27
8.3 CONFIGURATION CHANGES............................................................................................................28
8.4 USING THE USB INTERFACE ..........................................................................................................28
8.5 INSTALLING USB DEVICE DRIVERS...............................................................................................29
8.6 SYNCHRONIZATION........................................................................................................................31
8.7 INTERNAL SYNC.............................................................................................................................31

FASTRAK MANUAL
Rev. G iv JUNE 2012
8.8 EXTERNAL SYNC............................................................................................................................31
8.9 VIDEO SYNC ..................................................................................................................................32
8.10 MULTIPLE SYSTEMS OPERATION –FASTRAKS PRODUCED AS OF JANUARY 2012.....................32
8.11 OUTPUT CONSIDERATIONS...........................................................................................................32
9. SYSTEM COMMANDS...................................................................................................................34
9.1 COMMAND FORMAT NOTATION AND CONVENTION.......................................................................34
9.2 COMMAND FORMAT NOTES...........................................................................................................35
9.3 COMMAND/OUTPUT LISTING .........................................................................................................36
‘A’ – Alignment Reference Frame...................................................................................................................37
‘B’ – *Boresight...............................................................................................................................................39
‘b’ – *Unboresight...........................................................................................................................................40
‘C’ – Continuous Output Mode........................................................................................................................41
‘c’ – Disable Continuous Printing....................................................................................................................42
‘D’ – Enable Fixed Metal Compensation.........................................................................................................43
‘d’ – Disable Fixed Metal Compensation.........................................................................................................44
‘e’ – Define Stylus Button Function ................................................................................................................45
‘F’ – Enable ASCII Output Format..................................................................................................................46
‘f’ – Enable Binary Output Format..................................................................................................................47
‘G’ – Boresight Reference Angles...................................................................................................................49
‘H’ – Hemisphere of Operation........................................................................................................................50
‘I’ – Define Increment......................................................................................................................................53
‘l’ – Active Station State..................................................................................................................................54
‘N’ – *Define Tip Offsets................................................................................................................................56
‘O’ – Output Data List .....................................................................................................................................57
System Data Record: ASCII Format................................................................................................................59
System Data Record: IEEE Floating-Point Format..........................................................................................61
‘o’ – Set Output Port........................................................................................................................................62
‘P’ – Single Data Record Output......................................................................................................................63
‘Q’ – Angular Operational Envelope...............................................................................................................64
‘R’ – *Reset Alignment Reference Frame .......................................................................................................66
‘r’ – Transmitter Mounting Frame...................................................................................................................67
‘S’ – System Status Record..............................................................................................................................68
‘T’ – Built-In-Test Information........................................................................................................................70
‘U’ – English Conversion Units.......................................................................................................................72
‘u’ – Metric Conversion Units .........................................................................................................................73
‘V’ – Position Operational Envelope...............................................................................................................74
‘v’ – Attitude Filter Parameters........................................................................................................................76
‘W’ – Reset System to Defaults.......................................................................................................................79
‘X’ – Configuration Control Data....................................................................................................................80
‘x’ – Position Filter Parameters........................................................................................................................81
‘y’ – Set Synchronization Mode.......................................................................................................................83
‘^K’ – *Save Operational Configuration .........................................................................................................85
‘^Q’ – *Resume Data Transmission ................................................................................................................86
‘^S’ – *Suspend Data Transmission ................................................................................................................87
‘^Y’ – *Reinitialize System.............................................................................................................................88
10. COMMAND ERROR.......................................................................................................................89
11. DEFAULT OPERATION WITH A STYLUS................................................................................90
APPENDIX A. Limited Warranty and Limitation of Liability................................................................................. A-1
APPENDIX B. Trouble Shooting............................................................................................................................. B-1
APPENDIX C. Glossary .......................................................................................................................................... C-1
APPENDIX D. ‘Accuracy and Resolution’ White Paper......................................................................................... D-1
APPENDIX E. ‘Latency’ White Paper .....................................................................................................................E-1
APPENDIX F. Cable Diagrams................................................................................................................................F-1
INDEX............................................................................................................................................................5

FASTRAK MANUAL
Rev. G v JUNE 2012
List of Figures
Figure 1-1 Complete FASTRAK System........................................................................................1
Figure 1-2 Transmitter Connection...............................................................................................2
Figure 1-3 Receiver Connection....................................................................................................2
Figure 1-4 Mounting Transmitter and Receiver on 2x4................................................................2
Figure 1-5 Power Connector.........................................................................................................3
Figure 1-6 DC Power Cable Installation ......................................................................................3
Figure 1-7 DC USB Cable Installation .........................................................................................4
Figure 1-8 PiMgr Screen Display..................................................................................................5
Figure 1-9 RS-232 Configuration Settings....................................................................................6
Figure 1-10 FASTRAK Data Record Display................................................................................6
Figure 7-1 FASTRAK SEU, Front View ......................................................................................15
Figure 7-2 FASTRAK SEU, Rear View........................................................................................15
Figure 7-3 Default I/O Select Dip Switch Settings......................................................................17
Figure 7-4 Sync Connector Identification (Input and Output)....................................................18
Figure 7-5 RS-232 Cable Connection..........................................................................................19
Figure 7-6 Transmitter Diagram.................................................................................................21
Figure 7-7 Transmitter ................................................................................................................21
Figure 7-8 RX2 Receiver Dimensions (in Inches) .......................................................................22
Figure 7-9 RX1-D Receiver (in inches) .......................................................................................23
Figure 7-10 Receiver ...................................................................................................................23
Figure 7-11 Stylus Dimensions....................................................................................................25
Figure 7-12 Stylus........................................................................................................................25
Figure 7-14 Video Sync Detector ................................................................................................26
Figure 8-1 Connection of USB Cable to Switch to USB Mode....................................................29
Figure 9-1 System Alignment.......................................................................................................36
Figure 9-2 Hemisphere Vector ....................................................................................................52
Figure C-1 Euler Angles........................................................................................................... C-5
Figure E-1 Position and Orientation Measurements System Block Diagram..........................D-2
Figure E-2 Black Box System ...................................................................................................D-3
Figure E-3 Translational Resolution........................................................................................D-4
DUE TO SOFTWARE AND HARDWARE MODIFICATIONS
SCREEN OR PRODUCT EXAMPLES APPEARING IN THIS MANUAL
MAY VARY SLIGHTLY FROM THE ACTUAL
SCREENS OR PRODUCTS THE USER ACCESSES.

FASTRAK MANUAL
Rev. G 1 JUNE 2012
1. Getting Started
Congratulations on buying the finest 3D tracker system yet! This section of the user manual has
been provided to help get your project under way as quickly as possible.
There are two ways to get started with your FASTRAK system, as with any new system. You
could “wing it,” which involves a great deal of assumptions based on either previous experience
and/or visual inspection, and hope for the best. Alternatively, you could sit down and read the
whole manual, line-by-line, and then start. What we provide here is a middle ground to cover the
basics to get you going quickly. However, this approach does not preclude using the manual as a
precise guide, reference and final arbiter.
NOTE: This approach assumes a single receiver, use of the USB port communicating with a
Windows PC, and use of the FASTRAK Host Software.
Unpack the FASTRAK SEU, transmitter, receiver(s), and power supply.
Figure 1-1 Complete FASTRAK System
1. Set up the system close to your host computer and away from large metal objects like file
cabinets, metal desks, etc. and away from the floor and walls.
2. Identify the transmitter (the two-inch gray cube or the four-inch black cube) and insert the
transmitter connector into the transmitter receptacle, being careful to firmly engage it.
Using your fingers or a small, flat blade screwdriver, lock the connector by tightening the
two retaining screws.

FASTRAK MANUAL
Rev. G 2 JUNE 2012
Figure 1-2 Transmitter Connection
3. For getting started, use only one receiver. Identify the receiver and insert it into the receiver
receptacle labeled “one” as shown below. Firmly engage and lock the receiver connector
into place in the same manner as the transmitter connector in Step 2.
Figure 1-3 Receiver Connection
4. For testing purposes, it is convenient to mount both the transmitter and the receiver on a
single block of wood (2X4 or equivalent) about 16 inches apart. Exact placement of the
transmitter and receiver is not important for this test; just make sure the cables of both
devices are not routed together and they come off opposite ends of the 2X4.
Figure 1-4 Mounting Transmitter and Receiver on 2x4

FASTRAK MANUAL
Rev. G 3 JUNE 2012
5. Identify the five pin “DIN” type power input connector on the back panel of the electronics
unit.
Figure 1-5 Power Connector
With the separate Power Supply (“brick”) UNPLUGGED from the outlet of the wall, plug
the “brick’s” DIN connector into the power-input connector on the rear panel of the
electronics unit and firmly seat.
Figure 1-6 DC Power Cable Installation
Identify the power ON/OFF rocker switch located on the rear panel of the electronics unit.
Ensure this switch is in the OFF position (logic “0”, DOWN) before inserting the “brick’s”
convenience plug into the 110/220 VAC outlet.
6. Connect the USB cable to the FASTRAK as shown below, and the remaining end of the
cable into a USB port on the host computer.

FASTRAK MANUAL
Rev. G 4 JUNE 2012
Figure 1-7 DC USB Cable Installation
7. Install the Host Software
NOTE: FASTRAK Host Software is intended to be installed on a computer running
Windows XP/Vista/Win 7 only.
•Insert the FASTRAK Host Software CD-ROM into your computer’s CD-ROM drive.
•If the FASTRAK Host Software Installation Panel does not run automatically, then
navigate to the CD-ROM drive using Windows Explorer. Run “Setup.exe”. The Host
Software Installation Panel will appear. Select “Install Host Software.” The installation
wizard will walk you through the installation.
•For simplicity, it is recommended that you use the default installation settings
suggested by the installation wizard.
•When the installation is complete, if you are planning to use your computer’s USB port
to connect to the FASTRAK System, leave the CD-ROM in the drive. It will be needed
when the initial USB connection is made.
•If you are not planning to use the USB port, you may remove the CD-ROM from the
drive now.
USB Driver Installation
•When FASTRAK is connected via USB to a Windows host for the first time, the host
will display a “Found New Hardware” message. The host will then launch the “Found
New Hardware Wizard” to locate and install the USB drivers for FASTRAK.
•If the CD-ROM is not already in the drive, load it now.
•When the Found New Hardware Wizard displays, select the “Install software
automatically” option and then “Next.”
•The wizard will install the FASTRAK Loader. When it has completed, select “Finish.”
•The same process will be launched again automatically to install the Polhemus
FASTRAK USB Driver. Repeat the same selections and the process will be complete.

FASTRAK MANUAL
Rev. G 5 JUNE 2012
8. Use the Polhemus PiMgr GUI
If you selected the default settings when you installed the FASTRAK Host Software on
your computer, you will find a shortcut to the PiMgr application on your Windows
XP/Vista/Win 7 desktop. It looks like this:
Otherwise, navigate to the program through the windows Start menu:
StartAll ProgramsPolhemusPiMgr
The initial PiMgr screen will look like this:
Figure 1-8 PiMgr Screen Display
a. With no FASTRAK system connected, notice that the icon appears in the
lower right corner. Once connected, the icon will change to .
b. If the FASTRAK system is already powered up and connected to the computer,
the PiMgr will discover the connection immediately upon startup. If not, you will
need to manually create the connection once you have powered up FASTRAK.
To do this, first you must select the type of connection you wish to create.
c. If you want to create a USB connection, skip to Step 9. PiMgr defaults to a USB
connection. If you want to create an RS-232 connection, first configure the serial
port settings by opening the Device Configuration dialog. Open this dialog off the
Device menu: DeviceDevice Configuration…, and select the Connection tab.
Select the RS-232 Connection Type on the left, and the appropriate RS-232
Properties on the right. Then select OK.

FASTRAK MANUAL
Rev. G 6 JUNE 2012
Figure 1-9 RS-232 Configuration Settings
d. To create a connection, select the Connect button on the PiMgr toolbar: .
When the connection has been established, the connection icon at the lower right
will change to .
e. To collect a single frame of motion data from the FASTRAK system, select the
Single button on the toolbar:
f. You can also do this by typing ‘p’ or ‘P’ anywhere on the PiMgr window. This
will cause PiMgr to request a single data frame from the FASTRAK system. The
contents of the frame will be displayed in the text window at the top of the PiMgr
display. The airplane image(s) in the graphics portion of the screen will move to
the retrieved position and orientation:
Figure 1-10 FASTRAK Data Record Display
9. At this point, you may turn on the FASTRAK using the power switch located on the back
panel of the SEU. Note the “power on” indicator located on the front panel of the
electronics unit. It should flash for approximately 10 seconds indicating self-test and set-

FASTRAK MANUAL
Rev. G 7 JUNE 2012
up. When these routines are completed (after the flashing), the indicator will turn to a
steady-on state thereby indicating that the system is ready to operate.
10. You may now use the PiMgr to exercise the system. After clicking a single button or
sending a ‘P’ – Single Data Record Output command (see page 63) to the system, the 6
Degree-Of-Freedom (6DOF) output data will be sent to the host. The data consists of a
header (0s, where sequals the station number) and six columns of data as follows: (NOTE:
These values represent an arbitrary placement of the receiver and transmitter.)
1 2 3 4 5 6 7
01 16.08 -0.38 0.71 3.05 1.12 -0.67
FASTRAK Data Record
Column Function
1 01 Header (not shown above)
2 X position in inches
3 Y position in inches
4 Z position in inches
5 Azimuth attitude in degrees
6 Elevation attitude in degrees
7 Roll attitude in degrees
Because you have locked the receiver in one position relative to the transmitter (Step 4),
the data output will not change regardless of the number of data samples you take.
11. Remove the receiver, move it approximately six inches toward the transmitter, secure it in
place, and take a data point. The value of the X position data will decrease by
approximately six inches. The Y and Z values will remain roughly the same as the original
data. If you left the attitude of the receiver approximately the same as it was when you
started, then the attitude data will be approximately the same also.
12. Again, remove the receiver and without moving its position, try twisting it in azimuth (in
the same plane as the 2 x 4) approximately 45 degrees and lock it down with tape. Now
take another data point by clicking a single button or using the ‘P’ – Single Data Record
Output command (page 63). The first four columns will be approximately as they were in
Step 10, but the Azimuth data in column 5 will have changed by approximately 45 degrees.
13. Experiment with the system as shown in Step 12 to demonstrate that it measures the
position and orientation (6DOF) of the receiver with respect to the transmitter.
14. If the system fails to produce 6DOF data, carefully go over the above procedure in a
systematic fashion, checking connections and switch settings especially. When all else
fails, call us.

FASTRAK MANUAL
Rev. G 8 JUNE 2012
2. Contacting Polhemus Customer Service
If problems are encountered with the FASTRAK system or if you are having difficulty
understanding how the commands work, help is just a telephone call away. Call Polhemus at
(800) 357-4777 and select “2” for Customer Service and then “1” for Technical Support.
Polhemus is open Monday through Friday, 8:00 AM to 5:00 PM, Eastern Standard Time. For the
most part, our customer service engineers are usually able to solve problems over the telephone
and get you back into the fast lane right away. Help is also available on our web page at
www.polhemus.com. Simply double-click Technical Support, then select
If a problem requires repair of your system, the customer service engineer will issue a Return
Merchandise Authorization (RMA) number so you can return the system to the factory. Please
retain and use the original shipping container, if possible, to avoid transportation damages (for
which you or your shipper would be liable). Please do not return any equipment without first
obtaining an RMA number. If your system is still under warranty, Polhemus will repair it free of
charge according to the provisions of the warranty as stated in APPENDIX A of this document.
The proper return address is:
Polhemus
40 Hercules Drive
Colchester, VT 05446
Attention RMA #____
Telephone (From the U.S. and Canada): (800) 357-4777
Telephone (From outside the U.S. and Canada): (802) 655-3159
Fax #: (802) 655-1439

FASTRAK MANUAL
Rev. G 9 JUNE 2012
3. Current FASTRAK vs. Previous Versions
Congratulations on purchasing our FASTRAK system! For our customers who presently own
one or more of our tracker products, there are some minor differences which should be noted for
all FASTRAKs produced as of January 2012:
•Fan has been removed
•16 bit binary has been removed
•Master/Slave mode has been removed
•External sync output has been removed

FASTRAK MANUAL
Rev. G 10 JUNE 2012
4. FASTRAK Commands Index
Cmnd.
Ltr FASTRAK Command Title Brief Description Page
A Alignment Reference Frame Defines reference frame and origin 37
B Boresight Sets AER to zero or the value set by G 39
b Unboresight Removes new reference set by B 40
C Continuous Output Mode Enables continuous data output 41
c Disable Continuous Output Disables continuous data output 42
D Enable Fixed Metal Compensation Turns on compensation (if applicable) 43
d Disable Fixed Metal Compensation Turns off compensation (if applicable) 44
e Define Stylus Button Function Modifies stylus button function 45
F Enable ASCII Output Format Enables ASCII output format 46
f Enable Binary Output Format Enables binary output format 47
G Boresight Reference Angles Allows B to yield specific AER output 49
H Hemisphere of Operation Defines operating side of transmitter 50
I Define Increment Control output by receiver movement 53
l Active Station State Turns a receiver station off or on 54
N Define Tip Offsets Modifies stylus tip offsets 56
O Output Data List Changes data output list 57
o Set Output Port Modifies output port parameters 62
P Single Data Record Output Requests a single data output record 63
Q Angular Operational Envelope Sets angular operational envelope 64
R Reset Alignment Reference Frame Clears previous alignment for new entry 66
r Transmitter Mounting Frame Modifies transmitter mounting frame 67
S System Status Record Requests a system status record 68
T Built-In-Test Information Clears BIT error and obtains more info 70
U Set Unit Inches Sets XYZ measurements to inches 72
u Metric Conversion Units Sets XYZ measurements to centimeters 73
V Position Operational Envelope Sets XYZ operational envelope 74
v Attitude Filter Parameters Modifies AER filter parameters 76
W Reset System to Defaults Resets EEPROM to default settings 79
X Configuration Control Data Modifies configuration data in status record 80
x Position Filter Parameters Modifies the XYZ filter parameters 81
y Set Synchronization Mode Modifies sync mode 83
^K Save Operational Configuration Saves current configuration to EEPROM 85
^Q Resume Data Transmission Allows data to be transmitted 86
^S Suspend Data Transmission Restricts data from being transmitted 87
^Y Re-initialize System Invokes start up as if power was cycled 88

FASTRAK MANUAL
Rev. G 11 JUNE 2012
5. Technical Overview
The FASTRAK tracking system uses electro-magnetic fields to determine the position and
orientation of a remote object. The technology is based on generating near field, low frequency
magnetic field vectors from a single assembly of three concentric, stationary antennas called a
transmitter, and detecting the field vectors with a single assembly of three concentric, remote
sensing antennas called a receiver. The sensed signals are input to a mathematical algorithm that
computes the receiver’s position and orientation relative to the transmitter.
The FASTRAK consists of a System Electronics Unit (SEU), one to four receivers, a single
transmitter, a power supply and a power cord. The system is capable of operating at any of four
discrete carrier frequencies. Different carrier frequencies allow operation of up to four
FASTRAKs simultaneously and in close proximity to one another. The FASTRAK interfaces to
the host computer via RS-232 and USB serial communication. Any single receiver may be
operated at the fastest update rate (120 Hz); any two receivers at one half this rate; any three at
one-third this rate; or all four at one fourth the fastest rate. Of course, the unit must be set to
output at a high enough baud rate to receive these updates. Mixed rates are not permitted
meaning that all active receivers operate at the same update rate, i.e. one cannot be operated
faster than another. Active receivers are selected by physical receiver cable connections and
software configuration commands.
Additionally, the FASTRAK may be used with a stylus instead of a standard package receiver.
Tip offsets are automatically calculated for the stylus and no special commands are required for
this mode of operation. Switch functionality is provided with the stylus. The stylus may be used
in any of the Receiver Ports. Operation of these devices is covered in Default Operation with a
Stylus on page 90.

FASTRAK MANUAL
Rev. G 12 JUNE 2012
6. Specification
Position Coverage
The system will provide the specified accuracy when standard* receivers are located within 30 inches (76
cm.) of the standard transmitter. Operation with separations up to 120 inches (305 cm.) is possible with
reduced accuracy.
*NOTE: Alternative devices of larger/smaller size are available as options and operate to longer/shorter
ranges.
Angular Coverage
The receivers are all-attitude.
Static Accuracy
0.03” (0.08 cm) RMS for the X,Y,or Z receiver position, and 0.15°RMS for receiver orientation.
Resolution vs. Range
Latency
4.0 milliseconds from center of receiver measurement period to beginning of transfer from output port.
Output
Software selectable including extended precision. Cartesian coordinates of position and Euler orientation
angles are standard. Direction cosines and quaternions are selectable. English or metric units and ASCII
or binary outputs also are selectable.
Update Rate
One receiver 120 updates/second
Two receivers 60 updates/second

FASTRAK MANUAL
Rev. G 13 JUNE 2012
Three receivers 40 updates/second
Four receivers 30 updates/second
Carrier Frequency
The FASTRAK may be configured with any one of four discrete carrier frequencies to allow
simultaneous operation of up to four systems in close proximity. Carrier frequencies are selected via color
coded Frequency Select Modules (FSM). These frequencies are:
Reference # Frequency Color Code
1 8013 Hz Black
2 10016 Hz Red
3 12019 Hz (Std) Yellow
4 14022 Hz Blue
5 14022 Hz Green TX1
6 12019 Hz White TX1
A colored dot can be found on the FSM, on the end closest to the connector and on the back panel of the
FASTRAK SEU as it comes from the factory. FSMs different from the standard can be specified by the
user at time of order or can be purchased for a nominal fee at any time. Field installation of a FSM should
prompt user change out of the SEU color dot in order to facilitate easy identification among multiple
FASTRAKs.
RS-232 Interface
RS-232C serial port with software selectable baud rates of 1200, 2400, 4800, 9600, 19200,
38400, 57600 and 115200; ASCII or Binary formats. The factory default setting is 115.2K baud.
An RS-422 port is available as an optional serial port in lieu of the RS-232 at the same baud
rates.
USB Interface
USB (Universal Serial Bus) has become the predominant interface standard. It removes
transmission speed limitations (due to maximum baud rate) and allows transmission speeds up to
12 Mbps. USB utilizes differential signaling for better signal quality and noise rejection and
therefore allows the use of longer communication cables between the host computer and the
FASTRAK system.
Operating Environment
Large metallic objects, such as desks or cabinets, located near the transmitter or receivers may
adversely affect the performance of the system. Many walls, floors, and ceilings also contain
significant amounts of metal.
Operating Temperature
10°C to 40°C at a relative humidity of 10% to 95% non-condensing.
Physical Characteristics
•SEU: Width 11.5” (29.20 cm.), length 10.3” (26.2 cm.), height 2.2” (6.10 cm.), weight 3.0 lb.
(1.40 Kg.).

FASTRAK MANUAL
Rev. G 14 JUNE 2012
•Transmitter: Width 2.2” (5.6 cm.), length 2.2” (5.6 cm.), height 2.3” (5.8 cm.), weight 0.6 lb.
(0.27 Kg.) excluding attached cable. The Transmitter may be purchased with either 10’ or 20’
cables.
•Receiver: Width 1.1” (2.83 cm.), length 0.90” (2.29 cm.), height 0.60” (1.52 cm.), weight 0.6
oz. (17.0 gm.) excluding attached cable. Receivers may be purchased with either 10’ or 20’
cables.
•Stylus: Length 7.00” (17.78 cm.) including tip, or the shorter version Stylus, length 3.5” (6.04
cm), maximum barrel diameter 0.75” (1.9 cm.), handle diameter 0.375” (0.95 cm.), tip length
0.8” (2.03 cm.), tip diameter 0.156” (0.4 cm.), weight 2.5 oz. (28.3 gm.) excluding attached
cable. Either stylus may be purchased with either 10’ or 20’ cables.
Power Requirements
International Power Sources Supply: Input power is 100-240 VAC, 47-63 Hz, and single phase at
15 watts.

FASTRAK MANUAL
Rev. G 15 JUNE 2012
7. Component Description
7.1 SEU
The System Electronics Unit (SEU) is a stand-alone unit that may be located anywhere that is
convenient to the work area, AC power and the host computer. It contains the required input and
output connectors and controls to support up to four receivers, a single transmitter and the
RS-232 and USB output ports. Receiver Input(s), Transmitter Input, I/O Cables, I/O Select
Switch, External Sync I/O, Video Sync Input, and Power Input connections are located on the
SEU as shown in Figure 7-1 and Figure 7-2, below.
Figure 7-1 FASTRAK SEU, Front View
Figure 7-2 FASTRAK SEU, Rear View
7.2 Transmitter Port
The single Transmitter receptacle port is a 15 pin, male “D” type connector located on the front
of the SEU as shown in Figure 7-1. The transmitter should be connected to the SEU before the
unit is powered on and disconnected after the unit is powered off. CAUTION: Do not
disconnect the transmitter while the FASTRAK SEU is powered on. Also, do not power on the
SEU without a transmitter connected. When routing cables, please be sure the transmitter cable is
routed separately from the receiver cables.
Table of contents
Other Polhemus GPS manuals