manuals.online logo
Brands
  1. Home
  2. •
  3. Brands
  4. •
  5. POLTI
  6. •
  7. Vacuum Cleaner
  8. •
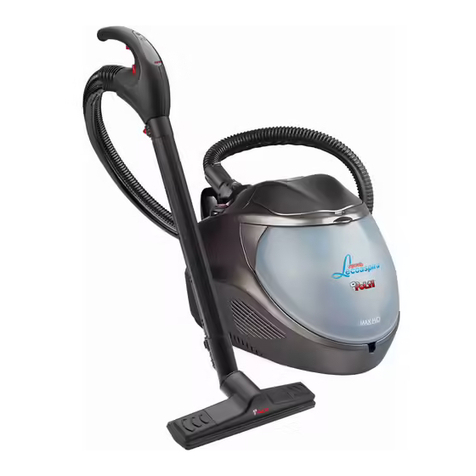
  9. POLTI LECOLOGICO SPECIALE PARQUET Parts list manual

POLTI LECOLOGICO SPECIALE PARQUET Parts list manual

Easy
Power System
Michelangelo Raffaello Espressì 600 Moka 1500 digit
Forever 450 Forever 900
Crema Express
Pratica Forever Clean Forever 1000 Super Pro
2H Professional 5200R Pro 3100R Prof 1300 Prof 1100
Professional System Advanced System
Pro Top Stira e Aspira Vaporella
Sprint Easy Steam
700
701 + Acc.
Ravviva Tende
807 806
Special Pets
520 510
Eco Pro 3000 2300 1300 2085 900
Vaporettino
Power
910 710 Kit
720 Lux
710 690
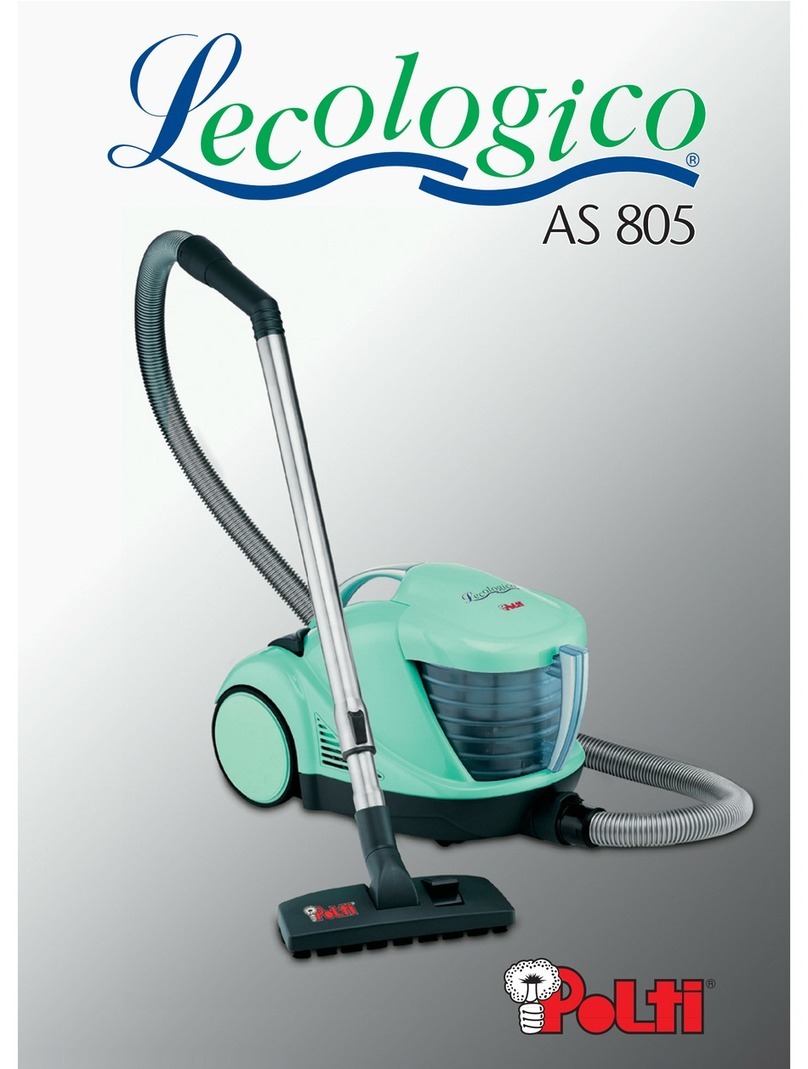
AS810 AS805 AS800
AS310E AS303 AS300
P7495_cop_lecologico_parquet 27-07-2006 16:33 Pagina 1
Fig. 2 Fig. 3 Fig. 4
Fig. 5 Fig. 8
Fig. 11
Fig. 7
Fig. 6
Fig. 12
Fig. 13
Fig. 1
Lecologico Special Parquet - M0S07495 Edizione 1M07
Fig. 14 Fig. 15 Fig. 16
Fig. 17
Fig. 9 Fig. 10
Fig. 18 Fig. 19 Fig. 20
Fig. 21
7
9
9a
10
Fig. 22
B
Z
E
H
F
G
CC1
L
D1
D
A
A1
4
17
15 12
6
5
3
14
12
8
13
18
11
19
P1 P
M
17
W
17b
17a
17c
6
16
O
N
Fig. 23 Fig. 24
X
COP-LECOL.SPEC.PARQUET M0S07495 1M07.qxp 10/07/2006 16.40 Pagina 1
KEY
1) Main switch
2) Cable winder button
3) Carry handle
4) Container handle
5) Rear wheels
6) “EcoActive-Filter” water container
7) MAX level (fig.4)
8) Air outlet grid
9) Filter cover (fig.16)
9a) Filter cover opening levers (fig.16)
10) Hepa filter (fig.18)
10a) Hepa filter retainer (fig.17)
10b) “Dual filter” assembly (fig.17)
11) Accessories holder housing
12) Casters
13) Power cable plug
14) Indicator lights
15) Connection
16) “Eco Active Filter” water filter assembly
17) Filter cage cover
17a) Filter cage body with fine mesh
17b) Sponge filter
17c) Filter nozzle
18) On/off and increased suction power
button
19) Decreased suction power button
KEY TO ACCESSORIES
A) Telescopic tube
A1) Telescopic tube release button
B) Joker brush
C) Universal brush
C1) Brush selector
D) Hose
D1) Suction opening
E) Multipurpose nozzle
F) Lance for cleaning corners /
skirting boards
G) Soft brush
H) Accessories holder hook
L) Radiator brush
M) Jointed tube
N) Mini turbo brush
O) Parquet brush
P) Wheel covers for hardwood floors
P1) Wheel covers anchoring joints
W) Float
X) HP007
Z) Water container cleaning brush
LECOLOGICO SPECIAL PARQUET
34
lecologico spec.parquet m0s07495 1m07.qxp 25/07/2006 17.25 Pagina 34
Dear Customer,
We would like to thank you for choosing this Polti appliance.
By choosing Lecologico, you have made a healthy choice for your home. Lecologico by Polti
is a friend of the environment and an enemy to dust, pollens, dust mites and their allergens.
With its EcoActive-Filter, Lecologico traps dust in water; then the dirty water is simply poured
away- so no risk of dispersing the dust into the air around you. When you’ve finished, you can
put your Lecologico away perfectly clean.
With Polti’s Lecologico you can sigh with relief indeed. Its 6-stage filtering system with HEPA
filter guarantees that the air coming out of the vacuum cleaner is perfectly clean. The EcoAc-
tive-Filter also does away with the need for dusty bags and all the unpleasant handling of
them. With Lecologico you can vacuum up dry dirt, including large objects. Or even vacuum
up a limited amount of liquids, solving the problem of minor home troubles.
A complete set of accessories is provided to help you to do all cleaning tasks quickly and
without effort.
We suggest to you to read this instruction booklet carefully before using your Lecologico.
What is EcoActive-Filter?
EcoActive-Filter is the revolutionary “green” heart of Lecologico, because its effectiveness is
based on the natural purifying force of water. Just the water flow contained in the special filter
and its bubbling imprison dirt, preventing all contact with dust, and avoiding dispersal of dust
back into the air.
What is the HEPA filter?
Lecologico has a special extra powerful washable HEPA filter, previously used only in profes-
sional applications requiring the utmost hygiene. This filter stops even the finest dust, pollens,
dust mites and other microorganisms and is easily rinsed clean when dirty.
This unit conforms with EC-directives 89/336 as amended by 93/68
(EMC) and 73/23 as amended by 93/68 (low voltage).
Polti S.p.A. reserves the right to change equipment or accessory specification wi-
thout prior notice.
LECOLOGICO SPECIAL PARQUET
35
lecologico spec.parquet m0s07495 1m07.qxp 25/07/2006 17.25 Pagina 35
PP
PPRR
RREE
EECC
CCAA
AAUU
UUTT
TTII
IIOO
OONN
NNSS
SS
KEEP THESE INSTRUCTIONS
• Read these instructions for use carefully be-
fore using the appliance.
• Any use which does not comply with these
instructions will invalidate the warranty.
• The wiring system to which the appliance is
connected must always comply with the laws
in force.
• Before connecting the appliance, make sure
that the mains voltage is the same as the vol-
tage indicated on the data label of the ap-
pliance and that the power outlet is connec-
ted to earth
• Always turn off the appliance at the on/off
switch before unplugging it.
• If the appliance is left unused, always di-
sconnect it from the mains. Never leave the
appliance unattended with the cable plugged
into the mains.
• Always make sure the appliance is unplug-
ged before performing maintenance work of
any kind
• Do not pull the power cable out of the socket,
but grasp the plug itself to avoid damage to
the socket.
• Do not allow the power cable to be twisted,
crushed, stretched, or come into contact with
sharp or hot surfaces.
• Do not use the appliance if the power cable
or other important parts are damaged.
• Do not use electric extension leads that are
not authorized by the manufacturer, as they
may cause damage or fire.
• If it is necessary to replace the power supply
cable, please refer to the nearest Polti autho-
rised service centre, since the use of a spe-
cial tool is necessary.
• Never touch the appliance with wet hands or
feet with the cable plugged into the mains.
• Do not use the appliance when barefoot.
• Do not use the appliance near a bathtub,
shower or container full of water
• Never immerse the appliance, the cable or
the plugs in water or another liquid.
• Use of the appliance in places where there is
a danger of explosions is prohibited.
• Do not use the product with toxic substan-
ces.
• Do not lay the hot appliance on surfaces
sensitive to heat.
• Do not leave the appliance exposed to wind
or rain.
• Do not place the appliance near a live ele-
ment, an electric stove or any other source of
heat.
• Do not expose the appliance to extreme tem-
peratures
• Never let children or people who are not fa-
miliar with how the appliance works use it.
• Do not press the buttons hard or with a poin-
ted object such as a pen.
• Always rest the appliance on a stable sur-
face.
• In case of accidental fall of the appliance it is
necessary to have it checked by an authori-
zed Service Centre as the internal safety fea-
tures may have been affected.
• In case of breakdown or malfunction switch
off the appliance and never attempt to disas-
semble it, but refer to an authorized Service
Centre.
• In order to avoid prejudicing the safety of the
appliance, use only original spare parts and
accessories approved by the manufacturer.
• Do not wind the power cable around the ap-
pliance, especially when the appliance is still
hot.
• Do not use the appliance to suck up acids or
solvents, as these might cause serious da-
mage to the appliance and above all do not
suck up explosive dust or liquids, as these
could cause explosions on coming into con-
tact with the inside components of the ap-
pliance.
• Do not suck up toxic substances.
• Do not suck up burning or incandescent ob-
jects such as embers, ash or other material
in which combustion is taking place.
• Do not suck up detergents or other sub-
stances which could generate foam inside
the water container, as this could cause mal-
functioning.
• Water container can be filled with tap water.
• Do not suck up materials such as cement,
chalk etc. which solidify once they come in
contact with water thus damaging the ap-
pliance.
• During refilling with water, switch off and di-
sconnect the appliance from the mains.
• It is necessary to keep the unit in horizontal
position during operation.
LECOLOGICO SPECIAL PARQUET
36
lecologico spec.parquet m0s07495 1m07.qxp 25/07/2006 17.25 Pagina 36
• Leave the appliance to cool down before
cleaning it.
• Before storing the appliance be sure that it
has completely cooled down.
CC
CCOO
OORR
RRRR
RREE
EECC
CCTT
TTUU
UUSS
SSEE
EEOO
OOFF
FFTT
TTHH
HHEE
EE
PP
PPRR
RROO
OODD
DDUU
UUCC
CCTT
TT
This appliance is intended for home use for
sucking up liquids and solids as described and
in accordance with the instructions provided in
this manual.
Please read these instructions carefully and
keep them, as you may find them useful in fu-
ture.
Polti declines liability for any damage or ac-
cident derived from any use of Lecologico
which is not in conformity with the instruc-
tions contained in this booklet.
AA
AATT
TTTT
TTEE
EENN
NNTT
TTII
IIOO
OONN
NN
Directive 2002/96/EC (Waste Electrical and
Electronic Equipment - WEEE): information for
users
This product complies with EU Directive
2002/96/EC.
The crossed-out wastebasket symbol on the
appliance means that at the end of its useful li-
fespan, the product must be disposed of sepa-
rately from ordinary household wastes.
The user is responsible for delivering the ap-
pliance to an appropriate collection facility at
the end of its useful lifespan.
Appropriate separate collection to permit recy-
cling, treatment and environmentally compati-
ble disposal helps prevent negative impact on
the environment and human health and promo-
tes recycling of the materials making up the
product. For more information on available col-
lection facilities, contact your local waste col-
lection service or the shop where you bought
this appliance.
II
IINN
NNSS
SSTT
TTAA
AALL
LLLL
LLAA
AATT
TTII
IIOO
OONN
NN
Before using Lecologico, assemble the casters
(12) as shown in figure 1.
PP
PPRR
RREE
EEPP
PPAA
AARR
RRAA
AATT
TTII
IIOO
OONN
NN
FF
FFOO
OORR
RR
UU
UUSS
SSEE
EE
• Remove the water container (6) from the ap-
pliance, holding it by the handle (4) (fig.2).
• Remove the filter assembly (16) (fig. 3). Fill
the water container (6) with ordinary tap wa-
ter up to the MAX H2O indicator (7) as
shown in figure 4. The required quantity is
800cc of water.
• Place the filter assembly (16) in the water
container (6), being careful to align them per-
fectly.
• Put the water container (6) back inside the
appliance, performing the operations listed
above in reverse order.
• Insert the suction opening (D1) on the hose
(D) into connection (15) (fig. 5).
FF
FFUU
UUNN
NNCC
CCTT
TTII
IIOO
OONN
NNII
IINN
NNGG
GG
• Unwind the cable (13) to remove it COM-
PLETELY from its housing, pulling the plug
towards you (fig. 7).
• Plug into a suitable power outlet.
• Press the main switch (1) (fig. 8) and the first
level of the indicator lights (14) will begin fla-
shing. This means Lecologico is in the pause
position. Hold down the button (18) for more
than one second, then release it. Lecologico
will begin operating at minimum speed, and
the first indicator light (14) will stay on.
• There are four power levels. We recommend
minimum power for curtains, medium/low
power for sofas, armchairs and cushions,
medium/high for carpets and high for floors
and hard surfaces (ceramics, marble, etc.).
• Press button (18) to increase speed; each
time you press button (18), the motor power
increases by one step. At each speed in-
crease a further level of the indicator lights
come on.
• Press button (19) to decrease speed; at each
speed decrease a further level of the indica-
tor lights goes out.
• To restore the appliance to the pause posi-
tion, hold down button (18) for more than one
second, then release it.
DD
DDRR
RRYY
YY––
––
LL
LLII
IIQQ
QQUU
UUII
IIDD
DD
SS
SSUU
UUCC
CCTT
TTII
IIOO
OONN
NN
The appliance can be used in the same way to
vacuum up dust or limited amount of liquids. If
the water is very dirty, replace it as described in
LECOLOGICO SPECIAL PARQUET
37
lecologico spec.parquet m0s07495 1m07.qxp 25/07/2006 17.25 Pagina 37
the section on “Emptying and cleaning the wa-
ter container”. When the dirt collected in the
water container (6) reaches the maximum per-
mitted level, the safety float (W) will automati-
cally stop the suction. The motor will turn over
audibly faster. After 10 seconds the appliance
will automatically pause and the four indicator
lights (14) will start flashing. To resume clea-
ning, perform the operations described in the
section on
“emptying and cleaning the water container”,
then top up the water level in the container.
BB
BBII
IIOO
OOEE
EECC
CCOO
OOLL
LLOO
OOGG
GGII
IICC
CCOO
OO
We advise to use Bioecologico for sanitising
while using the suction function. It is a scented
antibacterial product with natural-based anti-al-
lergenic substances. If it is added regularly to
the water in the water container (6) of Leco-
logico, it will prevent the proliferation of bacte-
ria and micro-organisms and inhibit the action
of allergens. In addition to assuring a sanitising
action, Bioecologico eliminates smells due to
the presence of dust in the water.
Use:add 8 ml each time you fill the water con-
tainer.
Bioecologico is sold by Polti dealers or by our
authorised Assistance Centres. Bioecologico is
available in mountain pine or citrus flavour.
EE
EEMM
MMPP
PPTT
TTYY
YYII
IINN
NNGG
GG
AA
AANN
NNDD
DD
CC
CCLL
LLEE
EEAA
AANN
NNII
IINN
NNGG
GG
TT
TTHH
HHEE
EE
WW
WWAA
AATT
TTEE
EERR
RR
CC
CCOO
OONN
NNTT
TTAA
AAII
IINN
NNEE
EERR
RR
((
((66
66))
))
Turn off the appliance with the main switch (1)
and unplug the power cable. This precaution
also resets the safety device.
Remove the water container (6) from the ap-
pliance, holding it by the handle (4) (fig. 2). Re-
move the filter assembly (16) (fig. 3), empty the
container tipping it toward the side with the
spout (fig.10), and then rinse it out. Top up the
water level if you want to continue working.
Reassemble the filter cage and put it back in-
side the appliance. The appliance is now ready
to be put away.
Note: water in the container will not damage
the appliance, but it is advisable to empty the
container before putting away Lecologico. One
of the greatest benefits offered by Lecologico is
the fact that you can put it away clean, unlike
vacuum cleaners with bags, which must be put
away with the dirt in the bag.
UU
UUSS
SSII
IINN
NNGG
GG
TT
TTHH
HHEE
EE
AA
AACC
CCCC
CCEE
EESS
SSSS
SSOO
OORR
RRII
IIEE
EESS
SS
Accessories can be connected directly to the
hose (D) or to the telescopic tube (A) or to the
jointed tube (M).
Using the telescopic tube (A)
The tube is about 60 cm long when closed, 1 m
when extended to its greatest length. To in-
crease or decrease length, press the release
button (A1) positioned as shown in fig. 6 and
extend or reduce length as desired.
Jointed tube (M)
The handy jointed tube is particularly adaptable
as it can be folded and adjusted to suit the task
in hand. It is handy for cleaning spots that are
hard to reach with traditional tools, such as
high shelves, the tops of wardrobes, underne-
ath furniture, etc. All other accessories can be
fitted to the jointed tube (fig.20).
Using the joker brush (B)
The Joker brush can be used to vacuum up
solids or liquids on any kind of surface.
Using the universal brush (C)
Connect the brush to the telescopic tube. Press
with your foot the selector on the brush (C1) to
change the suctioning surface without bending
down. The position with bristles extended is re-
commended for all non-carpeted floors.
The position without bristles is recommended
for carpets.
Multipurpose nozzle (E)
The multipurpose nozzle is recommended for
cleaning upholstery surfaces such as the joints
of sofas, armchairs, mattresses, car upholstery,
etc.
Lance for cleaning corners/skirting boards
(F) – radiator brush (L)
The lance (F) is recommended for thorough
vacuum cleaning of hard-to-reach spots such
as skirting-boards and folds in sofas, arm-
chairs, upholstered furniture and car uphol-
stery. Apply the radiator brush (L) to the tip of
the lance (F) to clean inside radiator elements
and remove accumulated dust.
Soft brush (G)
The soft brush has soft bristles for dusting deli-
LECOLOGICO SPECIAL PARQUET
38
lecologico spec.parquet m0s07495 1m07.qxp 25/07/2006 17.25 Pagina 38
cate surfaces such as picture frames, books,
etc.
Using the accessories holder hook (H) and
the accessories holder housing (11)
The holder can be used to fasten accessories
onto the body of the appliance or the handle.
Installation on the handle:
Hook one of the holder rings to the handle. In-
sert the accessories you want to keep within
reach in the rings (fig.11).
Installation on the appliance body:
Slide the accessories holder guide into the
groove on the back of the appliance as shown
in figure 12, proceeding to anchor the acces-
sories as described above. You can perform
the same operation to store the universal brush
(C) with the telescopic tube (A) attached to it
(fig.13).
Mini turbo brush (N)
The mini turbo brush is particularly recommen-
ded for cleaning sofas and armchairs, car
upholstery, fabric-covered walls, etc.
It easily removes dust, dandruff and textile resi-
dues. It is useful for preventing allergies, as the
mechanical action of the roller with bristles va-
cuums up animal hair.
Periodically clean the mini turbo brush as fol-
lows:
• Slacken the screws on the base of the brush
(fig.21).
• Separate the two parts that make up the
brush (fig.22).
• Vacuum up dirt inside the brush with the tube
with no tool on it (fig.23).
• Close the brush again, performing these
operations in reverse order (fig.24).
Parquet brush (O)
The parquet brush is designed to clean delicate
surfaces; it has bristles and wheels in specially
selected material to avoid damaging such sur-
faces.
Wheel covers for hardwood floors (P)
You should also use wheel covers (P) to pre-
vent damage to your hardwood floor. To as-
semble wheel covers, simply fit together the
two joints (P1) in the housings on the bottom of
the appliance (fig.14). To release the tool, sim-
ply press the two joints (P1) inward and lift off
the wheel cover.
AA
AAUU
UUTT
TTOO
OOMM
MMAA
AATT
TTII
IICC
CC
CC
CCAA
AABB
BBLL
LLEE
EE
WW
WWII
IINN
NNDD
DDEE
EERR
RR
Before putting your vacuum cleaner away,
rewind the power cable by pressing the button
(2), as shown in fig.9, being careful to accom-
pany it during winding.
GG
GGEE
EENN
NNEE
EERR
RRAA
AALL
LLMM
MMAA
AAII
IINN
NNTT
TTEE
EENN
NNAA
AANN
NNCC
CCEE
EE
Always make sure the appliance is unplugged
before performing maintenance work of any
kind.
CC
CCLL
LLEE
EEAA
AANN
NNII
IINN
NNGG
GG
TT
TTHH
HHEE
EE
WW
WWAA
AATT
TTEE
EERR
RR
FF
FFII
IILL
LLTT
TTEE
EERR
RR
AA
AASS
SSSS
SSEE
EEMM
MMBB
BBLL
LLYY
YY((
((11
1166
66))
))::
::
• Pull the nozzle (17c) until it comes off the fil-
ter cage. Separate the cage body (17a) from
the cage cover (17).
• Remove the sponge filter (17b) from the
cage. If the filter is damaged, replace it.
Rinse all the components under running wa-
ter. Let the sponge filter dry before putting it
back into the appliance.
• Reassemble the filter assembly, repeating
the operations in the reverse order.
Note: Make sure that the filter nozzle (17c) is
correctly positioned, checking that the arrow on
the nozzle is aligned with the notch on the bot-
tom of the cage (17a) (fig.15).
• If the filter needs replacing, always use an
original filter, available from Polti Technical
Service Centres.
• A cleaning brush (Z) is supplied for easy
cleaning of the water container (6); it can
also be used to clean the appliance’s hose
connections and the accessories inside.
NOTE: Do not use the brush for cleaning the
outside of the appliance
LECOLOGICO SPECIAL PARQUET
39
lecologico spec.parquet m0s07495 1m07.qxp 25/07/2006 17.25 Pagina 39
CC
CCLL
LLEE
EEAA
AANN
NNII
IINN
NNGG
GG
TT
TTHH
HHEE
EE
HH
HHEE
EEPP
PPAA
AAFF
FFII
IILL
LLTT
TTEE
EERR
RR
((
((11
1100
00))
))
AA
AANN
NNDD
DD
TT
TTHH
HHEE
EE
““
““DD
DDUU
UUAA
AALL
LLFF
FFII
IILL
LLTT
TTEE
EERR
RR””
””
AA
AASS
SSSS
SSEE
EEMM
MMBB
BBLL
LLYY
YY((
((11
1100
00bb
bb))
))
Proceed as follows to clean filters:
• press the two levers on the filter cover (9a)
and pull off the filter cover (9) (fig.16).
• Pull the “dual filter” (10b) to remove it from its
housing and then remove the microfilter and
moisture protection filter that compose it
(fig.19).
• Rotate the filter retainer (10a) as shown in
fig.17 and remove the Hepa filter (10)
(fig.18).
• Rinse the filters in cold running water. Shake
them gently after washing to eliminate any
residual dirt and excess water.
• When dry, put the filters back in the ap-
pliance, performing the same operations in
reverse order.
NOTE: let the filters dry naturally, far away from
light and heat sources. You should wait 24
hours before reassembling filters in the ap-
pliance.
• Replace the filters when torn.
• Filters should be cleaned every 4 months.
WARNING: do not clean filters with the brush,
as this could damage them, decreasing their fil-
tering capacity.
Do not use detergents, do not scrape filters,
and do not wash them in a dishwasher.
EE
EELL
LLEE
EECC
CCTT
TTRR
RRII
IICC
CCAA
AALL
LLSS
SSAA
AAFF
FFEE
EETT
TTYY
YY
No earth required.
Ensure the mains voltage suits your appliance.
Fitting the mains plug important
The wires in the mains lead are coloured in
accordance with the following code:
• Blue: Neutral
• Brown: Live
The wire which is coloured BLUE must be con-
nected to the Terminal which is marked with the
letter “N” or coloured BLACK.
The wire which is coloured BROWN must be
connected to the Terminal which is marked with
the letter “L” or coloured RED.
It is important that the outer sheath is clamped
correctly into the 3-pin plug.
If in doubt consult your local Service Dealer or
qualified electrician before the machine is
used.
A 13 AMP FUSE MUST BE FITTED TO THE
MAINS
PLUG.
LECOLOGICO SPECIAL PARQUET
40
lecologico spec.parquet m0s07495 1m07.qxp 25/07/2006 17.25 Pagina 40
LECOLOGICO SPECIAL PARQUET
41
TROUBLE CAUSE SOLUTION
The vacuum cleaner does not
start
Lack of voltage Check cable, plug and socket
The vacuum cleaner switches
off during suction and the four
indicator lights flash
The liquid level in the container
is too high
The selected power is too high
for the type of surface
In both cases, press the main
switch (1), unplug the power ca-
ble and leave it unplugged for a
few seconds in order to reset
the safety device.
The suction power decreases The nozzle, hose or accesories
may be blocked up, or the Hepa
filter may be dirty.
Clean the Hepa filter and re-
move any obstructions from the
hose.
Water leaks during suction of
liquids
The float is obstructed Clean the filter assembly and
make sure that the water level
in the container is correct.
TT
TTRR
RROO
OOUU
UUBB
BBLL
LLEE
EESS
SSHH
HHOO
OOOO
OOTT
TTII
IINN
NNGG
GG
lecologico spec.parquet m0s07495 1m07.qxp 25/07/2006 17.25 Pagina 41

Other POLTI Vacuum Cleaner manuals

POLTI AIR TECH C100 User manual

POLTI

POLTI AIR TECH C100 User manual

POLTI FORZASPIRA D-POWER SR550 User manual

POLTI

POLTI FORZASPIRA D-POWER SR550 User manual

POLTI Vaporetto Lecospira Parquet User manual

POLTI

POLTI Vaporetto Lecospira Parquet User manual

POLTI vaporetto pro90 turbo User manual

POLTI

POLTI vaporetto pro90 turbo User manual

POLTI Vaporetto DIFFUSION User manual

POLTI

POLTI Vaporetto DIFFUSION User manual

POLTI Vaporetto Lecoaspira FAV 80 TURBO... User manual

POLTI

POLTI Vaporetto Lecoaspira FAV 80 TURBO... User manual

POLTI ASPIRA AS610 Parts list manual

POLTI

POLTI ASPIRA AS610 Parts list manual

POLTI VAPORETTO AIRPLUS User manual

POLTI

POLTI VAPORETTO AIRPLUS User manual

POLTI VAPORETTO COMFORT User manual

POLTI

POLTI VAPORETTO COMFORT User manual

POLTI Vaporetto FOCUS User manual

POLTI

POLTI Vaporetto FOCUS User manual

POLTI ASPIRA AS404 Parts list manual

POLTI

POLTI ASPIRA AS404 Parts list manual

POLTI Vaporetto Lecoaspira FAV 80 TURBO... User manual

POLTI

POLTI Vaporetto Lecoaspira FAV 80 TURBO... User manual

POLTI Vaporetto PTEU0313 User manual

POLTI

POLTI Vaporetto PTEU0313 User manual

POLTI LECOWATER Basic Parts list manual

POLTI

POLTI LECOWATER Basic Parts list manual

POLTI LECOLOGICO AS890 User manual

POLTI

POLTI LECOLOGICO AS890 User manual

POLTI Forzaspira Slim SR110 User manual

POLTI

POLTI Forzaspira Slim SR110 User manual

POLTI LECOLOGICO AS807 User manual

POLTI

POLTI LECOLOGICO AS807 User manual

POLTI LECOLOGICO SPECIAL ALLERGY Parts list manual

POLTI

POLTI LECOLOGICO SPECIAL ALLERGY Parts list manual

POLTI FORZASPIRA C 115 User manual

POLTI

POLTI FORZASPIRA C 115 User manual

POLTI CINDERELLA TRIO User manual

POLTI

POLTI CINDERELLA TRIO User manual

POLTI Forzaspira User manual

POLTI

POLTI Forzaspira User manual

POLTI Unico MCV20 User manual

POLTI

POLTI Unico MCV20 User manual

POLTI LECOASPIRA 690 User manual

POLTI

POLTI LECOASPIRA 690 User manual

POLTI VT SMART_AIRPLUS User manual

POLTI

POLTI VT SMART_AIRPLUS User manual

Popular Vacuum Cleaner manuals by other brands

LG VC4916N Series owner's manual

LG

LG VC4916N Series owner's manual

Vacmaster EATC608S Operator's manual

Vacmaster

Vacmaster EATC608S Operator's manual

Oreck Pro-12 manual

Oreck

Oreck Pro-12 manual

Eureka Oxygen 6994 owner's guide

Eureka

Eureka Oxygen 6994 owner's guide

INDASA E Series Translation of original operating instructions

INDASA

INDASA E Series Translation of original operating instructions

Protool VCP 260 E-L AC Original instruction / spare parts list

Protool

Protool VCP 260 E-L AC Original instruction / spare parts list

Enviromaster P4511HVAF-R Operating/safety instructions

Enviromaster

Enviromaster P4511HVAF-R Operating/safety instructions

Disan evo 200 user guide

Disan

Disan evo 200 user guide

Linea 2000 Domo DO7287S Instruction booklet

Linea 2000

Linea 2000 Domo DO7287S Instruction booklet

Samsung VS20A95943N user manual

Samsung

Samsung VS20A95943N user manual

Electrolux ZB 2901 manual

Electrolux

Electrolux ZB 2901 manual

Stirling EE-9248 instruction manual

Stirling

Stirling EE-9248 instruction manual

Eureka 940 Series owner's guide

Eureka

Eureka 940 Series owner's guide

Royal Appliance Dirt Devil antiinfective R9 operating manual

Royal Appliance

Royal Appliance Dirt Devil antiinfective R9 operating manual

Bissell CrossWave Cordless Max 2554 Series quick start guide

Bissell

Bissell CrossWave Cordless Max 2554 Series quick start guide

Makita BVC340 instruction manual

Makita

Makita BVC340 instruction manual

Philips FC 9104 Service manual

Philips

Philips FC 9104 Service manual

Electrolux ZSH710 operating instructions

Electrolux

Electrolux ZSH710 operating instructions

manuals.online logo
manuals.online logoBrands
  • About & Mission
  • Contact us
  • Privacy Policy
  • Terms and Conditions

Copyright 2025 Manuals.Online. All Rights Reserved.