Porter 00700-000 Instruction manual

INSTALLATION,OPERATION &MAINTENANCE MANUAL
M
ANUAL
W
INCH
No. 00700-000
INST 00045 032
2015 PORTER ATHLETIC, INC. ALL RIGHTS RESERVED. 5-27-2015
SAVE THESE INSTRUCTIONS FOR FUTURE USE
TIGHTEN SET SCREW SECURELY ON CABLE AS SHOWN
IMPORTANT NOTE - CABLE FEED ONTO DRUM MUST BE AS
SHOWN, WITH A MINIMUM OF THREE (3) WRAPS OF CABLE ON
DRUM WHEN BACKSTOP (OR DIVIDER CURTAIN) IS IN THE
FULL DOWN POSITION
1
2
4
6
5
AFTER FINAL ASSEMBLY AND TESTING OF
WINCH FOR PROPER OPERATION, MOUNT
COVER OVER WINCH ASSEMBLY AND
SECURE TO WOOD PAD USING FOUR (4)
SHEET METAL SCREWS PROVIDED
REFER TO MAINTENANCE REQUIREMENTS ON PAGE 6
READ AND FOLLOW
SAFETY AND MAINTENANCE
INSTRUCTIONS ON PAGES 5 & 6

2
458"858"
2116"
134"
5
Detail "A"
WOOD PAD SEEN
FROM FRONT SIDE
2'-6"
DRILL 9/16" DIA. HOLE,
COUNTERBORE
BACKSIDE OF PAD TO 114"
DIAMETER x 1/4" DEEP,
THREE (3) PLACES, FOR
CARRIAGE BOLTS
DRILLING DETAIL
FOR WINCH
MOUNTING HARDWARE
15
3
334"
WARNING
READ ALL INSTRUCTIONS THOROUGHLY BEFORE ATTEMPTING TO ASSEMBLE THIS EQUIPMENT.
PARTS LIST – No. 00700-000 MANUAL WINCH
Item Item
No. Qty. Description No. Qty. Description
1 1 Winch Assembly
2 1 Winch Cover 3 3 1/2" x 2" lg. Carriage Bolt w/ Lockwasher & Nut
4 4 #14 x 3/4" lg. Sheet Metal Screw
PARTS LIST – PACKING LIST ITEMS
Item No. Part No. Qty. Description
5 XPAD 21002 60B 1 2 x 10 Wood Pad x 2'-6" lg.
6 XCRK 70000 002 1 Crank Handle
MOUNT WINCH TO WOOD PAD
1. Drill and counterbore wood pad (5)
for securing winch assembly (1) to
wood pad. See Detail "A".
2. Mount winch assembly to wood pad
using three 1/2" x 2" lg. carriage
bolts, lockwashers and hex nuts.
Note – this hardware is packed with
the winch. See Detail "A".

3
Detail "B"
3" 8" 16"
2'-6"
.
912"
512"2"2"
8"6"
HEIGHT OF
WINCH
16"
7'-0"
MINIMUM DISTANCE
FROM BOTTOM
OF WINCH TO
FINISHED FLOOR
MINIMUM OF FOUR
ANCHORS REQUIRED -
SEE METHODS A, B OR C
IN DETAIL "C"
ANCHOR WOOD PAD / WINCH TO WALL
3. Before installing wood pad/winch assembly to
wall, verify exact location of winch with
owner or architect. In determining the exact
winch location, the following must be
considered:
The operator must have a clear view of
the equipment he/she is operating.
Anticipate path of cable between winch
and pulley(s). Structural members, lights,
ducts, drain pipes, etc. are potential
obstacles.
The path of the cable cannot cause it to
contact any part of the backstop mast
during the folding cycles.
Extensive cable travel will require
additional idler pulleys to support the
cable run.
Refer to separate installation manual supplied
with backstops, etc. for supplemental
information on winch location, cable routing,
etc.
4. Anchor wood pad/winch assembly (from Step
No. 2) to wall, using one of three suggested
anchor detail methods shown in Detail "C".
See Detail "B" for anchor spacing on wood
pad. Consult with architect or engineer to
verify wall capacity and to select appropriate
connections.
5. As an alternate, the winch can be mounted to
the face of a steel column (not shown).
EXISTING WALL (ANCHORS)
ADURING CONSTRUCTION EXISTING WALL (THRU-BOLT)
B C
Detail "C"
1/2"
GALVANIZED
MACHINE
BOLT
GALVANIZED
BUILDING
WASHER
212"
HOLD
FOR
WOOD
PAD
GALVANIZED
BUILDING
WASHER
1/2"
GALVANIZED
MACHINE
BOLT HOLD
FOR
WOOD
PAD
212"
ANCHORS
WITH
1/2" x 4" Lg.
LAG SCREW
WOOD PAD
(BY PORTER)
RAWL
MASONRY
ANCHORS
ONLY POSSIBLE AT TIME
THAT WALL IS CONSTRUCTED THRU-BOLTING FOR
CONCRETE OR MASONRY WALLS INSTALL ANCHORS INTO HORIZONTAL MORTAR JOINTS
ON SPACING AS SHOWN IN DETAIL "B". NEVER
INSTALL ANCHORS INTO OPEN CELL OF BLOCK.
NOTE - ALL HARDWARE FOR ATTACHING WOOD PAD TO WALL ARE BY OTHERS. VERIFY MATERIAL AND THICKNESS
OF WALL, AND USE APPROPRIATE HARDWARE / ANCHOR COMBINATION (MINIMUM 1/2" DIA. HARDWARE).

4
SECURE CABLE TO WINCH DRUM
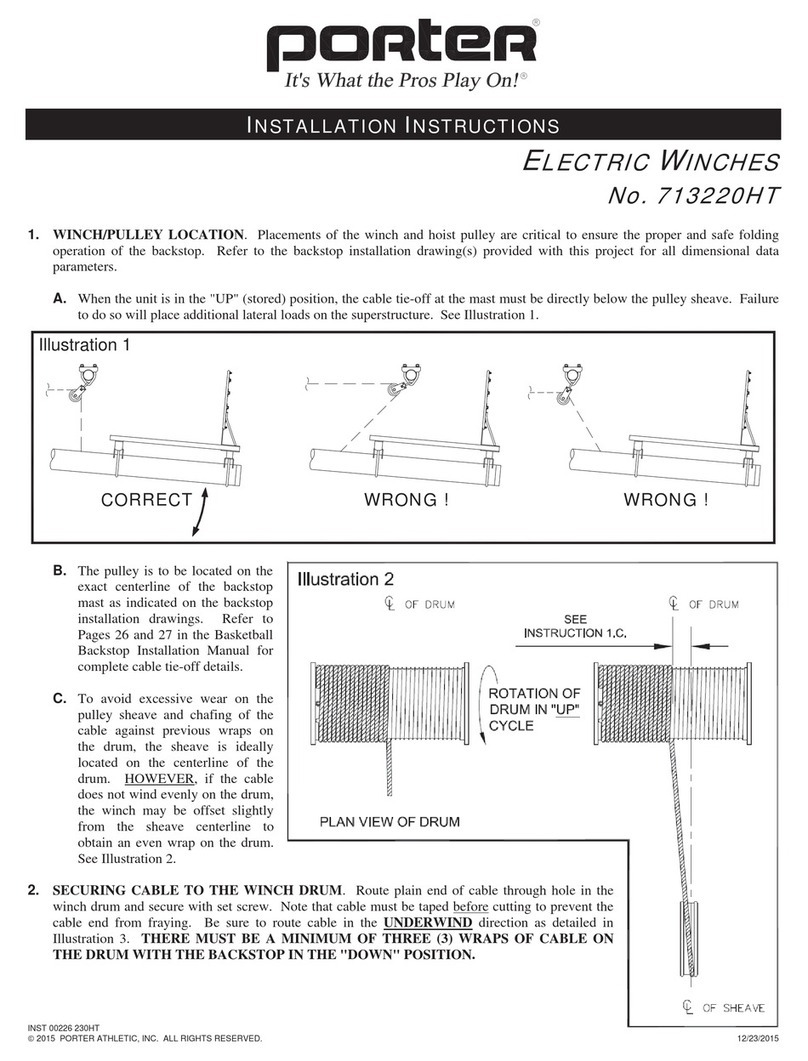
6. Route end of cable through hole in the winch drum and secure with set screw. Note that cable must be taped before cutting to
prevent the cable end from fraying. Be sure to route cable in the UNDERWIND direction as detailed on Page 1. THERE
MUST BE A MINIMUM OF THREE (3) WRAPS OF CABLE ON THE DRUM WITH THE BACKSTOP IN THE
"DOWN" POSITION.
7. Test winch for proper operation. Install winch cover to wood pad, using four (4) #14 x 3/4" lg. sheet metal screws provided with
winch. See detail on Page 1.
8. Refer to Maintenance note on Page 8.
9. Demonstrate operation of manual winch to customer. Emphasize safety precautions and maintenance requirements as detailed on
Pages 7 and 8.

5
MANUAL WINCH
LOCATION

6
MANUAL WINCH
LOADING DIAGRAM

7
WARNING
READ ALL WARNINGS THOROUGHLY BEFORE USING THIS EQUIPMENT.
FAILURE TO COMPLY WITH THE FOLLOWING INSTRUCTIONS AND WARNINGS MAY RESULT IN SERIOUS
INJURIES AND/OR PROPERTY DAMAGE.
This manual winch develops tremendous forces. Therefore, all backstops and divider curtains should be operated only by qualified
personnel, to avoid structural damage or possible injury to the operator and other individuals in the gymnasium.
Caution should be taken at all times for safety reasons, keeping the following guidelines in mind:
1. This winch is to be operated only by a trained adult.
2. Keep the area under the backstop or divider curtain (floor and bleachers) clear of all individuals when raising or lowering the
units.
3. Stop upward travel of backstop or divider curtain BEFORE contact with ceiling or support structure occurs.
4. Do NOT allow cable to become slack.
5. Operating handles or portable electric winch operators must be in the possession of responsible, trained personnel at all times.
6. Periodically inspect winch, cable, pulleys, safety straps, and all attachment points of stress for any signs of looseness, wear or
fatigue. Repair or replace immediately.
7. Inspect gear set every 3 to 4 months; and lubricate gears liberally with Pyroshield#5182 grease.
8. IMPORTANT – Drive shaft must turn clockwise (as shown on label) when backstop or divider curtain is being hoisted, in
order to place thrust against roller bearing. OPERATING THIS WINCH IN REVERSE WILL CREATE BINDING,
UNDUE WEAR, AND POSSIBLE WINCH FAILURE.
9. It is highly recommended that a safety strap mechanism be used on any backstop or divider curtain that operates over a
spectator bleacher. Consult factory or your local Porter dealer for details, if this unit was not included on the original
installation.
THE OWNER OF THIS EQUIPMENT IS RESPONSIBLE TO ENSURE THAT ALL INDIVIDUALS FOLLOW THESE
SAFETY AND OPERATING INSTRUCTIONS TO AVOID INJURIES OR PROPERTY DAMAGE. PROPER USE AND
SUPERVISION OF THIS EQUIPMENT IS ESSENTIAL TO HELP REDUCE THE POSSIBILITY OF ACCIDENTS OR
INJURIES.
WARNING
IMPROPER USE, INSPECTION OR MAINTENANCE OF THIS EQUIPMENT IS DANGEROUS AND COULD RESULT IN
STRUCTURAL DAMAGE TO EQUIPMENT, AND/OR SERIOUS INJURY, PARALYSIS OR DEATH TO THOSE IN THE
VICINITY OF THE EQUIPMENT.
WARNING
Use of Porter winches on products other than basketball backstops and gymnasium divider curtains is EXPRESSLY
PROHIBITED.

8
MAINTENANCE
Inspect this winch every three to four months. Check the gears for excessive wear or binding. Replace worn or defective parts as
necessary. Lubricate gears liberally, with Pyroshield#5182 grease.
601 Mercury Drive, Champaign, IL U.S.A. 61822
www.porterathletic.com
(888) 277-7778
THIS WARNING IS GIVEN IN COMPLIANCE
WITH CALIFORNIA’S PROPOSITION 65:
WARNING
This product contains chemicals known to the
State of California to cause cancer, birth defects
or other reproductive harm.
SAVE THESE INSTRUCTIONS FOR FUTURE USE
Table of contents
Other Porter Winch manuals
Popular Winch manuals by other brands

POWERWINCH
POWERWINCH PW2000 instruction manual

Superwinch
Superwinch H14W Fitting instructions

Harken
Harken Performa 50.2 STP Installation and maintenance manual

Lewmar
Lewmar C10 Capstan Owners installation, operation & servicing manual

Superwinch
Superwinch H10P owner's manual

Harken
Harken 35.2 PT Installation and maintenance manual