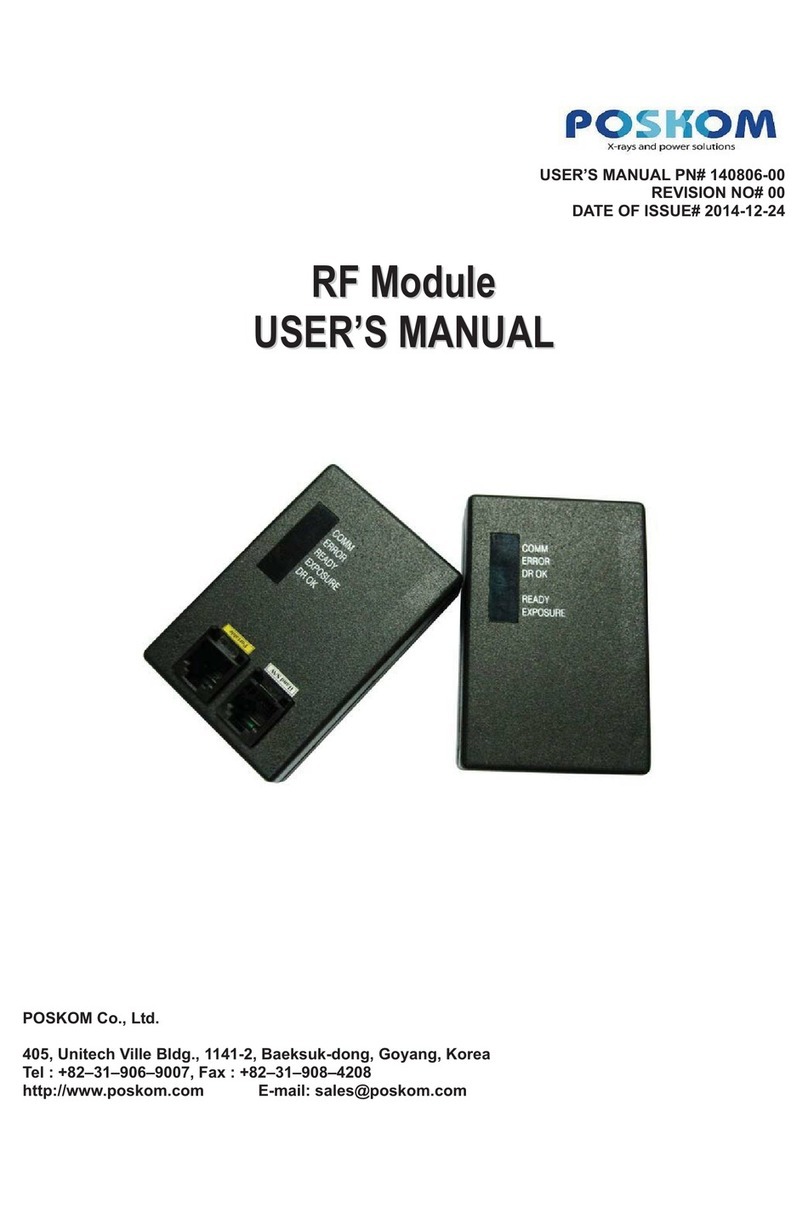
Poskom RF-1B User manual

G
G
USER’S MANUAL PN# 140806-00
REVISION NO# 00
DATE OF ISSUE# 2014-12-24
R
RF
F
M
Mo
od
du
ul
le
e
U
US
SE
ER
R’
’S
S
M
MA
AN
NU
UA
AL
L
POSKOM Co., Ltd.
405, Unitech Ville Bldg., 1141-2, Baeksuk-dong, Goyang, Korea
Tel : +82–31–906–9007, Fax : +82–31–908–4208
http://www.poskom.com E-mail: sales@poskom.com
All manuals and user guides at all-guides.com
all-guides.com

G
G
C
Co
on
nt
te
en
nt
t
1. Hardware Specification ....................................................................................................................................2
1.1 Connector...............................................................................................................................................................2
1.2 Status LED.............................................................................................................................................................4
1.3 Schematic..............................................................................................................................................................5
2. Setting ................................................................................................................................................................9
2.1 Frequency Channel................................................................................................................................................9
2.2 Net No..................................................................................................................................................................10
2.3 Option Function....................................................................................................................................................11
3. Communication Frame...................................................................................................................................13
3.1 Transmit Frame....................................................................................................................................................13
3.2ACK Frame...........................................................................................................................................................13
4. I/O Signal Control............................................................................................................................................14
4.1 Default Status.......................................................................................................................................................14
4.2 Signal Control.......................................................................................................................................................15
4.3ALIVE Check MODE............................................................................................................................................18
4.4 ERROR................................................................................................................................................................18
5. Supplement......................................................................................................................................................19
5.1 Label....................................................................................................................................................................19
5.2 RF CommunicationTiming Chart.........................................................................................................................20
5.3Antenna................................................................................................................................................................24
5.4 Link Wire..............................................................................................................................................................25
G
[ABBREVIATION]
MAIN R/F Main Module Communication
SUB R/F Sub Module Communication
RF Exposure Statement
This device and its antenna must not be collocated or operated in conjunction with any other
Antenna or transmitter.
To comply with FCC RF exposure requirements. Only use supplied antenna.
Any unauthorized modification to the antenna or device could void the user’s authority to operate
this device.
All manuals and user guides at all-guides.com

POSKOM Co.,Ltd.
RF Module User’s Manual PN# 140806-00 Rev.00 Page:1
O
Op
pe
er
ra
at
ti
io
on
na
al
lD
De
es
sc
cr
ri
ip
pt
ti
io
on
n
Product Description
{GGGymGUG G
pGGGGGGGGymTXiOthpuPGGymTYiOthpuVz|iPUG
iGGthpuGGz|iGGGG[ZZU^WWto¡G¥G[ZZU__^\t¡GGUG
GGGGto¡GGGGGGWUWXY\Gto¡GGz~YGGthpuGGz|iUG
G
thpuGGySGlGGGz|iUG
GGGGGoGzGGGGthpuGSGGGySGlGGGG
GGz|iUG
GGGGGhGGkyGvrGGGz|iSGthpuGGlGGGwGTGUG G
GGGGGkGGG\}SGG˅ GGwGTGUG
G
z|iGGGkyvrGGGthpuUG
GGGGhGGlGGGthpuSGGGkyGlwGpuGGGUG G
GGGGhGGkyGvrGGGGSGGGGGthpuUG
GGGGkGGG\}SGG˅ GGGUG
G
{GGtkXGGGGGG|omGGSGGGGG
GGSGGGGGGGGUG G
{GGGGGGG[ZZto¡GGUG G
{GGtkXGGGGG[ZZto¡GGUG G
G
G
G
G
FCC ID
RF-1B V5K–RF–1B
RF-2B V5K–RF–2B
Poskom Co., Ltd.
All manuals and user guides at all-guides.com

POSKOM Co.,Ltd.
Page:2 PN# 140806-00 Rev.00 RF Module User’s ManualG
1
1
1.
.
.H
H
Ha
a
ar
r
rd
d
dw
w
wa
a
ar
r
re
e
eS
S
Sp
p
pe
e
ec
c
ci
i
if
f
fi
i
ic
c
ca
a
at
t
ti
i
io
o
on
n
n
1.1 Connector
1) RF-1B(MAIN)
G
Part_No Specification PIN Remark
CN1
DEK623PCB-
TI
(6P4C)
01 Pin : GND
Connect to Hand S/W
02 Pin : Exposure Signal (Hand S/W)
03 Pin : GND
04 Pin : Ready Signal (Hand S/W)
CN2
DEK623PCB-
TI
(6P6C)
01 Pin : Not Use
Connect to Portable X-ray
unit Hand S/W connector
02 Pin : GND
03 Pin : DR-OK Signal
(RF Module Main Signal - Exposure)
04 Pin : GND
05 Pin : Ready Signal (Hand S/W)
06 Pin : +5VDC
JTAG1 53261-08P
01 Pin : TCK
Firmware Download
Connector
02 Pin : GND
03 Pin : TDO
04 Pin : VCC
05 Pin : TMS
06 Pin : /RESET
07 Pin : TDI
08 Pin : GND
G
All manuals and user guides at all-guides.com

POSKOM Co.,Ltd.
RF Module User’s Manual PN# 140806-00 Rev.00 Page:3
G
2) RF-2B(SUB)
Part No. Specification PIN Remark
CN1 53261-15P
01 Pin : +5VDC Input Voltage
02 Pin : GND
03 Pin : RF ON Signal Input Signal (MAIN Mode)
04 Pin : Ready Signal (Hand S/W) Input Signal (MAIN Mode)
05 Pin : GND
06 Pin : Exposure Signal (Hand S/W) Input Signal (MAIN Mode)
07 Pin : DR-OK Signal Input Signal (SUB Mode)
08 Pin : Ready Signal Output Signal (MAIN Mode)
09 Pin : GND
10 Pin : DR-OK Signal Output Signal (MAIN Mode)
11 Pin : Ready Signal Output Signal (SUB Mode)
12 Pin : Exposure Signal Output Signal (SUB Mode)
13 Pin : RS232 - RX RS232 RX
14 Pin : RS232 - TX RS232 TX
15 Pin : GND
JTAG1 53261-08P
01 Pin : TCK
Firmware Download
Connector
02 Pin : GND
03 Pin : TDO
04 Pin : VCC
05 Pin : TMS
06 Pin : /RESET
07 Pin : TDI
08 Pin : GND
All manuals and user guides at all-guides.com

POSKOM Co.,Ltd.
Page:4 PN# 140806-00 Rev.00 RF Module User’s ManualG
1.2 Status LED
1) RF-1B(MAIN)
You can control On/Off of Ready, Exposure Status only with Hand S/W.
2) RF-2B(SUB)
Symbol LED
No. Color Mean
COMM LED5 Green
RF MAIN, SUB
Linked
ERROR LED6 Red
RF MAIN, SUB
Communication Error
READY LED7 Orange Input
Hand S/W Ready
EXPOSURE LED8 Orange Input
Hand S/W Exposure
DR OK LED9 Red Output
Receive DR OK Signal
Symbol LED
No. Color Mean
COMM LED7 Green
RF MAIN, SUB
Linked
ERROR LED8 Red
RF MAIN, SUB
Communication Error
DR OK LED9 Orange
Input
DR OK Signal
from DR System
READY LED14 Red
Output
Receive Ready
EXPOSURE LED15 Red
Output
Receive Exposure
All manuals and user guides at all-guides.com
all-guides.com

POSKOM Co.,Ltd.
RF Module User’s Manual PN# 140806-00 Rev.00 Page:5
1.3 Schematic
G
1) PXMRF_1A ( MAIN )
G
All manuals and user guides at all-guides.com

POSKOM Co.,Ltd.
Page:6 PN# 140806-00 Rev.00 RF Module User’s ManualG
G
All manuals and user guides at all-guides.com

POSKOM Co.,Ltd.
RF Module User’s Manual PN# 140806-00 Rev.00 Page:7
2) PXMRF_2A ( SUB )
G
All manuals and user guides at all-guides.com

POSKOM Co.,Ltd.
Page:8 PN# 140806-00 Rev.00 RF Module User’s ManualG
G
G
G
All manuals and user guides at all-guides.com

POSKOM Co.,Ltd.
RF Module User’s Manual PN# 140806-00 Rev.00 Page:9
2
2
2.
.
.S
S
Se
e
et
t
tt
t
ti
i
in
n
ng
g
g
You can change Frequency Channel or Net No. and Option Function with DIP SW(SW1, SW2).
( * If you changed SW1 status, do not forget to push RST1(Reset). )
2.1 Frequency Channel
Initial frequency is configured to 433.7000MHz (Ch 01). If you would like other channels, you can change
the channels with SW2 (1,2,3,4). There are totally 16 channels - No.1 (433.7000MHz)~
No.16(433.8875MHz) -, frequency of each channel interval is 0.0125MHz.
Channel
(Ch)
Frequency
(MHz)
SW2 ( = ON , = OFF )
1234 5 6 7 8
01 433.7000 - - - -
02 433.7125 - - - -
03 433.7250 - - - -
04 433.7375 - - - -
05 433.7500 - - - -
06 433.7625 - - - -
07 433.7750 - - - -
08 433.7875 - - - -
09 433.8000 - - - -
10 433.8125 - - - -
11 433.8250 - - - -
12 433.8375 - - - -
13 433.8500 - - - -
14 433.8625 - - - -
15 433.8750 - - - -
16 433.8875 - - - -
All manuals and user guides at all-guides.com
all-guides.com

POSKOM Co.,Ltd.
Page:10 PN# 140806-00 Rev.00 RF Module User’s ManualG
2.2 Net No.
Initial Net No. is configured to No.01. If you would like other Net No., you can change the Net No. with
SW2 (5,6,7,8). There are totally 16 Net No. – No.01~ No.16 like channels. You can configure 16 Net No.
with one channel.
Net No.
SW2 ( = ON , = OFF )
1 2 3 4 5 6 7 8
No. 01 - - - -
No. 02 - - - -
No. 03 - - - -
No. 04 - - - -
No. 05 - - - -
No. 06 - - - -
No. 07 - - - -
No. 08 - - - -
No. 09 - - - -
No. 10 - - - -
No. 11 - - - -
No. 12 - - - -
No. 13 - - - -
No. 14 - - - -
No. 15 - - - -
No. 16 - - - -
All manuals and user guides at all-guides.com

POSKOM Co.,Ltd.
RF Module User’s Manual PN# 140806-00 Rev.00 Page:11
2.3 Option Function
1) RF-1B (SW1)
Pin
Number Setting Information Remark
1
OFF -
ON Not Use
2
OFF -
ON Not Use
3
OFF -
ON Certification Test Mode use
(500ms RF COMM. Send)
4
OFF -
ON -
2) RF-2B (SW1)
Pin
Number Setting Information Remark
1
OFF RF ON Signal Use MAIN Mode Setting
ON RF ON Signal Not use SUB Mode Setting
2
OFF MAIN Mode Setting
ON SUB Mode Setting
3
OFF -
ON Certification Test Mode use
(500ms RF COMM. Send)
4
OFF -
ON Ready Signal Control (to Portable)
All manuals and user guides at all-guides.com

POSKOM Co.,Ltd.
Page:12 PN# 140806-00 Rev.00 RF Module User’s ManualG
3) RF-2B MAIN mode, SUB mode Chang
Dip Switch (SW1)
- MAIN Mode Set (Portable In type)
Pin
Number Setting
1 OFF
2 OFF
3 OFF
4 OFF
- SUB Mode Set (External Type)
Pin
Number Setting
1 ON
2 ON
3 OFF
4 OFF
4) RF-2B MAIN mode Ready Signal Control
Hand Switch(Ready Signal) ON the power to Portable X-ray Unit
Dip Switch (SW1) – Pin 4 ON (Off : Not Use)
Pin
Number Setting
1 ON
2 ON
3 OFF
4 ON
All manuals and user guides at all-guides.com

POSKOM Co.,Ltd.
RF Module User’s Manual PN# 140806-00 Rev.00 Page:13
3
3
3.
.
.C
C
Co
o
om
m
mm
m
mu
u
un
n
ni
i
ic
c
ca
a
at
t
ti
i
io
o
on
n
nF
F
Fr
r
ra
a
am
m
me
e
e
G
3.1 Transmit Frame
ࢂ
ࢃ
ࢄ
ࢅ
ࢆ
ࢇ
Preamble Net No. Packet ID Data Check
Sum
Post
dummy
length (byte) 6 1 1 1 1 3
Total length
(byte) 13
ࢂPreamble (6 byte) : 0x55 + 0x55 + 0x55 + 0x55 + 0x55 + 0xff
ࢃNet No. (1 byte) : Configuration value of SW2(5,6,7,8).
ࢄPacket ID (1 byte) : ID for distinguishing Main and Sub.
ࢅData (1 byte) : * RF-1B(MAIN) – Hand S/W status(Ready, Exposure, Off)
* RF-2B(SUB) - DR OK
ࢆCheck Sum (1 byte) : Detect of Data Error, Check Sum = ࢃ+ ࢄ+ ࢅ
ࢇPost dummy (3 byte) : 0xff + 0xff + 0xff
3.2 ACK Frame
ࢂ
ࢃ
ࢄ
ࢅ
ࢆ
Preamble Net No. Packet ID Check Sum Post dummy
Length (byte) 6 1 2 1 3
Total length
(byte) 13
ࢂPreamble (6 byte) : 0x55 + 0x55 + 0x55 + 0x55 + 0x55 + 0xff
ࢃNet No. (1 byte) : Configuration value of SW2(5,6,7,8).
ࢄPacket ID (2 byte) : ID for distinguishing MAIN and SUB.( PID + PID )
ࢅCheck Sum (1 byte) : Detect of Data Error, Check Sum = ࢃ+ ࢄ+ ࢅ
ࢆPost dummy (3 byte) : 0xff + 0xff + 0xff
All manuals and user guides at all-guides.com

POSKOM Co.,Ltd.
Page:14 PN# 140806-00 Rev.00 RF Module User’s ManualG
4
4
4.
.
.I
I
I/
/
/O
O
OS
S
Si
i
ig
g
gn
n
na
a
al
l
lC
C
Co
o
on
n
nt
t
tr
r
ro
o
ol
l
l
4.1 Default Status
1) In case of turning RF-1B(MAIN) On
When RF-2B(SUB) power is OFF, as you turn RF-1B(MAIN) power On, ERROR(LED6) of
RF-1B(MAIN) is turned on.
2) In case of turning RF-2B(SUB) On
When RF-1B(MAIN) power if OFF, as you turn RF-2B(SUB) power on, ERROR(LED8) of RF-2B(SUB)
is turned on.
3) In case of turning RF-1B(MAIN) On in ‘1)’or ‘2)’ status
ྙin case of RF-1B(MAIN) of ‘1)’: ERROR(LED6) is turned off and COMM(LED5) is turned on within
5sec. .
ྚin case of RF-2B(SUB) of ‘2)’: ERROR(LED8) is turned off and COMM(LED7) is turned on within
10sec.
Part COMM ERROR READY EXPOSURE DR OK -
LED5 LED6 LED7 LED8 LED9 -
RF-1B(MAIN) OFF ON OFF OFF OFF -
Part COMM ERROR DR OK - READY EXPOSU
RE
LED7 LED8 LED9 - LED14 LED15
RF-2B(SUB) OFF OFF OFF - OFF OFF
Part COMM ERROR READY EXPOSURE DR OK -
LED5 LED6 LED7 LED8 LED9 -
RF-1B(MAIN) OFF OFF OFF OFF OFF -
Part COMM ERROR DR OK - READY EXPOSU
RE
LED7 LED8 LED9 - LED14 LED15
RF-2B(SUB) OFF ON OFF - OFF OFF
Part COMM ERROR READY EXPOSURE DR OK -
LED5 LED6 LED7 LED8 LED9 -
RF-1B(MAIN) ON OFF OFF OFF OFF -
Part COMM ERROR DR OK - READY EXPOSURE
LED7 LED8 LED9 - LED14 LED15
RF-2B(SUB) ON OFF OFF - OFF OFF
All manuals and user guides at all-guides.com
all-guides.com

POSKOM Co.,Ltd.
RF Module User’s Manual PN# 140806-00 Rev.00 Page:15
4.2 Signal Control
Whenever transmission connection status is normal between RF-1B(MAIN) and RF-2B(SUB) and
there is a change on Hand S/W condition basically, Signal Control treats Signal by creating transmission
Frame.
1) Ready Signal
ࢂ
RF-1B(MAIN)
When Ready S/W of Hand S/W is pushed, Ready Signal is inputted to RF-1B(MAIN) and X-Ray
Generator. Then, READY(LED7) of RF-1B(MAIN) is turned on, and MAIN creates transmission
Frame about Ready Signal and transmit it to RF-2B(SUB). Then, it waits for Receipt OK(ACK) Signal
of Ready Signal from RF-2B(SUB).
If it fails to receive Receipt OK(ACK) after transmitting Ready Signal, retry to transmit Ready Signal 5
times. If it fails again, considering it to Error, ERROR(LED6) is turned on.
- This is normal status when you push READY S/W of Hand S/W
- Status of not receiving Receipt OK(ACK) Signal according to Ready Signal transmission
ࢃ
RF-2B(SUB)
When Ready Signal is received from RF-1B(MAIN), READY(LED14) is turned on. And SUB transmits
Receipt OK(ACK) Signal of Ready Signal to RF-1B(MAIN).
- This is normal status of receiving Ready Signal
Part COMM ERROR READY EXPOSURE DR OK -
LED5 LED6 LED7 LED8 LED9 -
RF-1B(MAIN) ON OFF ON OFF OFF -
Part COMM ERROR READY EXPOSURE DR OK -
LED5 LED6 LED7 LED8 LED9 -
RF-1B(MAIN) OFF ON ON OFF OFF -
Part COMM ERROR DR OK - READY EXPOSURE
LED7 LED8 LED9 - LED14 LED15
RF-2B(SUB) ON OFF OFF - ON OFF
All manuals and user guides at all-guides.com

POSKOM Co.,Ltd.
Page:16 PN# 140806-00 Rev.00 RF Module User’s ManualG
2) Exposure Signal
When ‘1) Ready Signal’ handling is finished and Ready S/W of Hand S/W and Exposure S/W are
pushed, Exposure Signal is transmitted from RF-1B(MAIN) to RF-2B(SUB).
ࢂ
RF-1B(MAIN)
When Exposure S/W of Hand S/W is pushed, EXPOSURE(LED8) is turned on, and MAIN creates
transmission Frame about Exposure Signal, transmits it to RF-2B(SUB), and waits for Receipt
OK(ACK) Signal from RF-2B(SUB).
If it fails to receive Receipt OK(ACK) for 240ms after transmitting Exposure Signal, retry to send it 5
times. If it fails again, consider it to Error and ERROR(LED6) is turned on.
- This is normal status when you push Exposure S/W of Hand S/W. (in case of pushing Ready S/W)
- This is no receipt status of Receipt OK(ACK) Signal from Exposure Signal transmission
ྚ
RF-2B(SUB)
When Exposure Signal is received from RF-1B(MAIN), EXPOSURE(LED15) is turned on, and SUB
transmits Receipt OK(ACK) Signal of Exposure Signal to RF-1B(MAIN).
At the same time, Exposure Trans Line 1,2 of CN1-12Pin, 15Pin are Closed, and give Exposure
Signal to DR System. While Exposure S/W of Hand S/W is pushed, they are Closed, and when it is
released, they become Open. (Signal of contacting point : On=Close, Off=Open)
If DR OK Signal is occurred from DR System, ignore Receipt OK(ACK) of Exposure Signal, and
create transmission Frame of DR OK Signal and transmit it to RF-1B(MAIN). (refer to - ’4.2-3)DR OK
Signal’)
- This is normal status of receiving Exposure Signal.
- In case of DR OK Signal
Part COMM ERROR READY EXPOSURE DR OK -
LED5 LED6 LED7 LED8 LED9 -
RF-1B(MAIN) ON OFF ON ON OFF -
Part COMM ERROR READY EXPOSURE DR OK -
LED5 LED6 LED7 LED8 LED9 -
RF-1B(MAIN) OFF ON ON ON OFF -
Part COMM ERROR DR OK - READY EXPOSURE
LED7 LED8 LED9 - LED14 LED15
RF-2B(SUB) ON OFF OFF - ON ON
Part COMM ERROR DR OK - READY EXPOSURE
LED7 LED8 LED9 - LED14 LED15
RF-2B(SUB) ON OFF ON - ON ON
All manuals and user guides at all-guides.com

POSKOM Co.,Ltd.
RF Module User’s Manual PN# 140806-00 Rev.00 Page:17
3) DR OK Signal
When ‘2) Exposure Signal’ handling is finished and, DR OK Signal occurs from DR System, DR OK
Signal is transmitted from RF-2B(SUB) to RF-1B(MAIN).
ࢂ
RF-2B(SUB)
If Exposure Signal maintains from RF-1B(MAIN), and DR OK Signal occurs from DR System, at the
same time DR OK(LED9) is turned on, and SUB creates transmission Frame of DR OK Signal and
transmits it to RF-1B(MAIN). Then, it waits for Receipt OK(ACK) Signal from RF-1B(MAIN).
If Receipt OK(ACK) Signal is not received for 240ms after transmitting DR OK Signal, retry to
transmit DR OK Signal 5 times. If it fails again, consider it to Error, then ERROR(LED8) is turned on.
- This is the status of DR OK Signal occurrence
ྚ
RF-1B(MAIN)
When Hand S/W EXPOSURE is pushed and DR OK Signal is received from RF-2B(SUB) DR
OK(LED9) is turned on, and MAIN transmits Receipt OK(ACK) Signal to RF-2B(SUB).
At the same time, send Exposure Signal to X-Ray Generator.
If Exposure S/W of Hand S/W is pushed and DR OK Signal is Off or out of transmission range in
condition of received as RF-1B(MAIN), 5 sec. later, COMM(LED5) of RF-1B(MAIN) and DR
OK(LED9) are turned off and ERROR(LED6) is turned on.
- This is normal status of receiving DR OK Signal (in case of, Ready S/W, Exposure S/W are pushed)
-RF-2B(SUB) Power Off or out of transmission range status during processing DR OK Signal
receiving.
Part COMM ERROR DR OK - READY EXPOSURE
LED7 LED8 LED9 - LED14 LED15
RF-2B(SUB) ON OFF ON - ON ON
Part COMM ERROR READY EXPOSURE DR OK -
LED5 LED6 LED7 LED8 LED9 -
RF-1B(MAIN) ON OFF ON ON ON -
Part COMM ERROR READY EXPOSURE DR OK -
LED5 LED6 LED7 LED8 LED9 -
RF-1B(MAIN) OFF ON ON ON OFF -
All manuals and user guides at all-guides.com

POSKOM Co.,Ltd.
Page:18 PN# 140806-00 Rev.00 RF Module User’s ManualG
4.3 ALIVE Check MODE
This is to check the transmission connection when there is no Hand S/W Signal in RF-1B(MAIN) or
power is off in status of normal transmission connection between RF-1B(MAIN) and RF-2B(SUB).
1) RF-1B(MAIN)
In case that there is no Signal input of Ready S/W of Hand S/W or Exposure S/W for 5sec. MAIN
transmits present Hand S/W condition (Ready, Exposure, Off) to RF-2B(SUB), then waits for its
Receipt OK(ACK) Signal.
If it fails to receive Receipt OK(ACK) Signal, retry to transmit 5 times. If it fails again, considering it to
Error, COMM(LED5) is turned off, and ERROR(LED6) is turned on.
2) RF-2B(SUB)
When there is no transmission Signal from RF-1B(MAIN) for 10sec., considering it to Error,
COMM(LED7) is turned off and ERROR(LED8) is turned on.
4.4 ERROR
1) RF-1B(MAIN)
Whenever is there is a change in Hand S/W condition (Ready, Exposure, Off), MAIN transmits the
condition to RF-2B(SUB). Or when there is no change in Hand S/W for 5sec. MAIN transmits present
Hand S/W condition to (Alive check mode) and waits for its Receipt OK(ACK) Signal.
If it fails to receive Receipt OK(ACK) Signal, retry to transmit 5 times. If it fails again, considering it to
ERROR, COMM(LED5) is turned off, and ERROR(LED6) is turned on.
2) RF-2B(SUB)
When there is no Signal for 10sec. after transmitting Receipt OK(ACK) Signal received from
RF-1B(MAIN) or transmitting DR OK Signal to RF-1B (MAIN), COMM(LED7) is turned off and
ERROR(LED4) is turned on.
3) ERROR release
When there is normal transmission connecting status after handling Error, RF-1B(MAIN) and
RF-2B(SUB) - ERROR(LED8)- are turned off and COMM(LED7) is turned on.
All manuals and user guides at all-guides.com
Other manuals for RF-1B
1
This manual suits for next models
1
Table of contents
Other Poskom Transceiver manuals
Popular Transceiver manuals by other brands

Crestron
Crestron infiNET Gateway C2N-MNETGW Operation guide

G&D
G&D NEO-FiberLink-2 installation guide

Flightcell
Flightcell DZMx Plus installation manual

Fluidmesh
Fluidmesh 4200 FIBER Installation and configuration manual

Standard Horizon
Standard Horizon HX751 owner's manual

Altronix
Altronix HubSat4DV installation guide