manuals.online logo
Brands
  1. Home
  2. •
  3. Brands
  4. •
  5. Potterton
  6. •
  7. Boiler
  8. •
  9. Potterton Prorile Prima 30e User manual

Potterton Prorile Prima 30e User manual

Supplied By www.heating spares.co Tel. 0161 620 6677
30e, 40e, 50e, 60e, & 80e
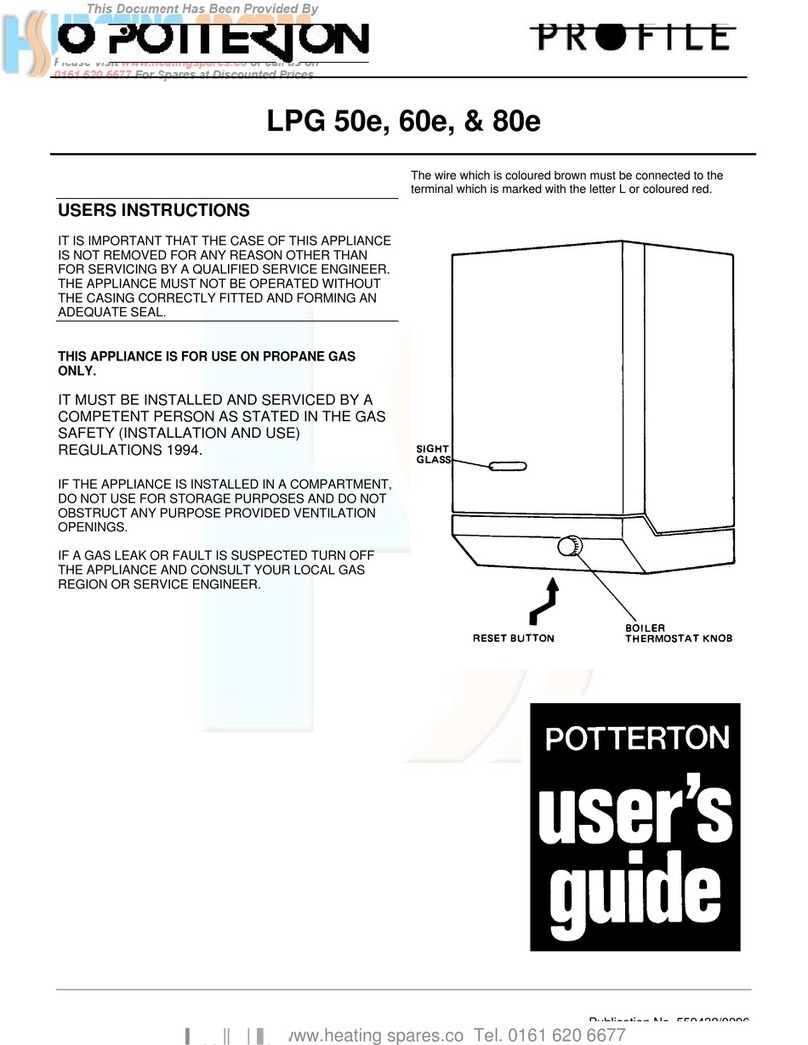
USERS INSTRUCTIONS
IT IS IMPORTANT THAT THE CASE OF THIS
APPLIANCE IS NOT REMOVED FOR ANY
REASON OTHER THAN FOR SERVICING BY A
QUALIFIED SERVICE ENGINEER. THE
APPLIANCE MUST NOT BE OPERATED
WITHOUT THE CASING CORRECTLY FITTED
AND FORMING AN ADEQUATE SEAL.
THIS APPLIANCE IS FOR USE ON NATURAL GAS
ONLY.
IT MUST BE INSTALLED AND SERVICED BY A
COMPETENT PERSON AS STATED IN THE GAS
SAFETY (INSTALLATION AND USE) REGULATIONS
1994.
IF THE APPLIANCE IS INSTALLED IN A COMPARTMENT,
DO NOT USE FOR STORAGE PURPOSES AND DO NOT
OBSTRUCT ANY PURPOSE PROVIDED VENTILATION
OPENINGS.
IF A GAS LEAK OR FAULT IS SUSPECTED TURN OFF
THE APPLIANCE AND CONSULT YOUR LOCAL GAS
REGION OR SERVICE ENGINEER.
Supplied By www.heating spares.co Tel. 0161 620 6677
INTRODUCTION
The information given on this card will help you to obtain the
maximum comfort from your boiler with the minimum trouble and
cost. Your boiler is fully automatic in operation and requires very
little attention apart from setting the thermostat.
Regular skilled servicing is required to maintain the safe and
efficient operation of your boiler throughout its long working life.
Further information on this subject is given at a later stage.
ELECTRICITY SUPPLY
WARNING: THIS APPLIANCE MUST BE EARTHED
Connection shall be made to a 240V-50 Hz supply. The appliance
must be protected by a 3 amp fuse if a 13 amp (B51363) plug is
used or if any other type of plug is used by a 5 amp fuse in the
circuit.
TO CONNECT A PLUG
As the colour of the wires in the mains lead of the appliance may
not correspond with the coloured markings identifying the
terminals in your plug, proceed as follows:-
The wire which is coloured green-and-yellow must be connected to
the terminal in the plug which is marked with the letter E or by the
earth symbol or coloured green or green-and-yellow.
The wire which is coloured blue must be connected to the terminal
which is marked with the letter N or coloured black.
The wire which is coloured brown must be connected to the
terminal which is marked with the letter L or coloured red.
SAFETY
The boiler should have the following minimum clearances for
Safety and Maintenance, 610mm (2ft) at the front of the boiler,
5mm (3116in) each side, 100mm (4in) at the bottom, 50mm (2in)
at the top.
Flammable materials must not be stored in close proximity to the
boiler.
Ensure that the flue terminal outside the house, does not become
obstructed, particularly by foliage.
THE BOILER THERMOSTAT
The boiler thermostat enables you to control the temperature of
the water as it leaves the boiler and is also used for turning the
boiler on and off. The thermostat knob can be set to 0 (OFF),
1,2,3,4,5 or Max. The graduations 1 to Max. correspond
approximately to a temperature range of 55C to 82 C (130F -
180F).
During the summer months, when the boiler is only being used to
supply stored domestic hot water and there is no independent hot
water temperature control, the thermostat can be set to position 1
or 2 which will probably be hot enough for bathing or washing up
requirements. For washing clothes, a higher setting may be
necessary.
In winter weather, when central heating is required, the thermostat
knob can be turned up higher but it must be remembered that
unless the temperature of the water in the domestic hot water
cylinder is independently controlled, the stored hot water could be
at a temperature that could scald, i.e. about 82C (180°F).
OTHER CONTROLS
A Potterton Electronic Programmer or other type of clock may
have been fitted in your system, together with room and/or cylinder
thermostats. Full instructions on the use of these controls should
be supplied with them.
TO LIGHT
1. Ensure that the boiler thermostat knob is at ‘0’ (fully anti-
clockwise).
2. Switch ‘ON’ the main electricity supply.
3. Ensure the electronic programmer or other time control, if
fitted, is in an ‘ON’ period (refer to time control literature).
4. Ensure that any room and/or cylinder thermostats are at a
high temperature setting.
Proceed as follows:— Turn the boiler thermostat on and to the
required setting. After a short period, the boiler will light: the main
burner can be seen through the sight glass on the front of the
boiler. Set the time control and any thermostats, where fitted, to
their desired settings.
NOTE:- When the boiler is first lit, there may be a slight smell. This
will disappear with use.
TO SHUT THE BOILER OFF
Turn the boiler thermostat knob to ‘0’, or switch the external
programmer to the ‘OFF’ position. To relight the boiler, simply turn
the boiler thermostat ‘ON’ or switch tile programmer to the ‘ON’
position.
FOR LONGER SHUT DOWN PERIODS
Turn the boiler thermostat to ‘0’, isolate the electrical supply at the
isolating switch, or pull the plug out of its socket.
NOTE:
If the system is fitted with a low limit thermostat and protection of
the system is required during cold weather, all that is required is
for the programmer to be turned to the ‘OFF’ position. This will
allow the boiler to cycle if the temperature within the house
becomes too low.
IMPORTANT
Gas and electricity are required to operate your boiler. Its
performance will not be affected by normal variation in gas or
electricity supply, but a gas or electricity failure will put the boiler
out of operation. It will automatically re-start when the supply is
restored, provided that the time clock and/or thermostats are in an
‘ON’ position.
In the event of your boiler not working, there are several checks
you should carry out before calling in a service engineer, as this
could save you unnecessary expense.
1Check that the gas, electricity and water are all turned on at
the main supply.
2. Check that the time control, if fitted, is in an ‘ON’ period.
Supplied By www.heating spares.co Tel. 0161 620 6677
3. Check that all the thermostats in the system are not on low
settings.
4. Overheat Limit Thermostat
The boiler is fitted with a safety thermostat to protect
against overheating of the water. Should the boiler fail to light,
allow it to cool and press the reset button. Access to the
button is through a hole in the underside of the controls cover,
see illustration on front page. If the problem persists, turn off
the boiler and consult your local Gas Region or Service
Engineer.
NOTE: Interruption of the electrical supply to the boiler may also
cause the overheat thermostat to operate.
Having checked these points, run through the lighting procedure
once more and if the boiler still fails to light, call in your local
service engineer.
FROST PRECAUTIONS
If your boiler has to be shut down for several hours or more during
very cold weather, it may be in danger of freezing, due to its
position, i.e. it may be in an outhouse or part of the pipework may
be vulnerable to frost. To avoid freezing, various methods of
protection can be used:-
1. Insulation of the boiler and pipework, taking care not to
impede any ventilation or air supply.
2. Completely draining the water system if not in use for long
periods. On a sealed system, draining and refilling must be
carried out by a competent person, e.g. your Service
Engineer.
NOTE:
Although the system can be emptied by using the drain-off taps
installed in the pipework around the system, to empty the boiler, it
is necessary to remove the drain tap which is situated within the
boiler case. This operation is best left to your Service Engineer.
3. Having a low limit thermostat fitted. Seek advice from your
installer.
NOTE:
If a low limit thermostat has been fitted, it cannot operate if the
boiler is completely shut down and the electricity is turned off. In
this instance, the system will have no protection and one of the
other methods must be used.
4. Where no frost protection is provided it may be necessary to
run the boiler at low thermostat settings at times when it would
normally be shut off.
CLEANING THE OUTSIDE OF THE BOILER CASING
The outside of the boiler casing can be wiped when necessary by
using a damp cloth to remove finger marks etc. Do not use an
abrasive as this may damage the casing finish.
CARE OF YOUR BOILER AND SYSTEM DURING THE
GUARANTEE PERIOD AND BEYOND
See Back Page
Supplied By www.heating spares.co Tel. 0161 620 6677
Publication No. 559430/0296
CARE OF YOUR BOILER AND SYSTEM DURING THE GUARANTEE PERIOD AND BEYOND
1. Registration of Purchase
It is important to register the purchase of your Potterton
boiler to ensure you receive prompt and efficient handling in
the event your boiler requires attention during the guarantee
period.
To register your guarantee simply complete and detach the
Registration of Purchase form enclosed with these
instructions. It is important to include details of your installer
(if known) and to return the completed form to the Potterton
Registration Department.
2. During the Guarantee Period
In the event of any problems with your system or the
operation of your boiler, you should first call your installer.
If there is a fault with the boiler under guarantee which your
installer is unable to rectify, he will call Potterton Service
Operations. For 12 months after the date of installation of the
boiler (or 18 months from the date of manufacture, whichever
is the shorter), Potterton will attend to any manufacturing
defect, on the appliance only (not the system or ancillary
controls), free of charge for parts and labour, subject to there
being no misuse or abuse. This does not affect your statutory
rights.
Service visits by Potterton Service Operations outside the
terms of the boiler guarantee will be charged for both parts
and labour at our normal rates for chargeable work.
During the period of the boiler guarantee, Potterton will only
be responsible for the costs of work done by them or on their
instructions by their Agent. We cannot accept any liability for
expenditure or work done by other parties without our
knowledge and/or approval.
3. Safety Check/Routine Maintenance
It is strongly recommended you have your boiler checked
annually for safety and to have routine maintenance. This
should be carried out by a CORGI Registered
Installer/Service Agent or Potterton Service Operations to
comply with the requirements of the Gas Safety (Installation
and Use) Regulations 1994
4. Boiler Breakdown Insurance
We are pleased to offer you the opportunity to protect your
investment once your boiler guarantee has expired, by the
payment of an annual premium. You can continue with this
insurance for the normal life of your boiler and you will find a
special 30 day introductory offer for second year cover
together with a card to register your purchase, as part of the
‘User Pack’ supplied with your boiler.
If you have not been handed a Registration
Card/Optional 2nd Year Breakdown Insurance Offer,
please contact the Potterton Registration Department for
a copy by telephoning 0181 944 4972
Back Page

Other manuals for Prorile Prima 30e

4

This manual suits for next models

10

Other Potterton Boiler manuals

Potterton Puma 100 Installation and maintenance instructions

Potterton

Potterton Puma 100 Installation and maintenance instructions

Potterton Promax System HE Plus LPG Installation and maintenance instructions

Potterton

Potterton Promax System HE Plus LPG Installation and maintenance instructions

Potterton Performa 28i User guide

Potterton

Potterton Performa 28i User guide

Potterton eurocondense four 125 kw General instructions

Potterton

Potterton eurocondense four 125 kw General instructions

Potterton Promax Combi HE Plus A Range Installation and maintenance instructions

Potterton

Potterton Promax Combi HE Plus A Range Installation and maintenance instructions

Potterton SIRIUS FS Release note

Potterton

Potterton SIRIUS FS Release note

Potterton Assure System Series Manual

Potterton

Potterton Assure System Series Manual

Potterton PROFILE LPG 100e User guide

Potterton

Potterton PROFILE LPG 100e User guide

Potterton Performa 24 Eco HE Instruction Manual

Potterton

Potterton Performa 24 Eco HE Instruction Manual

Potterton Sirius two WH 90 Guide

Potterton

Potterton Sirius two WH 90 Guide

Potterton Performa 9 SL HE User manual

Potterton

Potterton Performa 9 SL HE User manual

Potterton Performa 24i HE User manual

Potterton

Potterton Performa 24i HE User manual

Potterton EC three 125 User manual

Potterton

Potterton EC three 125 User manual

Potterton Kingfisher Mf Installation and maintenance instructions

Potterton

Potterton Kingfisher Mf Installation and maintenance instructions

Potterton Promax 24 Combi ErP Manual

Potterton

Potterton Promax 24 Combi ErP Manual

Potterton Performa 30 HE User manual

Potterton

Potterton Performa 30 HE User manual

Potterton Assure Heat 16 User manual

Potterton

Potterton Assure Heat 16 User manual

Potterton Prima 30B User guide

Potterton

Potterton Prima 30B User guide

Potterton Performa 24 User manual

Potterton

Potterton Performa 24 User manual

Potterton Gold HE A Range Installation and maintenance instructions

Potterton

Potterton Gold HE A Range Installation and maintenance instructions

Potterton Titanium 24 Installation and maintenance instructions

Potterton

Potterton Titanium 24 Installation and maintenance instructions

Potterton Combi 80 Installation and maintenance instructions

Potterton

Potterton Combi 80 Installation and maintenance instructions

Potterton Promax System HE User guide

Potterton

Potterton Promax System HE User guide

Potterton NXR4i User manual

Potterton

Potterton NXR4i User manual

Popular Boiler manuals by other brands

Crown Boiler BWC300 installation instructions

Crown Boiler

Crown Boiler BWC300 installation instructions

Worcester 47 311 43 Installation and service instructions

Worcester

Worcester 47 311 43 Installation and service instructions

Omcan WB-CN-0049 instruction manual

Omcan

Omcan WB-CN-0049 instruction manual

Cecilware ME10E-N Operator's manual

Cecilware

Cecilware ME10E-N Operator's manual

ACV Compact Condens 170 Installation, operation and maintenance instructions for the installer and the user

ACV

ACV Compact Condens 170 Installation, operation and maintenance instructions for the installer and the user

Ariterm BioComp-series Installation, operation and maintenance

Ariterm

Ariterm BioComp-series Installation, operation and maintenance

Baxi Luna 3 Avant Series Instructions for the User and the Installer

Baxi

Baxi Luna 3 Avant Series Instructions for the User and the Installer

Radijator TKAN Series instructions

Radijator

Radijator TKAN Series instructions

LAMBORGHINI MEGA 92 Operating, installation and maintenance instructions

LAMBORGHINI

LAMBORGHINI MEGA 92 Operating, installation and maintenance instructions

Beretta Kompakt R.S.I. Series Installation and use manual

Beretta

Beretta Kompakt R.S.I. Series Installation and use manual

Viessmann VITODENS 200 Service manual

Viessmann

Viessmann VITODENS 200 Service manual

Immergas VICTRIX 50 Instruction booklet and warning

Immergas

Immergas VICTRIX 50 Instruction booklet and warning

Ariston EuroCombi Type C A23 MFFI Servicing instructions

Ariston

Ariston EuroCombi Type C A23 MFFI Servicing instructions

Alpha 280E installation instructions

Alpha

Alpha 280E installation instructions

REMEHA W40 Installation and maintenance instructions

REMEHA

REMEHA W40 Installation and maintenance instructions

FireBird Enviromax Popular C12 Technical manual

FireBird

FireBird Enviromax Popular C12 Technical manual

Beretta BASE MIX 2 manual

Beretta

Beretta BASE MIX 2 manual

Ideal Heating VOGUE MAX SYSTEM 26IE user guide

Ideal Heating

Ideal Heating VOGUE MAX SYSTEM 26IE user guide

manuals.online logo
manuals.online logoBrands
  • About & Mission
  • Contact us
  • Privacy Policy
  • Terms and Conditions

Copyright 2025 Manuals.Online. All Rights Reserved.