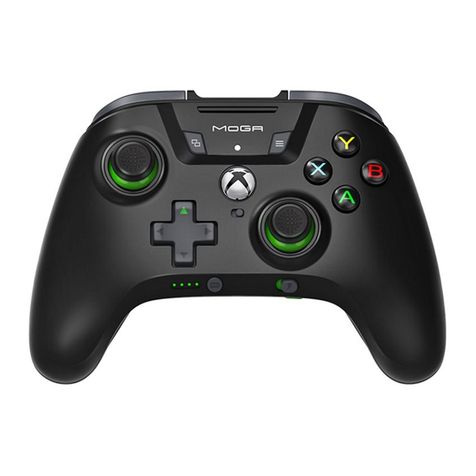
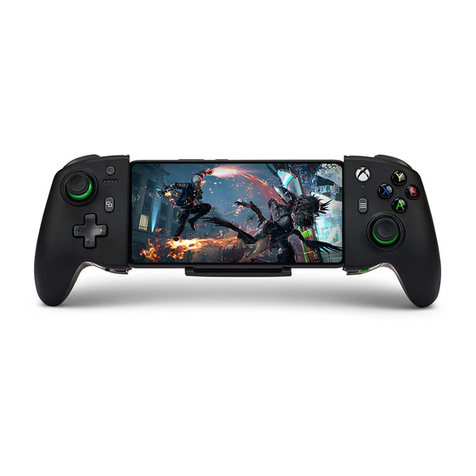
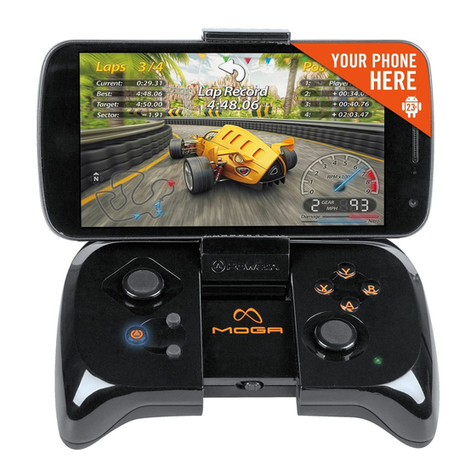
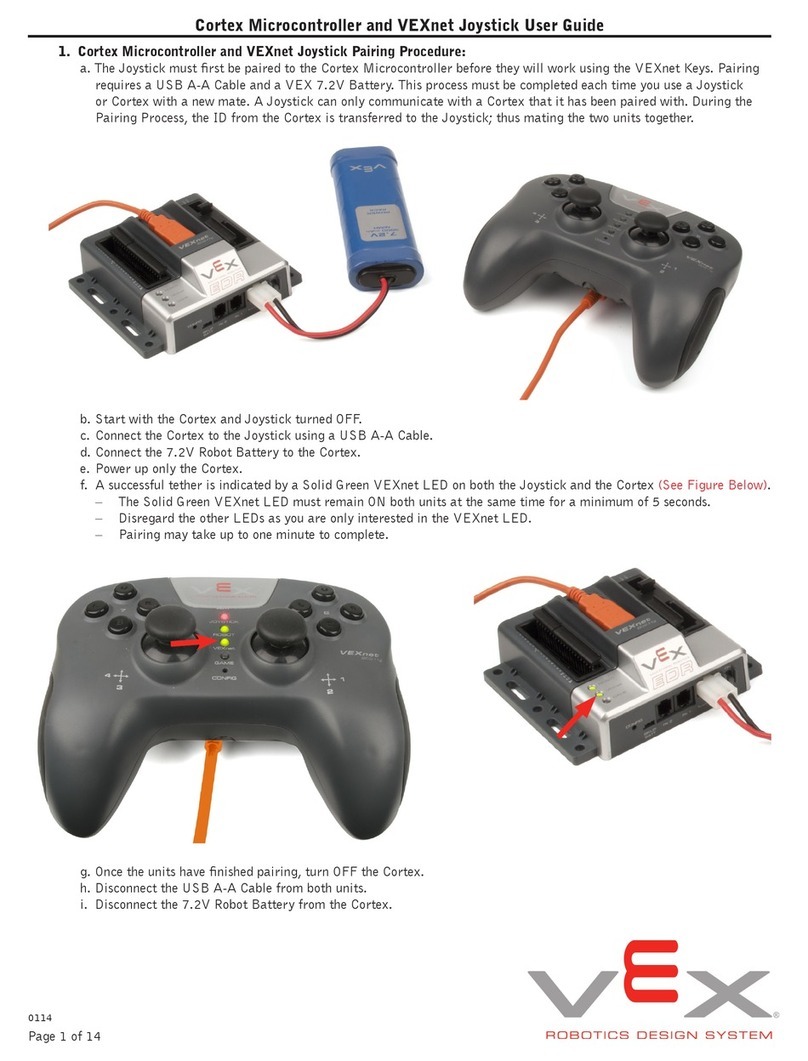
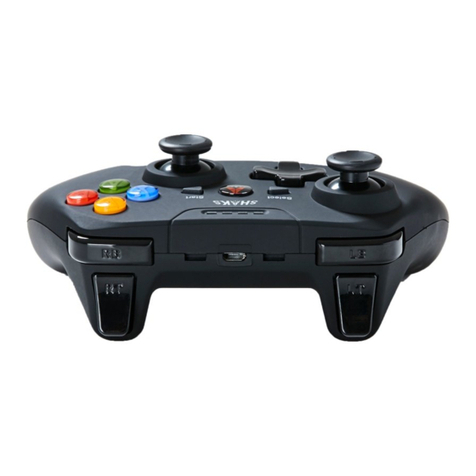
Power A MOGA XP5-A User manual

BLUETOOTH
CONTROLLER
CONTRÔLEUR BLUETOOTH
USER MANUAL / MANUEL DE L’UTILISATEUR
BEDIENUNGSANLEITUNG / MANUAL DE USUARIO
MANUALE PER L’USO / MANUAL DO USUÁRIO

PROGRAM BUTTON
SELECT BUTTON
PRECISION
ANALOG STICKS
MENU/POWER BUTTON
START BUTTON
WIRELESS/WIRED
MODE
D-PAD
GAMING CLIP SLOTPOWER/PROGRAM LED
A/B/X/Y BUTTONS
POWER BANK
ON/OFF BUTTON
CHECK
BATTERY LEVEL

ADVANCED GAMING
BUTTONS
BLUETOOTH
PAIRING BUTTON RB
RT
STANDARD USB PORT
LB
LT
MICRO USB PORT

SETUP
For best results, fully charge controller and power bank prior to first use.
CHARGING CONTROLLER + POWER BANK
• Using the included 6.5ft (2 m) USB Cable, connect the Micro-USB end to lower port at top of the
controller, and connect the Standard USB end to any powered USB source.
• When charging, four LEDs will display the charging level from 25-50-75-100%.
CHARGE LEVEL INDICATOR
Check battery charge level by pressing the battery status button ( ) on front lower left of controller.
The LEDs will indicate the current charge level from 25-100% even when controller is off.
WIRELESS MODE
Move Wireless/Wired switch on front center of controller to BT ( ) which indicates Bluetooth
wireless mode.
• If controller is off, press the MENU button ( ) to turn on (LED will illuminate).
• Press and hold the Bluetooth sync button ( ) on back of controller for 2 seconds to enter pairing
mode (LED will flash rapidly).
• Enter the Bluetooth settings on your device and choose the MOGA controller. The pairing LED will turn
solid when connected.
NOTE: A previously paired device will automatically pair to the controller when powered on.
POWERING OFF
Hold the menu button ( ) for 5 seconds to turn controller off and save battery capacity.
WIRED MODE
Move Wireless/Wired switch on front center of controller to USB ( ) which indicates wired mode.
• Connect Micro-USB end of the 7.8” (20 cm) or 6.5ft (2 m) cable to lower port at top of controller, and
connect other end to your gaming device.
• Gaming device input ports (Standard USB, Micro-USB, USB-C) will determine whether you use shorter
or longer micro-USB cable for wired gaming.
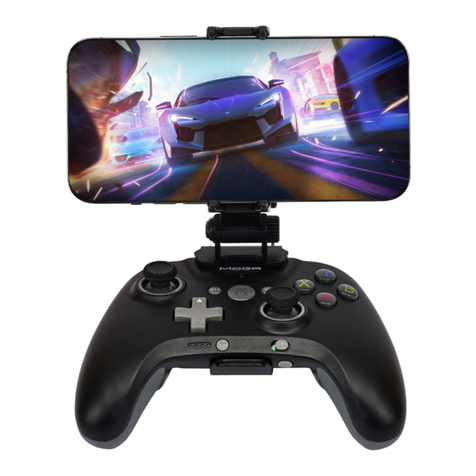
GAMING CLIP
A detachable gaming clip is included for use with gaming on your phone. You can use USB cables with
clip attached for charging or wired mode.
1. Slide MOGA Controller into gaming clip by tipping top edge in first.
2. Push controller bottom edge down into clip until it locks into notch on front edge of controller.
3. To insert phone, push top edge of phone against top of phone grip to expand upward.
4. Push bottom of phone down flat into place as you reach top limit of phone grip.
5. Adjust phone horizontally to center alignment over controller, and adjust viewing angle forward or back.
6. Open kickstand on clip when setting controller down between sessions to prevent tipping.
7. Remove clip by pulling front edge forward to release from notch.
INTEGRATED POWER BANK
A Power Bank built into the controller allows you to charge your phone during gameplay or while
controller is off.
• Connect Standard USB end of the 11.8” (30 cm) cable to upper port at top of controller, and connect
other end to your mobile device.
• During gameplay, move the Power Bank switch below right thumbstick to the right (on) to start
charging. If you prefer to use battery power to extend controller usage time rather than charge
phone, move swith to the left (off).
• To charge mobile device when controller is not in use, simply connect cable between controller and
device to begin charging (Power Bank Switch must be ON).
• Your mobile device will display charge status once connected. If charging does not begin, the power
bank battery may be too low: recharge controller.
• The amount of charge available for your phone depends on how much battery capacity remains on the
controller when charging begins.
ASSIGNING THE ADVANCED GAMING BUTTONS
1. Press the Orange Program Button on the bottom of the controller for 2 seconds. The LED Connection
Indicator will flash, signaling the controller is in assign mode.

2. Press 1 of the following buttons (A/B/X/Y/LB/RB/LT/RT/Left Stick Press/Right Stick Press/D-pad)
to re-assign. Then press the Advanced Gaming Button (AGR or AGL) that you wish to assign. The LED
connection indicator will stop flashing, signaling the Advanced Gaming Button has been set.
3. Repeat for the remaining Advanced Gaming Button.
NOTE: Advanced Gaming Button assignments will remain in memory even after disconnected.
RESETTING THE ADVANCED GAMING BUTTONS
1. Hold the Program Button down for 2 seconds. The LED Connection Indicator will slowly flash, signaling
the controller is in assign mode.
2. Press the previously assigned button for 5 seconds, and the function will be cleared.
FAQS
For latest FAQs, visit PowerA.com/Support
PROBLEM: My controller will not power on?
SOLUTION: Confirm the controller is fully charged by pressing the battery status button ( ) on front
lower left of controller. Plug in to recharge as needed.
PROBLEM: I do not see MOGA controller listed in mobile devices Bluetooth settings?
SOLUTION: Press and hold the Bluetooth sync button ( ) on back of controller for 2 seconds to enter
pairing mode (LED will flash rapidly).
PROBLEM: The integrated power bank is not functioning?
SOLUTION: Confirm the controller has more than 25% charge and Power Bank button is switched on.
CONTACT/SUPPORT
For support with your authentic PowerA accessories, please visit PowerA.com/Support.
MANUFACTURED BY
Bensussen Deutsch & Associates, LLC. (BDA, LLC.)
15525 Woodinville-Redmond Rd. NE Woodinville, WA 98072. BDAINC.com |POWERA.com
ADDITIONAL LEGAL
MOGA, the PowerA logo, and the MOGA by PowerA logo are trademarks of Bensussen Deutsch and Associates, LLC.
TM and © Bensussen Deutsch and Associates, LLC. All other trademarks are the property of their respective owners.
MOTION WARNING
Playing video games can make your muscles, joints, skin or eyes hurt. Follow these instructions to avoid
problems such as tendinitis, carpal tunnel syndrome, skin irritation or eyestrain:
• Avoid excessive play. Take a 10 to 15-minute break every hour, even if you don’t think you need it.
Parents should monitor their children for appropriate play.
• If your hands, wrists, arms or eyes become tired or sore while playing, or if you feel symptoms such
as tingling, numbness, burning or stiffness, stop and rest for several hours before playing again.
• If you continue to have any of the above symptoms or other discomfort during or after play, stop
playing and see a doctor.
FCC STATEMENT
This device complies with Part 15 of the FCC Rules. Operation is subject to the following two conditions:
(1) this device may not cause harmful interference, and (2) this device must accept any interference
received, including interference that may cause undesired operation.
WARNING:Changes or modifications to this unit not expressly approved by the party responsible for
compliance could void the user’s authority to operate the equipment.
NOTE: This equipment has been tested and found to comply with the limits for Class B digital device,
pursuant to Part 15 of the FCC Rules. These limits are designed to provide reasonable protection against
harmful interference in a residential installation. This equipment generates, uses and can radiate radio
frequency energy and, if not installed and used in accordance with the instructions, may cause harmful
interference to radio communications. However, there is no guarantee that interference will not occur
in a particular installation. If this equipment does cause harmful interference to radio or television
reception, which can be determined by turning the equipment off and on, the user is encouraged to try
to correct the interference by one or more of the following measures:
• Reorient or relocate the receiving antenna.
• Increase the separation between the equipment and receiver.
• Connect the equipment into an outlet on a circuit different from that to which the receiver is connected.
• Consult the dealer or an experienced radio/ TV technician for help.
AUSTRALIAN WARRANTY STATEMENT
This product comes with guarantees that cannot be excluded under the Australian Consumer Law.
You are entitled to a replacement or refund for a major failure and for compensation for any other
reasonably foreseeable loss or damage. You are also entitled to have the goods repaired or replaced
if the goods fail to be of acceptable quality and the failure does not amount to a major failure. If
purchased within Australia or New Zealand, this product comes with a One-year warranty from date of
purchase. Defects in the product must have appeared within One year from date of purchase, in order
to claim the warranty. All warranty claims must be facilitated back through the retailer of purchase
in accordance with the retailer’s return policies and procedures. Any expenses incurred, as a result of
returning the product to the retailer of purchase are the full responsibility of the consumer.
AU WHOLESALE DISTRIBUTOR
Level 2, 2 Darling Street South Yarra, Australia VIC 3141
bluemouth.com.au Email: support@bluemouth.com.au +61 (3) 9867 2666
REGIONAL COMPLIANCE SYMBOLS
More information available via web-search of each symbol name.
The WEEE symbol informs the end-user about separate disposal requirements for WEEE
(Waste of electrical and electronic equipment) as required per the Article 11(2) of the WEEE
Directive and prescribed by European standard EN50419:2005.
CE (Conformité Européene aka European Conformity) is a certification mark that indicates
conformity with health, safety, and environmental protection standards for products sold
within the European Economic Area.
The Regulatory Compliance Mark is a visible indication of a product’s compliance with all
applicable ACMA (Australian Communications and Media Authority) regulatory arrangements,
including all technical and record-keeping requirements regarding the electrical safety and/or
electromagnetic compatibility (EMC).
WARRANTY
2-Year Limited Warranty: Visit PowerA.com for details.
INSTALLATION
Pour obtenir de meilleurs résultats, chargez entièrement la manette et la batterie de secours avant
la première utilisation.
CHARGER LA MANETTE ET LA BATTERIE DE SECOURS
• À l’aide du câble USB de 2 m fourni, reliez le connecteur Micro-USB au port inférieur situé sur le haut
de la manette et reliez le connecteur USB standard à n’importe quelle source d’alimentation USB.
• Lors de la charge, quatre LED signaleront le niveau de charge de 25, 50, 75 et 100%
INDICATEUR DE NIVEAU DE CHARGE
Vérifiez le niveau de charge de la batterie en appuyant sur le bouton d’état de la batterie ( ) sur la
partie inférieure gauche à l’avant de la manette. Les LED indiqueront l’actuel niveau de charge, de 25 à
100%, même si la manette est éteinte.
MODE SANS FIL
Placez le commutateur sans fil/filaire de la partie centrale à l’avant de la manette sur la position BT
() pour activer le mode sans fil Bluetooth.
• Si la manette est éteinte, appuyez sur le bouton MENU ( ) pour l’allumer (La LED s’allume).
• Appuyez sur le bouton de synchronisation Bluetooth ( ) à l’arrière de la manette durant 2secondes
pour activer le mode synchronisation (la LED clignotera rapidement)
• Saisissez les paramètres Bluetooth sur votre appareil et sélectionnez la manette MOGA. La LED de
synchronisation restera allumée une fois la connexion établie.
REMARQUE: un appareil précédemment synchronisé se synchronisera automatiquement avec la manette
lors de l’allumage de cette dernière.
ÉTEINDRE
Maintenez appuyé le bouton MENU ( ) durant 5secondes pour éteindre la manette et économiser la
batterie.
MODE FILAIRE
Placez le commutateur sans fil/filaire de la partie centrale à l’avant de la manette sur la position USB
() pour activer le mode filaire.
• Reliez le connecteur Micro-USB du câble de 20cm ou 2 m au port inférieur situé sur le haut de la
manette et reliez l’autre extrémité à votre appareil de jeu.

• Les ports d’entrée de l’appareil mobile (USB standard, Micro-USB, USB-C) détermineront l’utilisation
du câble Micro-USB le plus long ou le plus court lorsque vous jouez en mode filaire.
CLIP DE JEU
Un clip de jeu détachable est fourni pour vos expériences de jeu sur téléphone. Vous pouvez utiliser les
câbles USB lorsque le clip est attaché pour le chargement ou le mode filaire.
1. Reliez la manette MOGA au clip de jeu en ajustant la partie supérieure en premier.
2. Poussez la partie inférieure de la manette dans le clip jusqu’à ce qu’il soit solidement en place dans
l’encoche située à l’avant de la manette.
3. Pour insérer le téléphone, poussez la partie supérieure de celui-ci contre la partie supérieure du
support à cet effet, afin de l’étendre.
4. Poussez la partie inférieure du téléphone et placez-le à plat lorsque vous atteignez la limite du
support.
5. Ajustez la position horizontale du téléphone afin de le centrer par rapport à la manette et d’ajuster
l’angle de vue vers l’avant ou l’arrière.
6. Utilisez la béquille du clip lorsque vous posez la manette entre les sessions de jeu afin d’éviter qu’elle
ne bascule.
7. Retirez le clip en tirant le bord avant vers l’avant pour libérer l’encoche.
BATTERIE DE SECOURS INTÉGRÉE
Une batterie de secours intégrée à la manette vous permet de charger votre téléphone lors des sessions
de jeu ou lorsque la manette est éteinte.
• Reliez le connecteur USB standard du câble de 30cm au port supérieur situé sur le haut de la manette
et reliez l’autre extrémité à votre appareil mobile.
• Lors des sessions de jeu, placez le commutateur de la batterie de secours, situé sous le stick
analogique droit, vers la droite (activer) pour débuter la charge. Si vous préférez utiliser l’énergie
de la batterie pour prolonger le temps d’utilisation de la manette plutôt que pour charger votre
téléphone, placez le commutateur vers la gauche (éteindre).
• Pour charger l’appareil mobile lorsque la manette n’est pas utilisée, reliez simplement le câble entre la
manette et l’appareil afin de débuter la charge (Power Bank Switch doit être activé).
• Votre appareil mobile affichera l’état de la charge une fois connecté. Si la charge ne débute pas, le
niveau de la batterie de secours est peut-être trop faible: rechargez la manette.
• Le niveau de charge disponible pour votre téléphone dépend de la capacité de batterie restante sur la
manette lorsque la charge débute.
BOUTONS DE JEU PROGRAMMABLES
1. Appuyez sur le bouton de programmation orange situé au bas de la manette pendant 2 secondes.
L’indicateur LED de connexion clignotera, indiquant que la manette est en mode d’affectation.
2. Appuyez sur l’un des boutons suivants (A/B/X/Y/LB/RB/LT/RT/Left Stick Press/Right Stick Press/D-
pad) pour réaffecter une fonction. Appuyez ensuite sur le bouton d’action avancée (AGR or AGL)
pour l’affecter. Le voyant de connexion à DEL cessera de clignoter, indiquant que le bouton d’action
avancée a été affecté.
3. Recommencez pour le bouton d’action avancée restant.
REMARQUE: Les affectations des boutons d’action avancée resteront en mémoire même lorsque le
dispositif est déconnecté.
RÉINITIALISATION DES BOUTONS D’ACTION AVANCÉE
1. Maintenez le bouton d’affectation enfoncé pendant 2 secondes. Le voyant de connexion à DEL
clignotera lentement, indiquant que la manette est en mode d’affectation.
2. Appuyez sur le bouton d’affectation et maintenez-le enfoncé pendant 5 secondes pour revenir à l’état
« Aucune fonction ».
FOIRE AUX QUESTIONS (FAQ)
Pour consulter les dernières questions fréquentes, rendez-vous sur PowerA.com/Support
PROBLÈME: ma manette ne s’allume pas
SOLUTION: vérifiez que la manette est entièrement chargée en appuyant sur le bouton d’état de la batterie
() sur la partie inférieure gauche à l’avant de la manette. Si besoin, branchez-la pour la recharger.
PROBLÈME: je ne vois pas la manette MOGA dans les paramètres Bluetooth de mes appareils mobiles.
SOLUTION: appuyez sur le bouton de synchronisation Bluetooth ( ) à l’arrière de la manette durant
2secondes pour activer le mode synchronisation (la LED clignotera rapidement).
PROBLÈME: la batterie de secours intégrée ne fonctionne pas correctement.

SOLUTION: vérifiez que la manette est chargée à plus de 25% et que le bouton de la batterie de secours
est activé.
MISE EN GARDE AU SUJET DES MOUVEMENTS
“Les jeux vidéo peuvent provoquer des douleurs des muscles, des articulations, de la peau ou des yeux.
Respectez les consignes suivantes pour éviter les problèmes tels que tendinite, syndrome du canal
carpien, irritation cutanée ou fatigue oculaire:
• Évitez de jouer trop longtemps. Faites une pause de 10 à 15 minutes après chaque heure de jeu, même
si vous n’en ressentez pas la nécessité. Les parents doivent s’assurer que leurs enfants jouent de
manière appropriée.
• Si vous ressentez de la fatigue ou une douleur dans vos mains, poignets, bras ou yeux pendant le jeu,
ou des symptômes tels que picotements, engourdissement, brûlure ou raideur, arrêtez de jouer et
reposez-vous pendant plusieurs heures avant de reprendre le jeu.
• Si l’un des symptômes cités persiste ou si vous ressentez une gêne prolongée pendant ou après le jeu,
arrêtez de jouer et consultez un médecin.
SERVICE CLIENTÈLE
Pour obtenir une assistance pour vos accessoires PowerA d’origine, veuillez consulter la rubrique
PowerA.com/Support.
SYMBOLES DE CONFORMITÉ RÉGIONAUX
Vous trouverez plus d’information sur chaque nom de symbole au moyen d’une recherche sur le Web.
Le symbole DEEE informe l’utilisateur final des exigences en matière d’élimination séparée
pour les DEEE (déchets d’équipements électriques et électroniques), comme l’exigent
l’article11(2) de la Directive DEEE et la norme européenne EN50419:2005.
CE (Conformité Européene ou European Conformity) est une marque de certification
qui indique la conformité avec les normes de santé, de sécurité et de protection de
l’environnement pour les produits vendus dans l’Espace économique européen.
Le Regulatory Compliance Mark est une indication visible de la conformité d’un produit avec
toutes les dispositions réglementaires applicables de l’ACMA (Australian Communications
and Media Authority), y compris toutes les exigences techniques et de conservation des informations
en matière de sécurité électrique ou de compatibilité électromagnétique (EMC).
CONFIGURACIÓN
Para obtener mejores resultados, carga completamente el mando y el banco de carga antes de usarlo
por primera vez.
CARGA DEL MANDO + BANCO DE CARGA
• Con el cable USB de 2 m, conecta el extremo Micro-USB al puerto inferior en la parte superior del
mando y el extremo estándar USB a cualquier fuente USB encendida.
• Cuando se está cargando, los 4LED mostrarán el nivel de carda de 25-50-75-100%.
INDICADOR DEL NIVEL DE CARGA
Comprueba el nivel de carga de la batería pulsando el botón de estado de la batería ( ) en la parte
inferior izquierda delantera del mando. Los LED indicarán el nivel de carga actual de 25-100% incluso
cuando el mando esté apagado.
MODO INALÁMBRICO
Mueve el interruptor con cable/inalámbrico en la parte central delantera del mando hacia BT ( ),
que indica el modo inalámbrico Bluetooth.
• Si el mando está apagado, pulsa el botón MENÚ ( ) para encenderlo (El LED se iluminará).
• Mantén pulsado el botón de sincronización de Bluetooth ( ) que está en la parte posterior del mando
durante 2segundos para iniciar el modo de sincronización (el LED parpadeará rápidamente).
• Entra en los ajustes de Bluetooth del dispositivo y selecciona el mando MOGA. El LED de sincronización
se volverá fijo cuando se conecte.
NOTA: Si antes ya se ha sincronizado un dispositivo, este se sincronizará automáticamente con el mando
cuando se encienda.
APAGAR
Mantén pulsado el botón de menú ( ) durante 5segundos para apagar el mando y guardar la capacidad
de la batería.

MODO CON CABLE
Mueve el interruptor con cable/inalámbrico en la parte central delantera del mando hacia USB ( ),
que indica el modo con cable.
• Conecta el extremo Micro-USB del cable de 20 o 2 m al puerto inferior, en la parte superior del mando,
y conecta el otro extremo a tu dispositivo de juego.
• Los puertos de entrada de los dispositivo de juego (USB estándar, Micro-USB, USB-C) determinarán si
tienes que utilizar un cable micro-USB más o menos largo para jugar con cable.
SOPORTE DE JUEGO
Se incluye un soporte de juego extraíble para jugar con el móvil. Puedes utilizar cables USB con el
soporte conectado para carga o en modo con cable.
1. Desliza el mando MOGA en el soporte de juego inclinando primero el borde superior.
2. Empuja hacia abajo el borde inferior del mando en el soporte hasta que se encaje en la ranura del
borde delantero del mando.
3. Para insertar el teléfono, empuja el borde superior del teléfono contra la parte superior del soporte
para que se expanda hacia arriba.
4. Empuja hacia abajo la parte inferior del móvil de forma horizontal en su sitio hasta que alcances el
límite superior del soporte para móviles.
5. Ajusta el móvil en posición horizontal para colocarlo en el centro sobre el mando y ajusta el ángulo de
visión hacia delante o hacia atrás.
6. Abre el pie de apoyo del soporte cuando lo dejes sobre el mando durante las sesiones para evitar que
se incline.
7. Retire el clip tirando del borde delantero hacia adelante para liberarlo de la muesca.
BANCO DE CARGA INTEGRADO
Tener un banco de carga integrado en el mando te permite cargar la batería del móvil mientras juegas o
mientras el mando está apagado.
• Conecta el extremo del USB estándar del cable de 30cm al puerto superior de la parte superior del
mando y el otro extremo a tu dispositivo móvil.
• Durante una sesión de juego, mueve el interruptor del banco de carga hacia la derecha (encender), que
se encuentra bajo el disparador derecho, para iniciar la carga. Si prefieres utilizar la alimentación de
la batería para ampliar el tiempo de uso del mando en vez de la carga del móvil, mueve el interruptor
hacia la izquierda (apagar).
• Para cargar el dispositivo móvil cuando no se esté utilizando el mando, solo tienes que conectar el
cable entre el mando y el dispositivo para iniciar la carga (El interruptor del banco de energía debe
estar encendido).
• Tu dispositivo móvil mostrará el estado de la carga una vez conectado. Si no se inicia la carga, puede
que la batería del banco de carga sea demasiado baja: vuelve a cargar el mando.
• La cantidad de carga disponible de tu móvil dependerá de cuánta capacidad de batería haya en el
mando cuando se inicia la carga.
BOTONES DE CONTROL AVANZADO DE JUEGO
1. Pulsa el botón de programación naranja en la parte inferior del mando durante 2 segundos. El indicador
LED de conexión parpadeará para indicar que el mando está en modo asignación.
2. Pulsa 1 de los siguientes botones (A/B/X/Y/botón superior izdo./botón superior dcho./gatillo izdo./
gatillo dcho./ presión control izquierdo/presión control derecho/control de dirección) para cambiar
la asignación. Luego pulsa el botón de juego avanzado (AGR o AGL) que deseas asignar. El indicador de
conexión LED dejará de parpadear, señalando que se ha configurado el botón de juego avanzado.
3. Repite para el otro botón de juego avanzado.
NOTA: Las asignaciones de botones de juego avanzado permanecerán en la memoria incluso una vez
desconectados.
RESTABLECIMIENTO DE LOS BOTONES DE JUEGO AVANZADO
1. Mantén pulsado el botón de asignación durante 2 segundos. El indicador de conexión LED parpadeará
lentamente para indicar que el mando está en modo de asignación.
2. Pulsa y mantén pulsado el botón de asignación durante 5 segundos para restablecerlo a ninguna función.
PREGUNTAS FRECUENTES
Para consultar las últimas preguntas frecuentes, visita PowerA.com/Support
PROBLEMA: ¿Mi mando no se enciende?

SOLUCIÓN: Confirma que el mando está completamente cargado pulsando el botón de estado de la
batería ( ), que se encuentra en la parte inferior izquierda delantera del mando. Si es necesario,
conéctalo para volver a cargarlo.
PROBLEMA: ¿No veo el mando MOGA en los ajuste de Bluetooth de mi dispositivo móvil?
SOLUCIÓN: Mantén pulsado el botón de sincronización de Bluetooth ( ) que está en la parte posterior
del mando durante 2segundos para iniciar el modo de sincronización (el LED parpadeará rápidamente).
PROBLEMA: ¿El banco de carga integrado no funciona?
SOLUCIÓN: Confirma que el mando tiene más de un 25% de carga y que el botón del banco de carga está encendido.
SERVICIO DE ATENCIÓN AL CLIENTE
Si necesitas ayuda con tus accesorios originales de PowerA, visita PowerA.com/Support.
ADVERTENCIA SOBRE LE SIONES CAUSADAS POR MOVIMIENTOS
“Tras varias horas de juego, puedes empezar a sentir dolor en los músculos, las articulaciones, la piel o
bien notar los ojos cansados. Sigue estas instrucciones para evitar problemas como tendinitis, síndrome
del túnel carpiano, irritación cutánea o fatiga visual:
• Evita jugar en exceso. Descansa entre 10 y 15 minutos por cada hora de juego, aunque creas que no lo
necesitas. Los padres deben supervisar a sus hijos para asegurarse de que juegan correctamente.
• Si se te cansan o te duelen las manos, las muñecas, los brazos o los ojos mientras estás jugando,
o sientes síntomas como hormigueo, entumecimiento, escozor o rigidez, deja de jugar y descansa
durante varias horas antes de retomar el juego.
• Si persisten dichos síntomas o sientes otras molestias mientras juegas o justo después, deja de jugar
y consulta a tu médico.
EINRICHTEN
Laden Sie den Controller und die Power Bank vor dem ersten Gebrauch vollständig auf, um optimale
Ergebnisse zu erzielen
AUFLADEN VON CONTROLLER + POWER BANK
• Schließen Sie das Micro-USB-Ende mit dem mitgelieferten 2-m-USB-Kabel an den unteren Anschluss
oben am Controller an und schließen Sie das Standard-USB-Ende an eine USB-Stromquelle an.
• Während des Ladevorgangs zeigen vier LEDs den Ladezustand von 25-50-75-100% an.
LADESTAND-ANZEIGE
Überprüfen Sie den Ladezustand der Batterie, indem Sie die Batteriestatustaste ( ) vorne links unten
am Controller drücken. Die LEDs zeigen den aktuellen Ladezustand von 25-100% an, auch wenn der
Controller ausgeschaltet ist.
KABELLOSER MODUS
Stellen Sie den Kabellos/Kabelgebunden-Schalter in der vorderen Mitte des Controllers auf BT ( ),
um den kabellosen Bluetooth-Modus anzuzeigen.
• Wenn der Controller ausgeschaltet ist, drücken Sie die MENU-Taste ( ), um ihn einzuschalten (LED
leuchtet auf).
• Halten Sie die Bluetooth-Sync-Taste ( ) auf der Rückseite des Controllers 2 Sekunden lang gedrückt,
um in den Kopplungsmodus zu wechseln (LED blinkt schnell)
• Geben Sie die Bluetooth-Einstellungen auf Ihrem Gerät ein und wählen Sie den MOGA-Controller. Die
Kopplungs-LED leuchtet dauerhaft, wenn die Verbindung hergestellt ist.
HINWEIS: Ein zuvor gekoppeltes Gerät wird beim Einschalten automatisch mit dem Controller gekoppelt.
AUSSCHALTEN
Halten Sie die Menütaste ( ) 5Sekunden lang gedrückt, um den Controller auszuschalten und
Batteriekapazität zu sparen.
KABELGEBUNDENER MODUS
Stellen Sie den Kabellos/Kabelgebunden-Schalter vorne in der Mitte des Controllers auf USB ( ), um
den verkabelten Modus anzuzeigen.
• Schließen Sie das Micro-USB-Ende des 20-cm- oder 2-m-Kabels an den unteren Anschluss oben am
Controller an und schließen Sie das andere Ende an Ihr Spielgerät an.
• Die Eingangsanschlüsse für Spielgeräte (Standard-USB, Micro-USB, USB-C) bestimmen, ob Sie für
kabelgebundene Spiele ein kürzeres oder längeres Micro-USB-Kabel verwenden.

GAMING-CLIP
Ein abnehmbarer Gaming-Clip ist für die Verwendung mit Spielen auf Ihrem Handy enthalten. Sie können
USB-Kabel mit angeschlossenem Clip zum Laden oder für den Kabelmodus verwenden.
1. Schieben Sie den MOGA Controller in den Gaming-Clip, indem Sie die obere Kante zuerst einklappen.
2. Drücken Sie die untere Kante des Controllers nach unten in den Clip, bis sie in der Kerbe an der
Vorderkante des Controllers einrastet.
3. Drücken Sie zum Einsetzen des Handys die Oberkante des Handys gegen die Oberseite des Handygriffs,
um es nach oben zu erweitern.
4. Drücken Sie die Unterseite des Handys flach nach unten, bis Sie die obere Grenze des Handygriffs
erreicht haben.
5. Stellen Sie das Handy horizontal ein, um die Ausrichtung über dem Controller zu zentrieren, und stellen
Sie den Blickwinkel nach vorne oder hinten ein.
6. Öffnen Sie den Kickstand am Clip, wenn Sie den Controller zwischen den Sessions absetzen, um ein
Umkippen zu verhindern.
7. Entfernen Sie den Clip, indem Sie die Vorderkante nach vorne ziehen, um ihn aus der Kerbe zu lösen.
INTEGRIERTE POWER BANK
Über eine im Controller integrierte Power Bank können Sie Ihr Handy während des Spiels oder bei
ausgeschaltetem Controller aufladen.
• Schließen Sie das Standard-USB-Ende des 30-cm-Kabels an den oberen Anschluss oben am Controller
an und schließen Sie das andere Ende an Ihr Mobilgerät an.
• Bewegen Sie während des Spiels den Power Bank-Schalter unter dem rechten Daumen nach rechts
(ein), um den Ladevorgang zu starten. Wenn Sie den Akku bevorzugen, um die Nutzungsdauer des
Controllers zu verlängern, anstatt das Handy aufzuladen, bewegen Sie den Schalter nach links (aus).
• Um ein Mobilgerät aufzuladen, wenn der Controller nicht verwendet wird, schließen Sie einfach das
Kabel zwischen Controller und Gerät an, um den Ladevorgang zu starten (Power Bank Schalter muss
eingeschaltet sein).
• Ihr Mobilgerät zeigt den Ladestatus an, sobald es verbunden ist. Wenn der Ladevorgang nicht beginnt,
ist der Akku der Power Bank möglicherweise zu schwach: Laden Sie den Controller auf.
• Die für Ihr Handy verfügbare Lademenge hängt davon ab, wie viel Akkukapazität der Controller zu
Beginn des Ladevorgangs noch hat.
TASTEN FÜR ERWEITERTE SPIELFUNKTIONEN
1. Drücken Sie die orangefarbene Programmtaste an der Unterseite des Controllers zwei Sekunden.
Die LED-Verbindungsanzeige blinkt und signalisiert, dass sich der Controller im Zuweisungsmodus
befindet.
2. Drücken Sie eine der folgenden Tasten (A/B/X/Y/LB/RB/LT/RT/linker Stick gedrückt/rechter Stick
gedrückt/Steuerkreuz), um eine Neubelegung vorzunehmen. Drücken Sie dann die Taste für erweiterte
Spielfunktionen (AGR oder AGL), die Sie neu belegen möchten. Die LED-Verbindungsanzeige hört auf zu
blinken, was anzeigt, dass die Belegung der Taste für erweiterte Spielfunktionen abgeschlossen ist.
3. Wiederholen Sie diese Schritte für die verbleibende Taste für erweiterte Spielfunktionen.
HINWEIS: Die Belegungen der Tasten für erweiterte Spielfunktionen bleiben auch nach Trennung vom
Stromanschluss im Speicher.
ZURÜCKSETZEN DER TASTEN FÜR ERWEITERTE SPIELFUNKTIONEN
1. Halten Sie die Belegungstaste zwei Sekunden lang gedrückt. Die LED-Verbindungsanzeige blinkt
langsam, was anzeigt, dass sich der Controller im Belegungsmodus befindet.
2. Halten Sie die Belegungstaste fünf Sekunden lang gedrückt, um auf keine Funktion zurückzusetzen.
FAQS
Die aktuelle Liste häufig gestellter Fragen finden Sie unter PowerA.com/Support
PROBLEM: Mein Controller lässt sich nicht einschalten?
LÖSUNG: Vergewissern Sie sich, dass der Controller vollständig aufgeladen ist, indem Sie die
Batteriestatustaste ( ) vorne links unten am Controller drücken. Schließen Sie das Gerät an, um es
bei Bedarf aufzuladen.
PROBLEM: Ich kann den MOGA Controller in den Bluetooth-Einstellungen für Mobilgeräte nicht sehen?
LÖSUNG: Halten Sie die Bluetooth-Sync-Taste ( ) auf der Rückseite des Controllers 2 Sekunden lang
gedrückt, um in den Kopplungsmodus zu wechseln (LED blinkt schnell).
PROBLEM: Die integrierte Power Bank funktioniert nicht?
LÖSUNG: Stellen Sie sicher, dass der Controller zu mehr als 25% aufgeladen ist und die Power-Bank-Taste
eingeschaltet ist.

KUNDENDIENST
Hilfe zu Ihrem PowerA-Originalzubehör erhalten Sie im Hilfebereich von PowerA.com/Support.
WARNHINWEIS ZUR BEWEGUNGSBELASTUNG
“Längeres Videospielen kann zu schmerzenden Muskeln, Gelenken, Hautflächen oder Augen führen.
Folgen Sie diesen Anweisungen, um Probleme wie Sehnenentzündungen, Karpaltunnelsyndrom,
Hautreizungen oder Augenüberanstrengung zu vermeiden:
• Übermäßig langes Spielen vermeiden. Nach jeder Stunde Spielzeit sollte unbedingt eine 10 bis 15
Minuten lange Pause eingelegt werden. Eltern sollten ihre Kinder beaufsichtigen, um ein angemessenes
Spielverhalten sicherzustellen.
• Wenn während des Spielens Ihre Hände, Handgelenke, Arme oder Augen müde werden oder schmerzen oder
wenn Symptome wie Kribbeln, ein taubes oder brennendes Gefühl oder Steifheit auftreten, muss vor dem
Weiterspielen eine mehrstündige Pause eingelegt werden.
• Sollten weiterhin irgendwelche der oben genannten Symptome oder sonstige Beschwerden während oder
nach dem Spielen auftreten, sollte ein Arzt aufgesucht werden.
IMPOSTAZIONI
Per risultati ottimali, ricaricare completamente il controller e il caricabatterie prima del primo
utilizzo
RICARICA DEL CONTROLLER + CARICABATTERIE
• Tramite il cavo USB incluso da 2 m (6,5 piedi), connettere l’estremità Micro-USB alla porta inferiore
nella parte alta del controller e l’estremità USB standard a un’unità USB collegata all’alimentazione.
• Durante la ricarica, quattro LED indicano il livello di ricarica (25-50-75-100%)
INDICATORE DEL LIVELLO DI RICARICA
Per verificare il livello di ricarica della batteria, premere il pulsante di stato della batteria ( ) nella
parte inferiore sinistra del controller. I LED indicano il livello di ricarica corrente, dal 25% al 100%, anche
quando il controller è spento.
MODALITÀ WIRELESS
Spostare l’interruttore della modalità (wireless/cablata) nella parte centrale anteriore del controller su
BT ( ), ossia su Bluetooth wireless.
• Se il controller è spento, premere il pulsante MENU ( ) per accenderlo (Il LED si illuminerà).
• Tenere premuto il pulsante di sincronizzazione del Bluetooth ( ) sul retro del controller per 2
secondi per attivare la modalità di associazione (il LED lampeggia rapidamente)
• Immettere le impostazioni Bluetooth sul dispositivo e scegliere il controller MOGA. Il LED di
associazione diventa fisso quando il dispositivo è collegato.
NOTA: un dispositivo già associato in precedenza si assocerà automaticamente al controller, una volta
acceso.
SPEGNIMENTO
Tenere premuto il tasto Menu ( ) per 5 secondi per spegnere il controller e prolungare l’autonomia
della batteria.
MODALITÀ CABLATA
Spostare l’interruttore della modalità (wireless/cablata) nella parte centrale anteriore del controller su
USB ( ), ossia sulla modalità cablata.
• Connettere l’estremità Micro-USB del cavo da 20 cm (7,8”) o da 2 m (6,5 piedi) alla porta inferiore
nella parte superiore del controller e l’altra estremità al dispositivo di gioco.
• Le porte di ingresso del dispositivo di gioco (USB standard, Micro-USB, USB-C) stabiliranno se è in uso
il cavo Micro-USB corto o quello lungo per il gioco in modalità cablata.
CLIP PER GIOCO
È inclusa una clip per gioco staccabile per giocare con il telefono. Si possono utilizzare cavi USB con la
clip collegata per effettuare la ricarica o giocare in modalità cablata.
1. Far scorrere il controller MOGA nella clip per gioco inclinando per primo il bordo superiore.
2. Introdurre il bordo inferiore del controller nella clip spingendo verso il basso finché non si blocca nella
tacca posta sul bordo anteriore del controller.
3. Per collegare il telefono, spingere il suo bordo superiore contro la parte superiore del supporto per

telefono per sollevarla.
4. Spingere verso il basso la parte inferiore del telefono tenendola diritta per inserirla, una volta
raggiunto il limite superiore del supporto per telefono.
5. Modificare la posizione del telefono in senso orizzontale per centrarla rispetto al controller e spostare
l’angolo visivo avanti o indietro.
6. Aprire il cavalletto della clip quando si appoggia il controller su un piano tra una sessione di gioco e
l’altra per evitare che il controller si ribalti.
7. Rimuovere la clip tirando il bordo anteriore in avanti per liberare dalla tacca.
CARICABATTERIE INTEGRATO
Il caricabatterie integrato nel controller consente di ricaricare il telefono durante il gioco o quando il
controller è spento.
• Connettere l’estremità USB standard del cavo da 30 cm (11,8”) alla porta superiore nella parte alta del
controller e l’altra estremità al dispositivo mobile.
• Durante il gioco, spostare a destra l’interruttore a levetta sotto il comando destro (posizione ON)
per iniziare la ricarica. Se si preferisce sfruttare l’alimentazione a batteria per prolungare il tempo
di utilizzo del controller e non per ricaricare il telefono, spostare a sinistra l’interruttore a levetta
(posizione OFF).
• Per ricaricare il dispositivo mobile quando il controller non è in uso, basta collegare il cavo dal
controller al dispositivo per iniziare la ricarica (L’interruttore Power Bank deve essere acceso).
• Il dispositivo mobile indicherà lo stato di ricarica, una volta collegato. Se la ricarica non inizia,
l’autonomia della batteria potrebbe essere insufficiente: ricaricare il controller.
• Il livello di ricarica disponibile per il telefono dipende dall’autonomia residua della batteria del
controller quando la ricarica inizia.
PULSANTI DI GIOCO AVANZATI
1. Premere il pulsante di programmazione arancione nella parte inferiore del controller per 2 secondi.
L’indicatore connessione LED lampeggia per indicare che il controller è in modalità di programmazione.
2. Premere 1 dei seguenti pulsanti (A/B/X/Y/LB/RB/LT/RT/Pulsante levetta sinistra/Pulsante levetta
destra/Dpad) per riprogrammarlo. Quindi premere il pulsante di gioco avanzato (AGR o AGL) da
programmare. La spia di connessione smette di lampeggiare, a indicare che il pulsante di gioco
avanzato è stato configurato.
3. Ripetere per l’altro pulsante di gioco avanzato.
NOTA: La programmazione dei pulsanti di gioco avanzato resta memorizzata anche dopo essersi scollegati.
RESET DEI PULSANTI GIOCO AVANZATO
1. Tenere premuto il pulsante di programmazione per 2 secondi. La spia di connessione lampeggia
lentamente, a indicare che il controller è in modalità programmazione.
2. Premere e tenere premuto il pulsante di programmazione per 5 secondi per cancellare la funzione
assegnata.
DOMANDE FREQUENTI
Per leggere le ultime domande frequenti, visitare PowerA.com/Support
PROBLEMA: il controller non si accende.
SOLUZIONE: assicurarsi che il controller si sia ricaricato completamente premendo il pulsante di stato
della batteria ( ) nella parte inferiore sinistra del controller. Collegare il dispositivo all’alimentazione
per effettuare la ricarica in base alle esigenze.
PROBLEMA: non vedo il controller MOGA tra i dispositivi mobili elencati nelle impostazioni Bluetooth.
SOLUZIONE: tenere premuto il pulsante di sincronizzazione del Bluetooth ( ) sul retro del controller per
2 secondi per attivare la modalità di associazione (il LED lampeggia rapidamente).
PROBLEMA: il caricabatterie integrato non funziona.
SOLUZIONE: verificare che il livello di ricarica del controller sia superiore al 25% e che il pulsante del
caricabatterie sia in posizione on.
SERVIZIO CLIENTI
Per richiedere assistenza per i tuoi accessori PowerA autentici, visita la pagina PowerA.com/Support.
PRECAUZIONI DI SICUREZZA
“L’uso di videogiochi può causare dolori muscolari, articolari, irritazioni cutanee o disturbi agli
occhi. Seguire le indicazioni fornite per evitare problemi quali tendinite, sindrome del tunnel carpale,
irritazione cutanea o affaticamento degli occhi:

• Evitare di giocare troppo a lungo. Fare una pausa di 10-15 minuti ogni ora, anche se non se ne sente il
bisogno. Si consiglia ai genitori di controllare che i figli giochino in modo appropriato.
• Se durante il gioco si avvertono sensazioni di affaticamento o dolore a mani, polsi, braccia od occhi, o
sintomi quali formicolio, intorpidimento, bruciore o rigidità, smettere di giocare e riposare per alcune
ore prima di riprendere il gioco.
• Se si continua ad avvertire uno dei sintomi sopra descritti o altri disturbi durante o dopo il gioco,
smettere di giocare e consultare un medico.
CONFIGURAÇÃO
Para melhores resultados, carrega completamente o comando e o carregador antes da primeira utilização.
CARREGAR O COMANDO + CARREGADOR
• Com o cabo USB de 2 m incluído, liga a extremidade Micro-USB à porta inferior, na parte superior do
comando, e liga a extremidade USB padrão a qualquer fonte USB com alimentação.
• Durante o carregamento, os quatro LEDs irão indicar o nível de carga de 25-50-75-100%.
INDICADOR DE NÍVEL DE CARGA
Verifica o nível de carga da bateria premindo o botão de estado da bateria ( ) na parte inferior
esquerda dianteira do comando. Os LEDs irão indicar o nível de carga atual de 25-100%, mesmo quando
o comando está desligado.
MODO SEM FIOS
Move o interruptor Com/Sem fios na parte central dianteira do comando para BT ( ), que indica o
modo sem fios Bluetooth.
• Se o comando estiver desligado, prime o botão MENU ( ) para o ligar (O LED acenderá).
• Prime e mantém premido o botão de sincronização Bluetooth ( ) na parte traseira do comando
durante 2 segundos para entrares no modo de emparelhamento (o LED irá piscar rapidamente).
• Acede às definições de Bluetooth no teu dispositivo e escolhe o comando MOGA. O LED de
emparelhamento ficará fixo quando estabelecer ligação.
NOTA: um dispositivo emparelhado anteriormente irá emparelhar automaticamente com o comando quando
for ligado.
DESLIGAR
Mantém premido o botão Menu ( ) durante 5 segundos para desligar o comando e poupar a capacidade
da bateria.
MODO COM FIOS
Move o interruptor Com/Sem fios na parte central dianteira do comando para USB ( ), que indica o
modo com fios.
• Liga a extremidade Micro-USB do cabo de 20 cm ou 2 m à porta inferior, na parte superior do comando,
e liga a outra extremidade ao teu dispositivo de jogo.
• As portas de entrada do dispositivo de jogo (USB padrão, Micro-USB, USB-C) irão determinar se deves
utilizar o cabo Micro-USB mais curto ou mais comprido para jogos com fios.
CLIPE DE JOGO
É incluído um clipe de jogo amovível para poderes jogar no teu telemóvel. Podes utilizar cabos USB com o
clipe colocado para carregar ou para o modo com fios.
1. Desliza o comando MOGA para o clipe de jogo inclinando primeiro a borda superior.
2. Empurra a borda inferior do comando para dentro do clipe até encaixar no entalhe na borda dianteira
do comando.
3. Para introduzires o telemóvel, empurra a sua borda superior contra a parte superior da pega para que
se expanda para cima.
4. Empurra a parte inferior do telemóvel para a encaixares de forma horizontal, à medida que atinges o
limite superior da pega do telemóvel.
5. Ajusta o telemóvel no plano horizontal para o centrares sobre o comando e ajusta o ângulo de
visualização para a frente ou para trás.
6. Abre o suporte do clipe quando pousares o comando entre sessões para evitar que se incline.
7. Remova o clipe puxando a borda frontal para frente para liberar do entalhe.

CARREGADOR INTEGRADO
O comando inclui um carregador que te permite carregar o telemóvel durante o jogo ou quando o
comando estiver desligado.
• Liga a extremidade USB padrão do cabo de 30 cm à porta superior, na parte superior do comando, e liga
a outra extremidade ao teu dispositivo móvel.
• Durante o jogo, move o interruptor do carregador por baixo do stick analógico direito para a direita
(ligar), para começar a carregar. Se preferires utilizar a alimentação da bateria para prolongar o tempo
de utilização do comando em vez da carga do telemóvel, move o interruptor para a esquerda (desligar).
• Para carregares o dispositivo móvel quando o comando não está a ser utilizado, basta desligares o
cabo entre o comando e o dispositivo para começar a carregar (O interruptor do banco de potência
deve estar ligado).
• O teu dispositivo móvel irá apresentar o estado da carga assim que for ligado. Se o carregamento não
iniciar, a bateria do carregador pode estar demasiado fraca: volta a carregar o comando.
• A quantidade de carga disponível para o teu telemóvel depende da capacidade restante da bateria do
comando quando começar a carregar.
BOTÕES DE JOGO AVANÇADOS
1. Prime o botão de programação Laranja na parte inferior do comando durante 2 segundos. O Indicador
de ligação LED irá piscar para indicar que o comando está no modo de atribuição.
2. Prime 1 dos seguintes botões (A/B/X/Y/LB/RB/LT/RT/stick analógico esquerdo/stick analógico
direito/bloco direcional) para voltar a atribuir. Em seguida, prime o botão de jogo avançado (AGR ou
AGL) que pretendes atribuir. O LED indicador de ligação deixará de piscar para indicar que o botão de
jogo avançado foi definido.
3. Repete a operação para os restantes botões de jogo avançado.
NOTA: As atribuições dos botões de jogo avançado continuam na memória mesmo depois de serem desligados.
REPOR OS BOTÕES DE JOGO AVANÇADO
1. Mantém o botão de atribuição premido durante 2 segundos. O LED indicador de ligação irá piscar
lentamente para indicar que o comando está no modo de atribuição.
2. Prime e mantém premido o botão de atribuição durante 5 segundos para repor para sem função.
PERGUNTAS FREQUENTES
As Perguntas frequentes mais recentes estão disponíveis em PowerA.com/Support
PROBLEMA: O meu comando não se acende.
SOLUÇÃO: Confirma se o comando está totalmente carregado premindo o botão de estado da bateria
() na parte inferior esquerda dianteira do comando. Liga-o para recarregar, conforme necessário.
PROBLEMA: Não vejo o comando MOGA listado nas definições de Bluetooth do dispositivo móvel.
SOLUÇÃO: Prime e mantém premido o botão de sincronização Bluetooth ( ) na parte traseira do
comando durante 2 segundos para entrares no modo de emparelhamento (o LED irá piscar rapidamente).
PROBLEMA: O carregador integrado não está funcionar.
SOLUÇÃO: Confirma que o comando tem mais de 25% de carga e o botão do Carregador está ligado.
APOIO AO CLIENTE
Para obter ajuda sobre os acessórios originais da PowerA, visita PowerA.com/Support.
AVISO SOBRE MOVIMENTO
“Jogar videojogos pode causar dor nos músculos, articulações, pele ou olhos. Segue estas instruções
para evitar problemas como tendinite, síndrome do túnel cárpico, irritação cutânea ou fadiga ocular:
• Evita jogar demasiado. Faz uma pausa de 10 a 15 minutos a cada hora, mesmo que aches que não é
necessário. Os pais deverão monitorizar o tempo de jogo adequado dos filhos.
• Se sentires fadiga ou dor nas mãos, pulsos, braços ou olhos ao jogar ou se sentires sintomas como
formigueiro, dormência, ardor ou rigidez, para e descansa durante várias horas antes de voltar a jogar.
• Se continuares a ter algum dos sintomas acima ou outra sensação de desconforto durante ou após o
jogo, para de jogar e consulta um médico.

POWERA.COM/SUPPORT
Service client | Kundendienst | Servicio a clientes
Assistenza clienti | Apoio ao Cliente
BDA LLC., 15525 WOODINVILLE-REDMOND RD NE, WOODINVILLE, WA 98072
2-YEAR LIMITED WARRANTY. VISIT POWERA.COM FOR DETAILS.
Garantía limitada de 2 años. Visita PowerA.com para obtener detalles.
Garantia limitada de 2 anos: Visita PowerA.com para obter detalhes.
Beschränkte 2-Jahres-Garantie
Details und Informationen finden Sie unter PowerA.com.
Garantie limitée de 2ans
Rendez-vous sur PowerA.com pour de plus amples informations.
Garantia limitada de 2 anos: Visita PowerA.com para obter detalhes.
CONTENTS
MOGA XP5-A Plus Controller | Detachable Gaming Clip
7.8 in (20 cm) micro-USB to USB type-C/micro-USB cable
11.8 in (30 cm) standard USB to USB-C/micro-USB cable
6.6 ft (2 m) micro-USB to standard USB cable | User Guide

CAN ICES-3(B)/NMB-3(B):
This device contains licence-exempt transmitter(s)/receiver(s)
that comply with Innovation, Science and Economic Development
Canada’s licence-exempt RSS(s). Operation is subject to the
following two conditions:
1. This device may not cause interference.
2. This device must accept any interference, including
interference that may cause undesired operation of the
device.
L’émetteur/récepteur exempt de licence contenu dans le
présent appareil est conforme aux CNR d’Innovation, Sciences
et Développement économique Canada applicables aux appareils
radio exempts de licence. L’exploitation est autorisée aux deux
conditions suivantes :
1. L’appareil ne doit pas produire de brouillage;
2. L’appareil doit accepter tout brouillage radioélectrique subi,
même si le brouillage est susceptible d’en compromettre le
fonctionnement.
Table of contents
Other Power A Video Game Controllers manuals

Power A
Power A lightsaber User manual

Power A
Power A MOGA XP7-X+ User manual

Power A
Power A MOGA User manual

Power A
Power A SPECTRA INFINITY User manual

Power A
Power A Pro Pack Mini Plus User manual

Power A
Power A FUSION 1511729-01 User manual

Power A
Power A MOGA XP5-X+ User manual

Power A
Power A MOGA XP5-i User manual

Power A
Power A FUSION 1513638-01 User manual