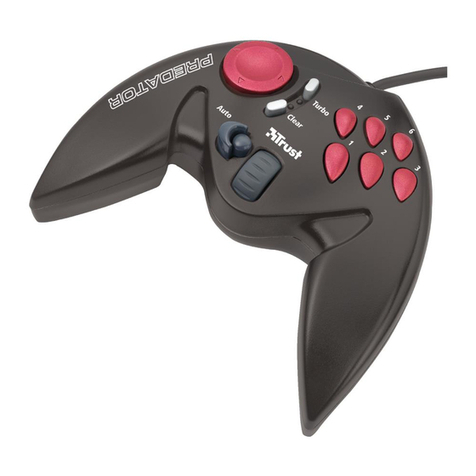
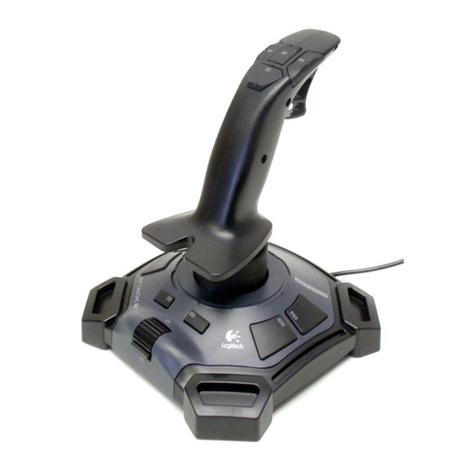
Trust Predator Digital 3D User manual

Predator Digital 3D
Predator Digital 3D
User's Manual
Version 1.0

Predator Digital 3D
Copyright Notice
No part of this manual may be reproduced or transferred, in any form
or manner whatsoever, electronically or mechanically, by means of
photocopying or recording, in data storage or retrieval systems,
without the prior written permission of the manufacturer, other than for
the purchaser's personal use.
Liability
The manufacturer accepts no liability whatsoever for all explicit or
implicit guarantees, including, but not limited to, guarantees for the
marketability and suitability for any specific purpose, regarding the
software, the enclosed product manual(s) and written material, and all
other enclosed hardware. The manufacturer reserves the right to
revise or improve the product at all times without prior notice to any
third party of these revisions or improvements.
The manufacturer accepts no liability whatsoever for any
consequential or incidental damage, including any business losses or
any commercial damage whatsoever resulting from the use of the
product.
All company or product names are trademarks or registered
trademarks of the respective owners.
PREDATOR DIGITAL 3D
Predator Digital 3D
1
Contents
1. Safety .............................................................................................2
2. Connection.....................................................................................3
3. Installation......................................................................................4
3.1 Windows 95 / 98........................................................................4
3.2 Windows 3.1x and DOS.............................................................5
4. Operation.......................................................................................6
5. Programming Buttons ..................................................................7
6. Testing under Windows 95 and 98...............................................9
7. Troubleshooting..........................................................................10
8. Specifications..............................................................................12

Predator Digital 3D
2
1. Safety
Please read the following instruction carefully:
1. Remove the power plug from the wall socket before cleaning the
joystick. Do not use liquid cleaners or aerosols. Wipe the joystick
with a moist cloth.
2. Do not use this joystick in high-humidity environments like
bathrooms, damp cellars, swimming pools, etc.

Predator Digital 3D
3
2. Connection
1. Switch off the computer.
2. Connect the joystick plug to the 15-pin game port of the
computer. The computer game port is usually located on the
sound card, with the socket protruding from the rear of the
computer.

Predator Digital 3D
4
3. Installation
Note: To use your joystick, DirectX 5.0 (or better) must be
installed before installing the joystick.
3.1 Windows 95 / 98
The examples assume that your computer system has assigned the
drive letter ‘D:’ to your CD-ROM drive. If your computer uses a
different letter, e.g. ‘E:’, substitute ‘E’ for ‘D’.
Note: Do not touch the joystick during installation or while the
system starts up. The joystick automatically calibrates
itself. There is no need for calibration in Windows.
1. Start Windows 95 / 98.
2. Click on the ‘Start’ button on the task bar and select ‘Run’.
3. In the entry field, type [D:\SETUP]. Press <Enter> to start the
installation.
4. Follow the on-screen instructions. If the joystick has been correctly
installed, a screen as in Figure 1 will be displayed. If this screen is
not displayed, please make sure the joystick has been correctly
connected.
Figure 1: Correct installation
5. Click on ‘OK’ to continue with the installation.
6. After installation, select the profile ‘Activator’ option by marking
the selector box (see Figure 2).

Predator Digital 3D
5
Figure 2: Predator Digital 3D installation
7. Click on ‘Finish’.
This completes the installation of the Predator Digital 3D.
3.2 Windows 3.1x and DOS
The joystick requires no drivers for Windows 3.1x and DOS. The
joystick can operate in two different modes, set by switch L (see
Figure 3). The various functions are listed in the table below.
Function (Switch L) CH Flightstick Pro Thrustmaster
Head switch?
Yes Yes
Correct processing of
multiple firing buttons
simultaneously depressed?
No Yes
Throttle control?
Yes No
Base buttons?
No No
3D function?
Yes Yes
Buttons ‘E’ through ‘I’ cannot be used in DOS or Windows 3.1x.
Many games offer a calibration function. This is required to adjust the
joystick to provide straight flying or driving with the joystick in the
centre position. Please refer to the game manual on how to proceed
for calibration.

Predator Digital 3D
6
4. Operation
Figure 3: Predator Digital 3D
The joystick features the following buttons. Some games cannot use
every available function. Please refer to the game manual for a list of
buttons that can be used. If you are running Windows 95 or 98,
keyboard keys can be assigned to the firing buttons (see Chapter 5).
Button Function
A - H Firing buttons 1 - 8
I Selector button Acts like the ‘Shift’ key on the keyboard. A
second function can be assigned to a firing
button. You can assign a function to, e.g.,
button 1, plus another function to selector
button + button 1.
J Throttle Adjustable game function, e.g.
accelerator/throttle.
K Head switch Use the head switch to select the viewing
direction in games.
L Mode switch Switch between CH Flightstick Pro and
Thrustmaster Joystick.
3D (Rudder) Rotate the stick for extra manoeuvrability
in games, e.g. for rudder deflection.

Predator Digital 3D
7
5. Programming Buttons
Note: This function is intended for older games that allow the
use of a maximum of 4 firing buttons. In games that
recognize all the firing buttons directly, it is better to
assign the functions directly to the buttons from within the
games, rather than use this program.
During the joystick installation procedure, a program has been
installed to program the firing buttons individually. This will enable you
to assign keyboard key functions to firing buttons. Proceed as follows:
1. After installation, the Predator Digital 3D profile screen will be
automatically activated. On the task bar, double-click on the icon
shown in Figure 4. A screen as shown in Figure 5 will be
displayed.
Figure 4: Predator Digital 3D icon
Figure 5: Predator Digital 3D profile screen
2. On the menu bar, click on ‘Utility’ and select ‘Editor’. A screen as
shown in Figure 6 will be displayed.
3. Click on the empty field of the firing button you wish to assign.
4. Enter a description for the firing button.

Predator Digital 3D
8
5. Click on ‘Record’ (see Figure 6). You can now start to record
keystrokes.
Figure 6: Editing the Predator Digital 3D profile
6. Press the key you wish to assign. The key name will be displayed
in the status bar. You can assign multiple keystrokes to each
button.
7. Click on ‘Stop’ to stop recording keystrokes for the selected firing
button. The button has now been programmed. Use the ‘Clear’
option to erase any incorrect keystrokes you may have entered.
8. Repeat steps 3 to 7 for each of the firing buttons to be
programmed.
9. Click on ‘File’ on the menu bar and select ‘Save As’.
10. Enter a name for the profile and press <Enter>.
11. Close the profile editing screen. This will return you to the main
profile screen (Figure 5).
12. On the menu bar, click on ‘File’ and select ‘Add Profile’.
13. Select the profile you saved under step 9, and press <Enter>.
14. Activate the profile by clicking on the ‘No’ option in front of the
selected profile. The ‘No’ option will change to ‘Yes’.

Predator Digital 3D
9
6. Testing under Windows 95 and 98.
Use this test to check the operation of all the buttons. Proceed as
follows:
1. On the task bar, click on the joystick icon (see Figure 4). A screen
as shown in Figure 5 will be displayed.
2. On the menu bar, click on ‘Utility’ and select ‘Test’. A screen as
shown in Figure 7 will be displayed.
Figure 7: Predator Digital 3D test screen
3. Press each of the buttons to see if they work.
4. Close the screen to end the test.

Predator Digital 3D
10
7. Troubleshooting
If you are having trouble with your joystick, check each of the items in
the table below. If you still cannot solve the problem, visit the Trust
Internet site at www.trust.com, or contact your dealer or the Trust help
desk. Please keep the following information at hand:
•Product number (you will find this under the bar code)
•Your Windows version and language
•CPU type and speed
•Your computer's memory specifications
•Name and version of the game
•The exact error message, or a precise description when and how
the joystick fails to work
Problem Cause Possible solutions
Using the
joystick has no
effect.
The plug has not
been correctly
connected.
Make sure the plug is
properly seated in the
game port.
The game port on the
sound card has been
disabled.
Enable the game port
on the sound card.
Please refer to
manuals of the sound
card and the software.
The sound card has
been incorrectly
installed.
Reinstall the sound
card. Please refer to
the manual of the
sound card.
More than one game
port has been
enabled.
Make sure only one
game port is enabled.
Using the
joystick has no
effect during
testing.
The joystick has not
been properly
connected.
Make sure the joystick
is properly connected
to the game port.

Predator Digital 3D
11
Problem Cause Possible solutions
Programmed
buttons give the
wrong results.
Profile has not been
activated. Activate the profile by
clicking on the ‘No’
option in front of the
selected profile.
Profile does not exist. Prepare the profile, see
section 5.
Keeping the
stick in the
centre position
does not result
in straight flying
or driving.
Joystick has not been
calibrated. Restart the system. Do
not touch the joystick
while the computer
starts up.

Predator Digital 3D
12
8. Specifications
Ergonomically designed joystick grip
Digital control with optical sensors
Digital/analogue mode in Windows 95/98
Analogue mode in Windows 3.1x/MS-DOS
Head switch, 8 directions
Throttle control
8 programmable firing buttons; 16 in combination with the selector
button in Windows 95/98
3D Rotation
MS-DOS, Windows 3.1x, 95, and Windows 98 compatible;
Table of contents
Other Trust Video Game Controllers manuals

Trust
Trust GXT 28 User manual

Trust
Trust 17735 User manual

Trust
Trust 16064 User manual

Trust
Trust 850F User manual

Trust
Trust GXT 580 User manual

Trust
Trust 16784 User manual

Trust
Trust COMPACT VIBRATION FEEDBACK STEERING WHEEL User manual

Trust
Trust Predator Extreme User manual

Trust
Trust Vibration Feedback Sight Fighter PSX User manual

Trust
Trust Sight Fighter PSX User manual