PowerBoss Armadillo 9X Series User manual

PowerBoss, Inc. Copyright 2010
PB# 4100033 Rev.* 06/10Armadillo 9X Series Sweeper
Page 1
Service Manual
Armadillo 9X Series
Models: 9XR, 9XR Europe, & 9XV
Gasoline, Lpg & Diesel
Starting @ Serial No. 18168059
PowerBoss, Inc.
A Member Of The Hako Group
PB# 4100039 Rev. * 06/10

PowerBoss, Inc. Copyright 2010
PB# 4100039 Rev.* 06/10 Armadillo 9X Series Sweeper
Page 2
PREFACE
Thank you for your purchase of the now industry standard for sweepers. PowerBoss takes great pride
in offering the most dependable, reliable and best value in industrial power sweepers and sweeper /
scrubbers. We set the standard.
Our Publishing Department would like to hear from you. If you see any errors, omissions or something
that needs clarication in this Service Manual please let us know. We are working hard toward perfec-
tion in our corner of the process to bring you the best you can buy. Please copy the form below, ll out
and comment on how you found our catalog.
Thank you.
*Name______________________________________________________________________
*Title: ______________________________________________________________________
*Company Name: _____________________________________________________________
*Address: ____________________________________________________________________
*Country: ____________________________________________________________________
Type of equipment or model number: ______________________________________________
Comments:
*Information is optional.
Please return to:
Manager, Publishing Department, International
PowerBoss, Inc.
175 Anderson Street
Aberdeen, North Carolina 28315 USA
Phone (800) 982-7141 Toll Free
(910) 944-2105 Local
E-Mail - [email protected]
PREFACE

PowerBoss, Inc. Copyright 2010
PB# 4100033 Rev.* 06/10Armadillo 9X Series Sweeper
Page 3
This is the Spare Parts Catalog for the PowerBoss Armadillo SW/9X Series Sweeper.
This catalog covers all Standard Armadillo 9X Series machine variations beginning May 2009.
We believe this machine will provide excellent service for many years.
However, the best results will be obtained if:
• The machine is operated with reasonable care.
• The machine is maintained regularly per the maintenance schedule provided in the User Manual.
• The machine is maintained with PowerBoss Inc. supplied or equivalent parts.
All right side and left side references to the machine (except for engine) are determined by facing the
direction of forward travel. The front of the engine or engine fan faces the rear of the machine. Some
hardware considered to be common or locally available has been omitted from the parts section to
make this manual clear. Be sure to use equivalent hardware when replacement becomes necessary.
The Model and Serial Number of your machine is shown on the I.D. name plate. This information is
needed when contacting Technical Support or when ordering parts. The I.D. plate is mounted on the
console of the machine left of the operator. Adjacent the main broom adjustment access door.
Example I.D Plate;
Parts may be ordered by phone,fax or e-mail from any PowerBoss parts and service center. Before
ordering parts or supplies, be sure to have your machine model number and serial number handy.
For your convenience Fill out the data block below for future reference.
MACHINE DATA
Fill out at installation
Serial Number: ___________________________________
Engine Serial Number: ____________________________
Sales Rep.: ______________________________________
Date of Install: ___________________________________
All information contained in this catalog is current at the time of printing However, PowerBoss re-
serves the right to make changes at any time without notice.
©2010, PowerBoss, Inc., Printed in USA
*Note* Where No Part Number Is Listed In The Right Column Part Number Is The Same As The Left Column
PREFACE

PowerBoss, Inc. Copyright 2010
PB# 4100039 Rev.* 06/10 Armadillo 9X Series Sweeper
Page 4
TECHNICAL SPECIFICATIONS
Model Armadillo 9X series
Model No. 9XRGASES / 9XRLPES / 9XRDSLES / 9XRGASESBR / 9XRLPESBR / 9XRDSLESBR
/ 9XRDSLCE / 9XRLPGCE / 9XNDLXLP / 9XNDLXGAS / 9XKDLXDSL / 9XDLXLPBR /
9XDLXDSLBR / 9XDLXGASBR
DIMENSIONS & WEIGHT
Length . . . . . . . . . . . . . . . . . . 105 inch
Width . . . . . . . . . . . . . . . . . . . 60 inch
Height................... 55.38 inch
Height w/ overhead guard . . . 81 inch
Height w/ cab . . . . . . . . . . . . . 81 inch
Weight . . . . . . . . . . . . . . . . . . 3500 lbs.
Minimum U-turn . . . . . . . . . . . 110 inch
SWEEPING SYSTEM
Productivity . . . . . . . . . . . . . . 184800 sq ft per hour
Sweep path. . . . . . . . . . . . . . . 62 inch
Main broom. . . . . . . . . . . . . . . 48 inch
Side broom . . . . . . . . . . . . . . . 24 inch
Second side broom. . . . . . . . . optional (72 inch path)
Hopper type . . . . . . . . . . . . . . RTR high dump
Hopper volume . . . . . . . . . . . . 22 cu ft
Hopper load capacity . . . . . . . 1500 lbs
Dust control . . . . . . . . . . . . . . 110 sq ft
High dump . . . . . . . . . . . . . . . 60 inch
RTR (rotary trash relocation) . yes
TECHNICAL SPECIFICATIONS

PowerBoss, Inc. Copyright 2010
PB# 4100033 Rev.* 06/10Armadillo 9X Series Sweeper
Page 5
CE DECLARATION OF CONFORMITY
DECLARATION OF CONFORMITY

PowerBoss, Inc. Copyright 2010
PB# 4100039 Rev.* 06/10 Armadillo 9X Series Sweeper
Page 6
TABLE OF CONTENTS
PREFACE .............................. 2
TECHNICAL SPECIFICATIONS. . . . . . . . . . . . . 4
DIMENSIONS & WEIGHT ........................ 4
SWEEPING SYSTEM ........................... 4
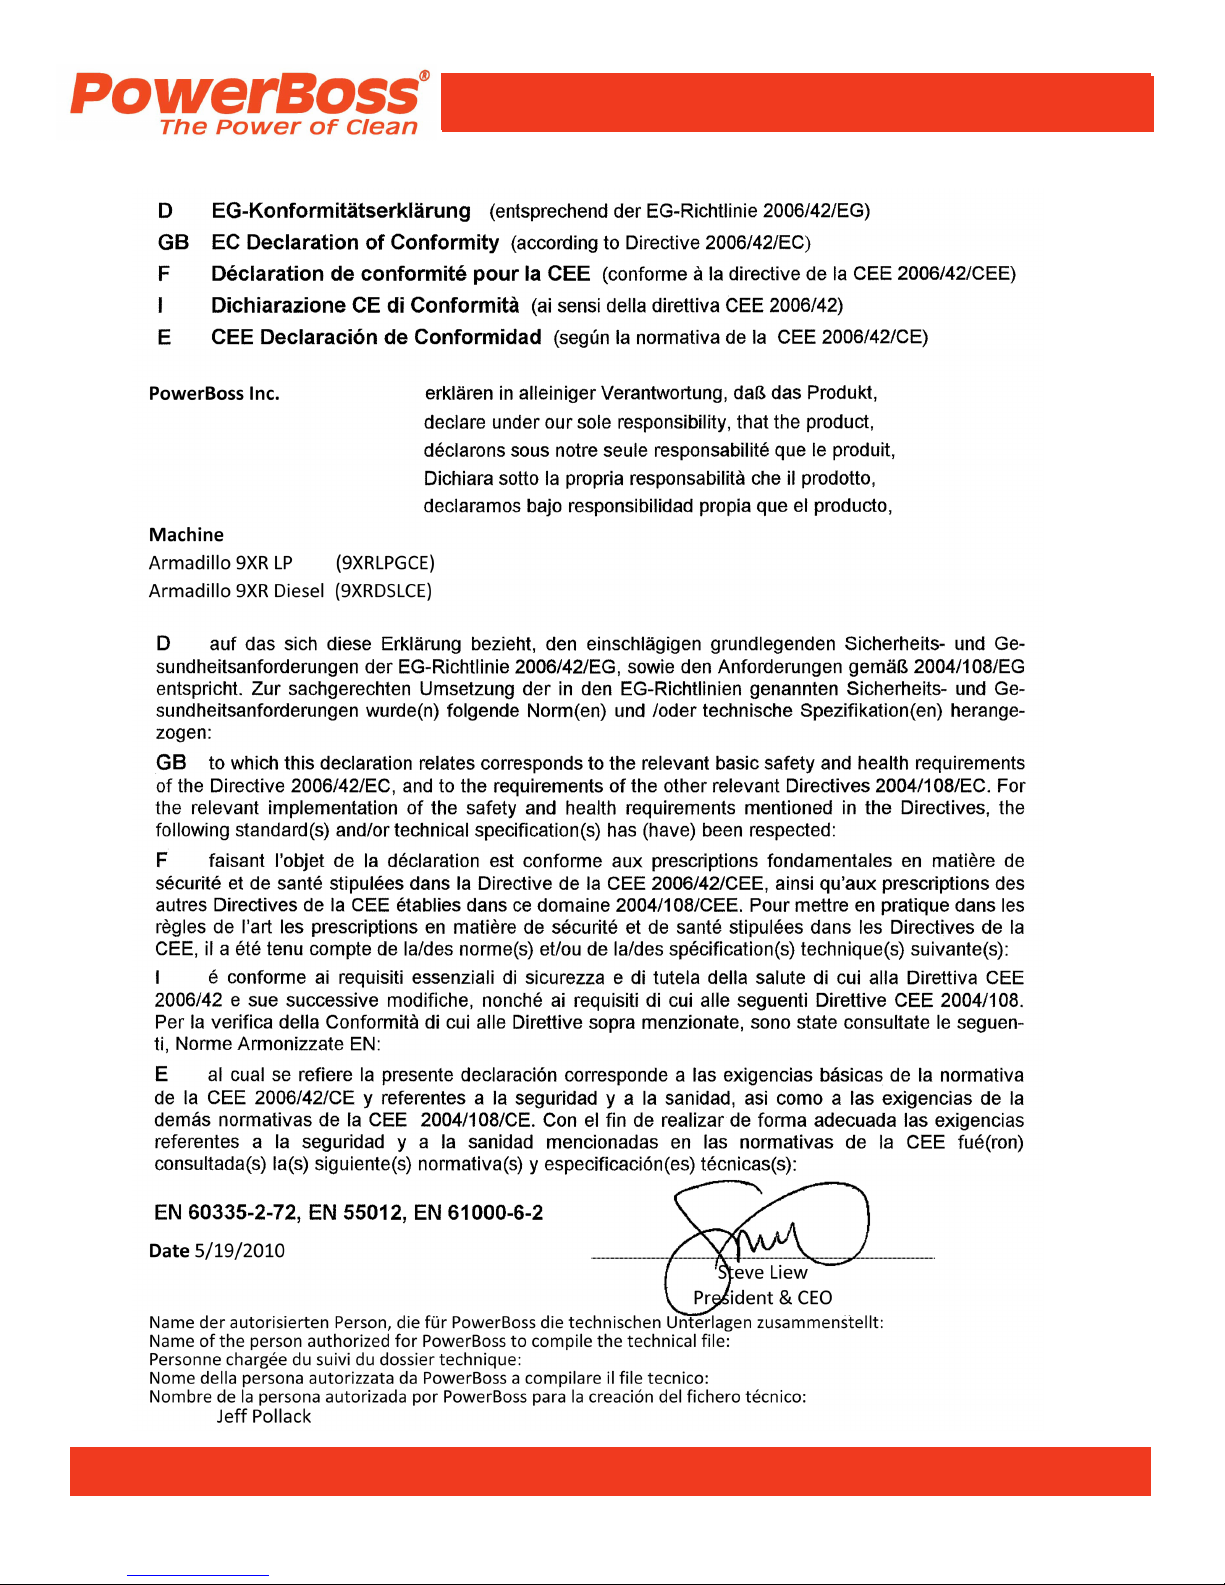
CE DECLARATION OF CONFORMITY . . . . . . . 5
SAFETY INFORMATION . . . . . . . . . . . . . . . . . . 8
IMPORTANT SAFETY INSTRUCTIONS. . . . . . . . . . . . . 8
FOR SAFETY DURING OPERATION. . . . . . . . . . . . . . . 8
FOR SAFETY WHEN SERVICING OR
MAINTAINING MACHINE ........................8
SAFETY SYMBOLS ............................ 8
SAFETY DECALS. . . . . . . . . . . . . . . . . . . . . . . . . . . . . . 9
BASIC POWERBOSS® SAFETY. . . . . . . . . . . . 10
TROUBLESHOOTING AND REPAIR . . . . . . . . . 12
OVERVIEW . . . . . . . . . . . . . . . . . . . . . . . . . . . . . . . . . . . 12
GENERAL SERVICE INFORMATION . . . . . . . . . . . . . . 12
TRANSPORTING THE MACHINE. . . . . . . . . . . . . . . 12
Using a Trailer or Transport Vehicle . . . . . . . . . . . 12
Pushing the Machine . . . . . . . . . . . . . . . . . . . . . . 12
TROUBLESHOOTING .......................... 12
TROUBLESHOOTING CHART . . . . . . . . . . . . . . . . . . . . 13
TROUBLESHOOTING PROCEDURES . . . . . . . . . . . . . 16
AIR INTAKE SYSTEM ........................ 16
Check Air Filter Service Indicator . . . . . . . . . . . . . 16
Air Filter Element Removal . . . . . . . . . . . . . . . . . 16
Air Filter Cleaning. . . . . . . . . . . . . . . . . . . . . . . . . 16
Air Filter Inspection . . . . . . . . . . . . . . . . . . . . . . . 16
Air Filter Installation . . . . . . . . . . . . . . . . . . . . . . . 16
ELECTRICAL SYSTEM . . . . . . . . . . . . . . . . . . . . . . 17
Battery Cleaning. . . . . . . . . . . . . . . . . . . . . . . . . . 17
Battery Replacement . . . . . . . . . . . . . . . . . . . . . . 17
Circuit Breakers .......................... 17
Fuses . . . . . . . . . . . . . . . . . . . . . . . . . . . . . . . . . . 17
FUEL SYSTEM . . . . . . . . . . . . . . . . . . . . . . . . . . . . . 18
COOLANT SYSTEM. . . . . . . . . . . . . . . . . . . . . . . . . 18
Blowing Out Radiator Fins . . . . . . . . . . . . . . . . . . 18
Reverse Flow Flushing. . . . . . . . . . . . . . . . . . . . . 18
LUBRICATION . . . . . . . . . . . . . . . . . . . . . . . . . . . . . . 18
Changing Engine Oil . . . . . . . . . . . . . . . . . . . . . . 18
LUBRICATION POINTS . . . . . . . . . . . . . . . . . . . . . . 19
Rear Drive Rotary Actuator . . . . . . . . . . . . . . . . . 19
Engine Mount Pivot . . . . . . . . . . . . . . . . . . . . . . . 19
Latches & Hinges . . . . . . . . . . . . . . . . . . . . . . . . . 19
Hopper Lift Arm Mounts . . . . . . . . . . . . . . . . . . . . 20
HYDRAULICS SYSTEM . . . . . . . . . . . . . . . . . . . . . . 21
Filling The Fluid Reservoir . . . . . . . . . . . . . . . . . . 21
Hydraulic Fluid Viscosity Specications . . . . . 21
Maintaining Hydraulic Oil Cooler Efciency . . . . . 21
Changing The Hydraulic Fluid . . . . . . . . . . . . . . . 21
Changing The Hydraulic Fluid Filter. . . . . . . . . . . 21
ADJUSTING THE DIRECTIONAL CONTROL
RETURN SPRING . . . . . . . . . . . . . . . . . . . . . . . . . . . 22
HOPPER ..................................22
High Dump Hopper Removal . . . . . . . . . . . . . . . . 22
High Dump Hopper Replacement . . . . . . . . . . . . 22
Filter Removal ........................... 23
Filter Cleaning ........................... 23
Filter Replacement ........................ 23
WEEP COMPONENTS .......................24
Broom Door Flap Inspection . . . . . . . . . . . . . . . . 24
Broom Door Flap Replacement and
Adjustment . . . . . . . . . . . . . . . . . . . . . . . . . . . . . . 24
Main Broom Adjustment . . . . . . . . . . . . . . . . . . . . 24
Main Broom Height Adjustment . . . . . . . . . . . . . . 24
Main Broom Taper Adjustment . . . . . . . . . . . . . . . 25
Main Broom Replacement . . . . . . . . . . . . . . . . . . 25
Side Broom Angle Adjustment . . . . . . . . . . . . . . . 26
Side Broom Height (Wear) Adjustment . . . . . . . . 26
To Adjust The Side Broom Height
For a 9XR or 9XV model: . . . . . . . . . . . . . . . . 26
To Adjust The Side Broom Height
For a 9XR Europe model: . . . . . . . . . . . . . . . . 26
Side Broom Lift Cable Adjustment . . . . . . . . . . . . 26
Side Broom Replacement . . . . . . . . . . . . . . . . . . 26
Floor Clearance and Dump Angle Adjustment 27
Vacuum Gasket Mount Adjustment . . . . . . . . . . . 29
Flap Replacement ........................ 29
Frame Seal Replacement . . . . . . . . . . . . . . . . . . 29
Front Frame Seal . . . . . . . . . . . . . . . . . . . . . . 29
Side Frame Seal. . . . . . . . . . . . . . . . . . . . . . . 29
TABLE OF CONTENTS

PowerBoss, Inc. Copyright 2010
PB# 4100033 Rev.* 06/10Armadillo 9X Series Sweeper
Page 7
TABLE OF CONTENTS (Continued)
PARKING BRAKE ........................... 29
Adjusting The Parking Brake Cable Length . . . . . 29
TIRES .................................... 30
Changing Solid Tires . . . . . . . . . . . . . . . . . . . . . . 30
Changing Pneumatic Tires . . . . . . . . . . . . . . . . . . 30
MISCELLANEOUS ADJUSTMENTS . . . . . . . . . . . . . 30
Anti-Static Chain Adjustment . . . . . . . . . . . . . . . . 30
Latch and Hinge Maintenance . . . . . . . . . . . . . . . 30
Cables .................................30
SCHEMATIC ELECTRICAL
W/KUBOTA V1505 ....................... 31
SCHEMATIC ELECTRICAL W/GM 1.6L . . . . . . 32
SCHEMATIC ELECTRICAL 9XR EUROPE
W/KUBOTA V1505 ....................... 33
SCHEMATIC HYDRAULIC 9XR . . . . . . . . . . . . . 34
SCHEMATIC HYDRAULIC 9XR EUROPE . . . . . 35
SCHEMATIC HYDRAULIC 9XV . . . . . . . . . . . . . 36
WARRANTY ............................ 37
TABLE OF CONTENTS

PowerBoss, Inc. Copyright 2010
PB# 4100039 Rev.* 06/10 Armadillo 9X Series Sweeper
Page 8
SAFETY INFORMATION
IMPORTANT SAFETY INSTRUCTIONS
Operators must read and understand this manual
before operating or maintaining this machine.
Do not operate this machine in ammable or
explosive areas.
This machine is designed solely for removing
dirt, dust and debris in an outdoor or indoor
environment. PowerBoss does not recommend
using this machine in any other capacity.
The following information below may cause a
potential hazard to the operator and equipment.
Read this manual carefully and be aware when
these conditions can exist. Take necessary
steps to locate all safety devices on the machine
and train the personnel operating the machine.
Report any machine damage or faulty operation
immediately. Do not use machine if it is not in
proper operating condition.
FOR SAFETY DURING OPERATION
Keep hands and feet clear of moving parts while
machine is in operation.
Make sure all safety devices are in place and
operate properly. All covers, doors and latches
must be closed and fastened before use.
During operation, attention should be paid to
other persons in the work area and especially if
small children are present.
Components can cause an explosion when
operated near explosive materials or vapor.
Do not operate this machine near ammable
materials such as solvents, thinners, fuels, grain
dust, etc.
Store or park this machine on a level surface
only. To prevent unauthorized use, machine
should be stored or parked with the key removed.
This machine is designed for level operation only.
Do not operate on ramps or inclines greater than
2%.
This machine is not suitable for picking up
hazardous dusts.
Use caution when moving this machine into areas
that are below freezing temperatures.
FOR SAFETY WHEN SERVICING OR
MAINTAINING MACHINE
Stop on level surface.
Disconnect the power to the machine when
servicing.
Avoid moving parts. Do not wear loose jackets,
shirts, or sleeves when working on machine.
Avoid contact with battery acid. Battery acid
can cause burns. When working on or around
batteries, wear protective clothing and safety
glasses. Remove metal jewelry. Do not lay tools
or metal objects on top of battery.
Authorized personnel must perform repairs
and maintenance. Use PowerBoss supplied
replacement parts.
SAFETY SYMBOLS
Five symbols are used throughout this
manual to emphasize various levels of safety
information. These symbols and the meaning of
each are listed below.
DANGER
To warn of immediate hazards which will result
in severe personal injury or death
WARNING
To warn of hazards or unsafe practices which
could result in severe personal injury or death.
CAUTION
To warn of hazards or unsafe practices which
could result in minor personal injury.
ATTENTION!
To warn of practices which could result in
extensive equipment damage.
SAFETY INFORMATION

PowerBoss, Inc. Copyright 2010
PB# 4100033 Rev.* 06/10Armadillo 9X Series Sweeper
Page 9
NOTE: To direct your attention to important
equipment information or special
instructions for preventing damage to
equipment
Symbols at the top of the list are the strongest
warnings. However, all symbols represent
important information which should be observed
to protect you and others from harm and injury,
and to prevent damage to the equipment.
SAFETY DECALS
Decals directly attached to various parts of the
sweeper are highly visible safety reminders which
should be read and observed. Make sure the
decals are replaced if they become illegible or
damaged.
Located in the drive compartment:
Part Number 301854
Located at the Impeller:
Part Number 301729
Located on the High Dump Hopper:
Part Number 301732
Located on the High Dump Hopper:
Located on the shroud of the radiator:
Part Number 301733
Located on the Shroud of the Radiator:
SAFETY INFORMATION

PowerBoss, Inc. Copyright 2010
PB# 4100039 Rev.* 06/10 Armadillo 9X Series Sweeper
Page 10
BASIC POWERBOSS® SAFETY
PowerBoss® sweepers should never be operated
unless:
1. The operator is trained and authorized to
operate the equipment and,
2. The equipment is free of malfunctions.
Malfunctioning equipment should be removed
from service.
DANGER
Keep cigarettes, matches and all other ame
sources away from the sweeper. Gasoline, LP
gas and diesel fuel are highly ammable. Lead
acid batteries are equally dangerous due to the
highly explosive hydrogen gas they emit.
WARNING
Before starting the engine, make sure that:
* You are securely seated in the operator’s
seat.
* The parking brake is locked.
* The directional control pedal is in neutral.
* The throttle is in idle.
* Hydraulic controls are in the OFF position.
WARNING
During operation:
* Keep your hands and body clear of moving
parts, especially when the hopper or lift arms
are partially or fully raised.
* Make sure others in the area stay clear of the
equipment and moving parts.
* Never attempt to dump debris from a dock or
mezzanine. Dump from ground level only.
WARNING
When leaving the sweeper unattended:
* Place the controls in the OFF position.
* Set the parking brake.
* Shut off the engine.
WARNING
During cleaning and maintenance:
* Always stop the engine and set the parking
brake before servicing.
* Never use detergents or cleansers that are
ammable or combustible.
* Never inate a pneumatic tire without using a
safety cage.
* Do not attempt any impeller adjustment
unless you have shut off the engine. Never
place your hands near the intake hoses or
inlet when the engine is running.
* Always engage the safety arm before
servicing the hopper. Do not rely on the
hydraulic cylinder to keep the hopper raised.
* Never test for hydraulic hose leaks using
your hand or any other part of your body.
High pressure leaks can be very dangerous
and should only be checked using a piece or
paper.
WARNING
When servicing or repairing the fuel system:
* Work in a properly ventilated area, do not
smoke or allow an open ame near the fuel
system.
* Never bypass safety components unless you
are testing them.
* Never bypass the fuel lter lock, except when
testing them (and always reconnect them
after testing).
* Wear gloves to disconnect the tank coupling.
SAFETY INFORMATION

PowerBoss, Inc. Copyright 2010
PB# 4100033 Rev.* 06/10Armadillo 9X Series Sweeper
Page 11
WARNING
Do not operate an LPG powered sweeper
when any component in the fuel system is
malfunctioning or leaking.
WARNING
Replace any defective safety components
before operating the sweeper.
CAUTION
Do not drive with the hopper in the raised
position except the few feet necessary to
position the hopper over the dumpster or
receptacle. Driving with the hopper raised
reduces visibility and creates conditions
for striking over-head objects, throwing the
machine off-balance and other hazards.
CAUTION
Travel slowly on grades.
CAUTION
Place a block or chock behind the wheels when
parking on inclines.
CAUTION
Use special care when traveling on wet
surfaces.
CAUTION
Observe all proper procedures for operation and
maintenance of the sweeper, as outlined in this
manual.
CAUTION
Remain alert at all times to people and
equipment in and around your area of operation.
ATTENTION!
Do not operate the #2 RTR lever before the #1
light illuminates.
ATTENTION!
Never push or tow a machine faster than 6 mph.
ATTENTION!
Engage tow valve before towing or pushing.
SAFETY INFORMATION

PowerBoss, Inc. Copyright 2010
PB# 4100039 Rev.* 06/10 Armadillo 9X Series Sweeper
Page 12
TROUBLESHOOTING AND REPAIR
OVERVIEW
This section provides information to assist in
identifying maintenance trouble and provides
possible causes and actions to correct the
problem. The procedures provide service
instructions for your 9X series sweeper. General
service information provides good practices
and for overall servicing the equipment. The
troubleshooting table is organized in the following
sections:
• Diesel Engine
• Hydraulic System
• Vacuum System
Additional troubleshooting information is provides
in the Kubota Diesel Engine Operator and service
Manuals and the GM1.6L Emission Control
Service Manual, refer to these manuals for
engine difculties.
NOTE: For a preventative maintenance schedule
refer to the 9X Series User Manual
PB# 4100033
GENERAL SERVICE INFORMATION
TRANSPORTING THE MACHINE
Using a Trailer or Transport Vehicle
1. Position the machine on the transport vehicle
or trailer and apply the parking brake.
2. Tie the machine down using the tie down
holes in the frame behind both front wheels
and in the rear center of the frame.
NOTE: Attach the tie downs to the frame only.
Pushing the Machine
Push the machine from the front or rear using the
bumpers only.
ATTENTION!
Do not tow or push the machine a distance of
more than .5 miles (.80 kilometers) or faster
than one mile per hour (1.61 km). Exceeding
these restrictions may cause damage to the
hydraulic system. If towing will exceed the
above restrictions, the rear wheel must be
raised or supported by a dolly.
TROUBLESHOOTING
This section provides information to assist in
identifying maintenance trouble and provides
possible causes and actions to correct the
problem.
TROUBLESHOOTING AND REPAIR

PowerBoss, Inc. Copyright 2010
PB# 4100033 Rev.* 06/10Armadillo 9X Series Sweeper
Page 13
TROUBLESHOOTING CHART
PROBLEM POSSIBLE CAUSE(S) SOLUTION(S)
Engine will not start or runs
roughly after start.
NOTE: On machines with
LPG fuel, also check the
following:
Battery dead. Recharge or replace battery.
Machine out of fuel. Refuel
Fuel lter plugged. Clean or replace lter.
Fuel line broken or obstructed. Blow fuel line out with compressed air.
Dirty air lter.
Problems with spark plugs, ignition points,
ignition coil
ignition switch, carburetor,
regulator, wiring harness.
Clean or replace air lter.
Review engine manual at
back of this manual for
maintenance and
troubleshooting procedures.
Tank valve not fully opened. Open the valve slowly.
Fuel tank type does not match fuel supply. Use the correct tank type for the fuel
supply.
Fuel tank and lines are covered with frost. Open shut-off valve slowly to ¼ open,
start.
Defective vacuum lock-off. Replace or repair.
Engine overheats.
NOTE: If coolant loss has
not occurred, check for
malfunction of the temperature
sending unit.
Low coolant level. Supply coolant.
Clogged radiator. Flush radiator.
Loose fan belt. Tighten belt.
Defective thermostat. Replace thermostat.
PowerBoss® moves slowly or
does not move.
Parking brake is on. Release brake.
Directional control pedal jammed,
damaged, or not adjusted properly.
Clear jam or adjust linkage.
Tires skidding from contact with oil or
grease.
Clean tires or drive through a solvent
absorbing substance.
Wheels jammed. Clear jam.
Low hydraulic uid level. Add hydraulic uid.
Hydraulic uid temperature too high
and too thin caused by excessive load,
climbing, high environment temperatures,
worn pump, or improper uid.
Use the proper weight oil or the operation
conditions; check pump.
Damaged or worn pump drive coupling. Replace damaged item.
Other problems with the hydraulics
system: pump failure, motor failure, relief
valve leaking or stuck open.
See Hydraulics System Problems in this
section.
PowerBoss® creeps in
neutral.
Directional control pedal return spring is
out of adjustment.
Perform the adjustment procedures.
Brushes do not turn or turn
very slowly.
Hydraulic system problem: See Hydraulics System Problems in this
section.
Motor
Control valve
Gear pump
Relief valve
TROUBLESHOOTING AND REPAIR

PowerBoss, Inc. Copyright 2010
PB# 4100039 Rev.* 06/10 Armadillo 9X Series Sweeper
Page 14
TROUBLESHOOTING CHART
PROBLEM POSSIBLE CAUSE(S) SOLUTION(S)
Little or no vacuum in brush
compartment.
Filters clogged. Clean lters.
Leak or clog in hose from impeller. Repair leaks; clear obstructions or replace
hose.
Impeller failure. Check and repair.
Loss of dust control. Debris in hose or impeller inlet. Clean.
Broom skirts or seal worn. Replace.
Skirt clearance from oor exceeds ⅛”. Adjust clearance.
Dust control lters clogged. Clean lters.
Filter seals worn or missing. Replace.
Poor seal with vacuum gasket. Visually check and adjust, if necessary.
Sweeper unit leaving debris. Hopper full. Dump hopper.
Broom(s) out of adjustment. Adjust.
Broom bristles worn. Check broom for wear and adjustment.
Poor performance of broom drive
mechanism.
Check for jam in broom chamber.
Broom lift arms hung up with debris. Clear out debris.
Hopper aps damaged or missing. Replace or adjust clearance.
Hopper out of adjustment. Check hopper clearance.
Dust control lters clogged. Clean lters.
Hopper does not raise or
lower.
Hydraulics system problem: See Hydraulics Systems
Problems in this section.
Control valve
Gear pump
Lift cylinder
Relief valve
Hopper arms binding. Lubricate or adjust arm linkage.
Hopper lift cylinder failure. Line to cylinder leaking. Tighten ttings or replace hose.
Piston seals leaking. Replace seals.
Bent piston rod. Replace rod.
Hopper does not rotate or
rotates too slowly.
Hopper load too heavy. Dump more frequently.
Hydraulics system problem: See Hydraulics System
Problems in this section.
Control valve
Gear pump
Lift cylinder
Relief valve
Hydraulic control valve failure Misaligned control linkage. Align.
Foreign matter in spool bore. Remove spool and clean bore.
Valve seals Leaking. Replace seals.
O-rings leaking. Replace O-rings
Relief valve stuck open. Clean or replace relief valve.
TROUBLESHOOTING AND REPAIR

PowerBoss, Inc. Copyright 2010
PB# 4100033 Rev.* 06/10Armadillo 9X Series Sweeper
Page 15
TROUBLESHOOTING CHART
PROBLEM POSSIBLE CAUSE(S) SOLUTION(S)
Hydraulic motor failure. Motor leaking. Replace seals.
Drive link malfunction. Replace drive link.
Output shaft malfunction. Replace output shaft and bearings.
Hydraulic gear pump failure. Pump leaking. Replace seals or RR Pump
Gears worn or scored. Rebuild pump or RR Pump
Relief valve stuck. Clean or replace (at control valve).
Oil supply low. Check and ll.
Oil strainer clogged. Replace strainer (inside reservoir).
Incorrect oil. Use recommended viscosity oil.
Damage due to entry of air into hydraulic
system.
Maintain correct hydraulic uid level in
reservoir. Keep suction hose ttings tight..
Hydraulic variable
displacement pump failure.
Pump leaking. Replace seals.
Relief valve(s) stuck. Clean or replace relief valve(s) at the
pump.
Drive coupling malfunction. Replace defective gears.
Control linkage out of adjustment. Check to see if linkage is binding
unfastened.
Charge pump gears worn or scored. Replace defective gears.
Damage due to entry of air into hydraulic
system.
Maintain correct hydraulic uid level in
reservoir. Keep suction hose ttings tight.
Hydraulic system noisy. Air in system. Check uid level in reservoir; check for
loose connections or leaks.
Relief valve dirty or damaged. Clean or replace.
Loose suction line. Tighten ttings.
Clogged section lter or pump inlet line. Replace lter, clear line; change uid in
reservoir if dirty and ush system.
Internal pump or motor damage. Inspect and repair.
TROUBLESHOOTING AND REPAIR

PowerBoss, Inc. Copyright 2010
PB# 4100039 Rev.* 06/10 Armadillo 9X Series Sweeper
Page 16
Air Filter Element Removal
1. Turn off the engine and set the parking brake.
2. Lift the engine cover.
3. Locate the air lter and loosen the retaining
clamp.
NOTE: The diesel engine has a screw type
retaining clamp. The gas and LP engines
have two lever retaining clamps.
4. Remove the dust cup.
5. Pull the rubber plug out of the dust cup and
empty the contents.
NOTE: The Diesel engine has a wing nut holding the
air lter element in place, remove the wing nut
rst.
6. Pull the air lter elements out of its housing.
Air Filter Cleaning
1. Once you have removed the air lter
elements, empty the dust cup and clean the
interior of the air lter housing.
2. Use an air hose to blow out the air lter
elements. Air pressure should be 100 psi or
less.
Air Filter Inspection
1. After you clean the air lter elements, check
the elements for holes by passing a light bulb
inside it.
Air Filter Installation
1. Wipe out the air cleaner housing with a damp
cloth. Be sure all dirt is removed.
2. Install the cleaned replacement lter elements
so that the ns are at the far end of the
housing. Be careful not to damage the ns.
3. Replace the wing nut and tighten it (Diesel
only).
4. Replace the rubber plug in the dust cup.
5. Replace dust cup, being sure embossed word
“top” on cup is positioned correctly
(up).
6. Tighten the ring clamp or retaining clips.
7. Check the condition of intake hoses and
clamps. Close engine cover.
TROUBLESHOOTING PROCEDURES
AIR INTAKE SYSTEM
Check Air Filter Service Indicator
The air lter service indicator shows when to
change the air lter element. Check the indicator
on a daily basis. The red indicator gradually
becomes visible as the air lter elements load
with dirt. It is not necessary to change the air lter
elements until the red indicator reaches the top of
the service indicator and locks into position.
1. Lift engine cover.
2. Inspect air lter service indicator
NOTE: The indicator may return to the nonviable
position when the engine is shut off. To
check, reset indicator and turn on the
engine, if it locks in visible position again
clean or change element.
AIR FILTER
ELEMENT INNER
AIR FILTER SERVICE
INDICATOR
RETAINING
CLAMPS
DUST CAP
AIR FILTER
ELEMENT OUTER
TROUBLESHOOTING AND REPAIR

PowerBoss, Inc. Copyright 2010
PB# 4100033 Rev.* 06/10Armadillo 9X Series Sweeper
Page 17
ELECTRICAL SYSTEM
Battery Cleaning
1. Combine baking soda and water in a strong
solution.
2. Brush the solution over the battery top,
including terminals and cable clamps. Make
sure the solution does not enter the battery.
3. Using a wire brush, clean the terminal posts
and cable clamps.
4. Apply a thin coating of petroleum jelly to the
terminals and cable clamps.
Battery Replacement
CAUTION
Remove the negative battery cable before you
remove the positive battery cable. This is done
to prevent accidental electrical shorting which
can result in personal injury.
1. Disconnect the negative (-) cable and then the
positive (+) cable.
2. Remove the battery.
3. Install the new battery.
4. Connect the positive (+) battery cable rst,
then the negative (-) cable.
Circuit Breakers
If a circuit breaker trips, it can be reset by pressing
the reset button in the center of the breaker. (The
circuit breakers are located on the instrument
panel below the steering wheel).
Fuses
Fuses are located in the fuse panel behind the
hopper on the re wall upper right corner when
facing the unit
CAUTION
Safety Arm Must Be Engaged When Checking
These Fuses
FUSES
CIRCUIT
BREAKER
TROUBLESHOOTING AND REPAIR

PowerBoss, Inc. Copyright 2010
PB# 4100039 Rev.* 06/10 Armadillo 9X Series Sweeper
Page 18
FUEL SYSTEM
WARNING
Never attempt to perform any service on the
equipment or components until the engine is
OFF, the parking brake is LOCKED, and the
wheels are CHOCKED.
WARNING
Never operate an LPG powered sweeper
when any component in the fuel system is
malfunctioning or leaking.
WARNING
Never bypass safety components unless you
are testing them.
WARNING
Replace any defective safety components
before operation the sweeper.
WARNING
During repair or servicing of the fuel system,
work in a properly ventilated area and do not
smoke or allow an open ame near the fuel
system.
WARNING
When disconnecting the tank coupling, always
wear gloves. LPG fuel can freeze bare hands.
WARNING
Under no circumstances should the fuel lter
lock be bypassed, except when testing. After
testing, always reconnect lock. Bypassing the
fuel lter lock after testing creates a potential
re hazard.
Tier װ compliant fuel system Refer to P.S.I Service
Manual
COOLANT SYSTEM
Blowing Out Radiator Fins
NOTE: Make sure radiator is cool before
blowing out the radiator ns with
compressed air.
Reverse Flow Flushing
1. At the engine, disconnect the hoses.
2. Make sure the radiator cap is on tight.
3. Using a hose clamp, attach a ushing gun
onto the lower hose.
4. Turn on the water and ll the radiator.
5. To keep from damaging the radiator, apply air
pressure slowly and carefully.
6. Shut off the air pressure, rell the radiator
with water, and reapply the air pressure. You
will need to repeat these steps until water
ushed from the radiator runs out clear.
7. Inspect and clean the radiator cap.
8. Inspect and reconnect the hoses.
9. Rell the radiator with coolant.
NOTE: Use a 50/50 mixture of water and an anti-
freeze with an ethylene glycol base.
LUBRICATION
Gasoline and LPG Engines: Use any SF or SG
rated oil meeting API specications and suited to
seasonal temperatures.
Refer to the Engine Manufacturer’s Operator
Manual for these specications.
Changing Engine Oil
1. Place a drain pan under the lowest end of the
engine.
2. Remove the drain plug and allow the oil to
drain into the pan.
3. Remove the used oil lter and replace with a
new one.
4. Dispose of the oil and oil lter in an approved
manner.
5. Remove the engine oil cap, add oil in the
amounts listed in the engine manual, then
secure the cap.
TROUBLESHOOTING AND REPAIR

PowerBoss, Inc. Copyright 2010
PB# 4100033 Rev.* 06/10Armadillo 9X Series Sweeper
Page 19
Latches & Hinges
The hinges and latches and all doors and covers
should be lubricated with oil every 500 hours.
There are numerous hinges and latches, make
sure to lubricate all of the following:
• Engine cover
• Side Door
• Main Broom Door
• Seat Hinge
• Engine latch
LUBRICATION POINTS
Rear Drive Rotary Actuator
The rear drive rotary actuator must be lubricated
every 50 hours with grease, There are two grease
points on the actuator.
Engine Mount Pivot
The engine mount pivot must be lubricated every
500 hours with grease, There is one lubrication
point on the pivot located underneath the engine.
REAR DRIVE
ROTARY ACTUATOR
LUBRICATION POINTS
ENGINE
MOUNT PIVOT
LUBRICATION
POINT
TROUBLESHOOTING AND REPAIR

PowerBoss, Inc. Copyright 2010
PB# 4100039 Rev.* 06/10 Armadillo 9X Series Sweeper
Page 20
Hopper Lift Arm Mounts
The hopper lift arm mounts must be lubricated
every 500 hours with lithium grease, There is one
lubrication point on each mount.
1. Park the machine on a level surface.
2. Raise the hopper and engage the safety arm
WARNING
Do not rely upon the hydraulic cylinders to
keep the hopper raised for maintenance.
Always engage the safety arm before
servicing the hopper.
1. Shut off the engine and engage the parking
brake.
2. Locate and grease the hopper lift arm
lubrication points.
SAFETY
ARM
ENGAGED
Shown with Hopper Removed
HOPPER LIFT ARM MOUNT
LUBRICATION POINT
HOPPER LIFT ARM MOUNT
LUBRICATION POINT
TROUBLESHOOTING AND REPAIR
This manual suits for next models
17
Table of contents
Other PowerBoss Blower manuals

PowerBoss
PowerBoss PB620DSL User manual

PowerBoss
PowerBoss apex 47 g User manual

PowerBoss
PowerBoss C82 User manual

PowerBoss
PowerBoss Armadillo 9X User manual

PowerBoss
PowerBoss 82 Europe User manual

PowerBoss
PowerBoss armadillo 10x series User manual

PowerBoss
PowerBoss Admiral 38 Installation and operation manual

PowerBoss
PowerBoss Armadillo SW/9XR User manual