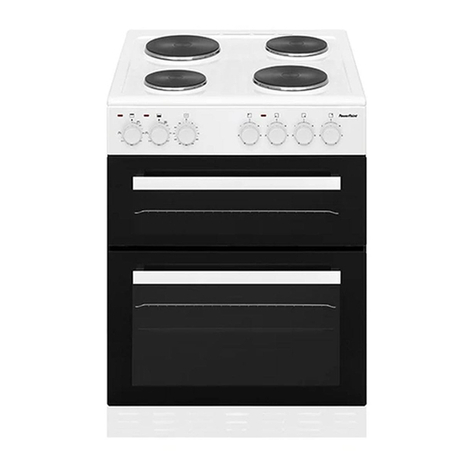
PowerPoint P05C2SWH User manual

Free Standing Electric Oven
50 x 60 - 60x60 cm
P05C2SWH / P06C2SWH /
P05C2S21NBL/ P05C2S1BL /
P06C2S21NBL

Features
………………………………….…………………………………………………………
……. 3
Safety Instructions........................................................................................ 4
Installation ................................................................................................... 6
Fixing to the Wall
…………………………………………………………………….…………….… 8
Electrical Requirements
…………………………….…………………………….…………...... 9
Connecting the Mains Supply
Cable…….….………………………………..….………... 10
Using your Hob
…………………………………………………………………………………..…. 11

Using your Oven
……………………….……………………………………………….…….….… 12
Cleaning and Care …………………………………...................................................
13
Replacing the Bulb/Top Tips
……………….…………………….…...……………………… 15
Disposal of Appliance/Problem Solving ……..……..…................................... 17
Health and Safety ...................................................................................... 18
Technical Data/ Warranty
Information………………….……………………………….. 20
Customer Care
…………………………………………….……………….…….…………………. 22

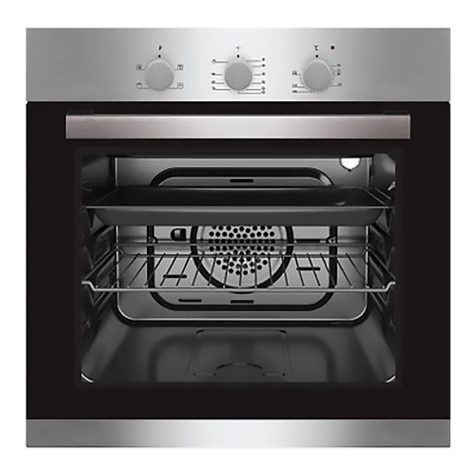
For illustration purposes only. Accessories provided with models P05C2SWH
– P06C2SWH
1 cooking tray, 2 chrome wire grid, 1 inner tray grid, 1 handle.

The use of any electrical appliance requires the following common sense
safety rules. There is danger of injury or death to the person and damage to
the appliance.
Note: If the following instructions are not adhered to the warranty will not
Be applicable
●This appliance is not intended for use by persons (including children)
with reduced physical, sensory or mental capabilities unless there is a
person responsible for their safety present
●Never attempt to repair the appliance yourself
●This appliance is intended to be used in household and residential
type environments, it is not suitable for commercial use
●Keep the electrical cable of your cooker away from any heat source
and do not let the cable touch the appliance
●Ensure that the electric supply cable is not trapped or damaged during
Installation
●Prior to installation ensure that the electricity voltage and frequency
are compatible with your cooker
●In the event that the cable connecting your cooker becomes damaged,
it must be replaced by an electrician
●The materials surrounding the appliance (cabinets) must be able to
withstand a minimum temperature of 100°C
●The appliance and its accessible parts become hot during use. Care
should be taken to avoid touching hot parts
●Cooking on a hob with fat or oil can be dangerous and should not be
left unattended
●NEVER try to extinguish a cooking fire with water. Instead switch off
the appliance and cover flame with a lid or a fire blanket
●The cooker may topple forward if a child climbs onto the door.
Children should be supervised in the kitchen at all times and this
Cooker must be secured to the wall using the fixing chain provided to prevent
accidents
●Do not allow children in the kitchen when cooking or while cooker
parts may still be hot. Many parts of the cooker will become hot
And present a considerable hazard to children

●When the oven is hot never touch the door
●Before starting to use your appliance ensure that curtains, paper or
flammable items are kept away from your appliance. Do not keep
flammable materials inside of or around your cooker
●Take care when closing the oven door that there is nothing
obstructing it from closing as this may break the glass door
●Position pans over the centre of the burners and turn handles to a
safe position where they cannot be knocked or grabbed
●Make sure the cooker control knobs are all in the off position when
not in use
●If you do not intend to use your cooker for a long period of time turn
off the electric supply to the cooker
●Ensure that the room where your cooker is installed is well ventilated
particularly while the cooker is in use. Keep natural ventilation holes
open and clear of obstructions or install an extractor hood. Prolonged
intensive use of your cooker may call for additional ventilation (by
opening a window)
●Do not try to lift or move this cooker by pulling on the door handle
●Ensure that the appliance is switched off before replacing the lamp to
avoid the possibility of electric shock
●Your appliance is produced in accordance with all applicable local and
International standards and regulations and must only be installed by an
authorized service technician
●Do not lean anything on the door while it is open as you may
unbalance your appliance or damage the door or its hinges
●Do not hang towels, dishcloths or clothes from the cooker or its
handles
●Do not operate the appliance using an external timer or remote
control system

●This cooker must be installed according to local regulations by a
suitably qualified technician
●Carefully unpack the cooker and check for any external visible
damage. Do not install or use if it is damaged
●Packaging materials should be collected together and disposed of
immediately as they may be harmful to children
●The appliance must be installed on a flat surface
●Surrounding furniture, cabinets and extractor fans should be
positioned in accordance with the diagram that follows
●If fitted, the extractor fan must be at least 65cm above the hob. If no
fan is fitted the minimum distance between the hob and any cabinet
or other structure must be 70cm
●This cooker should not be installed next to a refrigerator or freezer
●The height and level of the appliance can be adjusted by rotating the
feet underneath the appliance at each corner. Rotate in a clockwise
direction to decrease the height and anti-clockwise to increase the
height
●It is not recommended that the cooker is positioned below wall
cupboards, as the heat and steam may damage the cupboard and its
contents
●Keep all ventilation slots clear of obstruction

Before using the appliance fix it securely to the wall using the chain kit
provided. Fix to the wall at the back of the cooker. This will prevent the cooker
from toppling forward if excess weight is placed on the oven door. As the
chains must be attached to the wall using fixings suitable for your wall type,
the wall fixings are not supplied with the cooker. Fix the chain to the cooker
bracket with the nuts and bolts provided in the fixing kit. It is necessary to
ensure the chain is tight to avoid any movement of the cooker once it is
operational.
●All electrical connections should be made by a qualified Electrician

●Check that the voltage on the rating plate of your appliance
corresponds with your house electricity supply which must be A.C.
(Alternating Current)
●Ensure that the mains cable does not get damaged during installation
and that it never comes in contact with hot surfaces
●Do not let mains cables come into contact with the appliance door
Electrical details
Rated Voltage: 220 - 240 Vac 50 Hz
Supply Connection: 32 A (double pole switched fused outlet with3mm contact
gap)
Max Rated Inputs: 7.00 kW
Mains Supply Lead: 3 core x 6 mm² (not supplied)
For future reference please record the following information which can be
found on the rating plate and the date of purchase which can be found on
your sales invoice. The rating plate for your oven can be

The wires in the mains lead are coloured as follows:
GREEN AND YELLOW: EARTH
BLUE: NEUTRAL
BROWN: LIVE
●Release the cover plate by removing the cover screw
●Loosen the cable clamp
●Connect the mains supply cable to the terminal block on the cooker
using the colour code
●Secure the cable clamp
●Check the cable terminals for tightness and ensure that the terminal
links are in place, then replace the cover plate and cover screw
Control Panels

Please note as states below symbols may differ between models.
WARNING! There is a risk of burns from residual heat

Before first use switch on each cooking zone at 6 for 5 minutes. There may be
an unusual smell and some smoke, this is the burning off of protective
material and not a defect.
Each zone on the hob top is controlled by a knob. The icon above the dial
shows which knob controls which burner.
To activate a zone, position the control knob between 1 and 6. 6 is the highest
temperature setting and 0 is off. When you have finished cooking on a
particular zone, it is important to make sure that the control knob is turned
back to 0 (the off position). When turning the hob off, turn the knob
clockwise so that the position of the marker on the knob points upwards.
●Saucepans must be positioned exactly on the chosen zones for
efficient heating to occur. Pans should have the same diameter as the
cooking zone that they are being used on
●Do not use saucepans with rough bottoms as they can scratch the
surface of the hob. Use clean, dry pans only
●Cover pans with a lid to permit cooking at a lower heat
●Cook vegetables and potatoes, etc. in as little water as possible to
reduce cooking time
●Food or liquid that has a high sugar content may damage the hob top
if it comes into contact with the hob surface. Any spillages should be
wiped up immediately
●Before frying foods, dry the food and gently place into the hot oil
●Do not cover a pan of heating oil
●Position pans and saucepans so that their handles are not over the
hob to prevent the heating of handles
●Operating a cooking zone without a pan or saucepan on it will cause
damage to the appliance. Turn off each cooking zone after cooking is
complete
●Do not place plastic items on surface of the hob

When using your oven for the first time your oven may give off an unusual
smell from the heating elements and insulation materials. This is normal for
new cookers. To eliminate this smell run the oven at 240 degrees for 40-60
minutes with the oven empty. When cool, clean with warm soapy water.
In order to operate the oven the thermostat must be adjusted to the desired
temperature. In order to operate the oven, the timer switch should be set to
the desired cooking time.
Turn the oven function selection knob clockwise to select the mode of
cooking required.
●Do not use aluminium foil to line the bottom of the oven or grill tray
●Food should not be placed inside the cavity until the correct cooking
temperature has been reached
●Refer to food packaging for guidance on cooking temperatures and
times. Once familiar with the performance of your appliance,
temperatures and times can be varied to suit personal preference
●Check that any unused accessories are removed from the oven
●Place cooking trays in the centre of the oven and leave gaps between
the trays to allow air to circulate
●Keep oven door closed for all cooking functions
●Don’t place cookware on bottom of oven, use shelves

Cleaning the Oven
●Do not clean oven using caustic creams, abrasive cleaning powders,
wire wool or hard tools to clean any parts of this cooker
●Enamelled parts of the oven can be damaged if excess cleaning liquids
are not immediately removed
●Always turn the appliance off before cleaning and disconnect from
your mains supply
●Clean the interior parts of the oven with a soapy cloth, rinse and dry
thoroughly with a soft cloth
●Clean the glass surfaces with glass cleaning agents
●Never use flammable agents when cleaning your oven
●Do not clean your oven with a steam cleaner
●Do not wash any part of your oven in a dishwasher
●Clean spillages immediately
●Remove the glass front door by unscrewing the fixings using a
screwdriver, remove the inside glass, clean and rinse it. After drying
replace the seal properly and re-install the glass
●Cleaning of the oven should be carried out on a regular basis, clean
the interior after each use. Fat accumulation or other food remains
may result in a fire
●Care must be taken when cleaning between the door glass and inside
the inner frame as the edges may be sharp
●Cleaning must only be carried out when the oven is cool
●The oven should be thoroughly cleaned before it is operated for the
first time and after each use. This will avoid residual food stuffs
becoming baked onto the oven cavity. After residues have been baked
on several times, they are far more difficult to remove
●The oven cavity should only be cleaned with warm soapy water, using
either a sponge or soft cloth
●Outer parts of the oven should only be cleaned with warm soapy
Water using either a sponge or soft cloth
●Any damage that is caused to the appliance by a cleaning product will
not be rectified even if the appliance is within the guarantee period
●Do not use abrasive cleaners or sharp metal scrapers to clean the oven
door glass as it may shatter
Removing the Oven Door for Cleaning
:

To facilitate the cleaning of the inside of the cooker and the outer frame of the
oven, the door can be removed as follows:-
●Press the plastic latches on both left and right sides as shown in Figure
1 and
● Pull the profile towards you as shown in Figure 2
● Then remove the inner-glass as shown in Figure 3
If required the middle glass can be removed in the same way. After cleaning
and maintenance are done, remount the glass and the profile in reverse
Order.
Fig. 1 Fig. 2 Fig.3
●Open door, unlock by pulling the hinge lock upwards with a screw
driver
●Bring the hinge lock to the widest angle, bring both hinges connecting
the oven door to the same position
●Close the oven door to lean on the hinge lock
●To remove the oven door, pull it upwards by holding with both hands
when close to the closed position.
Cleaning the Hob Top
●Remove any residues of cleaning agents with warm soapy water
●Abrasive cleaners or sharp objects will damage the hob surface, use
warm soapy water

●It is easier to clean some deposits whilst the hob surface is still warm,
but be careful of burns
●Wipe the hob over with a damp cloth and a little washing up liquid after
each use
●Dry the appliance by rubbing the surface with a clean cloth
●To maintain the solid plates remove spillages using a soft brush, plastic
or nylon scourer and warm water
●To keep the solid plates in good condition put a little olive oil onto a
kitchen towel and rub it onto the surface of the plate. Alternatively you
can use a hotplate conditioner. If the solid plates are not maintained
regularly with olive oil or a hotplate conditioner they may rust

●Avoid using pans on the hob that are unstable as they may be easily
tipped over
●Use pans that have sufficient capacity for the amount of food being
cooked so that they don’t boil over
●Use dark coloured enamelled cookware to maximise heat
transmission
●Always position pans centrally over each hob zone
●Select the burner which is suitable for the size of the bottom of the
pot to be used
●Thick based pots will conduct heat more effectively
●When moving a pan from one zone to another, lift the pan and do not
slide it
●Ensure that the base of the pan is dry before placing it on the burner
●Keep children and animals out of reach of the cooker during and after
cooking
●After use the hob remains very hot for a prolonged period of time, do
not touch or place any object on top of the hob
●Never place cutlery or lids on the hob as they will get hot and could
cause serious burns
●Do not open oven door too frequently
●When deep fat frying never fill the pan more than one third full of
And do not use a lid; Never leave oil unattended
●Fry small quantities of frozen food at a time as the temperature
lowers causing the food to be greasy if too large a quantity is cooked
●Dry food before lowering into hot oil
●Keep the outside of your pans free from streaks of oil
●Do not store chemicals, food stuffs, pressurised containers in or
on the cooker or in cabinets immediately above or next to the
cooker
●Do not heat unopened food containers as pressure can build
Up which may cause the container to burst
●Do not place flammable or plastic items on or near the hob
Zones
●Do not allow fat or oil to build up in the oven trays, grill pan or on the
Oven base

●Do not place pans or baking trays directly on the base of the oven
cavity, or line it with aluminium foil
●Do not grill food containing fat without using the grill trivet. The
Grill trivet should never be covered with aluminium foil
●Do not place hot enamel parts in water, leave them to cool first
●Do not allow electrical fittings or cables to come into contact
With areas on the appliance that get hot
●Be careful if using alcohol as a cooking ingredient, there is a danger of
ignition
●Extend baking times by 10 – 15 minutes if you are baking on more
than one level
Dispose of used electrical appliances in an environmentally friendly manner.
This cooker bears the symbol for waste electrical and electronic equipment
(WEEE). This means that this equipment must be handled in accordance with
European Directive 2002/96/EC for recycling to minimise damage to the
environment. Before disposing of the appliance, cut off the power cable plug
and remove the door to avoid accidents.
Fault Oven doesn’t heat
Cause fuse may be blown, check that you have selected a cooking function
and temperature
Fault Lamp doesn’t function
Cause No electricity supply or bulb is faulty
Fault There is condensation in the oven
Cause Steam and condensation are a result of cooking food with high water

Content. Do not leave food in the oven to cool after it has been cooked. Use
a covered container, where practical, when cooking to
Reduce the amount of condensation that forms.
Location
●This appliance is intended to be used in household and residential
type environments. It is not suitable for use in shops, offices or other
working environments
●Do not use outdoors
●Do not place appliance on a highly polished wooden surface as
damage may occur to the surface
●This appliance should not be used in a garage, conservatory, annex,
shed or out-house
Personal Safety
●To protect against the risk of electric shock ensure the electrical
connections are kept dry
●This appliance is not intended for use by persons (including children)
with reduced physical, sensory or mental capabilities
●Use heat resistant gloves to remove hot dishes from the oven
●Stand back when opening oven door to allow the heat to disperse
●Do not place heavy objects on the oven door or lean on the oven door
when it is open, as this can cause damage to the hinges
Children
●Children should be supervised to ensure that they do not play with
this appliance

●Teach children to be aware of dangers in the kitchen
●Do not allow children to play with the appliance or tamper with the
controls
Other Safety Considerations
●Do not operate any appliance with a damaged cord or after the
appliance malfunctions or has been damaged in any manner
●Do not use the appliance for anything other than its intended purpose
●If the appliance is dropped or damaged in any manner, return the
appliance to the nearest authorized dealer or after-sales service
centre for examination, repair, electrical or mechanical adjustment
How to Extinguish a Fire
1. Turn off the power.
2. Cover the pan with a fire blanket, lid or damp cloth. This will
smother the flames and extinguish the fire.
3. Leave the pan to cool for at least an hour before attempting
To move it. Injuries are often caused by picking up a hot pan.
WARNING: Never Use Water to Extinguish Oil or Fat Pan Fires.
Warning: Risk of Burns! Never touch hot burners or the inside of the
Oven. Always use heat resistant gloves
This manual suits for next models
4
Table of contents
Other PowerPoint Oven manuals
Popular Oven manuals by other brands

Viking
Viking VESO5302WH Use & care manual

Siemens
Siemens CS656GB 2W Series instruction manual

Hotpoint Ariston
Hotpoint Ariston CE6IFA.HA S operating instructions

Bosch
Bosch CSG656R 2 Series User manual and installation instructions

Bosch
Bosch HBF113BA0Q User manual and installation instructions

Thermador
Thermador M301 installation manual