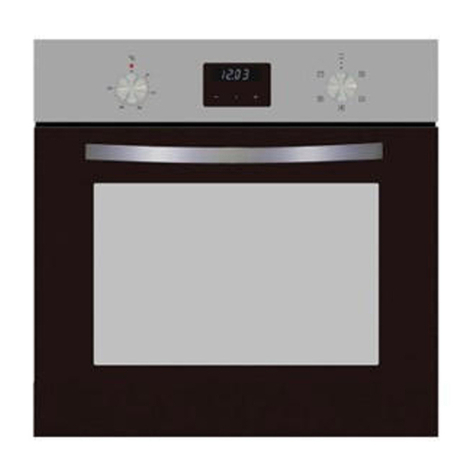
PowerPoint P24EFSBL User manual

1
Built In Electric Oven
P24EFSBL / P24EFSSS
INSTRUCTIONS:
Please read and keep safe for future use.

2
Safety Instructions........................................................................................ 3
Electrical Requirements ………………..............…………………………….…………..….. 4
Installation ................................................................................................... 5
Using your Oven ……………………….……………………………………….…………….……… 8
Cleaning and Care ……….…..…………………...................................................... 9
Replacing the Bulb/Top Tips ………………...................................................... 11
Disposal/ Problem Solving .………………………………………………..….…………..…… 12
Health and Safety ………………………………………………………………....………..…….. 13
Warranty Information................................................................................ 14
Customer Care ………………………………………………………………..…………….………. 16
Table of Contents

3
The use of any electrical appliance requires the following common sense
safety rules. There is danger of injury or death to the person and damage to
the appliance.
Note: If the following instructions are not adhered to the warranty will not
be applicable
This appliance is not intended for use by persons (including children)
with reduced physical, sensory or mental capabilities unless there is a
person responsible for their safety present
Never attempt to repair the appliance yourself
This appliance is intended to be used in household only, it is not
suitable for commercial use
Keep the electrical cable of your oven away from any heat source and
do not let the cable touch the appliance
Ensure that the electric supply cable is not trapped or damaged during
Installation
Prior to Installation ensure that the electricity voltage and frequency
are compatible with your oven
In the event that the cable becomes damaged, it must be replaced by
an electrician
The materials surrounding the appliance (cabinets) must be able to
withstand a minimum temperature of 100°C
The appliance and its accessible parts become hot during use. Care
should be taken to avoid touching hot parts
Do not allow children in the kitchen when cooking or while oven parts
may still be hot. Many parts of the oven will become hot
and present a considerable hazard to children
When the oven is hot never touch the door
Before starting to use your appliance ensure that paper or flammable
items are kept away from your appliance. Do not keep flammable
materials inside of or around your oven
Take care when closing the oven door that there is nothing
obstructing as this may break the glass door
Always grill with the door closed
Safety Instructions

4
Make sure the cooker control knobs are all in the off position when
not in use
If you do not intend to use your oven for a long period of time turn off
the electric supply
Do not try to lift or move this oven by pulling on the door handle
Ensure that the appliance is switched off before replacing the lamp to
avoid the possibility of electric shock
Your appliance is produced in accordance with all applicable local and
International standards and regulations and must only be installed by
an authorized service technician
Do not lean anything on the door while it’s open as you may
unbalance your appliance or damage the door or its hinges
Do not hang towels, dishcloths or clothes from the oven or its handles
Do not operate the appliance using an external timer or remote
control system
Warning: This appliance must be earthed
Warning: There is risk of electric shock
All electrical connections should be made by a qualified Electrician
Check that the voltage on the rating plate of your appliance
corresponds with your house electricity supply which must be A.C.
(Alternating Current)
Electrical Requirements

5
This oven must be installed according to local regulations by a suitably
qualified technician
Carefully unpack the oven and check for any external visible damage.
Do not install or use if it is damaged
Packaging materials should be collected together and disposed of
immediately as they may be harmful to children
This oven should not be installed next to a refrigerator or freezer
Keep all ventilation slots clear of obstruction
Fitting the Oven into the Kitchen Unit
Fit the oven into the space provided in the kitchen unit. The oven may be
fitted underneath a work top or in an upright cupboard. Fix the oven in
Installation Instructions

6
position by screwing into place, using the two fixing holes in the frame. To
locate the fixing holes, open the oven door and look inside. To allow adequate
ventilation the measurements and distances indicated must be adhered to.
The panels of the kitchen unit that are next to the oven must be heat
resistant. Remove the back of the kitchen unit to ensure an adequate current
of air circulates around the oven. The hob must have a rear gap of at least 45
mm.
Securing your oven to the cabinet
Connection the Oven
The wires in the mains lead are coloured as follows:
GREEN AND YELLOW: EARTH
BLUE: NEUTRAL
BROWN: LIVE
Release the cover plate by removing the cover screw
Fit oven into the cabinet recess
Open the oven door
Secure the oven to the kitchen
cabinet with two distance
Holders "A" which fit the holes
In the oven frame and fit
The two screws "B".

7
Loosen the cable clamp
Connect the mains supply cable to the terminal block on the cooker
using the colour code
Secure the cable clamp
Check the cable terminals for tightness and ensure that the terminal
links are in place, then replace the cover plate and cover screw
Correct Shelf Placement:
Accessories:
Wire Shelf Universal Pan

8
When using your oven for the first time your oven may give off an unusual
smell from the heating elements and insulation materials. This is normal for
new cookers. To eliminate this smell run the oven at 250 degrees for 40-60
minutes with the oven empty. When cool clean with warm soapy water.
The following cooking functions available on your appliance:
Fan
Using Your Oven
Turbo Heater with Fan: Combination of the fan and both
heating elements provides more even heat penetration, saving
up 30-40% of energy. Dishes are lightly browned on the outside
and still moist on the inside. This function is suitable for grilling
or roasting big pieces of meat at a higher temperature. If the
oven temperature is over 75 ºC the fan will continue to operate
for 15 minutes after cooking completion time or until the oven
temperature has reduced to 75 ºC.
Radiant Grilling: The inner grill element switches on and off to
maintain temperature. Best results can be obtained from using
the top shelf for small items and lower shelves for large items.
Grilling with Fan: The inside radiant element and top
element work with fan

9
Setting the Functions
Turn the knob to function required. Turn the temperature
knob to the required temperature. The oven will automatically operate once
function, time and temperature are set. If the oven is not in use, always set all
the knobs to "0".
Setting the Timer
To set the cooking time, turn the timer knob clockwise to the time required.
When the setting cooking time is reached, the timer will return to "0"
automatically, you will hear a bleep and the oven will power off.
Cleaning the Oven
Do not clean oven using caustic creams, abrasive cleaning powders,
wire wool or hard tools to clean any parts of this cooker
Enamelled parts of the oven can be damaged if excess cleaning liquids
are not immediately removed
Always turn the appliance off before cleaning and disconnect from
your mains supply
Clean the interior parts of the oven with a soapy cloth, rinse and dry
thoroughly with a soft cloth
Clean the glass surfaces with glass cleaning agents
Never use flammable agents when cleaning your oven
Do not clean your oven with a steam cleaner
Do not wash any part of your oven in a dishwasher
Clean spillages immediately
Cleaning and Care

10
Remove the glass front door by unscrewing the fixings using a
screwdriver, remove the inside glass, clean and rinse it. After drying
replace the seal properly and re-install the glass
Cleaning of the oven should be carried out on a regular basis, clean
the interior after each use. Fat accumulation or other food remains
may result in a fire
Care must be taken when cleaning between the door glass and inside
the inner frame as the edges may be sharp
Cleaning must only be carried out when the oven is cool
The oven should be thoroughly cleaned before it is operated for the
first time and after each use. This will avoid residual food stuffs
becoming baked onto the oven cavity. After residues have been baked
on several times, they are far more difficult to remove
Outer parts of the oven should only be cleaned with warm soapy
water using either a sponge or soft cloth
Any damage that is caused to the appliance by a cleaning product will
not be rectified even if the appliance is within the guarantee period
Do not use abrasive cleaners or sharp metal scrapers to clean the
oven door glass as it may shatter
Removing the Oven Door for Cleaning:
To facilitate the cleaning of the inside of the cooker and the outer frame of
the oven, the door can be removed as follows:-
The hinges have two movable bolts on them, if you raise both of the
movable bolts then the hinges are released from the oven housing
Grip the sides of the door at the centre and then incline it slightly
towards the cooker cavity and then pull it gently away from the
cooker cavity
Ensure that the door is supported at all times and place the door on
some padded material whilst cleaning
The oven door and door glass should only be cleaned using a damp
cloth and a small amount of detergent. The cloth must not have come
into contact with any form of cleaning product or chemical previously
To refit the door, slide the hinges back into their slots and open the
door fully
Movable bolts must be closed back into their original positions before
closing the door

11
Take care not to dislodge the hinge locking system when removing the
door as the hinge mechanism has a strong spring
Do not immerse the door in water
IMPORTANT: Disconnect oven from mains supply before removing or
replacing the oven bulb.
Remove all oven shelves and the drip tray
Unscrew the lamp cover
Unscrew the bulb and remove it from its holder
Replace the bulb with a 25-40W/220V-240V , T300°C halogen lamp
Do not use any other type of bulb
Screw the lamp cover back into its original position
Do not open oven door too frequently
Do not store chemicals, food stuffs, pressurised containers in
cabinets immediately above or next to the oven
Do not heat unopened food containers as pressure can build
up which may cause the container to burst
Do not allow fat or oil to build up in the oven trays, grill pan or on the
oven base
Do not place pans or baking trays directly on the base of the oven
cavity, or line it with aluminium foil
Do not grill food containing fat without using the grill trivet. The
grill trivet should never be covered with aluminium foil
Do not place hot enamel parts in water, leave them to cool first
Do not allow electrical fittings or cables to come into contact
with areas on the appliance that get hot
Extend baking times by 10 –15 minutes if you are baking on more
than one level
Food should not be placed inside the cavity until the correct cooking
temperature has been reached
Replacing the Oven Bulb
Top Tips

12
Refer to the conventional oven section on food packaging for
guidance on cooking temperatures and times. Once familiar with the
performance of your appliance, temperatures and times can be varied
to suit personal preference
Check that any unused accessories are removed from the oven
Place cooking trays in the centre of the oven and leave gaps between
the trays to allow air to circulate
Keep oven door closed for all cooking functions
Don’t place cookware on bottom of oven, use shelves
Dispose of used electrical appliances in an environmentally friendly manner.
This oven bears the symbol for waste electrical and electronic equipment
(WEEE). This means that this equipment must be handled in accordance with
European Directive 2002/96/EC for recycling to minimise damage to the
environment. Before disposing of the appliance, cut off the power cable and
remove the door to avoid accidents.
Fault Oven doesn’t heat
Cause fuse may be blown, check that you have selected a cooking function
and temperature.
Fault Lamp doesn’t function
Cause No electricity supply or bulb is faulty
Fault There is condensation in the oven
Cause Steam and condensation are a result of cooking food with high water
Disposal of Electrical Appliances
Problem Solving

13
content. Do not leave food in the oven to cool after it has been
cooked. Use a covered container, where practical, when cooking to
reduce the amount of condensation that forms
Location
This appliance is intended to be used in household only. It is not
suitable for use in shops, offices or other working environments
Do not use outdoors
This appliance should not be used in a garage, conservatory, annex,
shed or out-house
Mains Cable
Do not let the lead run across an open space
Do not let the cable run across the hob area which may damage the
cable
The mains cable should reach from the socket to the base unit without
straining the connections
The power cord cannot be replaced
Personal Safety
To protect against the risk of electric shock ensure that electrical
connections are kept dry
This appliance is not intended for use by persons (including children)
with reduced physical, sensory or mental capabilities
Use heat resistant gloves to remove hot dishes from the oven
Stand back when opening oven door to allow the heat to disperse
Do not place heavy objects on the oven door or lean on the oven
door when it is open, as this can cause damage to the hinges
Health & Safety

14
Children
Children should be supervised to ensure that they do not play with
this appliance
Teach children to be aware of dangers in the kitchen
Do not allow children to play with the appliance or tamper with the
controls
Other Safety Considerations
Do not operate any appliance with a damaged cord or plug or after
the appliance malfunctions or has been damaged in any manner
Do not use the appliance for anything other than its intended purpose
When the door of the oven is open do not leave anything on it, you
may unbalance your appliance or break the door
If the appliance is dropped or damaged in any manner, return the
appliance to the nearest authorized dealer or after-sales service
centre for examination, repair, electrical or mechanical adjustment
Warning: Risk of Burns! Never touch hot burners or the inside of the
oven. Always use heat resistant gloves
Registering Your 2 Year Guarantee
Your standard one year guarantee is extended for an additional 1 year when
you register the product within 28 days of purchase with the supplier Shomar
Ltd. If you do not register the product with Shomar Ltd within 28 days, your
product is guaranteed for 1 year. To validate your 2 year guarantee register
with us by completing the form attached and posting it to Shomar Ltd.
Please refer to the one year guarantee for more information.
One Year Guarantee
Warranty Information

15
It is important to retain the retailer’s receipt as proof of purchase. Staple your
receipt to this back cover for future reference.
Please quote the following information if the product develops a fault. These
numbers can be found on the product.
Model no.
Serial no.
Subject to the exclusions set out below (see Exclusions), the faulty appliance
will then be repaired or replaced. If for any reason, this item is replaced during
the guarantee period, the guarantee on the new item will be calculated from
original purchase date. Therefore it is vital to retain your original till receipt or
invoice to indicate the date of initial purchase.
To qualify for the 1 year guarantee, the appliance must have been used
according to the instructions supplied.
Exclusions
Shomar Ltd shall not be liable to replace or repair the goods under the terms
of the guarantee where:
1. The fault has been caused or is attributable to accidental use, misuse,
negligent use or used contrary to the manufacturer’s
recommendations or where the fault has been caused by power
surges or damage caused in transit.
2. The appliance has been used on a voltage supply other than that
stamped on the products.
3. Repairs have been attempted by persons other than our service staff.
4. The appliance has been used for hire purposes or non-domestic use.
5. The appliance is second hand.
This guarantee does not confer any rights other than those expressly set out
above and does not cover any claims for consequential loss or damage.

16
This guarantee is offered as an additional benefit and does not affect your
statutory rights as a consumer. This guarantee is valid in Ireland and the UK
only.
Servis products are intended for household use only. See usage limitations in
“safety instructions”. Shomar Ltd has a policy of continuous improvement in
product quality and design. The company, therefore reserves the right to
change the specification of its models at any time.
The After Sales Division for PowerPoint Appliances is located at the offices of
the Brand owner and Distributor –
Shomar Ltd, Unit 9 Western Industrial Estate, Dublin 12, Republic Of Ireland.
Helplines (office hours) & Spare Parts contact number is 01-450 5327 or email
Customer Care
This manual suits for next models
1
Table of contents
Other PowerPoint Oven manuals
Popular Oven manuals by other brands

Belling
Belling BI 60 G User's guide and installation instructions

GE
GE JTS10DP Dimensions and installation information

Electrolux
Electrolux Insight EKC6049 user manual

Pkm
Pkm BIC7 GK IX 4 instruction manual

Electrolux
Electrolux AEG BS8304021M Service manual

Fagor
Fagor Advance AG-061 Installation, use & maintenance manual

Electrolux
Electrolux EOB8851AA user manual

Maytag
Maytag CWE5100ACB10 installation instructions

Viking
Viking VEDO1302BK Use & care manual

Hotpoint
Hotpoint DY46K/2 Instructions for use and installation instructions

AEG Electrolux
AEG Electrolux D77000GF Installation and operating instructions

AEG
AEG KSK882220M Installation instruction