Prescitech RX12 Specification sheet

AC 1200 High Power Dual Band Wi-Fi Range Extender
GET STARTED

Overview
Package Contents....................................................
Front Panel ..............................................................
LED Descriptions......................................................
Using as an Extender
Connects to a WIFI network...................................
Acts as an access point for WIFI devices............
Download the APP before setup...........................
Power on & login the APP.....................................
Method 1: Connect by APP...............................
Method 2: Connect with WPS...........................
Connect an Ethernet-enabled Device...................
Self- Configuration of Prescitech RX12.................
Using as an Access Point
Other Settings
01
02
03
01
04
12
16
04
04
05
06
06
10
11
16

01
The Prescitech RX12 Dual Band WIFI Range Extender
is the second-generation network signal booster for in-
creasing the distance of a WIFI network signal. The
latest technology, Seamless Roaming could merge all
WIFI signal into one in the whole house no matter how
many RX12 installed.
Package Contents
Prescitech RX12 WiFi Range Extender x 1
Quick Installation Guide x 1
RJ-45 Networking Cable x 1
Overview

02
Before you install your extender, familiarize yourself with
its LEDs, buttons, and port.
Front Panel
WPS Button
Lan Port
LED Light
Reset Button
Wan/Lan Port

03
LED Descriptions
Green Blinking Slowly
Green Blinking Fast
Circle Blinking
(Red/Blue/Green)
Lit Blue
A WPS connection is ready
established.
Self-Configuration is starting.
Ready to connect/ Fail to connect
/ Incorrect password.
Best Connection.
Lit Red Under processing
/ Poor Connection.

04
The extender works like a bridge between a WIFI router
(or an access point) and a WIFI device out of the range
from WIFI router. The extender performs two main jobs:
When the extender connects over WIFI to an existing
network, it functions as a network client, similar to one
WIFI device connects to a network.
The extender broadcasts its own signal that WIFI
devic-es can join. As an access point, the extender
performs tasks that router does, such as broadcasting its
network name (SSID).
The extender must do each of these jobs so that both
ends of the bridge are in place.
Using as an Extender
Boosts the range of your
existing WiFi and creates
a stronger signal in hard
to reach areas.
WiFi Range Extender
sometimes your router
does not provide the
WiFi coverage you need.
Existing WiFi
Connects to a WIFI network
Acts as an access point for WIFI devices

05
Visit the official website
www.prescitech.com/download/app for download
the APP named “TenbayWiFi”.
Plug the extender into an electrical outlet which
next to your WIFI router. And wait the LED lights
turn to the Circle Blinking.
Download the APP before setup
1
Tenbay WiFi

06
To extend the range of your WiFi network, you must
connect the extender to your existing WiFi network.
You can do this in one of two ways:
Method 1. Connect by the APP.
Method 2. Connect with WPS. (more details on
page 11)
Power on & login the APP
1. Find and connect to the extender WIFI network
“RX12”.
2. Once connected, open the “TenbayWiFi” APP.
3. Click the “search” for finding out the RX12 repeat
er, click the repeater you want to setup.
Note: If your smartphone does not connect the
RX12, the list could not show up any devices, click
“Connect WiFi” to connect back.
Method 1: Connect by APP
2

07
4. Fillin the “admin” to login the setting page.
5. Custom the RX12 password & its name or leave it as
default. Click “Next”.

08
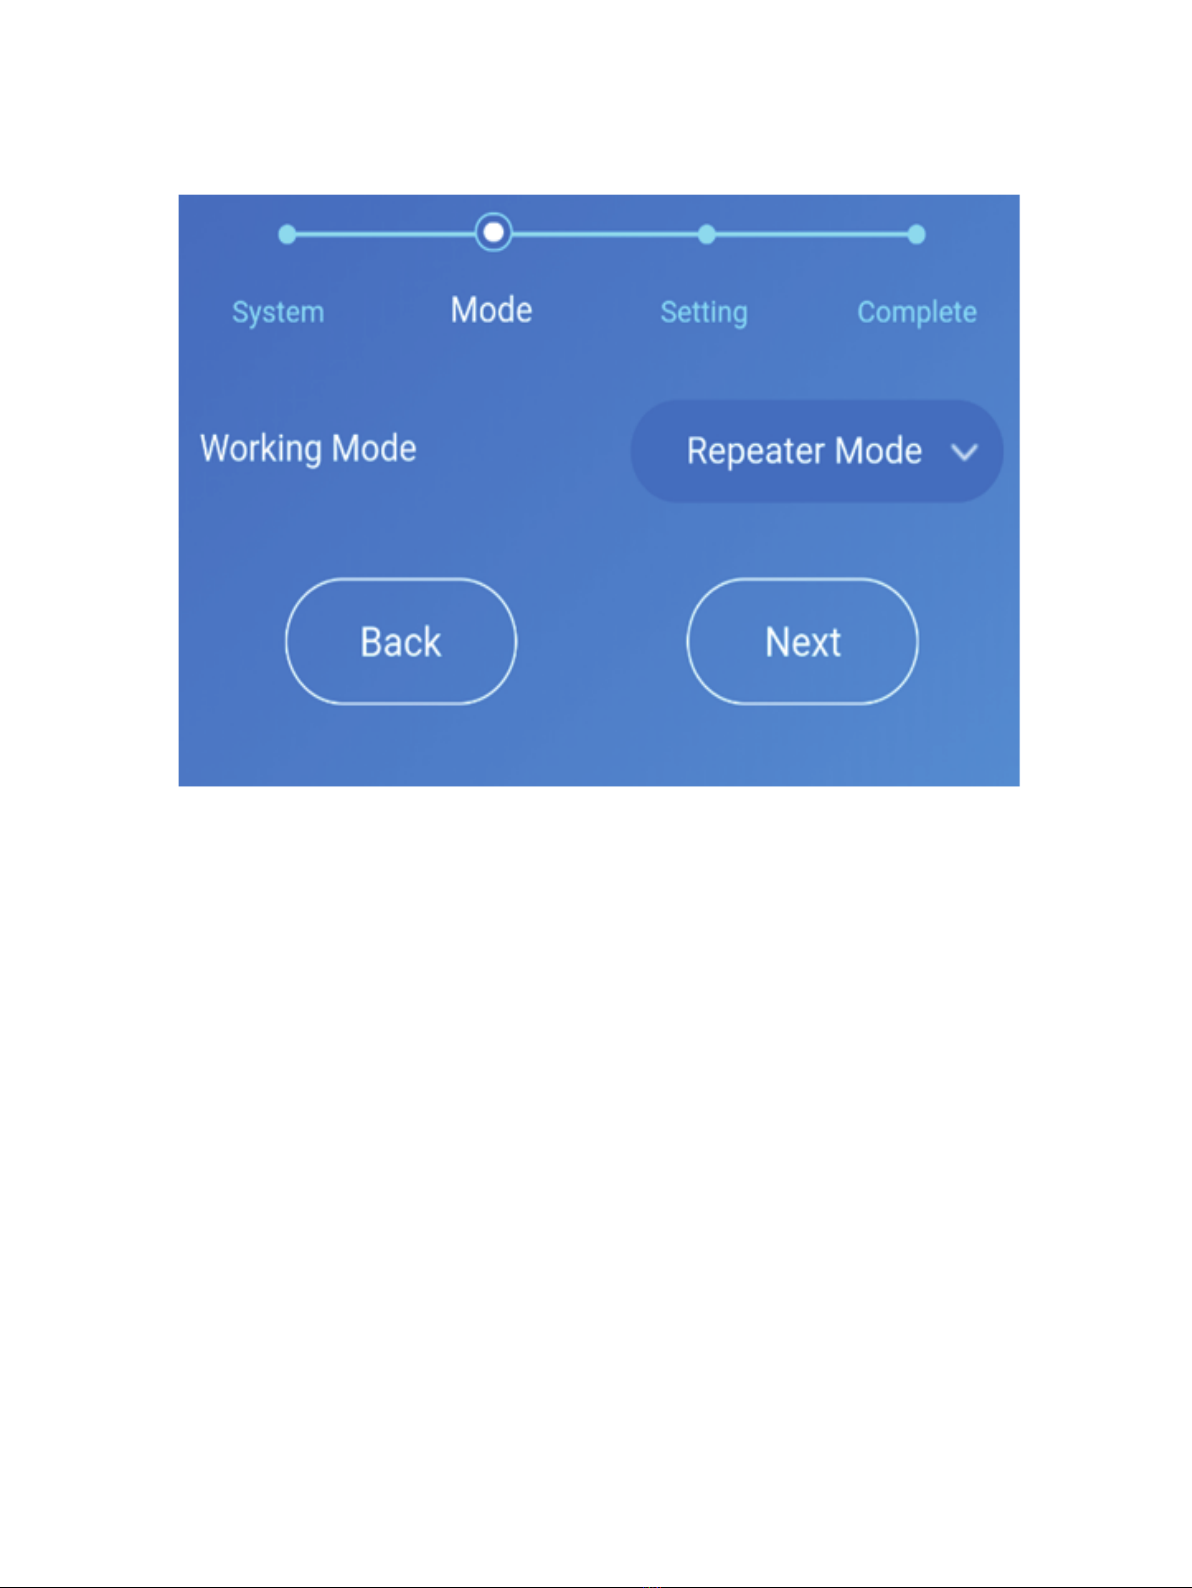
6. Choose “Repeater Mode”, click “Next”.

09
7. After scanning finish, choose your target WIFI
network, fill in the WIFI passwork. Click ”Next”.

10
8. Check the all setting of your repeater, Click “Save”.
9. The Prescitech RX12 needs around half one minute to
reboot & the LED turns to Lit. Blue. You can connect
back the extender by using the new SSIDs.
10. Unplug the extender and move it to a new location
that is about halfway between your router and the
area with a poor router WIFI signal. (Make sure the
LED light remains Lit. Blue)
Wi-Fi Protected Setup (WPS) lets you join a secure WiFi
network without typing the network name and password.
Note: WPS does not support WEP network security.
1. Press the WPS button on the front panel of the
extender 2 seconds. Then WPS LED blinks Green
slowly.
2. Within two minutes, press the WPS button on your
router or access point.
When the extender connects to your existing WIFI
network successful, the RX12 WIFI network name
would be changed into “YourTargetWiFi_EXT2.4G”
and “YourTargetWiFi_EXT5G", and the Status LED
Method 2: Connect with WPS
Note: If the extender fails to connect the router,
the Status LED still show Circle Blinking, that may
you give the wrong password.

11
3. After setup successful, you can connect back the
RX12 with new SSID. You can login the “TendayWiFi”
APP for further setting.
4. Unplug the extender and move it to a new location that
is about halfway between your router and the area with
a poor router WIFI signal.
would turn to Lit Blue. If the RX12 fails to connect, the
Status LED would turn to Circle Blinking. Try to setup
once again.
Connect an Ethernet-enabled Device
After the RX12 connected to your existing WIFI network
successful, you can connect a wired device to the RX12
by using an Ethernet cable. Then the device can access
your existing network through the WIFI connection.
WLAN WAN LAN1 LAN2 LAN3 LAN4 WPS

12
Using as an Access Point
The Prescitech RX12 WIFI Range Extender also can be
used as an Access Point. An access point receives in-
ter-net data by wired Ethernet (such as hotel’s wired
Ether-net), and converts into a 2.4GHz and 5GHz wire-
less sig-nals. It sends and receives wireless traffic to
and from nearby wireless clients.

13
1. Find and connect to the extender WIFI network “RX12”
2. Once connected, open the “TenbayWiFi” APP.
3. Click the “search” for finding out the RX12 repeater,
click the repeater you want to setup.
Note: If your smartphone does not connect the
RX12, the list could not show up any devices, click
“Connect WiFi” to connect back.

14
4. Fillin the “admin” to login the setting page.
5. Custom the RX12 password & its name or leave it as
default. Click “Next”.

15
6. Choose “AP Mode”, click “Next”
7. Give names for your 2.4G & 5G signal & the password
of RX12. Click “Next”.
8. Check the details of RX12 details & Click “Save”.
Till the LED light turn to Lit. blue.
9. Connect the WAN/LAN port of RX12 to your wired
Ethernet port with Ethernet cable.
LAN4 LAN3 LAN2 LAN1 WAN

16
Other Settings
This function ONLY work for Repeater Mode. Once you
setup one RX12 success, you can use the
Self-Configuration for the second one as below steps:
Press the WPS button around 6 seconds till LED turns to
Blinking Green Fast, then press the second one RX12
around 6 seconds till LED turns to Blinking Green Fast.
And the Self-Configuration is processing. The both LEDs
will turn to Lit Blue once finish configuration. Please
make sure the both RX12s next to each other while
configuration.
Self- Configuration of Prescitech RX12

AC 1200 High Power Dual Band Wi-Fi Range Extender
V1.0
Model: RX12
UK COST FREE Tech Support:
(GMT Mon-Sun 14:00-08:00)
800-970-3063
US COST FREE Tech Support:
(PST Mon-Sun 06:00-24:00)
800-213-1134
E-Mail:[email protected]
Website: www.prescitech.com
Other manuals for RX12
1
Table of contents
Other Prescitech Extender manuals
Popular Extender manuals by other brands

Enable-IT
Enable-IT 864P Mini DSLAM user manual

Inline
Inline VKM01 Operation manual

Hall Research Technologies
Hall Research Technologies U97-ULTRA-2B user manual

MuxLab
MuxLab Broadcast 500734 Installation & operation manual

Thinklogical
Thinklogical SDIXtreme 3G product manual

NETGEAR
NETGEAR Nighthawk X6S quick start guide