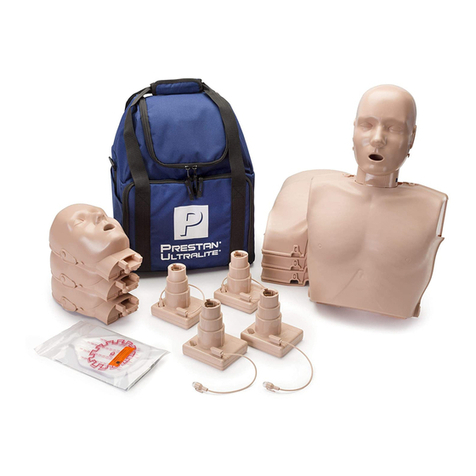
Prestan PP-IM-100M Quick reference guide

COPYRIGHT© 2016 PRESTAN PRODUCTS, LLC 11155-RevD
Prestan Professional Manikins
INFANT MANIKIN
USE AND CARE INSTRUCTION SHEET
THANK YOU for buying the Prestan Professional Infant Manikin!
Please read through these instructions and keep them with your manikin(s). For information on
Prestan’s Authorized Distributors, help guides, resources and more, visit the Prestan website at
www.prestanproducts.com.
For future reference, make note below of the Prestan Authorized Distributor where you purchased your
manikins. Call your Prestan Authorized Distributor for product questions, reordering parts/accessories,
or warranty issues:
________________________________________ _______________________ ___________________
Prestan Authorized Distributor Distributor Phone Purchase Date
Prestan Professional Infant Manikin 4-Pack
Prestan Professional Infant Manikin
First-Aid-Product.com - 760-944-1048
Toll Free: (800) 933-8495
First-Aid-Product.com
760-944-1048
Toll Free: (800) 933-8495

COPYRIGHT© 2016 PRESTAN PRODUCTS, LLC 2 11155-RevD
MODELS COVERED BY THIS INSTRUCTION SHEET
PP-IM-100M
PP-IM-100M-MS
PP-IM-100M-DS
SINGLE 1 INFANT YES SINGLE CASE 10-PACK
PP-IM-100
PP-IM-100-MS
PP-IM-100-DS
SINGLE 1 INFANT NO SINGLE CASE 10-PACK
PP-IM-400M
PP-IM-400M-MS
PP-IM-400M-DS
4-PACK 4 INFANT YES
1 PER MANIKIN 4-PACK CASE w/strap 50-PACK
PP-IM-400
PP-IM-400-MS
PP-IM-400-DS
4-PACK 4 INFANT NO 4-PACK CASE w/strap 50-PACK
PP-FM-300M
PP-FM-300M-MS
PP-FM-300M-DS
COLLECTION **
1 ADULT,
1 CHILD,
1 INFANT
YES
1 PER MANIKIN COLLECTION CASE w/strap 10-PACK PER
MANIKIN
PP-FM-500M
PP-FM-500M-MS
PP-FM-500M-DS
FAMILY PACK **
2 ADULTS,
1 CHILD,
2 INFANTS
YES
1 PER MANIKIN FAMILY PACK CASE w/strap 10-PACK PER
MANIKIN
REGARDING THE ABOVE CHART AND THE CONTENTS OF YOUR ORDER:
*The CPR Rate Monitor (Rate Monitor, CPR Monitor, Monitor) is a patented feedback feature for Prestan
Professional Manikins that consists of an LED light bank that responds to compressions (see the section on the
CPR Rate Monitor). The CPR Rate Monitor is pre-installed in the diaper area of the Infant manikin, with batteries
for the Monitor already installed. Batteries are provided as a courtesy and are not a warrantied item. If you
purchased the Prestan Professional Manikin without the CPR Rate Monitor and later decide you would like one, it
may be ordered separately from your Prestan Authorized Distributor and easily installed. Installation instructions
may be found in the Resources section of www.prestanproducts.com.
** The Prestan Collection and Prestan Family Pack also include Prestan Professional Adult and Child Manikins.
These have separate Instruction Sheets that are included with the manikins or can be accessed at
www.prestanproducts.com.
Available Skin Tones: Any of the above models may be available in one of two Skin Tones:
A model number with a “-MS”at the end (i.e. PP-AM-100M-MS) signifies a Medium Skin Tone
A model number with a “-DS” at the end (i.e. PP-AM-400-DS) this signifies Dark Skin tone
If anything is missing, please contact the Prestan Authorized Distributor where you made your purchase.
First-Aid-Product.com - 760-944-1048
Toll Free: (800) 933-8495

COPYRIGHT© 2016 PRESTAN PRODUCTS, LLC 3 11155-RevD
CLEANING
The face and the body skin of the Prestan®Professional Manikin is made out of the same material and can be
cleaned in the same manner.
If the material becomes dirty, clean with a mixture of soap and water. If the area is extremely dirty, common
household cleaners such as Formula 409®, Windex®or Vim®may be used. Non-bleach wipes such as Clorox®or
Lysol®disinfecting wipes are convenient and work well. It is recommended that the use of these cleaners be
done cautiously with minimum amount of abrasion to insure the life of the skin.
A melamine foam eraser such as Mr. Clean®Magic Eraser®or Scotch-Brite™ Easy Erasing Pad may be used
cautiously for stains.
Cleaners containing wax, oil, or citrus (d-Limonene) are not recommended.
Any cleaner not listed/recommended above may be tested in a non-visible area of the manikin. Open the
manikin’s torso chest and test the cleaner on the underside. Monitor for 24 hours. Should there be an
undesirable reaction, the cleaner should not be used on the manikin.
The face skin may also be sanitized with alcohol wipes or soaked in a solution of 1/4 cup bleach mixed with
one gallon of water for 10 minutes. Between student uses, the instructor (or student) may clean the faces off
with an alcohol wipe as an extra measure of safety.
Don’t forget to wipe the upper chest foam and skin in the same way in order to sanitize the inside of the
manikin as well.
Replacement skins for the face and torso may be purchased from your Prestan Authorized Distributor.
STORAGE
Store the Prestan Professional Manikin(s) in the nylon carry bag(s).
For added protection, store the manikin inside the carry bag, and place the carry bag inside the original
shipping box.
Do not stack the manikins unless they are inside the original shipping box or other protective container.
The nylon carry bag for the Prestan Professional Manikin(s) is not meant to store or transport belongings
(i.e. books) in addition to the manikin(s) - please use the carry bag only for the intended manikin(s) to prevent
damage to the bag.
Store the manikin(s) in a cool, dry area, at temperatures between 50°-70° F and 50% relative humidity.
For storage longer than 1 month, it is recommended that the batteries be removed from the CPR Rate
Monitor (if the manikin has this feature).
First-Aid-Product.com - 760-944-1048
Toll Free: (800) 933-8495

COPYRIGHT© 2016 PRESTAN PRODUCTS, LLC 4 11155-RevD
CPR FEATURES
FACE-SHIELD/LUNG-BAG FOR THE VISIBLE CHEST RISE
The Face-Shield/Lung-Bag (PP-ILB-10, PP-ILB-50) combines the Face Shield and the Lung Bag into a single,
t-shaped airway for the manikin. Air goes in through the Face-Shield opening to inflate the Lung-Bag,
which provides the visible chest rise in response to administered CPR breaths.
Face-Shield/Lung-Bags are sized specifically to fit each Prestan Professional Manikin (Adult/Child/Infant)
and are not interchangeable among the different manikin sizes.
The Face-Shield portion covers the mouth of the manikin. It stays in place by hooking the ends onto
buttons located at each side of the head under the ears.
The Lung-Bag portion is placed on the manikin chest (under the torso skin) and fills with air from
administered CPR breaths. This provides a visual chest rise for the student.
Face-Shield/Lung-Bags are a consumable item and should be changed depending on how they are used:
oIf breaths are being administered by mouth, either directly or via rescue mask adaptor, the Face-
Shield/Lung-Bag should be changed between classes due to accumulation of bacteria-causing
moisture inside the neck and bag. This change is advised for both sanitary and performance
purposes.
oIf breaths are being administered by a manual resuscitator (BVM/Ambu bag), there is no need to
change the Face-Shield/Lung-Bag.
When a manikin is being shared by more than one student, it is recommended that each student be
provided with their own sanitary and disposable mouth protector:
oIf direct mouth contact is being used to give CPR breaths, students should be supplied with their
own Face Shield (PP-IFS-50) (sold separately and disposable). The fitted Face Shield can be placed
over the already-installed Face-Shield/Lung-Bag on the mouth of the manikin when it is that
student’s turn to give breaths. Generic, non-fitted face shields (10077-PPS) may also be used, but
may slide around on the mouth and possibly cover the mouth opening if not held in place.
oIf rescue masks are being used to give CPR breaths, students should be supplied with their own
Rescue Mask Adaptor (10076-PPA, 10076-PPA-50) (sold separately and disposable). The adaptors
can be inserted into any standard mask when it is that student’s turn to give breaths.
CPR CLICKER
The Clicker is the round disk in the center of the manikin’s back, under the infant skin and foam piece.
The Clicker works with compressions to provide an audible “click” when compression depth reaches 2”
(the compression is able to continue to a 2.4” depth).
The Clicker sends a signal to the CPR Rate Monitor (if the manikin has this feature) to allow it to provide
feedback on compression speed (see CPR Rate Monitor –Guide).
First-Aid-Product.com - 760-944-1048
Toll Free: (800) 933-8495

COPYRIGHT© 2016 PRESTAN PRODUCTS, LLC 5 11155-RevD
CPR RATE MONITOR - GUIDE
The CPR Rate Monitor is a patented feedback feature that comes pre-installed (with
batteries included) in the diaper area of the Prestan Professional Child Manikin. If you
have purchased a Prestan Professional Infant Manikin without the CPR Rate Monitor
and later decide you want this feature –it may be purchased and installed separately
by contacting your Prestan Authorized Distributor.
The Prestan Professional Training Manikin CPR Rate Monitor has a unique way of
monitoring both the depth of compressions and the rate of compressions:
Press the button on the diaper to turn on the monitor. The smaller, green on-light will
stay on until you press the button again to turn the monitor off. All four of the monitor
lights will come on, indicating that the lights are working. (Figure 1)
If the lights do not light, make sure that the depth of compression is deep enough (you
will hear a clicking sound). The lights will not work if the student is not compressing
the manikin correctly.
Once a student begins chest compressions, from zero to less than 60 compressions per
minute, the red light will be on. (Figure 2)
As the student increases the rate of compressions and reaches 60 compressions per
minute, a yellow light will come on until the student reaches 80 compressions per
minute. (Figure 3)
As the student increases the rate of compressions and reaches 80 compressions per
minute, the first green light will come on until the student reaches 100 compressions
per minute. (Figure 4)
When the student reaches 100 compressions per minute, a second green light comes
on, indicating that the recommended rate has been reached. (Figure 5)
If the student slows down, one of the green lights will go out indicating that the
student needs to increase the rate of compressions.
Should compressions exceed 120 per minute, a yellow light will flash rapidly indicating
the recommended cap has been reached. (Figure 6)
Always try to maintain the recommended speed between 100 and 120 compressions
per minute as indicated by the 2 green lights.
If the student’s depth of compression is not correct, at any time, all the lights will go off
and the red light will blink.
Figure 2; <60 cpm
Figure 3; 60-80 cpm
Figure 4; 80-100 cpm
Figure 5; 100-120 cpm
Figure 6; >120 cpm
Figure 1
First-Aid-Product.com - 760-944-1048
Toll Free: (800) 933-8495

COPYRIGHT© 2016 PRESTAN PRODUCTS, LLC 6 11155-RevD
Figure 2a
Figure 2b
Figure 2c
Figure 2d
Figure 3
Figure 4
Figure 5
Figure 6
Figure 1
FACE-SHIELD/LUNG BAG INSTALLATION
1. Unlatch the front torso skin of the Prestan Professional Infant
Manikin by unhooking skin from the ‘tabs’ located at the top of the
shoulders and peeling down the skin to expose the chest plate
(Figure 1).
2. Fold the Lung-Bag portion of the Face-Shield/Lung-Bag (Figures 2a-2d):
The Face-Shield/Lung-Bag has four ‘dotted lines’ printed on one
side of the bag (along with an oval)
Using the four dotted lines, fold the Face-Shield/Lung-Bag into fourths, following the diagram below
3. Tilt back the head of the manikin to open the airway.
4. Insert the folded Lung-Bag into the mouth of
the manikin (Figure 3).
5. Push the Lung-Bag into the mouth until the bag exits
through the neck of the manikin (Figure 4).
6. Grasp the Lung-Bag and finish pulling it through the
neck of the manikin (Figure 4).
7. Attach the Face-Shield tabs to the ‘buttons’ located
on the side of the manikin head (Figure 5).
8. Lightly pull down on the Lung-Bag to help open the
mouth hole on the Face-Shield.
9. Then position the Lung-Bag on top of the compression
plate (the hard plastic circular piece found on top of
the torso foam core) with the circular imprint on the
Lung-Bag aligning with the compression plate (Figure 6).
10. With proper positioning, the neck of the Face-Shield/
Lung-Bag will have slack. Make sure it is not twisted.
11. Roll the skin back up over the Lung-Bag being careful
not to press down and “fold” the skin. The torso may
then be closed by pushing on down on the shoulder
tabs until they snap into place.
First-Aid-Product.com - 760-944-1048
Toll Free: (800) 933-8495

COPYRIGHT© 2016 PRESTAN PRODUCTS, LLC 7 11155-RevD
TROUBLESHOOTING GUIDE
SYMPTOM
POSSIBLE ISSUES OR COMMENTS
SOLUTIONS
CPR Rate Monitor
Cannot find CPR Rate
Monitor (Monitor) –no
lights in the diaper area
You have purchased/received a Prestan
Professional Infant Manikin without the
CPR Rate Monitor
If you were expecting a monitored
manikin, check with the distributor
where you purchased the manikin to
insure you received the item you paid
for. See the chart on page 2 of this
manual for the product numbers.
Note: Infant CPR Rate Monitors may be
purchased separately from your
Prestan Authorized Distributor. They
are shipped with a replacement diaper
area cover for viewing the lights
through it.
CPR Rate Monitor
(Monitor) lights are not
working properly
Please follow the
troubleshooting tips at
right in the order they are
listed for best results
Chest compressions are not deep
enough to signal Monitor
Batteries are not installed, need
replacing or are not inserted correctly
in the CPR Rate Monitor
Either the Clicker or the Monitor needs
to be replaced
Compress the chest until the click is
audible from the Clicker at 2”-2.4”
Install or replace batteries into Monitor
(front of manikin, top of diaper) –
requires 2-AA (1.5V) batteries
Exchange Monitors with working
manikins (if available) to confirm
whether the Monitor
(RPP-IMON-1) needs to be replaced*
CPR Rate Monitor
(Monitor) lights are all on
Batteries are running low
Replace batteries
CPR Rate Monitor
(Monitor) red light is
blinking
This is normal after replacing batteries
or manikin is paused - may blink up to
16 times to indicate ready status
Commence or resume compressions -
blinking will stop and feedback rate
signals will begin
CPR Rate Monitor falls out
when administering back
blows
Monitor cover in diaper area is no
longer fitting properly
Request new Infant Monitor Cover
(10402)*
*Contact your Prestan Authorized Distributor to either purchase the replacement part or receive it at no charge if the
manikin is within Prestan’s 3-year warranty period and is a qualifying warranty repair.
First-Aid-Product.com - 760-944-1048
Toll Free: (800) 933-8495

COPYRIGHT© 2016 PRESTAN PRODUCTS, LLC 8 11155-RevD
TROUBLESHOOTING GUIDE
(Continued)
SYMPTOM
POSSIBLE ISSUES OR COMMENTS
SOLUTIONS
Torso and Face-Shield/Lung-Bag
Cannot hear a click when
doing compressions
Hand position and/or compression
angle may be incorrect
Compressions may not be deep enough
to activate the clicker
Clicker may be broken
Confirm correct hand placement and
compress straight down from directly
above the manikin
Compress between 2 and 2.4 inches
depth
Replace Clicker in back of manikin
(RPP-CCLICK-1)*
Chest will not rise when
breaths are given
Head is not tilted back enough to open
airway
Face Shield is not attached
Lung Bag may be damaged or torn
(Note: there are holes in the Infant Lung
Bag necks by design to allow deflation)
Lung Bag is not lying flat or properly
positioned over the compression plate
and/or neck of bag is twisted
Lung Bag has accumulated moisture in
the neck, which may cause the sides to
stick together and prevent air passage
Push on forehead and/or lift at chin to
tilt head back enough to open airway
Attach Face Shield at “buttons” on the
side of the manikin’s head below ears
Blow into the Face-Shield/Lung-Bag
while it is outside the manikin to make
sure it inflates properly –if not, discard
and use another Face-Shield/Lung-Bag
Revisit instructions for installing a Face-
Shield/Lung-Bag earlier in this manual
A new Face-Shield/Lung-Bag should be
installed after each class, or more often
if needed due to excessive moisture
buildup
Manikin torso will not stay
closed (when breaths are
given)
Front torso skin may not be securely
latched
Secure skin onto shoulder tabs
*Contact your Prestan Authorized Distributor to either purchase the replacement part or receive it at no charge if the
manikin is within Prestan’s 3-year warranty period and is a qualifying warranty repair.
First-Aid-Product.com - 760-944-1048
Toll Free: (800) 933-8495

COPYRIGHT© 2016 PRESTAN PRODUCTS, LLC 9 11155-RevD
TROUBLESHOOTING GUIDE
(Continued)
SYMPTOM POSSIBLE ISSUES OR COMMENTS SOLUTIONS
Torso
Rattling in chest
Compression Sleeve may be broken
Replace sleeve in chest with part
RPP-ICOM-1 (compression assembly
includes chest plate, spring, sleeve and
clicker)*
Chest Plate is broken
Typically results from a combination of
incorrect (not centered) hand
placement, compression angle not
straight down from directly above
and/or overzealous compression force
Replace chest plate with RPP-ICOM-1
(compression assembly includes chest
plate, spring, sleeve and clicker)*
*Contact your Prestan Authorized Distributor to either purchase the replacement part or receive it at no charge if the
manikin is within Prestan’s 3-year warranty period and is a qualifying warranty repair.
First-Aid-Product.com - 760-944-1048
Toll Free: (800) 933-8495

COPYRIGHT© 2016 PRESTAN PRODUCTS, LLC 10 11155-RevD
WARRANTY
Three Year Limited Warranty
1. WARRANTY COVERAGE: Prestan offers a LIMITED WARRANTY against any defects in workmanship or materials
under normal use with respect to its PRESTAN TRAINING MANIKIN.
2. WARRANTY PERIOD: Prestan warrants the PRESTAN TRAINING MANIKIN for three (3) yearsfrom the date of
purchase. Any component of the PRESTAN TRAINING MANIKIN which proves defective within thirty-six (36) months
from the date of purchase will be repaired or replaced, at Prestan’s option, free of charge to the owner. The owner
is responsible for shipping and handling fees to the place which Prestan designates.
3. WARRANTOR’S RESPONSIBILITIES: Prestan will repair or replace (at Prestan’s option) a defective warranted
component subject to the provisions of Section 2 without charge except for transportation costs. OWNER’S SOLE
AND EXCLUSIVE REMEDY AGAINST PRESTAN SHALL BE FOR THE REPAIR OR REPLACEMENT OF DEFECTIVE GOODS AS
PROVIDED HEREIN. Repair or replacement of any component of any PRESTAN TRAINING MANIKIN does not extend
this limited warranty or begin a new limited warranty period.
4. CIRCUMSTANCE NEGATING WARRANTY AND OTHER LIMITATIONS:
a. Prestan reserves the right to refuse warranty service or replacement when product failure is due to misuse,
mishandling, misapplication, accident, neglect, improper installation, modification, use of unauthorized parts or
attachments, adjustments or repair performed by anyone other than Prestan or its authorized agent, or any
causes other than defective workmanship or material.
b. This limited warranty does not cover abrasion, abnormal use, damage caused by mishandling, neglect or
unauthorized modification. This warranty is void if the PRESTAN TRAINING MANIKIN is structurally altered.
c. Owner must provide proof of the date of purchase, place of purchase and the purchase price in order to obtain
service under this limited warranty.
d. Prestan makes no warranty other than as contained herein. No agent, representative, dealer or employee of
Prestan has the authority to alter the obligations or limitations of this limited warranty.
5. LIMITATIONS OF IMPLIED WARRANTIES AND DAMAGES:
a. Any and all implied warranties on the PRESTAN TRAINING MANIKIN, INCLUDING ANY IMPLIED WARRANTY OF
MERCHANTABILITY OR FITNESS FOR A PARTICULAR PURPOSE, SHALL NOT EXCEED IN DURATION THE
RESPECTIVE TERMS OF THIS LIMITED WARRANTY WHICH BEGINS WITH THE DATE OF PURCHASE. Some states
do not allow limitations on how long an implied warranty lasts, so the above limitation may not apply to you.
b. PRESTAN SHALL NOT BE LIABLE FOR INCIDENTAL OR CONSEQUENTIAL DAMAGES ARISING OUT OF THE USE OF
THE PRESTAN TRAINING MANIKIN OR THE BREACH OF THIS OR ANY OTHER EXPRESSED OR IMPLIED
WARRANTY. Some states do not allow the exclusion or limitation of incidental or consequential damages, so
the above limitation or exclusion many not apply to you. Any and all damages awarded for any breach of this
limited warranty shall be limited to the amount of the purchase price.
6. WARRANTY SERVICE. To obtain warranty service contact your Prestan Authorized Distributor, or for information
about Prestan, visit our website at www.prestanproducts.com.
7. RIGHTS UNDER STATE LAW: This warranty gives you specific legal rights and you may have other rights which vary
from state to state.
First-Aid-Product.com - 760-944-1048
Toll Free: (800) 933-8495
Other manuals for PP-IM-100M
1
This manual suits for next models
18
Table of contents
Other Prestan Medical Equipment manuals
Popular Medical Equipment manuals by other brands

Med-Mizer
Med-Mizer AllCare user manual
Verathon
Verathon Aperture user manual
Coaguchek
Coaguchek XS Plus System Getting started
Guilin Woodpecker Medical Instrument
Guilin Woodpecker Medical Instrument Fi-P WP4004 instruction manual
TytoCare
TytoCare TytoHome user guide
Bego
Bego Eltropol 300 Original instructions
