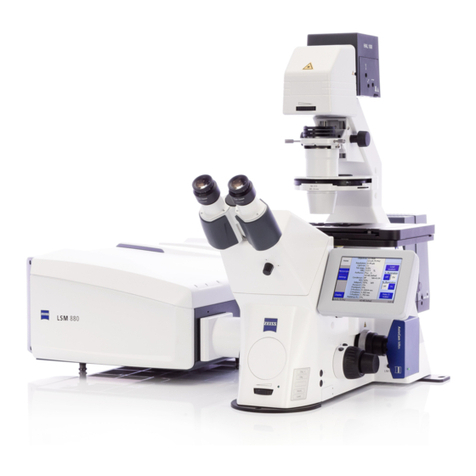
Primotech MAT User manual

Instruction Manual
Primotech
Upright Microscope

2
Primotech
Upright Microscope
Carl Zeiss Microscopy GmbH
Königsallee 9-21
37081 Göttingen
Germany
www.zeiss.com/microscopy
Document name: Instruction Manual
Revision: en 01
Effective from: March 2014
© Göttingen 2014 by Carl Zeiss Microscopy GmbH - all rights reserved
430055-9044-008
This document or any part of it must not be translated, reproduced, or transmitted in any form or by any means, electronic or mechanical, including
photocopying, recording, or by any information or retrieval system. Violations will be prosecuted.
The use of general descriptive names, registered names, trademarks, etc. in this document does not imply, even in the absence of a specific
statement, that such names are exempt from the relevant protective laws and regulations and therefore free for general use. Software programs will
fully remain the property of ZEISS. No program, documentation, or subsequent upgrade thereof may be disclosed to any third party, unless prior
written consent of ZEISS has been procured to do so, nor may be copied or otherwise duplicated, even for the customer's internal needs apart from
a single back-up copy for safety purposes.
ZEISS reserves the right to make modifications to this document without notice.

Table of Contents
Primotech|Document 430055-9044-008 V.1.0; 03 / 2014 3
1 Introduction 5
1.1 Welcome 5
1.2 Primotech Features 6
1.3 Overview of this Document 7
1.4 Intended Use 8
2 System Overview 9
2.1 Overview 9
2.2 Types of Illumination 9
2.3 Main Components 10
2.4 Components and Controls 11
2.4.1 Intermediate Tubes 12
2.4.2 Stages 13
2.4.3 Condenser 14
3 First Steps 15
3.1 Overview 15
3.2 Assembling the Microscope 15
3.3 Inserting the Sample 17
3.4 Adjusting the Eyepieces 18
3.5 Selecting Objectives and Focusing 20
3.6 Adjusting the Illumination Properties 21
3.6.1 Adjusting the Illumination Brightness 21
3.6.2 Adjusting the Color of Reflected Illumination 22
3.6.3 Using Oblique Reflected Illumination 22
3.6.4 Adjusting the Transmitted Illumination Size 23
3.7 Adjusting the Resolution and Depth of Field 23
3.8 Imaging with Primotech and Matscope 25
4 Adjusting the Condenser Settings 27
4.1 Overview 27
4.2 Specifying the Condenser Position 27
4.3 Adjusting the Köhler Illumination 29

Table of Contents
4Primotech|Document 430055-9044-008 V.1.0; 03 / 2014
5 Polarization and Conoscopy 32
5.1 Overview 32
5.2 Centering the Objectives 33
5.3 Polarization Examinations 35
5.4 Performing Polarization Examinations with Transmitted Light 37
5.5 Performing Polarization Examinations with Reflected Light 37
5.6 Conoscopy Examinations 38
5.7 Performing Conoscopy Examinations 38
6 Changing Components 40
6.1 Overview 40
6.2 Changing Objectives 40
6.3 Changing the Tube 41
6.4 Replacing the Light Source 43
6.5 Changing the Microscope Network Adapter 44
7 Maintenance and Disposal 45
7.1 Routine Cleaning and Care 45
7.2 Corrective and Preventive Maintenance 46
7.3 Support 47
7.4 Disassembling the Microscope 47
7.5 Disposal of Primotech 48
7.6 Warranty 48
8 Troubleshooting 49
9 Technical Data and Conformity 51
9.1 Power Requirements and Operating Data 51
9.2 Physical Dimensions and Key Specifications 54
9.3 Environmental Requirements 55
9.4 Scope of Delivery 56
9.4.1 Primotech MAT (430055-9000-100) 57
9.4.2 Primotech D/A MAT (430055-9010-100) 58
9.4.3 Primotech D/A POL (430055-9020-100) 59
9.4.4 Primotech D/POL Conoscopy (430055-9030-100) 60
Index 61

1 Introduction|1.1 Welcome
Primotech|Document 430055-9044-008 V.1.0; 03 / 2014 5
1 Introduction
1.1 Welcome
Welcome to the Primotech User Documentation.
Primotech is the new family of upright microscope from ZEISS. Its design and
intuitive controls result in a simple, robust, easy-to-use yet powerful microscope
that helps you inspect a wide range of samples. Primotech microscopes can also be
connected to an iPad to process and analyze images. Connecting the microscope
to a WLAN network even enables multiple users to view a sample simultaneously.
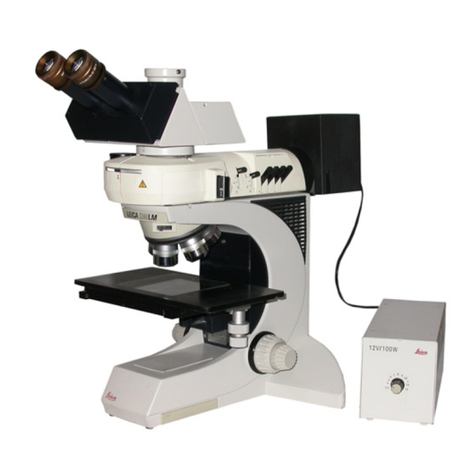
Primotech MAT Primotech D/A MAT
Primotech D/A POL Primotech D/POL Conoscopy

1 Introduction|1.2 Primotech Features
6Primotech|Document 430055-9044-008 V.1.0; 03 / 2014
1.2 Primotech Features
Four types of Primotech microscope are available. The different microscopes have
different features and are suitable for different applications:
Feature Primotech MAT Primotech D/A
MAT
Primotech D/A
POL
Primotech D/POL
Conoscopy
Reflected
light
Yes Yes Yes -
Transmitted
light
Yes Yes Yes Yes
Condenser - Köhler Köhler Köhler
Stage X-Y X-Y, ESD Rotatable Rotatable
Centering of
objectives
- - Yes Yes
Main feature Suitable for large
sample heights
(<34mm)
Suitable for medium
sample heights
(<17mm)
Designed for
polarization analyses
Designed for
conoscopy analyses
For a detailed list of components per microscope, see Scope of Delivery [}56].

1 Introduction|1.3 Overview of this Document
Primotech|Document 430055-9044-008 V.1.0; 03 / 2014 7
1.3 Overview of this Document
This document contains all the information you need to assemble your microscope,
perform various types of examination, connect it to an iPad, as well as to perform
troubleshooting and maintenance.
The majority of the documentation applies to all Primotech microscopes. General
exceptions:
¢Chapter 4 only applies to:
– Primotech D/A MAT
– Primotech D/A POL
– Primotech D/POL Conoscopy
¢Chapter 5 only applies to:
– Primotech D/A POL
– Primotech D/POL Conoscopy
¢All topics related to reflected light do not apply to Primotech D/POL
Conoscopy.
Individual details that are only specific to a certain microscope are indicated within
each topic.
INFO
The appearance of the microscope in illustrations may differ from that of your
microscope.

1 Introduction|1.4 Intended Use
8Primotech|Document 430055-9044-008 V.1.0; 03 / 2014
1.4 Intended Use
Primotech microscopes are all-purpose light microscopes primarily designed for
industrial applications such as:
¢Metallurgy
¢Electronics
¢Geoscience
Primotech microscopes are also designed for use in education.
Primotech microscopes, including their original accessories, must not be used for
microscopic techniques other than those described in the Instruction Manual. Using
the microscope for any other purpose is not allowed and could be hazardous.
Do not operate Primotech microscopes or any accessories in potentially explosive
areas, in the presence of volatile anesthetics, or in the presence of combustible
solvents, such as alcohol, benzene, or similar chemicals.
INFO
The Safety Information document is also considered to be part of the Primotech
microscope. You must follow all the instructions provided in this document.
Primotech microscopes have been designed, produced, and tested in compliance
with the standard DIN EN 61010-1 (IEC 61010-1) “Requirements for Electrical
Measuring, Control, and Laboratory Instruments”.
Primotech microscopes meet the requirements of EU directive 2006/95/EC
Appendix 1 and carry the mark.
Radio interference suppression complies with DIN EN 61326-1.
Primotech microscopes must be disposed of in accordance with the WEEE Directive
2012/19/EC. For more information on disposal and recycling please consult your
ZEISS representative.

2 System Overview|2.1 Overview
Primotech|Document 430055-9044-008 V.1.0; 03 / 2014 9
2 System Overview
2.1 Overview
This chapter describes the main components and controls of Primotech
microscopes, as well as the types of illumination supported.
2.2 Types of Illumination
Primotech microscopes support both transmitted light and reflected light
illumination.
Transmitted Light In transmitted light illumination, the light source is below the sample. The light
passes through the sample before being focused into the eyepieces. Transmitted
light is particularly suitable for the following scenarios:
¢Thin samples
¢Polarization examinations
¢Conoscopy examinations
Transmitted light Reflected light
Reflected Light In reflected light illumination, the light source is above the sample. The light is
reflected from the surface of the sample before being focused into the eyepieces.
Reflected light is particularly suitable for the following scenarios:
¢Thick samples
¢Surface examinations, especially of metallic or ceramic samples
INFO
Primotech D/POL Conoscopy does not feature reflected light.

2 System Overview|2.3 Main Components
10 Primotech|Document 430055-9044-008 V.1.0; 03 / 2014
2.3 Main Components
Primotech microscopes consist of the following main components. For a detailed
list of the components of your microscope, see Scope of Delivery [}56].
9
1
2
4
6
5
3
7
8
1
Eyepieces
2
Intermediate tube
3
Objectives
4
Stage
5
Condenser and aperture diaphragm
6
Tube
7
Microscope stand
8
Microscope Network Adapter (MNA)
9
Accessories: polarizers, analyzers, compensators, filter holders, and tools

2 System Overview|2.4 Components and Controls
Primotech|Document 430055-9044-008 V.1.0; 03 / 2014 11
2.4 Components and Controls
Primotech microscopes consist of various components and controls. The exact
configuration depends on your microscope. For more information, see Scope of
Delivery [}56].
The stand contains the following components and controls:
1
DIN 6x20 slot for
compensators
2
Objective centering screws
3
Reflected light intensity
indicators
4
Condenser limit screw
5
Reflected light intensity
control
6
Transmitted illumination
light source
5
6
1
2
4
3
1
Transmitted light intensity
indicators
2
Transmitted light intensity
control
3
Coarse focus drive
4
Fine focus drive
5
Adjust torque of focus
wheels
6
Rotatable nosepiece to
select objective
7
Power switch
1
3
2
4
5
7
6

2 System Overview|2.4 Components and Controls
12 Primotech|Document 430055-9044-008 V.1.0; 03 / 2014
2.4.1 Intermediate Tubes
Two different intermediate tubes are available. The standard intermediate tube is
supplied with the following microscopes:
¢Primotech MAT
¢Primotech D/A MAT
¢Primotech D/A POL
1
Tube mounting screw
2
Slot for analyzer
3
Slot for polarizer (reflected
light)
4
Slot for filters (e.g. color)
5
Aperture diaphragm
(reflected light)
6
Oblique illumination slider
1
3
2
5
6
4
The intermediate tube with Bertrand lens is supplied with Primotech D/POL
Conoscopy.
1
Tube mounting screw
2
Bertrand lens focus
3
Slot for analyzer
(transmitted light)
4
Swing Bertrand lens into
beam path
1
4
3
2

2 System Overview|2.4 Components and Controls
Primotech|Document 430055-9044-008 V.1.0; 03 / 2014 13
2.4.2 Stages
Two different stages are available. The X-Y stage is supplied with the following
microscopes:
¢Primotech MAT
¢Primotech D/A MAT
1
Object guide
2
Move sample along y axis
3
Move sample along x axis
1
3
2
The rotatable stage is supplied with the following microscopes:
¢Primotech D/A POL
¢Primotech D/POL Conoscopy
1
Move sample on stage
2
Object guide
3
Stage rotation lock
4
45° click-stop
2
1
3
4

2 System Overview|2.4 Components and Controls
14 Primotech|Document 430055-9044-008 V.1.0; 03 / 2014
2.4.3 Condenser
The Köhler condenser is supplied with the following microscopes:
¢Primotech D/A MAT
¢Primotech D/A POL
¢Primotech D/POL Conoscopy
1
Adjust condenser position
2
Rotatable polarizer
(transmitted light)
Not available for Primotech
D/A MAT.
3
Luminous field diaphragm
4
Aperture diaphragm
(transmitted light)
5
Condenser centering screws
5
3
2
1
4

3 First Steps|3.1 Overview
Primotech|Document 430055-9044-008 V.1.0; 03 / 2014 15
3 First Steps
3.1 Overview
This chapter describes how to get started with your Primotech microscope, from
assembling it and performing general one-off calibrations, through to acquiring
your first image.
3.2 Assembling the Microscope
The Primotech microscope stand is supplied with the following standard
components already attached:
¢Tube
¢Stage (rotatable or X-Y stage, as applicable)
¢Light sources (transmitted or reflected, as applicable)
¢Condenser (if available)
Procedure 1Place the microscope stand on a stable, flat, and smooth surface.
2Remove the dustcaps from the tube.
3Remove the two eyepieces from the protective tubes and push them into the
tube.
4Unscrew the dustcap labeled 1 from the nosepiece.
12
1
2
1
1
1
1
1
1
1
1
1
1
1
1
1
1
2 4
5Unscrew the objective with the lowest magnification out of its protective tube
and screw it into the nosepiece.
6Insert the remaining objectives in the nosepiece in order of increasing
magnification.

3 First Steps|3.2 Assembling the Microscope
16 Primotech|Document 430055-9044-008 V.1.0; 03 / 2014
7Attach the power adapter that is appropriate for your country to the plug.
6
7
8Attach the cables between the tube and the rear of the microscope:
– Network cable between the network port of the tube and the top of the
MNA
– 12 V power cable between the power socket of the tube and the rear of
the microscope stand
This does not apply to Primotech D/POL Conoscopy.
9Plug the microscope into a power socket and press the power switch.
The lowest LED on each side of the stand illuminates.
INFO
Dirt and dust may impair the performance of the microscope. Use the dust cover
to protect the microscope when not in use.
uDo not place the dust cover over the microscope while the microscope
stand is turned on.
uWait 10 minutes for the microscope to cool before placing the dust cover
over the microscope.

3 First Steps|3.3 Inserting the Sample
Primotech|Document 430055-9044-008 V.1.0; 03 / 2014 17
3.3 Inserting the Sample
Primotech microscopes are suitable for a wide range of samples, for example
material or mineral samples.
The samples should be prepared according to your standard company or institution
guidelines and be within the guidelines specified in the technical data (see Physical
Dimensions and Key Specifications [}54]).
Procedure 1Ensure the condenser tip (if available) is below the stage surface.
!
For more information, see Specifying the Condenser Position [}27].
2Lower the stage so that the sample can fit below the objectives.
The condenser automatically moves together with the stage. Ensure that the
stage is low enough so that none of the objectives collide with the sample
when rotating the objective nosepiece.
3Place the sample on the center of the stage.
You can use the object guide (if available) to fix the sample in place. The object
guide has non-overlapping axis scales (e.g. 0-60mm and 100-140mm) so that
any coordinate pair is unambiguous.
4If you know the area of interest already, move the sample so that the area is
illuminated.
– To move the sample on the rotatable stage, turn the corresponding screw
on the object guide.
– To move the sample on the static stage, turn the corresponding knob of
the coaxial drive under the stage.
5If the microscope has a rotatable stage, turn it to the desired angle by pushing
the stage surface.
You can apply the 45° click-stop control under the stage to rotate the stage in
45° steps.

3 First Steps|3.4 Adjusting the Eyepieces
18 Primotech|Document 430055-9044-008 V.1.0; 03 / 2014
3.4 Adjusting the Eyepieces
The eyepieces can be used with or without glasses, and can be adjusted to
compensate visual impairments. You can adjust various properties of the eyepieces
to enhance your viewing experience:
Property Procedure Graphic
Distance between the
eyepieces
(“interpupillary
distance”)
Swing the eyepiece tubes symmetrically up
or down.
The setting is correct when you see one
round image when looking through the two
eyepieces.
Viewing height Each separation has a high and a low
viewing height.
Swing the eyepieces to their upper or lower
position at the desired separation.
Rotation of the
crosshair
Eyepieces with a
crosshair are indicated
by the additional red
dot
To rotate the crosshair, rotate the entire
eyepiece.
Only Primotech D/A POL and Primotech D/
POL Conoscopy are supplied with an
eyepiece with a crosshair
Use with glasses Turn the ring of each eyepiece so that it is in
the zero position.
For eyepieces with a red dot, the zero should
be next to the red dot.
For other eyepieces the zero should be next
to the white dot.

3 First Steps|3.4 Adjusting the Eyepieces
Primotech|Document 430055-9044-008 V.1.0; 03 / 2014 19
Use without Glasses If you have visual impairments and wish to observe the sample without glasses, you
can adjust the eyepieces to compensate for the impairments:
Procedure 1Ensure the left eyepiece is in the zero position.
The zero on the ring should be next to the white dot of the eyepiece.
2Select a magnification between 10x and 20x.
3Look at the sample through the left eyepiece with your left eye only.
4Raise or lower the stage until the sample is in focus.
For more information, see Selecting Objectives and Focusing [}20].
5Look at the sample through the right eyepiece with your right eye only.
6Turn the right eyepiece ring until the sample is in focus.
A diopter scale on the ring also helps you find the correct setting.
The sample should now be in focus when you look at it with both eyes. Once you
have adjusted the eyepieces, you should subsequently only change the focus of a
sample by turning the focus wheel. For more information, see Selecting Objectives
and Focusing [}20].

3 First Steps|3.5 Selecting Objectives and Focusing
20 Primotech|Document 430055-9044-008 V.1.0; 03 / 2014
3.5 Selecting Objectives and Focusing
Selecting Objectives To select a different magnification:
Procedure 1Rotate the objective nosepiece until the objective with the desired
magnification is at the front.
Ensure the nosepiece is rotated to a click-stop position.
Ensure the sample is sufficiently far below the objective that they do not
collide.
2For Primotech D/A POL and Primotech D/POL Conoscopy, ensure the objective
is centered.
For more information, see Centering the Objectives [}33].
Focusing To focus the sample:
Prerequisites ¢The eyepieces have been adjusted [}18]
Procedure 1Select the lowest magnification (e.g. 5 x).
2Look through the eyepieces and turn the focus wheel to raise or lower the
stage until the sample is in focus.
Ensure that the stage does not collide with the objective during focusing.
– Turn the larger wheel for coarse focus
1
.
– Turn the smaller wheel for fine focus
2
.
2
3
1
This manual suits for next models
3
Table of contents

