PRINCESS HOUSE VIDA SANA PRO-7 Guide

PRO-7 AIR FRYER CARE & USE MANUAL
MY PRINCESS HOUSE CONSULTANT
PHONE NUMBER
C5209 2/20

2
TWO-YEAR LIMITED WARRANTY
Princess House offers the original purchaser, from the date of purchase, a two-year performance warranty to
replace the Vida Sana™Pro-7 Air Fryer, if found defective in material, construction, or workmanship when the
product is used in normal domestic household use and in accordance with the care and use instructions provided.
Princess House shall have the right to determine if the item is defective and, at its option, replace it with a similar
or equivalent item, or provide a refund of the purchase price. In order for a replacement or refund to be made, the
defective product must be returned at customer’s expense to Princess House with a brief explanation and proof
of purchase.
THIS WARRANTY DOES NOT COVER DAMAGE FROM IMPROPER USE AND FAILURE TO FOLLOW THE
CARE & USE INSTRUCTIONS ENCLOSED WITH THE PRODUCT.
Exclusions from warranty:
• Normal wear and tear of wearable parts including Fry Basket and Pan
• Discoloration and deterioration of any of the components by improper cleaning after each use
• Stains, discolorations, or scratches on the inside or outside of Unit, Pan, or Fry Basket
• Damage caused to the Unit, Pan, or Fry Basket by use of metal or sharp utensils
• Damage caused to the Unit, Pan, or Fry Basket from improper or inadequate maintenance including
use of scouring pads, steel wool, abrasive cleaners, bleach, oven cleaners, and the like that may damage
surfaces
• Damage caused by any accident, fire, flood, etc.
• Damage caused by misuse, abuse, and/or negligence (including overheating)
• Damage resulting from repairs or manipulations carried out by unauthorized or non-qualified repair/
service personnel
• Unsupervised use of children under 18 years of age
This warranty is available to the original purchaser only and is void when the covered product is used for any reason
other than for personal, family, or household purposes.
THIS WARRANTY IS IN LIEU OF ALL OTHER WARRANTIES AND REPRESENTATIONS, EXPRESS OR IMPLIED,
AND ALL OTHER OBLIGATIONS OR LIABILITIES ON PRINCESS HOUSE’S PART. ANY IMPLIED WARRANTIES
THAT MAY BE IMPOSED BY LAW ARE LIMITED TO ONE YEAR, OR THE SHORTEST PERIOD ALLOWED BY
APPLICABLE LAW. SOME STATES DO NOT ALLOW LIMITATIONS OR EXCLUSIONS ON HOW LONG AN IMPLIED
WARRANTY OF MERCHANTABILITY OR FITNESS LASTS, SO THE ABOVE LIMITATIONS OR EXCLUSIONS MAY
NOT APPLY TO YOU.
THIS WARRANTY IS LIMITED AND EXPRESS TO THE TERMS AND CONDITIONS SET FORTH HEREIN. THIS
WARRANTY EXCLUDES ALL INDIRECT, CONSEQUENTIAL OR INCIDENTAL DAMAGES. SOME STATES DO NOT
ALLOW LIMITATION OR EXCLUSION OF THESE DAMAGES SO THESE EXCLUSIONS MAY NOT APPLY TO YOU.
IF APPLICABLE, THESE DISCLAIMERS CONTINUE AFTER EXPIRATION OF THE EXPRESS WARRANTIES SET
FORTH ABOVE.
This warranty gives you specific legal rights and you may also have other rights which vary from state to state.
HALF-PRICE REPLACEMENT POLICY: Because your satisfaction is our priority, it is our pleasure to offer
Half-Price Replacements on every purchase you make. Product(s) or part(s) that are currently available in our line
can be replaced at just half the current suggested retail price if it becomes broken or damaged in use. To receive a
replacement at half price you must return an identifiable piece of the product with the original sales receipt. Please
contact your Princess House Consultant or Princess House Customer Service for assistance in making your return.
If you are unable to return an identifiable piece of the product with the original sales receipt, you may replace your
product at the current full suggested retail value through your Princess House Consultant or by contacting
Princess House Customer Service.
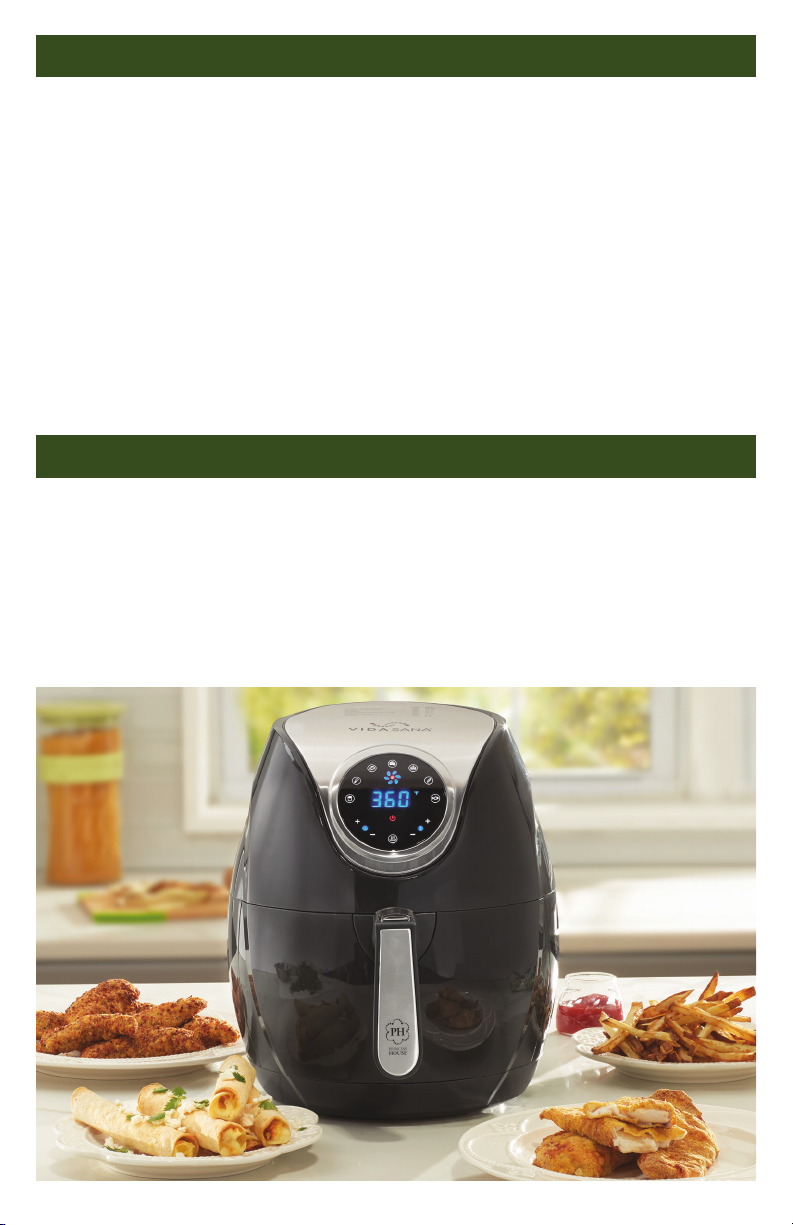
TABLE OF CONTENTS
Two-Year Limited Warranty ....................................................................................................2
Introduction.............................................................................................................................3
Important Safeguards..............................................................................................................4
Components.............................................................................................................................5
Getting to Know Your Display Panel................................................................................... 6-7
How to Use Preprogrammed Modes.......................................................................................7
How to Use Manual Mode.......................................................................................................8
Quick Cooking Guide...............................................................................................................8
Shaking Foods..........................................................................................................................9
Cooking Tips ..........................................................................................................................10
Cooking Guide ................................................................................................................. 10-11
Cleaning & Care............................................................................................................... 11-12
Troubleshooting ....................................................................................................................12
INTRODUCTION
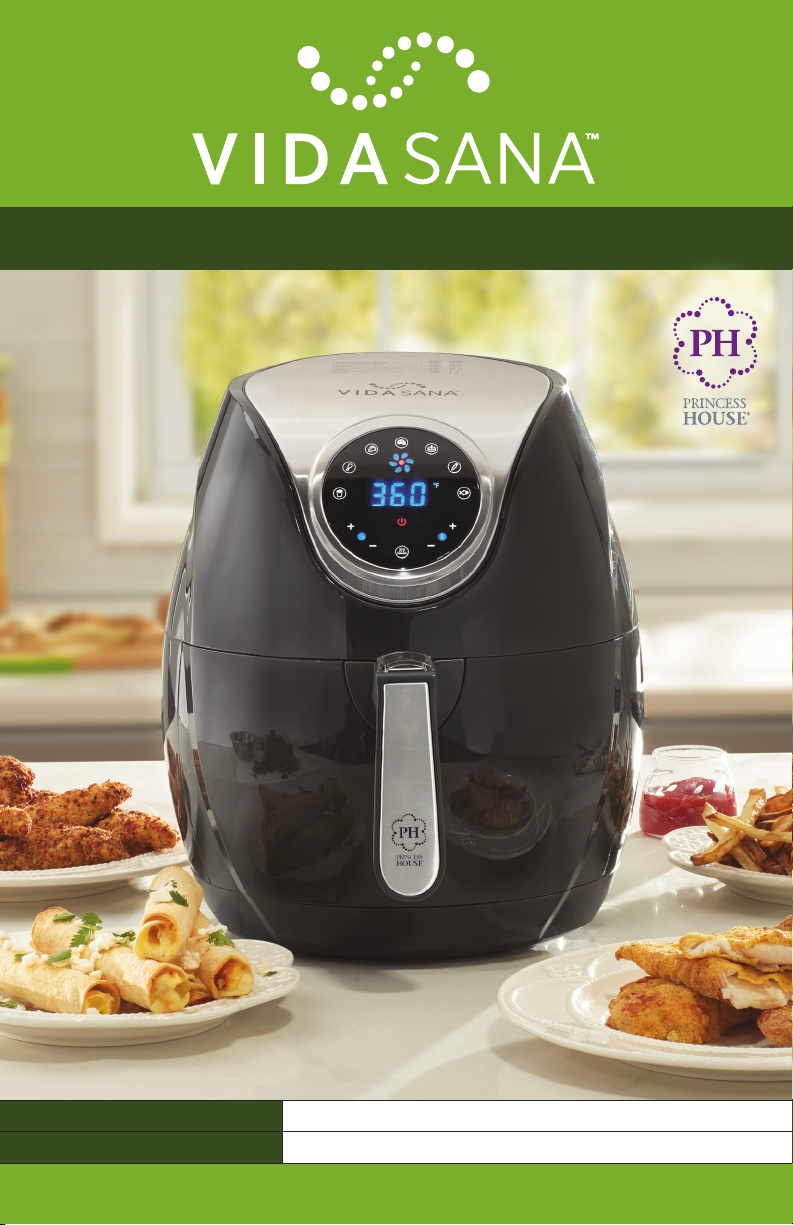
Enjoy healthier versions of your favorite fried foods with your Vida Sana™Pro-7 Air Fryer. Its
Turbo-Air Technology gives you the same crispy fried taste and texture you love with little to no
oil, no trans fats, and with no greasy mess to clean up! The results are a variety of traditionally fried
foods made with fewer calories without sacrificing taste.
Your Vida Sana™Pro-7 Air Fryer also offers the versatility of roasting, baking, and grilling foods with
a digital touch screen that is easy to use. It includes 7 one-touch preprogrammed modes and
manual mode allowing you to customize the temperature and cooking time.
3

IMPORTANT SAFEGUARDS
ALWAYS FOLLOW BASIC PRECAUTIONS WHEN USING YOUR AIR FRYER. SAVE AND READ THESE
INSTRUCTIONS IN FULL BEFORE USING YOUR AIR FRYER.
4
Key Safety Points
•Do not touch hot surfaces. Outer surfaces may become
hot during use. Pan and Fry Basket will be hot.
Use Handle.
• Only press the Release Button on the Fry Basket
Handle when the Pan is resting flat on a heat-resistant
counter (or any level heat-resistant surface) as the hot
Pan will drop.
• Do not use if Sliding Button Guard ever becomes
detached from Fry Basket.
• Make sure there is proper ventilation. Hot steam is
released through Air Outlet in the back of unit. Allow
for at least 6 inches between Air Fryer and the wall.
Keep your hands and face a safe distance from the Air
Outlet Vent. Avoid hot steam and air when removing
the Pan and Fry Basket from Air Fryer.
• Always operate on a level heat-resistant surface. Do
not operate on a surface covered with a tablecloth.
• This appliance is not intended for use by people,
including children, with reduced physical, sensory
or mental capabilities, or lack of experience and
knowledge, unless a person responsible for their
safety provides close supervision and instructions
concerning use of the appliance.
General Safety
• Do not immerse your Air Fryer Main Unit Housing or
plug in water or liquid. Do not rinse under the tap.
• Do not leave Air Fryer unattended when in use.
• Closely supervise children near your Air Fryer.
• Unplug Air Fryer when not in use and before cleaning.
Always allow parts to cool before cleaning.
• Do not use a different Pan or Fry Basket not provided
by Princess House.
• Do not place your Air Fryer on a stove, near gas or
electric burners, or in a heated oven.
• Be extremely cautious when moving your Air Fryer or
removing the Fry Basket.
• Do not clean with any metal or abrasive scouring pads.
Metal fragments can break off the pad and touch
electrical parts creating risk of electric shock.
• Do not place anything on top of your Air Fryer.
• Do not store anything inside your Air Fryer.
• Your Air Fryer is designed for household use only.
• Only use your Air Fryer as directed in this manual.
• Never place hands inside the unit.
• Allow Air Fryer to cool for 30 minutes before cleaning.
Electromagnetic Fields (EMF)
• This Air Fryer complies with all standards regarding
electromagnetic fields (EMF). If handled properly and
according with instructions in this user manual, your
Air Fryer is safe to use based on scientific evidence
available today.
While Operating Air Fryer
• You may smell a slight burning odor during initial
use. This is normal. Make sure to wash and dry all
components before use to minimize the smell.
• Air Fryer works with hot air only. NEVER FILL PAN
OR FRY BASKET WITH OILS, FATS, OR ANY OTHER
LIQUIDS.
• To avoid electric shock, do not put liquids of any kind
into the Main Unit Housing.
• Never use your Air Fryer without the Pan with Fry
Basket secured in place.
• Do not overfill your Air Fryer with food or use
metal utensils.
• Do not place paper, cardboard, non-heat resistant
plastic, or similar materials into your Air Fryer.
• You may use parchment paper or foil under foods.
NEVER place over foods.
• Always use heat-safe containers. Do not use containers
that are not metal, heat-resistant glass or heat-safe
silicone.
• Should your Air Fryer emit black smoke, unplug
immediately and wait for smoke to stop before
removing Pan with Fry Basket.
Plug & Cord
•Use only with 120V AC Power outlet. This Air Fryer
has a three-prong plug. To reduce the risk of electric
shock, this plug is intended to fit into a three-prong
outlet only. If the plug does not fit fully into the outlet,
contact a qualified electrician. Do not modify the plug
in any way.
• Plug Air Fryer into its own dedicated outlet. Never
use this Air Fryer with an extension cord of any kind.
If electrical circuit is overloaded, Air Fryer may not
operate properly.
• Do not use your Air Fryer if damaged, not working
properly, or if the cord is damaged.
• Never allow cord to hang over the edge of a table or
counter or to touch hot surfaces.
• Keep cord out of reach of children.
• Do not operate your Air Fryer in areas with unfinished
walls and exposed electrical cords. Doing so could create
risk of fire.
Automatic Shut-Off
• Your Air Fryer has a built-in Timer and will automatically
shut down when the countdown reaches zero.
• You can also manually turn off your Fryer by pressing
the Power Button.
• It takes approximately 20 seconds to shut down.
Overheating Protection System
• Should the inner temperature control system fail, the
overheating protection system will be activated and the
Air Fryer will not function. Should this happen, unplug
the power cord and let cool for 30 minutes before
restarting or storing.

5
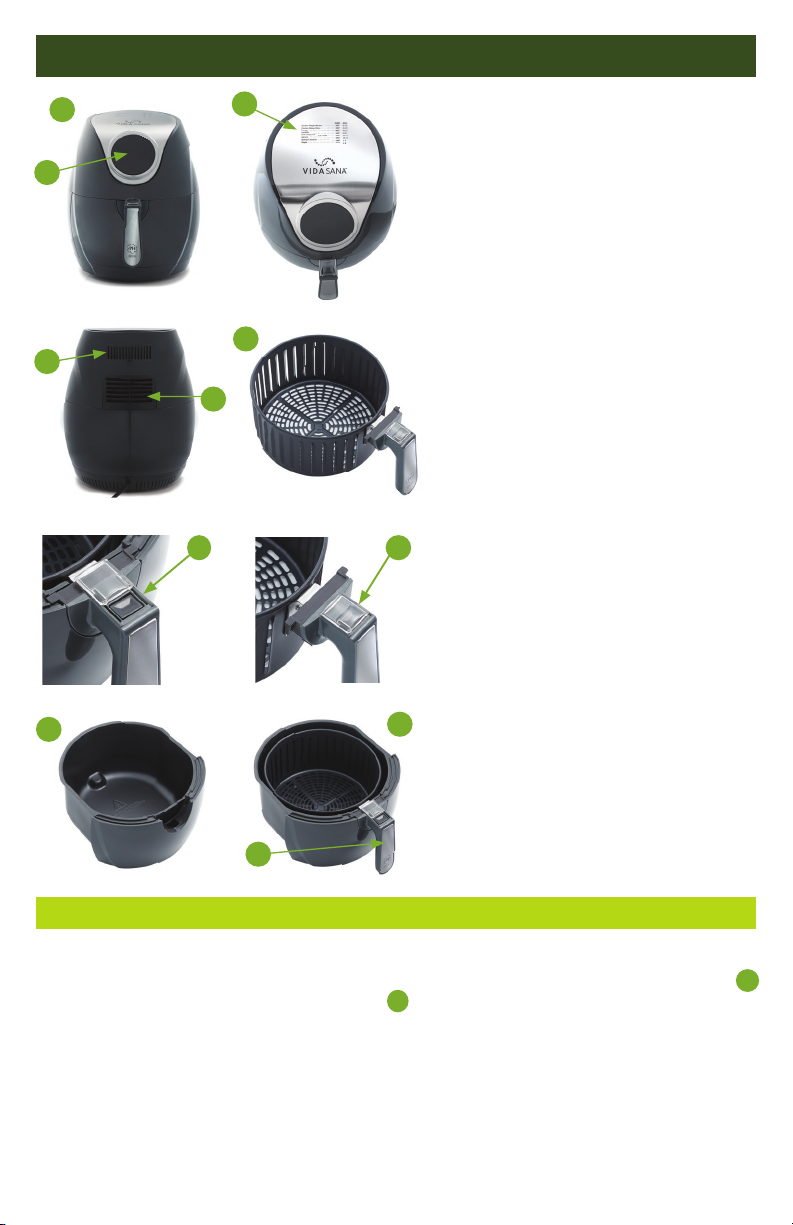
1. Main Unit Housing
2. Digital Control Panel
3. Quick Cooking Guide
4. Air Intake Vent
5. Air Outlet Vent
6. Fry Basket
7. Fry Basket Release Button
8. Release Button Slide Guard
9. Pan
10. Fry Basket Handle
11. Pan with Basket assembled
The Release Button Slide Guard helps
to ensure you do not press the Fry
Basket Release Button by accident.
Pressing the Fry Basket Release Button
causes the Pan to separate from the
Fry Basket and may result in injury or
damage if not done on a level,
heat-resistant surface.
Do not move Release Button Slide
Guard forward until Fry Basket and
Pan are resting on a level, heat-
resistant surface.
CAUTION: Discontinue use if Release
Button Slide Guard ever becomes
detached from Handle.
Your Pro-7 Air Fryer has been shipped
with the components shown. Check
everything carefully before use. If any
parts are missing or damaged, do not
use this product.
COMPONENTS
8
7
BEFORE FIRST USE:
• Remove all packing material and stickers from Air Fryer.
• Start by pulling the Pan with Fry Basket out, rest on flat surface; slide Release Button Guard,
press and hold Fry Basket Release Button and lift Fry Basket from Pan.
• Thoroughly clean the Fry Basket and Pan with warm, soapy water using a
non-abrasive sponge.
• Dry completely and place Fry Basket back into Pan; you will hear a click. Slide Pan with Fry
Basket back into Air Fryer; you will hear a click. Release Button Slide Guard will move to cover
Fry Basket Release Button.
• Preheat Air Fryer to eliminate manufacturing oil before cooking.
13
2
4
5
11
10
6
9
8
7

4. MANUAL/PREHEAT BUTTON
The Manual/Preheat button allows you to cook
foods manually or to preheat Air Fryer.
• To Cook Foods Manually, press the Manual
button once and adjust the temperature and
time by using the + and - buttons. Then press
the Power button to start.
• To Preheat, press the Manual button once
followed by the Power button. Air Fryer will
operate for 3 minutes at 360°F and then
automatically shut down.
5. PREPROGRAMMED BUTTONS
These 7 Presets allow you to choose from: French
Fries, Bone-In Chicken, Chicken Breasts, Steak,
Cake, Root Vegetables, and Fish. You can
adjust the preprogrammed settings if desired
using the timer and temperature control buttons.
6. TEMPERATURE/TIME DISPLAY
This window displays the temperature and
cooking time counting down.
7. BLUE FAN ICON
The spinning Blue Fan Icon will appear when the
Air Fryer is in use and up to 20 seconds after it
is turned off. Red Heat Light will appear inside
the center when the Air Fryer is reaching default
or selected temperature. Once temperature is
reached, only Blue Fan icon is visible.
GETTING TO KNOW YOUR DISPLAY PANEL
1. POWER BUTTON
• Once the Pan and Fry Basket are
properly placed in the Air Fryer
Unit Housing, the Power Button
will illuminate in RED. Selecting the
Power Button one time will set the
Air Fryer to a default temperature of
360°F and the cooking time will be
set to 15 minutes.
• Pressing the Power Button a second
time will start the cooking process.
• Pressing the Power Button during
the cooking cycle will shut the
Air Fryer off.
2. TIMER CONTROL BUTTONS
The + and – symbols enable you
to increase or decrease cooking time,
1 minute at a time each time you
press or by 10 minutes by holding
the button down. Timer control
ranges from 1 to 60 minutes.
3. TEMPERATURE CONTROL
BUTTONS
The + and – symbols enable you to
increase or decrease temperature
10°F at a time. Temperature control
ranges from 180°F - 400°F.
6
5
2
1
4
3
6
7
1
2
3
5
6
7
4

7
What to know for either Manual or Preprogrammed Mode:
• When cooking smaller pieces of food (cut veggies, fries, meatballs), pull out Pan with Fry
Basket and shake or turn them to ensure they cook evenly.
• It is better to cook most foods in batches to help ensure even cooking.
• For fresh ingredients like meat and washed veggies, pat them dry before cooking.
• Toss foods with a bit of oil and seasoning in a bowl before placing in Fry Basket for a
crispy texture.
• For ready-to-eat frozen foods, take them out of the freezer and immediately place in Fry
Basket. Do not thaw.
• Air Fryer will PAUSE automatically when you pull out Pan to check on food. Slide Pan back
into Air Fryer, and it will continue to cook for the remaining time.
HOW TO USE – PREPROGRAMMED MODES
• Plug Air Fryer in, Power button will light up and stay on. Pull out Pan with Fry Basket inside.
• Place food into the Air Fryer’s Fry Basket, making sure not to overfill so food cooks evenly.
See MAX line inside Fry Basket.
• Slide the Pan with Fry Basket back into Air Fryer. All lights in Display Panel will light up for
2 seconds and then go off.
• Press the Power button again; Time/Temp Display will show 360°F/15 min intermittently until
a function is selected.
Using Preprogrammed Modes
• Press one of the Preprogrammed buttons (Food icon) on the Display Panel that fits your food
or recipe best, then press red Power Button to begin air frying.
• Air Fryer will start working, Blue Fan Icon light will start spinning, and Time/Temp Display
Screen will show temperature and remaining time alternating during the duration of the
cooking mode selected.
• Preprogrammed modes can also be
adjusted while Air Fryer is working
by pressing the + or – buttons on the
TEMP or TIME function.
• To check on the food, you can pause
the cooking cycle by pulling the
Pan with Fry Basket out, and then
pushing it back again into Air Fryer.
Remaining time will resume.
• You can stop the Air Fryer completely
by pressing Power button again.
• Air Fryer will shut itself off at the end
of the cooking time and you will hear
10 beeps. Fan will continue to work
until unit has cooled down.
Preset Icon Default
Time Default
Temp
French Fries 15 min 360°F
Bone-In Chicken 25 min 380°F
Chicken Breast 20 min 360°F
Steak 20 min 360°F
Cake 20 min 400°F
Root Vegetables 15 min 400°F
Fish 25 min 320°F

8
HOW TO USE – MANUAL MODE
• Press the Manual Button on the Display Panel. Button will blink and Time/Temp Display
Screen will show default temperature and time (360°F/3 min) alternating.
• Adjust to your desired Temperature and/or Time by pressing + or – button, and then press
red Power Button.
• You can reset to the original default of 360°F/3 min by pressing the Manual Button again.
• Air Fryer will start working, Blue Fan Icon light will start spinning, and Time/Temp Display
Screen will show selected temperature and remaining time alternating until cycle finishes.
• To check food, you can pause the cooking cycle by pulling the Pan with Fry Basket out, and
then pushing it back again into Air Fryer. Remaining time will resume.
• You can stop the Air Fryer completely by pressing Power Button again. Air Fryer will shut itself
off at the end of the cooking time and you will hear 10 beeps. Fan will continue to work until
unit has cooled down.
QUICK COOKING GUIDE
Times in Cooking Guide for Manual Mode are estimates and may need adjustment depending
on your preference.
• Located on top of your Air Fryer, you will find a quick reference guide for common foods
that can be cooked using the Manual Mode.
Preheat Mode
• Some foods and recipes call for Preheating Time. To do so, start by pressing the Manual
Button which is also the Preheat button on the Display Panel.
• Button will blink and Time/Temp Display Screen will show default temperature and time
(360°F/3 min) alternating.
• Press red Power Button, Air Fryer will start working, Blue Fan Icon light will start spinning, and
at the end of the 3 min cycle the Fry Basket is preheated and ready to start cooking your food
or recipe.
• Air Fryer will shut itself off at the end of the preheating time and you will hear 10 beeps.
Fan will continue to work until unit has cooled down.
TEMP MINS
Chicken Thighs........................ 380° 18-20
Chicken Wings......................... 380° 20-24
Flautas..................................... 400° 10-12
Gorditas................................... 360° 8-10
Port Chops .............................. 360° 10-12
Salmon.................................... 380° 10-12
Shrimp .................................... 360° 5-7
Tilapia...................................... 370° 6-8

SHAKING FOODS
To ensure even cooking, some foods require “shaking” during the cooking process – like French
fries, nuggets, roasted vegetables, and smaller foods. You can flip foods like steak to ensure even
browning.
How to Shake
• Remove the Assembled Pan with Fry Basket from
the Air Fryer Unit and gently shake foods and place
back into the Unit to continue cooking.
• When you remove the Assembled Pan with
Fry Basket, the Air Fryer will pause cooking
automatically. As a safety feature, the display will
turn off until Assembled Pan with Fry Basket are
replaced. Cooking program will resume once
securely in place.
• Avoid shaking for longer than 30 seconds as the
Air Fryer may start to cool down.
When to Shake
• Shake at least once during cooking. Depending on recipes and preferences you may need to
shake foods several times.
• Tip – Set Timer to half the cooking time needed for recipe.
Removing Food from Fry Basket
• When removing the Assembled Pan with
Fry Basket you may feel slight resistance. Place
hand on top of the Air Fryer (make sure to use
an oven mitt as it may be hot) and gently pull
the Handle on the Fry Basket.
• To remove foods from the Assembled Pan
with Fry Basket, place the Pan on a level
heat–resistant surface.
• Move the Release Button Slide Guard forward.
• Press and hold the Fry Basket Release Button and lift the Fry Basket out of the Pan.
• Turn the Fry Basket over and let foods fall onto plate or serving platter.
• Use silicone utensils to remove larger foods.
• Do not turn the Assembled Pan with Fry Basket upside down as any excess juices or oils in
foods that may have collected at the bottom will pour over foods.
• Once foods are removed, the Air Fryer is ready for another batch.
COOKING TIPS
9

• AIR FRYER AND PARTS WILL BECOME HOT DURING THE COOKING PROCESS.
• Do not overfill Fry Basket with foods – see MAX line
• Do not pack foods into Fry Basket.
HELPFUL REMINDERS
COOKING GUIDE
Note these settings are a guide. As ingredients differ in size, shape and brand,
you may need to adjust cooking times and temperatures.
10
For Crispier Texture:
• Adding a small amount of oil to
foods can make them crispier.
Use no more than 2 tablespoons
and put it on the food – not in
the Pan.
• Oil sprays are good for applying
small amounts of oil evenly
to foods.
Food Tips:
• You can air fry frozen foods that can be
baked in the oven.
• To make cakes, hand-pies, or any foods
with filling or batter, place foods in heat-safe
container and place that in Fry Basket.
• Pat dry foods like wet vegetables or
marinated meats before adding to
Fry Basket.
Reheating Foods: Simply set temperature to 300oF for up to 10 minutes.
FOOD AMOUNT TIME TEMPERATURE
CHICKEN
Breast, bone in 1.25 lbs. 25 min 370°F
Breast, boneless 4 oz. each 12 min 380°F
Drumsticks 2.5 lbs. 25 min 380°F
Legs, bone in 1.75 lbs. 30 min 380°F
Tenders 6-8 pieces 20 min 360°F
Thighs, bone in 2 lbs. 18-20 min 380°F
Thighs, boneless 1.5 lbs. 20 min 380°F
Whole Chicken 6.5 lbs. 75 min 360°F
Wings 1-2 lbs. 20-24 min 380°F
BEEF
Burger 4 oz. each 16 min 370°F
Flank Steak 1.5 lbs. 12 min 400°F
London Broil 2 lbs. 20-28 min 400°F
Meatballs 1" each 7 min 380°F
Meatballs 3" each 10 min 380°F
Sirloin Steak 12 oz, 1" thick 9-14 min 400°F
PORK AND LAMB
Loin 2 lbs. 55 min 360°F
Lamb Loin Chops 1" thick 8-12 min 400°F
Pork Chops, bone in 6.5 oz, 1" thick 10-12 min 360°F
Pork Chops, boneless 6.5 oz, 1" thick 10 min 360°F
Tenderloins 1 lb. 15 min 370°F
FISH AND SEAFOOD
Calamari 8 oz. 4 min 400°F
Fish Fillet 8 oz, 1" thick 10 min 400°F
Salmon 6 oz. fillet 10-12 min 380°F
Scallops 8-10 pieces 5-7 min 400°F
Shrimp 1 lb. 5-7 min 360°F
Swordfish 6 oz. steak 10 min 400°F
Tilapia 6 oz. steak 6-8 min 370°F
Tuna 6 oz. steak 7-10 min 400°F
COOKING TIPS

CLEANING & CARE
• Always allow the Air Fryer to fully cool down for 30 minutes before removing and cleaning
any of its components.
• Unplug the unit from the wall outlet before cleaning.
• Clean Air Fryer after every use.
• The Pan and Fry Basket have a nonstick coating. Do not use metal utensils, abrasive sponges,
or cleaners to clean them, as this may damage the nonstick surface.
• Clean the Pan and Fry Basket with warm, soapy water and a non-abrasive sponge. Do not
leave submerged in water. These pieces are also dishwasher safe.
• If food residue remained on the Pan or Fry Basket, add some water and dish soap and let sit
for approximately 10 minutes. Wash with a non-abrasive sponge. Dry all pieces thoroughly.
• Clean the inside of Air Fryer (except heating elements) Use a wet, soapy nonabrasive sponge
to clean the inside of Air Fryer (except heating elements). DO NOT SUBMERGE IN WATER.
COOKING GUIDE (continued)
FOOD AMOUNT TIME TEMPERATURE
FROZEN FOODS
Breaded Shrimp 12 oz. 9 min 400°F
Chicken Nuggets 12 oz. 10 min 400°F
Fish Fillets 10 oz, ½" thick 14 min 400°F
Fish Sticks 10 oz. 10 min 400°F
Mozzarella Sticks 11 oz. 8 min 400°F
Onion Rings 12 oz. 8 min 400°F
French Fries 18 oz. 14-18 min 400°F
VEGETABLES
Asparagus Slices, 1" thick 6 min 400°F
Broccoli Florets 6 min 400°F
Brussel Sprouts Halved 15 min 380°F
Carrots Slices, ½" thick 15 min 380°F
Cauliflower Florets 12 min 400°F
Corn on the Cob Halved 6 min 390°F
Eggplant 1 ½" cubes 15 min 400°F
Peppers 1" chunks 15 min 400°F
Potatoes 1.5 lbs, small baby 15 min 400°F
Potatoes French Fries 25 min 400°F
Potatoes 1" cubes 12 min 400°F
Potatoes Whole 40 min 400°F
Squash ½" chunks 12 min 400°F
Sweet Potato Whole 35 min 380°F
Zucchini ½" sticks 12 min 400°F
BAKED GOODS
Bread 8 min 320°F
Brownies 30 min 360°F
Chocolate Lava Cake 10 min 375°F
Cookies 10-15 min 350°F
SPECIALTY FOODS
Flautas 10-12 min 400°F
Gorditas 8-10 min 360°F
Chimichangas 6-8 min 400°F
Sopes 6-8 min 400°F
Taquitos 5-6 min 400°F
Tostones 10 min 400°F
11

12
TROUBLESHOOTING
PROBLEM SOLUTION
The Air Fryer will not turn on Make sure the Air Fryer is plugged in. Push the Pan with
Basket securely into the Air Fryer until it clicks in place.
Foods are not completely cooked Place smaller batches of food into the Basket, not going
over the MAX line. If Basket is overfilled, foods will be
undercooked. Try increasing cooking temperature or time.
Foods are cooked unevenly Foods that are stacked on top of each other or too close to
each other need to be shaken or turned while cooking. Place
smaller batches of food into the Basket, not going over the
MAX line.
My food is burned Check progress throughout cooking, in some cases you need
to shake or turn food. Remove food when desired level of
brownness has been achieved, even if cooking time hasn't
ended. Remove food immediately after the cook time is
complete to avoid overcooking.
Foods are not crispy Some foods may need to be dried, and then sprayed or
brushed with a small amount of oil to get crispy. Toss, spray,
or brush foods in a bowl BEFORE placing them in Air Fryer's
Basket.
Pan and/or Basket does not slide into
Air Fryer easily Make sure the Basket is not overfilled with food. Make sure
the Basket is securely placed inside the Pan.
White smoke is coming out of the
Air Fryer The Air Fryer may produce some white smoke when you use
it for the first time. This is normal. Make sure the Pan and
Basket are cleaned properly and not greasy before each use.
Air frying greasy foods can cause oil to drip into the Pan.
This oil will produce white smoke, and the Basket and Pan
can get hotter than usual. This is normal and should not
affect cooking. When cooking fatty foods, add some water to
bottom of Pan to keep dripping fats from smoking.
Dark smoke is coming out of the
Air Fryer. Immediately unplug your Air Fryer as food is burning.
Wait for smoke to clear before pulling the Pan and Basket out.
Time/Temperature Display shows E1
or E2 message There is an open circuit or a short circuit in the temperature
monitor. Unplug Air Fryer and contact Princess House
Customer Service at 508.823.6800 for additional information.
Do not attempt to disassemble or repair Air Fryer.
• Do not use abrasive cleaners, bleach, or oven cleaner to clean any of the components of Main
Unit Housing.
• Clean the heating element with a dry cleaning brush to remove any food residue, only after
Air Fryer has completely cooled down and it is unplugged from the wall.
• Wipe the outside of the appliance with a dry cloth.
CLEANING & CARE (continued)

12
PROBLEMAS Y SOLUCIONES
PROBLEMA SOLUCIÓN
La Freidora sin aceite no
enciende. Asegúrate que la Freidora sin aceite esté enchufada. Empuja el guardacesta con la
cesta para freír de forma segura dentro de la
Freidora hasta que encaje en su lugar.
Los alimentos no están
completamente cocidos. Coloca tandas más pequeñas de alimentos en la cesta para freír, sin sobrepasar la
línea MAX. Si la cesta se llena en exceso, los alimentos estarán poco cocidos. Intenta
aumentar la temperatura o el tiempo de cocción.
Los alimentos se cocinan de
manera desigual. Los alimentos apilados uno encima del otro o demasiado cerca uno del otro deben
agitarse o voltearse mientras se cocinan. Coloca tandas más pequeñas de alimentos
en la cesta para freír, sin sobrepasar la línea MAX.
Mi comida está quemada. Verifica el progreso durante la cocción, en algunos casos necesitas agitar o voltear los
alimentos. Retira los alimentos cuando hayan alcanzado el nivel de dorado deseado,
incluso si el tiempo de cocción no ha terminado. Retira los alimentos inmediatamente
después de que se haya terminado el tiempo de cocción para evitar la sobrecocción.
Los alimentos no están
crujientes. Es posible que algunos alimentos deban secarse y luego rociarse o untarse con una
pequeña cantidad de aceite para obtener una textura crujiente. Mezcla, rocía o unta
los alimentos en un tazón ANTES de colocarlos en la cesta de la Freidora.
El guardacesta y/o cesta para
freír no se deslizan fácilmente
dentro de la Freidora sin aceite.
Asegúrate que la cesta para freír no esté demasiado llena con alimentos y que esté
colocada de manera segura dentro del guardacesta.
Está saliendo humo blanco de
la Freidora sin aceite. La Freidora puede producir humo blanco cuando la usas por primera vez. Esto es
normal. Asegúrate que el guardacesta y la cesta para freír estén limpias y que no
estén grasosas antes de cada uso. Freír sin aceite y con aire los alimentos grasosos
puede causar que el aceite gotee en el guardacesta. Este aceite producirá humo
blanco, y el guardacesta y la cesta pueden calentarse más de lo usual. Esto es normal
y no debería afectar la cocción. Cuando cocines alimentos grasosos, agrega un poco
de agua en el fondo del guardacesta para evitar el humo de las grasas que goteen.
Está saliendo humo negro de la
Freidora sin aceite. Desenchufa inmediatamente tu Freidora sin aceite. La comida se está quemando.
Espera a que desaparezca el humo antes de sacar el guardacesta
y la cesta para freír.
La pantalla de tiempo/
temperatura muestra el
mensaje E1 o E2.
Hay un circuito abierto o un cortocircuito en el monitor de temperatura. Desenchufa
la Freidora sin aceite y comunícate con el Servicio al Cliente de Princess House al
508.823.6800 para obtener información adicional.
No intentes desarmar ni reparar la Freidora.
• Si quedan restos de comida en el guardacesta o en la cesta para freír, agrega un poco de agua y
jabón para platos y déjala reposar durante aproximadamente 10 minutos. Lava con una
esponja no abrasiva. Seca todas las piezas a fondo.
• Limpia el interior de la Freidora sin aceite (con excepción del elemento de calor). Usa una esponja
no abrasiva que esté húmeda y jabonosa para limpiar el interior de la Freidora sin aceite (excepto
los elementos de calor). NO LA SUMERJAS EN AGUA. No uses limpiadores abrasivos, lejía ni
limpiadores para hornos para limpiar ninguno de los componentes del cuerpo de la unidad.
• No uses limpiadores abrasivos, lejía ni limpiadores para hornos para limpiar ninguno de los
componentes del cuerpo de la unidad.
• Limpia el elemento de calor con un cepillo para limpiar seco para eliminar cualquier residuo de
comida, solo después de que la Freidora se haya enfriado por completo y esté desenchufada de
la pared.
• Limpia el exterior de la unidad con un paño seco.
LIMPIEZA Y CUIDADO (cont.)

LIMPIEZA Y CUIDADO
• Siempre permite que la Freidora sin aceite se enfríe por completo durante 30 minutos antes
de quitar y limpiar cualquiera de sus componentes.
• Desenchufa la unidad del tomacorriente antes de limpiarla.
• Limpia la Freidora sin aceite después de cada uso.
• El guardacesta y la cesta para freír tienen un revestimiento antiadherente. No utilices utensilios
de metal o esponjas, o limpiadores abrasivos para limpiarlos, ya que esto puede dañar la
superficie antiadherente.
• Limpia el guardacesta y la cesta para freír con agua tibia jabonosa y una esponja no abrasiva
pero no las dejes sumergidas en agua. Estas piezas también se pueden colocar en la
máquina lavaplatos.
GUÍA DE COCCIÓN (cont)
ALIMENTO CANTIDAD TIEMPO TEMPERATURA
Pez espada Filete de 6 oz. 10 min 400°F
Tilapia FIlete de 6 oz. 6-8 min 370°F
Atún Filete de 6 oz. 7-10 min 400°F
ALIMENTOS CONGELADOS
Calamares 12 oz. 9 min 400°F
Nuggets de pollo 12 oz. 10 min 400°F
Filetes de pescado 10 oz., ½" grosor 14 min 400°F
Deditos de pescado 10 oz. 10 min 400°F
Deditos de mozzarella 11 oz. 8 min 400°F
Aros de cebolla 12 oz. 8 min 400°F
Papitas fritas 18 oz. 14-18 min 400°F
VEGETALES
Espárragos Pedazos de 1" de grosor 6 min 400°F
Brócoli Flores 6 min 400°F
Repollitos de Bruselas Mitades 15 min 380°F
Zanahorias Rebanadas, ½" grosor 15 min 380°F
Coliflor Flores 12 min 400°F
Mazorcas de maíz Mitades 6 min 390°F
Berenjenas Cubos de 1½" 15 min 400°F
Pimientos Pedazos de 1" 15 min 400°F
Papas 1.5 lbs., pequeñas baby 15 min 400°F
Papas Papitas fritas 25 min 400°F
Papas Cubos de1" 12 min 400°F
Papas Completas 40 min 400°F
Calabacitas Pedazos de ½" 12 min 400°F
Camotes Completos 35 min 380°F
Calabacín Palitos de ½" 12 min 400°F
ALIMENTOS PARA HORNEAR
Pan 8 min 320°F
Brownies 30 min 360°F
Pastel de chocolate lava 10 min 375°F
Galletas 10-15 min 350°F
PLATILLOS ESPECIALES
Flautas 10-12 min 400°F
Gorditas 8-10 min 360°F
Chimichangas 6-8 min 400°F
Sopes 6-8 min 400°F
Taquitos 5-6 min 400°F
Tostones 10 min 400°F
11

10
CONSEJOS PARA COCINAR
•LA FREIDORA SIN ACEITE Y LAS PIEZAS SE CALENTARÁN DURANTE EL PROCESO
DE COCCIÓN.
• No llenes demasiado la cesta para freír con alimentos. Revisa la línea de llenado máximo
MAX.
• No amontones alimentos en la cesta para freír. HELPFUL REM
GUÍA DE COCCIÓN
Ten en cuenta que esta es una guía de referencia. Como los ingredientes difieren en tamaño,
forma y marca, es posible que debas ajustar los tiempos y las temperaturas de cocción.
Para texturas más crujientes:
• Añade una pequeña cantidad
de aceite a los alimentos para
que estén más crujientes. No
uses más de 2 cucharadas y
agrégalo a la comida, no en
el guardacesta.
• Los aceites en aerosol son buenos
para aplicar uniformemente
pequeña cantidades de aceite a
los alimentos.
Consejos para los alimentos:
• Puedes freír sin aceite y con aire alimentos
congelados que se pueden hornear en el horno.
• Para hacer pasteles, tartas o cualquier comida
con relleno o masa, coloca los alimentos en un
recipiente para hornear y colócalo en la cesta
para freír.
• Seca los alimentos como vegetales húmedos
o carnes marinadas antes de agregarlas a la
cesta para freír.
Recalentar alimentos: Simplemente ajusta la temperatura a 300°F hasta por 10 minutos.
ALIMENTO CANTIDAD TIEMPO TEMPERATURA
POLLO
Pechuga con hueso 1.25 lbs. 25 min 370°F
Pechuga sin hueso 4 oz. cada uno 12 min 380°F
Muslitos 2.5 lbs. 25 min 380°F
Pierna con hueso 1.75 lbs. 30 min 380°F
Deditos de pollo 6-8 piezas 20 min 360°F
Muslos con hueso 2 lbs. 18-20 min 380°F
Muslos sin hueso 1.5 lbs. 20 min 380°F
Pollo completo 6.5 lbs. 75 min 360°F
Alas 1-2 lbs. 20-24 min 380°F
CARNE DE RES
Hamburguesas 4 oz. cada una 16 min 370°F
Bistec de falda 1.5 lbs. 12 min 400°F
London Broil 2 lbs. 20-28 min 400°F
Albóndigas 1" cada una 7 min 380°F
Albóndigas 3" cada una 10 min 380°F
Solomillo 12 oz., 1" grosor 9-14 min 400°F
CERDO Y CORDERO
Lomo 2 lbs. 55 min 360°F
Chuletas de lomo de cordero 1" grosor 8-12 min 400°F
Chuletas de cerdo con hueso 6.5 oz., 1" grosor 10-12 min 360°F
Chuletas de cerdo sin hueso 6.5 oz., 1" grosor 10 min 360°F
Solomillos 1 lb. 15 min 370°F
PESCADO Y MARISCOS
Calamares 8 oz. 4 min 400°F
Filete de pescado 8 oz., 1" grosor 10 min 400°F
Salmón Filete de 6 oz. 10-12 min 380°F
Vieiras 8-10 piezas 5-7 min 400°F
Camarones 1 lb. 5-7 min 360°F

9
AGITAR LOS ALIMENTOS
Para garantizar una cocción uniforme, algunos alimentos requieren ser "agitados" durante el
proceso de cocción, como papas fritas, nuggets de pollo, vegetales asados y alimentos más
pequeños. Puedes voltear otros alimentos como filetes para garantizar un dorado uniforme.
Cómo agitar
• Retira el guardacesta con la cesta para
freír de la unidad de la Freidora sin aceite, agita
suavemente los alimentos y vuelve a colocarla en
la unidad para continuar cocinando.
• Cuando retires el guardacesta con la cesta para
freír la Freidora sin aceite detendrá la cocción
automáticamente. Como medida de seguridad,
la pantalla se apagará hasta que se coloquen
de nuevo la cesta para freír y guardacesta
ensamblados. El programa de cocción se
reanudará una vez que esté en su lugar.
• Evita agitar durante más de 30 segundos, ya que la Freidora puede comenzar a enfriarse.
Cuándo agitar
• Agita al menos una vez durante la cocción. Dependiendo de las recetas y preferencias, puede
que necesites agitar los alimentos varias veces.
• Consejo: ajusta el control de tiempo a la mitad del tiempo de cocción necesario para
la receta.
Retirar los alimentos de la cesta
para freír
• Al retirar el guardacesta con la cesta para freír
puedes sentir una ligera resistencia. Coloca la
mano sobre la Freidora sin aceite (asegúrate de
usar un guante para horno, ya que puede estar
caliente) y tira suavemente del mango de la
cesta para freír.
• Para retirar los alimentos del guardacesta con
la cesta para freír, coloca el guardacesta sobre
una superficie plana resistente al calor.
• Mueve el protector deslizable del botón de liberación hacia adelante.
• Mantén presionado el botón de liberación de la cesta para freír y saca la cesta para freír
del guardacesta.
• Voltea la cesta para freír y deja que los alimentos caigan en un plato o en una bandeja.
• Usa utensilios de silicón para retirar alimentos más grandes.
• No voltees el guardacesta con la cesta para
freír al revés ya que cualquier exceso de jugos o aceites de los alimentos que se hayan
acumulado en el fondo se derramarán sobre los alimentos.
• Una vez que se retiren los alimentos, la Freidora sin aceite está lista para otra tanda.

8
CÓMO USAR TU FREIDORA – MODO MANUAL
• Presiona el botón manual en el panel de control. El botón parpadeará y la pantalla de control
de tiempo/temperatura mostrará alternando la temperatura y el tiempo predeterminados
(360°F/3 min).
• Ajusta la temperatura y/o tiempo deseado presionando el botón + o -, y luego presiona el
botón de encendido rojo.
• Puedes restablecer el modo predeterminado original de 360°F/3 min presionando
nuevamente el botón manual.
• La Freidora sin aceite comenzará a funcionar, la luz azul del ícono del ventilador comenzará
a girar y la pantalla de control de tiempo/temperatura mostrará alternando la temperatura
seleccionada y el tiempo restante hasta que finalice el ciclo.
• Para revisar la comida, puedes pausar el ciclo de cocción tirando hacia afuera el guardacesta
con la cesta para freír y luego empujándola nuevamente hacia la Freidora. El tiempo restante
se reanudará.
• Puedes detener completamente la Freidora sin aceite presionando nuevamente el botón de
encendido. La Freidora sin aceite se apagará automáticamente al final del tiempo de cocción
y escucharás 10 pitidos. El ventilador continuará funcionando hasta que la unidad se haya
enfriado.
GUÍA DE COCCIÓN RÁPIDA
Los tiempos en la Guía de cocción para el modo manual son estimados y es posible que debas
ajustarlos según tu preferencia.
• En la parte superior de tu Freidora sin aceite encontrarás una Guía de referencia rápida para
alimentos comunes que se pueden cocinar usando el modo manual.
Modo de precalentamiento
• Algunos alimentos y recetas requieren tiempo de precalentamiento. Para precalentar,
comienza presionando el botón manual, que también es el botón para precalentar en el panel
de control.
• El botón parpadeará y la pantalla de control de tiempo/temperatura mostrará alternando la
temperatura y el tiempo predeterminados (360°F/3 min).
• Presiona el botón de encendido rojo, la Freidora comenzará a funcionar, la luz azul del
ícono del ventilador comenzará a girar y, al final del ciclo de 3 minutos, la cesta para freír se
precalentará y estará lista para comenzar a cocinar tu comida o receta.
• La Freidora sin aceite se apagará automáticamente al final del tiempo de precalentamiento
y escucharás 10 pitidos. El ventilador continuará funcionando hasta que la unidad se haya
enfriado.
TEMP MIN
Muslos..................................... 380° 18-20
Alitas ....................................... 380° 20-24
Flautas..................................... 400° 10-12
Gorditas................................... 360° 8-10
Chuleta de cerdo..................... 360° 10-12
Salmón.................................... 380° 10-12
Camarón ................................. 360° 5-7
Tilapia...................................... 370° 6-8

Qué saber para el modo manual o preprogramado:
• Cuando cocines piezas pequeñas de comida (vegetales cortados, papas fritas, albóndigas),
saca el guardacesta con la cesta para freír y agita o voltéalas para asegurarte de que se
cocinen de manera uniforme.
• Es mejor cocinar la mayoría de los alimentos en tandas para asegurarte de que se cocinan de
manera uniforme.
• Seca antes de cocinar los ingredientes frescos como carne y vegetales recién lavados.
• Para obtener una textura crujiente mezcla los alimentos en un tazón con un toque de aceite y
condimentos antes de colocarlos en la cesta de la Freidora.
• Para alimentos congelados listos para comer, sácalos del congelador e inmediatamente
colócalos en la cesta para freír.
• La Freidora sin aceite se DETENDRÁ automáticamente cuando retires el guardacesta para
revisar la comida. Vuelve a colocar el guardacesta y la Freidora continuará cocinando por el
tiempo restante.
CÓMO USAR TU FREIDORA – MODOS PREPROGRAMADOS
• Enchufa la Freidora sin aceite, el botón de encendido se encenderá y permanecerá encendido.
Saca el guardacesta con la cesta para freír adentro.
• Coloca los alimentos en la cesta para freír de la Freidora, asegurándote de no llenarla
demasiado para que los alimentos se cocinen de manera uniforme. Revisa la línea máxima de
llenado MAX dentro de la cesta para freír.
• Desliza el guardacesta con la cesta para freír nuevamente dentro de la Freidora. Todas las
luces en el panel de control se encenderán durante 2 segundos y luego se apagarán.
• Presiona el botón de encendido nuevamente; la pantalla de tiempo/temperatura mostrará
360°F/15 min de forma intermitente hasta que selecciones una función.
Uso de modos preprogramados
• Presiona uno de los botones preprogramados (ícono de comida) en el panel de control
que mejor seadapte a tu comida o receta, luego presiona el botón de encendido rojo para
comenzar a freír sin aceite y con aire.
• La Freidora sin aceite comenzará a funcionar, la luz azul del ícono del ventilador comenzará a
girar y la pantalla de control de tiempo/temperatura mostrará alternando la temperatura y el
tiempo restante durante el modo de cocción seleccionado.
• Los modos preprogramados también se pueden
ajustar mientras la Freidora sin aceite está
funcionando presionando los botones + o - en
la función TEMP o TIME.
• Para revisar la comida, puedes pausar el ciclo de
cocción tirando hacia afuera el guardacesta con la
cesta para freír y luego empujándola nuevamente
hacia la Freidora. El tiempo restante se reanudará.
• Puedes detener completamete la Freidora sin
aceite presionando nuevamente el botón de
encendido.
• La Freidora sin aceite se apagará automáticamente
al final del tiempo de cocción y escucharás 10
pitidos. El ventilador continuará funcionando
hasta que la unidad se haya enfriado.
7
Predeterminado cono Tiempo
predet. Temp.
predet.
Papitas fritas 15 min 360°F
Pollo con hueso 25 min 380°F
Pechugas de pollo 20 min 360°F
Filetes 20 min 360°F
Pastel 20 min 400°F
Tubérculos
(verduras con raíz) 15 min 400°F
Pescado 25 min 320°F

CONOCE TU PANEL DE CONTROL
1. BOTÓN DE ENCENDIDO
• Una vez que el guardacesta y la cesta para
freír estén colocados correctamente en el
cuerpo de la unidad de la Freidora, el
botón de encendido se iluminará en ROJO.
Al seleccionar el botón de encendido
una vez, la Freidora sin aceite tendrá una
temperatura predeterminada de 360°F
y el tiempo de cocción se establecerá en
15 minutos.
• Al presionar el botón de encendido por
segunda vez, se iniciará el proceso de
cocción.
• Al presionar el botón de encendido durante
el ciclo de cocción se apagará la Freidora.
2. BOTONES DE CONTROL DE TIEMPO
Los símbolos + y - te permiten agregar o
disminuir el tiempo de cocción, 1 minuto por
cada vez que lo presionas o por 10 minutos
cuando mantienes presionado el botón. El
control del tiempo va desde 1 a 60 minutos.
3. BOTONES DE CONTROL DE TEMPERATURA
Los símbolos + y - te permiten agregar o
disminuir la temperatura 10°F a la vez.
El control de temperatura varía de 180°F
a 400°F.
4. BOTÓN MANUAL/PRECALENTAMIENTO
El botón manual/precalentamiento te permite
cocinar alimentos manualmente o precalentar la
Freidora sin aceite.
• Para cocinar alimentos manualmente,
presiona el botón manual una vez y ajusta la
temperatura y el tiempo usando los botones
+ y -. Luego presiona el botón de encendido
para comenzar.
• Para precalentar, presiona el botón manual
una vez seguido del botón de encendido. La
Freidora sin aceite funcionará durante
3 minutos a 360°F y luego se apagará
automáticamente.
5. BOTONES PREPROGRAMADOS
Estos 7 modos predeterminados te permiten
elegir: papas fritas, pollo con hueso, pechugas
de pollo, filete, pastel, verduras/vegetales,
verduras con raíz y pescado. Puedes ajustar el
modo preprogramado si lo deseas utilizando los
botones de control de tiempo y temperatura.
6. CONTROL DE TEMPERATURA/TIEMPO
Esta ventana muestra la temperatura y el tiempo
de cocción en cuenta regresiva.
7. ÍCONO AZUL DEL VENTILADOR
El ícono azul del ventilador giratorio aparecerá
cuando la Freidora sin aceite esté funcionando
y hasta 20 segundos después de que se apague.
La luz roja de calor aparecerá dentro del centro
cuando la Freidora alcance la temperatura
predeterminada o seleccionada. Una vez que
se alcanza la temperatura, solo se ve el ícono
azul del ventilador.
6
1
2
3
4
5
6
7
5
2
1
4
3
6
7

1. Cuerpo de la unidad
2. Panel de control digital
3. Guía de cocción rápida
4. Conducto de ventilación para
entrada de aire
5. Conducto de ventilación para
salida de aire
6. Cesta para freír
7. Botón de liberación de la cesta
para freír
8. Protector deslizable del botón
de liberación
9. Guardacesta
10. Mango de la cesta para freír
11. Cesta para freír y
guardacesta ensamblados
El protector deslizable del botón de
liberación ayuda a garantizar que no
presiones por accidente el botón de
liberación de la cesta para freír. Al
presionar el botón de liberación de la
cesta para freír, el guardacesta se separa
de la cesta para freír y puede provocar
lesiones o daños si no se hace en una
superficie nivelada y resistente al calor.
No muevas el protector deslizable del
botón de liberación hacia adelante
hasta que la cesta para freír y el
guardacesta descansen sobre una
superficie nivelada y resistente al calor.
Tu Freidora sin aceite Pro-7 Vida Sana™ha
sido enviada con los componentes que se
muestran. Verifica todo cuidadosamente
antes de usar. Si falta alguna pieza o está
dañada, no uses este producto.
COMPONENTES
ANTES DEL PRIMER USO
• Retira todo el material de empaque y las etiquetas de la Freidora sin aceite.
• Comienza tirando hacia afuera el guardacesta con la cesta para freír, colócalo sobre una superficie
plana; desliza el protector del botón de liberación , presiona y mantén presionado el
botón de liberación de la cesta para freír y levanta la cesta del guardacesta.
• Limpia a fondo la cesta y el guardacesta con agua tibia jabonosa y una esponja no abrasiva.
• Seca completamente y vuelve a colocar la cesta para freír dentro del guardacesta; escucharás un
clic. Desliza el guardacesta con la cesta para freír nuevamente dentro de la Freidora sin aceite;
escucharás un clic. El protector del botón se deslizará para cubrir el botón de liberación de la cesta
para freír.
• Precalienta la Freidora sin aceite antes de cocinar para eliminar los aceites de la fabricación.
3
1
2
4
5
6
5
PRECAUCIÓN: Suspende su uso si el protector
deslizable del botón de liberación llega
a separarse del mango.
8
7
8
7
11
10
9
Table of contents
Languages:
Popular Fryer manuals by other brands

Singer
Singer VITA COOK AF-4610 instruction manual

STODDART
STODDART Woodson W.FAS80 Specification, installation and operation manual

ROBAND
ROBAND FD10 Series operating instructions

Dean
Dean SR42 Series Installation & operation manual

Gourmia
Gourmia GTF7650 user manual

Koolatron
Koolatron Total Chef TCAF03 user manual