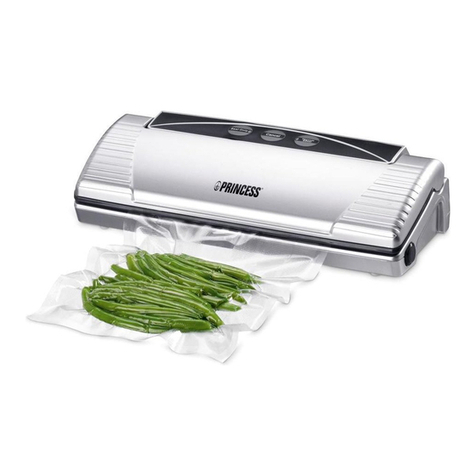
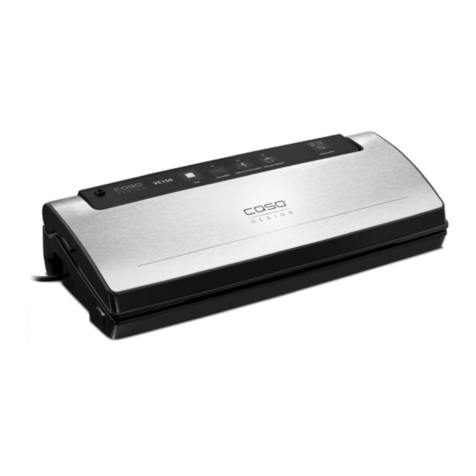
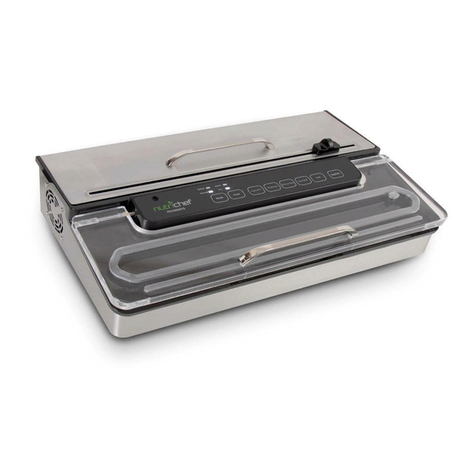
Princess 492966 User manual

Garantiekaart / Guarantee card /
Certificat de garantie / Garantiekarte /
Certificado de garantía / Certificato di
garanzia / Garantikort / Garantibevis/
Takuutodistus / Garantibevis / Postal de
garantia / Κάρτα εγγύησης /
ΔϗΎτΑϥΎϤπϟ
Datum van aankoop / Date of purchase / Date d'achat / Kaufdatum / Fecha de compra / Data di acquisto /
Inköpsdatum / Købsdato / Ostopäivämäärä / Kjøpsdato / Data de compra / Ηµεροµηνία αγοράς /
:
˯ήθϟ ΦϳέΎΗ
Dealer / Dealer / Concessionnaire / Händler / Distribuidor / Rivenditore / Återförsäljare / Forhandler /
Myyjä / Forhandler/Revendedor / Κατάστηµα/:
ήΟΎΘϟ
Type / Model / Type / Typ / Tipo / Modello / Modell / Type / Tyyppi / Type / Tipo / Μοντέλο / :
ϞϳΩϮϤϟ
Koper / Purchaser / Acheteur / Käufer / Comprador / Dati relativi all'acquirente / Köpare / Køber /
Ostaja / Kjøper / Cliente / Αγοραστής / :
ϱήΘθϤϟ
Silver Vacuum Sealer
Article 492966
• Gebruiksaanwijzing • User's instructions • Mode d'emploi
• Bedienungsanleitung • Instrucciones de uso • Istruzioni per l'uso
• Bruksanvisning • Brugsanvisning • Bruksanvisning • Käyttöohje
• Instruções de uso • Οδηγίες χρήσης •
ϡΪΨΘδϤϟ ϞϴϟΩ
Nederlands 1
English 6
Français 11
Deutsch 16
Español 21
Italiano 26
Svenska 31
Dansk 35
Norsk 39
Suomi 43
Português 47
Ελληνικά 52
57
ΓΪΤΘϤϟ ΔϜϠϤϤϟ
Princess_Silver_Vacuum_Sealer_492966_omslag.fm Page 1 Thursday, December 20, 2007 2:04 PM

1
1 2 3 45
6
7
9
10
11
8
12
2
3
Nederlands: Garantievoorwaarden
1 jaar op fabrikage- en materiaalfouten. De
garantie geldt alleen met volledig ingevuld garan-
tiebewijs. Geen garantie op defekten t.g.v.
verkeerd gebruik, onbevoegde demontage en
vallen. De garantie is niet geldig voor gevolg-
schade.
English: Terms and conditions of
guarantee
1 year on manufacturing and material faults.
The guarantee is valid solely when the guarantee
card has been completed in full. The guarantee
does not cover defects caused by incorrect use,
unauthorized disassembly, or damage caused
by a fall. The guarantee does not cover
consequential damage.
Français : Conditions de garantie
1 année sur les défauts de pièce et main
d'œuvre. La garantie est valable uniquement si le
certificat de garantie est entièrement rempli. La
garantie n'est pas valable si l'appareil a été incor-
rectement utilisé, démonté par une personne non
qualifiée, ou est tombé. La garantie n'est pas
valable pour les dommages consécutifs.
Deutsch: Garantiebedingungen
1 Jahr auf Herstellungs- und Materialfehler.
Die Garantie gilt nur mit komplett ausgefülltem
Garantienachweis. Die Garantie gilt nicht für
Schäden, die aufgrund falschen Gebrauchs,
unbefugter Demontage und weil das Gerät
heruntergefallen ist, entstanden sind. Die Garan-
tie gilt nicht für Folgeschäden.
Español: Condiciones de garantía
1 año por defectos de fabricación o de los
materiales. La garantía es válida únicamente con
la presentación del certificado de garantía debi-
damente gestionado. No se otorga garantía por
fallos ocasionados por el uso inadecuado,
desmontaje de las partes por personas no
autorizadas o caída del aparato. La garantía no
aplica para daños consecuenciales.
Italiano: Condizioni di garanzia
L'apparecchio è garantito per un periodo di 12
mesi dalla data di acquisto a copertura di difetti di
materiale e/o di fabbricazione. La garanzia è
valida unicamente se accompagnata da un
certificato di garanzia debitamente compilato in
ogni sua parte. La garanzia non si applica ai
danni derivanti da utilizzo errato o non conforme
del prodotto, da riparazioni eseguite da
personale non autorizzato e da eventuali cadute
dell'apparecchio. La garanzia non copre gli
eventuali danni indiretti a persone e/o cose
causati dal malfunzionamento del prodotto.
Svenska: Garantivillkor
1 år på tillverknings- och materialfel. Garantin
gäller endast tillsammans med ett fullständigt
ifyllt garantibevis. Ingen garanti för fel på grund
av felaktig användning, obehörig demontering
och fall. Garantin täcker inte följdskador.
Dansk: Garantibetingelser
1 år på fabrikations- og materialefejl. Garantien
gælder kun med et fuldstændigt udfyldt garan-
tibevis. Ingen garanti på defekter opstået som
følge af forkert brug, uautoriseret afmontering og
fald. Garantien dækker ikke følgeskade.
Norsk: Garantibetingelser
Ett år på fabrikasjons- og materialfeil. Garantien
gjelder bare når garantibeviset er fullstendig
utfylt. Det gis ingen garanti for defekter på grunn
av feil bruk, uautorisert demontering og fall.
Garantien gjelder ikke følgeskader.
Suomi: Takuuehdot
Yhden vuoden takuu valmistus- ja materiaalivir-
heiden osalta. Takuu on voimassa vain, jos
takuutodistus on täytetty täydellisesti. Takuu ei
kata vikoja, jotka johtuvat virheellisestä käytöstä,
valtuuttomattomasta purkamisesta tai
putoamisesta. Takuu ei kata seurannaisva-
hinkoja.
Português: Condições de garantia
1 ano para defeitos de fabrico e de material A
garantia apenas é válida com a prova de
garantia completamente preenchida. Não se
garantem defeitos devido a utilização errada,
desmontagem não autorizada e queda.
A garantia não abrange danos resultantes.
Όροι και προϋποθέσεις της εγγύησης
Παρέχεται εγγύηση 1 έτους έναντι προβληµάτων
που οφείλονται στην κατασκευή και τα υλικά. Η
εγγύηση ισχύει µόνο εφόσον συµπληρώθηκε
πλήρως η κάρτα εγγύησης. Ηεγγύησηδεν
καλύπτει βλάβες και προβλήµατα τα οποία
οφείλονται σε λανθασµένη χρήση,
αποσυναρµολόγηση από µη-εξουσιοδοτηµένα
άτοµα, ή πτώση της συσκευής. Ηεγγύησηδεν
καλύπτει αποθετικές ή επακόλουθες ζηµιές.
ΓΪΤΘϤϟ ΔϜϠϤϤϟ:ϥΎϤπϟ ρϭήη
ΔϣΪΨΘδϤϟ ΩϮϤϟϭ ϊϴϨμΘϟ ϲϓ ΐϴϋ ϱϷ ΓΪΣϭ ΔϨγ.
˱ΔϠϣΎϛ ϥΎϤπϟ ΔϗΎτΑ ˯Ϟϣ ϝΎΣ ϲϓ ϻ· ˱ΎΤϟΎλ ϥΎϤπϟ ϥϮϜϳ ϻϭ.
ˬίΎϬΠϟ ϡΪΨΘγ ˯Ϯγ Ϧϋ ΔΠΗΎϨϟ ΏϮϴόϟ ϥΎϤπϟ ϲτϐϳ ϻϭϞϜθΑ ϪϜϓ ϭ
ίΎϬΠϟ ρϮϘγ Ϧϋ ΞΗΎϨϟ Ϟτόϟ ϭ ˬϪΑ κΧήϤϟ ήϴϏ.
ΔϴϋΎΒΘΘγϻ έήοϷ ϥΎϤπϟ ϲτϐϳ ϻϭ.
4
Princess_Silver_Vacuum_Sealer_492966_omslag.fm Page 2 Thursday, July 27, 2006 12:25 PM

1
Silver Vacuum Sealer Article 492966
Algemeen
Deze fraaie Princess Silver Vacuum
Sealer, uitgevoerd in zilverkleur, is ideaal
om allerlei soorten voedsel vacuüm te
verpakken, om daarna bijvoorbeeld te
bewaren is de vriezer.
Met één druk op het apparaat wordt een
zak met etenswaren vacuüm gezogen en
daarna geseald. Hierdoor kunt u uw
etenswaren veilig en handig bewaren of
invriezen. Het apparaat is voorzien van
indicatielampjes en een
snoeropbergsysteem.
Gebruik voor de Princess Silver Vacuum
Sealer bij voorkeur Princess zakken en
rollen folie. Deze zijn verkrijgbaar bij uw
normale Princess verkoopadres en bij het
Princess Service Center.
Werking en bediening
Zie figuur 1.
Het apparaat bevat de volgende
onderdelen:
1 Ontluchtingsknop
2 Deksel
3 Sealstrip boven
4 Schuimrubberen afdichting boven
5 Stopknop
6 Indicatielampje ‘sealen’
7 Indicatielampje ‘vacuüm trekken’
8 Verwijderbare vacuümbuis
9 Schuimrubberen afdichting onder
10 Sealstrip onder
11 Vergrendelingsschuif vacuümbuis
12 Onderkant met snoeropbergsysteem
Voor het eerste gebruik
1 Verwijder de beschermfolie.
2 Maak het apparaat schoon (zie
hoofdstuk ‘Onderhoud en reinigen’).
Sealen en vacuüm trekken
Voor het verpakken etenswaren maakt u
gebruik van een plastic zak of van buisfolie
(rol plastic folie met gesloten zijkanten). U
maakt hiervan een plastic zak door deze
aan de onderkant te sealen.
Zorg dat de plastic zak altijd minstens
8 cm langer is dan het te verpakken
voedsel.
Voorbereiding
1 Plaats het apparaat op een droge en
stabiele ondergrond.
2 Zorg dat de vacuümbuis goed geplaatst
is.
3 Steek de stekker in het stopcontact.
Gebruik van buisfolie
1 Knip, zonder te rafelen, een stuk folie af
dat groot genoeg is voor het verpakken.
2 Open het deksel en plaats een van de
open kanten van de folie met de gladde
kant naar boven op de goudbruine
sealstrip (10).
Zorg ervoor dat de folie de doorzichtige
vacuümbuis niet raakt!
3 Sluit het deksel en druk met beide
handen het deksel een aantal
seconden dicht, totdat het
indicatielampje ‘sealen’ begint te
knipperen. Als het indicatielampje
uitgaat, is de folie geseald.
4 Druk de ontluchtingsknop in om weer
lucht in het apparaat te laten stromen.
5 Open het deksel en haal de folie eruit.
Nu heeft u een zak die u kunt gebruiken
om het voedsel te verpakken.
6 Ga nu verder met de volgende stappen
voor het gebruik van een plastic zak.

2Silver Vacuum Sealer Article 492966
Gebruik van een plastic zak
1 Plaats het voedsel in de zak. Verwijder
vloeistof of voedselresten op de plek
waar u de zak wilt sealen.
2 Trek de bovenkant van de zak, waar u
de zak wilt sealen, strak en plaats deze
in de vacuümbuis (zie figuur 2).
3 Sluit het deksel en druk met beide
handen het deksel een aantal
seconden dicht (zie figuur 3). Het
indicatielampje ‘vacuüm trekken’ gaat
knipperen. Nu wordt de lucht uit de zak
gezogen.
4 Als de lucht uit de zak is gezogen,
wordt de zak geseald. Dan gaat ook het
indicatielampje ‘sealen’ knipperen. Als
de zak is geseald gaan beide
indicatielampjes uit.
5 Druk de ontluchtingsknop in, zodat
weer lucht in de vacuümbuis kan
stromen.
6 Open het deksel en haal de zak uit het
apparaat.
Als u het vacuüm trekken wilt
onderbreken (als de zak bijvoorbeeld
niet goed is geplaatst), druk dan eerst
op de stopknop en daarna op de
ontluchtingsknop, voordat u het deksel
opent.
7 Controleer de gesealde naad van de
zak, deze moet eruit zien als een
gladde streep op het plastic. Als de
naad niet glad is of rimpels vertoont,
kan het zijn dat de zak niet goed
geseald is.
Houdbaarheid
Houdbaarheid bij
normale verpakking
Houdbaarheid bij
vacuüm verpakking
In de koelkast (±5°)
Rund-, varkens- en lamsvlees 3 tot 4 dagen 8 tot 9 dagen
Gevogelte 2 tot 3 dagen 6 tot 8 dagen
Vis 1 tot 3 dagen 4 tot 5 dagen
Vleeswaren (plakken) 4 tot 6 dagen 20 tot 25 dagen
Worst 7 dagen 25 dagen
Harde kazen 15 dagen 60 dagen
Zachte kazen 5 tot 7 dagen 20 dagen
Groente 1 tot 3 dagen 7 tot 10 dagen
Fruit 5 tot 7 dagen 14 tot 20 dagen
Soep 2 tot 3 dagen 8 tot 10 dagen
Pasta en rijst 2 tot 3 dagen 6 tot 8 dagen
Gestoofd of gebraden vlees 3 tot 5 dagen 10 tot 15 dagen
Gebak 2 tot 3 dagen 8 dagen
In de vriezer (-18°)
Vlees 4 tot 6 maanden 15 tot 20 maanden
Vis 3 tot 4 maanden 10 tot 12 maanden
Groente 8 tot 10 maanden 18 tot 24 maanden

3
Silver Vacuum Sealer Article 492966
Onderhoud
en reinigen
• Zorg ervoor dat het apparaat niet is
aangesloten op de netvoeding en is
afgekoeld als u het gaat
schoonmaken.
• Gebruik geen agressieve of
schurende schoonmaakmiddelen of
scherpe voorwerpen (zoals messen of
harde borstels) bij het reinigen.
• Dompel het apparaat nooit onder in
water.
• Zet het apparaat nooit in een afwas-
machine.
• Let er op dat geen vocht in het
apparaat dringt.
Reinigen apparaat
1 Haal de stekker uit het stopcontact.
2 Reinig de binnen- en buitenzijde van
het apparaat alleen met een vochtige
doek.
3 Droog het apparaat grondig af.
Reinigen vacuümbuis
Zie figuur 4.
1 Open het deksel van het apparaat.
2 Trek de vergrendelingsschuif aan de
zijkant van het apparaat uit.
3 Houd de vergrendelingsschuif vast en
trek de buis aan de linkerkant omhoog.
4 Neem de gehele buis uit het apparaat.
5 Was de vacuümbuis onder de kraan of
in de vaatwasser. Droog het vervolgens
grondig af.
6 Plaats de vacuümbuis terug door eerst
de rechterkant in het apparaat te
plaatsen en dan de buis voorzichtig
naar beneden te duwen totdat hij op zijn
plaats klikt.
Veiligheid
Algemeen
• Lees de gebruiksaanwijzing goed
door en bewaar deze zorgvuldig.
• Gebruik dit apparaat alleen zoals
beschreven in deze gebruiks-
aanwijzing.
• Gebruik dit apparaat alleen voor
huishoudelijke doeleinden.
• Houd het apparaat buiten het bereik
van kinderen of personen die er niet
goed mee om kunnen gaan.
• Laat reparaties uitvoeren door een
gekwalificeerde monteur. Probeer
nooit zelf het apparaat te repareren.
Op kamertemperatuur (±21°)
Vers brood 1 tot 3 dagen 8 tot 10 dagen
Koekjes 4 tot 6 maanden 12 maanden
Pasta en rijst 5 tot 6 maanden 12 maanden
Bloem 4 tot 5 maanden 12 maanden
Noten 3 tot 4 maanden 12 maanden
Gemalen koffie 2 tot 3 maanden 12 maanden
Thee 5 tot 6 maanden 12 maanden
Melkpoeder 1 tot 2 maanden 12 maanden

4Silver Vacuum Sealer Article 492966
• Gebruik uitsluitend toebehoren die
door de leverancier worden
aanbevolen. Door gebruik van andere
toebehoren kan schade optreden aan
het apparaat waardoor gevaar voor de
gebruiker kan ontstaan.
Warmte en elektriciteit
• Controleer voordat u het apparaat
gebruikt of de netspanning
overeenkomt met de aangegeven
netspanning op het typeplaatje van
het apparaat.
• Haal altijd de stekker uit het
stopcontact wanneer u het apparaat
niet gebruikt.
• Als u de stekker uit het stopcontact
neemt, trek dan aan de stekker, niet
aan het snoer.
• Trek nooit aan het aansluitsnoer om
het apparaat te verschuiven of om de
stekker uit het stopcontact te nemen.
• Gebruik het apparaat niet als het
apparaat of het snoer beschadigd is.
Stuur het naar onze servicedienst om
risico's te vermijden. Bij dit type
apparaat kan een beschadigd snoer
alleen door onze servicedienst
worden vervangen met behulp van
speciaal gereedschap.
• Zorg ervoor dat het apparaat en het
snoer niet in aanraking komen met
hittebronnen, zoals een hete
kookplaat of open vuur.
• Zorg ervoor dat het snoer en de
stekker niet in aanraking komen met
water.
Tijdens gebruik
• Gebruik het apparaat nooit buiten.
• Plaats het apparaat op een stabiele en
vlakke ondergrond, op een plaats
waar het niet kan vallen.
• Laat het snoer niet over de rand van
een aanrecht, werkblad of tafel
hangen.
• Zorg ervoor dat het snoer volledig
uitgerold wordt.
• Zorg ervoor dat uw handen droog zijn
als u het apparaat, het snoer of de
stekker aanraakt.
• Gebruik het apparaat nooit in vochtige
ruimten.
• Schakel het apparaat uit en verwijder
de stekker uit het stopcontact als u
tijdens het gebruik storingen
ondervindt, het apparaat gaat
reinigen, een accessoire aanbrengt of
verwijdert, of klaar bent met het
gebruik.
• Zorg dat kleine kinderen niet bij het
apparaat kunnen. Bepaalde delen van
het apparaat kunnen tijdens het
gebruik heet worden.
• Gebruik het apparaat niet in de buurt
van een warmtebron. Let er op dat de
warme onderdelen van het apparaat
niet in contact komen met licht
ontvlambare stoffen zoals een
handdoek.
• Bepaalde delen van het apparaat
kunnen heet worden. Raak de warme
delen van het apparaat niet aan om te
voorkomen dat u zich verbrandt.
• Het apparaat mag alleen gebruikt
worden voor het sealen van plastic
zakken. Gebruik het nooit voor het
sealen van andere materialen.
• Dompel het apparaat, het snoer en de
stekker nooit onder in water of een
andere vloeistof.

5
Silver Vacuum Sealer Article 492966
• Pak het apparaat niet op wanneer het
in het water is gevallen. Neem direct
de stekker uit het stopcontact.
Gebruik het apparaat niet meer.
• Maak het apparaat na gebruik grondig
schoon (zie hoofdstuk ‘Onderhoud en
reinigen’). Laat het apparaat volledig
afkoelen voordat u het opruimt.
Milieu
Werp verpakkingsmateriaal zoals plastic
en dozen in de daarvoor bestemde
containers.
Wilt u het apparaat weg doen terwijl het
nog goed functioneert of eenvoudig
gerepareerd kan worden, zorg dan voor
hergebruik van het apparaat.
Aan het einde van de levensduur moet u
het apparaat op een verantwoorde wijze
laten verwerken, zodat het apparaat of
onderdelen daarvan kunnen worden
hergebruikt. Zet het apparaat niet bij het
ongesorteerde afval, maar lever het in bij
de winkelier of bij een erkend inzamelpunt.
Neem contact op met uw gemeente voor
informatie over de beschikbare inleverings-
en inzamelsystemen.

6Silver Vacuum Sealer Article 492966
General information
This attractive Princess Silver Vacuum
Sealer, with a silver finish, will enable you
to vacuum package a wide range of foods
before, for example, storing them in a
freezer.
One push on the appliance is sufficient to
draw a vacuum in a bag of food and then
seal the bag. This offers you a safe and
convenient means of storing or freezing
your food. The appliance is equipped with
indicator lights and a cord storage system.
Preference is given to the use of Princess
bags and rolls of film with your Princess
Silver Vacuum Sealer. These are available
from your Princess sales outlet and the
Princess Service Center.
Operation and
controls
See Figure 1.
The appliance has the following features:
1 Air inlet button
2Lid
3 Upper sealing strip
4 Upper foam-rubber seal
5 Stop button
6 ‘Sealing’ indicator light
7 ‘Drawing vacuum’ indicator light
8 Removable vacuum sleeve
9 Lower foam-rubber seal
10 Lower sealing strip
11 Vacuum-tube locking slide
12 Base with cord storage system
Before use for the first time
1 Remove the protective film.
2 Clean the appliance (see the ‘Cleaning
and maintenance’ Section).
Sealing and drawing a vacuum
You can use plastic bags or tubular film (a
roll of plastic film with closed sides) to
package your food. You seal the base of a
length of tubular film to make a bag.
Always make sure that the plastic bag is
at least 8 cm longer than the food you
wish to package.
Preparations
1 Put the appliance on a dry and stable
surface.
2 Make sure that the vacuum sleeve is
fitted correctly.
3 Put the plug in the wall socket.
Using tubular film
1 Cut off a length of film long enough to
package the food. Make sure that the
ends are straight.
2 Open the lid, and lay one end of the film
on the golden-brown strip (10) with the
smooth side facing upwards.
Make sure that the film does not contact
the transparent vacuum sleeve!
3 Close the lid, and use both hands to
press the lid closed for a couple of
seconds until the ‘Sealing’ indicator
light begins to flash. The film has been
sealed once the indicator light
extinguishes.
4 Press the air inlet button to allow air to
enter the appliance.
5 Open the lid, and remove the film. You
now have a bag you can use to
package the food.
6 Continue with the following steps for the
use of a plastic bag.

7
Silver Vacuum Sealer Article 492966
Use of a plastic bag
1 Put the food in the bag. Remove any
liquid or food residues from the area of
the seal.
2 Pull the upper end of the bag at the
location of the seal taut and fit it in the
vacuum sleeve (see Figure 2).
3 Close the lid, and use both hands to
press the lid closed for a couple of
seconds (see Figure 3). The ‘Drawing
vacuum’ indicator light will begin to
flash. The air will now be sucked from
the bag.
4 Once the air has been sucked from the
bag it will be sealed. The ‘Sealing’
indicator light will then also begin to
flash. Once the bag has been sealed
both indicator lights will extinguish.
5 Press the air inlet button to allow air to
enter the vacuum sleeve.
6 Open the lid and remove the bag from
the appliance.
If you wish to stop whilst vacuum is
being drawn (for example, because the
bag is not fitted correctly) then press
the stop button and press the air inlet
button before you open the lid.
7 Check the bag’s seal; the seal should
be of the form of a smooth stripe along
the end of the plastic. The bag may not
be sealed properly if the seal is not
continuous, or is rumpled.
Shelf life
Shelf life with normal
packaging
Shelf life with
vacuum packaging
In a refrigerator (approx. 5°)
Beef, pork and lamb 3 to 4 days 8 to 9 days
Poultry 2 to 3 days 6 to 8 days
Fish 1 to 3 days 4 to 5 days
Meat (sliced) 4 to 6 days 20 to 25 days
Sausage 7 days 25 days
Hard types of cheese 15 days 60 days
Soft types of cheese 5 to 7 days 20 days
Vegetables 1 to 3 days 7 to 10 days
Fruit 5 to 7 days 14 to 20 days
Soup 2 to 3 days 8 to 10 days
Pasta and rice 2 to 3 days 6 to 8 days
Stewed and roasted meat 3 to 5 days 10 to 15 days
Gateau 2 to 3 days 8 days
In a freezer (approx. -18°)
Meat 4 to 6 months 15 to 20 months
Fish 3 to 4 months 10 to 12 months
Vegetables 8 to 10 months 18 to 24 months

8Silver Vacuum Sealer Article 492966
Maintenance
and cleaning
• Before cleaning, make sure that the
appliance is not connected to the
power supply and that it has cooled
down.
• Never use corrosive or scouring
cleaning agents or sharp objects
(such as knives or hard brushes) to
clean the appliance.
• Never immerse the appliance in water.
• Never put the appliance in a
dishwasher.
• Make sure that the interior of the
appliance does not become damp.
Cleaning the appliance
1 Remove the plug from the wall socket.
2 Clean the interior and exterior of the
appliance only with a damp cloth.
3 Dry the appliance thoroughly.
Cleaning the vacuum sleeve
See Figure 4.
1 Open the appliance’s lid.
2 Pull the locking slide on the side of the
appliance outwards.
3 Keep hold of the locking slide and lift up
the left-hand side of the vacuum sleeve.
4 Take the entire tube out of the
appliance.
5 Wash the vacuum sleeve under the tap,
or in a dishwasher. Dry it thoroughly.
6 Return the vacuum sleeve by fitting the
right-hand side in the appliance and
then gently pressing down on the
sleeve until it clicks into place.
Safety
General information
• Please read these instructions
carefully, and retain them for future
reference.
• Use this appliance only in accordance
with the instructions.
• This appliance is intended solely for
domestic use.
• Keep the appliance out of the reach of
children, and of persons who may not
be able to operate it safely.
• Have the appliance repaired only by a
qualified electrician. Never try to
repair the appliance yourself.
• Use solely accessories recommended
by the supplier. The use of other
accessories may result in damage to
At room temperature (approx. 21°)
Fresh bread 1 to 3 days 8 to 10 days
Biscuits 4 to 6 months 12 months
Pasta and rice 5 to 6 months 12 months
Flour 4 to 5 months 12 months
Nuts 3 to 4 months 12 months
Ground coffee 2 to 3 months 12 months
Tea 5 to 6 months 12 months
Milk powder 1 to 2 months 12 months

9
Silver Vacuum Sealer Article 492966
the appliance, thereby creating
hazards for the user.
Electricity and heat
• Verify that the mains voltage is the
same as that indicated on the type
plate on the appliance before use.
• Always remove the plug from the
socket when the appliance is not in
use.
• Always remove the plug from the wall
socket by pulling on the plug, not the
power cord.
• Never pull on the power cable to move
the appliance or remove the plug from
the wall socket.
• Do not use the appliance if the power
cord or the appliance is damaged. For
your safety return the appliance to our
service department. A damaged power
cord can be replaced solely by our
service department, who have the
special tools required for the repair.
• Make sure that the appliance and the
power cord do not come in contact
with sources of heat, such as a hot
hob or naked flame.
• Make sure that the cord and the plug
do not come in contact with water.
During use
• Never use the appliance outdoors.
• Place the appliance on a flat, stable
surface where it cannot fall.
• Never allow the power cord to hang
over the edge of the draining board,
worktop or table.
• Always make sure that the cord is
unwound completely.
• Make sure that your hands are dry
when you touch the appliance, the
power cord or the plug.
• Never use the appliance in humid
rooms.
• Switch off the appliance and remove
the plug from the wall socket in the
event of a malfunction during use, and
before cleaning the appliance, fitting
or removing an accessory, or storing
the appliance after use.
• Make sure that small children cannot
reach the appliance. Certain parts of
the appliance can become hot during
use.
• Never use the appliance in the vicinity
sources of heat. Make sure that the
hot parts of the appliance do not come
into contact with flammable fabrics,
such as tea towels.
• Certain parts of the appliance can
become hot; Do not touch the warm
parts of the appliance; these could
cause burns.
• This appliance may be used solely to
seal plastic bags. Never use it to seal
other materials.
• Never immerse the appliance, the cord
or the plug in water or any other
liquid.
• Do not pick up the appliance if it falls
into water. Remove the plug from the
wall socket immediately. Do not use
the appliance any more.
• Clean the appliance thoroughly after
use (see the ‘Cleaning and
maintenance’ Section). Allow the
appliance to cool down completely
before storage.

10 Silver Vacuum Sealer Article 492966
The Environment
Dispose of packaging material, such as
plastic and boxes, in the appropriate waste
containers.
You should ensure for the reuse of the
appliance if you wish to dispose of it whilst
it is still in good working order or needs
only a minor repair.
When the appliance reaches the end of its
useful life it must be disposed of in a
responsible manner, thereby ensuring for
the reuse of (parts of) the appliance. Do
not dispose of the appliance with unsorted
refuse; hand it in at the store, or take it to a
recognized collection point. Contact your
municipality for information about the
reception and collection systems in your
area.

11
Silver Vacuum Sealer Article 492966
Généralités
Votre Princess Silver Vacuum Sealer est
une excellente soudeuse de sachets sous
vide, au fini argenté, idéale pour emballer
sous vide toutes sortes d'aliments et les
conserver, par exemple au congélateur.
Il suffit d'appuyer une seule fois sur le
couvercle, et le sachet d'aliments est mis
sous vide et soudé. Vous conserverez
ainsi les aliments de façon pratique et
sûre, par réfrigération ou congélation.
L'appareil comprend les témoins lumineux
nécessaires et un système de rangement
du cordon.
Avec votre Princess Silver Vacuum Sealer,
vous utiliserez de préférence les sachets et
rouleaux de feuille plastique Princess .
Vous les trouverez chez votre revendeur
Princess ordinaire, et auprès du service
après-vente au Princess Service Center.
Fonctionnement et
utilisation
Voir la figure 1.
Les composants de l'appareil sont :
1 Bouton d'admission d'air
2Couvercle
3 Barre de soudure supérieure
4 Scellé caoutchouc mousse supérieur
5 Bouton d'arrêt
6 Témoin lumineux 'souder'
7 Témoin lumineux 'faire le vide'
8 Cloche à vide amovible
9 Scellé caoutchouc mousse inférieur
10 Barre de soudure inférieure
11 Verrou de la cloche à vide
12 Dessous avec système de rangement
du cordon
Avant la première utilisation
1 Enlevez le film de protection.
2 Nettoyez l'appareil (voir 'Nettoyage et
entretien').
Souder les sachets et les mettre
sous vide
Vous emballez les aliments soit dans des
sachets en plastique, soit dans du tube
plastique (rouleau de feuille plastique
tubulaire). Vous en coupez la longueur
voulue et il suffit d'en souder un côté pour
en faire un sachet.
Veillez à ce que le sachet soit toujours
au moins 8 cm plus long que ce que
vous mettez dedans.
Préparation
1 Installez l'appareil sur une surface
sèche et stable.
2 Veillez à ce que la cloche à vide soit
bien en place.
3 Branchez la fiche.
Utilisation du tube en plastique
1 Coupez, bien lisse, un morceau de
feuille plastique tubulaire suffisant pour
l'emballage voulu.
2 Ouvrez le couvercle et placez un des
côtés ouverts de la feuille tubulaire,
face lisse vers le haut, sur la barre de
soudure marron (10).
Attention : la feuille plastique ne doit
pas toucher la cloche à vide
transparente !
3 Refermez le couvercle et appuyez
dessus, des deux mains, pendant
quelques secondes, jusqu'à ce que le
témoin lumineux 'souder' clignote.
Lorsque le témoin lumineux s'éteint, le
plastique est soudé.

12 Silver Vacuum Sealer Article 492966
4 Appuyez sur le bouton d'admission d'air
pour que l'air rentre dans l'appareil.
5 Ouvrez le couvercle et sortez le
plastique. Vous pouvez maintenant
utilisez le sachet ainsi fabriqué pour
emballer vos aliments.
6 Pour la suite, procédez exactement
comme avec tout autre sachet.
Utilisation d'un sachet en plastique
1 Placez les aliments dans le sachet. S'il
y a de la nourriture ou du liquide à
l'endroit où vous allez souder le sachet,
nettoyez-le.
2 Lissez l'ouverture supérieure du
sachet, là où vous allez le souder, et
placez-le dans la cloche à vide (voir la
figure 2).
3 Refermez le couvercle, et appuyez
dessus, des deux mains, pendant
quelques secondes (voir la figure 3). Le
témoin lumineux 'faire le vide' clignote.
L'air est aspiré hors du sachet.
4 Une fois que l'air est sorti du sachet,
l'appareil le soudera. Le témoin
lumineux 'souder' clignote alors
également. Une fois le sachet soudé,
les deux témoins lumineux s'éteignent.
5 Appuyez sur le bouton d'admission
d'air, pour que l'air puisse rentrer dans
la cloche à vide.
6 Ouvrez le couvercle et sortez le sachet
de l'appareil.
Pour interrompre la mise sous vide (par
exemple si le sachet est placé de
travers), vous appuyez d'abord sur le
bouton d'arrêt, puis sur le bouton
d'admission d'air, avant d'ouvrir le
couvercle.
7 Contrôlez la soudure du sachet ; elle
doit se présenter comme une ligne
droite et lisse sur le plastique. Si la
soudure est bosselée ou ridée, il y a
risque que le sachet est mal soudé.
Durée de conservation
sous emballage normal
Durée de
conservation sous
emballage sous
vide
Au réfrigérateur (±5°)
Viande de boeuf, porc et agneau 3 à 4 jours 8 à 9 jours
Volaille 2 à 3 jours 6 à 8 jours
Poisson 1 à 3 jours 4 à 5 jours
Charcuterie (tranchée) 4 à 6 jours 20 à 25 jours
Saucisse, saucisson 7 jours 25 jours
Fromages à pâte dure 15 jours 60 jours
Fromages à pâte molle 5 à 7 jours 20 jours
Légumes 1 à 3 jours 7 à 10 jours
Fruits 5 à 7 jours 14 à 20 jours
Soupe 2 à 3 jours 8 à 10 jours
Pâtes et riz 2 à 3 jours 6 à 8 jours
Viande cuite ou rôtie 3 à 5 jours 10 à 15 jours
Pâtisserie 2 à 3 jours 8 jours

13
Silver Vacuum Sealer Article 492966
Entretien
et nettoyage
• Pendant que vous le nettoyez,
l'appareil doit être refroidi, et ne doit
pas être branché sur le réseau
électrique.
• N'utilisez pas de détergents agressifs
ou décapants ni d'objets tranchants
(tels que couteaux ou brosses dures)
pour le nettoyage.
• N'immergez jamais l'appareil.
• Ne mettez jamais l'appareil au lave-
vaisselle.
• Ne laissez pas d'humidité pénétrer à
l'intérieur de l'appareil.
Nettoyage de l'appareil
1 Débranchez la fiche.
2 Nettoyez l'extérieur de l'appareil
uniquement avec un chiffon humide.
3 Séchez bien à fond.
Nettoyage de la cloche à vide
Voir la figure 4.
1 Ouvrez le couvercle de l'appareil.
2 Débloquez le verrou sur le côté de
l'appareil.
3 Maintenez le verrou, et tirez la cloche
vers le haut, du côté gauche.
4 Retirez de l'appareil la cloche entière.
5 Nettoyez la cloche à vide sous le
robinet ou au lave-vaisselle. Séchez
bien à fond.
6 Remettez la cloche à vide en place ;
vous mettez d'abord le côté droit dans
l'appareil, puis vous enfoncez la cloche
tout entière jusqu'à ce qu'elle se mette
à sa place, avec un déclic audible.
Sécurité
Généralités
• Lisez soigneusement le mode
d'emploi et conservez-le
précieusement.
• Utilisez cet appareil uniquement
suivant les instructions décrites dans
le mode d'emploi.
Au congélateur (-18°)
Viande 4 à 6 mois 15 à 20 mois
Poisson 3 à 4 mois 10 à 12 mois
Légumes 8 à 10 mois 18 à 24 mois
À température ambiante (±21°)
Pain frais 1 à 3 jours 8 à 10 jours
Biscuits 4 à 6 mois 12 mois
Pâtes et riz 5 à 6 mois 12 mois
Farine 4 à 5 mois 12 mois
Noix 3 à 4 mois 12 mois
Café moulu 2 à 3 mois 12 mois
Thé 5 à 6 mois 12 mois
Lait en poudre 1 à 2 mois 12 mois

14 Silver Vacuum Sealer Article 492966
• L'appareil est destiné uniquement à
l'utilisation domestique.
• Tenez l'appareil hors de la portée des
enfants ou des personnes incapables
de l'utiliser correctement.
• Faites effectuer les réparations par un
technicien qualifié. Ne tentez jamais
de réparer vous-même l'appareil.
• Utilisez uniquement des accessoires
que recommande le fabricant de
l'appareil. L'utilisation d'autres
accessoires peut endommager
l'appareil, ce qui peut entraîner un
danger pour l'utilisateur.
Électricité et chaleur
• Avant d'utiliser cet appareil, assurez-
vous que la tension du réseau
correspond à la tension du réseau
indiquée sur la plaquette type de
l'appareil.
• Débranchez toujours l'appareil
lorsque vous ne l'utilisez pas.
• Lorsque vous débranchez la fiche,
saisissez la fiche elle-même; ne tirez
pas sur le cordon.
• Ne tirez jamais sur le cordon de
l'appareil pour le déplacer ou pour le
débrancher.
• N’utilisez pas l'appareil si le cordon ou
l'appareil lui-même est endommagé.
Pour éviter une électrocution, le
renvoyer à notre service de réparation.
La réparation du cordon sur ce type
d’appareils nécessite des outils
spéciaux et ne peut donc être
effectuée que par notre service de
réparation.
• Assurez-vous que ni l'appareil, ni le
cordon n'entre en contact avec une
source de chaleur telle qu'une plaque
électrique chaude ou une flamme.
• Assurez-vous que ni le cordon, ni la
fiche n'entre en contact avec de l'eau.
Pendant l'utilisation
• N´utilisez jamais l'appareil à
l'extérieur.
• Installez l'appareil sur une surface
plane et stable, à un endroit où il ne
risque pas de tomber.
• Ne laissez pas le cordon pendre par-
dessus le bord du plan de travail ou de
la table.
• Le cordon doit être entièrement
déroulé.
• Assurez-vous que vos mains sont
sèches avant de toucher l'appareil, le
cordon ou la fiche.
• N'utilisez jamais l'appareil dans une
pièce humide.
• Éteignez l'appareil et débranchez la
fiche en cas de problème durant
l'utilisation, pour le nettoyage, le
montage ou le démontage d'un
accessoire, et dès que vous avez fini
de l'utiliser.
• Gardez l'appareil hors de portée des
enfants. Certaines parties de cet
appareil peuvent s'échauffer
fortement durant l'utilisation.
• N'utilisez pas l'appareil trop près
d'une source de chaleur. Assurez-
vous qu'aucun matériau inflammable
(tel qu'un linge) n'est en contact avec
les parties de l'appareil qui
s'échauffent beaucoup.
• Certaines parties de cet appareil
peuvent s'échauffer fortement. Évitez
de toucher les parties échauffées,
pour ne pas vous brûler.
• Utilisez l'appareil exclusivement pour
souder des sachets en plastique. Ne
l'utilisez jamais pour d'autres
matériaux.
• N'immergez jamais l'appareil, le
cordon ni la fiche dans l'eau ou tout
autre liquide.
• Si l'appareil est tombé à l'eau, ne le
rattrapez pas. Débranchez

15
Silver Vacuum Sealer Article 492966
immédiatement la fiche. Cessez
d'utiliser l'appareil.
• Nettoyez soigneusement l'appareil
après l'utilisation (voir 'Nettoyage et
entretien'). Avant de ranger l'appareil,
laissez-le refroidir complètement.
Environnement
Jetez le matériel d'emballage, tel que le
plastique et les boîtes, dans les
conteneurs prévus à cet effet.
Si vous désirez vous débarrasser de
l'appareil alors qu'il fonctionne encore bien,
ou est facilement réparable, ne le mettez
pas au rebut mais recyclez-le.
Lorsque l'appareil ne peut plus servir, il
doit être retraité, de façon à pouvoir être
recyclé au moins partiellement. Ne le
mettez pas aux ordures ménagères, mais
portez-le chez le vendeur ou dans un
centre de collecte agréé. Pour plus
d'informations sur les possibilités de
retraitement, contactez les autorités
communales.

16 Silver Vacuum Sealer Article 492966
Allgemein
Dieser schöne Princess Silver Vacuum
Sealer in silberfarbener Ausführung ist
ideal zum Vakuumverpacken von vielen
Lebensmittelsorten, um sie anschließend
zum Beispiel im Gefrierschrank
aufzubewahren.
Mit einem Druck auf das Gerät wird ein
Beutel mit Lebensmitteln vakuum gezogen
und anschließend verschweißt. Dadurch
können Sie Ihre Lebensmittel sicher und
praktisch aufbewahren oder einfrieren.
Das Gerät ist mit Kontrolllampen und
einem praktischen Kabelaufbewahrungs-
system ausgestattet.
Verwenden Sie für den Princess Vacuum
Sealer vorzugsweise Princess Folienbeutel
und –rollen. Diese sind bei den gängigen
Princess Verkaufsstellen und beim
Princess Service Center erhältlich.
Funktion und
Bedienung
Siehe Abbildung 1.
Das Gerät besteht aus den folgenden
Te i l en :
1 Entlüftungstaste
2 Deckel
3 Verschlussstreifen oben
4 Schaumgummidichtung oben
5Stopptaste
6 Kontrolllampe „verschweißen“
7 Kontrolllampe „Vakuum ziehen"
8 Abnehmbares Vakuumrohr
9 Schaumgummidichtung unten
10 Verschlussstreifen unten
11 Verriegelungsschieber d. Vakuumrohrs
12 Unterseite mit
Kabelaufbewahrungssystem
Vor der ersten Verwendung
1 Entfernen Sie die Schutzfolie.
2 Reinigen Sie das Gerät (siehe Kapitel
„Reinigung und Wartung“).
Verschweißen und Vakuum
ziehen
Zum Verpacken von Lebensmitteln
verwenden Sie einen Kunststoffbeutel oder
Schlauchfolie (eine Rolle Kunststofffolie
mit geschlossenen Seiten). Durch
Verschweißen der Unterseite stellen Sie
hieraus einen Kunststoffbeutel her.
Sorgen Sie dafür, dass der
Kunststoffbeutel immer mindestens
8 cm länger ist als die zu verpackenden
Nahrungsmittel.
Vorbereitung
1 Stellen Sie das Gerät gerade auf einen
trockenen und stabilen Untergrund.
2 Achten Sie darauf, dass das
Vakuumrohr richtig angebracht ist.
3 Stecken Sie den Stecker in die
Steckdose.
Verwendung der Schlauchfolie
1 Schneiden Sie ein Stück Folie ab, das
groß genug zum Verpacken ist. Fransen
Sie die Folie dabei nicht aus.
2 Öffnen Sie den Deckel und legen Sie
eine der offenen Seiten der Folie mit
der glatten Seite nach oben auf den
goldbraunen Verschlussstreifen (10).
Sorgen Sie dafür, dass die Folie nicht
mit dem transparenten Vakuumrohr in
Berührung kommt!
3 Schließen Sie den Deckel und drücken
Sie ihn mit beiden Händen einige
Sekunden zu, bis die Kontrolllampe
„verschweißen“ zu blinken beginnt.

17
Silver Vacuum Sealer Article 492966
Wenn die Kontrolllampe erlischt, ist die
Folie verschweißt.
4 Drücken Sie auf die Entlüftungstaste,
um wieder Luft in das Gerät strömen zu
lassen.
5 Öffnen Sie den Deckel und nehmen Sie
die Folie heraus. Jetzt haben Sie einen
Beutel, den Sie zur Verpackung von
Lebensmitteln verwenden können.
6 Fahren Sie mit den folgenden Schritten
fort, wenn Sie einen Kunststoffbeutel
verwenden.
Verwendung eines Kunststoffbeutels
1 Legen Sie die Lebensmittel in den
Beutel. Entfernen Sie Flüssigkeit oder
Lebensmittelsreste von der Stelle, an
der Sie den Beutel verschweißen
wollen.
2 Ziehen Sie die Oberseite des Beutels,
wo sie ihn verschweißen wollen,
stramm und bringen Sie ihn im
Vakuumrohr an (siehe Abbildung 2).
3 Schließen Sie den Deckel und drücken
Sie ihn mit beiden Händen einige
Sekunden zu (siehe Abbildung 3). Die
Kontrolllampe „Vakuum ziehen“ blinkt.
Jetzt wird die Luft aus dem Beutel
gezogen.
4 Wenn die Luft aus dem Beutel gezogen
wurde, wird der Beutel verschweißt.
Dann blinkt auch die Kontrolllampe
„verschweißen“. Wenn der Beutel
verschweißt ist, gehen beide
Kontrolllampen aus.
5 Drücken Sie auf die Entlüftungstaste,
sodass wieder Luft in das Vakuumrohr
strömen kann.
6 Öffnen Sie den Deckel und nehmen Sie
den Beutel aus dem Gerät heraus.
Wenn Sie das Vakuum ziehen
unterbrechen wollen (wenn der Beutel
beispielsweise nicht richtig platziert
wurde), dann drücken Sie zuerst auf die
Stopptaste und anschließend auf die
Entlüftungstaste, bevor Sie den Deckel
öffnen.
7 Kontrollieren Sie die verschweißte Naht
des Beutels; diese muss aussehen als
verliefe ein glatter Strich auf dem
Kunststoff. Wenn die Naht nicht glatt ist
oder Falten aufweist, kann es sein,
dass der Beutel nicht richtig
verschweißt ist.
Haltbarkeit
Haltbarkeit bei
normaler Verpackung
Haltbarkeit bei
Vakuumverpackung
Im Kühlschrank (± 5°)
Rind-, Schweine- und Lammfleisch 3 – 4 Tage 8 – 9 Tage
Geflügel 2 – 3 Tage 6 – 8 Tage
Fisch 1 – 3 Tage 4 – 5 Tage
Fleischwaren (Scheiben) 4 – 6 Tage 20 – 25 Tage
Wurst 7 Tage 25 Tage
Hartkäse 15 Tage 60 Tage
Weichkäse 5 – 7 Tage 20 Tage
Gemüse 1 – 3 Tage 7 – 10 Tage
Obst 5 – 7 Tage 14 – 20 Tage
Suppe 2 – 3 Tage 8 – 10 Tage
Nudeln und Reis 2 – 3 Tage 6 – 8 Tage

18 Silver Vacuum Sealer Article 492966
Pflege
und Reinigung
• Sorgen Sie dafür, dass das Gerät bei
der Reinigung nicht an die
Netzspannung angeschlossen und
abgekühlt ist.
• Verwenden Sie zur Reinigung keine
aggressiven Reinigungs- oder
Scheuermittel oder scharfen
Gegenstände (wie Messer oder harte
Bürsten).
• Tauchen Sie das Gerät nie unter
Wasser.
• Stellen Sie das Gerät keinesfalls in
einen Geschirrspüler.
• Achten Sie darauf, dass keine
Feuchtigkeit ins Gerät gelangt.
Reinigen des Geräts
1 Ziehen Sie den Stecker aus der
Steckdose.
2 Reinigen Sie die Innen- und Außenseite
des Geräts nur mit einem feuchten
Tu c h.
3 Trocknen Sie das Gerät gründlich ab.
Reinigung des Vakuumrohrs
Siehe Abbildung 4.
1 Öffnen Sie den Deckel des Geräts.
2 Ziehen Sie den Verriegelungsschieber
an der Seite des Geräts heraus.
3 Halten Sie den Verriegelungsschieber
fest und ziehen Sie das Rohr an der
linken Seite nach oben.
4 Nehmen Sie das ganze Rohr aus dem
Gerät heraus.
5 Waschen Sie das Vakuumrohr unter
dem Wasserhahn ab oder im
Geschirrspüler. Trocknen Sie es danach
gründlich ab.
6 Setzen Sie das Vakuumrohr wieder ein,
indem Sie erst die rechte Seite im Gerät
anbringen und dann das Rohr
vorsichtig nach unten drücken, bis es
einrastet.
Geschmortes oder gebratenes Fleisch 3 – 5 Tage 10 – 15 Tage
Gebäck 2 – 3 Tage 8 Tage
Im Gefrierschrank (-18°)
Fleisch 4 – 6 Monate 15 – 20 Monate
Fisch 3 – 4 Monate 10 – 12 Monate
Gemüse 8 – 10 Monate 18 – 24 Monate
Bei Zimmertemperatur (± 21°)
frisches Brot 1 – 3 Tage 8 – 10 Tage
Kekse 4 – 6 Monate 12 Monate
Nudeln und Reis 5 – 6 Monate 12 Monate
Mehl 4 – 5 Monate 12 Monate
Nüsse 3 – 4 Monate 12 Monate
gemahlener Kaffee 2 – 3 Monate 12 Monate
Tee 5 – 6 Monate 12 Monate
Milchpulver 1 – 2 Monate 12 Monate
Table of contents
Languages:
Other Princess Food Saver manuals