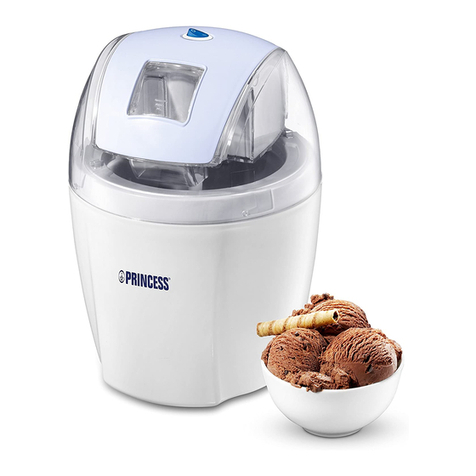
Princess 282600 User manual

282600 Princess
Ice-Cream Maker
Nederlands 6
English 14
Français 21
Deutsch 29
Español 37
Italiano 45
Svenska 53
Dansk 60
Norsk 67
Suomi 74
Português 81
103

2
A
14
11
13
12
9
10
3 5 4
1 827 6
16 15
A

3
B
11
9
10
8

4
12
11
14
13
C

5
11
11
14
14
D

6
NL
6
Gefeliciteerd!
U heeft een huishoudelijk apparaat van
Princess aangeschaft. Ons doel is om
kwaliteitsproducten met een smaakvol
ontwerp en tegen een betaalbare prijs te
bieden. We hopen dat u gedurende vele jaren
plezier zult hebben van dit apparaat.
Instructies voor gebruik
De instructies voor gebruik zijn verzameld in
de bijbehorende sectie. Zorg ervoor dat u
vertrouwd bent met de veiligheidsinstructies
wanneer u de instructies voor gebruik
raadpleegt.
Veiligheidsinstructies
Waarschuwing!
Bij het gebruik van netvoedingapparatuur
moeten de basisveiligheidsinstructies altijd
in acht worden genomen om het risico van
brand, elektrische schok en persoonlijk
letsel te verkleinen.
Gebruik het apparaat niet in de buurt van
badkuipen, douches, wastafels of andere
voorzieningen die water bevatten.
Lees voor gebruik de volledige
gebruiksaanwijzing zorgvuldig door.
Het beoogde gebruik is beschreven in
deze gebruiksaanwijzing. Het gebruik van
accessoires of het uitvoeren van
werkzaamheden met dit apparaat die niet
in deze gebruiksaanwijzing zijn beschreven,
kunnen leiden tot persoonlijk letsel.
Bewaar deze gebruiksaanwijzing voor
toekomstig gebruik.
Houd altijd toezicht op kinderen om te
voorkomen dat ze met het apparaat spelen.
Het gebruik van dit apparaat door kinderen
of personen met een lichamelijke,
zintuiglijke, geestelijke of motorische
handicap of zonder de benodigde kennis
en ervaring kan gevaar veroorzaken.
Personen die verantwoordelijk zijn voor
hun veiligheid moeten uitdrukkelijke
instructies geven of toezicht houden op het
gebruik van het apparaat.
Gebruik
Wees altijd voorzichtig wanneer u het
apparaat gebruikt.
Pas op voor hete delen. Het oppervlak kan
heet worden wanneer het apparaat in
gebruik is.
Bescherm het apparaat altijd tegen water
of hoge vochtigheid.
Gebruik het apparaat niet als u handen
nat zijn. Gebruik het apparaat niet als u
blootvoets bent.
Geleid het netsnoer zorgvuldig om ervoor
te zorgen dat het niet over de rand van
een werkblad hangt. Zorg ervoor dat het
netsnoer niet per ongeluk verstrengeld
raakt of de oorzaak van een struikeling kan
vormen.
Trek nooit aan het netsnoer om de
netstekker van de netvoeding te verwijderen.
Houd het netsnoer uit de buurt van
warmtebronnen, olie en scherpe randen.
Verwijder geen onderdeel of accessoire
wanneer de netstekker op de netvoeding
is aangesloten. Verwijder altijd eerst de
netstekker van de netvoeding.
Indien het netsnoer tijdens gebruik
beschadigd raakt, verwijder dan onmiddellijk
de netstekker van de netvoeding. Raak het
netsnoer niet aan voordat u de netstekker
van de netvoeding verwijdert.
Verwijder de netstekker van de netvoeding
wanneer het apparaat niet in gebruik is,
voor montage- of demontage-
werkzaamheden en voor reinigings- en
onderhoudswerkzaamheden.
Veiligheid van anderen
Laat kinderen en personen die niet
vertrouwd zijn met deze instructies het
apparaat niet gebruiken.
Laat kinderen of dieren niet in de buurt van
de werkruimte komen. Laat kinderen of
dieren het apparaat of het netsnoer niet
aanraken. Nauw toezicht is noozakelijk
wanneer het apparaat wordt gebruikt in de
buurt van kinderen.

7
NL
Zorg ervoor dat er geen water in de
pluggen van het netsnoer en het
verlengsnoer kan komen.
Draai het netsnoer en het verlengsnoer
altijd volledig uit.
Gebruik het apparaat niet buitenshuis.
Bedien het apparaat niet als het deksel
zich niet op de emmer bevindt.
Plaats het apparaat op een stabiel en vlak
oppervlak.
Houd uw handen uit de buurt van de
bewegende delen.
Houd lang haar en losse kleding uit de
buurt van de bewegende delen.
Houd spatels en ander keukengerei uit de
buurt van de bewegende delen.
Gebruik geen scherpe voorwerpen of
keukengerei in de verwijderbare emmer.
Gebruik uitsluitend een rubberen spatel,
een plastic schep of een houten lepel in de
verwijderbare emmer.
Plaats de verwijderbare emmer niet op
vlammen, hete platen of kachels.
Houd het apparaat uit de buurt van
warmtebronnen.
Zorg ervoor dat het apparaat niet in contact
komt met brandbaar materiaal.
Haal de onderkant niet uit elkaar om het
risico van brand, elektrische schok en
persoonlijk letsel te verkleinen.
Verplaats het apparaat niet wanneer het is
ingeschakeld.
Laat het apparaat niet onbeheerd achter
tijdens gebruik.
Beschrijving (fig. A)
Uw 282600 Princess ijsmachine is ontworpen
voor het maken van roomijs en andere
bevroren desserts. Het apparaat is uitsluitend
geschikt voor huishoudelijk gebruik.
1. Bedieningspaneel
2. Digitaal display
3. POWER-knop
4. START/STOP-knop
5. TIMER-knop
6. Mengindicator (groen)
7. Koelindicator (rood)
8. Vaste emmer
9. Verwijderbare emmer
Na gebruik
Verwijder de netstekker van de netvoeding
en laat het apparaat afkoelen voordat u het
zonder toezicht achterlaat en voordat u
onderdelen van het apparaat verwisselt,
reinigt of inspecteert.
Berg het apparaat op een droge plaats op
wanneer het niet in gebruik is. Zorg ervoor
dat kinderen geen toegang hebben tot
opgeborgen apparaten.
Inspectie en reparaties
Controleer het apparaat voor gebruik op
beschadigde of defecte onderdelen.
Inspecteer het apparaat op kapotte
onderdelen, beschadigingen aan
schakelaars en andere zaken die de
werking nadelig kunnen beïnvloeden.
Gebruik het apparaat niet als een
onderdeel beschadigd of defect is.
Laat beschadigde of defecte onderdelen
door een erkend servicecentrum repareren
of vervangen. Probeer nooit zelf
onderdelen te verwijderen of te vervangen.
Controleer voor gebruik het netsnoer op
slijtage of beschadiging.
Gebruik het apparaat niet als het netsnoer
of de netstekker beschadigd of defect is.
Indien het netsnoer of de netstekker
beschadigd of defect is, moet het door de
fabrikant of een erkend servicecentrum
worden vervangen.
Veiligheidsinstructies voor
ijsmachines
Controleer voor gebruik altijd of de
netspanning overeenkomt met de spanning
op het typeplaatje van het apparaat.
Sluit het apparaat aan op een geaard
stopcontact. Gebruik indien nodig een
geaarde verlengkabel met een geschikte
diameter (minimaal 3 x 1 mm2).
Installeer voor extra bescherming een
reststroomvoorziening (RCD) met een
nominale bedrijfsstroom die kleiner is dan
of gelijk is aan 30 mA.
Het apparaat mag niet worden bediend
door middel van een externe timer of een
apart afstandsbedieningssysteem.

8
NL
Let op! De mengarm (11) past niet automatisch
stevig in de verwijderbare emmer (9). Het
deksel (12) moet eerst op de verwijderbare
emmer (9) worden geplaatst met de mengarm
(11) in het midden van het deksel (12).
Plaats het deksel (12) op de verwijderbare
emmer (9). Zorg ervoor dat de bovenkant
van de mengarm (11) zich in het midden
van het deksel (12) bevindt. Draai het
deksel (12) vast door het rechtsom te
draaien.
Plaats de dekselafsluiting (13) op het
deksel (12).
Plaats de motorunit (14) op het deksel (12).
Let op! Zorg ervoor dat het gat in de bovenkant
van de mengarm (11) op een lijn is met de
vorm van de as van de motorunit (14) (fig. D).
Gebruik
In- en uitschakelen (fig. A)
Druk op de POWER-knop (3) om het
apparaat in te schakelen. De digitale
display (2) geeft ”50:00” aan.
Druk nogmaals op de POWER-knop (3)
om het apparaat uit te schakelen.
Instellen van de tijd (fig. A)
De gewneste tijd kan worden ingesteld met
behulp van de TIMER-knop (5). De standaard
tijd is 50 minuten.
Druk 1x op de TIMER-knop (5) om de tijd
in te stellen op 40 minuten. De digitale
display (2) geeft ”40:00” aan.
Druk 2x op de TIMER-knop (5) om de tijd
in te stellen op 30 minuten. De digitale
display (2) geeft ”30:00” aan.
Druk 3x op de TIMER-knop (5) om de tijd
in te stellen op 10 minuten. De digitale
display (2) geeft ”10:00” aan.
Druk 4x op de TIMER-knop (5) om de tijd
in te stellen op 50 minuten. De digitale
display (2) geeft ”50:00” aan.
10. Afdichtingsring
11. Mengarm
12. Deksel
13. Dekselafsluiting
14. Motorunit
15. Maatbeker
16. Maatlepel
Inhoud van de verpakking
IJsmachine
Verwijderbare emmer
Mengarm
Deksel
Dekselafsluiting
Motorunit
Afdichtingsring
Maatbeker
Maatlepel
Eerste gebruik
Voorbereiding
Reinig het apparaat.
Zie ”Reiniging en onderhoud”.
Reinig de accessoires.
Zie ”Reiniging en onderhoud”.
Assemblage
Waarschuwing!
- Schakel voor het assembleren altijd het
apparaat uit en verwijder de netstekker uit
het stopcontact.
- Zorg er voor het plaatsen van de
verwijderbare emmer in de vaste emmer
voor dat de buitenkant van de verwijderbare
emmer en de binnenkant van de vaste
emmer droog zijn. De verwijderbare emmer
en de vaste emmer kunnen vastvriezen.
Assembleren van het apparaat
(fig. B - D)
Plaats de afdichtingsring (10) boven op de
vaste emmer (8).
Plaats de verwijderbare emmer (9) in de
vaste emmer (8).
Plaats de mengarm (11) in de
verwijderbare emmer (9). De onderkant
van de mengarm (11) rust in het midden
van de verwijderbare emmer (9).

9
NL
Na 60 minuten wordt de verlengde koelfunctie
automatisch gedeactiveerd.
Aanwijzingen voor gebruik
(fig. B & C)
Let op! Houd het deksel (12) en de
dekselafsluiting (13) tijdens gebruik gesloten.
Bereid de ingrediënten.
Plaats het apparaat op een stabiel en vlak
oppervlak.
Plaats de ingrediënten in de verwijderbare
emmer (9).
Let op! Zorg ervoor dat de verwijderbare
emmer (9) niet voor meer dan 80% van de
capaciteit wordt gevuld met ingrediënten.
Het dessert zet uit tijdens het proces.
Plaats de afdichtingsring (8).
Plaats de verwijderbare emmer (9).
Plaats de mengarm (11).
Plaats het deksel (12).
Plaats de dekselafsluiting (13).
Plaats de motorunit (14).
Schakel het apparaat in.
Stel indien nodig de tijd in voor het maken
van desserts.
Start het proces voor het maken van
desserts.
Houd het deksel (12) en de dekselafsluiting
(13) tijdens het proces zo veel mogelijk
gesloten. Open het deksel (12) en de
dekselafsluiting (13) uitsluitend om te
controleren of het proces is voltooid.
Schakel na gebruik het apparaat uit en
verwijder de netstekker uit het stopcontact.
Recepten
Vanilleroomijs
Ingrediënten Hoeveelheid
Volle melk (gekoeld) 1 kop
Suiker 3/4 kop
Slagroom (gekoeld) 2 koppen
Vanille-extract (puur) 1 - 2 tl.
Gebruik een staafmixer (lage snelheid)
of een garde om de melk en de suiker te
mengen totdat de suiker is opgelost.
Roer de slagroom en de vanille door het
mengsel.
Starten en stoppen van het
apparaat (fig. A)
Indien de tijd is ingesteld, druk dan op de
START/STOP-knop (4) om het mengproces
te starten. De mengindicator (6) gaat
branden. De digitale display (2) telt af
tijdens het proces.
Na 2 minuten start het koelproces
automatisch. De koelindicator (7) gaat
branden.
Verricht ter onderbreking van het proces
een van de volgende stappen:
- Druk 2 seconden op de START/STOP-
knop (4).
- Druk op de POWER-knop (3).
Indien het proces is voltooid, klinkt een
zoemer 10 keer om het einde van het
proces aan te geven. De digitale display
(2) geeft ”00:00:00” aan.
Aanpassen van de tijd (fig. A)
Tijdens gebruik
Indien het apparaat in gebruik is, kan de tijd
worden aangepast met behulp van de TIMER-
knop (5). De standaard tijd is 50 minuten.
Druk 1x op de TIMER-knop (5) om de tijd
te verhogen met 5 minuten.
Iedere druk op de TIMER-knop (5)
verhoogt de tijd met 5 minuten.
Na gebruik
Indien het dessert na het einde van het proces
van onvoldoende kwaliteit is, kan het apparaat
opnieuw worden gestart met behulp van de
START/STOP-knop (4).
Druk 2 seconden op de START/STOP-
knop (4).
Druk indien nodig op de TIMER-knop (5)
om de tijd in te stellen.
Druk op de START/STOP-knop (4) om het
apparaat te starten.
Verlengde koelfunctie
Het apparaat is voorzien van een verlengde
koelfunctie. Indien het apparaat niet binnen
10 minuten na het einde van het proces wordt
uitgeschakeld, wordt de verlengde koelfunctie
automatisch geactiveerd. De koelfunctie
(zonder de mengfunctie) wordt eerst 10 minuten
geactiveerd en vervolgens 10 minuten
gedeactiveerd.

10
NL
Gebruik een garde om de aardbeien, het
citroensap en 1/3 van de suiker te mengen.
Laat de aardbeien gedurende 2 uur weken.
Gebruik een staafmixer (lage snelheid)
of een garde om de melk en de suiker te
mengen totdat de suiker is opgelost.
Roer de slagroom, de vanille en het sap van
de geweekte aardbeien door het mengsel.
Doe het mengsel in de verwijderbare
emmer (9).
Start het proces voor het maken van
desserts.
Voeg de aardbeien 5 minuten voor het
einde van het proces toe.
Koeltijd: De standaard koeltijd is 50 minuten.
De koeltijd kan naar uw smaak worden
ingesteld voor gebruik of worden aangepast
tijdens of na gebruik.
Aantal porties (1/2 kop): 12.
Koffieroomijs
Ingrediënten Hoeveelheid
Volle melk (gekoeld) 1 kop
Suiker 3/4 kop
Oploskoffie/-espresso 2 el.
Slagroom (gekoeld) 2 koppen
Vanille-extract (puur) 1 tl.
Gebruik een staafmixer (lage snelheid)
of een garde om de melk, de suiker en de
oploskoffie/-espresso te mengen totdat de
suiker en de oploskoffie/-espresso zijn
opgelost.
Roer de slagroom en de vanille door het
mengsel.
Doe het mengsel in de verwijderbare
emmer (9).
Start het proces voor het maken van
desserts.
Koeltijd: De standaard koeltijd is 50 minuten.
De koeltijd kan naar uw smaak worden
ingesteld voor gebruik of worden aangepast
tijdens of na gebruik.
Aantal porties (1/2 kop): 10.
Doe het mengsel in de verwijderbare
emmer (9).
Start het proces voor het maken van
desserts.
Koeltijd: De standaard koeltijd is 50 minuten.
De koeltijd kan naar uw smaak worden
ingesteld voor gebruik of worden aangepast
tijdens of na gebruik.
Aantal porties (1/2 kop): 10.
Chocoladeroomijs
Ingrediënten Hoeveelheid
Volle melk (gekoeld) 1 kop
Suiker 1/2 kop
Pure / halfpure chocolade (stukken) 225 g
Slagroom (gekoeld) 2 koppen
Vanille-extract (puur) 1 tl.
Verhit de melk net tot het kookpunt.
Gebruik een blender of een keukenmachine
(pulse-modus) om de chocolade en de
suiker te mengen totdat de chocolade is
fijngehakt.
Roer de hete melk door het mengsel totdat
het mengsel een gladde substantie vormt.
Laat het mengsel volledig afkoelen.
Roer de slagroom en de vanille door het
mengsel.
Doe het mengsel in de verwijderbare
emmer (9).
Start het proces voor het maken van
desserts.
Koeltijd: De standaard koeltijd is 50 minuten.
De koeltijd kan naar uw smaak worden
ingesteld voor gebruik of worden aangepast
tijdens of na gebruik.
Aantal porties (1/2 kop): 10.
Aardbeienroomijs
Ingrediënten Hoeveelheid
Volle melk (gekoeld) 1 kop
Suiker 1 kop
Aardbei (in plakjes) 400 g
Citroensap (vers) 3 el.
Slagroom (gekoeld) 2 koppen
Vanille-extract (puur) 1 tl.

11
NL
Roer de gekoelde suikersiroop en de
maïssiroop door het mengsel.
Laat het mengsel volledig afkoelen.
Doe het mengsel in de verwijderbare
emmer (9).
Start het proces voor het maken van
desserts.
Koeltijd: De standaard koeltijd is 50 minuten.
De koeltijd kan naar uw smaak worden
ingesteld voor gebruik of worden aangepast
tijdens of na gebruik.
Aantal porties (1/2 kop): 10.
Mangosorbet
Ingrediënten Hoeveelheid
Suiker 2/3 kop
Maïssiroop 1/2 kop
Mango (in blokjes) 4
Citroen-/limoensap (vers) 6 el.
Gebruik een blender of een keukenmachine
(pulse-modus) om de mango en het
citroen-/limoensap te mengen totdat het
mengsel een gladde substantie vormt.
Doe het mengsel in de verwijderbare
emmer (9).
Start het proces voor het maken van
desserts.
Koeltijd: De standaard koeltijd is 50 minuten.
De koeltijd kan naar uw smaak worden
ingesteld voor gebruik of worden aangepast
tijdens of na gebruik.
Aantal porties (1/2 kop): 10.
Bevroren chocoladeyoghurt
Ingrediënten Hoeveelheid
Volle melk (gekoeld) 1 kop
Magere vanilleyoghurt 2 koppen
Suiker 1/4 kop
Pure / halfpure chocolade (stukken) 170 g
Gebruik een blender of een keukenmachine
(pulse-modus) om de melk en de chocolade
te mengen totdat het mengsel een gladde
substantie vormt.
Roer de vanilleyoghurt en de suiker door
het mengsel totdat de suiker is opgelost.
Doe het mengsel in de verwijderbare
emmer (9).
Citroensorbet
Ingrediënten Hoeveelheid
Suiker 2 koppen
Water 2 koppen
Citroensap (vers) 1,5 kop
Citroenrasp 1 el.
Doe het water en de suiker in een steelpan.
Verhit de melk (gemiddelde verhitting) net
tot het kookpunt.
Laat het mengsel sudderen (lage verhitting)
totdat de suiker is opgelost.
(Roer het mengsel niet.)
Laat het mengsel volledig afkoelen.
Roer het citroensap en de citroenrasp door
het mengsel.
Doe het mengsel in de verwijderbare
emmer (9).
Start het proces voor het maken van
desserts.
Koeltijd: De standaard koeltijd is 50 minuten.
De koeltijd kan naar uw smaak worden
ingesteld voor gebruik of worden aangepast
tijdens of na gebruik.
Aantal porties (1/2 kop): 8.
Aardbeiensorbet
Ingrediënten Hoeveelheid
Suiker 1 kop
Water 1 kop
Maïssiroop 1/4 kop
Aardbei (in vieren) 200 g
Citroen-/limoensap (vers) 6 el.
Doe het water en de suiker in een steelpan.
Verhit de melk (gemiddelde verhitting) net
tot het kookpunt.
Laat het mengsel sudderen (lage verhitting)
totdat de suiker is opgelost.
(Roer het mengsel niet.)
Laat het mengsel volledig afkoelen.
Gebruik een blender of een keukenmachine
(pulse-modus) om de aardbeien en het
citroen-/limoensap te mengen totdat het
mengsel een gladde substantie vormt.
Druk het mengsel door een fijne zeef om
de zaden te verwijderen.

12
NL
Koeltijd: De standaard koeltijd is 50 minuten.
De koeltijd kan naar uw smaak worden
ingesteld voor gebruik of worden aangepast
tijdens of na gebruik.
Aantal porties (1/2 kop): 8.
Bewaren van desserts
Waarschuwing!
- Bewaar desserts niet langer dan 2 weken
in de vriezer.
- Vries ontdooide desserts niet opnieuw in.
- Consumeer geen ontdooide desserts.
Let op!
- Gebruik geen scherpe of metalen
voorwerpen om desserts uit de verwijderbare
emmer te verwijderen.
- Bewaar geen bevroren desserts of drankjes
in de verwijderbare emmer.
Verwijder het dessert uit de verwijderbare
emmer met behulp van een rubberen spatel,
een plastic schep of een houten lepel.
Doe het dessert in een luchtdichte plastic
bewaardoos.
Markeer de plastic bewaardoos met de
huidige datum en het soort dessert.
Plaats de plastic bewaardoos in de vriezer.
Reiniging en onderhoud
Het apparaat moet na ieder gebruik worden
gereinigd.
Waarschuwing!
Verwijder voor reiniging en onderhoud de
netstekker uit het stopcontact en wacht
totdat het apparaat is afgekoeld.
Dompel het apparaat voor reiniging niet
onder in water of andere vloeistoffen.
Let op!
Gebruik geen bijtende of schurende
reinigingsmiddelen om het apparaat te
reinigen.
Gebruik geen scherpe voorwerpen om het
apparaat te reinigen.
Controleer het apparaat regelmatig op
mogelijke schade.
Start het proces voor het maken van
desserts.
Koeltijd: De standaard koeltijd is 50 minuten.
De koeltijd kan naar uw smaak worden
ingesteld voor gebruik of worden aangepast
tijdens of na gebruik.
Aantal porties (1/2 kop): 8.
Bevroren bessenyoghurt
Ingrediënten Hoeveelheid
Volle melk (gekoeld) 1/2 kop
Magere vanilleyoghurt 2 koppen
Suiker 1/4 kop
Bevroren gemengde bessen
(gepureerd) 340 g
Gebruik een staafmixer (lage snelheid) of
een garde om de vanilleyoghurt, de melk
en de suiker te mengen totdat de suiker is
opgelost.
Roer de bessenpuree door het mengsel.
Doe het mengsel in de verwijderbare
emmer (9).
Start het proces voor het maken van
desserts.
Koeltijd: De standaard koeltijd is 50 minuten.
De koeltijd kan naar uw smaak worden
ingesteld voor gebruik of worden aangepast
tijdens of na gebruik.
Aantal porties (1/2 kop): 8.
Bevroren perzikyoghurt
Ingrediënten Hoeveelheid
Magere vanilleyoghurt 2 koppen
Suiker 1/3 kop
Perzik (in sap) 400 g
Lek de perziken uit. Bewaar een halve kop
perziksap.
Gebruik een blender of een keukenmachine
(pulse-modus) om de perziken te hakken.
Roer de vanilleyoghurt, de suiker en het
perziksap door het mengsel totdat de suiker
is opgelost.
Doe het mengsel in de verwijderbare
emmer (9).
Start het proces voor het maken van
desserts.

13
NL
Reinig het apparaat met een vochtige
doek. Droog het apparaat met een schone,
droge doek.
Reinig de accessoires in sop.
Droog de accessoires volledig.
Berg het apparaat met de accessoires op
op een droge plaats, buiten bereik van
kinderen.
Disclaimer
Wijzigingen voorbehouden; specificaties
kunnen zonder opgave van redenen worden
gewijzigd.

14
EN
Do not operate the appliance if your hands
are wet. Do not operate the appliance if
you are barefoot.
Carefully guide the mains cable to make
sure that it does not hang over the edge
of a worktop and cannot be caught
accidentally or tripped over.
Never pull the mains cable to disconnect
the mains plug from the mains. Keep the
mains cable away from heat, oil and sharp
edges.
Do not remove any part or accessory when
the mains plug is connected to the mains.
Always first disconnect the mains plug from
the mains.
If the mains cable becomes damaged
during use, immediately disconnect the
mains plug from the mains. Do not touch
the mains cable before disconnecting the
mains plug from the mains.
Disconnect the mains plug from the mains
when the appliance is not in use, before
assembly or disassembly and before
cleaning and maintenance.
Safety of others
Do not allow children or any person
unfamiliar with these instructions to use
the appliance.
Do not allow children or animals to come
near the work area. Do not allow children
or animals to touch the appliance or mains
cable. Close supervision is necessary
when the appliance is used near children.
After use
Disconnect the mains plug from the mains
and let the appliance cool down before
leaving it unattended and before replacing,
cleaning or inspecting any parts of the
appliance.
Store the appliance in a dry place when not
in use. Make sure that children do not have
access to stored appliances.
Inspection and repairs
Before use, check the appliance for
damaged or defective parts. Inspect the
appliance for breakage of parts, damage
to switches and other conditions that can
affect the operation.
Congratulations!
You have purchased a Princess household
appliance. Our aim is to provide quality
products with a tasteful design and at an
affordable price. We hope that you will enjoy
this appliance for many years.
Instructions for use
The instructions for use have been collected in
the corresponding section. Be familiar with the
safety instructions when you consult the
instructions for use.
Safety instructions
Warning!
When using mains-powered appliances,
basic safety instructions must always be
followed to reduce the risk of fire, electric
shock and personal injury.
Do not use the appliance near bathtubs,
showers, basins or other vessels
containing water.
Read the entire manual carefully before use.
The intended use is described in this
manual. The use of any accessory or the
performance of any operation with this
appliance other than recommended can
cause a risk of personal injury.
Keep this manual for future reference.
Children should be supervised to ensure
that they do not play with the appliance.
The use of this appliance by children or
persons with a physical, sensory, mental
or motorial disability, or lack of experience
and knowledge can give cause to hazards.
Persons responsible for their safety should
give explicit instructions or supervise the
use of the appliance.
Use
Always be careful when using the
appliance.
Beware of hot parts. The surface can
become hot when the appliance is
operating.
Always protect the appliance from water
or excessive humidity.

15
EN
Only use a rubber spatula, a plastic scoop,
or a wooden spoon in the removable bowl.
Do not place the removable bowl on
flames, hot plates or stoves.
Keep the appliance away from heat sources.
Make sure that the appliance does not
come into contact with flammable material.
Do not disassemble the base to reduce
the risk of fire, electric shock and personal
injury.
Do not move the appliance while it is
switched on.
Do not leave the appliance unattended
during use.
U.K. Wiring instructions Class 1
The wires in the mains lead are coloured in
accordance with the following code:
BLUE NEUTRAL
BROWN LIVE
GREEN/YELLOW EARTH
As the colours of the wire in the mains lead
of this appliance may not correspond with the
colour markings identifying the terminals on
your plug, proceed as follows:
The wire which is coloured BLUE must be
connected to the terminal which is marked
with the letter N or coloured black.
The wire which is coloured BROWN must be
connected to the terminal which is marked
with the letter L or coloured red.
The wire which is coloured GREEN/YELLOW
must be connected to the terminal which is
marked with the letter E or (earth symbol)
and is coloured GREEN or GREEN/YELLOW.
If a 13Amp (BS1363) plug is used, a 3Amp
(BS1362) fuse must be fitted, or if any other
type of plug is used, a 13Amp fuse must be
fitted, either in the plug or adaptor, or on the
distribution board.
Warning! This appliance must be earthed.
Do not use the appliance if any part is
damaged or defective.
Have any damaged or defective part
repaired or replaced by an authorised
repair agent. Never attempt to remove or
replace any part yourself.
Before use, check the mains cable for wear
or damage.
Do not use the appliance if the mains cable
or mains plug is damaged or defective.
If the mains cable or mains plug is damaged
or defective, it must be replaced by the
manufacturer or an authorised repair agent.
Safety instructions for ice-cream
makers
Before use, always check that the mains
voltage is the same as the voltage on the
rating plate of the appliance.
Connect the appliance to an earthed wall
socket. If necessary, use an earthed
extension cable of a suitable diameter
(at least 3 x 1 mm2).
For additional protection, install a residual
current device (RCD) with a rated residual
operating current that does not exceed
30 mA.
The appliance is not intended to be
operated by means of an external timer or
separate remote-control system.
Make sure that water cannot enter the
contact plugs of the mains cable and the
extension cable.
Always fully unwind the mains cable and
the extension cable.
Do not use the appliance outdoors.
Do not operate the appliance without the
bowl lid.
Place the appliance on a stable and flat
surface.
Keep your hands away from the moving
parts.
Keep long hair and loose clothing away
from the moving parts.
Keep spatulas and other kitchen utensils
away from the moving parts.
Do not use sharp objects or kitchen
utensils in the removable bowl.

16
EN
- Before mounting the removable bowl into
the fixed bowl, make sure that the outside
of the removable bowl and the inside of the
fixed bowl are dry. The removable bowl and
the fixed bowl can freeze together.
Assembling the appliance
(fig. B - D)
Place the seal ring (10) on top of the fixed
bowl (8).
Mount the removable bowl (9) into the fixed
bowl (8).
Mount the mixing arm (11) into the
removable bowl (9). The bottom of the
mixing arm (11) rests in the centre of the
removable bowl (9).
Caution! The mixing arm (11) does not fit
firmly into the removable bowl (9)
automatically. The bowl lid (12) must first be
mounted onto the removable bowl (9) with the
mixing arm (11) fitted in the centre of the bowl
lid (12).
Mount the bowl lid (12) onto the removable
bowl (9). Make sure that the top of the
mixing arm (11) is fitted in the centre of the
bowl lid (12). Tighten the bowl lid (12) by
turning it clockwise.
Mount the bowl lid cover (13) onto the bowl
lid (12).
Mount the motor unit (14) onto the bowl lid
(12).
Caution! Make sure that the hole in the top of
the mixing arm (11) aligns with the shape of
the shaft of the motor unit (14) (fig. D).
Use
Switching on and off (fig. A)
Press the POWER button (3) to switch on
the appliance. The digital display (2) shows
”50:00”.
Press the POWER button (3) again to
switch off the appliance.
Setting the time (fig. A)
The required time can be set using the TIMER
button (5). The default time is 50 minutes.
Description (fig. A)
Your 282600 Princess ice-cream maker has
been designed for making ice cream and other
frozen desserts. The appliance is suitable for
domestic use only.
1. Operation panel
2. Digital display
3. POWER button
4. START/STOP button
5. TIMER button
6. Mixing indicator (green)
7. Cooling indicator (red)
8. Fixed bowl
9. Removable bowl
10. Seal ring
11. Mixing arm
12. Bowl lid
13. Bowl lid cover
14. Motor unit
15. Measuring cup
16. Measuring spoon
Package contents
Ice-cream maker
Removable bowl
Mixing arm
Bowl lid
Bowl lid cover
Motor unit
Seal ring
Measuring cup
Measuring spoon
Initial use
Preparation
Clean the appliance.
Refer to ”Cleaning and maintenance”.
Clean the accessories.
Refer to ”Cleaning and maintenance”.
Assembly
Warning!
- Before assembly, always switch off the
appliance and remove the mains plug from
the wall socket.

17
EN
Extended cooling function
The appliance is equipped with an extended
cooling function. If the appliance is not switched
off within 10 minutes after the process is
completed, the extended cooling function will
be activated automatically. The cooling
function (withouth the mixing function) will first
be activated for 10 minutes and subsequently
deactivated for 10 minutes. After 60 minutes,
the extended cooling function will be
deactivated automatically.
Hints for use (fig. B & C)
Caution! Keep the bowl lid (12) and the bowl
lid cover (13) closed during use.
Prepare the ingredients.
Place the appliance on a stable and flat
surface.
Put the ingredients into the removable bowl
(9).
Note! Make sure that the removable bowl (9)
is not filled with ingredients for more than 80%
of the capacity. The dessert expands during
the process.
Place the seal ring (8).
Mount the removable bowl (9).
Mount the mixing arm (11).
Mount the bowl lid (12).
Mount the bowl lid cover (13).
Mount the motor unit (14).
Switch on the appliance.
If necessary, set the time for the process
for making desserts.
Start the process for making desserts.
Keep the bowl lid (12) and the bowl lid
cover (13) closed during the process as
much as possible. Only open the bowl lid
(12) and the bowl lid cover (13) to check
whether the process is finished.
After use, switch off the appliance and
remove the mains plug from the wall socket.
Press the TIMER button (5) 1x to set the
time to 40 minutes. The digital display (2)
shows ”40:00”.
Press the TIMER button (5) 2x to set the
time to 30 minutes. The digital display (2)
shows ”30:00”.
Press the TIMER button (5) 3x to set the
time to 10 minutes. The digital display (2)
shows ”10:00”.
Press the TIMER button (5) 4x to set the
time to 50 minutes. The digital display (2)
shows ”50:00”.
Starting and stopping the
appliance (fig. A)
If the time is set, press the START/STOP
button (4) to start the mixing process. The
mixing indicator (6) comes on. The digital
display (2) counts down during the process.
After 2 minutes, the cooling process will
start automatically. The cooling indicator
(7) comes on.
To interrupt the process, take one of the
following actions:
- Press the START/STOP button (4) for
2 seconds.
- Press the POWER button (3).
If the process is completed, a buzzer will
sound 10 times to indicate the end of the
process. The digital display (2) shows
”00:00”.
Adjusting the time (fig. A)
During use
If the appliance is operating, the time can be
adjusted using the TIMER button (5).
The default time is 50 minutes.
Press the TIMER button (5) 1x to increase
the time by 5 minutes.
Each time the TIMER button (5) is pressed,
the time will be increased by 5 minutes.
After use
If the dessert is of insufficient quality after the
process is completed, the appliance can be
restarted using the START/STOP button (4).
Press the START/STOP button (4) for 2
seconds.
If necessary, press the TIMER button (5)
to set the time
Press the START/STOP button (4) to start
the appliance.

18
EN
Strawberry ice cream
Ingredients Quantity
Fat milk (chilled) 1 cup
Sugar 1 cup
Strawberry (sliced) 400 g
Lemon juice (fresh) 3 tbsp.
Whipped cream (chilled) 2 cups
Vanilla extract (pure) 1 tsp.
Use a whisk to mix the strawberries,
the lemon juice, and 1/3 of the sugar.
Allow the strawberries to macerate for
2 hours.
Use a stick blender (low speed) or a whisk
to mix the milk and the sugar until the
sugar is dissolved.
Stir the whipped cream, the vanilla, and
the juice from the macerated strawberries
through the mixture.
Put the mixture into the removable bowl.
Start the process for making desserts.
Add the strawberries 5 minutes before the
end of the process.
Cooling time: The default coooling time is
50 minutes. The cooling time can be set
according to your taste before use or
adjusted during and after use.
Amount of servings (1/2 cup): 12.
Coffee ice cream
Ingredients Quantity
Fat milk (chilled) 1 cup
Sugar 3/4 cup
Instant coffee/espresso 2 tbsp.
Whipped cream (chilled) 2 cups
Vanilla extract (pure) 1 tsp.
Use a stick blender (low speed) or a whisk
to mix the milk, the sugar, and the instant
coffee/espresso until the sugar and the
instant coffee/espresso are dissolved.
Stir the whipped cream and the vanilla
through the mixture.
Put the mixture into the removable bowl.
Start the process for making desserts.
Cooling time: The default coooling time is
50 minutes. The cooling time can be set
according to your taste before use or
adjusted during and after use.
Recipes
Vanilla ice cream
Ingredients Quantity
Fat milk (chilled) 1 cup
Sugar 3/4 cup
Whipped cream (chilled) 2 cups
Vanilla extract (pure) 1 - 2 tsp.
Use a stick blender (low speed) or a whisk
to mix the milk and the sugar until the
sugar is dissolved.
Stir the whipped cream and the vanilla
through the mixture.
Put the mixture into the removable bowl.
Start the process for making desserts.
Cooling time: The default coooling time is
50 minutes. The cooling time can be set
according to your taste before use or
adjusted during and after use.
Amount of servings (1/2 cup): 10.
Chocolate ice cream
Ingredients Quantity
Fat milk (chilled) 1 cup
Sugar 1/2 cup
Bittersweet / semi-sweet chocolate
(pieces) 225 g
Whipped cream (chilled) 2 cups
Vanilla extract (pure) 1 tsp.
Heat the milk until it just begins to boil.
Use a blender or a food processor (pulse
mode) to mix the chocolate and the sugar
until the chocolate is finely chopped.
Stir the hot milk through the mixture until
the mixture forms a smooth substance.
Allow the mixture to cool down completely.
Stir the whipped cream and the vanilla
through the mixture.
Put the mixture into the removable bowl.
Start the process for making desserts.
Cooling time: The default coooling time is
50 minutes. The cooling time can be set
according to your taste before use or
adjusted during and after use.
Amount of servings (1/2 cup): 10.

19
EN
Allow the mixture to cool down completely.
Put the mixture into the removable bowl.
Start the process for making desserts.
Cooling time: The default coooling time is
50 minutes. The cooling time can be set
according to your taste before use or
adjusted during and after use.
Amount of servings (1/2 cup): 10.
Mango sorbet
Ingredients Quantity
Sugar 2/3 cup
Corn syrup 1/2 cup
Mango (cubed) 4
Lemon/lime juice (fresh) 6 tbsp.
Use a blender or a food processor (pulse
mode) to mix the mango and the lemon/
lime juice until the mixture forms a smooth
substance.
Put the mixture into the removable bowl.
Start the process for making desserts.
Cooling time: The default coooling time is
50 minutes. The cooling time can be set
according to your taste before use or
adjusted during and after use.
Amount of servings (1/2 cup): 10.
Frozen chocolate yoghurt
Ingredients Quantity
Fat milk (chilled) 1 cup
Low-fat vanilla yoghurt 2 cups
Sugar 1/4 cup
Bittersweet / semi-sweet chocolate
(pieces) 170 g
Use a blender or a food processor (pulse
mode) to mix the milk and the chocolate
until the mixture forms a smooth substance.
Stir the vanilla yoghurt and the sugar
through the mixture until the sugar is
dissolved.
Put the mixture into the removable bowl.
Start the process for making desserts.
Cooling time: The default coooling time is
50 minutes. The cooling time can be set
according to your taste before use or
adjusted during and after use.
Amount of servings (1/2 cup): 8.
Amount of servings (1/2 cup): 10.
Lemon sorbet
Ingredients Quantity
Sugar 2 cups
Water 2 cups
Lemon juice (fresh) 1.5 cup
Lemon zest 1 tbsp.
Put the water and the sugar in a saucepan.
Heat the mixture (medium heat) until it just
begins to boil.
Allow the mixture to simmer (low heat)
until the sugar is dissolved.
(Do no stir the mixture.)
Allow the mixture to cool down completely.
Stir the lemon juice and the lemon zest
through the mixture.
Put the mixture into the removable bowl.
Start the process for making desserts.
Cooling time: The default coooling time is
50 minutes. The cooling time can be set
according to your taste before use or
adjusted during and after use.
Amount of servings (1/2 cup): 8.
Strawberry sorbet
Ingredients Quantity
Sugar 1 cup
Water 1 cup
Corn syrup 1/4 cup
Strawberry (quartered) 200 g
Lemon/lime juice (fresh) 6 tbsp.
Put the water and the sugar in a saucepan.
Heat the mixture (medium heat) until it just
begins to boil.
Allow the mixture to simmer (low heat)
until the sugar is dissolved.
(Do no stir the mixture.)
Allow the mixture to cool down completely.
Use a blender or a food processor
(pulse mode) to mix the strawberries and
the lemon/lime juice until the mixture forms
a smooth substance.
Press the mixture through a fine sieve to
remove the seeds.
Stir the cooled sugar syrup and the corn
syrup through the mixture.

20
EN
Caution!
- Do not use sharp or metal objects to remove
desserts from the removable bowl.
- Do not store frozen desserts or drinks in the
removable bowl.
Remove the dessert from the removable
bowl using a rubber spatula, a plastic
scoop, or a wooden spoon.
Put the dessert in an airtight plastic
container.
Mark the plastic container with the actual
date and the type of dessert.
Place the plastic container into the freezer.
Cleaning and maintenance
The appliance must be cleaned after each use.
Warning!
Before cleaning or maintenance, remove
the mains plug from the wall socket and
wait until the appliance has cooled down.
Do not immerse the appliance in water or
any other liquids for cleaning.
Caution!
Do not use aggressive or abrasive cleaning
agents to clean the appliance.
Do not use sharp objects to clean the
appliance.
Regularly check the appliance for possible
damage.
Clean the appliance with a damp cloth.
Dry the appliance with a clean, dry cloth.
Clean the accessories in soapy water.
Fully dry the accessories.
Store the appliance with the accessories
in a dry place, out of the reach of children.
Disclaimer
Subject to change; specifications can be
changed without further notice.
Frozen berry yoghurt
Ingredients Quantity
Fat milk (chilled) 1/2 cup
Low-fat vanilla yoghurt 2 cups
Sugar 1/4 cup
Frozen mixed berries (pureed) 340 g
Use a stick blender (low speed) or a whisk
to mix the vanilla yoghurt, the milk, and the
sugar until the sugar is dissolved.
Stir the berry puree through the mixture.
Put the mixture into the removable bowl.
Start the process for making desserts.
Cooling time: The default coooling time is
50 minutes. The cooling time can be set
according to your taste before use or
adjusted during and after use.
Amount of servings (1/2 cup): 8.
Frozen peach yoghurt
Ingredients Quantity
Low-fat vanilla yoghurt 2 cups
Sugar 1/3 cup
Peach (in juice) 400 g
Drain the peaches. Keep a half cup of the
peach juice.
Use a blender or a food processor
(pulse mode) to chop the peaches.
Stir the vanilla yoghurt, the sugar, and the
peach juice through the mixture until the
sugar is dissolved.
Put the mixture into the removable bowl.
Start the process for making desserts.
Cooling time: The default coooling time is
50 minutes. The cooling time can be set
according to your taste before use or
adjusted during and after use.
Amount of servings (1/2 cup): 8.
Storing desserts
Warning!
- Do not store the desserts in the freezer for
more than 2 weeks.
- Do not refreeze defrosted desserts.
- Do not consume defrosted desserts.
Table of contents
Languages:
Other Princess Ice Cream Maker manuals