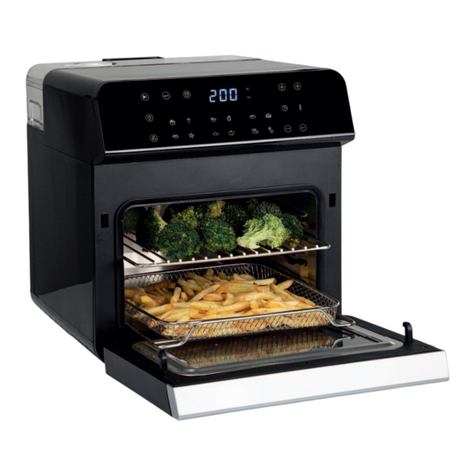
Princess 112459 User manual

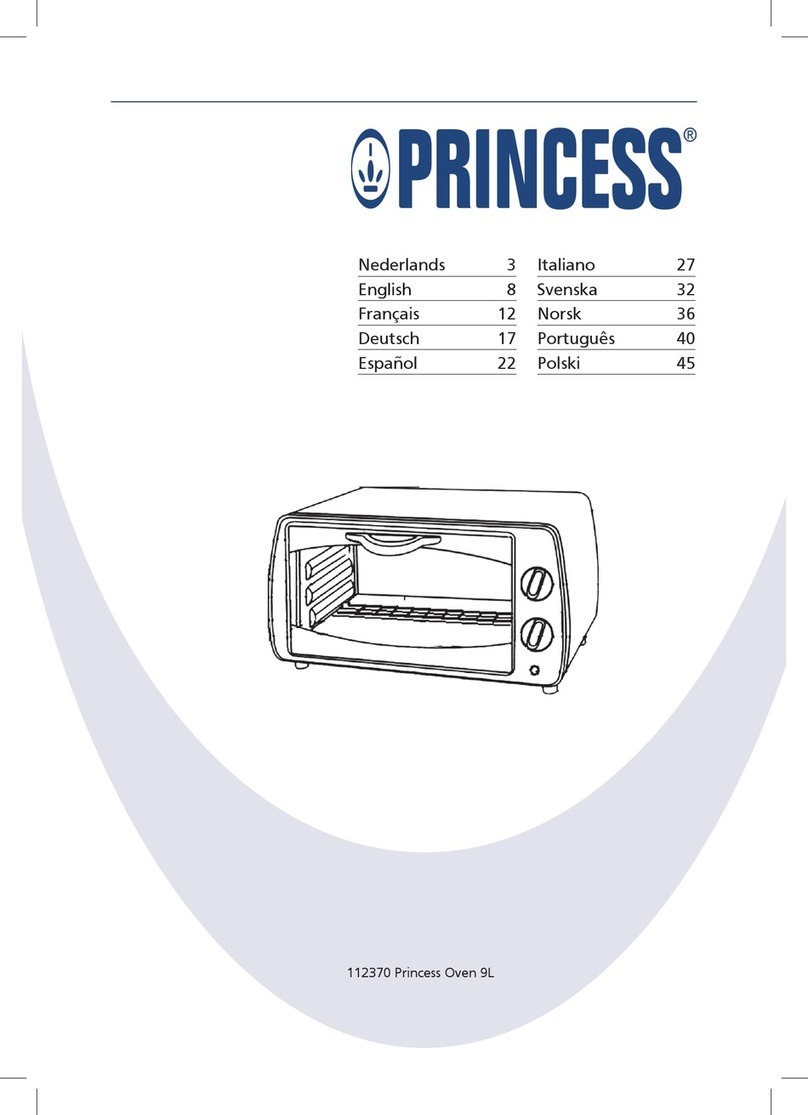
112459 Princess Oven 9L
Nederlands 4
English 9
Français 14
Deutsch 19
Español 24
Italiano 29
Svenska 34
Dansk 39
Norsk 44
Suomi 48
Português 52
57
66

2
7
6
9 10
8
5
4
2
311
1
A

3
10
9 4
B
12
11
C

4
NL
4
Gefeliciteerd!
U heeft een product van Princess aangeschaft.
Ons doel is om kwaliteitsproducten met een
smaakvol ontwerp en tegen een betaalbare
prijs te bieden. We hopen dat u gedurende
vele jaren plezier zult hebben van dit product.
Beschrijving (fig. A)
Uw 112459 Princess oven is ontworpen voor
het roosteren van brood, het bakken van
voedsel en het ontdooien van voedsel. Het
apparaat is uitsluitend geschikt voor gebruik
binnenshuis. Het apparaat is uitsluitend
geschikt voor huishoudelijk gebruik.
1. Temperatuurknop
2. Timerknop
3. Aan/uit-indicator
4. Kookcompartiment
5. Verwarmingselement
6. Deur
7. Deurhandgreep
8. Kijkvenster
9. Bakrooster
10. Bakplaat
11. Kruimeltray
Eerste gebruik (fig. A)
Voordat u verdergaat, vragen wij graag uw
aandacht voor de volgende punten:
- Zorg ervoor dat er voldoende ruimte rondom
het apparaat is voor het ontsnappen van
de warmte en voor voldoende ventilatie.
Reinig het apparaat. Zie het gedeelte•
“Reiniging en onderhoud”.
Reinig de accessoires. Zie het gedeelte•
“Reiniging en onderhoud”.
Plaats het apparaat op een stabiel en vlak•
oppervlak.
Plaats de netstekker in het stopcontact.•
Draai de temperatuurknop (1) rechtsom•
om de temperatuur in te stellen op 230 °C.
Draai de timerknop (2) rechtsom om de tijd•
in te stellen op 15 minuten. De aan/uit-
indicator (3) gaat branden. Het apparaat
begint met opwarmen.
Na het einde van het proces schakelt het•
apparaat automatisch uit. De aan/uit-
indicator (3) gaat uit.
Verwijder de netstekker uit het stopcontact.•
Laat het apparaat volledig afkoelen.•
Let op: Indien u het apparaat voor de eerste
keer inschakelt, kan gedurende korte tijd een
lichte rookontwikkeling onstaan en een
karakteristieke geur vrijkomen. Dit is normaal.
Gebruik
Instellen van de temperatuur (fig. A)
De temperatuur kan worden ingesteld van
0 °C tot 230 °C.
Draai de temperatuurknop (1) rechtsom•
om de temperatuur te verhogen.
Draai de temperatuurknop (1) linksom om•
de temperatuur te verlagen.
In- en uitschakelen (fig. A)
De tijd kan worden ingesteld van 0 minuten
tot 15 minuten. De tijd kan tevens worden
ingesteld op continubedrijf.
Om het apparaat voor 15 minuten of minder•
in te schakelen, draait u de timerknop (2)
rechtsom om de gewenste tijd in te stellen.
De aan/uit-indicator (3) gaat branden.
Om het apparaat voor meer dan 15 minuten•
in te schakelen, draait u de timerknop (2)
naar positie ‘I’ om de tijd op continubedrijf
in te stellen. De aan/uit-indicator (3) gaat
branden.
Om het apparaat uit te schakelen, draait•
u de timerknop (2) naar positie ‘0’.
De aan/uit-indicator (3) gaat uit.
Aanpassen van de tijd (fig. A)
De tijd kan worden aangepast terwijl het
apparaat in gebruik is.
Draai de timerknop (2) rechtsom om de•
tijd te verhogen.
Draai de timerknop (2) linksom om de tijd•
te verlagen.
Aanwijzingen voor gebruik
Voordat u verdergaat, willen wij graag dat u
uw aandacht vestigt op de volgende punten:
- Houd de deur tijdens gebruik altijd gesloten.

5
NL
- Gebruik het apparaat niet zonder de
kruimeltray. Laat kruimels zich niet
opeenhopen in de bodem van het apparaat.
Brood roosteren (fig. A - C)
Let op: De ruimte tussen het bovenste
verwarmingselement en het voedsel moet
minstens 30 mm bedragen om de beste
resultaten te verkrijgen.
Plaats het apparaat op een stabiel en vlak•
oppervlak.
Plaats de netstekker in het stopcontact.•
Open de deur (6) met behulp van de•
deurhandgreep (7).
Schuif het bakrooster (9) in het•
kookcompartiment (4) (fig. B).
Leg het gewenste aantal sneetjes brood op•
het bakrooster (9).
Plaats de kruimeltray (11) in de bodem van•
het apparaat met behulp van de handgreep
(12) (fig. C).
Sluit de deur (6) met behulp van de•
deurhandgreep (7).
Stel de temperatuur in met behulp van de•
temperatuurknop (1).
Schakel het apparaat in door de timerknop•
(2) rechtsom te draaien om de tijd in te
stellen. De aan/uit-indicator (3) gaat branden.
Het apparaat begint het brood te roosteren.
Let op: Experimenteer met de gewenste tijd
om de beste resultaten te verkrijgen. Het
tegelijkertijd roosteren van vier sneetjes brood
zal langer duren dan het roosteren van één
sneetje brood. De standaard tijd voor het
roosteren van brood is 3 tot 6 minuten.
Kijk regelmatig door het kijkvenster (8) om•
te controleren of het brood wordt
geroosterd en ervoor te zorgen dat het
niet aanbrandt.
Draai voor het onderbreken van het proces•
de timerknop (2) naar positie ‘0’.
De aan/uit-indicator (3) gaat uit.
Na het einde van het proces schakelt het•
apparaat automatisch uit. Een bel zal
rinkelen. De aan/uit-indicator (3) gaat uit.
Gebruik ovenhandschoenen om het brood•
uit het apparaat te verwijderen.
Verwijder na gebruik de netstekker uit het•
stopcontact en wacht totdat het apparaat
is afgekoeld.
Voedsel bakken (fig. A - C)
Voordat u verdergaat, willen wij graag dat u
uw aandacht vestigt op de volgende punten:
- Plaats de bakplaat altijd op het bakrooster.
Plaats de bakplaat niet rechtstreeks op het
onderste verwarmingselement.
- Verwam de oven indien nodig voor alvorens
het voedsel in het kookcompartiment te
zetten.
Let op: De ruimte tussen het bovenste
verwarmingselement en het voedsel moet
minstens 30 mm bedragen om de beste
resultaten te verkrijgen.
Plaats het apparaat op een stabiel en vlak•
oppervlak.
Plaats de netstekker in het stopcontact.•
Open de deur (6) met behulp van de•
deurhandgreep (7).
Schuif het bakrooster (9) in het•
kookcompartiment (4) (fig. B).
Plaats indien nodig de bakplaat (10) op het•
bakrooster (9) (fig. B).
Plaats het voedsel op het bakrooster (9) of•
op de bakplaat (10).
Plaats de kruimeltray (11) in de bodem van•
het apparaat met behulp van de handgreep
(12) (fig. C).
Sluit de deur (6) met behulp van de•
deurhandgreep (7).
Stel de temperatuur in met behulp van de•
temperatuurknop (1).
Schakel het apparaat in door de timerknop•
(2) rechtsom te draaien om de tijd in te
stellen. De aan/uit-indicator (3) gaat branden.
Het apparaat begint het voedsel te bakken.
Let op: Experimenteer met de gewenste tijd om
de beste resultaten te verkrijgen. Kleine stukken
bakken beter en sneller dan grote stukken.
Kijk regelmatig door het kijkvenster (8) om•
te controleren of het voedsel wordt
gebakken en ervoor te zorgen dat het niet
aanbrandt.
Draai voor het onderbreken van het proces•
de timerknop (2) naar positie ‘0’.
De aan/uit-indicator (3) gaat uit.
Na het einde van het proces schakelt het•
apparaat automatisch uit. Een bel zal
rinkelen. De aan/uit-indicator (3) gaat uit.

6
NL
Gebruik ovenhandschoenen om het voedsel•
uit het apparaat te verwijderen.
Verwijder na gebruik de netstekker uit het•
stopcontact en wacht totdat het apparaat
is afgekoeld.
Voedsel ontdooien (fig. A - C)
Voordat u verdergaat, vragen wij graag uw
aandacht voor de volgende punten:
- Kook het voedsel altijd onmiddellijk na het
ontdooien.
Voordat u verdergaat, willen wij graag dat u
uw aandacht vestigt op de volgende punten:
- Gebruik altijd de bakplaat om voedsel te
ontdooien. Plaats de bakplaat altijd op het
bakrooster. Plaats de bakplaat niet recht-
streeks op het onderste verwarmingselement.
- Stel een lage temperatuur in om voedsel te
ontdooien. Indien de temperatuur te hoog
wordt ingesteld, zal het voedsel snel
aanbranden.
Let op: De ruimte tussen het bovenste
verwarmingselement en het voedsel moet
minstens 30 mm bedragen om de beste
resultaten te verkrijgen.
Plaats het apparaat op een stabiel en vlak•
oppervlak.
Plaats de netstekker in het stopcontact.•
Open de deur (6) met behulp van de•
deurhandgreep (7).
Schuif het bakrooster (9) in het•
kookcompartiment (4) (fig. B).
Plaats de bakplaat (10) op het bakrooster•
(9) (fig. B).
Leg het voedsel op de bakplaat (10).•
Plaats de kruimeltray (11) in de bodem van•
het apparaat met behulp van de handgreep
(12) (fig. C).
Sluit de deur (6) met behulp van de•
deurhandgreep (7).
Stel de temperatuur in met behulp van de•
temperatuurknop (1).
Schakel het apparaat in door de timerknop•
(2) rechtsom te draaien om de tijd in te
stellen. De aan/uit-indicator (3) gaat branden.
Het apparaat begint het voedsel te
ontdooien.
Let op: Experimenteer met de gewenste tijd
om de beste resultaten te verkrijgen. De
benodigde tijd voor het ontdooien van voedsel
is afhankelijk van het soort voedsel, het gewicht
van het voedsel en de vorm van het voedsel.
Kijk regelmatig door het kijkvenster (8) om te•
controleren of het voedsel wordt ontdooid
en ervoor te zorgen dat het niet aanbrandt.
Open halverwege het proces de deur (6),•
draai het voedsel om en sluit de deur weer.
Draai voor het onderbreken van het proces•
de timerknop (2) naar positie ‘0’.
De aan/uit-indicator (3) gaat uit.
Na het einde van het proces schakelt het•
apparaat automatisch uit. Een bel zal
rinkelen. De aan/uit-indicator (3) gaat uit.
Gebruik ovenhandschoenen om het•
voedsel uit het apparaat te verwijderen.
Verwijder na gebruik de netstekker uit het•
stopcontact en wacht totdat het apparaat
is afgekoeld.
Reiniging en onderhoud
Voordat u verdergaat, vragen wij graag uw
aandacht voor de volgende punten:
- Verwijder voor reiniging en onderhoud de
netstekker uit het stopcontact en wacht
totdat het apparaat is afgekoeld.
- Dompel het apparaat niet onder in water
of andere vloeistoffen.
Voordat u verdergaat, willen wij graag dat u
uw aandacht vestigt op de volgende punten:
- Gebruik geen bijtende of schurende
reinigingsmiddelen om het apparaat te
reinigen.
- Gebruik geen scherpe voorwerpen om het
apparaat te reinigen.
- Gebruik geen ovenreinigers om de
binnenkant van het apparaat te reinigen.
- Reinig het apparaat niet in de vaatwasser.
Reinig de accessoires niet in de vaatwasser.
Controleer het apparaat regelmatig op•
mogelijke schade.
Reinig de binnenkant van het apparaat met•
een vochtige doek. Droog de binnenkant
van het apparaat grondig met een schone,
droge doek. Veeg niet over de
verwarmingselementen.

7
NL
Reinig regelmatig de accessoires:•
- Reinig het bakrooster en de bakplaat in
sop. Droog de accessoires grondig.
- Kantel het apparaat iets naar achteren.
Open de kruimellade door het handgreep
naar achteren en naar beneden te trekken.
Schud de kruimellade voorzichtig om
kruimels te verwijderen. Plaats de
kruimeltray terug in de bodem van het
apparaat met behulp van de handgreep.
Berg het apparaat met de accessoires op•
op een droge plaats, buiten bereik van
kinderen.
Veiligheidsinstructies
Algemene veiligheid
Lees voor gebruik de gebruiksaanwijzing•
zorgvuldig door. Bewaar de gebruiks-
aanwijzing voor toekomstig gebruik.
Gebruik het apparaat en de accessoires•
uitsluitend voor hun beoogde doeleinden.
Gebruik het apparaat en de accessoires niet
voor andere doeleinden dan beschreven in
de gebruiksaanwijzing.
Gebruik het apparaat niet als een onderdeel•
of een accessoire beschadigd of defect is.
Indien een onderdeel of een accessoire
beschadigd of defect is, moet het door de
fabrikant of een erkend servicecentrum
worden vervangen.
Houd altijd toezicht op kinderen om te•
voorkomen dat ze met het apparaat spelen.
Het gebruik van dit apparaat door•
kinderen of personen met een lichamelijke,
zintuiglijke, geestelijke of motorische
handicap of zonder de benodigde kennis
en ervaring kan gevaar veroorzaken.
Personen die verantwoordelijk zijn voor
hun veiligheid moeten uitdrukkelijke
instructies geven of toezicht houden op
het gebruik van het apparaat.
Gebruik het apparaat niet in de buurt van•
badkuipen, douches, wastafels of andere
voorzieningen die water bevatten.
Dompel het apparaat niet onder in water•
of andere vloeistoffen. Verwijder het
apparaat niet met uw handen indien het
apparaat is ondergedompeld in water of
andere vloeistoffen.
Verwijder onmiddellijk de netstekker uit
het stopcontact. Gebruik het apparaat niet
opnieuw indien het apparaat is onder-
gedompeld in water of andere vloeistoffen.
Dit apparaat is uitsluitend bedoeld voor•
huishoudelijk gebruik en voor gelijksoortige
toepassingsgebieden zoals werknemers-
kantines in winkels, kantoren en andere
werkomgevingen; boerderijen; door gasten
in hotels, motels, bed and breakfasts en
andere woonomgevingen.
Elektrische veiligheid
Controleer voor gebruik altijd of de•
netspanning overeenkomt met de spanning
op het typeplaatje van het apparaat.
Sluit het apparaat aan op een geaard•
stopcontact. Gebruik indien nodig een
geaarde verlengkabel met een geschikte
diameter (minimaal 3 x 1,5 mm2).
Installeer voor extra bescherming een•
aardlekschakelaar (RCD) met een nominale
reststroom van maximaal 30 mA.
Het apparaat mag niet worden bediend•
door middel van een externe timer of een
apart afstandsbedieningssysteem.
Zorg ervoor dat er geen water in de pluggen•
van het netsnoer en het verlengsnoer kan
komen.
Draai het netsnoer en het verlengsnoer•
altijd volledig uit.
Zorg ervoor dat het netsnoer niet over de•
rand van een werkblad hangt. Zorg ervoor
dat het netsnoer niet per ongeluk
verstrengeld raakt of de oorzaak van een
struikeling kan vormen.
Houd het netsnoer uit de buurt van•
warmtebronnen, olie en scherpe randen.
Controleer het netsnoer en de netstekker•
op tekenen van beschadiging. Gebruik het
apparaat niet als het netsnoer of de
netstekker beschadigd of defect is. Indien
het netsnoer of de netstekker beschadigd
of defect is, moet het door de fabrikant of
een erkend servicecentrum worden
vervangen.
Trek niet aan het netsnoer om de netstekker•
van de netvoeding te verwijderen.

8
NL
Verwijder de netstekker van de netvoeding•
wanneer het apparaat niet in gebruik is,
voor montage- of demontage-
werkzaamheden en voor reinigings- en
onderhoudswerkzaamheden.
Veiligheidsinstructies voor ovens
Gebruik het apparaat niet buitenshuis.•
Plaats het apparaat op een stabiel en vlak•
oppervlak.
Plaats het apparaat op een hittebestendig•
en spatvrij oppervlak.
Plaats het apparaat niet op een kookplaat.•
Bedek het apparaat niet.•
Zorg ervoor dat er voldoende ruimte rondom•
het apparaat is voor het ontsnappen van
de warmte en voor voldoende ventilatie.
Zorg ervoor dat het apparaat niet in•
contact komt met brandbaar materiaal.
Houd het apparaat uit de buurt van•
warmtebronnen. Plaats het apparaat niet
op hete oppervlakken of in de buurt van
open vlammen.
Plaats uitsluitend schalen, kommen, etc. van•
metaal, steen of glas in het apparaat. Plaats
geen schalen, kommen, etc. van andere
materialen in het apparaat.
Gebruik het apparaat niet voor•
opslagdoeleinden.
Pas op voor hete delen. De oppervlakken die•
zijn gemarkeerd met een waarschuwings-
symbool voor hete oppervlakken worden
heet tijdens gebruik. De toegankelijke
oppervlakken kunnen heet worden wanneer
het apparaat in gebruik is. Het buiten-
oppervlak kan heet worden wanneer het
apparaat in gebruik is.
Wees voorzichtig wanneer u het apparaat•
aanraakt. Gebruik altijd ovenhandschoenen
indien u het apparaat tijdens of kort na
gebruik moet aanraken.
Zorg ervoor dat uw handen droog zijn•
voordat u het apparaat aanraakt.
Laat het apparaat niet onbeheerd achter•
tijdens gebruik.
Verplaats het apparaat niet wanneer het is•
ingeschakeld of nog heet is. Verwijder de
netstekker uit het stopcontact en wacht
totdat het apparaat is afgekoeld.
Disclaimer
Wijzigingen voorbehouden; specificaties
kunnen zonder opgave van redenen worden
gewijzigd.

9
EN
Congratulations!
You have purchased a Princess product. Our aim
is to provide quality products with a tasteful
design and at an affordable price. We hope
that you will enjoy this product for many years.
Description (fig. A)
Your 112459 Princess oven has been designed
for toasting bread, baking food and defrosting
food. The appliance is suitable for indoor use only.
The appliance is suitable for domestic use only.
1. Temperature control dial
2. Timer dial
3. On/off indicator
4. Cooking compartment
5. Heating element
6. Door
7. Door grip
8. Viewing window
9. Baking rack
10. Baking tray
11. Crumb tray
Initial use (fig. A)
Before you proceed, we need you to pay
attention to the following notes:
- Make sure that there is sufficient space
around the appliance to allow heat to
escape and provide sufficient ventilation.
Clean the appliance. Refer to the section•
“Cleaning and maintenance”.
Clean the accessories. Refer to the section•
“Cleaning and maintenance”.
Place the appliance on a stable and flat•
surface.
Insert the mains plug into the wall socket.•
Turn the temperature control dial (1)•
clockwise to set the temperature to 230 °C.
Turn the timer dial (2) clockwise to set the•
time to 15 minutes. The on/off indicator
(3) comes on. The appliance starts heating.
If the process is completed, the appliance•
will switch off automatically. The on/off
indicator (3) goes off.
Remove the mains plug from the wall socket.•
Allow the appliance to cool down•
completely.
Note: If you switch on the appliance for the
first time, the appliance may emit a little smoke
and a characteristic smell for a short period.
This is normal operation.
Use
Setting the temperature (fig. A)
The temperature can be set from 0 °C and
230 °C.
Turn the temperature control dial (1)•
clockwise to increase the temperature.
Turn the temperature control dial (1)•
counterclockwise to decrease the
temperature.
Switching on and off (fig. A)
The time can be set from 0 minutes to
15 minutes. The time can also be set to
continuous mode.
To switch on the appliance for 15 minutes•
or less, turn the timer dial (2) clockwise to
set the required time. The on/off indicator
(3) comes on.
To switch on the appliance for more than•
15 minutes, turn the timer dial (2) to the
‘I’ position to set the time to continuous
mode. The on/off indicator (3) comes on.
To switch off the appliance, turn the timer•
dial (2) to the ‘0’ position. The on/off
indicator (3) goes off.
Adjusting the time (fig. A)
The time can be adjusted while the appliance
is operating.
Turn the timer dial (2) clockwise to increase•
the time.
Turn the timer dial (2) counterclockwise to•
decrease the time.
Hints for use
Before you proceed, we would like you to
focus your attention on the following notes:
- Always keep the door closed during use.
- Do not use the appliance without the
crumb tray. Do not allow crumbs to
accumulate in the bottom of the appliance.

10
EN
Toasting bread (fig. A - C)
Note: The space between the upper heating
element and the food must be at least 30 mm
in order to achieve the best results.
Place the appliance on a stable and flat•
surface.
Insert the mains plug into the wall socket.•
Open the door (6) using the door grip (7).•
Slide the baking rack (9) into the cooking•
compartment (4) (fig. B).
Put the required number of slices of bread•
onto the baking rack (9).
Insert the crumb tray (11) into the bottom•
of the appliance using the handgrip (12)
(fig. C).
Close the door (6) using the door grip (7).•
Set the temperature using the temperature•
control dial (1).
Switch on the appliance by turning the•
timer dial (2) clockwise to set the time.
The on/off indicator (3) comes on.
The appliance starts toasting the bread.
Note: Experiment with the required time to
achieve the best results. Toasting four slices of
bread at the same time will take longer than
toasting one slice of bread at the time. The
default time for toasting bread is 3 to 6 minutes.
Regularly look through the viewing window•
(8) to check whether the bread is toasted
and to make sure that it does not burn.
To interrupt the process, turn the timer dial•
(2) to the ‘0’ position. The on/off indicator
(3) goes off.
If the process is completed, the appliance•
will switch off automatically. A bell will ring.
The on/off indicator (3) goes off.
Use oven gloves to remove the bread from•
the appliance.
After use, remove the mains plug from the•
wall socket and wait until the appliance
has cooled down.
Baking food (fig. A - C)
Before you proceed, we would like you to
focus your attention on the following notes:
- Always place the baking tray onto the
baking rack. Do not place the baking tray
directly onto the lower heating element.
- If necessary, preheat the oven before putting
the food into the cooking compartment.
Note: The space between the upper heating
element and the food must be at least 30 mm
in order to achieve the best results.
Place the appliance on a stable and flat•
surface.
Insert the mains plug into the wall socket.•
Open the door (6) using the door grip (7).•
Slide the baking rack (9) into the cooking•
compartment (4) (fig. B).
If necessary, place the baking tray (10)•
onto the baking rack (9) (fig. B).
Put the food onto the baking rack (9) or•
the baking tray (10).
Insert the crumb tray (11) into the bottom•
of the appliance using the handgrip (12)
(fig. C).
Close the door (6) using the door grip (7).•
Set the temperature using the temperature•
control dial (1).
Switch on the appliance by turning the•
timer dial (2) clockwise to set the time.
The on/off indicator (3) comes on.
The appliance starts baking the food.
Note: Experiment with the required time to
achieve the best results. Small pieces will bake
better and more quickly than large pieces.
Regularly look through the viewing window•
(8) to check whether the food is baked and
to make sure that it does not burn.
To interrupt the process, turn the timer dial•
(2) to the ‘0’ position. The on/off indicator
(3) goes off.
If the process is completed, the appliance•
will switch off automatically. A bell will ring.
The on/off indicator (3) goes off.
Use oven gloves to remove the food from•
the appliance.
After use, remove the mains plug from the•
wall socket and wait until the appliance
has cooled down.
Defrosting food (fig. A - C)
Before you proceed, we need you to pay
attention to the following notes:
- Always cook the food immediately after
defrosting.

11
EN
Before you proceed, we would like you to
focus your attention on the following notes:
- Always use the baking tray in order to defrost
food. Always place the baking tray onto the
baking rack. Do not place the baking tray
directly onto the lower heating element.
- Set a low temperature in order to defrost
food. If the temperature is set too high,
the food will burn easily.
Note: The space between the upper heating
element and the food must be at least 30 mm
in order to achieve the best results.
Place the appliance on a stable and flat•
surface.
Insert the mains plug into the wall socket.•
Open the door (6) using the door grip (7).•
Slide the baking rack (9) into the cooking•
compartment (4) (fig. B).
Place the baking tray (10) onto the baking•
rack (9) (fig. B).
Put the food onto the baking tray (10).•
Insert the crumb tray (11) into the bottom•
of the appliance using the handgrip (12)
(fig. C).
Close the door (6) using the door grip (7).•
Set the temperature using the temperature•
control dial (1).
Switch on the appliance by turning the•
timer dial (2) clockwise to set the time.
The on/off indicator (3) comes on.
The appliance starts defrosting the food.
Note: Experiment with the required time to
achieve the best results. The time required for
defrosting food depends on the type of food, the
weight of the food and the shape of the food.
Regularly look through the viewing window•
(8) to check whether the food is defrosted
and to make sure that it does not burn.
Halfway the process, open the door (6), turn•
over the food and close the door again.
To interrupt the process, turn the timer dial•
(2) to the ‘0’ position. The on/off indicator
(3) goes off.
If the process is completed, the appliance•
will switch off automatically. A bell will ring.
The on/off indicator (3) goes off.
Use oven gloves to remove the food from•
the appliance.
After use, remove the mains plug from the•
wall socket and wait until the appliance
has cooled down.
Cleaning and maintenance
Before you proceed, we need you to pay
attention to the following notes:
- Before cleaning or maintenance, remove
the mains plug from the wall socket and
wait until the appliance has cooled down.
- Do not immerse the appliance in water or
any other liquids.
Before you proceed, we would like you to
focus your attention on the following notes:
- Do not use aggressive or abrasive cleaning
agents to clean the appliance.
- Do not use sharp objects to clean the
appliance.
- Do not use oven cleaners to clean the
inside of the appliance.
- Do not clean the appliance in the dishwasher.
Do not clean the accessories in the dishwasher.
Regularly check the appliance for possible•
damage.
Clean the inside of the appliance with a•
damp cloth. Thoroughly dry the inside of
the appliance with a clean, dry cloth. Do
not wipe the heating elements.
Regularly clean the accessories:•
- Clean the baking rack and the baking
tray in soapy water. Thoroughly dry the
accessories.
- Tilt the appliance slightly backward. Open
the crumb tray by pulling the handgrip
backward and down. Carefully shake the
crumb tray to remove crumbs. Insert the
crumb tray back into the bottom of the
appliance using the handgrip.
Store the appliance with the accessories in•
a dry place, out of the reach of children.
Safety instructions
General safety
Read the manual carefully before use.•
Keep the manual for future reference.

12
EN
Only use the appliance and the accessories•
for their intended purposes. Do not use the
appliance and the accessories for other
purposes than described in the manual.
Do not use the appliance if any part or any•
accessory is damaged or defective. If a part
or an accessory is damaged or defective,
it must be replaced by the manufacturer or
an authorised repair agent.
Children should be supervised to ensure•
that they do not play with the appliance.
The use of this appliance by children or•
persons with a physical, sensory, mental or
motorial disability, or lack of experience
and knowledge can give cause to hazards.
Persons responsible for their safety should
give explicit instructions or supervise the
use of the appliance.
Do not use the appliance near bathtubs,•
showers, basins or other vessels containing
water.
Do not immerse the appliance in water or•
other liquids. If the appliance is immersed in
water or other liquids, do not remove the
appliance with your hands. Immediately
remove the mains plug from the wall socket.
If the appliance is immersed in water or
other liquids, do not use the appliance again.
This appliance is intended to be used in•
domestic and similar applications such as
staff kitchen areas in shops, offices and
other working environments; farm houses;
by clients in hotels, motels and other
residential type environments; bed-and-
breakfast type environments.
Electrical safety
Before use, always check that the mains•
voltage is the same as the voltage on the
rating plate of the appliance.
Connect the appliance to an earthed wall•
socket. If necessary, use an earthed extension
cable of a suitable diameter (at least
3 x 1.5 mm2).
For additional protection, install a residual•
current device (RCD) with a rated residual
operating current that does not exceed
30 mA.
The appliance is not intended to be•
operated by means of an external timer or
separate remote-control system.
Make sure that water cannot enter the•
contact plugs of the mains cable and the
extension cable.
Always fully unwind the mains cable and•
the extension cable.
Make sure that the mains cable does not•
hang over the edge of a worktop and cannot
be caught accidentally or tripped over.
Keep the mains cable away from heat, oil•
and sharp edges.
Regularly check the mains cable and the•
mains plug for signs of damage. Do not use
the appliance if the mains cable or the
mains plug is damaged or defective. If the
mains cable or the mains plug is damaged
or defective, it must be replaced by the
manufacturer or an authorised repair agent.
Do not pull the mains cable to disconnect•
the mains plug from the mains.
Disconnect the mains plug from the mains•
when the appliance is not in use, before
assembly or disassembly and before cleaning
and maintenance.
Safety instructions for ovens
Do not use the appliance outdoors.•
Place the appliance on a stable and flat•
surface.
Place the appliance on a heat-resistant and•
splash-proof surface.
Do not place the appliance on a hob.•
Do not cover the appliance.•
Make sure that there is sufficient space•
around the appliance to allow heat to
escape and provide sufficient ventilation.
Make sure that the appliance does not•
come into contact with flammable material.
Keep the appliance away from heat sources.•
Do not place the appliance on hot surfaces
or near open flames.
Only put containers made of metal, stone or•
glass in the appliance. Do not put containers
made of other materials in the appliance.
Do not use the appliance for storage•
purposes.

13
EN
Beware of hot parts. The surfaces marked•
with a caution symbol for hot surfaces are
liable to become hot during use. The
accessible surfaces can become hot when the
appliance is operating. The outer surface can
become hot when the appliance is operating.
Be careful when touching the appliance. If•
you need to touch the appliance during or
shortly after use, always wear oven gloves.
Make sure that your hands are dry before•
touching the appliance.
Do not leave the appliance unattended•
during use.
Do not move the appliance while it is•
switched on or is still hot. Remove the
mains plug from the wall socket and wait
until the appliance has cooled down.
U.K. Wiring instructions
The wires in the mains lead are coloured in
accordance with the following code:
BLUE NEUTRAL
BROWN LIVE
GREEN/YELLOW EARTH
As the colours of the wire in the mains lead of
this appliance may not correspond with the
colour markings identifying the terminals on
your plug, proceed as follows:
The wire which is coloured BLUE must be
connected to the terminal which is marked
with the letter N or coloured black.
The wire which is coloured BROWN must be
connected to the terminal which is marked
with the letter L or coloured red.
The wire which is coloured GREEN/YELLOW
must be connected to the terminal which is
marked with the letter E or ( ) and is coloured
GREEN or GREEN/YELLOW.
If a 13Amp (BS1363) plug is used, a 13Amp
(BS1362) fuse must be fitted, or if any other
type of plug is used, a 13Amp fuse must be
fitted, either in the plug or adaptor, or on the
distribution board.
Warning! This appliance must be earthed.
Disclaimer
Subject to change; specifications can be
changed without further notice.

14
FR
Félicitations!
Vous avez acheté un produit Princess. Nous
souhaitons vous proposer des produits de
qualité associant un design raffiné et des prix
accessibles. Nous espérons que vous profiterez
longtemps de ce produit.
Description (fig. A)
Votre four 112459 Princess a été conçu pour
griller le pain, cuire les aliments et les décongeler.
L’appareil est réservé à un usage à l’intérieur.
L’appareil est réservé à un usage domestique.
1. Molette de température
2. Molette de minuterie
3. Témoin marche/arrêt
4. Compartiment de cuisson
5. Élément chauffant
6. Porte
7. Poignée de porte
8. Hublot
9. Étagère de cuisson
10. Plaque de cuisson
11. Bac à miettes
Utilisation initiale (fig. A)
Avant de procéder, vous devez faire attention
aux remarques suivantes :
- Assurez-vous que l’appareil dispose d’un
dégagement suffisant pour que la chaleur
se dissipe tout en assurant une ventilation
satisfaisante.
Nettoyez l’appareil. Consultez la section•
“Nettoyage et entretien”.
Nettoyez les accessoires. Consultez la•
section “Nettoyage et entretien”.
Placez l’appareil sur une surface stable et•
plane.
Insérez la fiche secteur dans la prise murale.•
Tournez la molette de température (1) dans•
le sens horaire sur la température de 230 °C.
Tournez la molette de minuterie (2) dans•
le sens horaire pour régler le temps sur
15 minutes. Le témoin marche/arrêt (3)
s’allume. L’appareil commence à chauffer.
Si le processus est terminé, l’appareil s’arrête•
automatiquement. Le témoin marche/arrêt
(3) s’éteint.
Débranchez la fiche secteur de la prise•
murale.
Laissez l’appareil refroidir complètement.•
Remarque : Pour sa première mise en marche,
l’appareil peut émettre une légère fumée et
une odeur caractéristique pendant une période
brève. C’est normal.
Utilisation
Réglage de la température (fig. A)
La température est réglable entre 0 °C et 230 °C.
Tournez la molette de température (1)•
dans le sens horaire pour augmenter la
température.
Tournez la molette de température (1)•
dans le sens antihoraire pour réduire la
température.
Mise en marche et arrêt (fig. A)
La durée est réglable de 0 minutes à 15 minutes.
La durée peut aussi être réglée sur le mode
continu.
Pour mettre l’appareil en marche 15 minutes•
ou moins, tournez la molette de minuterie
(2) dans le sens horaire sur la durée requise.
Le témoin marche/arrêt (3) s’allume.
Pour mettre l’appareil en marche plus de•
15 minutes, tournez la molette de minuterie
(2) sur la position ‘I’ pour régler la durée sur
le mode continu. Le témoin marche/arrêt
(3) s’allume.
Pour arrêter l’appareil, tournez la molette de•
minuterie (2) sur la position ‘0’. Le témoin
marche/arrêt (3) s’éteint.
Ajustement de la durée (fig. A)
La durée est réglable pendant le fonctionnement
de l’appareil.
Tournez la molette de minuterie (2) dans le•
sens horaire pour augmenter la durée.
Tournez la molette de minuterie (2) dans le•
sens antihoraire pour réduire la durée.
Conseils d’usage
Avant de procéder, nous souhaiterions que
vous preniez connaissance des remarques
suivantes :
- La porte doit toujours être fermée pendant
l’utilisation.

15
FR
- N’utilisez pas l’appareil sans le bac à miettes.
Ne laissez pas les miettes s’accumuler au
fond de l’appareil.
Griller du pain (fig. A - C)
Remarque : L’espace entre l’élément chauffant
supérieur et les aliments doit être d’au moins
30 mm pour optimiser les résultats.
Placez l’appareil sur une surface stable et•
plane.
Insérez la fiche secteur dans la prise murale.•
Ouvrez la porte (6) avec sa poignée (7).•
Glissez l’étagère de cuisson (9) dans le•
compartiment de cuisson (4) (fig. B).
Placez le nombre voulu de tranches de pain•
sur l’étagère de cuisson (9).
Insérez le bac à miettes (11) au fond de•
l’appareil avec la poignée (12) (fig. C).
Fermez la porte (6) avec sa poignée (7).•
Réglez la température avec la molette de•
température (1).
Mettez l’appareil en marche en tournant la•
molette de minuterie (2) dans le sens horaire
afin de régler l’heure. Le témoin marche/
arrêt (3) s’allume. L’appareil commence à
griller le pain.
Remarque : Expérimentez avec différentes
durées pour obtenir les meilleurs résultats.
Griller quatre tranches de pain simultanément
prend plus de temps que de les griller une par
une. La durée de grill du pain par défaut est
de 3 à 6 minutes.
Regardez régulièrement à travers le hublot•
(8) pour vérifier si le pain est grillé et vous
assurer qu’il ne brûle pas.
Pour interrompre le processus, tournez la•
molette de minuterie (2) sur la position ‘0’.
Le témoin marche/arrêt (3) s’éteint.
Si le processus est terminé, l’appareil s’arrête•
automatiquement. Une cloche retentit.
Le témoin marche/arrêt (3) s’éteint.
Utilisez des gants de cuisine pour retirer le•
pain de l’appareil.
Après usage, retirez la fiche secteur de la•
prise murale et attendez que l’appareil
refroidisse.
Cuire des aliments (fig. A - C)
Avant de procéder, nous souhaiterions que
vous preniez connaissance des remarques
suivantes :
- Placez toujours la plaque de cuisson sur
l’étagère de cuisson. Ne placez pas la plaque
de cuisson sur l’élément chauffant inférieur.
- Si nécessaire, préchauffez le four avant de
placer les aliments dans le compartiment
de cuisson.
Remarque : L’espace entre l’élément chauffant
supérieur et les aliments doit être d’au moins
30 mm pour optimiser les résultats.
Placez l’appareil sur une surface stable et•
plane.
Insérez la fiche secteur dans la prise murale.•
Ouvrez la porte (6) avec sa poignée (7).•
Glissez l’étagère de cuisson (9) dans le•
compartiment de cuisson (4) (fig. B).
Si nécessaire, placez la plaque de cuisson•
(10) sur l’étagère de cuisson (9) (fig. B).
Placez les aliments sur l’étagère de cuisson•
(9) ou la plaque de cuisson (10).
Insérez le bac à miettes (11) au fond de•
l’appareil avec la poignée (12) (fig. C).
Fermez la porte (6) avec sa poignée (7).•
Réglez la température avec la molette de•
température (1).
Mettez l’appareil en marche en tournant la•
molette de minuterie (2) dans le sens horaire
afin de régler l’heure. Le témoin marche/
arrêt (3) s’allume. L’appareil commence à
cuire les aliments.
Remarque : Expérimentez avec différentes
durées pour obtenir les meilleurs résultats. Les
petites portions sont plus faciles et plus rapides
à cuire que les plus grandes.
Regardez régulièrement à travers le hublot•
(8) pour vérifier si les aliments sont grillés
et vous assurer qu’ils ne brûlent pas.
Pour interrompre le processus, tournez la•
molette de minuterie (2) sur la position ‘0’.
Le témoin marche/arrêt (3) s’éteint.
Si le processus est terminé, l’appareil s’arrête•
automatiquement. Une cloche retentit.
Le témoin marche/arrêt (3) s’éteint.
Utilisez des gants de cuisine pour retirer les•
aliments de l’appareil.

16
FR
Après usage, retirez la fiche secteur de la•
prise murale et attendez que l’appareil
refroidisse.
Décongeler des aliments (fig. A - C)
Avant de procéder, vous devez faire attention
aux remarques suivantes :
- Cuisez toujours les aliments
immédiatement après les avoir décongelés.
Avant de procéder, nous souhaiterions que
vous preniez connaissance des remarques
suivantes :
- Utilisez toujours l’étagère de cuisson pour
décongeler les aliments. Placez toujours la
plaque de cuisson sur l’étagère de cuisson.
Ne placez pas la plaque de cuisson sur
l’élément chauffant inférieur.
- Réglez une température basse pour
décongeler les aliments. Si la température
réglée est trop élevée, les aliments vont
brûler facilement.
Remarque : L’espace entre l’élément chauffant
supérieur et les aliments doit être d’au moins
30 mm pour optimiser les résultats.
Placez l’appareil sur une surface stable et•
plane.
Insérez la fiche secteur dans la prise murale.•
Ouvrez la porte (6) avec sa poignée (7).•
Glissez l’étagère de cuisson (9) dans le•
compartiment de cuisson (4) (fig. B).
Placez la plaque de cuisson (10) sur l’étagère•
de cuisson (9) (fig. B).
Placez les aliments sur la plaque de cuisson•
(10).
Insérez le bac à miettes (11) au fond de•
l’appareil avec la poignée (12) (fig. C).
Fermez la porte (6) avec sa poignée (7).•
Réglez la température avec la molette de•
température (1).
Mettez l’appareil en marche en tournant la•
molette de minuterie (2) dans le sens horaire
afin de régler l’heure. Le témoin marche/
arrêt (3) s’allume. L’appareil commence à
décongeler les aliments.
Remarque : Expérimentez avec différentes
durées pour obtenir les meilleurs résultats.
La durée requise pour décongeler les aliments
dépend du type d’aliment, du poids des
aliments et de la forme des aliments.
Regardez régulièrement à travers le hublot•
(8) pour vérifier si les aliments sont décongelés
et vous assurer qu’ils ne brûlent pas.
Au milieu du processus, ouvrez la porte (6),•
retournez les aliments et refermez la porte.
Pour interrompre le processus, tournez la•
molette de minuterie (2) sur la position ‘0’.
Le témoin marche/arrêt (3) s’éteint.
Si le processus est terminé, l’appareil s’arrête•
automatiquement. Une cloche retentit.
Le témoin marche/arrêt (3) s’éteint.
Utilisez des gants de cuisine pour retirer les•
aliments de l’appareil.
Après usage, retirez la fiche secteur de la•
prise murale et attendez que l’appareil
refroidisse.
Nettoyage et entretien
Avant de procéder, vous devez faire attention
aux remarques suivantes :
- Avant le nettoyage ou l’entretien, retirez la
fiche secteur de la prise murale et attendez
que l’appareil refroidisse.
- Ne plongez pas l’appareil dans l’eau ou
autres liquides.
Avant de procéder, nous souhaiterions que
vous preniez connaissance des remarques
suivantes :
- N’utilisez pas de produits de nettoyage
agressifs ou abrasifs pour nettoyer l’appareil.
- Ne nettoyez pas l’appareil avec des objets
coupants.
- N’utilisez pas de produits nettoyants pour
four pour nettoyer l’intérieur de l’appareil.
- Ne nettoyez pas l’appareil dans le lave-
vaisselle. Ne nettoyez pas les accessoires au
lave-vaisselle.
Contrôlez régulièrement les éventuels•
dommages sur l’appareil.
Nettoyez l’intérieur de l’appareil avec un•
chiffon humide. Séchez soigneusement
l’intérieur de l’appareil avec un chiffon propre
et sec. N’essuyez pas les éléments chauffants.
Nettoyez régulièrement les accessoires :•
- Nettoyez l’étagère de cuisson et la plaque
de cuisson à l’eau savonneuse. Séchez
soigneusement les accessoires.

17
FR
- Inclinez légèrement l’appareil en arrière.
Ouvrez le bac à miettes en tirant la
poignée en arrière et vers le bas. Secouez
prudemment le bac à miettes pour
éliminer les miettes. Insérez à nouveau le
bac à miettes au fond de l’appareil avec
la poignée.
Rangez l’appareil avec les accessoires dans•
un endroit sec, hors de portée des enfants.
Instructions de sécurité
Sécurité générale
Lisez avec soin le manuel avant utilisation.•
Conservez le manuel pour référence future.
Utilisez l’appareil et ses accessoires•
uniquement pour leurs fins prévues. N’utilisez
pas l’appareil et ses accessoires pour tout
autre objet que celui exposé dans le manuel.
N’utilisez pas l’appareil si une pièce ou un•
accessoire quelconque est endommagé ou
défectueux. Si une pièce ou un accessoire
quelconque est endommagé ou défectueux,
il doit être remplacé par le fabricant ou par
un réparateur agréé.
Les enfants doivent toujours être surveillés•
pour s’assurer qu’ils ne jouent pas avec
l’appareil.
L’emploi de cet appareil par des enfants ou•
des personnes présentant un handicap
physique, sensoriel, mental ou moteur voire
ne disposant pas des connaissances et de
l’expérience nécessaires est potentiellement
dangereux. Les personnes responsables de
leur sécurité doivent leur fournir des
instructions explicites voire les surveiller
pour utiliser l’appareil.
N’utilisez pas l’appareil à proximité d’une•
baignoire, d’une douche, d’un lavabo ou
d’autres récipients contenant de l’eau.
Ne plongez pas l’appareil dans l’eau ou•
autres liquides. Si l’appareil est plongé dans
l’eau ou d’autres liquides, ne retirez pas
l’appareil avec vos mains. Débranchez
immédiatement la fiche secteur de la prise
murale. Si l’appareil est plongé dans l’eau
ou autre liquide, ne l’utilisez pas à nouveau.
Cet appareil est destiné à un usage•
domestique et pour des applications
similaires comme les zones de cuisine dans
une boutique, un bureau ou autre
environnement ; les fermes ; la clientèle des
hôtels, motels et autres environnements
résidentiels ; et les Bed & Breakfast.
Sécurité électrique
Avant toute utilisation, vérifiez que la tension•
du secteur correspond à celle indiquée sur
la plaque signalétique de l’appareil.
Connectez l’appareil à une prise murale•
mise à la terre. Si nécessaire, vous pouvez
utiliser une rallonge d’un diamètre adapté
(au moins 3 x 1,5 mm2).
Pour maximiser la protection, installez un•
dispositif de courant résiduel (RCD)
présentant une intensité de service résiduelle
nominale inférieure ou égale à 30 mA.
L’appareil n’est pas conçu pour être utilisé•
avec une minuterie externe ou un système
de télécommande séparé.
Assurez-vous que l’eau ne peut pas s’infiltrer•
dans les contacts de prise du cordon
d’alimentation et de la rallonge.
Déroulez toujours complètement le cordon•
d’alimentation et la rallonge.
Assurez-vous que le cordon d’alimentation•
ne pend pas sur le bord d’un plan de travail
et ne peut pas être happé ou faire trébucher
quelqu’un accidentellement.
Maintenez le cordon d’alimentation à l’écart•
de la chaleur, de l’huile et des bords
tranchants.
Contrôlez régulièrement l’état du cordon•
d’alimentation et de la fiche secteur. N’utilisez
pas l’appareil si le cordon d’alimentation
ou la fiche secteur est endommagé ou
défectueux. Si le cordon d’alimentation ou la
fiche secteur est endommagé ou défectueux,
il doit être remplacé par le fabricant ou par
un réparateur agréé.
Ne tirez pas sur le cordon d’alimentation•
pour débrancher la fiche secteur du secteur.
Débranchez la fiche secteur du secteur•
lorsque l’appareil n’est pas utilisé, avant le
montage ou le démontage de même
qu’avant le nettoyage ou l’entretien.

18
FR
Instructions de sécurité pour les fours
N’utilisez pas l’appareil à l’extérieur.•
Placez l’appareil sur une surface stable et•
plane.
Placez l’appareil sur une surface résistante•
à la chaleur et aux projections.
Ne placez pas l’appareil sur une plaque de•
cuisson.
Ne couvrez pas l’appareil.•
Assurez-vous que l’appareil dispose d’un•
dégagement suffisant pour que la chaleur
se dissipe tout en assurant une ventilation
satisfaisante.
Assurez-vous que l’appareil n’entre en•
contact avec aucune matière inflammable.
Maintenez l’appareil à l’écart des sources•
de chaleur. Ne placez pas l’appareil sur une
surface chaude ou à proximité de flammes
nues.
Placez uniquement des conteneurs en•
métal, en pierre ou en verre dans l’appareil.
Ne placez pas de conteneurs composés
d’autres matériaux dans l’appareil.
N’utilisez pas l’appareil pour le rangement.•
Attention aux pièces chaudes. Les surfaces•
marquées d’un symbole d’attention aux
surfaces chaudes peuvent devenir chaudes
durant l’utilisation. Les surfaces accessibles
peuvent devenir chaudes lorsque l’appareil
fonctionne. La surface extérieure peut
devenir chaude lorsque l’appareil fonctionne.
Faites attention en touchant l’appareil.•
Utilisez toujours des gants de cuisine si vous
devez toucher l’appareil pendant ou juste
après l’utilisation.
Assurez-vous d’avoir les mains sèches avant•
de toucher l’appareil.
Ne laissez jamais l’appareil sans surveillance•
pendant l’utilisation.
Ne déplacez pas l’appareil s’il est sous•
tension ou encore chaud. Retirez la fiche
secteur de la prise murale et attendez que
l’appareil refroidisse.
Clause de non responsabilité
Sous réserve de modifications ; les spécifications
peuvent être modifiées sans préavis.

19
DE
Herzlichen Glückwunsch!
Sie haben ein Princess Produkt erworben.
Unser Ziel ist es, Qualitätsprodukte mit einem
geschmackvollen Design zu einem erschwing-
lichen Preis anzubieten. Wir hoffen, dass Sie
viele Jahre Gefallen an diesem Produkt finden.
Beschreibung (Abb. A)
Ihr 112459 Princess Ofen wurde zum Toasten
von Brot, zum Backen von Lebensmittel und
zum Auftauen von Lebensmittel konstruiert. Das
Gerät ist nur für den Gebrauch in geschlossenen
Räumen geeignet. Das Gerät ist nur für den
Hausgebrauch geeignet.
1. Temperaturwähler
2. Zeitschaltknopf
3. Ein-/Aus-Anzeige
4. Heizraum
5. Heizelement
6. Tür
7. Türgriff
8. Sichtfenster
9. Backrost
10. Backblech
11. Krümelblech
Erstgebrauch (Abb. A)
Bevor Sie fortfahren, beachten Sie bitte
unbedingt die folgenden Hinweise:
- Stellen Sie sicher, dass rund um das Gerät
ausreichend Platz vorhanden ist, damit die
Wärme entweichen kann und eine
ausreichende Belüftung gewährleistet ist.
Reinigen Sie das Gerät. Siehe Abschnitt•
“Reinigung und Wartung”.
Reinigen Sie das Zubehör. Siehe Abschnitt•
“Reinigung und Wartung”.
Stellen Sie das Gerät auf eine stabile, flache•
Oberfläche.
Stecken Sie den Netzstecker in die•
Wandsteckdose.
Drehen Sie den Temperaturwähler (1)•
im Uhrzeigersinn, um die Temperatur auf
230 °C einzustellen.
Drehen Sie den Zeitschaltknopf (2) im•
Uhrzeigersinn, um die Zeit auf 15 Minuten
einzustellen. Die Ein-/Aus-Anzeige (3)
leuchtet auf. Das Gerät beginnt mit dem
Aufheizvorgang.
Ist der Vorgang abgeschlossen, schaltet sich•
das Gerät automatisch aus. Die Ein-/Aus-
Anzeige (3) erlischt.
Ziehen Sie den Netzstecker aus der•
Wandsteckdose.
Lassen Sie das Gerät vollständig abkühlen.•
Hinweis: Wenn Sie das Gerät das erste Mal
einschalten, kann sich kurz etwas Rauch und
ein charakteristischer Geruch entwickeln. Dies
ist normal.
Gebrauch
Einstellen der Temperatur (Abb. A)
DieTemperaturkannvon0bis230
eingestellt werden.
Drehen Sie den Temperaturwähler (1) im•
Uhrzeigersinn, um die Temperatur zu
erhöhen.
Drehen Sie den Temperaturwähler (1) gegen•
den Uhrzeigersinn, um die Temperatur zu
verringern.
Ein- und Ausschalten (Abb. A)
Die Zeit kann von 0 Minuten bis 15 Minuten
eingestellt werden. Die Zeit kann auch auf
Dauerbetrieb eingestellt werden.
Um das Gerät 15 Minuten oder weniger•
einzuschalten, drehen Sie den Zeitschalt-
knopf (2) im Uhrzeigersinn, um die
erforderliche Zeit einzustellen. Die Ein-/Aus-
Anzeige (3) leuchtet auf.
Um das Gerät länger als 15 Minuten•
einzuschalten, drehen Sie den Zeitschaltknopf
(2) auf Position ‘I’, um die Zeit auf
Dauerbetrieb einzustellen. Die Ein-/Aus-
Anzeige (3) leuchtet auf.
Um das Gerät auszuschalten, drehen Sie•
den Zeitschaltknopf (2) auf Position ‘0’.
Die Ein-/Aus-Anzeige (3) erlischt.
Einstellen der Zeit (Abb. A)
Die Zeit kann eingestellt werden, während das
Gerät läuft.

20
DE
Drehen Sie den Zeitschaltknopf (2) im•
Uhrzeigersinn, um die Zeit zu erhöhen.
Drehen Sie den Zeitschaltknopf (2) gegen den•
Uhrzeigersinn, um die Zeit zu verringern.
Hinweise für den Gebrauch
Bevor Sie fortfahren, richten Sie bitte Ihre
Aufmerksamkeit auf folgende Hinweise:
- Halten Sie die Tür beim Gebrauch stets
geschlossen.
- Verwenden Sie das Gerät nicht ohne die
Krümellade. Lassen Sie keine Krümel unten
im Gerät ansammeln.
Toasten von Brot (Abb. A - C)
Hinweis: Zum Erzielen der besten Ergebnisse
muss der Freiraum zwischen dem oberen
Heizelement und dem Lebensmittel mindesten
30 mm betragen.
Stellen Sie das Gerät auf eine stabile, flache•
Oberfläche.
Stecken Sie den Netzstecker in die•
Wandsteckdose.
Öffnen Sie die Tür (6) am Türgriff (7).•
Schieben Sie den Backrost (9) in den•
Heizraum (4) (Abb. B).
Legen Sie die benötigte Anzahl von•
Brotscheiben auf den Backrost (9).
Schieben Sie das Krümelblech (11) am Hand-•
griff (12) unten in das Gerät ein (Abb. C).
Schließen Sie die Tür (6) am Türgriff (7).•
Stellen Sie die Temperatur mit dem•
Temperaturwähler (1) ein.
Schalten Sie das Gerät ein, indem Sie den•
Zeitschaltknopf (2) im Uhrzeigersinn drehen,
um die Zeit einzustellen. Die Ein-/Aus-
Anzeige (3) leuchtet auf. Das Gerät beginnt
mit der Toasten des Brots.
Hinweis: Experimentieren Sie mit der
erforderlichen Zeit, um die besten Ergebnisse zu
erzielen. Werden vier Brotscheiben gleichzeitig
getoastet, dauert dies länger, als wenn nur eine
Scheibe getoastet wird. Die voreingestellte Zeit
für das Toasten von Brot beträgt 3 bis 6 Minuten.
Schauen Sie regelmäßig durch das•
Sichtfenster (8), um zu kontrollieren, ob das
Brot getoastet wird und um sicherzustellen,
dass es nicht verbrennt.
Um den Vorgang zu unterbrechen, drehen•
Sie den Zeitschaltknopf (2) auf Position ‘0’.
Die Ein-/Aus-Anzeige (3) erlischt.
Ist der Vorgang abgeschlossen, schaltet sich•
das Gerät automatisch aus. Es ertönt eine
Klingel. Die Ein-/Aus-Anzeige (3) erlischt.
Verwenden Sie Ofenhandschuhe, um das•
Brot aus dem Gerät zu entnehmen.
Ziehen Sie nach dem Gebrauch den•
Netzstecker aus der Wandsteckdose und
warten Sie, bis das Gerät abgekühlt ist.
Backen von Lebensmittel (Abb. A - C)
Bevor Sie fortfahren, richten Sie bitte Ihre
Aufmerksamkeit auf folgende Hinweise:
- Legen Sie das Backblech stets auf das
Backrost. Legen Sie das Backblech nicht
direkt auf das untere Heizelement.
- Heizen Sie den Ofen gegebenenfalls vor,
bevor Sie das Lebensmittel in den Heizraum
legen.
Hinweis: Zum Erzielen der besten Ergebnisse
muss der Freiraum zwischen dem oberen
Heizelement und dem Lebensmittel mindesten
30 mm betragen.
Stellen Sie das Gerät auf eine stabile, flache•
Oberfläche.
Stecken Sie den Netzstecker in die•
Wandsteckdose.
Öffnen Sie die Tür (6) am Türgriff (7).•
Schieben Sie den Backrost (9) in den•
Heizraum (4) (Abb. B).
Legen Sie gegebenenfalls das Backblech•
(10) auf den Backrost (9) (Abb. B).
Legen Sie das Lebensmittel auf den Backrost•
(9) oder das Backblech (10).
Schieben Sie das Krümelblech (11) am Hand-•
griff (12) unten in das Gerät ein (Abb. C).
Schließen Sie die Tür (6) am Türgriff (7).•
Stellen Sie die Temperatur mit dem•
Temperaturwähler (1) ein.
Schalten Sie das Gerät ein, indem Sie den•
Zeitschaltknopf (2) im Uhrzeigersinn drehen,
um die Zeit einzustellen. Die Ein-/Aus-
Anzeige (3) leuchtet auf. Das Gerät beginnt
mit der Backvorgang.
Table of contents
Languages:
Other Princess Oven manuals

Princess
Princess 0118208501001 User manual

Princess
Princess 112371 User manual

Princess
Princess 112361 User manual

Princess
Princess 112370 User manual

Princess
Princess 182065 User manual

Princess
Princess 112359 User manual

Princess
Princess 01.183026.01.001 User manual

Princess
Princess 01.183314.01.7 User manual

Princess
Princess DeLuxe 01.182075.01.001 User manual
Popular Oven manuals by other brands

Belling
Belling Built-in Electric Induction Users guide & installation handbook

Blanco
Blanco BOSE 69PX Guide to installation

Zanussi
Zanussi FMW 5613 Instructions for the use and care

Blue Seal
Blue Seal Evolution GPE56 Installation and operation manual

AEG
AEG BPE742320M user manual

Metos
Metos CHEF 220 Installation and operation manual