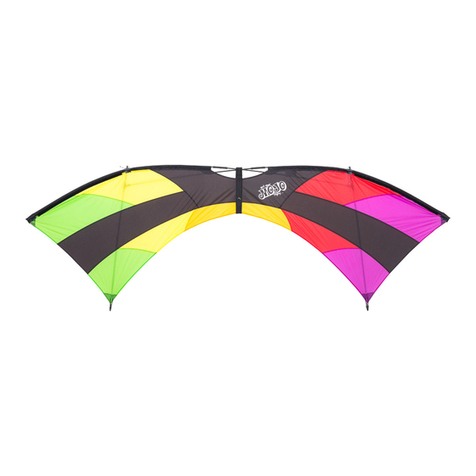
Prism Designs QUANTUM PRO User manual

OWNER'S MANUAL
2004 Prism Designs Inc. all rights reserved version 1.1 8-15-04
C

..for purchasing the Quantum Pro,
the most technically advanced sport
kite you can buy. The Pro was originally
conceived as a high performance version of the
Prism Quantum, but during an intense year of
development it evolved into a completely
unique, higher aspect design that shares only a
name and sail styling. If you are an advanced
pilot, the Quantum Pro will take you to the
expert level and beyond, effortlessly blending
laser-straight tracking with every trick in the
book. If you're just getting serious, the Pro is all
the kite you need for many happy hours to
come. The Pro is designed for experienced
pilots, so we will assume you are already familiar
with the basics of assembling, tuning, and flying
a typical sport kite. This owner's guide will
familiarize you with some of the unique features
of the Quantum Pro so you can get the most
fun and enjoyment from your investment.
SkyShark P200 and 5PT tapered wrapped
carbon frame for toughness, response, and a
wide wind range.
Optional adjustable counterweight system lets
you add mass as the wind increases and quickly
adjust the kite's center of gravity for a radical or
conservative flying style. Adding weight
facilitates yo-yo maneuvers and makes tricks
easier in high winds.
Yo-yo fittings on leading edge catch your lines
and let you fly normally in and out of yo-yo
maneuvers. Fittings are molded from an extra-
hard thermoplastic to reduce wear.
Five optional "safety stoppers" below the yo-yo
fittings catch your lines and prevent crashes even
if you give too much slack in a yo-yo move.
They offer extra security for the competition
pilot and will save many "walks of shame" as
you perfect your yo-yo moves.
Carbon glider bars fit over specially modified upper
leading edge fittings and allow your lines to slide
past the fittings without snagging during yo-yos.
Adjustable Spectra leechline in trailing edge of
sail lets you control the noise your kite makes.
Leave it loose for maximum precision and
competition flying, tighten it for silent flight and
to slow the kite in strong winds.
Extra-long bridle extensions reduce wear on
your flying lines and prevent them from
snagging and cutting into leading edge fittings.
CNC machined aluminum center T fitting
concentrates mass at the kite's center of gravity
for improved balance and allows quick
attachment of adjustable counterweights.
Three bridle response settings let you easily set
turning radius and response to your flying style.
1
1
2
2
3
3
4
4
5
5
6
6
9
7
7
8
8
9
FEATURES
THANKS!
2004 Prism Designs Inc. all rights reserved version 1.1 8-15-04
C

Tensioning the wingtips
Use the black tensioning lines at the wingtips to
lash the sail tight along the leading edge.
First pass the free end around the wingtip nock
and back through the loop to form a pulley.
Then tension the wing, pass the around the
wingtip once more, and tie off around the string
with two or three half hitches.
Check that no bridle legs are tangled behind the
spreaders.
Attach your flying lines to the far end of the
knotted grey bridle pigtail using a Lark's Head
knot. This provides a length of heavier string
between your flying lines and the kite to protect
the fittings from being cut by your lines.
Installing spars and standoffs
Push the upper and lower spreaders ALL THE
WAY into the elbow fittings on the leading edge,
then plug the male and female lower spreader
ends together through the aluminum center T
fitting.
Always grip the spars within an inch of the
fitting as you push them in to avoid a slip that
could puncture your sail.
To avoid cracking a spar, connect the two lower
spreaders at the T before you insert the
standoffs.
Tensioning the leechline
While we prefer the feel and precision of the
Quantum Pro without the leechline tensioned, a noisy
kite can be unwelcome in many areas and we urge you
to be respectful of others. If you prefer a silent kite,
tension the two white Spectra leechlines at the wingtips
the same way you did the tip tensioners. Use as little
tension as will keep the kite quiet. Overly tight
leechlines will slow the kite considerably and reduce
precision. When you find a setting you like, mark the
leechlines with a permanent marker for future
reference. If you fly on hard ground, cap your wingtips
with the large endcaps provided to protect the
tensioners from chafe.
Equipment list
Your Quantum Pro should come complete with:
Male lower spreader
Female lower spreader
Upper spreader
Velcro kite wrap
Travel sleeve
Yo-yo stopper kit
Wingtip endcaps
*An adjustable counterweight system with three
machined brass weights, adjustable armature,
and stainless thumbscrew is sold separately for
advanced pilots ready to explore yo-yo's and
roll-up moves. It is available from your kite
retailer or direct from Prism at
www.prismkites.com
ASSEMBLY
2004 Prism Designs Inc. all rights reserved version 1.1 8-15-04
C

YO-YO FITTING INSTALLATION
The yo-yo, or roll-up, is the latest thing in sport
kite tricks. An aggressive backflip and lots of
slack will cause your kite to flip over backwards
and keep going until it's back in flying position
with the lines wrapped fully around the kite.
Yo-yo fittings catch the lines as they slide down
the leading edge and let you steer normally
despite the rolled-up lines until you choose to
unroll it with a dramatic flourish.
The yo-yo is an advanced trick that will be
difficult until you have mastered the more
fundamental tricks such as the stall, the axel, the
backflip, and the fade. That's why we make the
yo-yo fittings an optional installation. Until
you're ready, the fittings will just give you more
things to snag your lines on and will make
disassembly more difficult should you ever
break a spar.
Your yo-yo fitting kit contains the following:
2 yo-yo fittings with zip ties
These fittings are specially molded from a hard
plastic to reduce wear. They should be installed
in the holes closest to the nose in the series of
holes along the leading edge.
10 zip ties for optional "safety stoppers"
These ties go into the holes below the main yo-
yo fitting and prevent your lines from sliding too
far if you give too much slack and miss the main
fittings in a yo-yo move. They offer extra
security for the competition pilot and will save
many "walks of shame" as you perfect your yo-
yo tricks.
2 extra zip ties
For backup in case you lose or break one.
Installation:
Clip the two yo-yo fittings over the leading edge
at the uppermost holes (nearest the nose).
Orient the fittings so they project outwards and
back. Use the zip ties provided to tighten them
into position. Pull the ties as tight as they will go.
Fit 5 zip ties through the remaining holes on
each leading edge as shown and tighten fully.
Use clippers or a sharp knife to trim all the ties
flush so they don't stick out and tear your sail.
Slide the two thin carbon glider bars under the
leading edge sleeve, over the upper leading edge
elbow fittings, and then back under the leading
edge sleeve. The bars should sit in the V-
grooves on the outer edges of the elbow fittings.
BE CAREFUL TO AVOID SPLINTERS AS
YOU HANDLE THE THIN RODS.
2 Glider bars
For installation over the upper leading edge
elbow fittings. These allow the lines to slide past
the upper leading edge fittings without snagging
in a yo-yo.
Yo-yo fittings
Safety stoppers
Glider bars
Tuck under leading edge
2004 Prism Designs Inc. all rights reserved version 1.1 8-15-04
C

While it is not necessary to adjust your bridle,
learning to do it will let you fly your kite more
easily in a wider wind range. The more you fly
the more you will be able to feel the differences
that tuning makes. Detailed tuning information
is available in the Kite Tuning section at
www.prismkites.com
Tuning for wind speed
On all sport kites, the bridle determines the
exact angle the kite holds to the wind as it flies
(the "angle of attack.") Tipping the nose slightly
further forward or further back affects the
speed, pull, and turn radius of the kite.
In light winds, your kite will fly easier with more
lift if you tip the nose forward (into the wind).
In stronger winds, the kite will feel less mushy
and turn more precisely if you tip the nose
backwards slightly.
Angle of attack adjustments can be made by
sliding the grey pigtails along the black outer
bridle yokes after first loosening the knots
slightly. Your kite will come with the pigtails on
the factory setting, which is indicated by a silver
mark on the outer yoke of the bridle. The factory
setting works best in the light to moderate side of
your kite's wind range, 6-10 mph.
Once you've gotten to know your kite, try moving
the pigtails slightly above or below the factory
marks, moving them only 1/4" at a time. You'll
find that the kite flies easier in light winds with
the pigtails up to 1/2" above the marks (nose
tipped forward), and in strong winds you'll find it
turns easier and pulls harder with the pigtails up
to 3/4" below the marks (nose tipped back).
Line Choices
With any sport kite, your choice of line will
make a big difference in how your kite flies.
Longer, stronger lines give you a bigger wind
window and slow the kite down, but they also
add drag in light winds and make tricks more
difficult. Lighter, shorter lines give a quicker,
more responsive feel but can break as the wind
increases. We suggest anywhere from 65' x 90#
to 120' x 150# depending on the conditions and
your flying style. For maximum performance use
the lightest 100% Spectra suitable for the
conditions.
Tuning for response and turn
radius:
Your Quantum Pro also has three bridle setting
options to customize the turning radius and
responsiveness to your flying style. Set each
inner leg above one of the three knots to adjust.
Setting #1: For finesse fliers who use small
control motions and a light "touch."
Setting #2: For all-around pilots who like a
moderate turning speed and solid tracking..
Setting #3: For agressive pilots who like poweful
and dramatic moves with large control inputs.
Pairs and team fliers who like rail-straight
tracking and moderate speed turns.
Outer yoke - black
(connects upper and
lower spreaders)
Inner yoke - black
(goes to center T)
1Tight turns, light touch
Adjust here for wind speed
2 Medium turns, medium response
3 Straightest tracking, for agressive pilots
Long pigtail - grey
(to flying lines)
TUNING AND ADJUSTMENT
2004 Prism Designs Inc. all rights reserved version 1.1 8-15-04
C

CARE AND REPAIR
The advanced materials in your kite are durable
and designed for a long life with minimal
maintenance. Keep your kite out of the sun
when not in use to keep the sailcloth from
fading. Beach sand is abrasive and will wear on
bridles and fittings, so do what you can to dust
off the sand after a session at the beach.
Compressed air works great for this if it's
available, and a freshwater rinse is a good idea if
your kite has been swimming in salt water. Keep
your kite out of hot car trunks and avoid using
solvents to clean the sail as they can dissolve the
adhesives in the seams.
Storage
To fold up your kite the way we do at the
factory, disconnect the upper and lower leading
edges at the joints and fold the lower leading
edges up against the upper leading edges. Then
fold the leading edges against the spine so all the
spars are next to each other. Tuck the standoffs
into the sail and roll the sail neatly up to (but not
around) the bundle of leading edges and spine.
Try to avoid wrinkles as you fold as they break
down the coatings in the sail and cause it to
stretch out. Use the Velcro strap provided or a
rubber band to bundle it all together, and don't
forget to include your loose spreaders.
Frame repairs
The carbon spars in your kite will not fatigue,
but occasionally you may break one learning
new tricks or pushing the limits in high winds.
Replacing a spar is quick and easy and many
pilots carry a couple of extras when traveling
just in case. Spare parts for all Prism kites are
available direct from our website at
www.prismkites.com.
Sail repairs
Your sail materials will last a long time unless you
like to fly near cactus or barbed wire fences.
Tears can also happen during assembly and
disassembly if a spar slips in your hands. Most
tears and punctures can be invisibly repaired
using a special transparent adhesive film called
Tedlar, which sticks to the back of the sail and is
unaffected by moisture or UV from the sun.
Tedlar repair tape is available from the spare
parts section of our website and will not affect
the performance of your kite on the average tear.
If your repair requires sewing, remove the frame
from the kite and send us just the sail so we can
get you a quote and take care of it for you. There
are very few mishaps that can't be effectively
fixed by our talented in-house repair team. To
send in a repair, download our repair form from
the website and include it with your sail so we
know who you are and how we can help.
Warranty
At Prism our warranty is simple: If you're not
happy we're not happy. If you have a problem
with your kite, contact us directly by phone,
fax, or e-mail and and we'll do what it takes to
make things right.
Please bear in mind that your kite can travel
as fast as 60mph and experience over 400g's
in a crash. Breaking a spar occasionally if you
push the limits is a normal part of sport
kiting, especially with the more fragile, higher
performance designs. Replacing a spar only
takes a minute and many pilots keep a spare
or two in their flight bag. Spares for all our
kites are available from our website at
www.prismkites.com.
Contact us
Feel free to contact us as you discover sport
kiting. We love to hear about your adventures
and we're always happy to help if you need
technical support of any kind. Our hours are
9am to 5pm Pacific Time Monday through
Friday.
Smooth winds and happy flying!
Prism Designs Inc.
4214 24th Ave. West
Seattle, WA 98199
206-547-1100
info@prismkites.com
206-547-1200 fax
www.prismkites.com
2004 Prism Designs Inc. all rights reserved version 1.1 8-15-04
C
Table of contents

