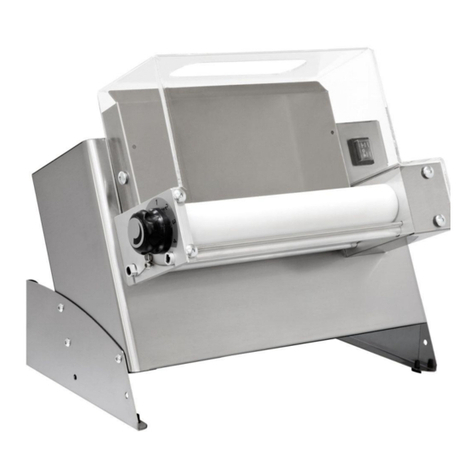
Prismafood TOUCH-AND-GO DSA310 User manual

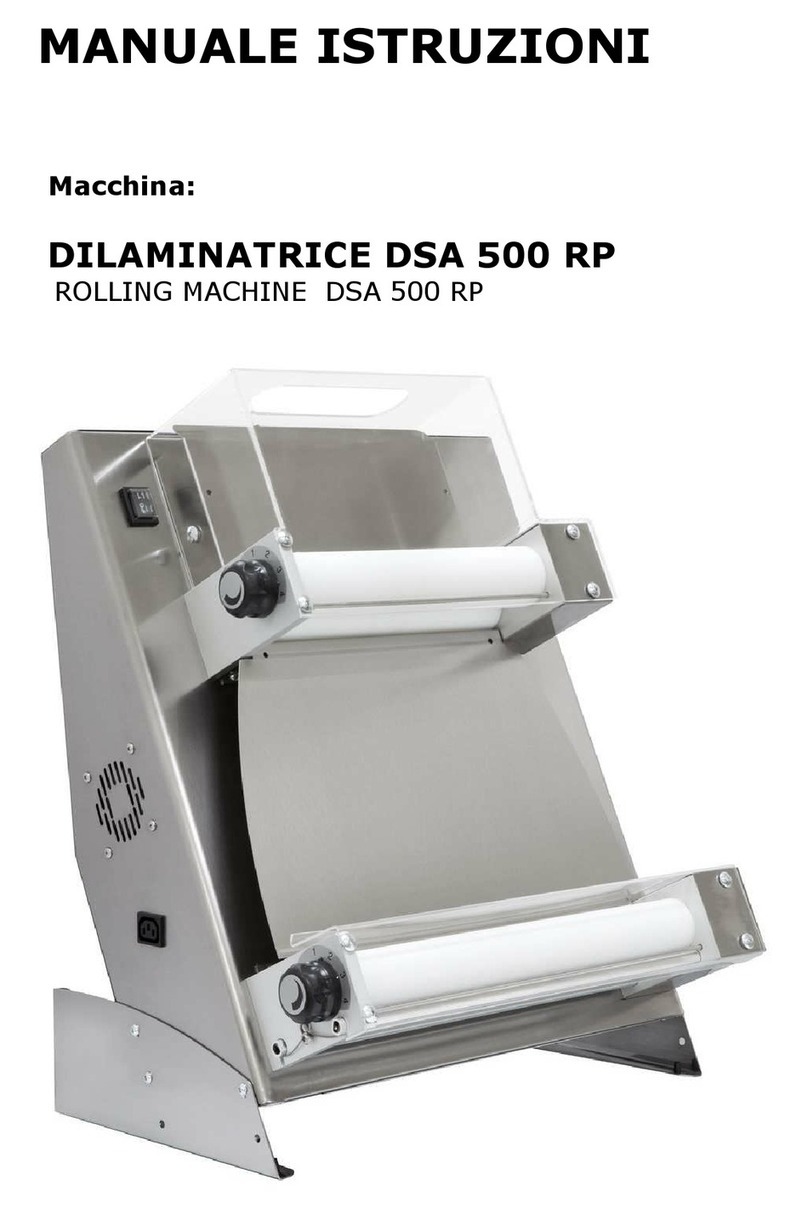
MANUALE ISTRUZIONI
Macchina:
DILAMINATRICE
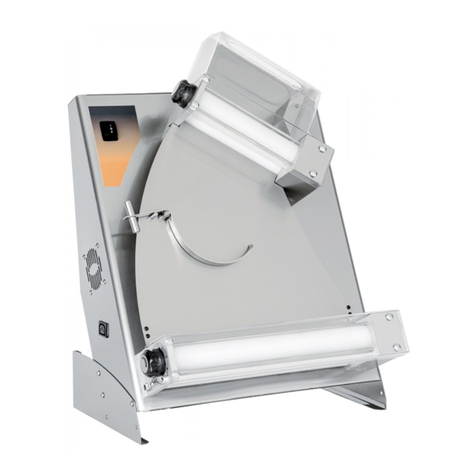
TOUCH-AND-GO DSA310 – DSA420
ROLLING MACHINE
DSA310 - DSA420 TOUCH-AND-GO

CARATTERISTICHE TECNICHE
Technical characteristics
Technische Kennzeichen
Caractéristiques techniques
Características técnicas
Características técnicas
Технические характеристики
DSA
m
a
d
e
i
n
I
t
a
l
y
DSA 310-420 TOUCH AND GO DSA 310-420
CENTRALINA DSA 420-500 RP
RP - Rulli paralleli e pedale elettrico | Parallel rollers end electric foot pedal | Parallelrollen und elektrischem fuBpedal | Rouleaux parallèles et pédale électrique | Rodillos paralelos y pedal eléctrico
Rolos paralelos e pedal elétrico |
С параллельными валиками и электрической педалью
OPTIONAL
Pedale elettrico per DSA310 / DSA420 | Electric foot pedal for DSA310 / DSA420 | Parallelrollen fur DSA310 / DSA420 | Pédale électrique pour DSA310 / DSA420
Pedal eléctrico para DSA310 / DSA420 | Pedal elétrico para DSA310 / DSA420 |
Дополнительные Позиции: Электрическая педаль для моделей DSA310 / DSA420
Peso pasta | Dough weigh | gewicht d. Teiges | Poids pâte
Peso de la masa | Peso da massa |
Вес теста
gr 80/210 210/700 220/1000 220/1000
Diametro pizza | Pizza diametre | pizza durchmesser | Diametre pizza
Diámetro de la pizza | Diâmetro da pizza |
Диаметр пиццы
cm 14/30 26/40 26/40 26/45
Alimentazione | power supply | Spannung | Alimentation
Alimentación | Alimentação |
Питание
volt 230 1 ph 50Hz
Potenza motore monofase | Single-phase motor power
Einphasiger motorleistung | Puissance moteur monophasé KW 0,25 0,37 0,37 0,37
Potencia del motor monofásico | Potência do motor monofásico
Мощность однофазного двигателя
hp 0,33 0,5 0,5 0,5
Dimensioni macchina | Machine sizes | Maschine abmessungen
Dimensions machine | Medidas de la máquina
Dimensões da máquina |
Размеры машины (д x ш x в)
lxpxh cm 44X38X61,5 54X41X72 54X41X68 63,5X41X68
Dimensioni imballo | Packing sizes | Verpackung Abmessungen
Dimensions emballage | Medidas del embalaje
Dimensões da embalagem |
Размеры упаковки (д x ш x в)
lxpxh cm 75X40X51 81x47,5x62,5 81X47,5X62,5 81X47,5X71
Volume | Volume | Volumen | Volume | Volumen | Volume |
Объем
mq 0,15 0,23 0,23 0,27
Peso netto | Net weight | Nettogewicht | Poids net | Peso neto
Peso líquido |
Вес-нетто
Kg 25 37 38 41
Peso lordo |Gross weight | Bruttogewicht | Poids brut | Peso bruto
Peso bruto |
Вес-брутто
Kg 26,8 39,4 40,4 43,4
DSA 310 T.GO
DSA 310
DSA420 T.GO
DSA 420 DSA 420 RP DSA 500 RPModello | Model | Modell | Modèle | Modelo | Modelo |
Модель
TOUCH AND GO
unica nel suo genere
brevettata e ideata da
Prismafood Solution
è una dilaminatrice ad
avviamento automatico
con sensori. È sufficien-
te avvicinare una pallina
di pasta allo scivolo
superiore e grazie a dei
sensori i rulli si avvieran-
no automaticamente e
la dilaminatrice inizierà
a funzionare. È possibile
impostare il tempo di la-
voro da 10 a 35 secondi
con il tasto “TIME SET”,
e la macchina si fermerà
automaticamente al ter-
mine del tempo prece-
dentemente impostato.
Grazie a questo metodo
innovativo è possibile
risparmiare energia
elettrica, tempo di la-
voro per l’operatore
e ridurre l’ usura dei
componenti meccanici.
TOUCH AND GO
patented Journal, there-
fore unique of its kind,
rolling machine with au-
tomatic start equipped
with sensors. Designed
by Prismafood Solu-
tion. Touch-sensitive it
switches on automati-
cally when the operator
brings near his hand
with the piece of dough.
You can set the work-
ing time from 10 to 35
seconds with the but-
ton “TIME SET” and the
machine will stop at the
end of the time previ-
ously setted. Thanks to
this innovative method
you can save energy,
working time for the
operator and reduce
the “wear and tear”
of mechanical com-
ponents
.
TOUCH AND GO
einzigartig, patetiert und
von Prismafood Solu-
tion lösung konzipiert,
ist eine Ausrollmaschi-
nen auto-start sensor.
Man braucht nur eine
kugel teig auf die obers-
te rutsche drauf tun und
dank an ein paar sen-
soren die rullen gehen
automatisch an und die
Ausrollmaschinen funk-
tioniert von alleine man
kann auch eine arbeit
zeit eingeben von 10 bis
35 sekünden, wenn sie
time set drüken, und die
machine hält automa-
tisch aus am ende von
der arbeit zeit dank an
diese innovative praktil,
kann man elektrizi-
tat energie sparen,
arbeitzeit für den
arbeiter und die re-
duzierung vom vers-
chleiß der mechani-
ker komponente.
TOUCH AND GO
brevetée, par consé-
quence unique, conçue
par Prismafood Solu-
tion, est une laminoir
équipée de capteurs
qui se met en marche
automatiquement. Ap-
portez une petite boule
de pâte dans la partie
supérieure du talus et
grâce à des capteurs
les rouleaux se lance-
ront automatiquement.
Vous pouvez définir le
temps de travail avec
le bouton “TIME SET
de 10 à 35 seconds. La
machine s’arrêtera à la
fin des secondes pré-
cédemment program-
mées. Grâce à cette
méthode vous pouvez
économiser l’énergie
électrique, temps de
travail pour l’opéra-
teur, réduire l’usure
des composants mé-
caniques.
TOUCH AND GO,
única en su género,
diseñada y patentada
por Prismafood Solu-
tion, es una laminadora
de arranque automático
con sensores. Con solo
acercar un bollo de
masa a la rampa supe-
rior, gracias a una serie
de sensores, los rodillos
se pondrán en marcha
automáticamente y la
laminadora comenzará
a funcionar. El tiempo
de funcionamiento se
puede ajustar entre 10 y
35 segundos con la tecla
“TIME SET”, y la máqui-
na se detendrá automá-
ticamente al finalizar del
tiempo definido.Gracias
a este método innova-
dor se ahorra energía
eléctrica y tiempo de
trabajo del operador,
además de reducirse el
desgaste de los com-
ponentes mecánicos.
TOUCH AND GO
único no seu género,
patenteado e conce-
bido pela Prismafood
Solution com sensores.
Basta aproximar uma
pequena bola de massa
à rampa superior e,
graças aos sensores, os
rolos arrancam automa-
ticamente e o laminador
começa a funcionar. É
possível definir o tempo
de trabalho de 10 a 35
segundos com o botão
“TIME SET” e a máquina
pára automaticamente
no fim do tempo pre-
definido. Graças a
este método inovado é
possível poupar ele-
tricidade, tempo de
trabalho do operador
e reduzir o desgaste
dos componentes
mecânicos.
TOUCH AND GO
это
единственная в своем
роде автоматическая
тестораскаточная
машина с датчиками,
запатентованная
и изобретенная
компание
Prismafood
Solution
Достаточно
приблизить шарик
теста к верхней части
ската: благодаря
специальным датчикам
валки запустятся
автоматически и
тестораскаточная
машина начнет
работать. При помощи
кнопки “TIME SET”
(настройка времени)
можно установить
время работы от 10 до
35 секунд, и машина
автоматически
остановится
по окончанию
установленного
времени. Этот
новый метод дает
возможность
увеличить экономию
электроэнергии,
уменьшить время
работы оператора и
износ механических
компонентов
.
IT
GB
D F ES P RU
SAVE ENERGY | TOUCH THE FUTURE | TOUCH AND GO

EMISSIONE:
2010
Il costruttore non si assume l'obbligo di notificare
eventuali successive modifiche del prodotto.
Inoltre si riserva a termini di legge la proprietà del
presente documento con divieto di manomissione,
riproduzione e trasmissione a terzi senza la sua
autorizzazione.
PREFAZIONE
Questo manuale è diretto a tutti coloro che sono
preposti all'installazione, l'uso e alla manutenzione della
dilaminatrice in modo che possano sfruttare nel migliore
dei modi le caratteristiche del prodotto.
E' importante che questo manuale sia conservato e
segua la macchina in tutti i suoi eventuali trasferimenti,
cambio di proprietà compreso, allo scopo di poter
essere consultato all'occorrenza e disporre quindi delle
informazioni necessarie per operare in condizioni di
sicurezza.
Il manuale è composto di:
- Capitoli
- Paragrafi
- Note
Il manuale è suddiviso nei seguenti capitoli:
CAPITOLO 1:
Informazioni generali.
CAPITOLO 2:
Installazione.
CAPITOLO 3:
Messa in funzione.
CAPITOLO 4:
Uso.
CAPITOLO 5:
Regolazioni.
CAPITOLO 6:
Manutenzione.
CAPITOLO 7:
Demolizione della mac-china.
CAPITOLO 8:
Servizio post-vendita.
EMISSION:
2010
The manufacturer is not under any obligation to notify of
any future modifications of the product.
All rights of this document are reserved and no
alteration or re-productions can be made without
permission of the manufacturer.
INTRODUCTION
This manual is specifically for the installation, use and
maintenance of Rolling machines, so you are able to
use the product in the best way.
It is important that the manual is kept in good condition
and should stay with the machine all the times,
including sale to another person, for security in the use
of the machine.
The manual includes:
- Chapters
- Paragraphs
- Notes
The manual is divided in the following chapters:
CHAPTER 1:
General information.
CHAPTER 2:
Installation.
CHAPTER 3:
Functioning.
CHAPTER 4:
Usage.
CHAPTER 5:
Regulations.
CHAPTER 6:
Maintenance.
CHAPTER 7:
Demolition of the machine.
CHAPTER 8:
After-sale service.

4
CAPITOLO 1
INFORMAZIONI
GENERALI
1.1
Garanzia
La durata della garanzia è di un anno e decorre dalla data
della ricevuta fiscale rilasciata all'atto dell'acquisto.
Entro tale periodo saranno sostituiti o riparati gra-
tuitamente e solo franco ns. stabilimento i particolari che
per cause ben accertate ed inequivocabili risultino difettosi
di fabbricazione, eccetto i componenti elettrici e quelli
soggetti ad usura.
Dalla garanzia sono escluse le spese di spedi-zione e il
costo della ma-nodopera.
La garanzia decade nei casi in cui si accerti che il danno
sia stato provocato da: trasporto, errata o insufficiente
manutenzione, imperizia degli operatori, manomissioni,
riparazioni eseguite da personale non autorizzato, inosser-
vanza delle prescrizioni del manuale.
Si esclude ogni rivalsa nei confronti del costruttore per
danni diretti o indiretti conseguenti al tempo in cui la
macchina rimarrà inoperosa causa:
avaria, in attesa per le riparazioni, o comunque riferibile
alla non presenza fisica dell'apparecchiatura.
1.2
Caratteristiche della macchina
La dilaminatrice è stata progettata e realizzata ad
esclusivo uso alimentare per la laminazione a freddo di
pasta per panificazione e dolci, allo scopo di facilitare la
formatura di dischi per la preparazione di: pizze, pane,
focacce, tortine ecc., mantenendo inalterate le caratteri-
stiche fondamentali dell'impasto.
Ogni dilaminatrice è composta da: una struttura metallica
in acciaio, da due gruppi di rulli, con relative protezioni, i
quali sono azionati tramite cinghie, da un motoriduttore
elettrico, comandato da un interruttore d’avviamento
alimentato tramite cavo con tensione di rete, da un
bilancino e due scivoli.
CHAPTER 1
GENERAL
INFORMATION
1.1
Warranty
Warranty is guaranteed for one year from date of purchase.
The date must be indicated on the guarantee on the day of
purchase.
The parts of the machine that could found have a
manufacturing
defect except electrical components or
parts worn out, will be changed and serviced free by us ex
-works within this period.
Delivery expenses and costs of labour are excluded from
the warranty.
The warranty will not be valid when the damage is due to:
transportation, incorrect or insufficient maintenance,
unskilled operators, damaging, repairs made by un-
authorised personnel, non-observance of the instructions of
the manual.
All reimbursements from the manufacturer are excluded for
direct and indirect damages caused in the time the
machine is inactive for the following reasons: breakdown,
waiting to be repaired, or anyway the non-presence of the
machine.
1.2
Characteristics of the machine.
Rolling machines was made with the intention for food
usage only to make dough for bakery and for, to make
easier the creation of disk shapes for : pizza, bread, buns,
cakes etc. maintaining the essential characteristics of the
mixture.
Every rolling machine is composed of: a metal structure in
steel, two sections of rollers with safety covers, which are
driven by a belt, an electrical motor connected by the cable
under the tension to the power system, a little balance and
two skids .

5
1.3
Caratteristiche tecniche
Technical characteristics
Descrizione
Description U.M. DSA310 DSA420
Dimensioni macchina
Machine dimension cm 44x 36,5 x 54,5 55 x 36,5x75
Peso netto
Net weight Kg 27 38
Temperatura d’esercizio
Operatine temperature °C + 15 ÷ +45
Peso pasta
Dough weight gr 80 ÷ 210 210 ÷ 700
Diametro pizza
Pizza diameter cm 14 ÷ 29 26 ÷ 40
Tensione d’alimentazione
Alimentation tension Vac 230 ( 1 Ph + N + T ) 50 Hz
Potenza assorbita
Absorbed power W 250 375
Potenza motore
Motor power W 240 370

6
sdsdsd
COMANDO SENSORE
1.4
Schemi elettrici
Electrical diagram

7
1.5
Informazioni sulla rumorosità
Il livello di pressione acustica ponderato A misurato su
un’identica macchina campione è risultato costante ed
inferiore a 70 dB (A).
1.6
Avvertenze generali per la sicurezza
La macchina, pur essendo conforme ai requisiti di
sicurezza previsti dalle norme di riferimento, elettriche,
meccaniche, igieniche, può costituire pericolo se:
- Usata per scopi e condizioni diverse da quelle previste dal
costruttore.
- Manomissione delle protezioni dei rulli
- Inosservanza delle prescrizioni previste per:
Installazione - Messa in funzione - Uso - Manutenzione.
IMPORTANTE
Tutte le operazioni d’installazione e manutenzione
devono essere eseguite da personale qualificato ed
autorizzato dal costruttore, il quale declina ogni re-
sponsabilità derivante da errata installazione o da
manomissioni.
1.7
Avvertenze per la sicurezza
IMPORTANTE
Leggere attentamente queste istruzioni prima di
utilizzare la macchina.
ATTENZIONE
Allo scopo di prevenire condizioni di pericolo e/o
possibili ferimenti causati da: corrente elettrica, organi
meccanici, incendio o di natura igienica, devono
essere osservate le seguenti avvertenze per la
sicurezza.
a - Mantenere in ordine il proprio posto di lavoro.
Il disordine comporta pericolo d’incidenti.
b - Valutare le condizioni ambientali.
Non utilizzare la macchina in ambiente umido, bagnato o
insufficientemente illuminato, in vicinanza di liquidi
infiammabili o gas.
c - Tenere lontano i bambini e i non addetti.
Non permettere che si avvicinino alla macchina o al posto
di lavoro.
d - Utilizzare la macchina nell'ambito della potenza di targa
e per il solo uso consentito.
Senza sovraccarico lavorerà meglio e in modo più sicuro.
e - Vestire in modo adeguato.
Non indossare abiti o accessori penduli che possano
impigliarsi negli organi in movimento. Usare scarpe
antiscivolo. Per motivi igienici oltre che di sicurezza, per i
capelli lunghi usare l'apposita rete e per le mani i guanti.
1.5
Information regarding acoustic noises
The acoustic pressure level well-pondered A measured on
an equal machine, turned out to be steady and lower of 70
dB (A).
1.6
General security indications
Although the machine is built in conformity to the required
security rules regarding electrical, mechanical and hygienic
regulations it can be dangerous if:
- it is used in cases and conditions different to those
described by the manufacturer.
- Modifications of the covers of the rollers.
- Inattention to the instructions of:
Installation - Functioning - Usage - Maintenance.
IMPORTANT
Installation and maintenance have to be done by
qualified personnel authorised by the manufacturer
who is not responsible for any mistaken installation or
violation of integrity
.
1.7
Security indications
IMPORTANT
Carefully read the instructions before using the
machine.
WARNING
To avoid dangerous conditions and/or possible injuries
caused by: electric current, mechanical parts, fire or
hygiene problems, you must follow the safety warnings
step by step.
a - Keeping in order your working area.
Disorder can cause dangerous accidents.
b - Considering environmental conditions.
Do not use the machine in humid, wet or badly lit
environments, close to inflammable liquids or gas.
c - Keeping away from children and non authorised
personnel.
Do not permit them to go near the machine or the working
area.
d - The machine should be used only with the correct
voltage.
Normal usage gives better results.
e – Dressing in adequate way.
Do not wear hanging clothes or any items which can be
caught in the machine.
Use non-slip shoes. For hygiene and safety keep your hair
tied back and wear protective gloves.

8
f - Proteggere il cavo d’alimentazione. Non tirare il cavo per
staccare la spina della presa.
Non esporre il cavo ad elevate temperature, a contatto con
spigoli taglienti, acqua, o solventi.
g - Evitare posizioni insicure. Ricercare la posizione più
idonea che assicuri sempre l'equilibrio.
h - Prestare sempre la massima attenzione.
Osservare il proprio lavoro. Non usare la macchina quando
si è distratti.
i - Staccare la spina dalla presa.
Alla fine d’ogni utilizzo, prima delle operazioni di pulizia, di
manutenzione o spostamento della macchina.
l - Cavi di prolungamento in aria aperta. Non devono
essere usati.
m - Controllare che la macchina non sia danneggiata.
Prima di usare la macchina, controllare attentamente
l'efficienza dei dispositivi di sicurezza. Verificare che: le
parti mobili non siano bloccate, che non vi siano
componenti danneggiati, che tutte le parti siano state
correttamente montate e che tutte le condizioni che
potrebbero influenzare il regolare funzionamento della
macchina siano ottimali.
n - Far riparare la mac-china da personale quali-ficato.
Le riparazioni devono essere eseguite esclusivamente da
persone qualificate, usando parti di ricambio originali.
L'inosservanza di queste prescrizioni può costituire
elemento di pericolo per l'utilizzatore.
CAPITOLO 2
INSTALLAZIONE
2.1
Prescrizioni a carico dell'utente
Le condizioni ambientali del luogo dove viene installata la
macchina devono avere le seguenti caratteristiche:
- essere asciutto
- fonti idriche di calore adeguatamente distanti
- ventilazione ed illuminazione adeguata rispondenti alle
norme igieniche e di sicurezza previste dalle leggi vigenti.
Il piano d’appoggio deve essere orizzontale, non devono
essere posti nelle immediate vicinanze della macchina
ostacoli di qualunque natura che possano condizionare la
normale ventilazione della stessa.
IMPORTANTE
La rete elettrica deve essere dotata di un interruttore
automatico differenziale con caratteristiche adeguate a
quelle della macchina nel quale la distanza d’apertura
dei contatti sia di almeno 3 mm.
In particolare è indispensabile un efficiente impianto di
terra.
Verificare che la tensione d’alimentazione e la frequenza
dell'impianto, siano compatibili con i valori riportati sia nelle
caratteristiche tecniche (1.3) che nella targhetta apposta
sul retro della macchina.
f - Protecting the cable
Do not pull the cable to extract the plug.
Do non leave the cable near high temperatures, sharp
object, water or solvents.
g - Avoiding insecure positions.
Find the best surface to ensure the machine is balanced.
h - Always paying maximum attention.
Do not be distracted when using the machine.
i - Taking the plug out.
When the machine is not in use, before cleaning,
maintenance and moving it.
l – Do not use further extensions.
m – Checking that the machine is not damaged.
Before using the machine, carefully check that all security
devices are working.
Checking that: the mobile parts are not blocked, there are
not any parts damaged, all the parts have been set-up
correctly and all the conditions that could influence the
regular functioning of the machine, are in working order.
n - Repairing the machine by qualified personnel.
The repairs can only be done by qualified people, using
original spare parts.
The non-compliance with these rules can represent danger
for the user.
CHAPTER 2
INSTALLATION
2.1
Instructions for the User
The environmental conditions in which the machine must
be installed, must follow following characteristics:
- be dry
- water and heat sources at safe distance
-adequate ventilation and lighting (corresponding to
hygiene and security rules following the existing laws).
The surface must be horizontal, for normal ventilation of the
machine no objects should obstruct.
IMPORTANT
The electric net must be provided with an automatic
differential switch and this has to be suitable to the
machine and have a distance between the contacts of
at least 3 mm. It is particularly important to have a
good ground system.
Verify that the electrical set-up corresponds with the
numbers of the technical characteristics (1.3) and on the
small plate at the back of the machine.

9
2.2
Modalità
d'installazione
La macchina viene fornita in un imballo chiuso.
Dopo aver estratto dall'imballo la macchina procedere nel
modo seguente:
- Posizionare la macchina
nella dislocazione prevista.
- Asportare il film protettivo evitando di usare utensili che
possono danneggiare le superfici.
NOTA
Tutti i particolari relativi all’imballo devono essere
smaltiti secondo le leggi vigenti
2.3
Collegamento elettrico
Il collegamento alla rete elettrica della macchina viene
effettuato tramite cavo d’alimentazione dotato di spina.
2.4
Posizionamento della macchina
La presa della rete elettrica deve essere facilmente
accessibile, non deve richiedere alcuno spostamento.
La distanza tra la macchina e la presa deve essere tale da
non provocare la tensione del cavo d’alimentazione inoltre
detto cavo non deve mai trovarsi sotto gli appoggi della
macchina.
CAPITOLO 3
MESSA IN FUNZIONE
3.1
Dispositivi di comando
La macchina è dotata dei seguenti dispositivi di nel lato
sinistro:
interruttore 1-0-2
-posizione n°1 – funzione del sensore
- pozione n°0 – macchina spenta
- posizione n°2 – funzione continua
Sul frontalino anteriore centralina comandi:
- Tasto nero Set time (impostazione tempo di lavoro);
- Tasto rosso Arresto;
- Segnalatore verde Macchina avviata.
2.2
Installation methods
The machine is supplied in a closed package.
After taking out the two covers, the higher slide and the
machine proceed as follows:
- Position the machine in the corresponding location.
- Remove protection, avoid contact with utensils that can
damage the surfaces.
NOTE
All the material belonging to the packaging, must be
disposed in conformity of the law
2.3
Electrical connection
The connection of the machine to the electrical network is
made through a cable provided with a plug.
2.4
Positioning of the machine
The plug must be accessible, does not have to require any
kind of movement.
The cable from the machine to the wall plug must not be
pulled tightly, also do not rest the machine on the cable.
CHAPTER 3
FUNCTIONING
3.1
Control devices
The machine is provided with the following control devices
on the left side:
Switch 1-0-2
-position n°1 – sensor function
- position n°0 – machine off
- position n°2 – continuous function
on the front panel :
- Black switch Set time (setting the working time);
- Red switch stoppage;
- Green light Machine starts.

10
3.2
Verifica funzionale
Dopo aver inserito la spina del cavo d’alimentazione nella
presa della rete elettrica, la macchina è pronta per la
verifica funzionale.
Avviamento continuo: premere l’interruttore a lato in
posizione 2 e la macchina si avvia.
Arresto: premere l’interruttore a lato in posizione 0 e la
macchina si arresta.
Avviare la macchina a vuoto per un minuto, verificare
che il funzionamento sia regolare.
CAPITOLO 4
USO
Prima di iniziare ogni ciclo di lavoro accertarsi che la
macchina sia perfettamente pulita in particolare le superfici
a contatto con la pasta.
Qualora necessario procedere alla pulizia secondo le
modalità
4.1
Uso della macchina con modalità Touch and Go
AVVIAMENTO
Premere l’interruttore a lato in posizione 1
Premere il tasto nero della centralina “SET TIME” per
impostare il tempo di lavoro da 10 a 35 secondi; la
macchina è pronta per la fase operativa.
Prima di introdurre
nell’apertura della protezione superiore
la pallina di pasta leggermente infarinata e
precedentemente lievitata (almeno 6-8 ore) schiacciare a
cuneo una parte del bordo della stessa allo scopo di
favorirne l'ingresso nella coppia di rulli superiori. I rulli si
avviano automaticamente a contatto della pasta con lo
scivolo superiore.
All'uscita di questi, la pasta subirà una prima riduzione
dello spessore , assumendo una forma ovale, poi
scivolando sul bilancino ruoterà in senso trasversale di
circa 90° disponendosi per il successivo passaggio nella
coppia di rulli inferiori dai quali uscirà un disco la cui
formatura, buona ma non ottimale, necessita di qualche
ritocco manuale. I rulli termineranno di girare
automaticamente al termine del tempo
precedentemente impostato.
ARRESTO
Premere l’interruttore a lato in posizione 0
3.2
Functional verification
After you have inserted the line cord into the socket, the
machine is ready for the functional verification.
Continuous mode: press the switch at the side in
position 2 and the machine will start.
Stop: press the switch at the side in position 0 and the
machine will stop.
Start the machine without using it, let it run for 1
minute and make sure it is functioning perfectly.
CHAPTER 4
USAGE
Before every work-cycle always make sure the machine is
perfectly clean, in particular those surfaces that get in touch
with the dough. If necessary clean the machine following
point
4.1
Usage of the machine with Touch and Go mode
TO START
press the switch at the side in position 2
Press the black switch of the unit “SET TIME” to set the
working time from 10 to 35 seconds; the machine is ready
for the operational phase.
Before you introduce in the opening of the highest cover
the small ball of dough made with flour and left to rise (at
least from 6 to 8 hours) squash the sides slightly so it can
easily go through the highest rollers . The rollers are
automatically started with the contact of the dough
with the top slide.
When the dough comes out you will see a reduction of
thickness, with an oval shape, then sliding along the scale
it will make a turn of about 90° ready to go under the
lowest rollers out of which it will have a disk shape. This
shape is not perfect so it needs the finishing touches by
hand.
The rollers turn will end automatically at the end
of the time previously set.
TO STOP
press the switch at the side in position 0.

11
CAPITOLO 5
REGOLAZIONI
Le regolazioni consigliate hanno carattere puramente indicativo
poiché le regolazioni vanno definite sperimentalmente per la
presenza delle seguenti variabili: caratteristiche dell'impasto,
grammatura, spessore, grandezza e forma del disco.
La macchina è fornita con regolazioni di massima, idonee per
pizze di media grammatura.
5.1
Regolazioni dello spessore
IMPORTANTE
Tutte le regolazioni devono essere eseguite con macchina
ferma.
Per soddisfare le singole esigenze, la macchina consente di
ottenere diversi spessori della pasta ruotando la manopola, il cui
sbloccaggio si ottiene tirando il pomello nero.
Lo spessore è modificato in funzione del senso di
rotazione del pomello:
-spessore minimo (-) ruotare in senso antiorario
-spessore massimo (+) ruotare in senso orario.
Per ottenere il miglior risultato si consiglia di differenziare le
regolazioni:
Es.:
rulli superiori apertura 3,5 mm
rulli inferiori apertura 2 mm
NOTA
Per evitare la frastagliatura della pasta, eseguire un unico
passaggio attraverso i rulli.
5.2
Regolazione della forma
Per ottenere una buona formatura del disco è indispensabile
adeguare la sensibilità della bilancia alle variazioni di peso della
pasta, allo scopo di modificare la disposizione di quest'ultima da
verticale a perfettamente orizzontale prima dell'ingresso nei rulli
inferiori.
NOTA
Assicurarsi che il bilancino, in condizione di riposo, si
posizioni sempre in alto.
5.2.2
Regolazione del bilancino
Questa regolazione consente di variare la velocità di rotazione
della pasta.
Svitando la vite di bloccaggio è possibile modificare la posizione
del contrappeso e conseguentemente la sensibilità secondo il
suo posizionamento nell’asola del bilancino.
CHAPTER 5
REGULATIONS
Regulating the machine can only be re-commended as
there are different characteristics of: the dough, the weight,
the thickness, the size and the shape of the disk.
Therefore the correct regulating of the machine must be
made by experimenting.
The machine is provided with medium size regulation.
5.1
How to regulate the thickness
IMPORTANT
All the regulations have to be done when the machine
is off.
With this machine you can have different thickness’ of
dough to suit all requirements, just by turning Knob you can
unblocked them pulling the black lever.
The thickness can be modified turning the knob:
- (-) turning clockwise for minimum thickness
- (+) turning anti-clockwise for maximum thickness.
To obtain the best results we suggest you variegate the
different regulations.
Ex :
Superior roller : 3,5 mm
Lower roller : 2 mm
NOTE
To avoid breaking the dough, let it pass only once
through the rollers.
5.2
How to regulate the shape
To obtain the right shape of the disk , it is necessary to
readjust the scale to the alteration of the weight of the
dough to modify the position of the vertical perfectly to
horizontal before entering the lowest rollers.
NOTE
Make sure that the scale is in the highest position
when not in use.
5.2.2.
How to regulate the small scale
This regulation gives the possibility to alter the rotation
speed of the dough. Unscrewing the blocking screw it is
possible to modify the position of the counterbalance and
its sensibility depending on its positioning in one of the
three holes in the small balance.

12
Es.:
Massima sensibilità:
- posizionare il contrappeso all’interno dell’asola;
- consigliata per basse grammature.
Media sensibilità:
- posizionare il contrappeso al centro dell’asola;
- consigliata per medie grammature.
Minima sensibilità:
- posizionare il contrappeso all’esterno dell’asola;
- consigliata per alte grammature.
A fine regolazione bloccare il contrappeso riavvitando la
vite.
CAPITOLO 6
MANUTENZIONE
ATTENZIONE
Prima di eseguire qual-siasi intervento di ma-
nutenzione, pulizia compresa, si deve staccare la
spina dalla presa della rete d’alimentazione.
In caso di malfunzionamento o di guasto della
macchina rivolgersi esclusivamente ai cen-tri
d’assistenza autorizzati dal costruttore (vedi Cap.8).
6.1
Pulizia
La pulizia deve essere eseguita alla fine d’ogni utilizzo in
osservanza delle norme igieniche e a tutela della
funzionalità della macchina.
Con l'ausilio di un pen-nello idoneo procedere ad una
prima rimozione dei residui di farina e pasta.
Togliere dalle loro sedi le due protezioni, il bilancino e i
due scivoli,
sganciare le molle sfilare i raschiapasta quindi ruotare le
leve di regolazione in posizione massima apertura,
condizione di massima apertura dei rulli .
Pulire accuratamente la macchina e tutti i particolari
compresi quelli smontati usando una spugna o un panno
inumiditi con acqua e detergente. Risciacquare quanto
basta per la completa rimozione del detergente.
Asciugare con carta assorbente per uso alimentare,
quindi ripassare prima le superfici a contatto con la pasta
e poi tutta la macchina con un panno morbido e pulito
imbevuto con disinfettante specifico per macchine
alimentari.
ATTENZIONE
Si raccomanda di non utilizzare in nessun caso
prodotti chimici non alimentari abrasivi o corrosivi.
Evitare nel modo più assoluto di usare getti d’acqua,
utensili vari, mezzi ruvidi o abrasivi quali pagliette in
acciaio, spugne, ecc. che possano danneggiare le
superfici ed in particolare compromettere la
sicurezza sotto il profilo igienico.
Rimontare nell'ordine: i raschiapasta, le molle, gli scivoli,
il bilancino e le protezioni.
Ex.:
Maximum balance:
- position the counter-balance in the inside hole;
- this is recommended for lower weights.
Medium balance:
- position the counter-balance in the middle hole;
-this is recommended for medium weights.
-
Minimum balance:
- position the counter-balance in the extreme hole;
- this is recommended for higher weights.
At the end of the regulation block the counterbalance screwing the
screw.
CHAPTER 6
MAINTENANCE
WARNING
Before doing any kind of maintenance or cleaning you must
take out the plug.
In any case of malfunctioning or damages of the machine you
must apply for authorised assistance from the manufacturer.
(See chapter 8)
6.1
Cleaning
Cleaning must be done every time the machine has been used
following all the rules to prevent malfunctioning of the
machine and for hygienic purposes.
Using a proper brush, first clean the residue of flour and dough.
Release the springs, loosen the dough scrapers then turn the
regulating levers in position, maximum opening of the rollers .
Clean very carefully the machine and all the parts, also the
disassembled parts, using a sponge or a cloth dampen with tepid
water and detergent. Rinse out very well so to remove completely
the detergent. Dry with blotting paper, then clean first the surface in
contact with the dough and then all the machine with a clean and
soft cloth soaked with a specific disinfectant for alimentary
machines.
WARNING
It is important not to use chemical abrasive or corrosive
products. Absolutely avoid to use running water, non-smooth
tools such as steel wool, sponges etc… these can damage the
surface and compromise the hygienically safety.

13
Verificare che tutti i particolari siano stati
correttamente posizionati e fissati.
6.2
Lubrificazione alberi e rulli
Con frequenza annuale è indispensabile procedere alla
lubrificazione degli alberi e dei rulli.
Dopo aver smontato: le protezioni, gli scivoli, le molle e i
raschiapasta, svitare le viti di fissaggio e smontare prima
lo schienale e successivamente i supporti , sfilare i rulli e i
giunti. Pulire accuratamente tutti i particolari con l’ausilio
di una spugna, acqua tiepida e detergente per uso
alimentare, risciacquare quanto basta ed asciugare con
carta assorbente. Lubrificare sia gli alberi sia i fori dei rulli
con una ragionevole quantità d’olio di paraffina.
Rimontare e fissare tutti i particolari procedendo in ordine
inverso rispetto alla sequenza di smontaggio.
6.4
Possibili anomalie
Anomalia Causa Soluzione
- La macchina
non si avvia
- Mancanza
d’energia elettrica
nella rete
- Il comando a
pedale è collegato
alla macchina.
- Verificare: il
contattore
generale, la
presa, la spina
e il cavo
d’alimenta-
zione.
- Premere i
comandi a
pedale
Mount everything in this order: the scrapingdough pieces, the
springs, the slides and the protections.
Verify that all pieces have been correctly positioned and fixed.
6.2
Lubrication of shafts and rollers
It is necessary to grease shafts and rollers every year. Take off the
protections, the slanted wall, the springs and the doughscrapers;
unscrew the fixing screws and take off first the back-panel and
then the stands and ; Take off the rollers and the joints . Clean all
these parts accurately by means of a sponge, warm water and food
detergent, rinse thoroughly and dry it with absorbing paper. Grease
both the shafts and the
back on and fix all the parts, starting from the last taken-off piece.
6.4
Possibles anomalies
Anomaly Cause Solution
- The machine
does not start
-Electrical power is missing
- The foot - control is on
- Check the
general
contactor, the
plug and the
feeding cable
- Push the foot
pedal

14
CAPITOLO 7
DEMOLIZIONE DELLA MACCHINA
In caso di smantella-mento e/o demolizione della
macchina, i particolari che la compongono non pre-
sentano un grado di pericolosità tale da ri-chiedere
l'adozione di particolari cautele.
Per facilitare le operazioni di riciclag-gio dei materiali,
vanno separate dalla macchi-na, tutte le parti che
compongono l'impianto elettrico, i componenti
termoplastici e le cinghie di trasmissione.
CAPITOLO 8
SERVIZIO POST-
VENDITA
8.1
Parti di ricambio
Per la richiesta di parti di ricambio riferirsi alle figure e
tab. 1
Italia
Prismafood s.r.l.
Via Tabina,18
33098 Valvasone (PN)
Tel.(+39)0434-85081
Fax(+39)0434-857878
Stati CEE:
Rivolgersi esclusivamente al proprio rivenditore.
CHAPTER 7
DEMOLITION OF THE MACHINE
In cases of dismantling and/or demolition of the machine, the pieces
which the machine is made of, do not present any kind of danger
that necessitates any particular caution.
To facilitate the recycling process of the materials, you must
separate all electrical and thermo-plastic components.
CHAPTER 8
AFTER SALE SERVICE
8.1
Spare parts
For a demand of spare parts, see the pictures and tab. 1.
Italia
Prismafood s.r.l.
Via Tabina,18
33098 Valvasone (PN)
Tel.(+39)0434-85081
Fax(+39)0434-857878
EEC Countries:
Contact exclusively place of purchase.
This manual suits for next models
4
Table of contents
Other Prismafood Commercial Food Equipment manuals
Popular Commercial Food Equipment manuals by other brands
Vulcan-Hart
Vulcan-Hart E30TB Installation and operation manual

Continental Refrigerator
Continental Refrigerator DL3RRFE-SS-PT-HD Installation and operation manual

BE&SCO
BE&SCO Betamax 20 manual
Prince Castle
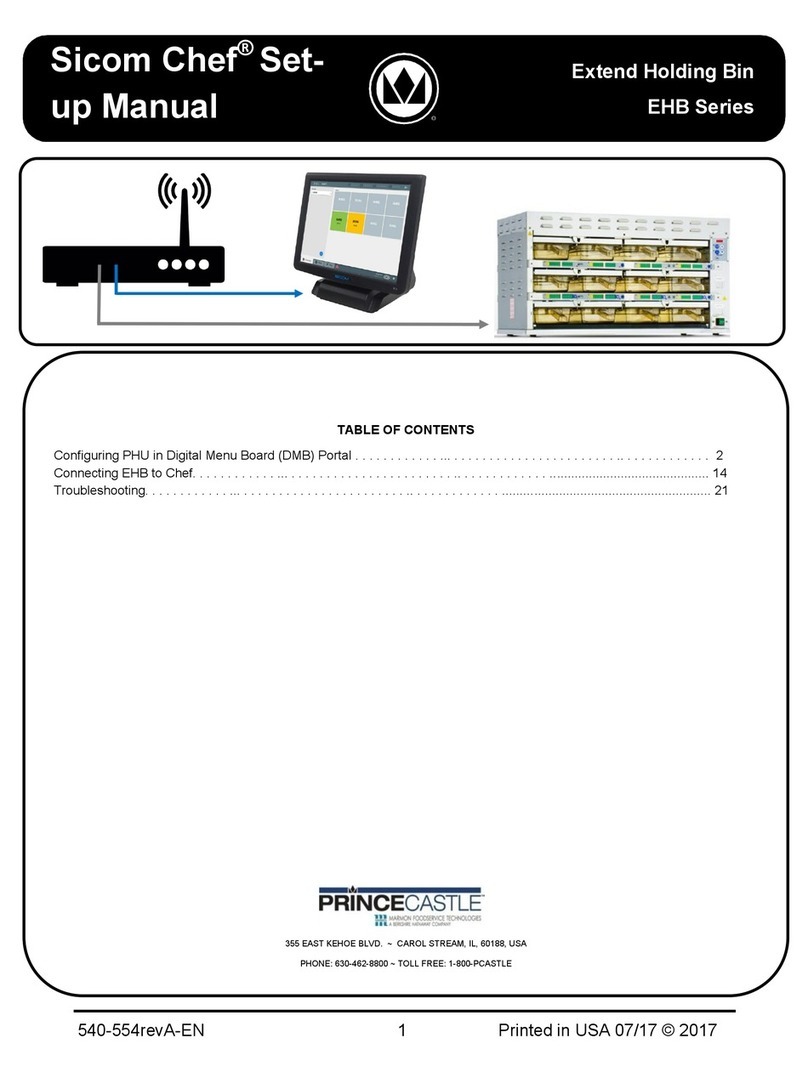
Prince Castle Sicom Chef EHB Series Setup manual
Gastrodomus
Gastrodomus GAL4100TN user manual
Henny Penny
Henny Penny LOV LVE-102 Operator's manual
