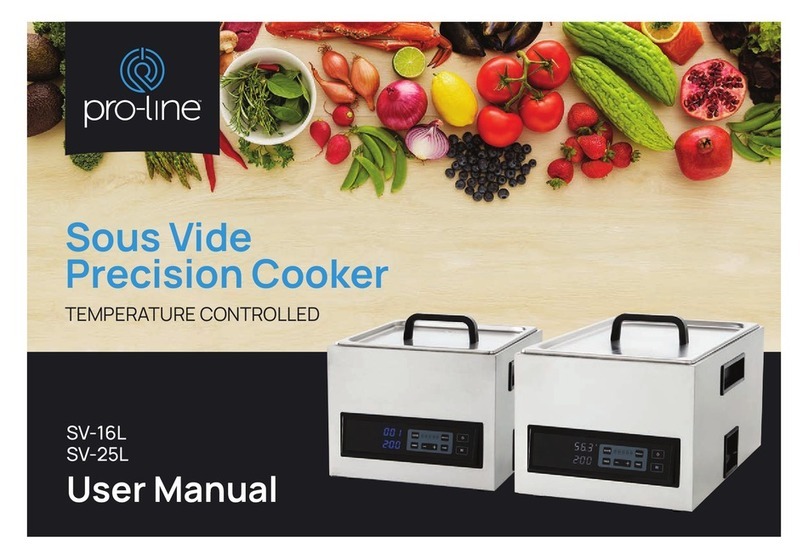
Pro-Line Boats SV-C1 User manual

SV-C1
User Manual
IPX7 COMMERCIAL
SOUS VIDE
PRECISION COOKER

Congratulations on your purchase
of a Pro-line Commercial Sous Vide Precision Cooker.
Note: Please read through the instructions carefully before using or installing the product and ensure that the
manual is kept in a safe place for future reference.
The system must be properly installed and located in accordance with the installation instructions before it is used.
During the set up of this product if you have any questions / comments / issues DO NOT RETURN TO STORE.
FOR SERVICE AND TECHNICAL ADVICE VISIT WWW.PROLINEAUSTRALIA.COM.AU/CONTACT
Electrical Requirements:
Australia / New Zealand 220-240V 50/60Hz
Due to manufacturing alterations product may
vary slightly from that pictured.
Pro-line Australia
PO Box 4187
Norwood South LPO
South Australia 5067
Email: info@prolineaustralia.com.au
Web: www.prolineaustralia.com.au
Find us
/prolineaustralia
/proline_australia

INSTALLATION AND OPERATING INSTRUCTIONS 3
• All components need to be installed in accordance with the
user manual instructions for correct performance of unit.
READ ALL INSTRUCTIONS CAREFULLY BEFORE OPERATION OF THE UNIT
• Proline recommends a safety switch is installed between the
Sous Vide Precision Cooker and the wall plug.
• This appliance should be used in conjunction with a safety switch.
• This appliance is not intended for use by persons (including
children) with reduced physical, sensory or mental capabilities,
or lack of experience and knowledge, unless they have
been given supervision or instruction concerning use of the
appliance by a person responsible for their safety.
• Do not operate appliance with a damaged cord or plug or after the
appliance malfunctions, or has been damaged in any manner.
• If the cord is damaged, it must be replaced by the
manufacturer, its service agent or similarly qualified persons
in order to avoid a hazard.
• Do not use appliance for other than Intended use.
• Do not disassemble, repair or re-form the unit. It may cause
injury, fire or other malfunctions. A qualified service agent
must make all service adjustments. Removing any part in
attempt to service the unit will void the warranty.
• To protect against fire, electric shock and personal injury, do
not immerse the power cord or plug in water or other liquids.
• Do not fill water past the ‘MAX’ fill line. Do not immerse the
upper section of the machine in water or other liquid.
• Do not use this appliance outdoors or on wet surfaces. It is for
household, indoor use only.
• Do not place the appliance or power cord on or near the edge
of a bench or table during operation. Always ensure cooking
container is out of reach of children.
• Do not place the appliance or power cord on or near a hot
surface or any other heat source.
• Do not operate the appliance near explosive or flammable
material.
• Place your cooking container on a heat protector or mat to
avoid damaging work surface. Do not operate the unit on an
inclined surface. Operate on a dry, flat and stable surface.
• Do not use attachments not recommended or sold by the
manufacturer as it may lead to fire, electric shock or injury.
• If an extension cord is used with this unit, the extension cord
must have a rating equal to the rating of this appliance.
• Children should be supervised to ensure they do not play with
the appliance.
• Unplug the unit when not in use and before cleaning. Allow
the appliance to cool before handling it or emptying the water
container.
• Use only clean water with this appliance.
OPERATION CONDITIONS & SAFETY PRECAUTIONS

4INSTALLATION AND OPERATING INSTRUCTIONS
CAUTION:
The cooking container, water bath, submerged part
of appliance and food pouches will become hot during use, use
extreme caution to avoid burns. Always allow system to cool
before handling or emptying water bath.
CAUTION:
Do not submerge the appliance past the ‘MAX’ level
mark. Extreme care must be taken to ensure the water level in
the cooking container does not go higher than the ‘MAX’ level
line on the appliance when food pouches are added to the water
bath. Allow sufficient room to accommodate the volume of food
pouches without exceeding the ‘MAX’ level line. Ensure food
pouches are completely submerged.
IMPORTANT:
Do not operate the appliance without sufficient
water in the cooking container. The water level must be above
the minimum ‘MIN’ level mark and completely cover submerged
food.
A heatproof stationary clip or similar may be used to attach the
sealed food pouch to the side of the water container to prevent
it moving around during cooking and keep it submerged.
Ensure the clip does not perforate the food pouch.
System Specifications Sous Vide Precision Cooker
Model Code SV-C1
Product Dimensions 159 (D) X 121 (W) X 285 (H) mm
Product Weight 1.6KG
Power 220-240V ~ 50/60Hz, 1500W
Temperature Range 5-95°C
Time Setting Range 5 minutes - 99 hours 59 minutes
Working Capacity 50 Litres Covered Container

INSTALLATION AND OPERATING INSTRUCTIONS 5
SOUS VIDE COMPONENT IDENTIFICATION
1. Touch Control Panel
2. Handle
3. Maximum Water Level
‘MAX’ mark
4. Minimum Water Level
‘MIN’ mark
5. Water Container
Attachment Arm
6. Water Inlet
7. Water Outlet
8. Quick release screw
1
3
5
8
2
6
4
7

6INSTALLATION AND OPERATING INSTRUCTIONS
SV-C1 CONTROL PANEL
1. Power Button
2. Set Temperature/Time
3. Start/Stop
4. Increase
5. Decrease
6. Set Temperature Unit
7. Temperature Display
8. Set Temperature Display
9. Time Display
10. Heat Indicator
11. Clean Reminder
12. Circulation Pump
4 1
3
6
9
10
11
12
8
7
2
5

INSTALLATION AND OPERATING INSTRUCTIONS 7
SV-C1 CONTROL PANEL DESCRIPTION
Ref Description
1. Power
In standby mode press to turn unit on. The current temperature will
displayed.
Second press will turn unit off to standby mode. Fan will automatically
stop after approximately 30 minutes.
2. Set Temperature/Time
Switches between Temperature and Time settings.
First press, Temperature display will flash, set desired temperature
with Increase/Decrease buttons.
Second press, Time display will flash, set desired cooking time
with Increase/Decrease buttons.
If no settings are selected the display will flash 10 times, then exit Set
Temperature/Time mode.
3. Start/Stop
Press Start/Stop to start the machine, heating and Circulation will start.
Press Start/Stop again to return the machine to standby mode.
4. Increase
‘+’ increases the Temperature and Time settings.
Ref Description
5. Decrease
‘-’ decreases Temperature and Time settings.
6. Set Temperature Unit
Press to switch between Celsius and Fahrenheit temperature units.
7. Temperature Display
Displays the actual temperature of the water bath at that moment.
8. Set Temperature Display
Displays the set operating temperature.
9. Time Display
Prior to the Start/Stop button being pressed, the set time is displayed.
In working mode the time remaining from the set time is displayed.
10. Heat Indicator
Icon Flashes when Heating.
11. Cleaning Reminder
Icon will illuminate after 20 individual cycles or 100 hours total
operating time.
12. Circulation Pump
Icon Flashes when circulating water.

8INSTALLATION AND OPERATING INSTRUCTIONS
FOOD SAFETY CAUTION:
Pregnant women, very young children,
the elderly and those with compromised immune systems
should not consume foods cooked using the Sous Vide method.
Food standards recommend that for safety, food should not be
consumed if kept between 5°C and 55°C for longer than 4 hours.
Following the below guidelines will help to minimise the risk of
food borne illness when using the Sous Vide method of cooking.
FOOD PREPARATION
• Wash hands well before commencing any food preparation.
• Do not cross contaminate - use separate cutting boards and
utensils for raw and cooked food.
• Food items used for Sous Vide cooking must be of the highest
quality in freshness and thoroughly cleaned.
• Ensure that the food pouches are clean and properly vacuum
sealed and have not been contaminated.
• Prepare foods to the recommended thickness in the
Temperature and Time guide.
COOKING
• Refer to the Temperature and Time guide as a guideline for
cooking times and temperatures.
• Ensure that the food pouches are completely sealed before
cooking commences and are still completely sealed when
cooking has finished.
STORAGE
• If the food is not intended for immediate consumption, it
should be quick chilled. To safely chill, completely submerge
the sealed food pouch into an ice water bath for 30 minutes to
1 hour. The food may then be frozen or refrigerated for later
consumption.
• Food cooked Sous Vide can be safely kept in the refrigerator
for up to 48 hours.
FOOD SAFETY GUIDELINES FOR SOUS VIDE COOKING

INSTALLATION AND OPERATING INSTRUCTIONS 9
TEMPERATURE AND TIME GUIDE
The tables are only meant to serve as a guideline to
setting the temperatures and times for your cooking.
Temperatures should be adjusted to your individual tastes
and preference of doneness.
• Thickness measurement refers to thickness once the
food has been vacuum sealed.
• Longer cooking times may result in an altered
texture of finished foods.
• The longer the cooking time, the more tender the result.
Tip:
Stick to the nominated cooking times initially then reduce or
increase times in future to achieve your desired result.
• Cooking times are for foods starting at refrigerator
temperature.
Food Doneness Temperature
(oC)
Meat
(Beef, Lamb, Pork, Veal)
Rare 54
Medium Rare 56.5
Medium 60
Medium Well 65.5
Well 68-70
POULTRY
White Meat (Duck Only) Medium Rare 56
White Meat (All Poultry) Medium 60-63
Well 75
Dark Meat (All Poultry) Medium 65
Well 75
Fish
Rare 40
Medium Rare 50
Medium 55
Vegetables/Fruit - 82-85

10 INSTALLATION AND OPERATING INSTRUCTIONS
Food Cooking
Temp (oC)
Time Thickness
Min Max
BEEF & LAMB
Tender Cuts
(Tenderloin, Rib Eye,
Sirloin, T-Bone Steak,
Lamb Chops)
56 or higher
1hr 2hrs
1-2cm
2hrs 4hrs
2-5cm
Tough Cuts (Roast,
Leg of Lamb, Chuck,
Shanks, Game Meats)
56 or higher 8hrs 24hrs
4-6cm
PORK
Pork Belly 60 or higher 6hrs 24hrs
Pork Chops 56 or higher 1hrs 3hrs
2-5cm
Pork Roast 60 or higher 3hrs 6hrs
5-7cm
Ribs 59 10hrs 24hrs
2-3cm
POULTRY
Chicken Breast
(Boneless) 64 1hr 2hr
3-5cm
Chicken Breast
(Bone In) 82 2hrs 3hrs
3-5cm
Chicken Leg/Thigh 70 or higher 1hr 4hrs
3-5cm
Duck Breast 56 or higher 2hrs 8hrs
2-3cm
Food Cooking
Temp (oC)
Time Thickness
Min Max
FISH & SEAFOOD
Lean Fish 50 40 1.10hrs 12.5mm
Fatty Fish 50 or
higher
40-50
min 1.10hrs 2.5cm
Shrimp
60 1hr Up to
1hr -
Prawns
Lobster Tail
Scallops
VEGETABLES
Root Vegetables 84 1hr Up to
1hr 1-5cm
Tender Vegetables

INSTALLATION AND OPERATING INSTRUCTIONS 11
Avoid using plastic containers made with BPAs or PVC materials.
Cooking container must be suitable for Sous Vide cooking.
1. Attach the Sous Vide Precision Cooker to the side of the
cooking container via the water container attachment arm.
Ensure the unit is secure and will not move during operation.
2. Place the vacuum sealed food pouches into the cooking
container. Fill the container with water.
Note:
Water must be filled to a level below the ‘MAX’ water level
marking and the food pouches are completely submerged.
Maximum amount of water the appliance can be used with is, 50L
in a covered container.
Tip:
Fill with warm water to speed up the time needed to reach the
desired water temperature.
3. Plug in the unit.
Note:
To change Temperature Unit press the Set Temperature Unit
button to change between °C and °F.
SET TEMPERATURE
4. Press Temp/Time button to adjust the temperature. Press the
Increase or Decrease buttons to set the desired temperature.
Note:
Temperature can be adjusted throughout the entire cooking
process. The temp set range is up to 95°C in increments of
0.10°C.
SET TIME
5. After setting the temperature, press Temperature/ Time
button a second time to switch from the temperature setting to
time setting. Press the Increase or Decrease buttons to set the
desired time (Time range from 5 minutes to 99 hours and 59
minutes).
6. Once temperature and time parameters have been set, press
Start/Stop to start the cooking process.
Heating and Circulation will start to pre-heat the water to the
set temperature.
When the set Temperature is reached there will be an audible
beep and the timer will start counting down.
When the timer finishes there will be an audible beep and the
machine will beep every 60 seconds.
The Machine will continue to hold the set temperature and
Circulate.
Press Start/Stop again to return the machine to standby mode.
Note:
During cooking process, loss of water from the container
will occur. Regularly check that the water level is higher than
the minimum (MIN) level mark. If the water level drops below
minimum the Sous Vide Precision Cooker will turn off and display
an error code ‘H2O’ as a safety precaution.
OPERATION INSTRUCTIONS

12 INSTALLATION AND OPERATING INSTRUCTIONS
CLEANING AND MAINTENANCE
Before carrying out any maintenance or cleaning of the unit,
ensure that the power to the unit is turned off and power cord is
unplugged from the socket.
IMPORTANT:
Do not rinse or submerge the main body in water as
water can enter and damage the upper section.
AFTER EACH USE
Once the Sous Vide Precision Cooker has cooled down, wipe the
surface with a damp cloth.
CAUTION:
Do not use chemicals, steel wool, or abrasive cleaners to
clean the outside as these will scratch the surface.
MAINTENANCE
Maintenance should be done every month on Sous Vide Precision
Cookers that are used frequently or more often in regions with
hard water.
Mineral deposit in tap water may cause a build up of lime scale on
the inside of the Sous Vide Precision Cooker.
To remove this build-up:
1. Make a solution of 75% water and 25% food grade vinegar.
2. Put the appliance in a pot and fill the pot to the ‘MAX’ level
indicated on the appliance with the water and vinegar solution.
NOTE:
Pot used must be suitable for Sous Vide cooking.
3. Turn the machine on and hold down Start/Stop (Button 3) and
Decrease Button (Button 5) simultaneously.
This will set the temperature to 80°C and the time to 3 hours.
These settings will flash 10 times, once they stop flashing,
push the Start/Stop button to start the cleaning process.
The Machine will Beep when the cleaning process is
completed.
4. Turn off and unplug the appliance.
5. When appliance is cool, rinse the bottom in cold water and dry
before storing.

INSTALLATION AND OPERATING INSTRUCTIONS 13
TROUBLE SHOOTING
BEFORE YOU EMAIL FOR SERVICE PLEASE REVIEW THE TROUBLE SHOOTING TIPS FIRST.
Problem Possible Cause Solution
The display screen
reads error code: H20
The water level is below the ‘MIN’
water level marker or higher than the
‘MAX’ water level marker
Make sure the water level is between the ‘MIN’ and ‘MAX’ marks on
the body of the Sous Vide Precision Cooker. Turn off the machine
power - if the water level is too low, add the right amount of water
to the container; if the water level is too high, remove some water
from the container.
The display screen
reads error code: E02
1. Possible issue with Heating pip
2. Possible issue with internal wiring
3. Possible issue with temperature
sensor
Contact customer support
The word CLEAN
is displayed on the
touch screen
The machine has been working for
more than 100 hours and requires a
clean
Refer to cleaning and maintenance section of this user manual
LP is displayed on the
touch screen
The machine suddenly loses power
during the normal cooking process Turn Power off at wall socket, wait 10 seconds and turn back on.

14 INSTALLATION AND OPERATING INSTRUCTIONS
Your Pro-line Australia Australian 12 Month Commercial
Repair or Replacement Warranty
Pro-line warrants this appliance to the first purchaser and subject to the
stated conditions:
Warranty covers any defects in material or workmanship in the
manufactured product within the first twelve months, from the date of
purchase.
To make a warranty claim you must visit Pro-line online at
www.prolineaustralia.com.au/warrantyclaim
If a product is found to be faulty there is a 90 day return policy from the date
of purchase. Products returned to store MUST be accompanied by a valid
proof of purchase.
For warranty claims outside of 90 days from date of purchase, product will
be repaired or replaced at our discretion. Repair or replacement costs of the
product will be covered under warranty by Pro-line.
Goods presented for repair may be replaced by refurbished goods of the
same type rather than being repaired. Refurbished parts may be used to
repair the goods.
The benefits given to you by this warranty are in addition to other rights and
remedies of the consumer law in relation to the goods or services to which
this warranty relates.
Our goods come with guarantees that cannot be excluded under the
Australian Consumer Law. You are entitled to a replacement or refund for a
major failure and compensation for any other reasonably foreseeable loss
or damage. You are also entitled to have the goods repaired or replaced if
goods fail to be of acceptable quality and the failure does not amount to a
major failure.
Conditions Of This Warranty:
1. This product has been fully installed in accordance with the
user manual installation instructions.
2. The warranty extends only to repairing or replacing any
component that proves to be defective in material
or workmanship.
3. The warranty does not cover defects occasioned by
misuse, alterations, accidents, or used for other than the
intended purpose.
4. The warranty does not cover damage to the product caused
by accident, fire, or floods, power surges or blackouts.
5. Proof of purchase is required for warranty claims.
Please keep purchase receipt in a safe place.
Pro-line Australia
PO Box 4187
Norwood South LPO
South Australia 5067
info@prolineaustralia.com.au
www.prolineaustralia.com.au

INSTALLATION AND OPERATING INSTRUCTIONS 15

Pro-line Australia
PO Box 4187
Norwood South LPO
South Australia 5067
Email: info@prolineaustralia.com.au
Web: www.prolineaustralia.com.au
Find us
/prolineaustralia
/proline_australia
Table of contents
Other Pro-Line Boats Cooker manuals
