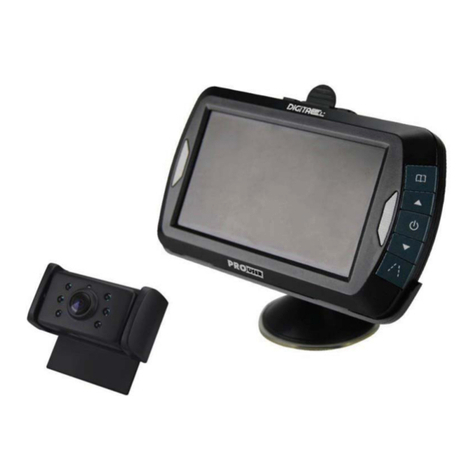
pro user DRC4310Solar User manual

www.pro-user.com
DIGITAL WIRELESS SOLAR
BACK-UP CAMERA SYSTEM
WITH 10,9CM / 4.3” MONITOR
DIGITALES KABELLOSES SOLAR
RÜCKFAHR-KAMERA-SYSTEM
MIT 10,9CM / 4,3” MONITOR
DIGITALE DRAADLOOS SOLAR CAMERASYSTEEM
MET 10,9CM / 4,3” MONITOR
SYSTÈME DE CAMERA DE RECUL SOLAIRE
SANS FIL NUMERIQUE
AVEC ÉCRAN 10,9CM / 4,3”
DRC4310Solar
DIGITAL WIRELESS
SOLAR-POWERED
BACK-UP CAMERA SYSTEM
OPERATING MANUAL p.03
BEDIENUNGSANLEITUNG p.15
GEBRUIKSAANWIJZING p.29
MODE D'EMPLOI p.42

2

3
The Pro-User DRC4310Solar is a member of the family of advanced car back-up camera systems
manufactured by Pro User.
The Pro-User DRC4310Solar Digital Wireless Back-up Camera System will improve your ability to see
behind your car, camper, trailer, or mini-van. The Pro-User DRC4310Solar can be operated at a high
voltage range (10-30V) and can therefore be used with 12V and 24V electrical systems. The built-in
LiPo battery of the camera-unit can be charged via USB and also charges itself with sunlight with the
help of the integrated solar-cells. The solar camera-unit can be easily installed without any modifications
at the car´s electrical system.
We have taken numerous measures in quality control to ensure that your product arrives in top condition,
and will perform to your satisfaction.
Please carefully read and follow the following safety and operating instructions.
CAUTION: Please read this instruction manual carefully before installing and starting
up the device. Do not operate the device unless you have fully read and understood
all the provided information. If you are not confident working with 12V/24V DC
voltage or are unsure of what you are doing, consider to seek for help by a
professional installation service or your vehicle´s manufacturer. Failure to observe
these instructions may cause an electrical shock, fatal or serious injury, material
damage or impair the function of the device.
Pro-User accepts no liability for direct or indirect damage caused by faulty assembly or connection, a
usage of damaged or altered products, a usage for purposes other than described and especially caused
by failure to follow these instructions.
General:
• Electrical devices are not toys. Keep the product away from children.
• Only use the product as intended and for purposes described in the manual.
• After opening the package, examine all parts for visible damage. If you have found any damage,
please contact the company you purchased this unit from.
• Always disconnect the battery when working on electrical system of your vehicle.
• This appliance is not intended for use by persons (including children) with reduced physical, sensory
or mental capabilities, or lack of experience and knowledge, unless they are supervised or have been
instructed on how to use the appliance by a person responsible for their safety. Children should be
supervised to ensure that they do not play with the appliance.
• Installing the device, maintenance and repair work may only be carried out by qualified personnel
who are familiar with the risks involved, the relevant regulations and with the guidelines and safety
precautions to be applied.
• Do not disassemble the device. Attempting to repair or modify the unit yourself may result in electric
shock or fire and will void the unit warranty.
• Always keep metal objects or other materials that can short circuit the terminals of the battery
securely away. A resulting spark or short-circuit may not only damage the device, but also cause an
explosion and potentially produce a current high enough to weld a ring or the like to metal. Remove
personal metal items such as rings, bracelets, necklaces, and watches when working on the device or
the battery.
INTRODUCTION
IMPORTANT SAFETY INSTRUCTIONS

4
Working with Batteries
• Batteries can store large amounts of energy and improper handling can be dangerous
• Keep children away from batteries and acid.
• Avoid getting electrolyte on your skin or clothes. It is acidic and can cause burns. If battery acid
contacts skin or clothing, wash immediately with water. Baking soda neutralizes lead acid battery
electrolyte. If electrolyte gets into your eyes, immediately flood your eyes with running cold water
for at least 20 minutes and get medical attention immediately. Eye protection is therefore
recommended.
• Always keep metal objects or other materials that can short circuit the terminals of the battery
securely away.
• Power-off the device before making or breaking the connections to the battery.
• Observe technical instructions of the seller or the manufacturer of your battery
• Check if all connections are tight and clean. Loose or dirty connections could result in overheating,
electrical sparks and fire. Use terminal grease where required.
• Never smoke or allow a spark or flame in vicinity of the battery.
• Never try to charge a damaged or frozen battery.
• Read your car´s owner's manual. Some vehicle manufacturers may have special requirements before
disconnecting the vehicle´s battery (e.g. fuses that have to be removed or certain security demands).
Electrical Cables
• If cables have to be fed through metal holes or other walls with sharp edges, use ducts or cable
bushings to prevent damage.
• Do not lay cables which are loose or bent next to electrically conductive material (metal).
• Do not pull on the cables.
Interference
This device is free from interferences coming from Bluetooth, cell phones, Wi-Fi routers, power lines and
other various electrical equipment.
Caution: Risk of Explosion.
Do not replace any internal batteries. There is a risk of explosion especially if a
battery is replaced by an incorrect type.
Intended use
The Pro-User Digital Wireless Solar Back-up Camera System is intended to be used as a back-up camera
to improve the ability to see behind a car, camper, trailer, or mini-van.
Maintenance
The unit itself is maintenance-free. From time to time, make sure all cable connections are clean and
tight. If necessary, clean the unit with care, using a dry cloth. Don’t try to open the body casing. There
are no user-serviceable parts inside. Damage due to improper use, modifications or attempted repairs
lead to the exclusion of liability and the loss of warranty. If the unit is damaged, the appliance must be
discarded. Cleaning and user maintenance shall not be made by children.
Packaging materials
To avoid danger of suffocation, do not let children play with foils or other packaging materials. Remove
all protective coverings before putting the device in operation.
Storage
When not in use at the car, store the device in a dry environment. Store the device in a safe place out of
the reach of children. Protect the unit from direct sunlight, heat and moisture. Turn off the camera unit
(switch 8 on the backside of the camera unit), in order to not deep-discharge the battery.
GENERAL INSTRUCTIONS

5
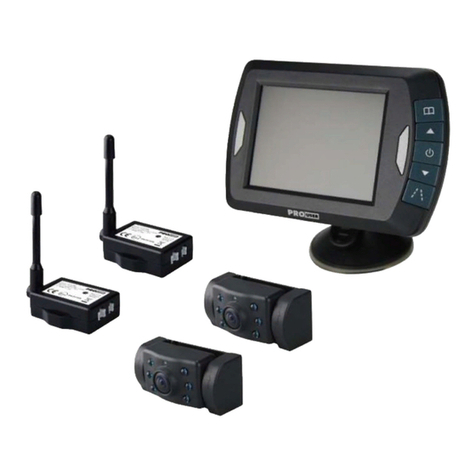
1. Monitor with suction cup 2. Camera with mounting plate
3. USB Cable 4. Monitor Power Cable
5. Needle
SCOPE OF DELIVERY

6
FRONT:
Item
Description
1
Wake-up / Sleep
2
Menu
3
Up p/ Cam 1 / Split-Screen
4
Power / Enter
5
Down q/ Cam 2 / Split-Screen
TECHNICAL DESCRIPTION

7
BACK-UP-CAMERA:
Item
Description
6
USB-charging socket & Pairing-Button (underneath a rubber cover)
7
Fixation-screws
8
On/Off Slide-Switch (Note: no button, no rocker switch)
®

8
These instructions do not apply to all vehicles. They are only meant as a general guide due to the
number of different makes & models. For vehicle-specific questions contact your vehicle’s
manufacturer.
Backup-Camera Installation
There are several ways to mount the camera on the back of your car. But the most convenient is to
mount it above or under the license plate.
The camera itself is mounted on the mounting plate. The camera is tiltable: the camera angle can be
adjusted manually in the vertical direction. Make sure that its field of view is not obstructed.
With some type of cars, it is not possible to mount the camera near the license plate. You may have to
find another spot at the back of your car to mount it.
1. The camera is powered by an internal battery, that can be charged by USB or the integrated solar
cells. Before installation, it is highly recommended to use the delivered micro-USB cable to fully
charge the internal battery of the camera-unit via USB (please charge for at least 5 hours with a
mobile phone adapter or a USB-powerbank). Please also make use of the USB charging socket, if your
car is parked without sunlight for a longer period of time and the internal battery is empty.
2. Make sure the slide switch on the back of the camera unit is turned to ON-position. This switch is
only used for storage purposes in order to prevent a deep discharge of the battery. While the camera
is installed at the number plate there is no use of the switch and it can be hidden behind the plate.
Note: This switch is under a rubber cover. It is a slide-switch (no button or rocker switch).
INSTALLATION

9
3. Adjust the camera angle
Depending if you like to put the camera on top or on bottom of the number plate you can change the
whole camera + solar panel upside down to get the right angle of the camera (camera only rotates
in one direction)
Loosen all the fixation screws and turn camera + solar upside down. Tighten the screws again when
finished.
Loosen the two fixation screws and adjust the camera angle to the desired position. Check the angel
of the camera by holding the camera to the planned fixation spot on the number plate. Tighten the
screws again when finished.
180°

10
4. Fixation on top of the number plate:
Remove the rear license plate, and then loosen the license plate bolts/screws.
Position the supplied mounting plates (with camera together) behind the license plate bracket.
Secure both license plate bracket and mounting plates with the license plate bracket bolts/screws.
5. Fixation on bottom of the number plate:
Mount the license plate on the license plate bracket.

11
Monitor Installation
When choosing a location to mount the monitor, make sure the monitor is in an
area that will not obstruct your vision while driving.
1. Before mounting the monitor, clean the mounting surface well.
2. Position the suction mount to the smooth surface which suits your
requirement.
3. Press the suction cap against the smooth surface and press the lock down to attach and fix the
mount to the surface.
4. Snap in the monitor to the suction mount.
5. Adjust the mounting arms to suit your view angle to the monitor and tighten the screws on the
mount to fix the position.
6. Route the power cable to the vehicle’s cigarette lighter socket 12V/24V power outlet. The cable
must not interfere with the safe operation of the vehicle.
7. Insert the small 12V/24V DC plug of the power cable into the right side of the monitor.
8. Plug the 12V/24V cigarette lighter plug into the vehicle’s cigarette lighter socket.
To maximize the effectiveness of the suction mount, it is recommended that the application be
performed under the following conditions:
• Surface temperature should be between 21 and 38 degrees Celsius.
• Application below 10 degrees should be avoided.
• Application should not occur in direct sunlight.
Mounting should be protected from exposure to direct sunlight for a period of 24 hours.

12
-
Please always pair the monitor and camera before the 1
st
operation (see below). Max. 2 cameras
can be paired to the receiver.
- Before the
1
st
operation
, it is highly recommended to use the delivered micro-USB cable to fully
charge the internal battery of the camera-unit via USB (please charge for at least 5 hours with a
mobile phone adapter or a USB-powerbank). Please also make use of the USB charging socket, if your
car is parked without sunlight for a longer period of time or the internal battery is empty for another
reason.
- Make sure the slide switch on the back of the camera unit is turned to ON-position.
- The camera is powered by an internal battery, that can be charged by the solar cells. In the ideal
case it is not necessary to charge the camera battery after installation. Nevertheless, please
regularly monitor the battery icon on the screen and charge the battery if needed.
General use of the menus:
Press the MENU-button to show the menu. Use the UP/DOWN-buttons to select an icon and press
the ENTER-button to activate an option or enter a sub-menu. Press the MENU-button again to go
back or leave the menu.
WAKE-UP-Button
Press the WAKE-UP-Button to turn on the screen and show the camera picture. When the monitor is
connected to power, the WAKE-UP-button will be lit and the camera is activated. Press the WAKE-UP-
button again to turn off the screen.
NOTE: UNDER EXTREME BRIGHT LIGHT CONDITIONS, THE SCREEN IMAGE MAY TAKE A FEW
SECONDS TO STABILIZE. PLEASE WAIT UNTIL THE IMAGE HAS STABILIZED BEFORE BACKING UP.
MENU-button
Press the MENU-button to enter the menu screen:
Select the desired sub-menu:
Picture Specs, Picture Direction, Setup, Information.
OPERATION (Backup-Camera)

13
Picture Specs:
After entering this menu, first select the respective camera (camera 1 or camera 2). Then select if you
wish to adjust the
brightness
, the
contrast
or the
colour
of the picture. Use the arrow keys to adjust.
Go back by pressing the MENU-button.
Picture Direction:
In the Menu “Picture direction” you can change the orientation of the picture. These different views
allow you to mount the camera upside down, but still keep the right picture on the monitor. First select
the respective camera (camera 1 or camera 2). The orientation of the picture will change every time
pressing the ENTER-button. To save the settings and exit the screen, please press the MENU-button.
SETUP
Select the desired sub-menu:
-
Pairing:
In this menu, you can pair the camera to the monitor. This system can make use of 2 camera-
units. First select the camera you want to pair (PAIR-1 fpór camera 1 or PAIR-2 for camera2).
Now press the pairing-button (6) of the camera unit with the delivered needle or a paper clip
until camera pairing is confirmed and the camera-picture is received and displayed on the
monitor.
-
Time-Out
Enter this menu to adjust, how long the camera display shall be displayed after pressing the
WAKE-UP-button.
Possible selections are: 30sec. , 45sec. , 60sec.
-
SplitScreen
If two cameras are connected, you may enter this menu, to adjust whether a splitscreen
view of the cameras ‘pictures is divided vertically or horizontally.
Information:
Select this menu item to show the firmware version of the unit.
Parking Guideline:
This camera system has the option to show distance-guidelines
on the display. This helps you to visually see the distance
between the objects behind your car. Press the WAKE-UP-Button
for 5 seconds to switch this option on or off.

14
Camera / Transmitter
Built-in Battery
2600mAh
Current consumption
Standby current consumption
≤250mA
≤0.3mA
Image sensor
CMOS
Resolution
640x480
Optical lens
1.7mm / F2.0
Transmission frequency
2.4 GHz (ISM band)
RF transmission distance (open space)
25m
USB input
5V, max. 500mA
Solar panel input power
2x max. 0.18W
LCD monitor /Receiver
Operation Voltage
10-30V DC
Standby Current
≤80mA
Operation Current
≤260 mA
LCD display screen size
10.9cm / 4.3-inch TFT
Resolution
480x272
Other
Operation temperature
-10 to +45 degrees Celsius
This model may be operated in EU countries.
The product is classed as Electrical or Electronic Equipment and should not be disposed of with
other household or commercial waste at the end of its working life. Please recycle where
facilities exist. Ask your local authority or retailer for recycling advice.
Pro-User warrants this product for a period of 2 years from the date of purchase to the original purchaser.
Warranty is not transferable. Warranty covers defect against workmanship and materials only. To obtain
warranty service, please return the unit to the place of purchase or authorized Pro-User dealer together
with your proof of purchase. The warranty is void if the product has been damaged or not used as
described in this manual. Warranty is void if a non-authorized repair has been performed. Pro-User makes
no other warranty expressed or implied. Pro-User is only responsible for repair or replacement (at Pro-
Users’ Discretion) of the defective product and is not responsible for any consequential damage or
inconvenience caused by the defect.
TECHNICAL SPECIFICATIONS
ENVIRONMENTAL PROTECTION
WARRANTY

15
Das DRC4310Solar gehört zur Familie der zukunftsweisenden Pro-User Auto-Rückfahr-Kamera-Systeme.
Die digitale kabellose Solar-Rückfahrkamera ermöglicht es Ihnen, hinter Ihr Auto, Ihren Wohnwagen,
Ihren Anhänger oder Mini-Van zu sehen.
Das Pro-User DRC4310Solar kann durch den hohen Betriebsspannungsbereich (10-30V DC) sowohl an
Fahrzeugen mit 12V als auch 24V Bordspannung betrieben werden. Der eingebaute LiPo-Akku der
Kameraeinheit kann über USB geladen werden, lädt sich aber auch mit Hilfe der eingebauten Solarzellen
mit Hilfe des Sonnenlichts selbst auf. Die Kameraeinheit kann somit ohne Änderungen an der Kfz-Elektrik
einfach installiert werden.
Permanente Qualitätskontrolle stellt sicher, dass Sie ein hochwertiges Produkt erhalten,dass Ihnen hohe
Zuverlässigkeit und Funktionalität bietet.
Bitte lesen Sie die Bedienungsanleitung sorgfältig durch und befolgen Sie insbesondere die
Sicherheitshinweise. Das Nichtbefolgen der Sicherheits- und Bedienungshinweise kann
schwerwiegende Unfälle an Sachgegenständen und Personen zur Folge haben. Wenn Sie das Gerät
an dritte Personen weitergeben, stellen Sie bitte ebenfalls sicher, dass die Personen auch die
Anleitung erhalten.
ACHTUNG: Lesen Sie diese Bedienungsanleitung sorgfältig vor der Inbetriebnahme.
Das Gerät darf nur von Personen benutzt werden, welche diese Anleitung vollständig
gelesen und verstanden haben und sich mit den Eigenschaften des Geräts vertraut
gemacht haben. Wenn Sie mit dem Umgang am elektrischen System Ihres Fahrzeugs
nicht vertraut sind oder anderweitig unsicher sind, ziehen Sie professionelle Hilfe zu
Rate, fragen Sie Ihren Fahrzeughersteller oder beauftragen Sie Ihre Werkstatt. Die
Nichteinhaltung der Bedienungsanleitung und Sicherheitshinweise kann die
Funktion des Geräts dauerhaft beeinträchtigen, Stromschläge begünstigen oder
schwerwiegende Unfälle an Gegenständen und Personen zur Folge haben.
Pro-User übernimmt keine Haftung für direkte oder indirekte Schäden, welche entstanden sind durch,
Montage- oder Anschlussfehler, fehlerhafte oder unsachgemäße Verwendung, Verwendung eines
modifizierten oder bekanntermaßen beschädigten Geräts, Verwendung außerhalb des
“bestimmungsgemäßen Gebrauchs” oder Missachtung dieser Bedienungsanleitung.
Allgemein
• Elektrische Geräte sind keine Spielzeuge. Sichern Sie das Gerät so, dass Kinder keinen Zugriff darauf
haben. Es können Gefahren entstehen, die von Kindern nicht erkannt werden.
• Benutzen Sie das Gerät nur für den in dieser Anleitung beschriebenen Gebrauch.
• Nach dem Öffnen der Verpackung überprüfen Sie bitte alle Teile auf Beschädigungen. Sollten Sie
Beschädigungen vorfinden, kontaktieren Sie bitte den Händler, bei dem Sie das Gerät erworben haben.
• Unterbrechen Sie bei Arbeiten am Gerät immer die Stromversorgung des Fahrzeugs.
• Dieses Gerät darf nicht von Personen (einschließlich Kindern) mit eingeschränkten physischen,
sensorischen oder mentalen Fähigkeiten, unerfahrenen Benutzern oder Benutzern mit mangelnden
Kenntnissen bedient werden, sofern sie nicht beaufsichtigt werden und bezüglich der sicheren
Bedienung des Geräts und der möglichen Gefahren bei der Benutzung eingewiesen wurden oder
unter ständiger Aufsicht eines geschulten Verantwortlichen sind. Insbesondere müssen Kinder unter
ständiger Aufsicht sein, um Sicherzustellen, dass sie nicht mit dem Gerät spielen. Eventuell
notwendige Reinigungs- und Wartungsarbeiten am Gerät dürfen nicht von Kindern durchgeführt
werden.
• Inbetriebnahme, Wartung und Reparatur des Geräts dürfen ausschließlich durch hierfür qualifizierte
Personen erfolgen, welche mit den damit verbundenen Gefahren bzw. einschlägigen Vorschriften
vertraut sind.
EINLEITUNG
WICHTIGE SICHERHEITSHINWEISE

16
• Versuchen Sie nicht das Gerät zu öffnen. Im Inneren liegen möglicherweise gefährliche Spannungen
an. Der Versuch das Gerät selbst zu warten oder zu reparieren kann zu Stromschlägen oder Feuer
führen und führt zur Erlöschung von Garantie und Gewährleistungsansprüchen.
• Sorgen Sie dafür, dass metallische bzw. stromleitende Gegenstände, welche einen Kurzschluss
verursachen könnten, sich nicht in der Nähe der Batteriepole befinden. Entstehende Funken oder
Kurzschlüsse könnten nicht nur das Gerät beschädigen, sondern sogar zu einer Explosion führen oder
sehr hohe Kurzschluss-Ströme erzeugen, welche stark genug sind, um metallische Gegenstände zu
schweißen. Bei Arbeiten an Batterien sind deshalb Halsketten, Ringe, Uhren und andere persönliche
Metallgegenstände stets abzulegen.
• Betreiben Sie das Gerät nur, wenn das Gehäuse und die Leitungen unbeschädigt und alle
Verbindungen fest sind. Lose oder verschmutze Verbindungen können zu Überhitzung, Funkenflug
und Feuer führen.
Arbeiten an Batterien
• Batterien können große Mengen Energie speichern und ein nicht ordnungsgemäßer Umgang damit
kann sehr gefährlich sein. Verbinden Sie das Gerät niemals mit einer Batterie mit falscher
Nennspannung oder anderen ungeeigneten oder defekten Batterien oder Geräten.
• Halten Sie Kinder fern von Batterien und Säuren.
• Vermeiden Sie den Kontakt von Batterieflüssigkeit auf Haut oder Kleidung. Die darin enthaltene
Säure kann zu Verbrennungen führen. Sollten Sie dennoch Kontakt zu Batterieflüssigkeit haben,
waschen Sie die betroffenen Stellen sofort mit viel Wasser aus. Natron kann die Säure neutralisieren
Falls Ihre Augen in Kontakt mit Batterieflüssigkeit gekommen sind, spülen Sie diese für mindestens
20 Minuten unter laufendem Wasser und begeben Sie sich sofort in ärztliche Behandlung. Ein Schutz
der Augen durch eine Schutzbrille wird stets empfohlen.
• Um Kurzschlüsse zu vermeiden, sorgen Sie dafür, dass metallische und andere leitfähige
Gegenstände ausreichend Abstand zu den Batteriepolen haben. Ein Kurzschluss, bzw. ein hierdurch
entstehender Funkenflug oder Lichtbogen, kann das Gerät beschädigen, eine Explosion auslösen oder
zu anderen gefährlichen Situationen führen. Legen Sie leitfähigen Körperschmuck wie metallische
Ringe, Uhren, Halsketten o.Ä. ab, wenn Sie am Gerät oder der Batterie Arbeiten vornehmen.
• Schalten Sie das Gerät aus bevor Sie elektrische Verbindungen herstellen oder trennen.
• Bitte beachten Sie auch die Anleitung Ihrer Batterie, bevor Sie das Gerät anschließen.
• Nehmen Sie das Gerät nur in Betrieb, wenn das Gehäuse und die Leitungen unbeschädigt und alle
Verbindungen fest sind. Lose oder verschmutze Verbindungen können zu Überhitzung, Funkenflug
und Feuer führen.
• Reinigen Sie nach Bedarf auch die elektrischen Verbindungen der Fahrzeugelektrik zur
Fahrzeugbatterie. Benutzen Sie falls notwendig Polfett.
• Rauchen Sie nicht und vermeiden Sie jeglichen Funkenflug in der Nähe von Batterien.
• Versuchen Sie niemals eine kaputte oder gefrorene Batterie aufzuladen oder zu benutzen.
• Bitte beachten Sie ebenfalls die Bedienungshinweise der Betriebsanleitung Ihres Fahrzeugs. Bei
manchen Fahrzeugen müssen spezielle Vorkehrungen getroffen werden, wenn die Batterie
abgeklemmt wird.
Elektrische Leitungen
• Müssen Leitungen durch Blechwände oder andere scharfkantige Wände geführt werden, dann
benutzen Sie Leerrohre bzw. Leitungsdurchführungen.
• Verlegen Sie die Leitungen so, dass eine Beschädigung des Kabels ausgeschlossen ist (insbesondere
durch scharfe Metallkanten oder heiße Oberflächen).
• Ziehen Sie nicht an Leitungen.
Interferenzen
Dieses Gerät erzeugt keine Wechselwirkungen mit Bluetooth, Mobiltelefonen, Wi-Fi Routern,
spannungsführenden Leitungen oder weiteren elektrischen Geräten.
Achtung: Explosionsrisiko
Versuchen Sie interne Batterien nicht zu ersetzen. Es besteht Explosionsrisiko -
insbesondere wenn eine Batterie mit einem nicht-kompatiblem Typ ersetzt wird.

17
Bestimmungsgemäßer Gebrauch
Die digitale kabellose Solar-Rückfahrkamera ist dafür vorgesehen, dem Benutzer eine Rückfahrkamera
zur Verfügung zu stellen, welche ihm ermöglicht hinter das Auto, den Wohnwagen, einen Anhänger oder
Mini-Van zu sehen.
Wartung
Das Gerät an sich ist wartungsfrei. Bitte überprüfen Sie von Zeit zu Zeit, ob alle Kabelverbindungen
sauber und fest sind. Falls nötig reinigen Sie das Gerät sorgsam mit einem trockenen Tuch. Öffnen Sie
niemals das Gehäuse des Geräts. Es sind keine Teile im Inneren verbaut, die ausgetauscht oder durch
den Benutzer gewartet werden können. Beschädigungen die auf nicht sachgemäßen Gebrauch
zurückzuführen sind, oder durch den Benutzer durchgeführte Modifikationen oder versuchte
Reparaturen führen zum Ausschluss jeglicher Haftung und Verlust der Gewährleistung. Wenn das Gerät
beschädigt ist, darf es nicht mehr benutzt werden und muss außer Betrieb gesetzt und entsorgt werden.
Wartungsmaßnahmen dürfen nicht von Kindern oder dafür nicht-geeigneten Personen durchgeführt
werden.
Verpackungsmaterial
Bitte entfernen Sie sämtliches Verpackungsmaterial vor der Nutzung des Gerätes. Um eine
Erstickungsgefahr zu vermeiden, lassen Sie Kinder niemals mit Folien oder Verpackungsmaterial spielen.
Aufbewahrung
Wenn Sie das Gerät nicht am Auto verwenden, lagern Sie es bitte an einem trockenen Ort. Lagern Sie es
an einem sicheren Platz außerhalb der Reichweite von Kindern. Schützen Sie das Gerät vor direkter
Sonnenstrahlung, Hitze und Feuchtigkeit. Schalten Sie zusätzlich die Kameraeinheit aus (Schalter 8 auf
der Rückseite der Kameraeinheit), um ein Tiefentladen des Akkus zu vermeiden.
ALLGEMEINE HINWEISE

18
1. Monitor mit Befestigungsarm 2. Kameraeinheit mit Montageplatte
3. USB Kabel 4. Stromkabel für den Monitor
5. Nadel für das Pairing
LIEFERUMFANG

19
VORDERSEITE:
Teil
Beschreibung
1
Aufwecken / Standby
2
Menü
3
AUF p/ Kamera 1 / Split-Screen
4
Power-Taste / Enter
5
AB q/ Kamera 2 / Split-Screen
TECHNISCHE BESCHREIBUNG

20
RÜCKFAHRKAMERA:
Teil
Beschreibung
6
USB-Ladebuchse & Pairing-Taste (seitlich unter der Gummiabdeckung)
7
Fixierschrauben
8
An/Aus -Schiebeschalter (Hinweis: keine Taste, kein Kippschalter)
®
Table of contents
Languages:
Other pro user Digital Camera manuals

pro user
pro user RVC3110 User manual
pro user
pro user DRC5040 User manual
pro user
pro user RPC3600 User manual
pro user
pro user APR043DC User manual
pro user
pro user DRC4340 User manual
pro user
pro user APR043 User manual
pro user
pro user DRC7010 User manual
pro user
pro user DRC4340 User manual

pro user
pro user DRC4340 User manual
pro user
pro user APR035X2 User manual
