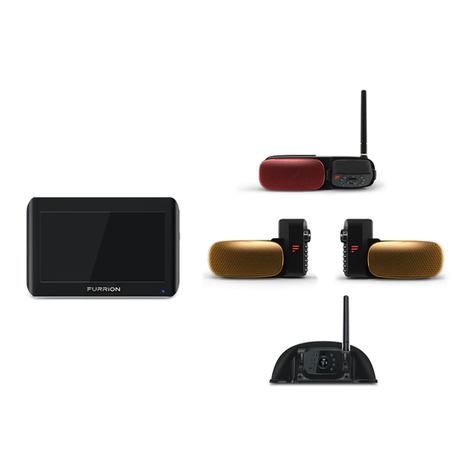
pro user DRC4311 User manual

!DIGITAL WIRELESS BACK-UP CAMERA
SYSTEM
DIGITALES KABELLOSES -
KAMERA-SYSTEM
SYSTEME DE CAMERA DE RECUL SANS FIL
NUMERIQUE
DIGITALE DRAADLOOS CAMERASYSTEEM
with 10,9cm / 4.3
mit 10,9 10,9cm / 4,3
met 10,9cm / 4,3
DRC4311

2
INTRODUCTION
The Pro-User DRC4311 is a member of the family of advanced car back-up systems
manufactured by Pro User International Ltd.
The Pro-User Digital Back-up Camera and Monitor with built in transmitter box, when
used as described, will improve your ability to see behind your car, camper, trailer, or
mini-van. We have taken numerous measures in quality control to ensure that your
product arrives in top condition, and will perform to your satisfaction.
Please carefully read and follow the following safety and operating instructions.
IMPORTANT SAFETY INSTRUCTIONS
Before You Install
If you are not confident working with 12V/24V DC vehicle wiring, removing and
reinstalling interior panels, carpeting, dashboards or other components of your vehicle,
ing the camera system professionally
installed.
Please check before the complete installation if the device works. This can be done that
you connect the display in the cigarette plug and at the same time connect the wires of
the rearview unit to a 12V source like the car battery or external source. If the picture
appears you can continue with the installation. If there is no transmission please check
the wiring and pairing. Make sure the device is working well before final installation.
Interference
This device is free from interferences coming from Bluetooth, cell phones, Wi-FI routers,
power lines and other various electrical equipment.
However, please bear in mind that too great a distance from the camera to the monitor
can lead to transmission problems. Superstructures, partition walls, etc. or reflective or
vapourised panes also impair the radio signal.
Storage of Display:
Please stow the monitor when not in use or when the vehicle is parked to prevent the
monitor from overheating due to sunlight or heat build-up.
Repair
The camera system should not be opened. Any attempt at modification or repair by the
user will entail the loss of your guarantee.
or
a
ge
of
D
i
sp
l
a
y
:
ea
se
s
t
o
w
t
he m
o
ni
t
o
on
i
t
o
rfr
om
o
verhe
a
t
i
e
p
a
i
r
e
c
a
m
e
r
a
s
y
s
t
e
m
s
h
o
e
r
w
i
l
l
e
n
t
a
i
l
t
h
e
l
o
s
s
w
h
e
n
t
h
e
v
e
h
i
c
l
e
i
s
p
ar
k
h
tb
ild
A
n
y
a
t
t
e
m
p
t
a
t
m
o
d
i
f
i
c
a
t

3
PARTS
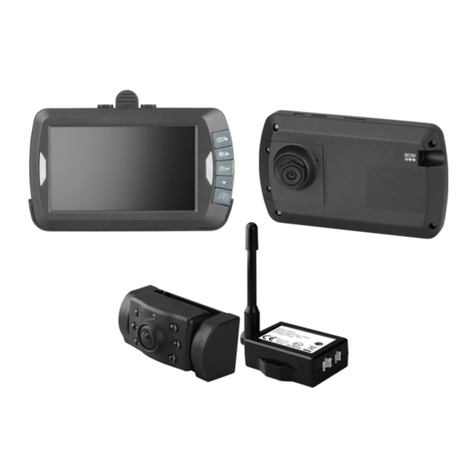
1. Monitor and mounting Arm 2. Camera with mounting plate
3. Mounting Accessories 4. Monitor Power Cable
5. Magnetic loop for camera cable

4
INSTALLATION
These instructions do not apply to all vehicles. They are only meant as a general
guide due to the number of different makes & models. For vehicle specific
Camera installation
There are several ways to mount the camera on the back of your car. But the most
convenient is to mount it near the license plate. Supplied is one mounting plate that can
be fixed behind the license plate, and the mounting plate have been installed in the
camera.
The camera itself is screwed on the mounting plate. The camera is tiltable, camera angle
can be adjusted manually on vertical direction.!Make sure that its field of view and
detection are not obstructed.
With some type of cars it is not possible to mount the camera near the license plate. You
may have to find another spot at the back of your car to mount it.
1. Remove the rear license plate, and then loosen the license plate bolts/screws.
2. Position the supplied mounting plates (with camera together) behind the license plate
bracket. Secure both license plate bracket and mounting plates with the license plate
bracket bolts/screws.

5
3. Mount the license plate on the license plate bracket.
4. Choose a routing path for the
reverse light circuit. If in doubt, seek professional installation assistance.
5. Some vehicles may have a hole available to pass the wire through, such as where the
license plate light is mounted, or you can drill a hole close to where the power cable
is attached to the camera. Once you have chosen where the cable will enter the
If you are able to use an existing opening, skip
the next two steps.
6. Before you drill a hole you MUST CHECK and see WHAT IS BEHIND WHERE YOU ARE
DRILLING. If there are any vehicle components, such as electrical parts or fuel
system components behind where you are drilling, you must take whatever
precaution is necessary not to damage them. Remove the license plate and camera
before drilling.
7. After you have drilled the hole, insert the supplied grommet, then pass the camera
cables through the grommet into the vehicle. You must use the grommet to prevent
the metal edge of the hole from cutting the camera cable.
8. the accessory position, engage the parking brake and put the car in reverse. Look at
located, they are the white
cle specific wiring diagrams.
9. Once you have located the reverse light circuit you will have to route the camera
cable to that location. You must securely fasten the power cable to prevent it from
being caught on any vehicle component such as the trunk hinge. Never route the
cable on the outside of the vehicle!
10.The reverse light sockets on most
vehicles have two wires connected to
them. Usually the negative wire is
black and the positive wire is a colored
wire. If you are uncertain about the
wiring, you can use a 12V/24V
multimeter available at most auto
parts stores to determine which is the
positive wire. Follow the
safe use of the multimeter.

6
11.After determining which wire is the positive and which is the negative, turn off the
12.Splice the red wire using the supplied in-
positive (+) wire. Use a set of slip joint pliers to squeeze the TAP and insure good
connection.
13.Next splice the black wire of the camera -)
wire or ground.
14.Replace the reverse light bulb, and then re-install the light socket. Secure all the
wires with cable ties or electrical tape.
15.Re-attach the negative battery cable to the battery.
Monitor Installation
When choosing a location to mount the monitor, make sure the
monitor is in an area that will not obstruct your vision while driving.
1. Before mounting the monitor, clean the mounting surface well.
2. Position the suction mount to the smooth surface which suits
your requirement.
3. Press the suction cap against the smooth surface and press the lock down to attach
and fix the mount to the surface.
4. Snap in the monitor to the suction mount.
5. Adjust the mounting arms to suit your view angle to the monitor and tighten the
screws on the mount to fix the position.

7
6. The cable must not interfere with the safe operation of the vehicle.
7. Insert the small 12V/24V DC plug of the power cable into the right side of the monitor.
8.
To maximize the effectiveness of the suction mount, it is recommended that the
application be performed under the following conditions:
Surface temperature should be between 21 and 38 degrees Celsius.
Application below 10 degrees should be avoided.
Application should not occur in direct sunlight.
Mounting should be protected from exposure to direct sunlight for a period of 24 hours.
NOTE: UNDER EXTREME BRIGHT LIGHT CONDITIONS, THE SCREEN IMAGE MAY TAKE A
FEW SECONDS TO STABLIZE. PLEASE WAIT UNTIL THE IMAGE HAS STABLIZED BEFORE
BACKING UP.
System testing
1.
2. Turn the ignition key to the accessory position, do not start the vehicle.
3. Engage the parking brake, and then put the shifter in the reverse position.
4. After testing the unit and you are satisfied with the route you have chosen for the
cabling, you must permanently install it.
5. Route all wires behind interior panels or under carpeting so they are hidden. Use
supplied cable ties to neatly gather any excess wire.

8

9
Picture SPEC:
Button. In this menu you can change brightness, contrast or colour of the picture.
Chose the desired function with the arrow buttons, confirm by pressing the Power button
and change the values with the arrow buttons.
To save the settings and exit the screen please press the menu button.
Orientation:
different views allow you to mount the camera and monitor in any position with keeping
and pressing the Power button. The orientation of the picture will change every time
pressing the Power button.
To save the settings and exit the screen please press the menu button.
Guideline button
This camera system has the option to show distance-
guidelines on the display. This helps you to visually see
the distance between the objects behind your car. By
pressing the guideline button, you can switch this option
on and off.

10
TECHNICAL SPECIFICATIONS
Camera
Operating Voltage 10 -30V DC
Current consumption < 250mA
Image sensor CMOS
Resolution 640x480
Optical lens 1.7mm / F2.0
Transmission frequency 2.4 GHz (ISM band)
RF transmission distance (open space) 10m
LCD monitor
Operation Voltage 10-30V DC
Standby Current <80mA
Operation Current <180mA
LCD display screen size 10.9cm / 4.3 inch
Resolution 480x272
Operation temperature -10 to +45 degree Celsius
This model may be operated in EU countries.
ENVIRONMENTAL PROTECTION
Waste electrical products should not be disposed of with household waste.
Please recycle where facilities exist. Check with your local authority or
retailer for recycling advice.

11
EINLEITUNG
Der Artikel Pro-User DRC4311 - -
Kamera-Systeme der Firma Pro-User-International Ltd.
Die digitale kabellose Pro- k
-Van zu sehen. Es wurden
hochwertiges Produkt zu Ihrer
Zufriedenheit zu liefern.
Sicherheitshinweisen und der Montageanleitung.
WICHTIGE SICHERHEITSHINWEISE
Vor der Montage /24V Stromversorgung Ihres
Verkleidungen etc.) nehmen Sie Kontakt zu Ihrem Autohaus oder zur Kfz-Werkstatt Ihres
Auftrag
Bitte prüfen Sie vor dem kompletten Einbau, ob das Gerät funktioniert. Dies können
Sie dadurch erreichen, dass Sie das Display in den Zigarettenstecker einstecken und
gleichzeitig die Drähte der Rückfahrteinheit an eine 12V-Quelle wie die Autobatterie
oder eine externe Quelle anschließen. Wenn das Bild erscheint, können Sie mit der
Installation fortfahren. Wenn keine Übertragung stattfindet, überprüfen Sie bitte die
Verkabelung und die Kopplung. Stellen Sie vor der endgültigen Installation sicher,
dass das Gerät gut funktioniert.
geben.
ssignale -System nicht von
Handys, Bluetooth, Navigationssysteme u
Bitte berücksichtigen Sie dennoch, dass ein zu großer Abstand von der Kamera zu dem
Monitor zu Übertragungsproblemen führen kann. Auch verschlechtern Aufbauten,
Trennwände etc. oder auch reflektierende oder bedampfte Scheiben das Funksignal.
Monitor aufbewahrung
Bitte verstauen Sie den Monitor bei Nichtbenutzung oder abgestelltem Fahrzeug
damit es durch Sonneneinstrahlung oder Stauhitze nicht zu einer Überhitzung des
Monitors kommt.
nd anderen
Reparatur
Dieses Kamera-System darf
Reparatur erlischt die Garantie.

12
1. Monitor mit Befestigungsarm 2. Kamera mit Befestigungsplatte
3. Installations- Material 4. Stromk

13
MONTAGE
fahrzeugspezifischen Fragen
wenden Sie sich bitte an Ihren Fahrzeughersteller.
Montage der Kamera
befestigen. D
diese Montageplatte wird die Kamera in einem weiteren Schritt befestigt. Die Kamera ist
vertikal schwenkbar, bitte stellen Sie diese nach den Gegebenheiten ein.
Nummernschild zu befestigen. Suchen Sie sich eine andere Stelle am Heck Ihres Autos
und befestigen Sie die Kamera mit den mitgelieferten Schrauben und Muttern.
1. des Nummernschildhalters und nehmen Sie diesen ab.
2. Positionieren Sie die Befestigungsplatte mit der Kamera hinter dem
Nummernschildhalter und befestigen Sie die Befestigungsplatte und den
Nummernschildhalter am Fahrzeug.

14
3. Befestigen Sie nun Ihr Nummernschild wieder auf dem Nummernschildhalter.
4. Elektrokabel der Kamera durch die Karosserie
5.
Kennzeichens, dicht an der Stelle, wo sich das Kabel der Kamera befindet, selber ein
Kamera und das Kennzeichen wieder demontieren. Wenn Sie eine vorhandene
6.
ass sich dort keine Elektrokabel,
7. Nachdem Sie gebohrt haben, befestigen Sie den mitgelieferten Kantenschutz in der
ziehen Sie das Kabel der Kamera ins Fahrzeuginnere.
8.
entsprechenden Kabel orten. Ggf. suchen Sie hierzu Ihr Autohaus oder die Kfz-
Werkstatt Ihres Vertrauens auf.
9. Wenn Sie die entsprechenden Kabel gefunden haben, legen Sie das Kabel der Kamera
Sie das Kabel niemals
10.
negative Draht schwarz und der positive farbig.
Wenn Sie unsiche
12V/24V Multimeter (im Fac
Folgen Sie der Bedienungsanleitung des

15
11.Wenn Sie festgestellt haben, welcher Draht positiv bzw. negativ ist, schalten Sie die
entfernen Sie das negative Kabel Ihrer Autobatterie. So ist
12.Verbinden Sie den roten Draht vom Kabel der Kamera mit dem positiven Draht des
Sie die Klemmen fest mit einer Zange zusammen und legen Sie die rote
13.Verbinden Sie nun den schwarzen Draht des Kamera-Kabels mit dem negativen Draht
en Sie auch hier die Kabelklemmen)
14.
nd!
15.
Montage des Monitors
Wenn Sie den passenden Platz zur Befestigung des Monitors
gefunden haben, vergewissern Sie sich, dass Ihnen nicht die
1.
2.
3. um damit der Sauger sicher und fest sitzt.
4. Schieben Sie den Monitor in die am Sauger befindliche Halterung.
5. Position aus. Drehen Sie nun die Schrauben an.

16
6. Verlegen Sie das Kabel so, das es
7. Stecken Sie den kleinen 12V/24V
rechten Seite vom Monitor.
8. Den anderen Stecker des Kabels steck
Einhaltung folgender Voraussetzungen empfohlen:
Der Gebrauch unter 10 Grad Celsius sollte vermieden werden.
Der Gebrauch bei direkter Sonneneinstrahlung sollte vermieden werden.
MONITOR EI
BILD STABILISIERT HAT.
System Test
1.
2. Ihres Autos an (bitte nicht starten)
3.
4. Nachdem Sie den Test zur Zufriedenheit beendet haben verlegen Sie alle noch frei
liegenden Kabel.
5. Verlegen Sie nun alle Kabel hinter den Fahrzeugverkleidungen oder unter den
Fahrzeugteppichen, so dass sie nicht mehr sichtbar sind. Gebrauchen Sie die
beiliegenden Kabelbinder um die Kabel ordentlich zusammen zu binden.

17
BEDIENUNG
Bitte koppeln Sie die Kamera mit dem Monitor vor der ersten Verwendung wie
unten beschrieben.
Es sind 5 Steuertasten am Monitor vorhanden.
Power-Taste Power-Taste um den Monitor mit Strom zu versorgen. Das Bild auf dem
Monitor erscheint automatisch (vorausgesetzt
. Wenn ein Bild erscheint,
leuchtet die blaue LED auf. Wenn der Monitor Strom hat, aber kein Bild empfangen wird,
blinkt die blaue LED. Wenn der Monitor ausgeschaltet ist wird kein Bild angezeigt und die
blaue LED ist aus.
Menu-Taste
Wenn Sie die Taste heint auf dem Monitor folgendes:
der Power-Taste.
Kopplung:
Power-Taste e kurz danach
den kleinen Plastikknopf auf der Unterseite der Kamera solange, bis sich die Kamera und
erkennen sich die Kamera und der Monitor automatisch und eine manuelle Kopplung ist
nicht mehr notwendig.
kurz die -Taste.
Menu-Taste
Hilfslinien-Taste
Power-Taste
Pfeiltaste
Pfeiltaste

18
Bildeinstellung: nschaften)
Power-Taste
r Power-Taste
Sie die Werte mit den Pfeiltasten.
kurz die -Taste.
Bilddrehung:
Um die Ausrichtung des Monitor- -Taste
den Power-Taste
-Taste.
Hilfslinien-Taste
Dieses Kamera System hat die Option, Ihnen einen
Abstands-Hinweis auf dem Display anzuzeigen. Hier
Objekt hinter Ihrem Fahrzeug und Ihrem Fahrzeug
erkennen. Mit Druck auf den
taste - und
ausschalten.

19
TECHNISCHE SPEZIFIKATION
Kamera
Betriebsspannung 10-30V DC
Stromaufnahme <250mA
Bildsensor CMOS
640x480 Punkte
Linsenoptik 1,7mm / F2,0
Kabelloser Transmitter der Kamera
2,4 GHz (ISM band)
10m
LCD Monitor
Betriebsspannung 10-30V DC
Stromaufnahme min. <80mA
Stromaufnahme max. <180mA
LCD Monitor Diagonale 10,9cm / 4.3 inch
Bildschirms 480x272 Punkte
Zul. Temperaturbereich bei Gebrauch -10 bis +45 Grad Celsius
UMWELTSCHUTZ

20
INTRODUCTION
Le Pro-User DRC4311 fait partie de la gamme de cameras de recules sans fils de
Pro User International Ltd.
-
vue vers l'arrière de votre voiture, camping-car, caravane ou remorque, si vous l'utilisez
-
vous pourrez vous en servir sans problèmes et que vous serez entièrement satisfait de
son fonctionnement.
IMPORTANT - CONSIGNES DE SECURITE
de bord ou d'autres pièces de votre voiture, on vous conseille de prendre contact avec
votre concessionnaire, votre garage ou centre auto pour faire installer ce système de
Veuillez vérifier avant l'installation complète si l'appareil fonctionne. Pour ce faire,
connectez l'écran dans la prise de la cigarette et connectez en même temps les fils
de l'unité de rétrovision à une source de 12V comme la batterie de la voiture ou
une source externe. Si l'image apparaît, vous pouvez continuer l'installation.
S'il n'y a pas de transmission, vérifiez le câblage et l'appairage. Assurez-vous que
l'appareil fonctionne bien avant l'installation finale.
Toutefois, n'oubliez pas qu'une trop grande distance entre la caméra et le moniteur peut
entraîner des problèmes de transmission. De même, les superstructures,les cloisons, etc.
ou encore les vitres réfléchissantes ou vaporisées aggravent le signal radio.
Rangement du moniteur
Veuillez ranger le moniteur lorsqu'il n'est pas utilisé ou lorsque le véhicule est garé
afin d'éviter que le moniteur ne surchauffe en raison de la lumière du soleil ou de
l'accumulation de chaleur.
Ce système sans fil, le Pro-User ne pourra pas
fonctionnement par des portables, des casques bluetooth, des systèmes GPS,
lisateur pert la
garantie.
Table of contents
Languages:
Other pro user Digital Camera manuals
pro user
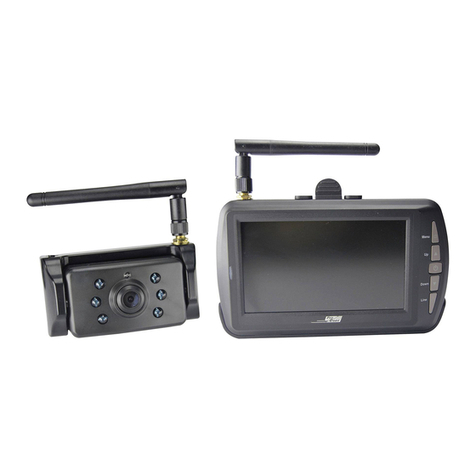
pro user DRC4340 User manual
pro user
pro user DRC5040 User manual
pro user
pro user DRC4310Solar User manual
pro user
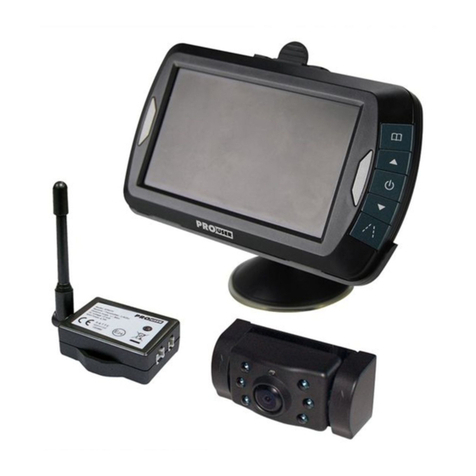
pro user APR043 User manual
pro user
pro user DRC7010 User manual
pro user
pro user RVC3110 User manual
pro user
pro user RPC3600 User manual
pro user
pro user APR035X2 User manual
pro user
pro user APR043DC User manual
pro user
pro user DRC4340 User manual


