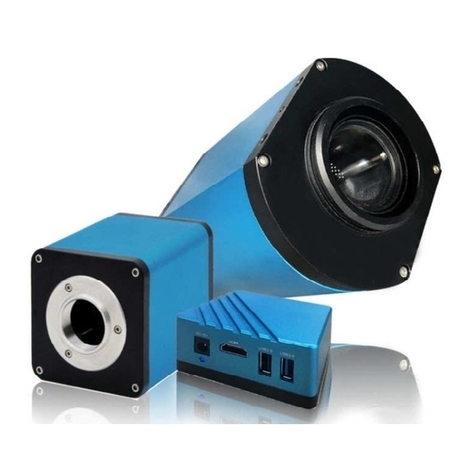
Eert C304 User manual

Company website
:
www.eertvision.nl
Eert C304
User Manual V1.0

Company website
:
www.eertvision.nl
Contents
Introduction ................................................................................................................................................. 4
1 Preparation ............................................................................................................................................... 4
1.1 Mode Switch ....................................................................................................................................... 4
1.2 PC Mode Matching Device ............................................................................................................... 4
1.3 HDMI Mode Matching Device ......................................................................................................... 5
2 PC Mode Operation ................................................................................................................................. 5
2.1 Installation and Connection .............................................................................................................. 5
2.1.1 Installation .................................................................................................................................... 5
2.1.2 Connect Camera ........................................................................................................................... 6
2.2 Functional Area ................................................................................................................................. 7
2.3 Operation ........................................................................................................................................... 7
2.3.1 Config ........................................................................................................................................... 7
2.3.2 Extended Depth of Focus ........................................................................................................... 11
2.3.3 Video Stitch ................................................................................................................................ 13
2.3.4 Photograph Operation ................................................................................................................. 13
2.3.5 Recording ................................................................................................................................... 15
2.3.6 Measuring ................................................................................................................................... 15
3 Detailed HDMI Mode Operation .......................................................................................................... 25
3.1 Control .............................................................................................................................................. 25
3.1.1 Language .................................................................................................................................... 27
3.1.2 Menu Lock.................................................................................................................................. 27
3.1.3 Focus Mode ................................................................................................................................ 27
3.1.4 Focus Area .................................................................................................................................. 27
3.1.5 Exposure ..................................................................................................................................... 28
3.1.6 White Balance ............................................................................................................................ 28
3.1.7 Function ...................................................................................................................................... 29
3.1.8 Crosshair Tool ............................................................................................................................ 29

Company website
:
www.eertvision.nl
3.1.9 Photograph .................................................................................................................................. 31
3.1.10 Recording ................................................................................................................................. 32
3.1.11 Open Picture ............................................................................................................................. 33
3.1.12 Compare Pictures ...................................................................................................................... 34
3.1.13 System Settings ........................................................................................................................ 36
3.1.14 Freeze ....................................................................................................................................... 36
3.1.15 Flip/ Mirror ............................................................................................................................... 36
3.1.16 HDR .......................................................................................................................................... 37
3.1.17 FBL ........................................................................................................................................... 37
3.1.18 Anti-screen flicker .................................................................................................................... 37
3.1.19 Black and White Mode ............................................................................................................. 37
3.1.20 Default ...................................................................................................................................... 37
3.1.21 Version ..................................................................................................................................... 38
3.2 Measurement ................................................................................................................................... 38
3.2.1 Assist Tools ................................................................................................................................ 39
3.2.2 Measurement Tool ...................................................................................................................... 40
3.2.3 Scan Data .................................................................................................................................... 40
3.2.4 Custom Template........................................................................................................................ 41
3.2.5 Measurement operation .............................................................................................................. 41

Company website
:
www.eertvision.nl
Introduction
Our C304 cameras has global patented autofocus technology, 12M pixel or 4K
ultra-high-definition image quality, as well as high-speed and stable USB and HDMI dual output
image transmission. Different operations can be carried out at the same time without interfering
with each other, super high work efficiency. It can seamlessly interface with a variety of image
processing software. A rich SDK development kit is also provided. Mainly used in the fields of
biomedical industry, industrial testing, monitoring system and astronomical observation.
1 Preparation
1.1 Mode Switch
Mode switch: ON is HDMI mode, OFF is PC mode.
1.2 PC Mode Matching Device
1.Front end matching:
C-mount microscope or C-mount lens.
2.Supported system platforms:
Microsoft Windows 32-bit Win7, Win8, Win10; 64-bit Win7, Win8, Win10.
Turn the camera's mode switch to the OFF end
to enter the PC mode.

Company website
:
www.eertvision.nl
3.Computer configuration requirements:
Processor: Intel(R) Core(TM) i3-3220 CPU @3.30GHz 3.30GHz, and above.
Installed memory (RAM): 2.00GB and above.
1.3 HDMI Mode Matching Device
Front end matching: C-mount microscope or C-mount lens.
Back-end matching: With HDMI, it can support 1080P@50Hz or 1080P@60Hz displays.
2 PC Mode Operation
2.1 Installation and Connection
2.1.1 Installation
Install 64 bit or 32 bit software based on your PC configuration.

Company website
:
www.eertvision.nl
2.1.2 Connect Camera
Open "Device" and click
"UVC_Camera" to connect the
device.
After the device is successfully
connected, it prompts "Connected "
and you can start operation.

Company website
:
www.eertvision.nl
2.2 Functional Area
2.3 Operation
2.3.1 Config
2.3.1.1 Focus Mode
Focus mode: automatic\manual\OneKey
Ca
m
era control
area
Menu toolbar
Measurement data list area
Connection status
Frame rate, resolution status
Image display area
Measurement tool

Company website
:
www.eertvision.nl
Check “Auto”, the program judges that the image is blurred and re-focuses automatically.
Check manual focus and pull the focus progress bar to adjust the focus value. In manual mode,
scroll the mouse wheel to adjust the focus position. One-key focusing mode, can realize one-time
auto-focusing by clicking the mouse. Different focal planes need to click again to focus.
Note: In the image display area, click the right mouse button to switch from automatic focus
mode to manual focus mode. If you need to switch back to auto focus mode, click the "Select
Focus Area" tool.
Focus area: Large focus frame\Small focus frame\FocusFrame\ClickFocus
The area size can choose the size of the focus frame,and pull the progress bar to adjust the
horizontal or vertical position of the focus frame.
FocusFrame: In auto focus mode, check the "focus frame", the image display area will display
the focus frame. In the auto focus mode, check the "ClickFocus" to achieve auto focus by
clicking the screen with the mouse.
2.3.1.2 Exposure
Exposure: automatic\manual

Company website
:
www.eertvision.nl
When the "Auto" exposure is checked, the "Brightness" progress bar can be pulled to adjust the
brightness. When you check the "Hand" exposure, you can pull the "Gain" progress bar to adjust
the gain, or pull the "Shutter" progress bar to adjust the shutter;
Default:The default is automatic exposure.
2.3.1.3 White Balance
White balance: automatic\manual
Auto: Realize automatic white balance under different color temperature conditions.
Hand: Pull the "red, green and blue" progress bar to adjust the color value of "red, green and
blue".
2.3.1.4 Flip
Horizontal: The horizontal direction of the video on the screen is opposite to the actual one.
Vertical: The vertical direction of the video on the screen is opposite to the actual one.

Company website
:
www.eertvision.nl
2.3.1.5 Function
1.Chroma\Saturation\Contrast\Sharpness\Zoom
Chroma: 1-100 value can be adjusted. The default value is 50;
Saturation: 1-100 value can be adjusted. The default value is 50;
Contrast: 1-100 value can be adjusted. The default value is 50;
Sharpness: 0-15 adjustable. The default value is 4.
2.Resolution: There are three groups of resolutions that can be switched in the resolution
options. Every time you switch the resolution, the camera will reconnect.
3. MJPG Quality: adjust the frame rate of different resolutions. The larger the value of MJPG,
the lower the frame rate, the clearer the image, and the larger and clearer the recorded picture is.
4. B&W: black and white/color switching in the image display area.
5.FBL\Save\Default

Company website
:
www.eertvision.nl
The whole movement of the sensor in the camera is 16mm. Click "Center", the sensor will
move to the middle position, and the focus mode will automatically switch to manual mode. After
setting the parameters, click "Save" to save all the parameters. Click "Reset" to restore all
parameters to factory settings.
2.3.2 Extended Depth of Focus
This function can replace the clear part of the image with different focal planes for the
unclear part, thereby obtaining a clear picture with a large depth of field. During image fusion,
the direction of the object to be measured cannot be moved to avoid misalignment after image
synthesis.
1. Click the "Extended Depth of Focus " tool, click on different focal planes in the image
display area to set the start position and end position respectively;
2. Set the capture interval, the larger the capture interval value, the less the number of

Company website
:
www.eertvision.nl
snapshots;
3. Set the grab waiting interval, the unit is ms;
4. Click Start, and when the current progress value is consistent with the number of
snapshots, the interface will display a picture. There is a hint when the synthesis is completed,
and the depth of field synthesis is completed.
5. Save the synthesized picture: The synthesized picture is displayed on the screen, and then
click the "Save" icon in the menu, specify the path and name, and click OK.
6. When operating the depth of field synthesis function, the focus mode will automatically
switch to manual mode. The image display area shows the currently synthesized image. For
example, Tab2*, click "UVC_Camera" to switch to real-time video display. Then click
"Configuration Management" to set the focus mode.
Clear side of the starting position
.
Clear side of the end position
.
Clear picture with large depth of
field after synthesis.

Company website
:
www.eertvision.nl
2.3.3 Video Stitch
1. First set the white balance and exposure to manual exposure mode. Then adjust the
brightness of the light source to adjust the exposure to an appropriate value to avoid overexposure
during the splicing process.
2. Select stitching and adjust stitching speed. There are "fast, middle, slow" options for speed.
Click ‘start’ to stitch the images, and the moving speed should be kept at a constant speed, not too
fast, otherwise the composite image will be blurred. The direction of the image should basically
keep moving in both horizontal and vertical directions, otherwise the effect will not be good.
Finally click ‘stop’ to complete the image stitching.
2.3.4 Photograph Operation
Custom photo:
Drag the splicing speed progress bar to
set the splicing speed
.

Company website
:
www.eertvision.nl
Click the “Set” icon in the menu and select "Custom" as the naming method. There are
two ways to customize a photo:
Method 1: Click the "Caputer" icon in the menu toolbar, the picture will be displayed on
the screen, then click the "Save" icon in the menu, specify the path and name, and click
OK.
Method 2: Directly click the "Save" icon in the menu toolbar, and the save path will
pop up. Confirm the path and name and save. (In the .jpg format, this method can save the
primitives. The picture will display the primitive information when the software is opened again.
For example, the measurement data information is displayed on the image)
Automatically photos:
Click the “Set” icon in the menu, select "Auto" as the naming method, and set the
record path.
Method: directly click the "Save" icon in the menu toolbar, the picture is named by the
date by default, and it is automatically saved in the snapshot path set above. (In the .jpg format,
this method can save the primitives. The picture will display the primitive information when the
software is opened again. For example, the measurement data information is displayed on the
image)

Company website
:
www.eertvision.nl
Modify the photo format: Click the “Set” icon in the menu and select the desired photo
format.
Modify the default naming method for pictures: click the “Set” icon in the menu, select
the quick save method, and name it by date by default. If you need to name the scanner, you need
to use the scanner.
2.3.5 Recording
Click the "Recorder" icon in the menu toolbar to start recording. The interface will display
the icon in the video, click the "Video" icon again to end the video. The video
is automatically saved, and the default path is the software installation path. The path can be
modified in the settings. The path modification method is the same as the method of taking
photos to modify the path.
The recorded video save format is MP4 format.
The video name is named after the time when the recording started.
2.3.6 Measuring
2.3.6.1 Measuring Tool Name
Serial
Number
Tool Name Serial
Number
Tool Name
1 calibration group selection list 12 vertical line

Company website
:
www.eertvision.nl
2 calibration unit selection tool 13 angle measuring tool
3 calibration tool 14 rectangle
4 select focus area 15 measuring arc
5 tracing tool 16 circle
6 select measurement object tool 17 concentric circles
7 automatic edge finding tool 18 polygon
8 straight line 19 Measuring line-circle
9 horizontal line 20 double-circle
10 vertical line 21 text
11 parallel lines 22 crosshair
2.3.6.2 Calibration
1. Click the yellow triangle in the lower right corner of the calibration tool and select
straight line calibration or circle calibration .
2. Activate the calibration tool in the toolbar, drag the marking line to align with the marking
line of the calibration ruler.
3. Enter the lens magnification value, the actual length between the engraved lines, and then
select the unit to complete the calibration.
line calibration circle calibration
Delete calibration: Click the drop-down calibration list, select the calibration group to be

Company website
:
www.eertvision.nl
deleted, and click the red circle to delete the calibration group.
2.3.6.3 Measurement Setup
Before measurement, you can click “Set” to set the measurement tool.
Click the red circle to delete the
calib
ration
.

Company website
:
www.eertvision.nl
You can set the point thickness, color, line
width, line color, font size and font color of
the measured line.
You can set the line width and color of
the crosshair
.
Set the decimal point accuracy of
measurement data
.
Set the line spacing, you can set two sets of lines.
When both sets of values are set to 0, parallel lines
cannot be displayed.
Set the distance between concentric circles, you can set
two groups of concentric circles. When both sets of
values are set to 0, no concentric circles are displayed.
After checking, reduce line drawing
jagged phenomenon
.
Set the saving path, mode and format of a photo

Company website
:
www.eertvision.nl
2.3.6.4 Measurement Operation
1.
The measurement tool includes various stitch measurements. First select the appropriate
calibration and unit according to the specific application.
2.Then choose the appropriate tool to measure. When measuring, just click the anchor point of
the measurement with the mouse. After clicking and releasing the mouse, the measurement data is
displayed in the measurement data list area
.
3.After the measurement is completed, the data in the measurement data list can be exported.
Click the export button , and the data will be automatically saved in a .csv file. The user can
select the save path and modify the file name.
Display measurement data list
.
Measurement line display.
Pull down the calibration list
and select calibration
.

Company website
:
www.eertvision.nl
Delete measurement data: In the measurement data list, select the data to be deleted and
click the right mouse button, and it will prompt to delete a group of data, or delete all data, select
according to your needs.
2.3.6.5 Select Focus Area Tool
After operating the measurement, the focus mode is automatically switched to manual mode.
At this time, you cannot use the mouse to directly click the focus mode to switch to the automatic
mode. You must click the select focus area tool with the left mouse button to select the focus
mode in the focus mode area.
2.3.6.6 Select measurement object tool
1.Left mouse click to select the measurement object tool 。
2.Select a single image element: click to select a measurement data in the image display area,
the color of the selected single image element becomes the inverse of the set color, and the
corresponding image element data is displayed in gray shade in the data list.
Table of contents
Other Eert Digital Camera manuals
Popular Digital Camera manuals by other brands
Santec
Santec SFC-240KBIF Quick installation guide
Casio
Casio EX-V8 - EXILIM Hi-Zoom Digital Camera user guide
Olympus
Olympus E-P1 - Digital Camera - Prosumer installation manual
Sony
Sony a7RIV instruction manual
Teledyne
Teledyne Flir Saros DM Series Quick install guide
DW
DW V1365T Series instruction manual
