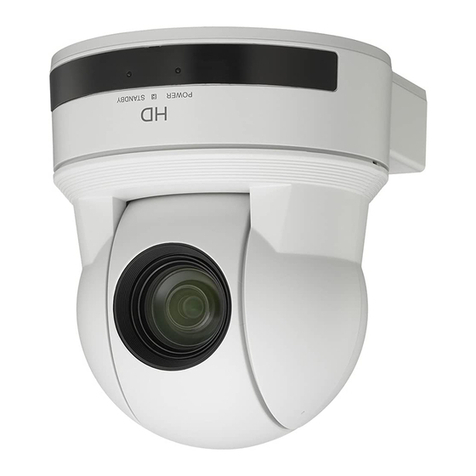
Proctor 700TVL Installation instructions

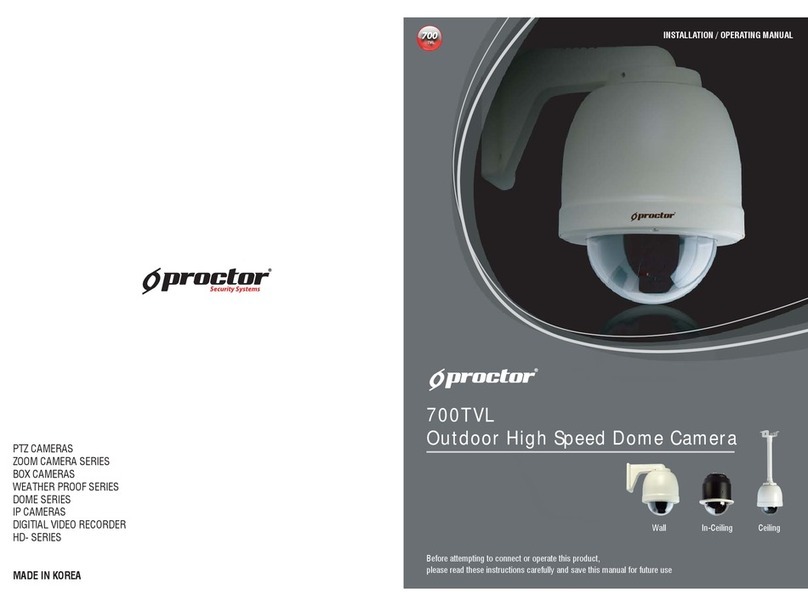
700TVL
High Speed Dome Camera
INSTALLATION / OPERATING MANUAL
Before attempting to connect or operate this product,
please read these instructions carefully and save this manual for future use.
MADE IN KOREA
Wall In-Ceiling Ceiling

02
Indoor Speed PTZ Dome Camera System Use's Guide
03
1. 1 Important Safety Instructions
•
Read these instructions carefully.
•
Pay attention to all the warnings.
•
Follow all instructions.
•
Do not block any ventilation openings. Install in accordance with the manufacturer's instructions.
•
Do not disassemble or insert foreign objects.
•
Do not install near any heat sources such as radiation, stoves, or other apparatus
Including amplifiers that produce any heat.
•
Do not aim the camera at the sun or any other strong light source.
•
Do not install the camera on intermittent lighting environments.
•
Only use attachments/accessories specified by the manufacturer.
•
Use only with the cart, stand, tripod, bracket, or table specified by the manufacturer or sold with
the apparatus. When a cart is used, use caution when moving the cart/apparatus combination
to avoid injury from tipping.
•
Refer all servicing to qualified service personnel. Servicing is required when the apparatus has been
damaged in any way, such as power-supply cord or plug is damaged, liquid has been spilled or
objects have fallen into the apparatus, the apparatus has been exposed to rain or moisture, does not
operate normally, or has been dropped.
•
Installation should be done only by qualified personnel and conform to all local codes.
•
Installation should be done in a place strong enough to hold it.
•
Use only installation methods and materials capable of supporting four times the maximum specified load.
•
It is designed for indoor use only and it must not be installed where exposed to rain and moisture
without additional outdoor housing and bracket.
•
To prevent damage from water leakage when installing a mount outdoors on a roof or wall,
apply sealant around the bolt holes between the mount and mounting surface.
•
These instructions are for use by qualified service personnel only. To reduce the risk of electrical shock
do not perform any servicing or repair other that contained in the operating instructions unless you are
qualified to do so.
•
Only use replacement parts recommended by manufacturer in
these instructions.
1. PRECAUTIONSTABLE OF CONTENTS
3p.
4p.
4p.
5p.
6p.
7p.
8p.
10p.
12p.
12p.
13p.
14p.
14p.
16p.
18p.
19p.
30p.
30p.
31p.
32p.
36p.
36p.
37p.
37p.
38p.
39p.
40p.
1. PRECAUTIONS
1. 1 Important Safety Instructions...................................................................................
2. GETTING STARTED
2. 1 Descriptions ..........................................................................................................
2. 2 Unpacking ..............................................................................................................
2. 3 Selection Flow ........................................................................................................
2. 4 High Speed PTZ Dome Camera Module ..................................................................
2. 5 Accessories Selection (Sold Separately) .................................................................
2. 6 DIP Switch Setting .................................................................................................
2. 7 Cable Connection ...................................................................................................
3. INSTALLATION
3. 1 Surface Mount .......................................................................................................
3. 2 Inceiling Mount ......................................................................................................
3. 3 Indoor / Outdoor Housing..........................................................................................
4. ON-SCREEN DISPLAY PROGRAM MENU
4. 1 Powering ON ..........................................................................................................
4. 2 Establishing Camera Control ...................................................................................
4. 3 Motion Menu ..........................................................................................................
4. 4 Dome Menu ...........................................................................................................
4. 5 Camera Setting.......................................................................................................
4. 6 Clear Menu.............................................................................................................
4. 7 PTZ RESET.............................................................................................................
5. SPECIFICATION
5. 1 Mechanism Specification .......................................................................................
5. 2 Camera Specification..............................................................................................
6. DIMENSION
6. 1 Camera .................................................................................................................
6. 2 Wall and Ceiling Bracket .........................................................................................
6. 3 Parapet Mount Bracket ...........................................................................................
6. 4 Corner Mount / Pole Mount ....................................................................................
7. CONFIGURATION
7. 1 Control from Keyboard or DVR ................................................................................
7. 2 Connecting to Keyboard with DVR -1 ......................................................................
7. 3 Connecting to Keyboard with DVR -2 ......................................................................
Indoor Speed PTZ Dome Camera System Use's Guide

04
Indoor Speed PTZ Dome Camera System Use's Guide
05
Indoor Speed PTZ Dome Camera System Use's Guide
2. 1 Descriptions 2. 3 Selection Flow
This camera is the latest surveillance camera using state of the art technology. It features various functions
including optical auto focus zoom, heavy duty high-speed pan/tilt mechanism and mechanical IR removal
cut-filter. Additional functions include auto focus tracking and preset accuracy of less than 0.1°, 255 preset
positions, 8 privacy masking zones, 4 record 240sec patterns, Auto Flip, and its ability to automatically detect
multiple protocols.This compact speed dome will withstand all types of weather conditions with its IP66 outdoor
housing with heater and blower. It delivers a variety of advanced features and functions making it
the perfect choice for security professionals
2. 2 Unpacking
The following parts are included with an indoor speed PTZ dome camera.
1. Dome body (housing)
2. Dome cover
3. Interface cable with two wired wiper on one end and BNC female on the other end(In-ceiling only)
4. User’s Guide
5. Self-tapping screws & plastic anchors
2. GETTING STARTED
<Figure 1. package Components>
Plate Base
Plastic Anchors Screws(3x8)Screws(4x25)
Video Cable User’s Guide
2. 3. 1
Indoor
2. 3. 2
Outdoor
Model Select
Indoor Surface Mount
In-ceiling Mount
Indoor Ceiling Mount
Mount Type
B type Base
B type Base
B type Base
B type Base
Indoor Wall Mount
Model Select
Outdoor Wall Mount
Outdoor ceiling Mount
Outdoor Corner & Pole Mount
Mount Type
Outdoor Parapet Mount
Camera

06
Indoor Speed PTZ Dome Camera System User’s Guide
07
Indoor Speed PTZ Dome Camera System User’s Guide
2. 5 Accessories Selection (Sold Separately)2. 4 High Speed PTZ Dome Camera Module
2. 4. 1 High Speed PTZ dome camera Models
1/4" Sony Super HAD II (Double Scan )CCD, Optical 36x with WDR
1/4" Sony Super HAD II (Double Scan )CCD, Optical 33x with WDR
1/4" Sony Super HAD II (Double Scan )CCD, Optical 28x with WDR
1/4" Sony Super HAD II (Double Scan )CCD, Optical 22x with WDR
IMPORTANT> When placing order, please make sure which of the below optional selections for the default
camera package is proper for your application.
PAL type / NTSC type
IMPORTANT> Smoke dome cover lets others be unaware of where the camera is shooting.
The camera performance is likely to be the same using either the smoke or transparent clear
cover or slightly darker with smoke cover. If you don't want others to know where you are
shooting, then choose the smoke cover.
2. 5. 1 Out/Indoor environmental Applications
Item
Wall Bracket
Model name
Image
Description
- Aluminum body
- Unit: 1.0Kg
- Cool gray / Black
Wall Pipe Plate Ceiling Pipe Plate Ceiling Plate Pipe Adaptor
- Unit: 3.1Kg
- Cool gray color
- Aluminum & Steel body
- Steel body
- Unit : 1.4Kg
- Cool gray color
- Aluminum diecasting
- Unit : 5.0Kg
- Silver color
- Aluminum & Steel body
- Unit : 1.6K
g,
- Cool gray color
Item
In-ceiling Mount Housing
Model name
Image
Description
Item
Parapet Mount Bracket
Model name
Image
Description
- Stainless steel(SUS) body
- Unit : 5.2Kg
- Maximum load : 20Kg
- Dimensions : 890x650 (Arm)
- 250x350 (Mount plate)
Mounting Adaptor Mounting Adaptor Installation Box
- Steel body
- Unit: 1.3Kg
- Cool gray color
- Steel body
- Unit: 0.7Kg
- Cool gray color
- Steel body
- Unit: 0.4Kg
- Cool gray color
Outdoor Housing with ange Mounting Flange Sun Visor
- Aluminum body
- Unit: 3.1Kg
- Cool gray color
- For wall/ceiling mount
- Aluminum body
- Cool gray color
- Aluminum body
- Unit: 0.6Kg
- Cool gray color

08
Indoor Speed PTZ Dome Camera System User’s Guide
09
Indoor Speed PTZ Dome Camera System User’s Guide
2. 6. 2 Set the termination On/Off
2. 6 DIP Switch Setting
2. 6. 1 Dip Switch Setting
Before using the dome camera set the dip-switches and clock-switches to the correct protocol,
camera address, and termination settings
The device which is connected at the end of the line must have the cable communication terminated.
Without proper termination, there is potential forcontrol signal errors.
The camera can have the cable communication terminated by setting the appropriate dip switch as shown
below.
1: On2: On' Terminated
1: Off 2: Off ' Not terminated
2. 6. 3 Set the camera address (ID)
2. 6. 4 Set the details of the dome
① Separate the dome with the bottom plate.
(Turn the camera counterclockwise from the bottom plate.)
< Bottom side connector board >
8
2
8
7
6
5
7
3
4
6
5
S2
9
0
1
9
0
2
3
41
S3
S3: 1-digit number of address (ID)
S2: 10-digit number of address (ID)
S1: 100-digit number of address (ID)
Ex) If S1=1, S2=2, S3=8, then the ID number is 128.
To prevent electrical damage, each dome camera must have a unique address (ID).
Set the details of the dome
S4(1~3) : Protocol
S4(4)S5(1,2) : Band Rate
S5(3,4) : Parity
S6(1,2) : Camera Module
S6(3) : Video Format
S6(4) : Communication
N.COn
EM
On FCB
Off
SDMOff
2
On
Off
On
Off
1Camera Module
S6
412
Off Off Off
Off Off On
Off On Off
Off On On
On Off Off
On Off On
On On Off
On On On
9600 bps
4800 bps
2400 bps
N.C
57600 bps
38400 bps
19200 bps
S4 / S5 Band Rate
N.C 4
On
Off RS-422
RS-485
S6 Communication
3
On
CSTNffO
PAL
S6 Video Format
* When the camera is ON, camera protocols will be fixed with the first detected protocol.
N.C
S5
3 4
off off
off on
on off
on on
none
even
odd
Parity
AC~
G
1 2
ON
5
6
7
8
901
2
3
4
S4
4
3
2
1
0
9
8
765
S3
S5
S6
S1
S2
-- 0 1
-- 1 1
Reserved
Reserved
Cameramodule
S/TX30
AutoDete
- - 0 1
- - 0 0
RS-485
Communication
-1 - -
-0 - -
RS-422
NTSC
PAL
VideoFormat
S4
S4
S4
0- - -
12 3 4
12 3 4
12 3 4
I/O 1
I/O 2
VIDEO
4
3
2
1
0
9
8
7
65
GND
TX -
TX +
RX -
RX +
G
ON ON
123
Off Off Off
Off Off On
Off On Off
Off On On
On Off Off
On Off On
On On Off
On On On
WPP
Pelco-D v.1.0
WTX
N.C
N.C
N.C
Pelco-D v.5.0
S4 Protocol
N.C

10
Indoor Speed PTZ Dome Camera System User’s Guide
11
Indoor Speed PTZ Dome Camera System User’s Guide
2. 7 Cable Connection 2. 7. 3 Alarm connection
Power connection
- Connect the power of AC 24V, 1000mA to this dome camera.
- Use certified / Listed Class 2 power supply transformers only.
2. 7. 1 Power/Data communication cable connection
-> One way communication with any Keyboard controller by RS-485/ RS-422.
-> Two way communication with video server or other equimpemnt by RS-422.
Simply connect TX- and TX+ of contoller to RX- and RX+ of camera as above.
Connect RX-,RX+,TX- and TX+ of quipment to TX-, TX+, RX- and RX+ of Camera as shown below.
2. 7. 2 Video Output connection
Connect the video out (BNC) connector to the monitor or video input of DVR.
(Video cable and RS-485/422 communication cables are not provided in this product's package.)
VIDEO OUT
Tx - / Tx +
POWER AC 24V
FGND
Rx -
Rx +
Tx -
Tx +
AC
FGND
AC
N N C G 8 7 6 5
O C O N
O C O N
N N C G 4 3 2 1
G Tx- Tx+ Rx- Rx+
AC~G
on
1 2
I/O 1
I/O 2
VIDEO
ALARM INPUT(I/O 2)
ALARM INPUT(I/O 1)
RX-
RX+
TX-
TX+
POWER AC 24V
FGND
Rx -
Rx +
Tx -
Tx +
AC
FGND
AC
N N C G 8 7 6 5
O C O N
O C O N
N N C G 4 3 2 1
G Tx- Tx+ Rx- Rx+
AC~G
on
1 2
I/O 1
I/O 2
VIDEO
N N C G 8 7 6 5
O C O N
O C O N
N N C G 4 3 2 1
G Tx- Tx+ Rx- Rx+
G ~CA
on
1 2
I/O 1
I/O 2
I/O 1 I/O 2
ALARM PIN DETAILS
1 ALARM1 1
2 ALARM2 2
3 ALARM3 3
4 ALARM4 4
5 GND 5
6 COM 1 6
7 NC 1 7
8 NO 1
ALARM5
ALARM6
ALARM7
ALARM8
GND
COM 2
NC 2
NO 28

12
Indoor Speed PTZ Dome Camera System User’s Guide
13
Indoor Speed PTZ Dome Camera System User’s Guide
3.Installation
3. 1 Surface Mount
3. 2 In-ceiling Mount
- The following steps of installation and connection work should only be done by qualified service
personnel or system installers and should conform to all local codes.
- Be sure to leave the camera off until installation is completed.
- Do not install the camera near the air outlet of an air conditioner.
- Before installation, set the dome system with Dip switch on the back side of the mechanism part, and
assemble the mechanism and housing according to the below instruction.
3. 3 Indoor / Outdoor Housing
① Make a cabling hole (70mm diameter) to the
proper position in the ceiling and attach the
included bottom plate.
② Using the safety wire, attach the camera to the
bottom plate.
③ After the cabling, turn clockwise to connect the
camera to the bottom plate.
④ Ensure the camera is not loose by using the side
safety screws.
① Make a cabling hole to the proper position
in the ceiling.
② Before installation, attach the bottom plate to the
in-ceiling housing.
③ Install the In-ceiling housing and pull out the cables
from the ceiling.
④ After the cabling, turn clockwise to connect the
camera to the bottom plate.
⑤ Attach the deco-ring after connecting the camera
system.
① Make wiring and attach the bottom plate in the
Indoor/outdoor housing.
② Using the safety wire, attach the camera to the
bottom plate.
③ After the cabling, turn clockwise to connect the
camera to the bottom plate.
④ Ensure the camera is not loose by using the side
safety screws.
⑤ Attach the dome cover and fasten up by using
the screws.

14
Indoor Speed PTZ Dome Camera System User’s Guide
15
Indoor Speed PTZ Dome Camera System User’s Guide
4. 1 Powering On
When turning the camera power on, there isaten (10) second delay before the camera starts
itshoming phase. During thehoming phase the camera pans left and right and tilts up and down. It also
adjusts the lens focus.
4. 2 Establishing Camera Control
The most common way to interface with the camera is using a keyboard and on-screen display (OSD)
menu. This method is the most common and is covered in this manual.
4. 2. 1 Basic Keyboard Operation
The following tables summarize the basic operations fora standard keyboard and the functions available
to control the camera.
Table 1. 1 Typical Keyboard Functions
Table 2. 1 Typical Keyboard Controls for speed PTZ dome camera system
4. ON-SCREEN DISPLAY PROGRAM MENU
Typical Keyboard Features Usage
Function Keys
Number Keys
Camera Key
Enter Key
Focus Key (Or Near Key)
Iris Key
Key LEDs
LCD
Joystick
Selects a specific control setting
Inputs a number from 0 to 9.
Selects a camera number
Inputs a selection
Sets the lens focus or make a menu selection in OSD menu.
Sets the lens iris setting or makes a menu selection in OSD menu.
Indicates an active key
Displays the current status
Controls a pan/tilt/zoom
Dome Operation How to Control
To Pan Side to Side
To Tilt Up and Down
To Zoom In
To Zoom Out
Move the joystick left or right.
Move the joystick forward and back.
Twist the joystick clockwise.
Twist the joystick counterclockwise.
This camera isprogrammed through the on-screen display (OSD)menus.
To access the OSD menus, you must open themain Setup Menu.
4. 2. 3 Setup Program OSD Menu From Keyborad.
The main Setup Menu provides access to all programmable camera settings.
4. 2. 2 Keyboard Commands
- Keyboard control commands are composed of a sequence of two (2) inputs with the following
convention: 1) a Command number key(s) + 2) a Function key.
- Command numbers range from 1 to 255.
- Refer to the keyboard manual for the key naming conventions in detail.
4. 2. 4 Go into the camera setup 0SD Menu
Press key “1” and keep pressing the“MENU” key for approximately 3 seconds, or press key “95” and
press “Preset” key togointothe set-up menu.Setup menus are shown in thediagram below. You can
adapt the camera to your requirements by setting up the respective items in these menus.
4. 2. 5 OSD Menu tree
→
→
→
→

16
Indoor Speed PTZ Dome Camera System User’s Guide
17
Indoor Speed PTZ Dome Camera System User’s Guide
4. 3 Motion Menu
4. 3. 1 PRESET
- Function : Max. 255 positions can be stored as Preset position. The preset number can be assigned
from 1 to 255, but 95 is reserved for starting OSD menu. Camera characteristics
(i.e. WhiteBalance, AutoExposure) except for Focus can be set up independently for each
preset. Label can be freely set to each Preset position. All characteristics can be set up
in the OSD menu.
- Preset No. : Max. 255 positions can be stored and each position can be assigned as a defined
Preset No.
- Label : Each Preset can have its own label name.
- Position : It displays the coordinates to position the assigned Preset.
- Focus : It enables setting the camera focus for each Preset position. (Default Auto)
4. 3. 2 TOUR
- Function :
By using the Tour function, you can set the camera to move among a Max. 15 Preset
positions
repeatedly. When Tour function runs, camera moves from thepreset assigned
as the1st
point to the preset assigned as the last point in sequence. The camera will stay
to each
point for the time set to the dwell time in Tour Edit and move to the next point.
- Tour No. :
Max. 8 Tours can be stored and the each tour can have Max. 15 Preset positions with the
defined
Tour No.
- Label : Each Tour can have its own label name.
- Tour Edit : The Preset position, Speed and Dwell time can be assigned to each Tour. The Speed
can be set up from 1°/sec to 63°/sec and the Dwell time can be set up from 1sec to 99secs.
4. 3. 3 GROUP
- Function : Max.6 group can be stored and camera moves assigned tour.
- GROUP No. : Max 6 groups.
- Label : Each group can have its own label name.
- Group Edit : Max.6 tour can be assigned to each tour.
4. 3. 4 SCAN
- Function :
By using Scanfunction, the camera moves between 2 positions if there is no PTZ command
after passing the assigned Dwell time. When there is no camera movement, the Scan function
runs and the camera moves from the position assigned as the starting point to the position
assigned as the end point in Clockwise direction.
- Scan No. : Max. 8 Scans can be stored.
- Label : Each of scan can have its own label name.
- Start position : Assign the coordinate of the Scan starting position.
- End position : Assign the coordinate of the Scan ending position.
- Speed : It enables the setting of the running speed in each coordinate.(1~63sec)
- Dwell : The Scan function runs after the Dwell time without any camera movement.(~59 min)
- Focus : It enables the setting of the camera Focus. (Default is Auto)
4. 3. 5 PATTERN
- Function :
Pattern function isthat a camera memorizes thepath (mostly curve path) by joystick of
controller for the assigned time and revives the path exactly as it memorized.
- Pattern No. : 4 Patterns can be stored in Keyboard menu. But if by chance your Keyboard does not
have
this menu, then
the Pattern might not be performed correctly.
- Label: Each Pattern can have its own label name.
- Record :
Movement byjoystick and preset movement can be memorized in apattern. To save therecording,
press NEAR key. It records Max. 60seconds. If by chance your Keyboard is not set to WCY
model, then this Record menu might not be performed.
- Play : To revive the Pattern during the recorded time.
4. 3. 6 AREA
- Function :
By using the Area function, you can make the camera move between 2 pan positions
repeatedly.
When Area functions runs, camera moves from thepan position assigned as the
start pan
position to the position assigned as the stop pan position. In case the position
assigned
as the start point is the same as the position assigned as the end position, the
camera turns on its axis by 360° in Clockwise direction and then it turns on its axis by 360° in
counterclockwise
direction.
- Area No. : Max. of 16 Areas can be stored.
- Label : Each Area can have its own label name.
- Start Pan Position : Assign the coordinate of Area starting position.
- Stop Pan Position : Assign the coordinate of Area stopping position.
4. 3. 7 ALARM
- Function :
Alarm function enables the camera to move to the programmed Preset position when there is
Alarm trigger.
- Alarm No. : Max. 8 Alarms can be stored.
- Label : Each Alarm can have its own label name.
- Preset No. : Assign the Preset No. to run when alarm is triggered.
4. 3. 8 PRIVACY
- Function : To protect privacy, Max. of 8 Privacy settings can be created on the arbitrary position to
hide objects
such as windows, shops or private houses With spherical coordinates
system powerful
Privacy zone masking function is possible.
- Privacy No. : 8 Privacy zone can be stored.
- Position : Assign the coordinate to hide with Privacy.

18
Indoor Speed PTZ Dome Camera System User’s Guide
19
Indoor Speed PTZ Dome Camera System User’s Guide
4. 4. 1 TITLE
- Function : Set the camera title to display on screen
- To store the Title, press TELE button on the Keyboard. To delete, press WIDE.
4. 4. 2 POWER UP ACTION
- Function :
This function enables to resume the last action executed before power down. Most of actions
such as Preset, Tour, Pattern, and Scan are available for this function but Jog actions are not
available to resume.
- To activate this function, set this function to ON.
4. 4. 3 PARK ACTION
- Function :
This function enables to locate the camera to specific position automatically if operator doesn’t
operate the controller for a while.
- Time<Min> : The Park time can be assigned from 5min to 60min.
- Function : Can select one of the motion functions, Preset, Tour, Scan and Pattern.
- Number : The number of selected motion function.
4. 4. 4 DISPLAY ON/OFF
- Function : It enables to turn on or off for the menu On-screen display.
-
TITLE, ALARM,ZOOM,POSITION, PRESET, GROUP, ACTION, TOUR, SCAN, PATTERN, PRIVACY, and AREA
menu
On-screen display On/Off
- To turn on the display, press TELE button from the Keyboard. To turn off, press WIDE.
4. 4. 5 DOME SUB MENU
- TILT LIMIT : Set tilt stop angle. : OFF ~15 DEG
- SPEED BY ZOOM : Pan and Tilt speed can be changed depending on zoom magnification. ON will slow down
the speed of Pan/Tilt and OFF will increase the Pan/Tilt speed.
- AUTO FLIP : In case that tilt angle arrives at the top of tilt orbit (90°), zoom module camera keep moving
to opposite tilt direction (180°) to keep tracing targets. As soon as zoom module camera passes through the top
of tilt direction (90°), images should be reversed automatically and appears in screen. If this function is set to OFF,
tilt movement range is 0~90°
- PRESET FREEZE :Video out for start & stop points only and during camera movement the screen is shown paused
image.
4. 4. 6 FACTORY SET
- Function : It makes to restore all of setting value to the factory default.
- Please be careful that all of existing value would be erased by this Factory Set ON.
4. 4 Dome Menu
D-ZOOM (Digital Zoom)
- Magnification of the Digital Zoom can be switched On and Off.
- It is recommended that the Digital Zoom is set up before the preset operation.
- As the digital zoom magnification increases, the image quality is lowered.
ZOOM MENU
ZOOM SPEED : 7
DZOOM : OFF
BACK
< NEAR / RIGHT ZOOM SPEED>
ZOOM MENU
ZOOM SPEED : 7
DZOOM : ON
BACK
< NEAR / RIGHT D-ZOOM >
ZOOM SPD : Select from 1step to 7 steps,
7 (Standard speed)
Decide using of digital zoom function.
D-ZOOM: ON/ OFF
①
ZOOM MODE
Zoom speed can be set and decide using of digital
zoom function.
4. 5 Camera Setting
Select :
NE AR
Set :

20
Indoor Speed PTZ Dome Camera System User’s Guide
21
Indoor Speed PTZ Dome Camera System User’s Guide
②
FOCUS
In Focus menu, you can set up the focus mode among Auto, One Push, Manual or Infinity.
CAMERA MENU
ZOOM MODE
FOCUS MODE
AE MODE
WB MODE
ICR MODE
SPECIAL
CAM RESET
SAVE BACK EXIT
< NEAR / RIGHT FOCUS SET >
AUTO: The camera adjusts the focus automatically while
monitoring the screen continuously in auto mode.
In auto focusing mode, zoom key operation is not
recognized as the input of the focus key.
One Push: It will be focused in about 5 seconds after zooming,
panning, and return to MANUAL mode automatically.
This is for focusing accurately after zooming.
Manual: In the manual mode, users can adjust the camera
focus manually.
Infinity: Infinity focus is the state where a lens forms an image of an object an infinite distance away.
This corresponds to the point of focus for parallel rays.
Set the speed for camera focusing.
CAMERA MENU
ZOOM MODE
FOCUS MODE
AE MODE
WB MODE
ICR MODE
SPECIAL
CAM RESET
SAVE BACK EXIT
< NEAR / RIGHT AE SET >
③AUTO EXPOSURE
AUTO EXPO.MENU
AE MODE : AUTO
SHUTTER SPD : AUTO
SLOWSHUTTER : OFF
IRIS LEVEL : AUTO
GAIN LEVEL : AUTO
AGC MODE : ON
EXPO. MODE : ON
EXPO. LEVEL : 0dB
BACK
< NEAR / RIGHT AE MODE >
AE setting is a function that adjusts the shutter speed according to subject’s brightness to get optional
amount of exposed light.
AF MODE: Set the AF MODE.
SENSITIVITY: Set the sensitivity of focus
Set the near limit.
Select AUTO,MANUAL,SHUTTER and IRIS.
FOCUS MENU
FOCUS MODE : AUTO
FOCUS SPEED : XXXX
NEAR LIMIT : 10CM
AF MODE : NORMAL
SENSITIVITY : NORMAL
BACK
< NEAR / RIGHT FOCUS MODE >
FOCUS MENU
FOCUS MODE : AUTO
FOCUS SPEED : XXXX
NEAR LIMIT : 10CM
AF MODE : NORMAL
SENSITIVITY : NORMAL
BACK
< NEAR / RIGHT FOCUS SPD >
FOCUS MENU
FOCUS MODE : AUTO
FOCUS SPEED : XXXX
NEAR LIMIT : 10CM
AF MODE : NORMAL
SENSITIVITY : NORMAL
BACK
< NEAR / RIGHT NEAR LIMIT >
FOCUS MENU
FOCUS MODE : AUTO
FOCUS SPEED : XXXX
NEAR LIMIT : 10CM
AF MODE : NORMAL
SENSITIVITY : NORMAL
BACK
< NEAR / RIGHT AF MODE >
BACK
< NEAR / RIGHT SENSITIVITY >
FOCUS MENU
FOCUS MODE : AUTO
FOCUS SPEED : XXXX
NEAR LIMIT : 10CM
AF MODE : NORMAL
SENSITIVITY : NORMAL
Select :
NE AR
Set :
Select :
NE AR
Set :
Select :
NE AR
Set :
Select :
NE AR
Set :
Select :
NE AR
Set :
Select :
NE AR
Set :

22
Indoor Speed PTZ Dome Camera System User’s Guide
23
Indoor Speed PTZ Dome Camera System User’s Guide
AE MODE : AUTO
SHUTTER SPD : AUTO
SLOWSHUTTER : OFF
IRIS LEVEL : AUTO
GAIN LEVEL : AUTO
AGC MODE : ON
EXPO. MODE : ON
EXPO. LEVEL : 0dB
BACK
< NEAR / RIGHT SHUTTER SPD >
AE MODE : AUTO
SHUTTER SPD : AUTO
SLOWSHUTTER : OFF
IRIS LEVEL : AUTO
GAIN LEVEL : AUTO
AGC MODE : ON
EXPO. MODE : ON
EXPO. LEVEL : 0dB
BACK
< NEAR / RIGHT SLOW SHT >
AE MODE : IRIS
SHUTTER SPD : AUTO
SLOWSHUTTER : OFF
IRIS LEVEL : 07
GAIN LEVEL : 28db
AGC MODE : ON
EXPO. MODE : ON
EXPO. LEVEL : 0dB
BACK
< NEAR / RIGHT IRIS LEVEL >
AE MODE : AUTO
SHUTTER SPD : AUTO
SLOWSHUTTER : OFF
IRIS LEVEL : AUTO
GAIN LEVEL : AUTO
AGC MODE : ON
EXPO. MODE : ON
EXPO. LEVEL : 0dB
BACK
< NEAR / RIGHT GAIN LEVEL >
AE EXPO.MENU
AE MODE : AUTO
SHUTTER SPD : AUTO
SLOWSHUTTER : OFF
IRIS LEVEL : AUTO
GAIN LEVEL : AUTO
AGC MODE : ON
EXPO. MODE : ON
EXPO. LEVEL : 0dB
BACK
< NEAR / RIGHT AGC MODE >
AE EXPO.MENU
AE MODE : AUTO
SHUTTER SPD : AUTO
SLOWSHUTTER : OFF
IRIS LEVEL : AUTO
GAIN LEVEL : AUTO
AGC MODE : ON
EXPO. MODE : ON
EXPO. LEVEL : 0dB
BACK
< NEAR / RIGHT EXPO. MODE >
AE EXPO.MENU
AE MODE : AUTO
SHUTTER SPD : AUTO
SLOWSHUTTER : OFF
IRIS LEVEL : AUTO
GAIN LEVEL : AUTO
AGC MODE : ON
EXPO. MODE : ON
EXPO. LEVEL : 0dB
BACK
< NEAR / RIGHT EXPO. LEVEL >
Select ON/ OFF.
Select ON/ OFF in AGC MODE.
Select AUTO or Manual.
If you set SHUTTER in the AE MODE, you can control image
brightness by adjusting shutter speed.
If you set IRIS in the AE MODE, you can set the IRIS level
from 00 to 17 .
If you set MANUAL, IRIS and SHUTTER in the AE MODE, you can
set the GAIN for brighter image from 0~30dB. (Changable by 2dB)
AUTO EXPO.MENU
AUTO EXPO.MENU
AUTO EXPO.MENU
AUTO EXPO.MENU
If you set ON in the EXPO MODE, you can control this level.
( "0" is standard (±10.5 selectable), changed by 1.5dB)
Select :
NE AR
Set :
Select :
NE AR
Set :
Select :
NE AR
Set :
Select :
NE AR
Set :
Select :
NE AR
Set :
Select :
NE AR
Set :
Select :
NE AR
Set :
1/15
1/30
1/60
1/90
1/100
1/180
1/250
1/500
1/1000
1/1500
1/2000
1/5000
1/10000
1/20000
1/50000
1/100000
X512
X128
X64
X32
X16
X8

24
Indoor Speed PTZ Dome Camera System User’s Guide
25
Indoor Speed PTZ Dome Camera System User’s Guide
CAMERA MENU
ZOOM MODE
FOCUS MODE
AE MODE
WB MODE
ICR MODE
SPECIAL
CAM RESET
SAVE BACK EXIT
< NEAR / RIGHT WB SET >
CAMERA MENU
ZOOM MODE
FOCUS MODE
AE MODE
WB MODE
ICR MODE
SPECIAL
CAMERA RESET
SAVE BACK EXIT
< NEAR / RIGHT ICR SET >
ICR MENU
ICR MODE : AUTO
ICR THRESHOLD :11
BACK
< NEAR / RIGHT ICR MODE >
④WHTE BALANCE
Sets the white balance of camera.
⑤ICR MODE
Sets the LED operation depending ICR Mode.
Select AUTO, DAY, NIGHT,SENSIN and ext mode and the LED will be operated depending on this mode.
WHITE BALANCE MODE
WB MODE : ATW
RED GAIN : xxx
BLUE GAIN: xxx
BACK
< NEAR / RIGHT WB MODE SEL >
WHITE BALANCE MODE
WB MODE : MANUAL
RED GAIN : 025
BLUE GAIN: 025
BACK
< NEAR / RIGHT R GAIN >
White balance setting is a function revising color temperature
to resolve the problem of the screen’s colors change
by the color
temperature’s difference according to time.
WB MODE: Set the color depend on white balance.
WB MODE : Select AUTO, INDOOR, OUTDOOR and
ONEPUSHWB,ATW and MANUAL.
RED GAIN: Adjust red color level from 0~255.
(Standard level is 025)
BLUE GAIN: Adjust blue color level from 0~255.
(Standard level is 025)
Set the ICR THRESHOLD from 00 to 28 LUX.
ICR MENU
ICR MODE : AUTO
ICR THRESHOLD :11
BACK
< NEAR / RIGHT ICR THRESHOLD >
Select :
NE AR
Set :
Select :
NE AR
Set :
Select :
NE AR
Set :

26
Indoor Speed PTZ Dome Camera System User’s Guide
27
Indoor Speed PTZ Dome Camera System User’s Guide
MAIN MENU
< NEAR / RIGHT SPECIAL SET >
MOTION
DOME
CAMERA
CLEAR
CAM RESET
SPECIAL
SAVE BACK EXIT
⑥SPECIAL
In the Special menu, it’s available to set APERTUREGAIN, FLICKERLESS, BACK LIGHT, LINE LOCK,
V PHASE, DNR LEVEL and WDR MODE.
SUB SP MODE : In the Special menu, it’s available to set
special function of the camera
SPECIAL MENU
BACK
< NEAR / RIGHT SUB MENU >
SUB SP MODE
APERTUREGAIN : 07
FLICKERLESS : OFF
BACK LIGHT : OFF
LINE LOCK : OFF
V PHASE : XXX
DNR LEVEL : AUTO
WDR MODE : OFF
SPECIAL MENU
BACK
< NEAR / RIGHT ON/OFF>
STABILIZER : OFF
BLC MODE : OFF
HLC MODE : OFF
HLC CLIP LEV: XX
HLC LEVEL : XX
STABILIZER: Select ON or OFF.
SPECIAL MENU
BACK
< NEAR / RIGHT ON/OFF>
STABILIZER : OFF
BLC MODE : OFF
HLC MODE : ON
HLC CLIP LEV : XX
HLC LEVEL : XX
BLC MODE : Select ON or OFF.
SPECIAL MENU
BACK
< NEAR / RIGHT ON/OFF>
STABILIZER : OFF
BLC MODE : OFF
HLC MODE : ON
HLC CLIP LEV : XX
HLC LEVEL : XX
HLC MODE : Select ON or OFF.
SPECIAL MENU
BACK
< NEAR / RIGHT LEVEL>
STABILIZER : OFF
BLC MODE : OFF
HLC MODE : ON
HLC CLIP LEV : XX
HLC LEVEL : XX
HLC CLIP LEVEL : Select HLC function ON and set the HLC
CLIP LEVEL.
SPECIAL MENU
BACK
< NEAR / RIGHT LEVEL>
STABILIZER : OFF
BLC MODE : OFF
HLC MODE : ON
HLC CLIP LEV : XX
HLC LEVEL : XX
HLC LEVEL : Set the HLC LEVEL.
Select :
NE AR
Set :
Select :
NE AR
Set :
Select :
NE AR
Set :
Select :
NE AR
Set :
Select :
NE AR
Set :
Select :
NE AR
Set :

28
Indoor Speed PTZ Dome Camera System User’s Guide
29
Indoor Speed PTZ Dome Camera System User’s Guide
MAIN MENU
< NEAR / RIGHT RESET >
MOTION
DOME
CAMERA
CLEAR
CAM RESET
SPECIAL
SAVE BACK EXIT
Initializes all setting values which are set in CAMERA MENU.
⑦CAMERA RESET
Set the APERTUREGAIN value .
Select ON/OFF in the FLICKERLESS function.
Select ON/OFF in the BACK LIGHT function.
If you set ON in the LINE LOCK menu, you can set
the V PHASE.
Set the DNR LEVEL from AUTO, OFF and 1 ~ 10.
Set the WDR MODE from OFF, LEV1 ~LEV7.
Select :
NE AR
Set :
Select :
NE AR
Set :
Select :
NE AR
Set :
Select :
NE AR
Set :
Select :
NE AR
Set :
Select :
NE AR
Set :
Select :
NE AR
Set :
Select :
NE AR
Set :
SPECIAL MENU
BACK
< NEAR / RIGHT APERTURE >
SUB SP MODE
APERTUREGAIN : 07
FLICKERLESS : OFF
BACK LIGHT : OFF
LINE LOCK : OFF
V PHASE : XXX
DNR LEVEL : AUTO
WDR MODE : OFF
SPECIAL MENU
BACK
< NEAR / RIGHT FLICKERLESS >
SUB SP MODE
APERTUREGAIN : 07
FLICKERLESS : OFF
BACK LIGHT : OFF
LINE LOCK : OFF
V PHASE : XXX
DNR LEVEL : AUTO
WDR MODE : OFF
SPECIAL MENU
BACK
< NEAR / RIGHT BACK LIGHT >
SUB SP MODE
APERTUREGAIN : 07
FLICKERLESS : OFF
BACK LIGHT : OFF
LINE LOCK : OFF
V PHASE : XXX
DNR LEVEL : AUTO
WDR MODE : OFF
SPECIAL MENU
BACK
< NEAR / RIGHT LINE LOCK >
SUB SP MODE
APERTUREGAIN : 07
FLICKERLESS : OFF
BACK LIGHT : OFF
LINE LOCK : OFF
V PHASE : XXX
DNR LEVEL : AUTO
WDR MODE : OFF
SPECIAL MENU
SUB SP MODE
APERTUREGAIN : 07
FLICKERLESS : OFF
BACK LIGHT : OFF
LINE LOCK : OFF
V PHASE : XXX
DNR LEVEL : AUTO
WDR MODE : OFF
BACK
< NEAR / RIGHT V PHASE >
SPECIAL MENU
SUB SP MODE
APERTUREGAIN : 07
FLICKERLESS : OFF
BACK LIGHT : OFF
LINE LOCK : OFF
V PHASE : XXX
DNR LEVEL : AUTO
WDR MODE : OFF
BACK
< NEAR / RIGHT DNR LEVEL >
SPECIAL MENU
SUB SP MODE
APERTUREGAIN : 07
FLICKERLESS : OFF
BACK LIGHT : OFF
LINE LOCK : OFF
V PHASE : XXX
DNR LEVEL : AUTO
WDR MODE : OFF
BACK
< NEAR / RIGHT WDR MODE >

30
Indoor Speed PTZ Dome Camera System User’s Guide
31
Indoor Speed PTZ Dome Camera System User’s Guide
5. SPECIFICATION
Here you can clear programmed Preset, Tour, Scan, Pattern, Area, Alarm
and Privacy.
4. 6. 1 Preset
Clear all of memorized Preset data
4. 6. 2 Tour
Clear all of memorized Tour data
4. 6. 3 GROUP
Clear all of memorized Scan data
4. 6. 4 Scan
Clear all of memorized Scan data
4. 6. 5 Pattern
Clear all of memorized Pattern data
4. 6. 6 Area
Clear all of memorized Area data
4. 6. 7 Alarm
Clear all of memorized Alarm data
4. 6. 8 Privacy
Clear all of memorized Privacy data
5. 1 Mechanism Specifications
4. 6 Clear Menu
4. 7 PTZ RESET
- Pan : 360° Continuous Pan, 0.1º to 90º/sec. (64 steps proportional to zoom)
- Pan Preset Speed : 380°/sec, ± 0.1° Accuracy
- Tilt : 0.1º to 90º/sec. (proportional to zoom)
- Tilt Preset Speed : 150°/sec, ± 0.05° Accuracy
- Weight : Approx. 1.6Kg (4.7 lbs) / Packing : 2.0Kg
- Dimensions : 125(Ø) x 194(D) mm – 4.9(Ø) x 7.64(D) mm
- Ingress Protection : IP66 (Outdoor Housing)
- Construction : Aluminum
- Color : Cool Gray
- Operating Temp : Indoor : 0°C to 50°C (14° F to 122° F)
Outdoor : -20°C to 50°C (14° F to 131° F) / (W/Outdoor Housing)
- Storage Temp : -20°C to 60°C (-4° F to 140° F)
- Humidity : 0% to 90% (non-condensing)
- Fan / Heater operate : 35°C off , 45°C on / 10°C on , 20°C off
(Optional outdoor housing)
- Preset : 255 points, less than 0.1° accuracy
- Tour : 8 programmable
- Pattern : 4 patterns for 240 second.
- Auto Flip : Auto / Off (Rotate 90° at bottom of tilt)
- Scan : 8(programmable speed and diagonal scan)
- Privacy Zone :
8 blocks with title (Mask)
- Address : Up to 255 selectable ID (Rotary switch)
- Control :
RS-485 / RS-422, Multiple protocol (Auto detection)
2400, 4800, 9600, 19200. 38400, 57600 bps selectable
- Protocol : Multiple protocol (PELCO-D/P, WONWOO)
2400, 4800, 9600, 19200, 38400, 57600 bps selectable
- Alarm In :
8 alarm
- Alarm Out :
2 relay out
- Display :
16 Area title
Zone title on/off (start / end zone)
- Power :
24VAC 60Hz / 24VAC 50Hz (Power adaptor not included)
- Consumption :
18.0 W ( 1.0 A Max.)
- Heater :
33W or 62.7W (Optional outdoor housing)
- Fan :
3.4W (Optional outdoor housing)
- Power(Camera) : AC21V - AC28V, 50/60Hz - 15W Maximum
- Power(Heater) : AC21V - AC28V, 50/60Hz - 30W Maximum
- RS-422, 485 : + / - Optional Control Data
- Video : BNC
- Alarm Inputs : 8 Programmable
- Relay Out : 2 Dry Contact Output Rating: 1A 30V DC / 0.3A 125V AC
- CE EMC , FCC CLASS A, RoHS
5. 1. 1 MECHANICAL
5. 1. 2 ENVIRONMENTAL
5. 1. 3 FUNCTIONS
5. 1. 4 ELECTRICAL
5. 1. 5 USER CONNECTRIONS
5. 1. 6 CERTIFICATIONS
Select :
NE AR
Set :
→
→
→
→

32
Indoor Speed PTZ Dome Camera System User’s Guide
33
Indoor Speed PTZ Dome Camera System User’s Guide
5. 2 Camera Specifications
- Image Sensor
- Total Pixels
- Scanning system
- Scanning Frequency
- Sync. System
- Resolution
- Min. illumination
- Video Output
- S/N Ratio
- Lens type
- Zoom Ratio
- Focal Length
- Aperture Ratio
- Focus
- Focus Distance
- E. Zoom
- Exposure
- Gain Control
- Shutter Speed
- Digital Shutter Speed
- Flickerless
- Brightness
- WDR
- Day&Night
- White Balance
- Image DNR
- Sharpness
- Effect
- Freeze
- Intelligent
- Privacy Mask
- Motion Detection
- Object Detection
- Special
- Sync Mode
- Phase
- Digital Image Stabilizer
:1/4" SONY Super HADⅡ(Double Scan) CCD
:1028(H) × 508(V) , 1028(H) x 596(V)
: 2:1 Interlace
: 15.734KHz(H),59.94Hz(V) , 15.625KHz(H),50Hz(V)
: Internal / External (V-Lock)
: MAX 700 TV lines (COLOR) , 750 TV lines (BW)
: Color : 0.5 lux , BW : 0.2 lux , Color DSS : 0.001 lux
BW DSS : 0.0004 lux
: 1.0 Vp-p (75 ohm, composite)
: More than 50dB (AGC off)
: 36x Day & Night Zoom Lens
: Optical 36x, Digital 32x Zoom
: f = 3.4 mm ~ 122.4 mm
: F1.6 (wide) ~ F4.5 (tele)
: Auto / One Push / Manual
: 0.1 / 1.3 / 1.8 / 3.0 / 5.0 m
: Off / Max 2x~32x
: Auto / Shutter PRI / Iris PRI / Manual
: Off / On (Auo Max 30dB)
: 1/60 ~ 1/100,000 sec , 1/50 ~ 1/100,000 sec
: Off / Max 2x~512x
: Off / On
: 1 ~15 steps
: Off / WDR / BLC
: Day / Night / Auto / Ext
: ATW / One-Push / Indoor / Outdoor / Manual / Auto
: Off / Manual / Auto
: 1 ~ 16 steps
: Off / Negative / B&W
: Off / On
: Privacy / MD / OD
: Off / 8 positions
: Off / 3 positions
: Off / On
: Sync / Phase / Comm
: INT / LL
: 0 ~ 255 steps
: Off / On
Optical 36x with WDR
- Image Sensor
- Total Pixels
- Scanning system
- Scanning Frequency
- Sync. System
- Resolution
- Min. illumination
- Video Output
- S/N Ratio
- Lens type
- Zoom Ratio
- Focal Length
- Aperture Ratio
- Focus
- Focus Distance
- E. Zoom
- Exposure
- Gain Control
- Shutter Speed
- Digital Shutter Speed
- Flickerless
- Brightness
- WDR
- Day&Night
- White Balance
- Image DNR
- Sharpness
- Effect
- Freeze
- Intelligent
- Privacy Mask
- Motion Detection
- Object Detection
- Special
- Sync Mode
- Phase
- Digital Image Stabilizer
:1/4" SONY Super HADⅡ(Double Scan) CCD
:1028(H) × 508(V) , 1028(H) x 596(V)
: 2:1 Interlace
: 15.734KHz(H),59.94Hz(V) , 15.625KHz(H),50Hz(V)
: Internal / External (V-Lock)
: MAX 700 TV lines (COLOR) , 750 TV lines (BW)
: Color : 0.5 lux , BW : 0.2 lux , Color DSS : 0.001 lux
BW DSS : 0.0004 lux
: 1.0 Vp-p (75 ohm, composite)
: More than 50dB (AGC off)
: 33x Day & Night Zoom Lens
: Optical 33x, Digital 32x Zoom
: f = 3.4 mm ~ 115.5 mm
: F1.6 (wide) ~ F4.5 (tele)
: Auto / One Push / Manual
: 0.1 / 1.3 / 1.8 / 3.0 / 5.0 m
: Off / Max 2x~32x
: Auto / Shutter PRI / Iris PRI / Manual
: Off / On (Auo Max 30dB)
: 1/60 ~ 1/100,000 sec , 1/50 ~ 1/100,000 sec
: Off / Max 2x~512x
: Off / On
: 1 ~15 steps
: Off / WDR / BLC
: Day / Night / Auto / Ext
: ATW / One-Push / Indoor / Outdoor / Manual / Auto
: Off / Manual / Auto
: 1 ~ 16 steps
: Off / Negative / B&W
: Off / On
: Privacy / MD / OD
: Off / 8 positions
: Off / 3 positions
: Off / On
: Sync / Phase / Comm
: INT / LL
: 0 ~ 255 steps
: Off / On
Optical 33x with WDR

34
Indoor Speed PTZ Dome Camera System User’s Guide
35
Indoor Speed PTZ Dome Camera System User’s Guide
- Image Sensor
- Total Pixels
- Scanning system
- Scanning Frequency
- Sync. System
- Resolution
- Min. illumination
- Video Output
- S/N Ratio
- Lens type
- Zoom Ratio
- Focal Length
- Aperture Ratio
- Focus
- Focus Distance
- E. Zoom
- Exposure
- Gain Control
- Shutter Speed
- Digital Shutter Speed
- Flickerless
- Brightness
- WDR
- Day&Night
- White Balance
- Image DNR
- Sharpness
- Effect
- Freeze
- Intelligent
- Privacy Mask
- Motion Detection
- Object Detection
- Special
- Sync Mode
- Phase
- Digital Image Stabilizer
:1/4" SONY Super HADⅡ(Double Scan) CCD
:1028(H) × 508(V) , 1028(H) x 596(V)
: 2:1 Interlace
: 15.734KHz(H),59.94Hz(V) , 15.625KHz(H),50Hz(V)
: Internal / External (V-Lock)
: MAX 700 TV lines (COLOR) , 750 TV lines (BW)
: Color : 0.5 lux , BW : 0.2 lux , Color DSS : 0.001 lux
BW DSS : 0.0004 lux
: 1.0 Vp-p (75 ohm, composite)
: More than 50dB (AGC off)
: 28x Day & Night Zoom Lens
: Optical 28x, Digital 32x Zoom
: f = 3.4 mm ~ 97.9 mm
: F1.6 (wide) ~ F4.5 (tele)
: Auto / One Push / Manual
: 0.1 / 1.3 / 1.8 / 3.0 / 5.0 m
: Off / Max 2x~32x
: Auto / Shutter PRI / Iris PRI / Manual
: Off / On (Auo Max 30dB)
: 1/60 ~ 1/100,000 sec , 1/50 ~ 1/100,000 sec
: Off / Max 2x~512x
: Off / On
: 1 ~15 steps
: Off / WDR / BLC
: Day / Night / Auto / Ext
: ATW / One-Push / Indoor / Outdoor / Manual / Auto
: Off / Manual / Auto
: 1 ~ 16 steps
: Off / Negative / B&W
: Off / On
: Privacy / MD / OD
: Off / 8 positions
: Off / 3 positions
: Off / On
: Sync / Phase / Comm
: INT / LL
: 0 ~ 255 steps
: Off / On
Optical 28x with WDR
- Image Sensor
- Total Pixels
- Scanning system
- Scanning Frequency
- Sync. System
- Resolution
- Min. illumination
- Video Output
- S/N Ratio
- Lens type
- Zoom Ratio
- Focal Length
- Aperture Ratio
- Focus
- Focus Distance
- E. Zoom
- Exposure
- Gain Control
- Shutter Speed
- Digital Shutter Speed
- Flickerless
- Brightness
- WDR
- Day&Night
- White Balance
- Image DNR
- Sharpness
- Effect
- Freeze
- Intelligent
- Privacy Mask
- Motion Detection
- Object Detection
- Special
- Sync Mode
- Phase
- Digital Image Stabilizer
:1/4" SONY Super HADⅡ(Double Scan) CCD
:1028(H) × 508(V) , 1028(H) x 596(V)
: 2:1 Interlace
: 15.734KHz(H),59.94Hz(V) , 15.625KHz(H),50Hz(V)
: Internal / External (V-Lock)
: MAX 700 TV lines (COLOR) , 750 TV lines (BW)
: Color : 0.5 lux , BW : 0.2 lux , Color DSS : 0.001 lux
BW DSS : 0.0004 lux
: 1.0 Vp-p (75 ohm, composite)
: More than 50dB (AGC off)
: 22x Day & Night Zoom Lens
: Optical 22x, Digital 32x Zoom
: f = 3.9 mm ~ 85.8 mm
: F1.6 (wide) ~ F3.7 (tele)
: Auto / One Push / Manual
: 0.1 / 1.3 / 1.8 / 3.0 / 5.0 m
: Off / Max 2x~32x
: Auto / Shutter PRI / Iris PRI / Manual
: Off / On (Auo Max 30dB)
: 1/60 ~ 1/100,000 sec , 1/50 ~ 1/100,000 sec
: Off / Max 2x~512x
: Off / On
: 1 ~15 steps
: Off / WDR / BLC
: Day / Night / Auto / Ext
: ATW / One-Push / Indoor / Outdoor / Manual / Auto
: Off / Manual / Auto
: 1 ~ 16 steps
: Off / Negative / B&W
: Off / On
: Privacy / MD / OD
: Off / 8 positions
: Off / 3 positions
: Off / On
: Sync / Phase / Comm
: INT / LL
: 0 ~ 255 steps
: Off / On
Optical 22x with WDR

36
Indoor Speed PTZ Dome Camera System User’s Guide
37
Indoor Speed PTZ Dome Camera System User’s Guide
6. DIMENSION
)mm(:tinU )mm(:tinU
6. 2 Wall and Ceiling Bracket
)mm(:tinU )mm(:tinU
6. 3 Parapet Mount Bracket
6. 4 Corner Mount / Pole Mount
- Stainless steel(SUS) body
- Unit : 5.2Kg
- Silver color
- Maximum load : 20Kg
- Dimensions : 890x650 (Arm)
- 250 x 350 (Mount plate)
- 1.25 Inch to 1.5 Inch pipe adaptor
- Steel body
- Unit : 1.3Kg
- Cool gray color
- Steel body
- Unit : 0.7Kg
- Cool gray color
)mm(:tinU )mm(:tinU
)mm(:tinU )mm(:tinU
115
647.00
950.00
350.00
250.00
180
100 100 100
1.25 Inch
5.00
0 0 .0 3 Ø
155.00
00 .58 1
5.00
00.
00
1
0 0 . 0 4
90°
0 4 . 2 2 1
05 .1 = t
05.1 = t
05 .8 6
155.00
0 0 . 0 3 Ø
00 . 0 2
0 0 . 581
80
6. 1 Camera
PTZ mechanism Outdoor Housing In-ceiling Housing
329
188.4 63.8
Ø214.8
R83
Ø188
71.0
193.7
127.6
125.0
117
111
15
PF 1/4 THREAD
48
32
150
45
93
Ø35
90
120
PF 1/4 TAP
4-Ø8
32 86
280
150
Ø42.2
120
25
SPPS 32A Sch40
Ø48.3
90
2

7. CONFIGURATION
38
Indoor Speed PTZ Dome Camera System User’s Guide
39
Indoor Speed PTZ Dome Camera System User’s Guide
7. 1 Control from Keyboard or DVR 7. 2 Connecting to Keyboard with DVR - 1
WH
B
L
S
L
O
R
B
R
B
K
Y
L
R
D
G
R
Other manuals for 700TVL
1
Table of contents
Other Proctor Security Camera manuals
