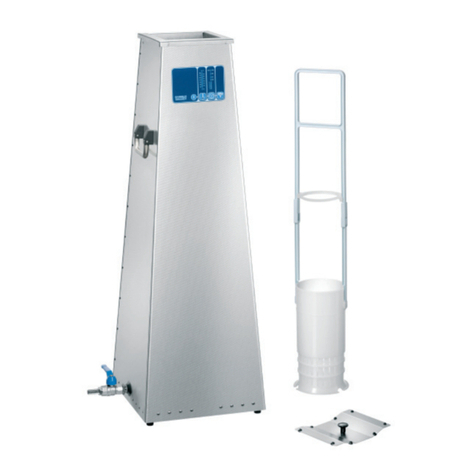
ProDevice ASM240 User manual

www.prodevice.eu
DEGAUSSER INSTRUCTION MANUAL
ProDevice ASM240

www.prodevice.eu
02
CONTENTS:
FEATURES OF ASM240 DEGAUSSER 03
SPECIFICATION 04
STORAGE MEDIA SUITABLE FOR DEGAUSSING 04
UNPACKING 05
DECOMMISSIONING 05
SAFETY 06
REQUIREMENTS FOR POWER SUPPLY 07
LOCATION OF THE DEVICE DURING OPERATION 07
FRONT, REAR PANELS AND SIDE VIEW 08
DEGAUSSING INSTRUCTIONS 10
USING ASM 240 DEGAUSSER WITH A PC 13
WARRANTY CONDITIONS 14

www.prodevice.eu 03
Thank you for purchasing ProDevice ASM240 degausser. This device
was designed using state of the art technical know-how and manufac-
tured using modern and reliable electrical, electronic and mechanical
elements. It produces a strong magnetic field to completely delete data
from magnetic storage media. It was designed and manufactured in our
modern R&D center, which is fully-equipped and adapted to scientific
research end experiments.
ASM240 safely and completely removes data from magnetic media
using a strong electromagnetic field generated by the device. Each
erase cycle is verified by the built-in microcomputer, which guarantees
a successful process of data removal.
Please read the manual carefully before using the device.
Observe instructions included in the manual to prevent incorrect use
and possible damage to the degausser.
Retain the instruction manual and keep it in a secure place.
FEATURES OF ASM240 DEGAUSSER
• 100% eciency – permanently data removal from media with an
electromagnetic field up to 20,000 Gauss (2T)
• automatic operation - a fully automatic process of data removal from
the magnetic media
• Network mode – the possibility of connecting the device to the Eth-
ernet network
• PPMS (Pre-Paid Management System) technology – charging of de-
vice remotely for a specified number of data removal cycles

www.prodevice.eu
04
magnetic field [Gs] 20.000/10.000 (LITE version)
data removal cycle time [s] 40/20 (LITE version)
degaussing system impulse
discharge verification system YES
PPMS technology YES (optional)
operating mode automatic
counter of deleted media YES
the maximum size of the media [mm] 115 × 115 × 30
power supply 230/115 V (50/60 Hz)
power consumption [A] max. 3,6/7,2
operating temperature [°C] 15 - 40
humidity [%] 10-70 non-condensing
noise level during electromagnetic
discharge [dB] 69
dimensions [mm] 465 × 350 × 325
weight without external feeder [kg] 37,8
• DISKS: HDD 2.5- and 3.5-inch STREAMER
• TAPES: LTO, DLT, SDLT, DDS, DAT, AIT, Travan, SLR, QIC, 3592, 3590E,
3490E, 3480, 9840, 9940, T10K
• OTHERS: floppy disks 3.5”, audio and video cassettes
STORAGE MEDIA SUITABLE FOR DEGAUSSING:
SPECIFICATION:
* For power supply of 115V/60HZ, data removal cycle: 55s (ASM240 LITE – 30s)

www.prodevice.eu 05
UNPACKING
DECOMMISSIONING
The device is protected against transport damages. Remove packaging ele-
ments after unpacking in a way not harmful to environment. Check for trans-
port damages to degausser immediately after unpacking.
Inform the transport company and the of the device distributor if the degaus-
ser or accessories were damaged or impaired.
Read the detailed information on the warranty.
Leave the device for at least 3 hours before starting to degauss if the device
has been transported in low ambient temperature.
According to the idea of GreenIT, correct handling of electronic
and electrical waste helps to avoid harmful consequences to the
people’s health and to environment resulting from incorrect stora-
ge and processing of equipment. This is provided for by Europe-
an Community Directive 2002/96/EC and Polish act on waste electrical and
electronic equipment.
A degausser after the end of life should be submitted to an electrical and elec-
tronic waste collection point.
This is signalled by a symbol placed on the product, packaging or in manual.
Information on collection points for waste can be obtained from the degaus-
ser’s manufacturer.

www.prodevice.eu
06
HIGH VOLTAGE!
Risk of electric shock after removing cover!
ELECTROMAGNETIC FIELD!
People with pacemaker should not stay in the same place with
degausser.
WATER AND HUMIDITY!
Do not use and store the degausser in places where it might be
subjected to humidity. Do not place containers with water. Do not
let any liquids act on the device.
HIGH TEMPERATURE!
Do not place the device near sources of high temperature.
LIGHTNING/ELECTRIC DISCHARGE!
Unplug the device from local and power grid during a thunder-
storm.
CLEANING
Unplug the device from mains before cleaning the housing. Do
not use any liquids for cleaning.
SAFETY

www.prodevice.eu 07
REQUIREMENTS FOR POWER SUPPLY
LOCATION OF THE DEVICE DURING OPERATION
IT IS PROHIBITED TO OPEN DEVICE HOUSING. ANY SERVI-
CE ACTIVITIES SHOULD BE PERFORMED ONLY BY QUALI-
FIED PERSONNEL WITH APPLICABLE QUALIFICATIONS.
REMOVING THE HOUSING CAUSES RISK OF ELECTRIC
SHOCK AND/OR DEATH!
Check power supply parameters for the device on the rating plate located
on the rear panel of degausser. Use only the original power cable supplied
with ASM240.
The main power switch activates and initializes the operation of the device
and activates cooling system.
Place the degausser on a flat, stable surface. Forced cooling air flow is used to
maintain optimum air temperature inside the degausser. Keep 20 cm distance
from any objects to ensure optimum operation of cooling system located at
the back of the device. All devices (in particular data media not intended for
degaussing) should be located at least 1 m from degausser.

www.prodevice.eu
08
FRONT, REAR PANELS AND SIDE VIEW
FRONT PANEL
1. START/STOP button
2. LCD display
3. „RESET” button
REAR PANEL
4. Power button
5. Power socket
6. Fuse
5
6
4
13
2
0
I
0
I
2.
3.
4. 5.
6.
1.

www.prodevice.eu 09
0
I
0
I
LEFT SIDE VIEW
7. Media input
8. Fan
9. Side handle
RIGHT SIDE VIEW
10. Micro PC (optional)
11. Ethernet socket
12. Fan (2)
13. Side handle (2)
14. Media output
7.
8.
9.
10. 11.
12.
13.
14.

www.prodevice.eu
10
NOTE! Messages shown on LCD display are in English but they are also ava-
ilable in dierent languages. Contact manufacturer or distributor to change
the language.
DEGAUSSING INSTRUCTIONS
1. Connect the power cable
2. Press the power button
3. Press the START/STOP button
4. The following items are displayed in sequence:

www.prodevice.eu 11
YOU MUST DISCONNECT THE CONNECTING CABLE BETWEEN THE DE-
VICE AND COMPUTER AND PLACE COMPUTER AT LEAST 1 M FROM
DEGAUSSER BEFORE STARTING THE DEGAUSSING OF STORAGE MEDIA.
LEAVING THE CONNECTED CABLE MAY DAMAGE THE COMPUTER.
ATTENTION! During degaussing cycle, you could place only one piece of
media in the media input (no matter what is the media size).
5. Put a storage medium for degaussing I media input. When the flap
is opened, the following message will appear on the LCD display:
6. Approx. 30s (10 s- LITE version) loading cycle starts after closing the flap,
the cycle progress is shown on the LCD.

www.prodevice.eu
12
7. Degaussing begins after the completion of loading cycle. A message abo-
ut successful or failed degaussing cycle is shown on the LCD.
8. After the information about the result of the data deletion cycle is dis-
played, a message about the number of cycles is displayed.
9. After the successful or unsuccessful degaussing cycle, the data carrier
falls out the media output. The degaussing cycle is finished.
10. Placing another storage carrier inside the device starts a new data dele-
tion cycle.
NOTE! Opening the flap during the cycle terminates a degaussing
process and the user is informed about it with a message on the display.

www.prodevice.eu 13
USING ASM 240 DEGAUSSER WITH A PC
11. Press the START/STOP button and power button after the completion
of the cycle to turn o the device correctly.
The device is adapted for use with a PC with software to enable configuration
and checking degausser operating parameters.
ASM240 has a RJ45 Ethernet port hidden in the right panel of housing.
The RESET button is located next to the port used for changing the settings
of network address to a standard address in case of loss of device’s network
address settings.
To change network address to standard address, press and hold RESET
for approx. 5 s after turning the device on with the main power switch. Change
of the network address to default value is shown with applicable message
on the display.
Communication between computer and the device is possible only directly
after turning on the device with main switch before the first cycle.

www.prodevice.eu
14
These warranty conditions apply as additional conditions and in no way
limit the purchaser’s rights under legal regulations.
DISKUS Polska Sp. z o.o. located at ul. Kościuszki 1, 32-020 Wieliczka, Poland,
hereinafter referred to as the „Manufacturer” guarantee correct operation
of the device hereinafter referred to as the „Product” per the technical
and operational conditions described in the instruction manual. The details
of the product purchaser hereinafter referred to as the Purchaser are
described in the warranty card. The warranty is valid and applicable
on the territory of Poland.
Make sure that the serial number of the Product matches serial number stated
in the Warranty Card.
1. To take advantage of rights of this warranty, the Purchaser must show all
of the listed documents:
• correctly completed warranty card (serial number, model, date of pur-
chase, Seller’s stamp, Purchaser’s signature)
• valid proof of purchase of the Product
2. The warranty includes provision of free spare parts and workmanship per
the conditions stated for two years from the date of purchase of the Product.
NOTE! The manufacturer recommends carrying out a technical survey
of the device after completion of 5000 erasing cycles. Ignoring these recom-
mendations voids the warranty.
WARRANTY CONDITIONS

www.prodevice.eu 15
3. Failures in the Product discovered during the warranty period will be re-
paired in the shortest possible time. The warranty period is extended by the
repair period.
4. The Purchaser has the right for a replacement Product with a new one if it
is impossible to repair the failure.
5. In special cases (e.g. the Product is no longer included in the trade oer),
replacement of the Product with the same one is impossible. The Manufactu-
rer replaces the product with a product with matching technical parameters
during the period agreed upon with the Purchaser, not longer than 30 days
from the beginning of the situation described in section 4.
6. Products with mechanical or electrical damages resulting from causes not
on the part of the Manufacturer are exempt from warranty, in particular:
• Products with transport and handling damages,
• Damages resulting from misuse of Product, i.e. the use without observing
instruction manual or safety regulations,
• Products damaged in fire, flood, strike of lightning or another natural di-
sasters, unforeseen accidents, flooding with liquids, power and/or tele-
communications network over voltages or connection to power network in
a way not compliant with instruction manual.
• Products with modifications by unauthorized persons (incl. removal
of housing), changes or repairs resulting in damage of warranty seal.
• Products with any modifications in Warranty Card or serial numbers, incl.
changes, blurring or rubbed.
• Products that were used under the wrong conditions (see „Location of the
device during operation)

www.prodevice.eu
16
7. The Manufacturer and distributors are not responsible for the regulations
of this agreement (warranty conditions), if the required repairs cannot be
completed due to import/export restrictions on spare parts or other legal
regulations and unforeseen circumstances making it impossible to perform
the repair or due to negative eects of force majeure.

HOTLINE
+44 203 514 12 05
MANUFACTURER’S ADDRESS AND CONTACT DETAILS:
DISKUS Polska Sp. z o.o.
ul. Kościuszki 1, 32-020 Wieliczka, Poland
phone. +48 12 379 30 30
service: [email protected]
If you have an improvement idea or suggestion,

Other manuals for ASM240
1
Table of contents
Popular Ultrasonic Jewelry Cleaner manuals by other brands

Martin-Till
Martin-Till UMO-WA1360 installation instructions

molgen
molgen PurePrep 32 Operation manual
Manitowoc
Manitowoc iAuCS Installation, operation and maintenance manual

Audiodesksysteme Glass
Audiodesksysteme Glass Vinyl Cleaner PRO operating instructions

Tennant
Tennant Nobles ASC-15 Operator's manual
Steren
Steren LIM-650 quick start guide

