PROF DC 16E User manual

DC 16, DC 20
Instruction Manual for Dehumidifier GB 1
Ilmankuivaimen käyttöohje FI 13
Bruksanvisning för avfuktare
SE 26
Bruksanvisning for avfukter
NO 39
Осуш тель воздуха, руководство для пользователя RU 52
Õhukuivati kasutusjuhend
EE 65
Instrukciju rokasgrāmata gaisa žāvētājs
LV 78
Sausintuvas gaminių naudojimo instrukcija
LT 91
Дапаможнік па экплуатацыі асушальніка паветра асушальнік паветра BE 104

EN
Dehumidifier
Instruction Manual for DC 16, DC 20 series
☆
☆☆
☆
Read and retain these instructions for future reference

1
Contents
Please take time to read this manual carefully before use and save it for
future reference
Page
Model no reference
Specification
How it works
Where to position
Before use
Parts
Operation
Drainage
Maintenance
Trouble shooting
1
2
3
3
4
5
6, 7
8, 9
10, 11
12
Model no. reference
DC 16E … 16 L/day dehumidifier
DC 20E … 20 L/day dehumidifier
DC 16EP … 16L/day dehumidifier w/ PTC heater
DC 20EP … 20L/day dehumidifier w/ PTC heater
For additional UV light function, the model no will end with “T”, such as DC16ET or
DC 16EPT

2
Specification
Model no. DC 16E
DC 16E
DC 16EP
DC 16EP
DC 20E
DC 20E
DC 20EP
DC 20EP
Power supply 220V-240V~, 50Hz
Moisture removal capacity 16L/day 20L/day
Power/Ampere
consumption for PTC use
N/A 780 W/3 4A N/A 830 W/ 3 6A
Power /Ampere
consumption *
280W/ 1 3A 370W/ 1 7A
Compressor Rotary
Refrigerant R134a
Working range 5 ~ 35
o
C
Water tank capacity 5 5 L
Size (WxDxH) 410 x 210 x 545 mm
N W 12 kgs 12 5 kgs
Above is measured under RT 30
o
C, RH 80%
The data marked with * may vary for technical reasons For greater
precision, please refer to the rating label placed on the product

3
How it works
This product is a dehumidifier It controls relative humidity by passing the air
through the unit, forcing the excess moisture to condensate over the cooling
elements Contact with this cold surface causes the moisture in the air to
condense This condensed water then drains safely into the water tank The dried
air then passes through the condenser where it is slightly warmed and re-enters
the room at a slightly elevated temperature
Where to position
Excess moisture will travel
throughout your home, in
the same way that cooking
smells waft to every room in
the house For this reason,
the dehumidifier should be
positioned, so that it can
draw this moist air towards
it from all over the home
Alternatively, if you have a
serious problem in one area
you can begin by
positioning the dehumidifier
close to this area and later
moving it to a more central
point
When positioning the
dehumidifier, ensure that it
is placed on a level surface
and that there is a minimum
of 10 cm (4") of space on
either side of the unit to
allow for efficient airflow
This dehumidifier is fitted
with castors for extra
mobility, if you move the
unit, it should first be
switched off and the water
tank emptied
We do not recommend the
use of an extension lead, so
please try to ensure that the
unit is sufficiently close to a
fixed mains socket If it is
necessary to use am
extension lead, please
ensure the diameter of the
wires of the cable is at least
1 mm2
When the dehumidifier is in
operation, outside doors
and windows should be
closed when necessary for
most efficient use
DRY
WARMER AIR
FAN
MOTOR
WATER TANK
CONDENSER
EVAPORATER
MOIST
SATURATED AIR
COMPRESSOR
WATER TANK
MICRO SWITCH

4
Before use
Caution!
Always keep the unit in vertical position
Leave the unit to stand for one hour before connecting to the mains
supply after transport or when it has been tilted (e g during cleaning)
Keep all foreign objects away from the air intake or output openings
The mains supply must conform to the specification shown on the
rating plate at the back of the unit
If the supply cord is damaged, it must be replaced by an approved
service representative or a similar qualified person in order to avoid a
hazard
Never use the plug to start and stop the unit Always use switch on the
control panel
Before moving the unit, first switch off, then unplug and empty the
water tank
Don't use bug sprays or other flammable cleaners on the unit
Never pour or spray water over the unit
THIS APPLIANCE IS NOT INTENDED FOR USE BY PERSONS
(INCLUDING CHILDREN) WITH REDUCED PHYSICAL, SENSORY OR
MENTAL CAPABILITIES, OR LACK OF EXPERIENCE AND
KNOWLEDGE, UNLESS THEY HAVE BEEN GIVEN SUPERVISION OR
INSTRUCTION CONCERNING USE OF THE APPLIANCE BY A
PERSON RESPONSIBLE FOR THEIR SAFETY CHILDREN SHOULD
BE SUPERVISED TO ENSURE THAT THEY DO NOT PLAY WITH
APPLIANCE
IMPORTANT!
Do not use this unit at ambient temperatures below 5
o
C, to prevent the
possibility of a heavily ice up evaporating coil

5
Parts
Front
1 Control panel
2 Cover for air outlet
3 Air outlet
4 Water full indicator
5 Water tank
6 Handle
Rear
7 Air filter / air inlet
8 Power cord
9 Handel
10 Hole for continuous
drainage
11 Water tank
12 Caster
Assembly of the filters
Grille Washable
filter
Active
carbon filter Filter fixer

6
Operation
Control panel
1 Heat button (only for the
model with heat function)
2 UV light button (only for the
model with UV function)
3 Timer
4 Display window
5 Speed (ventilation) button
6 Humidity selection button
7 ON/OFF button
Display window
1 Humidity display: continuous de-humidifying , 50%, 60%, 70%, 80%
2 Ambient humidity condition: good fair, bad
means 50% ≤ambient room humidity ≤70%

7
means 30% ≤ambient room humidity < 50% or 70% < ambient room
humidity ≤80%
means the ambient room humidity is higher than 80%
3 compressor is in progress In case the de-frost function is working, the
water drops will flash
compressor is not in progress
water full
4
Heat indicator (only for the model with heat function): While you press the
heat button and the ambient temperature is lower than 25
o
C, the heat indicator
will light on and the heater will work At this time, the fan speed will keep at
high speed only However, if the ambient temperature is higher than 25
o
C, the
heat indicator will not light on and the heater will not work, either
* This PTC
heater is protected by thermostat & thermal fuse for overheat protection
5 UV ( ultraviolet ) indicator, only for the model with UV light * UV can kill the
bacteria in the air
6 Timer indicator, 1 to 24 hours
7 Room humidity indicator, can display the room temperature in Celsius degree
(
o
C) or Fahrenheit (depending on the version you purchased) by pressing
“HUM” button for at least 2 seconds
8 Fan speed/ventilation indicator: high speed, low speed
Operation
1 Plug the unit into a correct mains socket (Please refer to the rating label at the
rear of the unit )
2 Press button ON/OFF to turn on the unit The compressor will start to work in
continuous mode
3 Press button HUMIDITY to set the room humidity you need: continuous
de-humidifying , 50%, 60%, 70% or 80%
4 Press the speed button to choose the ventilation speed, high or low
5 To turn off the unit, press button ON/OFF again
6 The direction of the air outlet can be adjusted by hand

8
Drainage
While the water tank is full, the compressor will stop for self-protection and:
The sign of water full will flash
The unit will buzz * For stopping the buzz, you may press the ON/OFF button
to turn off the unit
The water level window will turn into red
To move the water tank, pull it out squarely from the unit by using the handle at
the water tank
After empting the water tank, place the water tank into space Make sure it is
properly positioned, in order for the 'water full' sign to go out and your
dehumidifier is operating
Please note, i
n case, the water tank has not been positioned well, the water level
window will turn into red and the unit will buzz, too
As the water tank is full
or has not been
positioned well, the
water level window will
turn into red.
To move the water tank,
pull it out squarely from the
unit by using the handle at
the water tank.

9
Continuous drainage
When the dehumidifier is operated at very high humidity levels, the water tank will
require more frequent drainage In this situation, it may be more convenient to set the
unit up for continuous drainage with the following procedures:
1 Cut the outlet at the unit back (FIG 1)
* Caution:
When the outlet is cut off, the said portion would leave as a hole and
cannot be covered by any plug If cover the said portion by plug,
the condensed water cannot go down to the water tank.
2 Connect the drain hole with a water tube of inner diameter 12mm (FIG 2)
* Please note, the water tube is not supplied with the unit
3 Ensure the water will always drain away freely and the tube will remain in
place
Note! In very cold weather conditions, precautions should be taken to
prevent the water tube from freeing
FIG 1
FIG 2
Water tube of inner dia. 12
mm. Please note, the tube is
not supplied with the unit.

10
Maintenance
Always unplug the unit from the mains before carrying out any maintenance
or cleaning of the unit
CLEANING HE BODY
Use soft cloth to wipe the unit clean
Don't ever use volatile chemicals, gasoline, detergents, chemically treated clothes, or
other cleansing solutions These all could possibly hurt the cabinet
CLEANING HE FIL ER
For washable filter - Use a vacuum cleaner or tap the filter lightly for easy cleaning If
the filter is particularly dirty, use warm water with a small amount of medium
strength
For active carbon filter - This filter is not
washable Its life span is variable and
depends on the ambient conditions
where the appliance is used The filter
should be checked periodically (about
every 6 months) and replaced if
necessary
Grille
Washable
filter
Active
carbon filter
Filter fixer

11
S ORAGE
If not use the unit for an extended period of time please:
Turing the unit off, unplug and tidy AC cord
Completely empty the water tank and wipe it clean
Cover the unit and store where it will not receive direct sunlight

12
rouble shooting
THE UNIT DOES NOT OPERATE:
Is the unit plugged in?
Is the house electricity on?
Is the room temperature below 5
o
C or above 35
o
C? If so, then it is out of the
working range of the unit
Ensure the humidistat (or ON/OFF switch) is turned on
Check the water tank is positioned properly in the unit and it is not full
Make sure the air inlet and outlet are not obstructed
THE UNIT SEEMS TO DO NOTHING:
Is the filter dusty, contaminated ?
Is the air intake or outlet blocked up?
Is the room humidity already quite low?
THE UNIT SEEMS TO DO LITTLE:
Are too many windows or doors open?
Is there something in the room producing lots of humidity?
THE UNIT IS TOO NOISY:
Check whether the unit is sitting on a level surface
THE UNIT IS LEAKING:
Make sure the unit is in good shape
If you are not using continuous drainage, please remove the water tube, so
the condensed water can go down to the water tank
100825

13
FI
Ilmankuivain
Käyttöohje mallisarjoille DC 16 ja DC 20
☆
Lue ja säilytä nämä käyttöohjeet tulevaa käyttöä varten.

14
Sisällysluettelo
Varaa aikaa lukeaksesi nämä käyttöohjeet huolellisesti ennen käyttöä ja
säilytä ne tulevaa käyttöä varten
Sivu
Viittaus malliin
Tekniset tiedot
Toimintaperiaate
Sijoituspaikan valinta
Ennen käyttöä
Osat
Käyttö
Vedenpoisto
Huolto
Vianmääritys
14
15
16
16
17
18
19, 20
21, 22
23, 24
25
Viittaus malliin
DC 16E … Ilmankuivain 16 l/pv
DC 20E … Ilmankuivain 20 l/pv
DC 16EP … Ilmankuivain 16 l/pv
PTC-lämmityselementillä
DC 20EP … Ilmankuivain 20 l/pv
PTC-lämmityselementillä
Mikäli laitteessa on lisänä ultraviolettisäteily-toiminto, mallin nro loppuu kirjaimeen T,
kuten DC 16ET tai DC 16EPT

15
ekniset tiedot
Mallinumero
DC 16E
DC 16E
DC 16EP
DC 16EP
DC 20E
DC 20E
DC 20EP
DC 20EP
Sähkönsyöttö
220 V – 240 V~, 50 Hz
Kosteudenerotusteho
16 l/pv 20 l/pv
Tehon-/virrankulutus
PTC-käytössä
Ei
saatavissa
780 W /
3,4 A Ei
saatavissa
830 W /
3,6 A
Tehon-/virrankulutus *
280 W / 1,3 A 370 W / 1,7A
Kompressori
Kiertomäntäkompressori
Kylmäaine
R134a
Toiminta-alue
5 – 35 ºC
Vesisäiliön tilavuus
5,5 l
Mitat (LxSxK)
410 x 210 x 545 mm
Nettopaino
12 kg 12,5 kg
Yllämainitut arvot on mitattu huoneenlämpötilassa 30 °C suhteellisen
kosteuden ollessa 80 %
Merkinnällä * ilmoitetut tiedot voivat vaihdella teknisistä syistä Katso
tarkemmat tiedot tuotteen arvokilvestä

16
oimintaperiaate
Tämä tuote on ilmankuivain Se säätää suhteellista kosteutta päästämällä ilman
laitteen läpi ja pakottaa ylimääräisen kosteuden tiivistymään
jäähdytyselementteihin Kosketus tähän kylmään pintaan aiheuttaa
ilmankosteuden tiivistymisen Tämä tiivistynyt vesi valuu turvallisesti vesisäiliöön
Sitten kuivattu ilma läpäisee lauhduttimen (jossa se lämpenee hiukan) ja palaa
huoneeseen hieman korkeammassa lämpötilassa
Sijoituspaikan valinta
Ylimääräinen kosteus leviää
kotisi jokaiseen huoneeseen
samalla tavoin kuin
ruoanlaitosta syntyvät
hajutkin Tästä syystä
kuivain on asennettava siten,
että se voi imeä tämän
kostean ilman ympäriltään
kaikkialta kodistasi
Vaihtoehtoisesti mikäli
sinulla on suuria ongelmia
yhdellä alueella, voit aluksi
asettaa kuivaimen tälle
alueelle ja siirtää sen
myöhemmin lähemmäksi
keskikohtaa
Varmistu kuivainta
asentaessasi, että se on
asetettu vaakasuoralle
alustalle ja että sen
molemmille puolille on jätetty
vähintään 10 cm tilaa
riittävän ilmavirtauksen
varmistamiseksi
Kuivain on liikuttamisen
helpottamiseksi varustettu
siirtopyörin Ennen siirtoa
laite on kytkettävä pois
päältä ja sen vesisäiliö
tyhjennettävä
Emme suosittele jatkojohdon
käyttöä, joten yritä asettaa
laite riittävän lähelle kiinteää
pistorasiaa Mikäli jatkojohto
on välttämätön, varmista,
että kaapelin johtimien
poikkipinta on vähintään 1
mm
2
Kun kuivain on käytössä,
ulko-ovet ja ikkunat on
oltava suljettuina, mikäli
halutaan parhain
mahdollinen tehokkuus
KUIVA LÄMMIN
ILMA
TUULETIN
MOOTTORI
VESISÄILIÖ
LAUHDUTIN
HAIHDUTIN
KOSTEA
KYLLÄSTETTY
ILMA
KOMPRESSORI
VESISÄILIÖ
MIKROKYTKIN

17
Ennen käyttöä
Varoitus!
Pidä laite aina pystyasennossa
Mikäli laitetta on liikuteltu tai kallistettu (esim puhdistuksen aikana),
anna laitteen seisoa paikallaan yksi tunti ennen sen kytkemistä
sähköverkkoon
Pidä vieraat esineet poissa ilman sisääntulo- tai ulostuloaukoista
Sähköverkon on vastattava laitteen taakse sijoitettuun arvokilpeen
merkittyä erittelyä
Mikäli virtajohto on vioittunut, se on vaihdettava uuteen Vaarojen
välttämiseksi tulee vaihto suorittaa vain valtuutetun huoltoliikkeen
edustajan tai muun samanlaisen pätevyyden omaavan henkilön
toimesta
Älä koskaan käytä pistoketta laitteen käynnistämiseen tai
pysäyttämiseen Käytä aina ohjauspaneeliin asennettua kytkintä
Ennen laitteen liikuttamista kytke se pois päältä, irrota sitten pistoke ja
tyhjennä vesisäiliö
Älä käytä hyönteissumutteita tai muita syttyviä puhdistusaineita
laitteeseen
Älä koskaan vala tai suihkuta vettä laitteeseen
LAITTEEN KÄYTTÖÄ EI OLE TARKOITETTU HENKILÖILLE (LAPSET MUKAAN
LUKIEN), JOILLA ON HEIKENTYNYT FYYSISET, AISTILLISET TAI HENKISET
KYVYT, TAI KOKEMUKSEN JA TIEDON PUUTE, NIIN KAUAN KUIN HEITÄ EI
VALVOTA TAI OLE OPASTETTU LAITTEEN KÄYTTÖÖN TURVALLISUUDESTA
VASTAAVAN HENKILÖN TOIMESTA LAPSIA ON VALVOTTAVA, JOTTA HE
VARMASTI EIVÄT PÄÄSE LEIKKIMÄÄN LAITTEELLA
HUOMIO!
Älä käytä tätä laitetta alle 5 °C:een lämpötilassa estääksesi runsaan jään
muodostumisen höyrystimen kierukkaan

18
Osat
Näkymä edestä
1 Ohjauspaneeli
2 Ilman ulostulon kansi
3 Ilman ulostulo
4 Vedentason ilmaiseva
palkki
5 Vesisäiliö
6 Kädensija
Näkymä takaa
7 Ilmansuodatin / ilman
sisääntulo
8 Virtajohto
9 Kädensija
10 Poistoaukko jatkuvaa
vedenpoistoa varten
11 Vesisäiliö
12 Siirtopyörä
Suodattimien asennus
Säleikkö
Pestävä
suodatin
Aktiivi
-
hiilisuodatin Suodattimen pidin
This manual suits for next models
7
Table of contents
Languages:
Popular Other manuals by other brands
Paradyne
Paradyne 9161 Single T1 reference guide
Rice Lake
Rice Lake iQUBE installation manual
Philips
Philips HR2370 user manual
Sony
Sony STR-DE997 - Fm Stereo/fm-am Receiver operating instructions
CEMO
CEMO Trolley 60 l AdBlue Car PRO operating instructions
HydraMaster
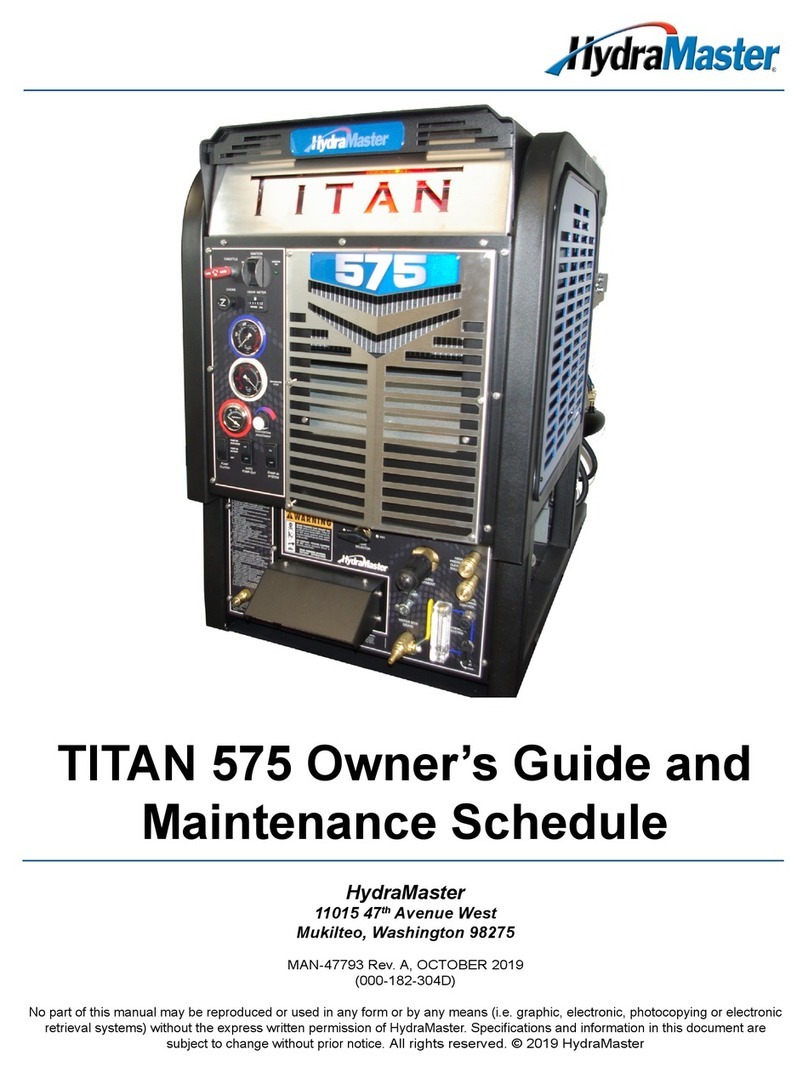
HydraMaster Titan 575 Owner’s Guide and Maintenance Schedule


