Professional Series PS75098 User manual
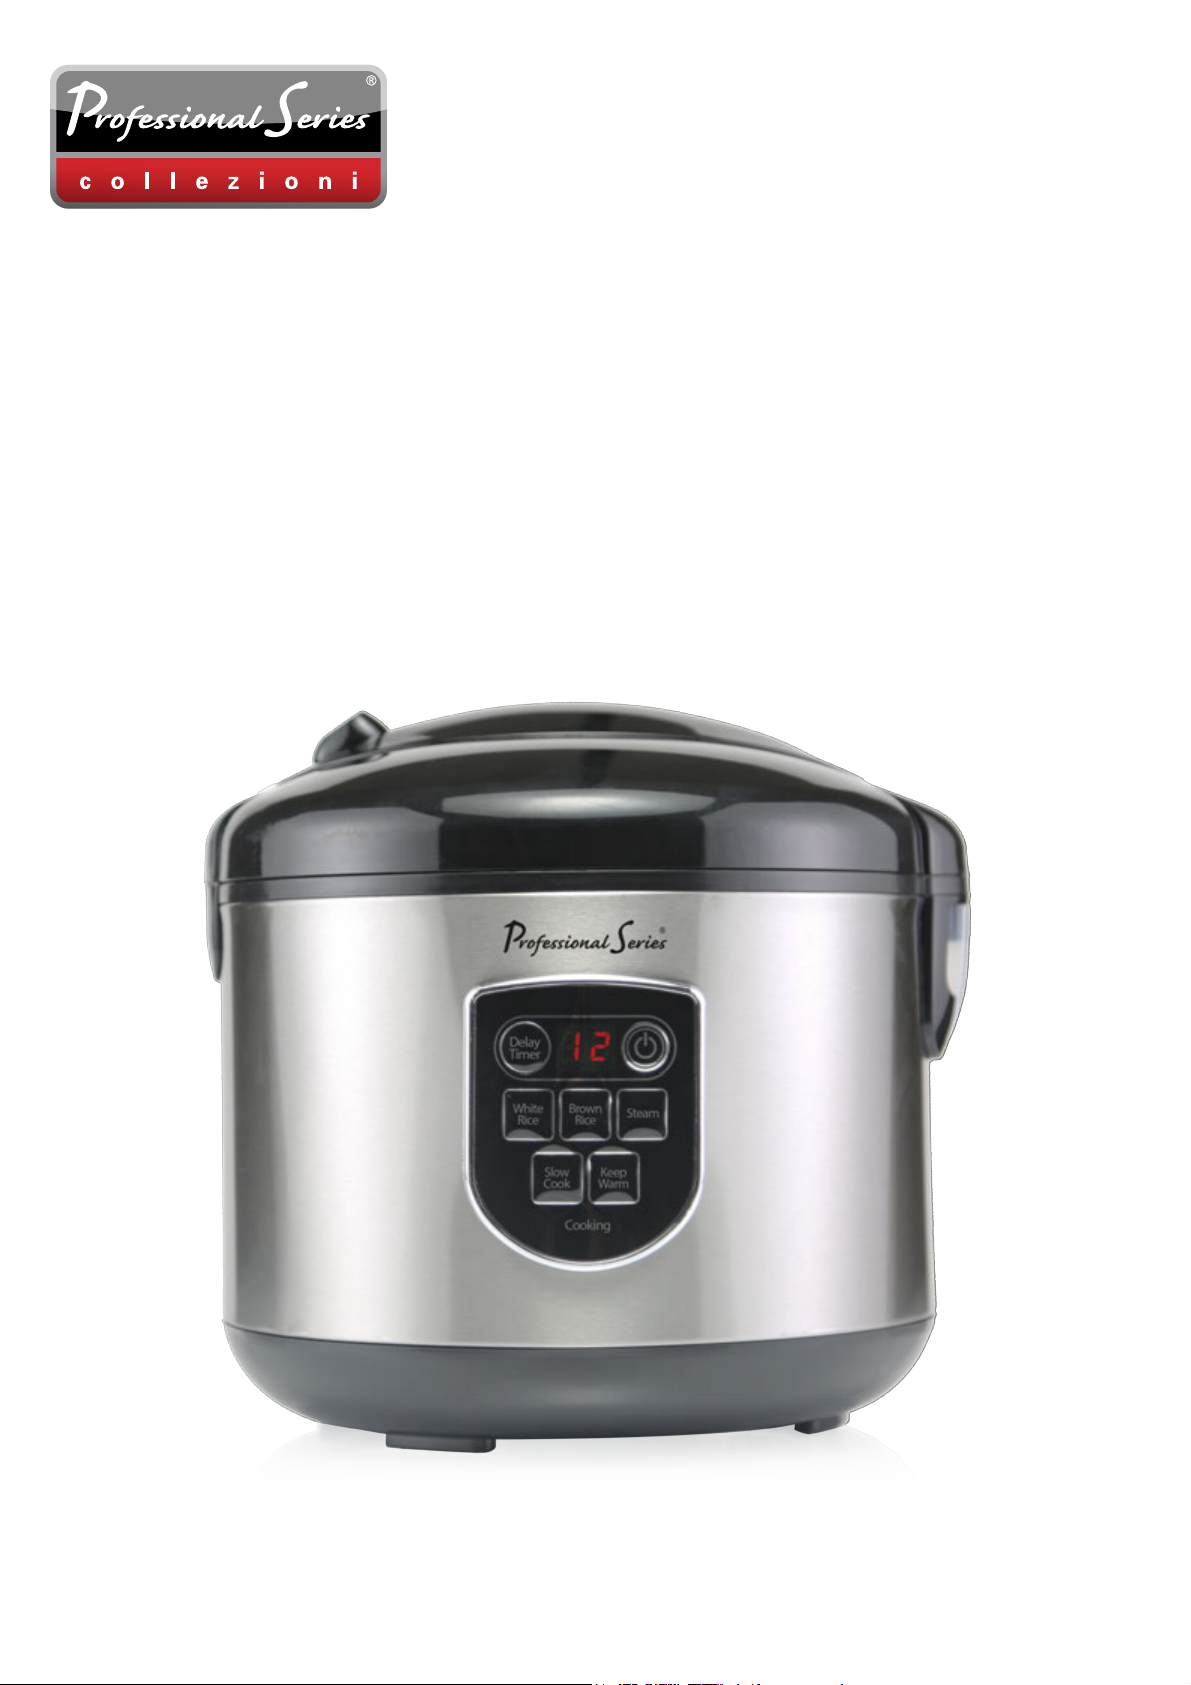
Digital Rice Cooker
User Manual
Model: PS75098

liquid.
4. Close supervision is necessary when any appliance is used by or near children.
5. Unplug from outlet when notin use and before cleaning. Allow to cool before attaching or
removing parts.
6. Do not operate any appliance with a damaged cord or plug or after the appliance malfunctions,
or has been damaged in any manner. Return or exchange the appliance at the point of purchase
or consult an electrician for examination, repair, or adjustment.
7. The use of accessory attachments not recommended by the appliance manufacturer may cause
injury.
8. Do not use outdoors.
9. Do not let cord hang over edge of table or counter, or touch hot surfaces.
10. Do not place on or near a hot gas or electric burner, or heated oven.
11. Extreme caution must be used when moving an appliance containing hot oil or other liquids.
12. Do not use appliance for other than intended use.
13. This appliance is not intended for use by persons (including children) with reduced physical,
sensory or mental capabilities, or lack of experience and knowledge, unless they have been
given supervision or instruction concerning use of the appliance by a person responsible for their
safety.
14. Children should be supervised to ensure that they do not play with the appliance.
15. These units are “household use”.
16. Preheating of the appliance is not necessary.
SAVE THESE INSTRUCTIONS.
This appliance has a polarized plug (one blade is wider than the other). To reduce the risk of electric
shock, this plug is intended tofit into a polarized outlet only one way. If the plug does not fit fully into
the outlet, reverse the plug. If it still does not fit, contact a qualified electrician. Do not attempt to
modify the plug in any way.
USING FOR THE FIRST TIME
1. Before using the digital rice cooker for the first time, remove all labels and tags from the product.
2. Wash the ceramic pot and glass lid inhot soapy water with a sponge or adish cloth, rinse
thoroughly and dry.
IMPORTANT: DO NOT IMMERSE THE DIGITAL RICE COOKER BASE IN WATER.
Note: During initial use you may notice a slight odor due to the burning off of manufacturing
residues. This is completely normal and will disappear soon.
2
IMPORTANT SAFEGUARDS
When using your electrical appliances, basic safety precautions should always be followed including
the following:
1. Read all instructions carefully.
2. Do not touch hot surfaces, use handles or knobs.
3. To protect against electrical shock do not immerse cord, plugs, or main body in water or other
3
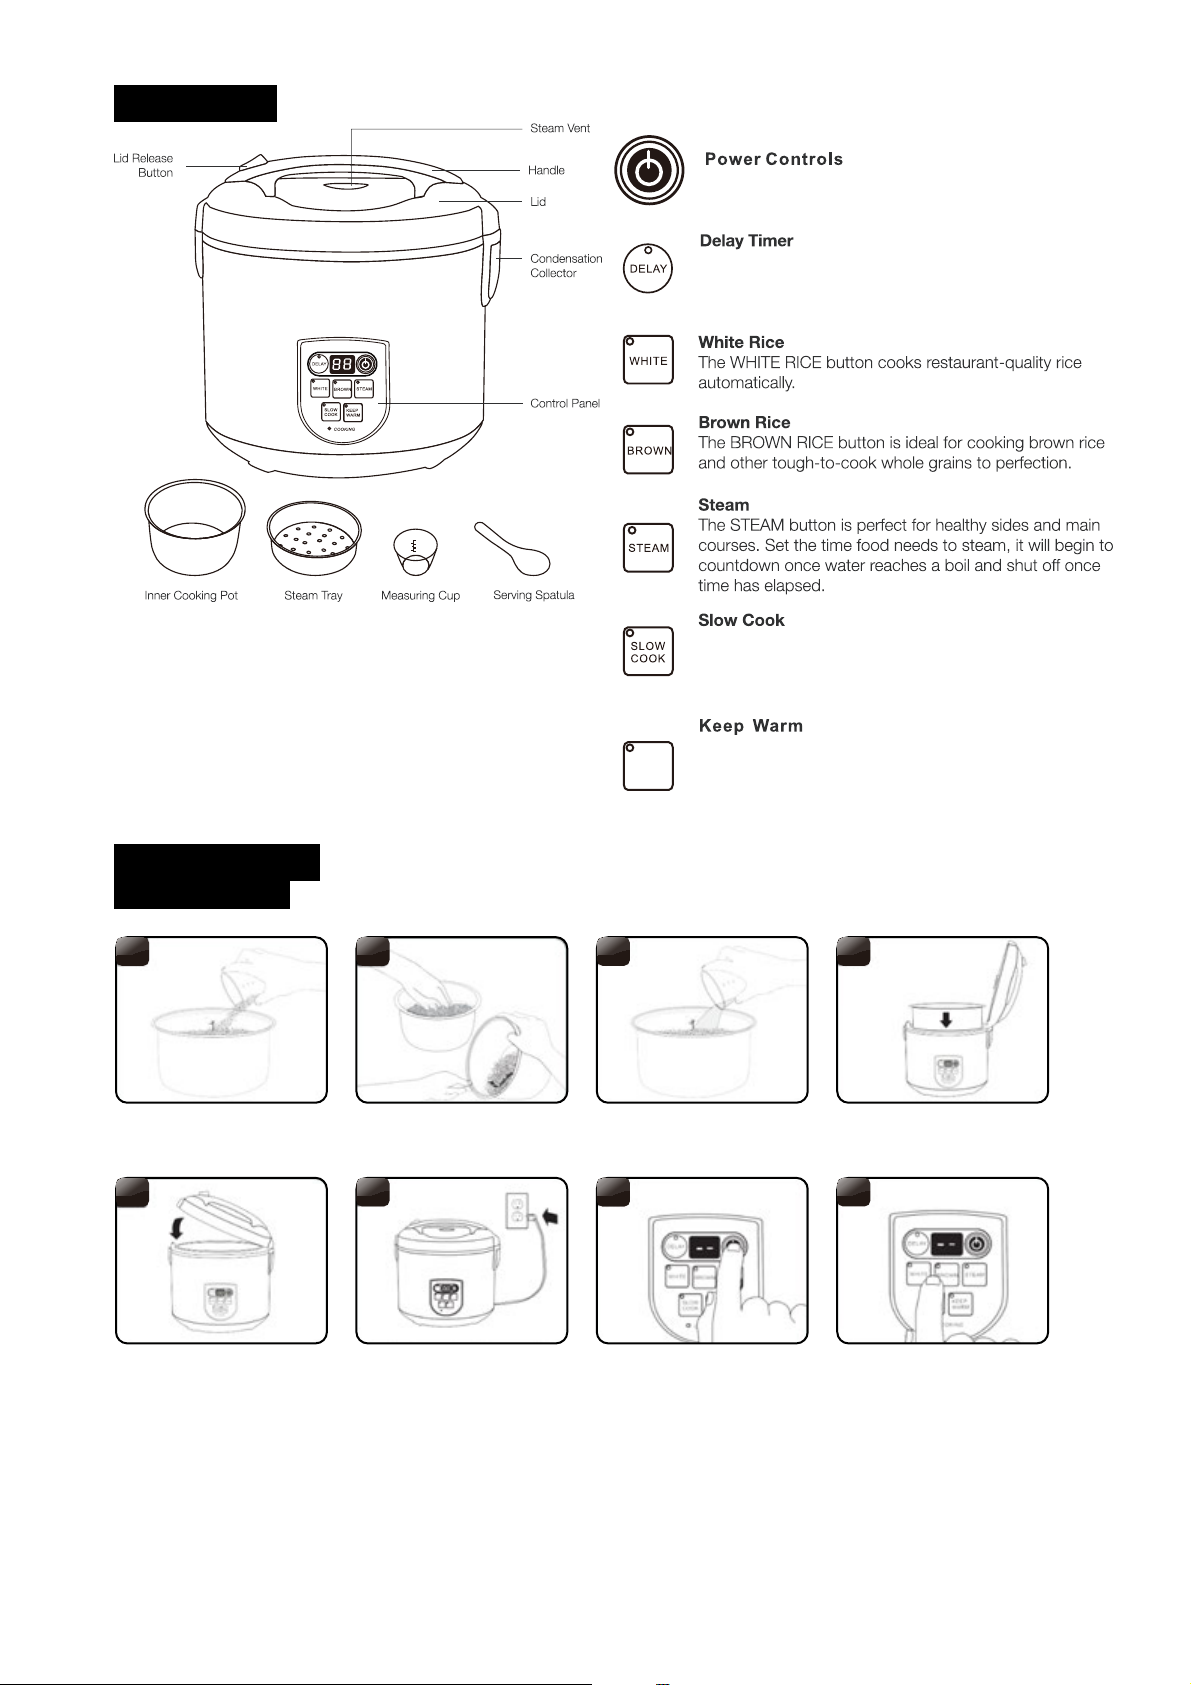
PART LIST
HOW TO USE
TO COOK RICE
Place the inner cooking pot into the
rice cooker.
Plug the rice cooker into an
available outlet.
Press the Power button to turn
on the rice cooker.
Press the WHITE RICE or BROWN
RICE button, depending upon the
type of rice being cooked.
Close the lid securely.
The POWER button turns the rice cooker on
and off.
The DELAY remove cap-LC button allows for rice to be
ready right when it’s needed. Add rice and water in the
morning and come home to delicious rice ready to eat!
KEEP
WARM
The Keep-Warm button is perfect for keeping food warm
and ready to serve.
The rice cooker automatically switches over to Keep-Warm
once rice is finished cooking.
The SLOW COOK button transforms the rice cooker into
a 3-quart programmable slow cooker. Set it to cook from
1 to 10 hours for all your slow cooked favorites!
1
5 6 77 8
2 3 4
Using the provided measuring cup,
add rice to the inner cooking pot.
Rinse rice to remove excess starch,
Drain.
Fill with water to the line which
matches the number of cups of
rice being cooked.

4
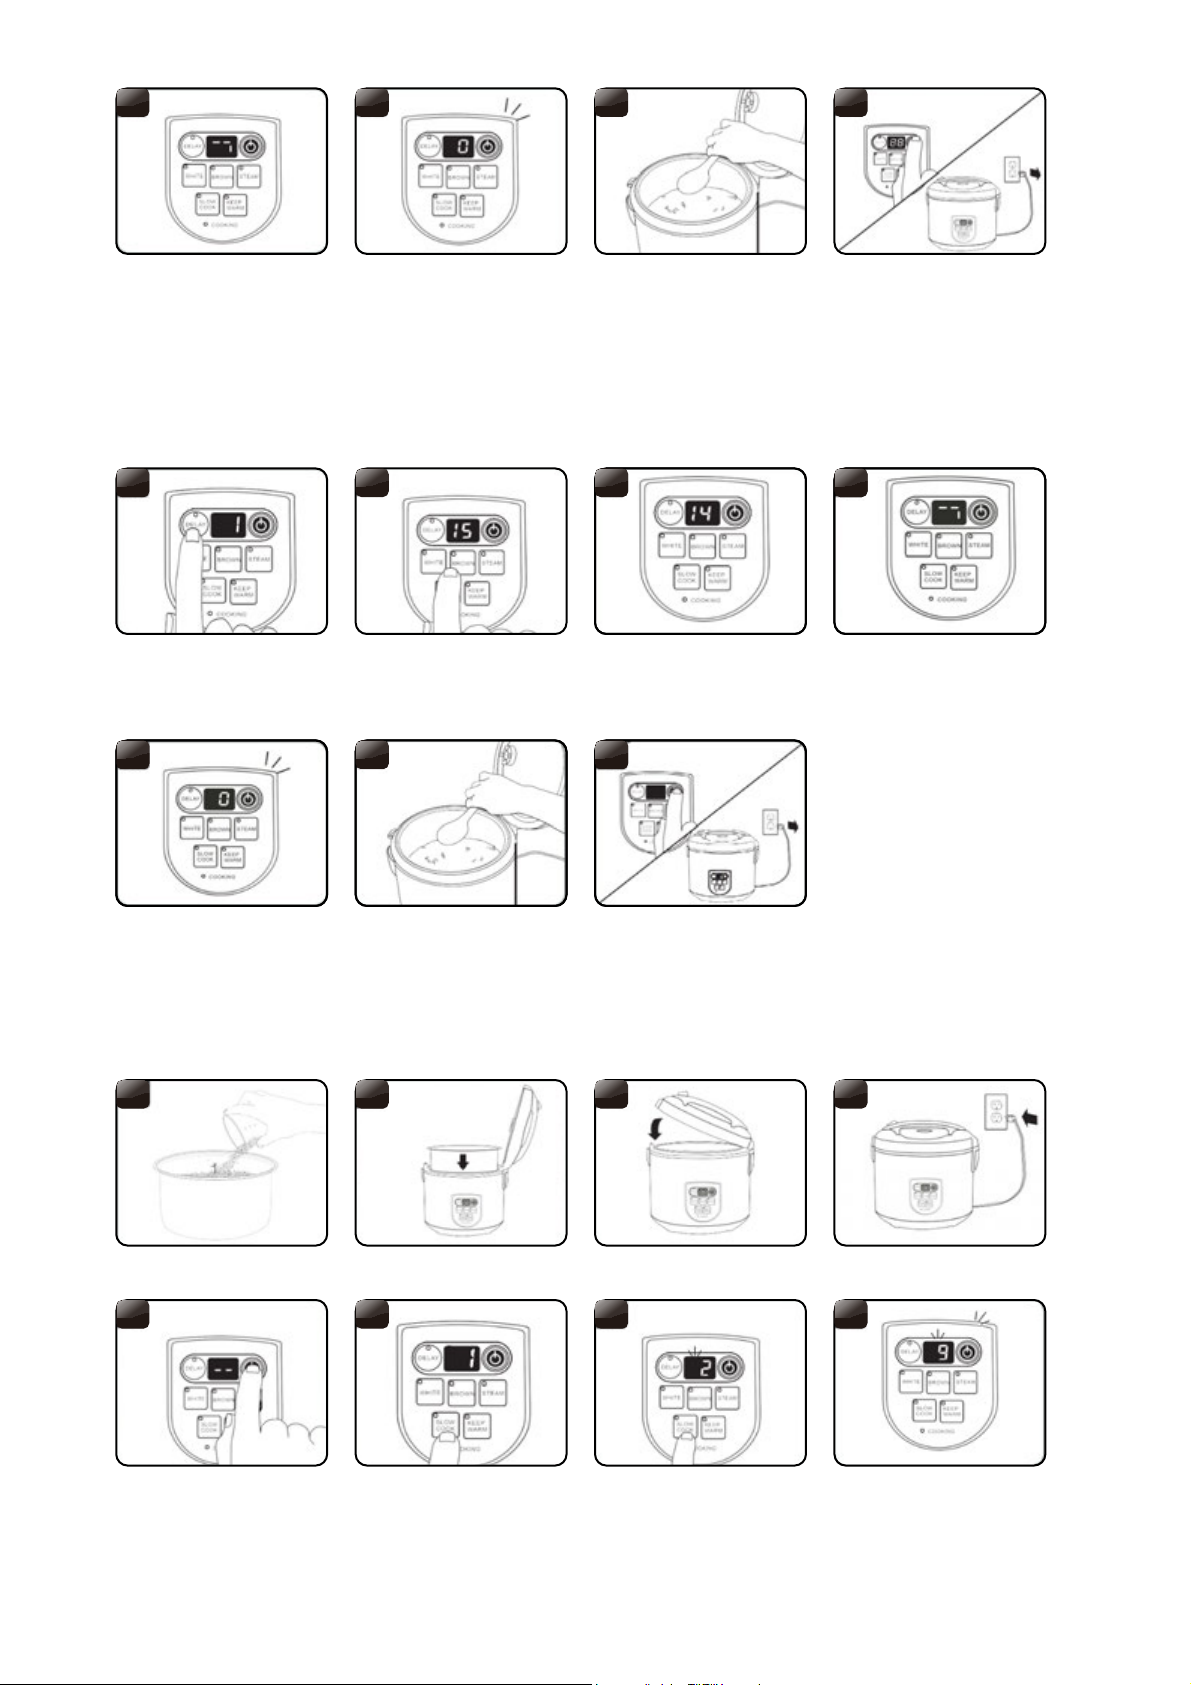
TO USE THE DELAY TIMER
Follow steps 1 to 7 of “TO COOK RICE” beginning on page 3
TO SLOW COOK
The rice cooker will begin cooking.
The digital display will show a
“chasing” pattern.
When finished serving rice, turn
the rice cooker off by pressing
the POWER button and unplug
the power cord.
Once rice is finished, the rice
cooker will beep and automatically
switch to Keep-Warm. The digital
display will show a “0” and will
display the number of hours it has
been on Keep-Warm.
For better results, stir the rice with
the serving spatula to distribute
any remaining moisture.
Press the DELAY TIMER button.
Each press increases in one hour
increments. It may be set to have
rice ready in 1 to 15 hours.
Once rice begins cooking, the
digital display will show a “chasing”
pattern.
Once the needed time is selected,
press the WHITE RICE or BROWN
RICE button, depending upon the
type of rice being cooked.
The digital display will countdown
from the time selected.
Once rice is finished, the rice
cooker will beep and automatically
switch to Keep-Warm. The digital
display will show a “0” and will
display the number of hours it has
been on Keep-Warm.
For better results, stir the rice with
the serving spatula to distribute
any remaining moisture.
When finished serving rice, turn
the rice cooker off by pressing
the POWER button and unplug
the power cord.
Add food to be slow cooked to the
inner cooking pot.
Plug the rice cooker into an
available outlet.
Place the inner cooking pot into the
slow cooker.
Close the lid securely.
Press the Power button to turn
the rice cooker on .
Once the needed cooking timeis
selected, the display will stop
flashing after a few seconds to
indicate the time has been set.
Press the SLOW COOK button. The
digital display will show a flashing 2
to represent two hours of slow cook
time.
Each press of the SLOW COOK
button will increase the slow cook
time by one hour, up to 10 hours.
After 10 hours, it will cycle back to
two hours.
8
1
5 6 7
2 3 4
8
9 1010 1011
1012 1013 1014
9 10 11 12

5
TO STEAM
The rice cooker will begin to
slow cook. The digital display will
countdown in one hour increments
from the selected time.
When finished serving rice, turn
the rice cooker off by pressing
the POWER button and unplug
the power cord.
Once rice is finished, the rice
cooker will beep and automatically
switch to Keep-Warm. The digital
display will show a “0” and will
display the number of hours it has
been on Keep-Warm.
For better results, stir the rice with
the serving spatula to distribute
any remaining moisture.
Using the provided measuring
cup, add 3 cups water to the
inner cooking pot.
Place the steam tray into the rice
cooker.
Place the inner cooking pot into
the rice cooker.
Place food to be steamed onto the
steam tray.
Close the lid securely. Press the STEAM button. The digital
display will show a flashing 10 to
represent ten minutes of steam time.
Plug the rice cooker into an
available outlet.
Press the Power button to turn
the rice cooker on .
Each press of the STEAM button
will increase steaming time by one
minute, up to 30 minutes. After 30
minutes, it will cycle back to five
minutes.
Once the needed time is selected,
the rice cooker will beep to indicate
it is setting at the displayed time. It
will beep once more and the display
will stop flashing to indicate it is set.
Once the water reaches a boil, the
digital display will countdown in one
minute increments from the selected
time.
Check steamed food for doneness.
If finished steaming, remove food
immediately to avoid overcooking.
Turn the rice cooker off by pressing
the POWER button and unplug the
power cord.
Once the selected time has passed,
the rice cooker will beep and switch
to Keep-Warm mode. The digital
display will show a “0” and will
display the number of hours it has
been on Keep-Warm.
9
1234
567 8
10 11 12
9 10 11 12
1013 1014

6
CARE & CLEANING
Always make sure the rice cooker is unplugged and in the OFF position before storing or cleaning.
Make sure the unit has cooled down completely before cleaning.
To remove any foods that have been cooked onto the inner cooking pot, simply soak overnight in
soapy water and rinse the next day.
The exterior of the rice cooker can be wiped with a damp cloth and dried. DO NOT use harsh
abrasive cleaner or scouring pad toclean any part of the cooker as this will damage the
surfaces.
Any other servicing should be performed by an authorized service representative.
WARNING:
1. NEVER SUBMERGE THE ENTIRE RICE COOKER INTO WATER OR ANY OTHER LIQUID
AS THIS MAY DAMAGE THE RICE COOKER.
2. NEVER PLACE THE GLASS LID IN THE REFRIGERATOR, OTHERWISE IT MAY CRACK.
3. DO NOT USE CERAMIC POT IMMEDIATELY AFTER REMOVING FROM REFRIGERATOR.
ALLOW IT TO COME TO ROOM TEMPERATURE, APPROXIMATELY 40 MINUTES,
OTHERWISE IT MAY CRACK.
4. NEVER PLACE THE CERAMIC POT ON THE GAS OR ELECTRIC STOVE TO USE,
OTHERWISE IT MAY CRACK.
5. PLEASE DO NOT COOK FROZEN FOODS. ALLOW FOODS TO THAW BEFORE COOKING.
6. PLEASE BE CAREFUL OPENING THE LID AFTER COOKING AS THE LID MAY BE SEALED
TIGHT AFTER COOKING.
ENVIRONMENTALLY FRIENDLY DISPOSAL
You can help protect the environment!
Please remember to respect the local regulations. Turn in non-working electrical
equipment to an appropriate waste disposal center.
•
•
•

Olla Arrozera Digital
Manual de Usuario
Modelo: PS75098

USO POR PRIMERA VEZ
2
PRECAUCIONES IMPORTANTES
Al momento de utilizar cualquier electrodoméstico, y con el fin de evitar el riesgo de que se
produzca un incendio, una descarga eléctrica y lesiones personales, debe seguirse las siguientes
precauciones de seguridad básicas:
1. Lea todas las instrucciones.
2. No toque las superficies calientes. Utilice los mangos o perillas.
3. Con el fin de evitar una descarga eléctrica, no sumerja el cordón, el enchufe o el electro-
doméstico en agua u otros líquidos.
4. Debe supervisarse el electrodoméstico mientras esté en uso en la presencia de niños.
5. Desenchufe si no va a utilizar el electrodoméstico y antes de proceder con la limpieza. Deje
enfriar antes de colocar o retirar piezas y antes de proceder a limpiar.
6. No utilice la arrocera si el cordón o el enchufe se encuentran dañados o si el electrodoméstico
presenta algún desperfecto, ha sufrido una caída o cualquier tipo de daño. Lleve el electro-
doméstico al centro de servicio autorizado para que se lo examine, repare o se le haga los
ajustes eléctricos o mecánicos necesarios.
7. El uso de accesorios o aditamentos no recomendados por parte del fabricante podría ocasionar
un incendio, una descarga eléctrica o lesiones personales.
8. No utilice el electrodoméstico en exteriores.
9. No permita que el cordón cuelgue del borde de la mesa o repostero de cocina ni que entre en
contacto con superficies calientes.
10. No coloque el electrodoméstico encima o cerca de un quemador de cocina a gas o eléctrico ni
dentro de un horno caliente.
11. Debe tenerse sumo cuidado al trasladar el electrodoméstico si éste contiene aceite u otros
líquidos calientes.
12. No utilice el electrodoméstico para otros fines.
13. Este electrodoméstico no ha sido diseñado para ser utilizado por personas (incluyendo niños)
con capacidades físicas, mentales o sensoriales limitadas o con la falta de experiencia y cono-
cimiento debidos a no ser que estén bajo la supervisión o instrucción con respecto al uso del
electrodoméstico por parte una persona responsable de su seguridad.
14. Debe supervisarse a los niños con el fin de asegurase de que no jueguen con el electro-
doméstico.
15. Estas unidades son "uso doméstico".
16. No es necesario precalentar el electrodoméstico.
GUARDE ESTAS INSTRUCCIONES
El electrodoméstico cuenta con un enchufe polarizado (una extremidad es más ancha que la
otra). Con el fin de reducir el riesgo de que se produzca una descarga eléctrica, este tipo de
enchufe debe encajar dentro de un tomacorriente polarizado solamente de una manera. Si el
enchufe no encajara totalmente dentro del tomacorriente, intente dándole la vuelta. Si aún así
no encajara, póngase en contacto con el electricista calificado. No intente modificar el enchufe
de ninguna manera.
1. Antes de utilizar la olla arrocera por primera vez, retire todas las etiquetas del producto.
2. Lave la olla interna con agua tibia jabonosa con una esponja o un paño, enjuague bien y seque.
IMPORTANTE: NO SUMERJA LA BASE DE LA OLLA ARROCERA DIGITAL EN AGUA.
Nota: Durante el uso inicial se podría percibir un ligero olor debido al quemado de los residuos de
fabricación. Esto es completamente y desaparecerá pronto.

3
LISTA DE PARTES
CÓMO UTILIZAR
PARA PREPARAR ARROZ
Control de encendido
KEEP
WARM
1
5 6 77 8
2 3 4
El botón POWER sirve para encender o apagar la
arrocera.
Temporizador de demora
El botón DELAY permite tener el arroz listo cuando se
necesite. Añada el arroz y el agua en la mañana y a la hora
que se retire a casa el arroz estará listo para consumirse.
Arroz blanco
El botón WHITE RICE permite preparar arroz de calidad de
restaurante automáticamente.
Arroz integral
El botón BROWN RICE es ideal para preparar arroz
integral y otros granos difíciles de cocer a la perfección.
Cocción al vapor
El botón STEAM es perfecto para preparar acompañamien-
tos y platos de fondo. Programe el tiempo de cocción al
vapor. Se iniciará un conteo regresivo una vez que el agua
hierva y se apagará una vez transcurrido el tiempo.
Cocción lenta
El botón SLOW COOK transforma la arrocera la olla arrocera
en una olla de cocción lenta de 4 cuartos. Programe la
cocción entre 2 a 10 horas para efectuar la cocción de sus
paltos favoritos.
Mantener caliente
El botón KEEP WARM es perfecto para mantener los
alimentos calientes y tenerlos listos para servir.
La arrocera automáticamente pasará a la opción de
mantener caliente una vez que el arroz quede cocido.
Utilizando la taza medidora, añada
el arroz en la olla de cocción
interna.
Enjuague el arroz para retirar el
exceso de almidón. Drene.
Llene con agua hasta la marca
que concuerde con el número de
tazas de arroz a prepararse.
Coloque la olla interna de cocción
dentro de la olla arrocera.
Cierre la tapa firmemente. Conecte la arrocera a un
tomacorriente.
Presione el botón POWER para
encender la arrocera.
Presione el botón WHITE RICE o
BROWN RICE dependiendo del
tipo del arroz a prepararse.
Botón para
soltar la tapa
Ventilación de vapor
Mango
Tapa
Recolector de
condensación
Panel de control
Olla interna de cocción Bandeja de vapor Taza medidora Espátula para servir
4
CÓMO UTILIZAR EL TEMPORIZADOR DE DEMORA
Siga los pasos del 1 al 8 de “Cómo preparar arroz” en la página 2.
COCCIÓN LENTA
8
1
5 6 7
2 3 4
8
9 1010 1011
1012 1013 1014
9 10 11 12
La arrocera iniciará la cocción. La
pantalla mostrará el símbolo “- - “
Una vez listo el arroz, la arrocera
emitirá un sonido y pasará
automáticamente a mantener
caliente.
Para mejore resultados, remueva
el arroz con la espátula para servir
para distribuir la humedad
restante.
Al momento de terminar de servir
el arroz, apague la arrocera
presionando el botón POWER y
proceda a desenchufar.
Presione el botón DELAY TIMER.
Con cada pulsación se incremen-
tará intervalos de 1 hora. Se
puede programar para tener el
arroz listo entre 1 a 15 horas.
Una vez seleccionado el tiempo
necesario, y que el arroz comience
a cocerse, la pantalla digital
mostrará el símbolo “- - “.
Una vez listo el arroz, la arrocera
emitirá un sonido y pasará
automáticamente a mantener
caliente.
Al momento de terminar de servir
el arroz, apague la arrocera
presionando el botón POWER y
proceda a desenchufar.
Para obtener mejores resultados,
revuelva el arroz con
la espátula de servir para distribuir
cualquier humedad restante.
Cuando termine de servir el arroz,
la olla de arroz apagando
el botón POWER y desenchufe el
el cable de alimentación.
Para mejores resultados, remueva
el arroz con la espátula para servir
para distribuir la humedad.
Añada los alimentos a cocerse a la
olla interna de cocción.
Coloque la olla interna de cocción
dentro de la olla arrocera.
Cierre la tapa firmemente. Conecte la arrocera a un
tomacorriente.
Presione el botón POWER para
encender la arrocera.
Presione el botón SLOW COOK.
La pantalla mostrará “2” que
representa dos horas de tiempo de
cocción lenta. La luz indicadora de
cocción lenta se iluminará de
manera intermitente.
Con cada pulsación del botón
SLOW COOK, se incrementará la
cocción en una hora, hasta un
máximo de 10 horas. Después de
10 horas, se retornará a dos
horas.
Una vez se seleccione el tiempo
de cocción necesario, la luz
intermitente se detendrá después
de unos segundos para indicar
que el tiempo ha quedado
programado.

5
COCCIÓN AL VAPOR
9
1234
567 8
10 11 12
9 10 11 12
1013 1014
La olla comenzará con la cocción
lenta. La pantalla iniciará un
conteo regresivo en incrementos
de una hora desde la hora
seleccionada.
Una vez lista la comida, la
arrocera emitirá un sonido y
pasará automáticamente a
mantener caliente.
Para mejores resultados, remueva
el arroz con la espátula para servir
para distribuir la humedad.
Al momento de terminar de servir
el arroz, apague la arrocera
presionando el botón POWER y
proceda a desenchufar.
Utilizando la taza medidora, añada
3 tazas de agua en la olla de
cocción interna.
Coloque la olla interna de cocción
dentro de la base de la arrocera.
Coloque los alimentos a cocerse al
vapor dentro de bandeja para
vaporizar.
Coloque la bandeja para vaporizar
dentro de la arrocera.
Cierre la tapa firmemente. Conecte la arrocera a un
tomacorriente.
Presione el botón POWER para
encender la arrocera.
Presione el botón STEAM. La
pantalla mostrará “10” que
representa diez minutos de
cocción al vapor.
Con cada pulsación del botón
STEAM, se incrementará la
cocción en un minuto, hasta un
máximo de 30 minutos. Después
de 30 minutos, se retornará a
cinco minutos.
Una vez lista la comida, la
arrocera emitirá un sonido
indicando lo programación del
tiempo. Emitirá un sonido adicional
y la pantalla dejará de ser
intermitente indicando que ha
quedado programado.
Una vez el agua hierva, la pantalla
iniciará un conteo regresivo un
incrementos de un minuto desde el
tiempo seleccionado.
Verifique los alimentos para ver si
están cocidos. Si ya están listos,
retírelos inmediatamente para
evitar que se cuezan demasiado.
Apague la arrocera presionando el
botón POWER y proceda a
desenchufar.
Una vez transcurrido el tiempo
seleccionado, la arrocera emitirá
un sonido y pasará a mantener
caliente.

6
CUIDADO Y LIMPIEZA
DESEHCHO A FAVOR DEL MEDIO AMBIENTE
Asegúrese de que la olla arrocera se encuentre desenchufada y en OFF antes de guardar o
efectuar la limpieza.
Asegúrese que la olla se haya enfriado completamente antes de llevar a cabo la limpieza.
• Para retirar alimentos pegados a la olla de cocción interna, deje remojar toda la noche con agua
jabonosa y proceda a enjuagar al día siguiente.
• La parte externa de la olla arrocera se puede limpiar con un paño húmedo. NO utilice limpi-
adores abrasivos ni esponjas para refregar para limpiar ninguna de la olla ya que esto puede
dañar las superficies.
• Cualquier otro servicio de mantenimiento debe llevarse a cabo por el personal de servicio
técnico autorizado.
ADVERTENCIA:
1. Nunca sumerja la olla arrocera en agua u otros líquidos ya que esto puede dañar el electro-
doméstico.
2. Tenga cuidado al retirar la tapa ya que ésta puede haber quedado cerrada herméticamente
durante la cocción.
3. No utilice el taza de cerámica inmediatamente después de retirarse del refrigerador. Permitirle
que vaya a la temperatura de la habitación, aproximadamente 40 minutos, de otra manera
puede irritar.
4. Nunca coloque el tazo de cerámica en el gas o la estufa eléctrica para usar, de otro modo
puede griar.
5. Por favor no cocine los alimentos congelados. Permite alimentar los animales antes de cocinar.
6. Por favor tenga cuidado de abrir la tapa después de cocinar como la tapa puede ser sellada
apretada después de cocinar.
¡Usted puede ayudar a proteger el medio ambiente!
Recuerde respetar las normas de su localidad. Deje sus equipos electrónicos en
un centro de deshecho apropiado.
Table of contents
Languages:


