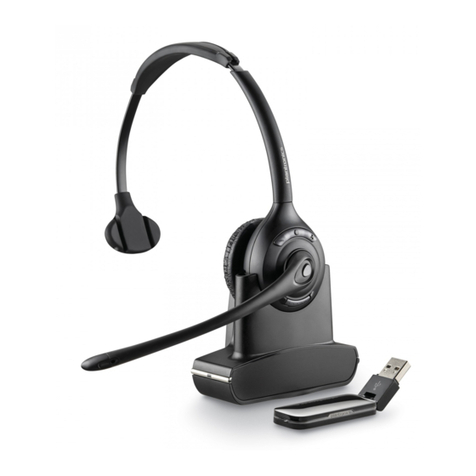
Professor CP3D-WL-2.4G-A101 User manual

SURROUND
USER INSTRUCTIONSUSER INSTRUCTIONS
Http://www.professor.com.tw
PROFESSOR TECHNOLOGY CO., LTD.
E-mail:jack@professor.com.tw
2.4GHz Digital Transmission
Wireless Surround Headphone System
2.4GHz Digital Transmission
Wireless Surround Headphone System
2.4GHz
CP3D-WL-2.4G-A101

2.4GHz
1
Dear customer:
Thank you very much for your purchasing our wireless headphone. The
CP3D-WL-2.4G-A101 wireless headphone system consists of CP3D-2.4G-TX010
transmitter and CP3D-2.4G-RX011 headphones. Based on 2.4GHz RF digital
transmission, CP3D-WL-2.4G-A101 wireless headphone system can deliver the
vivid sound quality without any distortion, and make you freely enjoy your
multi-media entertainment without any inconvenience of cord. In order to make an
optimum use of your CP3D-WL-2.4G-A101, please take a few minutes to read
this instruction below before using the equipment. Please also keep the manual
for future reference.
Content Table
1. Description----------------------------------------------------------------------------------2
2. Precaution-----------------------------------------------------------------------------------2
3. Unpacking-----------------------------------------------------------------------------------2
4. Controls--------------------------------------------------------------------------------------2
4.1 Headphones-----------------------------------------------------------------------2
4.2 Transmitter-------------------------------------------------------------------------3
5. Operating Notes---------------------------------------------------------------------------3
5.1 Charging the Batteries------------------------------------------------------------3
5.2 Connecting the Transmitter to Your Audio Source ------------------------4
5.2.1 Connecting to a Headphone Output -----------------------------------4
5.2.2 Connecting to a LINE Output --------------------------------------------4
5.3 Setting Up the System -----------------------------------------------------------4
5.4 POWER ON/ SIGNAL LED Status --------------------------------------------5
5.4.1 Transmitter -------------------------------------------------------------------5
5.4.2 Headphones -----------------------------------------------------------------5
6. Specifications -----------------------------------------------------------------------------5
7. Troubleshooting --------------------------------------------------------------------------6
8. Important Notes --------------------------------------------------------------------------7
9. Warranty Conditions --------------------------------------------------------------------7

2
'
'
1. Description
The CP3D-WL-2.4G-A101 headphone
system
1. Allows you eliminate the hassle of wires
and give you absolute freedom while
maintaining vivid audio quality by
transmitting the audio in a 2.4GHz RF
digital format.
2. Provides a perfect 3D surrounding sound,
digital clarity, mobility, and signal
transmission in a distance of 20 meters or
more under ideal interior transmission
condition (free field).
3. Provides 8 selectable carrier frequencies
to avoid the interference by other 2.4GHz
RF devise, and while transmitter adjusted
by the channel selector ( 0 set up
originally), an Autotuning function helps
the headphones automatically tune to
match the transmitter frequency.
4. Easily switches headphone to another
audio output as you want by a transforming
button.
5. Features a power saving and fuzzy use by
Mechanical-sensor function that the
headphone can switch the power on or off
according to the work angle formed by
earphone case and hook.
6. Easy to connect to any audio source, such
as home entertainment Multi-media device,
TV, car DVD, PC or notebook computer.
7. Provides easier arrangement for your
satisfied volume by the electronic adjuster
on headphone.
2. Precautions
1. Operate the headphone with two AAA
size1.2V rechargeable batteries or
powerful Alkaline batteries; operate the
transmitter with AC/ DC adapter directly.
2. Before charging the batteries, please make
sure that the batteries in the headphones
are rechargeable type. As charging the
batteries, the headphones
will be shut down automatically and you
cannot hear any sound.
3
. Dispose of rechargeable battery confirming
to local waste disposal rules. Never throw
battery into fire.
4. If your headphones not in use, please
never separate two headphone pieces in
order to keep your headphone s power.
5. Never try to open the headphone and
transmitter case. Refer serving to qualified
service personnel only.
6. Never use alcohol, petroleum-based
cleaners, or paint thinners to clean the
headphone or transmitter.
3. Unpacking
Your headphones system package contains
the following components.
nOne pair of Headphones (CP3D-2.4G
-RX011)
nOne Certified Transmitter (CP3D-2.4G
-TX010)
nTwo Connecting Cables with gold plated
connectors:1 RCA signal cable, & 1 jack
cable (1 3.5mm mini plug-to-2 RCA
connectors)
nOne Jack plug (mini jack-to-1/4 )
n5V DC, 1A AC Adapter
nTwo 1.2V AA size Rechargeable
Batteries
nOne Charging Cable for charging the
headphone via Transmitter
4. Controls
4.1 Headphones
nLeft: (Refer to F-1)
1. Electronic volume adjuster
nRight: (Refer to F-2)
2. Power LED
...
""
""
""
'
"
2.4GHz

R
SURROUND
Translucent Cover
Battery
Compartment
5
6
DC 5VDC 5V
Audio inAudio in
Audio outAudio out
Channels Charge
02
6
3
1
754
11109
8
7
3
1
SURROUND
L
3. Charging connector
4. Battery compartment
4.2 Transmitter (Refer to F-3)
nTop Interface
5. AUDIO headphone/spaeker Button
6. Power LED
nRear Panel
7. DC Power
8. AUDIO IN L/R
9. AUDIO OUT L/R
10. Channels selector
11. DC (Charge)
5. Operating Notes
5.1 Charging the Battery
1. In order to ensure the longest possible
service life for the rechargeable battery,
you will have to fully charge the supplied
battery before first operating your
headphones system.
2
4
R
SURROUND
3
R
F-1
F-2
F-3
F-4
'
2. While inserting the batteries, you will firstly
press the translucent cover s two wings and
pull it out, and then place the batteries
inside the compartment as polarity mark
(Refer to F-4).
3. Plug the charging cable into the
2.4GHz

4
DC 5VDC 5V
Audio inAudio in
Audio outAudio out
Channels Charge
02
6
3
1
754
White
Red
DC 5VDC 5V
Audio inAudio in
Audio outAudio out
Channels Charge
02
6
3
1
754
White
Red
charging jack of headphone and connect to
transmitter s DC jack.
4. If the transmitter connecting with electricity,
the POWER LED will light on and the
battery be being charged via charging
cable.
5. By the charging system, the batteries will
be fully charged for 8 ~ 10 hours.
5.2 Connecting the Transmitter to your
Audio Source
5.2.1 Connecting to a Headphone Output
(Refer to F-5)
1. Before connecting the transmitter to your
audio source, please switch the audio
device OFF.
2. Connect the stereo mini jack plug of the
jack cable to the headphone output of your
audio source. And consequently, plug the
supplied connecting cables to jack cable.
3. Plug the red RCA connector (Right
channel) on the supplied jack cable into the
red AUDIO IN (R) socket and the white
RCA connector (Left channel) on the
supplied jack cable into the white AUDIO
IN (L) socket on the transmitter s rear
panel.
5.2.2 Connecting to a LINE Output (Stereo
L/R) (Refer to F-6)
1. Before connecting the transmitter to your
audio source, please switch the audio
device OFF.
2. Use the supplied RCA cable to connect the
white LINE OUT (L) jack on your audio
source to the white AUDIO IN (L) jack on
the transmitter rear panel and the red LINE
OUT (R) jack on your audio source to the
red AUDIO IN (R) jack.
5.3 Setting Up the System
1. If the transmitter connects to the electricity,
the POWER LED will light on.
Right(Red)
Left(White)
Audio Out
(Stereo Out)
F-5
F-6
'
'
2.4GHz

5
Please press the AUDIO IN/OUT button
down as you would like to enjoy the audio
by headphones.
2. Switch ON the audio source to which the
transmitter is connected.
3. As carrying on the headphones,
headphone s POWER LED will light on and
start to work because the work angle
formed by headphone case and hook is
compressed and the headphone s
power-switch is connected up. On the
contrary, as two headphone pieces placed
face-to-face, the power switch interrupt a
connection and the headphones are
always on the OFF condition.
4. If the audio signal presents on
headphone s receiver input, the SIGNAL
LED will light on; and then, you will listen to
the minimal sound and please use
electronic VOLUME control on left
headphone case to adjust the best volume
condition for you.
5. When hearing the noise or distortion, you
can change your transmitter s channel for
the best carrier frequency in order to
eliminate the interference.
6. Additionally, as you want to switch to
another alternative audio output, please
press the button up.
IMPORTANT:For keeping your hearing,
the volume is reset to minimal level when
you turn off every time. As you carry on
the headphones, you will
re-enlarge the volume in order to listen
well.
5.4 POWER ON/ SIGNAL LED Status
5.4.1 Transmitter
If LED is Transmitter
lighting
on is connected to the electricity
and automatically turns on; is
connected to the headphones by
charging cable and charging the
batteries.
no light isn t connected to the
electricity and the adapter is
switched off.
5.4.2 Headphones
If POWER
LED (R) is
Headphone
lighting on is placed on your head and
automatically turns on as the
power-switch is connected up.
no light is stored and automati-
cally turns off.
If SIGNAL
LED (L) is
Receiver
lighting on is successfully receiving
the message from Transmitter.
no light doesn t receive any
message.
6. Specifications
Normal Impedance 32
Frequency Response 20 Hz ~ 20 KHz
Output Power 100 mW
Frequency Range 2400~2484 MHz
Channel 8 (Max.)
Sensitivity 115 dB
'
""
'
'
...
... ...
... ... '
...
... ...
... ...
...
... ...
... ... '
2.4GHz
'

6
Signal-to-noise ratio Type. 85dB
Transmit Distance 15~20 Meters
Power Supply (Transmitter) 5V DC, 1AAC Adapter
Power Supply (Headphone) Two 1.2V AAA size, Rechargeable/ Alkaline Battery
Type Dynamic, Close Air
Weight Approx. 380 g (Headphones)
7. Troubleshooting
Symptom Cause Solution
1.AC adapter is not connected to
transmitter and/ or AC outlet. 1.Connect AC adapter to transmitter and/
or AC outlet.
2.Transmitter is not connected to
audio source. 2.Connect transmitter to audio source.
3.Audio is switched to other output
instrument. 3.Press down Audio Out/ In button on
transmitter.
4.Connected audio source is
switched off. 4.Switch audio source on to feed signal to
transmitter input.
5.Volume control on audio source
is at zero. 5.Set audio source volume to desired
level.
6.Batteries are dead. 6.Charge batteries.
No sound
7.Just carry on the headphones
and volume is at minimal level. 7.Set VOLUME control on headphones to
desired level.
POWER ON
LED does not
light
1.Transmitter is not connected to
AC power. 1.Connect transmitter to AC power.
1.Input signal is noisy. 1.Check audio source.
2.Audio level at transmitter input is
too high. 2.Decrease audio source volume.
3.Carrier frequencies are interfered
by other 2.4GHz RF device. 3.Use FREQ selector on transmitter to
select different carrier frequency and
headphone receiver will autotune to
match.
4.Using the headphones over
effective transmission distance. 4.Come near the transmitter and into the
effective distance.
Loud noise or
Distorted
sound
5.Batteries are low. 5.Charge batteries.
If you still got problem to use this system, please contact with the seller or call us to
solve.
This manual and specifications subject to change without notice.
2.4GHz

7
8. Important Notes
1. Operating switch on or connecting the
transmitter to your audio source may cause
clicks which at high volume settings to
affect your hearing. Therefore, be sure to
set the VOLUME control on your audio
source to minimum before connecting the
transmitter.
2. Listening over headphone at high volume
level, particularly over extended periods of
time, may damage your hearing.
3. Your CP3D-WL-2.4G-A101 headphone
system is a RF device based on 2.4GHz
transmission. In order to enjoy
interference-free listening pleasure, please
avoid operating your CP3D-WL-2.4G-
A101 in the close vicinity of radio
equipment, cellular phones, or other
wireless device.
9. Warranty Conditions
PROFESSOR warrants PROFESOR
products against evident defects in material
and workmanship for a period of one year
from the date of original purchasing for use.
This Warranty does not cover damage
resulting from misuse or abuse, or lack of
reasonable care, or inadequate repairs
performed by unauthorized service centers.
Performance of repairs or replacements
under this Warranty is subject to submission
of the sales slip. Shipment of defective items
for repair under this Warranty will be at the
customer s own risk. This Warranty is valid for
the original purchaser only.
2.4GHz
'

FCC RF Explosure NOTE
This equipment has been tested and found to comply with the limits for a Class B
digital device, pursuant to Part 15 of the FCC Rules. These limits are designed to
provide reasonable protection against harmful interference in a residential installation.
This equipment generates, uses and can radiated radio frequency energy and, if not
installed and used in accordance with the instructions, may cause harmful interference
to radio communications. However, there is no guarantee that interference will not
occur in a particular installation If this equipment does cause harmful interference to
radio or television reception, which can be determined by turning the equipment off
and on, the user is encouraged to try to correct the interference by one or more of the
following measures:
-Reorient or relocate the receiving antenna.
-Increase the separation between the equipment and receiver.
-Connect the equipment into an outlet on a circuit different from that to which the
receiver is connected.
-Consult the dealer or an experienced radio/TV technician for help.
Changes or modifications not expressly approved by the party responsible for
compliance could void the user‘s authority to operate the equipment.
This device and its antenna(s) must not be co-located or operating in conjunction with
any other antenna or transmitter.

PROFESSOR TECHNOLOGY CO., LTD.
5F, No. 25-1, Jilin Rd., Chung-Li Industrial Park
Taoyuan 320, Taiwan R.O.C.
Table of contents


