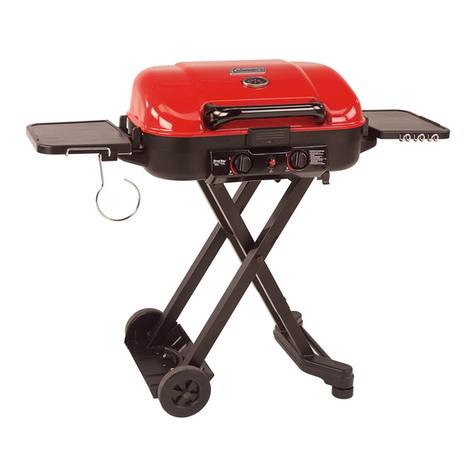
ProFire ProSear User manual

www.profiregrills.com
Owner’s Manual & Installation Instructions
For questions about features, operation/performance, parts or service, call 888.781.4657 or
Visit our website at www.profiregrills.com
Write the model and serial number here:
MODEL #_________________________
SERIAL #_________________________
Find these numbers on the grill body.
Installer: Leave this manual with the appliance.
Consumer: Retain this manual for future reference. PF0215
Before using your appliance, be sure to read and save these instructions.
Pay special attention to the Important Safety Instructions located at the beginning of the manual.
Patent Pending

2
INFRARED GRILL SAFETY
Your safety and the safety of others are very important
We have provided many important safety messages in this manual and on your appliance. Always read and obey all
safety messages.
This is the safety alert symbol.
This symbol alerts you to potential hazards that can kill or hurt you and others.
All safety messages will follow the safety alert symbol and either the word “DANGER” or “WARNING.”
DANGER
WARNING
You can be killed or seriously injured if you don’t immediately follow instructions.
This indicates that death or serious injuries may occur as a result of non-observance of this
warning.
All safety messages will tell you what the potential hazard is, tell you how to reduce the chance of injury, and tell you what can
happen if the instructions are not followed.
This ProSear Infrared Grill is made by
ProFire Grills
5565 12th Street
Butler, WI 53007
Questions?
888.781.4657
www.profiregrills.com
We look forward to hearing from you!
CAUTION This indicates that minor or moderate injuries may occur as a result of non-observance of
this warning.
NOTICE: This indicates that damage to the appliance or property may occur as a result of non-compliance with this advisory.
NOTE: This alerts you to important information and/or tips.
ProSear Table of Contents
Safe Guards.............................................................2,3,4, and 5
Overall and Cut-Out Dimensions..........................................5
Cabinet Preparation...............................................................6
Installation of Grill..................................................................7
Checking for Leaks.................................................................8
Ventilation................................................................................9
Maintenance..........................................................................10
Lighting..................................................................................11
Accessories and Cooking Tips..............................................12
Gas Conversion...............................................................13, 14
Flame Adjustment.................................................................14
Wiring Diagram....................................................................15
Parts List................................................................................16
Parts List Drawing................................................................17
Trouble Shooting...................................................................18
Warranty................................................................................19

3
IMPORTANT SAFETY INSTRUCTIONS
READ AND SAVE THESE INSTRUCTIONS
Safety
Important Safety Instructions
WARNING
When property cared for, your new appliance has been designed to be
safe and reliable. Read all instructions carefully before use. These pre-
cautions will reduce the risk of burns, electric shock, fire and injury to
persons. When using kitchen appliances, basic safety precautions must
be followed, including those in the following pages.
Gas Appliance Safety
WARNING:
If the information in this manual is not followed exactly, a
fire or explosion may result causing property damage, per-
sonal injury or death.
Do not store or use combustible materials, gasoline or
other flammable vapors and liquids in the vicinity of
this or any other appliance.
WHAT TO DO IF YOU SMELL GAS
Do not try to light any appliance.
Do not touch any electrical switch.
Do not use any phone in your building.
Immediately call your gas supplier from a neighbor’s
phone. Follow the gas supplier’s instructions.
If you cannot reach your gas supplier, call the fire depart-
ment.
Installation and service must be performed by a qualified in-
staller, authorized service agency or the gas supplier.
*
*
*
Have the installer show you where the gas shut-off valve is
located.
If a burner goes out and gas escapes, open windows and
doors. Wait until gas dissipates before using the appliance.
If you smell gas, your installer has not done a proper job of
checking for leaks. If the connections are not perfectly
tight, you can have a small leak and, therefore, a faint
smell. Finding a gas leak is not a “DO-IT-YOURSELF”
procedure. Some leaks can only be found with the burner
control in the “ON” position and this must be done by a
qualified service technician. See “WHAT TO DO IF YOU
SMELL GAS” on page 2.
To prevent carbon monoxide build-up, do not block appli-
ance air vents.
For proper lighting and performance of burners, keep ig-
niters clean and dry.
Warning: Gas leaks cannot always be detected by smell. Gas
suppliers recommend that you use a gas detector approved by
UL or CSA.
WARNING
To reduce the risk of fire, electrical shock, injury to persons, or
damage when using the grill, follow basic precautions, includ-
ing the following:
NEVER use this appliance as a space heater to heat or
warm the room. Doing so may result in carbon monoxide
poisoning and overheating of the grill.
CAUTION: Do not store items of interest to children in
cabinets above the grill—children climbing on the grill to
reach items could be seriously injured.
Proper installation—The grill, when installed, must be
electrically grounded in accordance with local codes or, in
the absence of local codes, with the National Electrical
Code, ANSI/NFPA70 or Canadian Electrical Code, Part 1.
Be sure the grill is properly installed and grounded by a
qualified technician.
This grill is equipped with a three-prong grounding plug
for your protection against shock hazard and should be
plugged directly into a proper grounded receptacle. Do not
cut or remove the grounding prong from this plug.
Disconnect the electrical supply before servicing the grill.
Injuries may result from the misuse of the grill such as
stepping, leaning, or sitting on the top surface.
Maintenance—Keep grill area clear and free from combus-
tible materials, gasoline, and other flammable vapors and
liquids.
WARNING
State of California Proposition 65 Warnings:
This product contains chemicals known to the State of California
to cause cancer, birth defects or other reproductive harm.
IMPORTANT SAFETY NOTICE: The California Safe
Drinking Water and Toxic Enforcement Act requires the
State of California to publish a list of substances known to
the State to cause cancer, birth defects or other reproductive
harm, and requires businesses to warn customers of potential
exposure to such substances.
The burning of gas cooking fuel can generate some by-
products which are on the list. To minimize exposure to
these substances, always operate this unit according to
the instructions contained in this booklet and provide good
ventilation.
Birds have very sensitive respiratory systems. Keep pet
birds out of the kitchen or other rooms where kitchen fumes
could reach them. Kitchen fumes such as overheating
margarines and cooking oils may be harmful.
FIRE SAFETY
Do not use aluminum foil to line any part of the grill.
Set the burner control so that the flame does not extend be-
yond the bottom of the pan.

4
IMPORTANT SAFETY INSTRUCTIONS
READ AND SAVE THESE INSTRUCTIONS
Use this appliance only for its intended use as described in
manual. For example, never use the appliance for
heating the room. Never use the appliance for storage.
Do not allow aluminum foil, plastic, paper or cloth to
come in contact with a hot burner or grate. Do not allow
pans to boil dry.
If the grill is near a window, forced air vent, or fan, be
certain that flammable materials such as window coverings
do not blow over or near the burners or elements. They
could catch on fire.
Always have a working smoke detector near the kitchen.
Never leave the grill unattended when in use. Boil overs
cause smoking and greasy spillovers may ignite.
WARNING:
TO REDUCE THE RISK OF A RANGE TOP GREASE FIRE:
1. Never leave surface units unattended at high settings. Boil overs
cause smoking and greasy spillovers that may ignite. Heat oils
slowly on low or medium setting.
2. Clean ventilating fans frequently. Grease should not be allowed to
accumulate on fan or filter.
3. Use proper pan size. Always use cookware appropriate for the size
of the surface element.
In the event that personal clothing or hair catches fire, drop and roll
immediately to extinguish flames.
Smother flames from food fires other than grease fires with baking
soda. Never use water on cooking fires.
Take care that drafts like those from fans or forced air vents do not
push the flames so that they extend beyond the edges of the pan.
WARNING:
TO REDUCE THE RISK OF INJURY TO PERSONS IN THE
EVENT OF A GREASE FIRE, OBSERVE THE FOLLOWING:
SMOTHER FLAMES with a close-fitting lid, cookie sheet, or
metal tray, then turn off the burner. BE CAREFUL TO PRE-
VENT BURNS. If the flames do not go out immediately, EVAC-
UATE AND CALL THE FIRE DEPARTMENT.
NEVER PICK UP A FLAMING PAN—You may be burned.
DO NOT USE WATER, including wet dishcloths or towels—a
violent steam explosion will result.
Use an extinguisher ONLY if.
A. You know you have a Class ABC extinguisher, and you already
know how to operate it.
B. The fire is small and contained in the area where it started.
C. The fire department is being called.
D. You can fight the fire with your back to an exit.
E. Have an appropriate fire extinguisher available, nearby,
highly visible and easily accessible near the appliance.
Whenever possible, do not operate the ventilation system
during a grill top fire. However, do not reach through fire
to turn it off.
Burn Prevention
DO NOT TOUCH SURFACE UNITS OR AREAS
NEAR UNITS—Surface units may be hot even though
they are dark in color. Areas near surface units may be-
come hot enough to cause burns. During and after use, do
not touch, or let clothing, potholders, or other flammable
materials contact surface units or areas near units until
they have had sufficient time to cool. Among these areas
are the grill and areas facing the grill.
Do not heat or warm unopened food containers. Build-up
of pressure may cause the container to burst and cause
injury.
Use high heat settings on the grill only when necessary. To
avoid bubbling and splattering, heat oil slowly on no more
than a low–medium setting. Hot oil is capable of causing
extreme burns and injury.
Never move a pan of hot oil, especially a deep fat fryer.
Wait until it is cool.
CAUTION:
All igniters spark when any single burner is turned on. Do not
touch any of the burners when the grill is in use.
Child Safety
When children become old enough to use the appliance, it
is the legal responsibility of the parents or legal guardians
to ensure that they are instructed in safe practices by
qualified persons.
Do not allow anyone to climb, stand, lean, sit, or hang on
any part of an appliance. This can damage the appliance
and potentially cause severe injury.
Do not allow children to use this appliance unless closely
supervised by an adult. Children and pets should not be
left alone or unattended in the area where the appliance is
in use. They should never be allowed to play in its vicinity,
whether or not the appliance is in use.
CAUTION:
Items of interest to children should not be stored in an appli-
ance, in cabinets above an appliance or on the backsplash.
Children climbing on an appliance to reach items could be seri-
ously injured.
Cleaning Safety
Do not clean the appliance while it is still hot. Some clean-
ers produce noxious fumes when applied to a hot surface.
Wet cloth or sponges can case burns from steam.
After a spill or boil over, turn off the burner and allow the
grill to cool. Clean around the burner and burner ports.
After cleaning, check for proper operation.

5
IMPORTANT SAFETY INSTRUCTIONS
READ AND SAVE THESE INSTRUCTIONS
Have the installer show you the location of the circuit
breaker or fuse. Mark it for easy reference.
This appliance must be properly installed and grounded by
a qualified technician. Connect only to properly grounded
outlet. Refer to installation instructions for details.
This appliance is intended for normal family household
use only. It is not approved for outdoor use.
Do not store or use corrosive chemicals, vapors, flamma-
bles or nonfood products in or near this appliance. It is
specifically designed for use when heating or cooking
food. The use of corrosive chemicals in heating or cleaning
will damage the appliance and could result in injury.
Do not operate this appliance if it is not working proper, or
if it has been damaged. Contact an authorized service pro-
vider.
Do not repair or replace any part of the appliance unless
specifically recommended in this manual. Refer all servic-
ing to the factory or authorized service center.
To avoid electrical shock hazard, before servicing the grill,
switch power off at the service panel and lock the panel to pre-
vent the power from being switched on accidentally.
WARNING:
Proper Installation and Maintenance
ProFire
19 7/8"
30 1/2"
21"
15 1/2"
21 1/2"
3/4"
19 7/8"
12 3/4"
25 1/2"
28 3/4"
Overall Dimensions of Unit
20"
29"
120V
Female
Socket
3/8 NPT
Pipe
120V
Socket
Recommended 16"
Typical 36"
Minimum 20"
Recommended 15"
Marking
Label
Recommended Shut OFF Valve Location-X
Electrical and Gas Connection
Location
120 Volt, 60H, 12 Amp
The ProSear grill comes with a 48”
electric cord.
Cut-Out Dimensions
29"x 20"

Min.
1"
Min.
4"
Min.
14"
Min.
14"
Heat Shield
Clearances: With heat shield installed, must have
minimum horizontal distance(s) from the sides and
back of appliance to adjacent vertical combustible
walls extending above the top panel, 6 inches from
the side walls, 4 inches from the rear wall. Mini-
mum horizontal distance from the front of the coun-
ter to the front side of the appliance, 1 inch.
6
The ProSear grill comes with 3/8” NPT
threaded pipe. A manual valve must be
installed in an accessible location in the
gas line external to the appliance for the
purpose of turning on or shutting off the
gas to the appliance.
Shut Off Valve
For proper operation of this unit the MAXIMUM
gas inlet pressure for Nat. and LP gas is 13”WC.
The MINIMUM gas inlet pressure for Nat gas is
3.5" WC and for LP gas the MINIMUM pressure
is 10" WC.
Gas Pressure
Caution:
The cabinet doors must not have a center support as a center support will block access to the drip
pan. See Figure D, (Page 7)
ProSear Cabinet Preparation
Side Wall/Alcove Counter Installation
Without heat shield installed, must have mini-
mum horizontal distance(s) from the sides and
back of appliance to adjacent vertical combus-
tible walls extending above the top panel, 14
inches from the side walls, 14 inches from the
rear wall. Minimum horizontal distance from the
front edge of the counter to the front side of the
appliance 1 inch. Minimum clearance from the
cooking surface to the bottom of a vent hood is
26 inches and a minimum 36 inches wide hood
is recommended.
Island Counter Installation
Minimum vertical distance
from the top of the cooking to
any overhead unprotected
combustible surface is 48 inch-
es. Maximum depth of the
overhead cabinets is 13 inches.
Combustible Wall
Min.
6"Min.
6"
Heat Shield
Combustible Wall
Min.
14"
Min.
1"
NOTE: See page 7 for heat shield installation.

ProSear Installation Instructions
Installation Of Your Indoor Grill
Your ProSear Indoor Grill is fully insulated and can be installed into standard wood cabinetry with zero clearance to
combustibles. The grill was designed to fit into a standard 30” base cabinet. A cut out of 29" x 20" is required in the
counter top. Combustible wall clearance must be maintained according to the specs on page 6 of this manual.
After cutting the recommended open-
ing in the counter top, remove the
Stainless Trim on the grill & place
the grill into the opening and secure
the unit in place by screwing the four
counter brackets into the counter top
(Fig. A). Then replace the Trim on
the grill and reinstall the 4 screws (Fig
A1), or install the Heat Shield (Fig.
A2) and the Stainless Steel Trim us-
ing the 4 screws that were removed.
Connect your gas line to the 3/8” pipe supplied with
your grill. A safety shut off valve must be installed
in an accessible location in the gas line external to
the appliance for the purpose of turning on or shut-
ting off the gas to the appliance (Fig B and B1).
Plug the female end of the electric power cord sup-
plied with your unit into the electrical jack located at
the bottom of the control panel. Plug the male end into
a grounded 120V,60H 15 Amp receptacle (Fig. C).
WARNING: After the installation is complete, the Indoor Grill & all gas connections must be checked for leaks. See
Page 6 for Leak Check Instructions.
WARNING: This appliance is equipped with a three prong grounding plug for your protection against shock hazard and
should be plugged directly into a properly grounded receptacle. Do not cut or remove the grounding prong from this plug.
WARNING: Your electric socket should be checked for proper polarity. Improper polarity can cause an electric shock
and serious personal injury.
Fig. A Fig. A1
The Indoor Grill is designed to fit into a standard 30”
base cabinet. Your cabinets CANNOT have a center
door support as this would block the drip pan which is
located in the center of the grill (Fig. D). Fig. D
Fig. B Fig. B1
Safety Shut Off
Fig C
↑
Drip Pan
7
Fig. A1
Fig. A2
Stainless Steel Trim and Heat
Shield Installation.
See page 6 for combustion clearances
when using heat shield or not using.
Gas Safety Shut Off
Electrical Jack Location
Drip Pan

8
ProSear Installation Instructions
Checking For Leaks
After installing the grill or after any service or repair you must check all gas connec-
tions for leaks.
Spray or brush a solution of 50% water and 50% liquid soap on to all gas connections
and the valve. See Figure E. Make sure the gas is turned on and wait up to five minutes.
If bubbles appear, there is a leak. See Figure E1
To repair the leak, tighten the connection. If the leak persists, shut off the gas and get a
qualified service technician to repair the leak.
WARNING: Never use a flame to check for leaks. Doing so may cause serious injury,
property damage or death.
Liquefied Petroleum (LP) and Natural Gas have an odorant added to the gas. If
you smell an odor, you may have a gas leak. Follow the leak check instructions
above. If you are unable to find and repair the leak, shut the gas off and call a
qualified service technician or your gas company.
WARNING: When checking for or repairing leaks or if you smell gas,
extinguish all flames and do not turn on any device that could cause a spark such as
lights, power tools, cooking appliances or this grill. If you cannot
repair the leak, turn the gas off and call a qualified service technician to repair the
leak.
Figure E Figure E1

9
ProSear Installation Instructions
Ventilation Requirements
CAUTION: Your Indoor Grill requires proper ventilation.
A minimum 600CFM Internal Blower or 900 CFM External blower ventilation hood is
required over your ProSear Indoor Infrared Grill. The maximum height above the cook-
ing surface is 30” to the bottom of the hood. The hood must overlap the cooking surface
a minimum of 3” on each side.
See your local appliance dealer for a hood that meets these specifications.

10
ProSear Installation Instructions
Care & Maintenance
Your ProSear Indoor Infrared Grill requires occasional cleaning. Use only non abrasive cleaners or de-
greasers designed for use on Stainless Steel when cleaning your ProSear Grill. Always apply a Stainless
Shine product such as Sheila Shine to all external Parts of your grill after cleaning. This will keep the finish
of your grill like new for many years. Keeping the grill clean will also prevent fires and flare-ups. Always
follow the manufacturers directions & warnings when using cleaners & degreasers. The Cooking Grid
should be cleaned after each use with a wire brush. When needed, it should be cleaned with soap & water.
There is a grease drip pan at the front of the grill that should be cleaned frequently. See Figure D
The ProSear Grill features two removable Dishwasher Safe Shields (Fig. F) and Infrared Burner inside the
grill. The Shields should be removed frequently for cleaning. Fig. F1 Burner with Screen. Fig. F2 Burner
w/o Screen Showing Ceramic. The Drip Pan, Shields and Cooking Grid are Dishwasher Safe.
Good maintenance and clean up will lengthen the life of your grill and provide you many years of grilling
enjoyment. Periodic cleaning of your grill will help you avoid accumulations of flammable grease, fats,
and other debris.
The high intensity of the Infrared burner, drippings and food particles that fall onto the burner surface dur-
ing grilling will become ash. However, some debris and residue will remain. To remove this residue after
each meal, leave the control on “HIGH” for approx. five (5) minutes.
Caution: Allow grill to cool sufficiently before cleaning grill components.
Ash...if allowed to accumulate for a long period of time, can contribute to blockage of the small ports of
the burner ceramic surface. To prevent this blockage, remove the cooking grids and the burner screen (Fig.
F1). Vacuum off the burner surface with a conventional canister type vacuum cleaner every four to six
months.
Caution: The ceramic surface of the burner is fragile and must be handled carefully.
Fig. F
Fig. F1
Fig. F2

11
ProSear Installation Instructions
Lighting Instruction
Lighting: To light your grill, remove the dust cover. Turn knob to “High”. The grill has a 5 second de-
lay before beginning to light. You will hear a ticking sound. This is the igniter lighting the grill. After
the burner is lit, the ticking will stop. If the grill fails to light, the unit will retry 2 more times and after
the 3rd time if it fails, the unit will automatically shut “OFF” the gas to the burner and stop sparking.
The valve knob must be shut off before trying to light grill again. The electric spark device is reset by
turning the grill “Off”. The grill must remain OFF for 60 seconds in between lighting attempts so as not
to allow a build up of gas that will cause an unsafe situation. If after 3 attempts the grill fails to light,
contact the dealer you purchased your grill from, or a qualified service technician.
Relight & Safety Shut Off: The ProSear Indoor Infrared Grill also includes a relight feature that will
begin trying to light the grill again if the flame were to be extinguished while in the “ON” position. If
the grill fails to light, the unit will retry 2 more times and after the 3rd time if it fails, the unit will auto-
matically shut “OFF”. The gas will be shut off to the burner and the sparking will stop. The valve knob
must be turned to the “Off” position to reset the spark device.
Preheat the grill on “High” for ten minutes before beginning to cook. After 10 minutes you can adjust
the grill temperature to suit the type of food you are cooking.
Do not cover the cooking surface with the dust cover, a lid, foil, cooking utensil or anything else. The
ProSear Indoor Infrared Grill was designed to cook your food without covering it.
WARNING: Covering the cooking surface can cause an unsafe situation and can lead to seri-
ous injury or damage to personal property.
WARNING: Immediately after turning the grill on, all surfaces of the grill become extremely
hot. Do not touch any part of the grill except for the knob to adjust the cooking temperature
or to turn the grill off.
When you are done cooking, leave the grill on for an additional 10 minutes. This will cause your grill
to act like a self cleaning oven and carbonize any excess grease or food particles.
After the grill has cooled (Approx 30 Minutes) you can replace the dust cover.

12
ProSear Accessories and Infrared Cooking Tips
The ProSear Grill has optional griddle part number “PFGRIDDLE”. You can order accessories from your local ProFire
Grills dealer. Do not use any accessories not approved by ProFire Grills. Using unapproved accessories can cause an un-
safe situation and lead to serious personal injury or damage to the grill or personal property.
Griddle: To use the griddle first remove cooking grid from the grill. Place the griddle on to the grill. See Figure G
Turn the valve knob to “High” and let the griddle preheat for 10 Minutes.
See page 11 for lighting instructions. Then turn the knob to the desired
cooking temperature. The griddle is made out of aluminum and does not
have a non stick coating. We recommend a light coating of cooking oil,
butter or non stick spray to prevent the food sticking to the cooking surface.
Figure G
Rotisserie Kit Available as Shown
Assembly Instructions are Packed with the Rotisserie
Kit from the Factory.
1. Infrared gas grills get very hot. Do not leave food unattended on the grill for any length of
time.
2. Estimate cooking times to be 30% to 50% less than a conventional grill.
3. Always thaw food thoroughly before cooking to achieve better, more predictable results.
4. Always use long handled grill tools for grilling. A grilling mitt may be useful for handling hot
items.
5. The use of a fork is not recommended for grilling on your new ProFire grill. A fork may mar the
surface of the cooking grids. Piercing foods while cooking will allow the juices to escape, causing
the finished product to be drier than may be desired.
6. To minimize flare-up, trim fat from meats or remove skin from poultry.
7. If a flare-up occurs, don’t try to control it with water. Water can cause burner damage. Instead,
move the food to another part of the grill or lower the heat setting.
Burner Failure Caused By Water Damage Is Not Covered Under Warranty.
8. Allow the grill to heat up for 5 minutes on high before cooking.
9. Place the food on the cooking grids - while the grill is on high—to sear the food thoroughly.
Searing is the key to locking in the juices for that delicious grilled flavor.
10. After searing for 2-3 minutes per side, lower the temperature to finish cooking the food as desired.
11. Never cook over an unlit infrared burner. The drippings could cause the burner to crack when re
lit. Always use a drip pan to protect the unlit burner when cooking indirectly.
Burner Failure Caused By Cooking Over An Unlit, Unprotected Burner Is Not Covered Under
Warranty.
12. To clean the grill after cooking, burn burner on high for at least 5 minutes.
INFRARED COOKING TIPS

“This conversion kit shall be installed by a qualified
service agency in accordance with the manufactur-
er’s instructions and all applicable codes and re-
quirements of the authority having jurisdiction. If
the information in these instructions is not followed
exactly, a fire, explosion or production of carbon
monoxide may result causing property damage, per-
sonal injury or loss of life. The qualified service agen-
cy is responsible for the proper installation of this
kit. The installation is not proper and complete until
the operation of the converted appliance is checked
as specified in the manufacturer's instructions sup-
plied with the kit”.
13
ProSear Installation Instructions
Gas Conversion
The gas conversion kit Model GCLP and GCNT is only for use with Model: PFINDOOR. The conversion kit is shipped with your Indoor
Grill. If you need an additional kit, contact ProFire Grills, Butler WI., 888.781.4657
The gas conversion kit Model GCLP contains 1– LP Orifice #49, 3– Stickers.
The gas conversion kit Model GCNP contains 1– Nat. Orifice #33 3– Stickers.
Your ProSear Grill was designed for LP or Natural gas. You must be sure that the type of gas used is the same as what the grill was
set up for. Check the label located on the front of grill to determine if your grill was set up from the factory for use with LP or Nat gas.
If a conversion from one type of gas to another is necessary, ProFire Grills has supplied you with the appropriate orifice for the conver-
sion. It is located attached to the control panel. See Figure K. Follow the directions carefully and make all necessary adjustments.
Caution: Before proceeding with the conversion,
shut off the gas supply to the appliance prior to
disconnecting the electrical power.
WARNING: Do not attempt to use any other gas
besides LP “Liquefied Petroleum” or Natural Gas
with your ProSear Indoor Grill. The use of any oth-
er type of gas will cause serious personal injury or
property damage. Caution: For proper operation of this unit
the MAXIMUM gas inlet pressure for Nat.
and LP gas is 13” WC. The MINIMUM gas
inlet pressure for Nat gas is 3.5” WC, LP gas
the MINIMUM pressure is 10” WC.
Burner Input Rating for Nat. & LP
gas is: 35,000 Btu’s per hour
Fig. L Fig. L1
Control Panel
Gas Conversion: The unit must be outside of any enclosure prior to beginning the conversion. The grill must not be connected
to gas or electric. Remove the cooking grid, flavor grid, dishwasher shields, burner and trim. Insert a 7/16” socket thru the open-
ing at the top of the control panel and remove the two 7/16” nuts. Then remove the bottom two nuts. See Figure L. Remove the
control panel. See (Fig. L1). Remove the orifice using a 1/2” open end wrench or deep well socket (Fig. M). Locate the new
orifice. See (Fig. K above). Confirm the orifice size is correct. LP gas is a #49, Nat is #33. Apply a small amount of approved
pipe dope to the threads & install the new orifice. The regulator must also be converted as directed on page 14. Then reinstall the
control panel by reversing the above procedure. Install the grill according to the instructions on page 5 of the manual. With the
gas & electric turned on, check the orifice for leaks by spraying a 50% liquid soap & 50% water solution on the threaded side of
the orifice. Bubbles will appear if there is a leak. Call a qualified service technician to repair the leak. Save the orifice removed
from the appliance for future use. To convert the unit back to its original gas, reinstall original orifice per these instructions and
remove the rating labels indicating that the conversion was done.
WARNING
Figure K
Orifice
Pressure
Tap
Regulator
Ignition
Control
Orifice
Fig. M
Adjustment
Cap

Conversion to LP or Natural Gas operation should be performed by a qualified technician or installer.
ProSear Installation Instructions
Gas Conversion and Low Flame Adjustment
Converting the Regulator: After you have installed the appropriate orifice, the regulator must be set for the appropriate gas also. With the control
panel off, locate the gas pressure adjustment cap. See Fig. K Page 13). Remove the cap, turn it over and reinstall the cap. The cap has one side
marked Nat Gas and the other side marked as LP Gas (see Fig. N ).
Checking the Pressure: The gas pressure must be checked after the conversion. The grill must be installed with the gas and electrical connections.
See page 5 of the manual. Remove the pressure tap screw (Fig. O). Attach a manometer or pressure gauge to the pressure tap hole. Turn the valve
knob to the “ON” position. The unit must be turned on to check the pressure. The gas pressure for Nat gas is 3.5” WC. For LP gas the pressure
is 10”WC. Minimum input pressure for Nat. gas is 3.5” WC, for LP gas 10” WC. Maximum gas inlet pressure for Nat & LP gas is 13” WC.
WARNING: The gas must be turned off immediately after checking the pressure and the pressure tap screw replaced and checked for leaks. Seri-
ous injury, property damage or death may occur if gas is allowed to escape from pressure tap.
Adjusting the Valve: After a gas conversion from LP to Nat or Nat to LP, it may be necessary to adjust the valve because of too low or too high
flame on the low setting. In some cases the flame height may be adjusted to compensate for varying gas pressures. First light the grill following the
directions on page 11 of the manual. Then turn the valve knob to the “Low” setting and remove the knob. This will expose the valve stem. Look
inside the valve stem and you will see a low flame adjustment screw. With the grill burning, turn the screw counter clockwise to make the low
flame bigger. Turn the screw clockwise to decrease the flame size. See (Fig P below). Warning: Do not remove the screw, Leaks will occur. If
there is a leak, turn the screw clockwise until leak subsides. After you are satisfied with the flame height, replace the knob and turn the unit off.
Fig. O Fig. P
14
TURN OFF GAS AND ELECTRIC SUPPLY. Before you begin, turn off the gas supply at the shut-off valve.
Disconnect the electrical supply from the grill.
Failure to make the appropriate conversion can result in serious personal injury and property damage.
1. Locate the regulator that is attached to the inlet on the grill and remove the vent cap. Turn the insert over and then reinsert the
opposite side into the regulator.
Regulator
Cap
LP
Gas
Turn end-to-end
and refit into
regulator
Nat.
Gas
Regulator
Fig. N Fig. O

15
ProSear Installation Instructions
Service & Wiring Diagram
The ProSear Indoor Infrared Grill was designed with a removable control panel that houses all the electronics & gas compo-
nents. See Figure K, page 13. This exclusive feature allows for the easy repair or replacement of all electrical and gas compo-
nents of your grill.
Removing the Control Panel: First, unplug the electric cord to the grill, shut off the gas and disconnect the gas line from the
grill. Remove the valve knob & Stainless Steel trim and remove the grill from cabinetry. See page 7. Next, remove the 4 x 7/16
nuts that hold the control panel to the body of the grill. See page 13. Disconnect the electrode wire (Fig. Q) from the electrode.
Replacing the Control Panel: After the module has been repaired or replaced, reinstall the control panel onto the grill body by
reversing the above procedure. Reinstall the grill into the cabinetry by following the directions on page 7. The unit and all its gas
connections should then be checked for leaks. See page 6
Caution: Label all wires prior to disconnection when servicing controls. Wiring errors can
cause improper and dangerous operation. Verify proper operation after servicing.
Wiring Diagram
Wiring Diagram
Electrode Wire
Fig. Q

16
11777VALVE Indoor Grill Valve
21PF10-319S Brass (F) PIPE 1/4 TO (M) FLARE 3/8
31PF109-B-2Brass 1/8 MNPT SQUARE PLUG
41PF110-B-4-2Brass 1/8 (F) TO 1/4 (M)
51PF127-B-2Brass 1/8 FPT x 1/8 FPT x 1/8 MPT TEE
61PF1823-120COVER Indoor Grill Electrode Cover
71PF21423-18 Indoor Grill Infrared Burner,
81PF12423-18SCRN Indoor Grill Burner Screen
91PF30100-5IGNITOR SWITCH - INDOOR
10 1PF30-125 COOKING GRID INDOOR 15-3/8 x 21-3/8
11 1PF30-1809-121 WIRING HARNESS - INDOOR Grill
12 1PF30-1823-120 Indoor Grill Infrared Electrode
13 1PF30-1827-28 Indoor Grill Ign. Wire
14 1PF30-2021-34 Indoor Grill Infrared Ignition. Control,
15 1PF21423-18BRKT Indoor Grill Burner Bracket
16 1PF30-312007-01 INDOOR GRILL 4' CORD
17 1PF30-5VALVE KNOB CHROME INDOOR
18 1PFKKSSBZ Bezel
19 1PF30-701W-X2/04 INDOOR GRILL AC RECEPTACLE
20 1PF30-CP INDOOR GRILL CONTROL PANEL
21 1PF30-CV300P1 Indoor Grill Infr Reg/Control Valve,
22 1PF30-DP INDOOR GRILL DRIP PAN
23 1PF30-GB Indoor Grill Body
24 2PF30-GD INDOOR GRILL GREASE DEFLECTOR
25 1PF30-GT Indoor Grill Top
26 1PF30-HGS Indoor Grill Heat and Grease Shield
27 1PF30-
ORIFICEWASH
Indoor Grill Orifice Spacing Washer
28 1PF30-REGBRKT Indoor Grill Regulator mounting bracket
29 1PF648F-6-4 (M) PIPE 1/4 x (M) FLARE 3/8
30 1PF80-13-54-NAT ORIFICE MAIN BURNER NAT
30 1PF80-13-63-LP ORIFICE MAIN BURNER LP
31 1PF80-23S BRASS ELBOW 1/4 x1/8
32 1NMSHAN HANDLE
33 1PF80-9898-10FP 3/8" Flare x 10" Un-Coated SS Flex Tube
34 1PFBI-100-DBlack 1/2 90 degree female elbow
35 1PFBI-110-DC Black 1/2" male x 3/8" female bushing
36 1PFBI-113-D1-1/2 Black 1 1/2 x 1/2 dia pipe nipple
37 1PFBI-113-C4 Black 4" x 3/8" pipe nipple
38 1PFBI-113-D9 Black 9"x 1/2" dia pipe nipple
39 1PFBI-119-DA Black 1/2" x 1/8" female reducer
40 1PFIG-69 UL LABEL FOR INDOOR
41 1PFSSCOVER INDOOR GRILL SS COVER
42 1PF80-712 ProFire Logo
ProSear Parts List with Description
Replacement parts are available from your local
ProFire dealer or ProFire Grills
888-781-4657 www.profiregrills.com
FIG.
No.
Quan-
tity
Part No. Description FIG.
No.
Quan
tity
Part No. Description

17
ProSear Parts List Drawing
Heat and Grease Shield
32
41
10
24
8
7
16
23
22
26
11
40
25
18
17 6
13
19
12
29
27
30 31
20
33
14
9
1
5
3
2
3938
34
36
28
35
21
37
15
4
42
ProFire

18
ProSear Installation Instructions
Troubleshooting
Try the solutions suggested here first in order to avoid the cost of an unnecessary service call.
Nothing Will Operate
Electrical Shock Hazard
Plug into a grounded 3 prong outlet.
Do not remove grounded prong.
Do not use an adapter.
Do not use an extension cord.
Failure to follow these instructions can result in death,
fire, or electrical shock.
• Is the power supply cord unplugged?
Plug into a grounded 3 prong outlet.
• Has a household fuse blown, or has a circuit breaker
Tripped?
Replace the fuse or reset the circuit breaker. If the problem
continues, call an electrician. Assistance or Service
Before calling for assistance or service, please check
“Troubleshooting.” It may save you the cost of a service
call. If you still need help, follow the instructions below.
When calling, please know the purchase date and the com-
plete model and serial number of your appliance. This infor-
mation will help us to better respond to your request.
If you need replacement parts
If you need to order replacement parts, we recommend that
you use only factory specified parts. These factory specified
parts will fit right and work right because they are made
with the same precision used to build new ProFire applianc-
es.
To locate factory specified parts in your area, call us or visit
your ProFire Dealer.
Burner Makes Fluttering Sound
1. If during cooking the burner “flashes” and begins to make
a “fluttering sound”, immediately turn the control dial to
“OFF”.
2. Remove any food from the cooking grid.
3. Allow the burner to cool for 5 minutes.
4. Follow lighting procedure.
5. If the problem recurs, immediately turn control valve to
“OFF”.
6. Consult ProFire.
NOTE: Fluttering usually occurs because of an opening in or
around the ceramic due to cracks, breakage or loss of proper
gasket seal. This must be replaced or repaired.
Burner Will Not Operate
• Gas supply not connected or turned on.
See the installation instructions section.
• Is the control knob set correctly?
Push in knob before turning to a setting.
• Is propane gas being used?
The appliance may have been converted improperly.
• Orifice in burner may be clogged.
Remove the obstruction.
Constant Flare-Ups
1. Grill too cold before start of cooking. You should al-
ways pre-heat grill for 5 minutes before cooking.
2. Fatty foods. Trim excessive fat from fatty meats.
3. Heat setting too high. Lower heat setting.
Food Sticks to Cooking Grid
1. Cooking grid is probably too hot. Lower heat setting.
You’ll need to experiment with heat settings to get the
best results.
2. Food being turned before sear lines are produced.
Time food to turn over only once.

ProSear Indoor Infrared Grill
Warranty
LIMITED WARRANTY
Lifetime Parts Warranty: Stainless Steel Cooking Grid and Stainless Steel Body
Five (5) Infrared Burner
One (1) Year Parts Warranty: All Other Grill Components
Grill for commercial, community or multi-tenants applications or use, will have a 1-year warranty on all parts only.
Subject to the conditions, limitations, exclusions, disclaimers and remedies provided herein, ProFire LLC, (“Manufacturer”) warrants that its
ProFire® Indoor Gas Grill (“Product”) is of good quality and workmanship in manufacture, conforms to the Manufacturer’s applicable specifica-
tions, drawings and descriptions, and will be free from defects in materials and workmanship in manufacture for a period of one (1) year from the
date the original consumer purchaser (“Purchaser”) initially purchased the Product. The Manufacturer further warrants that the Product’s Stainless
Steel Cooking Grids and Stainless Steel Body conform to the Manufacturer’s applicable specifications, drawings and descriptions, and will be free
from defects in materials for the lifetime of the Product.
The Manufacturer only shall be liable to the Purchaser under this Limited Warranty if:
the Product is installed, used, operated, maintained, serviced and repaired in the manner intended by the Manufacturer and in accordance with the
written instructions contained in the Owner’s Manual furnished with the Product;
the Purchaser initially purchased the Product on or after January 1, 2003;
the Purchaser furnishes a written description of the warranty claim and provides proof of the date of the Purchaser’s original purchase of the Product
(i.e., sales receipt or invoice) to the Manufacturer’s Customer Service Department within ninety (90) days of the Purchaser’s discovery of the claimed
defect; the claimed defect arose during normal and residential use and service of the Product and, except for warranty claims pertaining to the Stain-
less Steel Cooking Grids and Stainless Steel Body, arose within one (1) year from the date the Purchaser initially purchased the Product;
the Purchaser returns the claimed defective part(s) to the Manufacturer, freight and shipping prepaid by the Purchaser, when requested by the Manu-
facturer; and upon examination, inspection and testing by the Manufacturer, the part(s) prove to be defective in material or workmanship in manufac-
ture during normal and residential use and service of the Product.
THIS LIMITED WARRANTY DOES NOT COVER ANY DEFECT, MALFUNCTION, FAILURE OR DETERIORATION OF
THE PRODUCT ARISING FROM, CAUSED BY, OR RELATED TO: ACCIDENT, MISUSE, ABUSE, UNREASONABLE
USE, ALTERATION, MISAPPLICATION, VANDALISM, WEATHER, EXPOSURE TO THE ELEMENTS, NATURAL CA-
TASTROPHE OR DISASTER, ACTS OF GOD, DISCOLORATION, TARNISH, SCRATCHING, OR MARRING. THE DIS-
COLORATION OF STAINLESS STEEL IS IN NO WAY COVERED BY THIS LIMITED WARRANTY. THIS LIMITED
WARRANTY WILL BE VOIDED BY: THE INSTALLATION, USE, OPERATION, MAINTENANCE, SERVICE OR REPAIR
OF THE PRODUCT INCONSISTENT WITH THE INSTRUCTIONS PROVIDED IN THE OWNER’S MANUAL; THE COM-
MERCIAL USE OF THE PRODUCT; AND THE FAILURE TO PERFORM ROUTINE MAINTENANCE, SERVICE AND
REPAIRS TO THE PRODUCT.
In the event of a defect in any part or portion of the Product that is covered by this Limited Warranty arising within one (1) year of the date of the
Product’s initial purchase, the Purchaser’s sole and exclusive remedy shall consist of the in-home repair or replacement of the defective part(s), at the
Manufacturer’s option. In the event that the Manufacturer elects the remedy of repair or replacement and, after a reasonable attempt by Manufacturer
to repair the defect or if the elected remedy fails of its essential purpose the Purchaser’s sole and exclusive remedy shall consist of replacement of the
Product with a new product of equivalent grade, model and quality. In the event of a defect in the Product’s Stainless Steel Cooking Grids and Stain-
less Steel Body that is covered by this Limited Warranty arising more than one (1) year from the date the Purchaser initially purchased the Product
and during the lifetime of the Product, the Purchaser’s sole and exclusive remedy only shall consist of replacement of the defective part(s). The Pur-
chaser solely is responsible for all other costs, which may include, but are not limited to, labor charges for service, removal, repair or reinstallation,
and any necessary or incidental costs for any materials and/or permits required for installation of the replacement parts.
IMPLIED WARRANTIES, INCLUDING ANY WARRANTY OF MERCHANTABILITY OR FITNESS, FOR THE
PRODUCT AND ITS PARTS, ARE LIMITED TO ONE (1) YEAR IN DURATION AND OTHERWISE ARE EXCLUD-
ED. SOME STATES DO NOT ALLOW LIMITATIONS ON HOW LONG AN IMPLIED WARRANTY LASTS, SO
THE ABOVE LIMITATION MAY NOT APPLY TO YOU. NO OTHER EXPRESS WARRANTY OTHER THAN THE
WARRANTY STATED HEREIN HAS BEEN MADE OR WILL BE MADE ON BEHALF OF THE MANUFACTURER
WITH RESPECT TO THE PRODUCT AND ITS PARTS OR THE REPAIR OR REPLACEMENT OF THE PRODUCT
AND ITS PARTS.
The purchaser’s sole and exclusive remedy in the event of a defect is replacement or repair, at the option of the manufacturer, of the defective part or
parts. THE MANUFACTURER SHALL NOT BE RESPONSIBLE FOR ANY COSTS, EXPENSES, LOSSES OR DAMAGES, WHETHER
DIRECT, INDIRECT, INCIDENTIAL OR CONSEQUENTIAL, WHETHER ARISING IN CONTRACT OR IN TORT. THE MANUFAC-
TURER SHALL NOT BE RESPONSIBLE FOR LOSS OR DAMAGE TO PERSONAL PROPERTY, LOSS OF USE OF THE PRODUCT,
INCONVENIENCE, OR LOSS OR DAMAGE RESULTING TO THE PRODUCT OR OTHER PROPERTY FROM FIRE, SMOKE, FUEL,
WATER OR EXPOSURE TO THE ELEMENTS OR CHEMICALS. Some states do not allow the exclusion or limitation of incidental or conse-
quential damages, so the above limitation or exclusion may not apply to you.
This Limited Warranty is not transferable or assignable. This Limited Warranty gives you specific legal rights, and you may also have oth-
er rights that vary from state to state.
19

©2015 ProFire Printed in U.S.A.
5565 North 124th Street • Butler, Wisconsin 53007
Phone: 262.781.4657 • 888.761.4657
Fax: 262.781.3965 • 888.781.3965
Email: info@profiregrills.com
Web Site: www.profiregrills.com
A Division of Modern Home Products Corp.
Everglow
One Quality Modern Home Products Leads To Another
First in Outdoor Gas
Grills
First in Grill
Replacement Parts
Outdoor Lighting
Cooks It All
Professional Quality Products For Your Backyard
MHP configuration, ProFire Grills, Phoenix are registered trademarks of Modern Home Products Corp
Because of constant product improvement, ProFire Grills reserves the right to change specification without notice.
Kamado
Charcoal Grill
Patent Pending
Table of contents
Other ProFire Grill manuals

