ProLite Mini-Web User manual

Page | 1
Mini-Web
RS232 to TCP/IP Converter Module
Quick Start Guide
Version 1.0
Page | 2
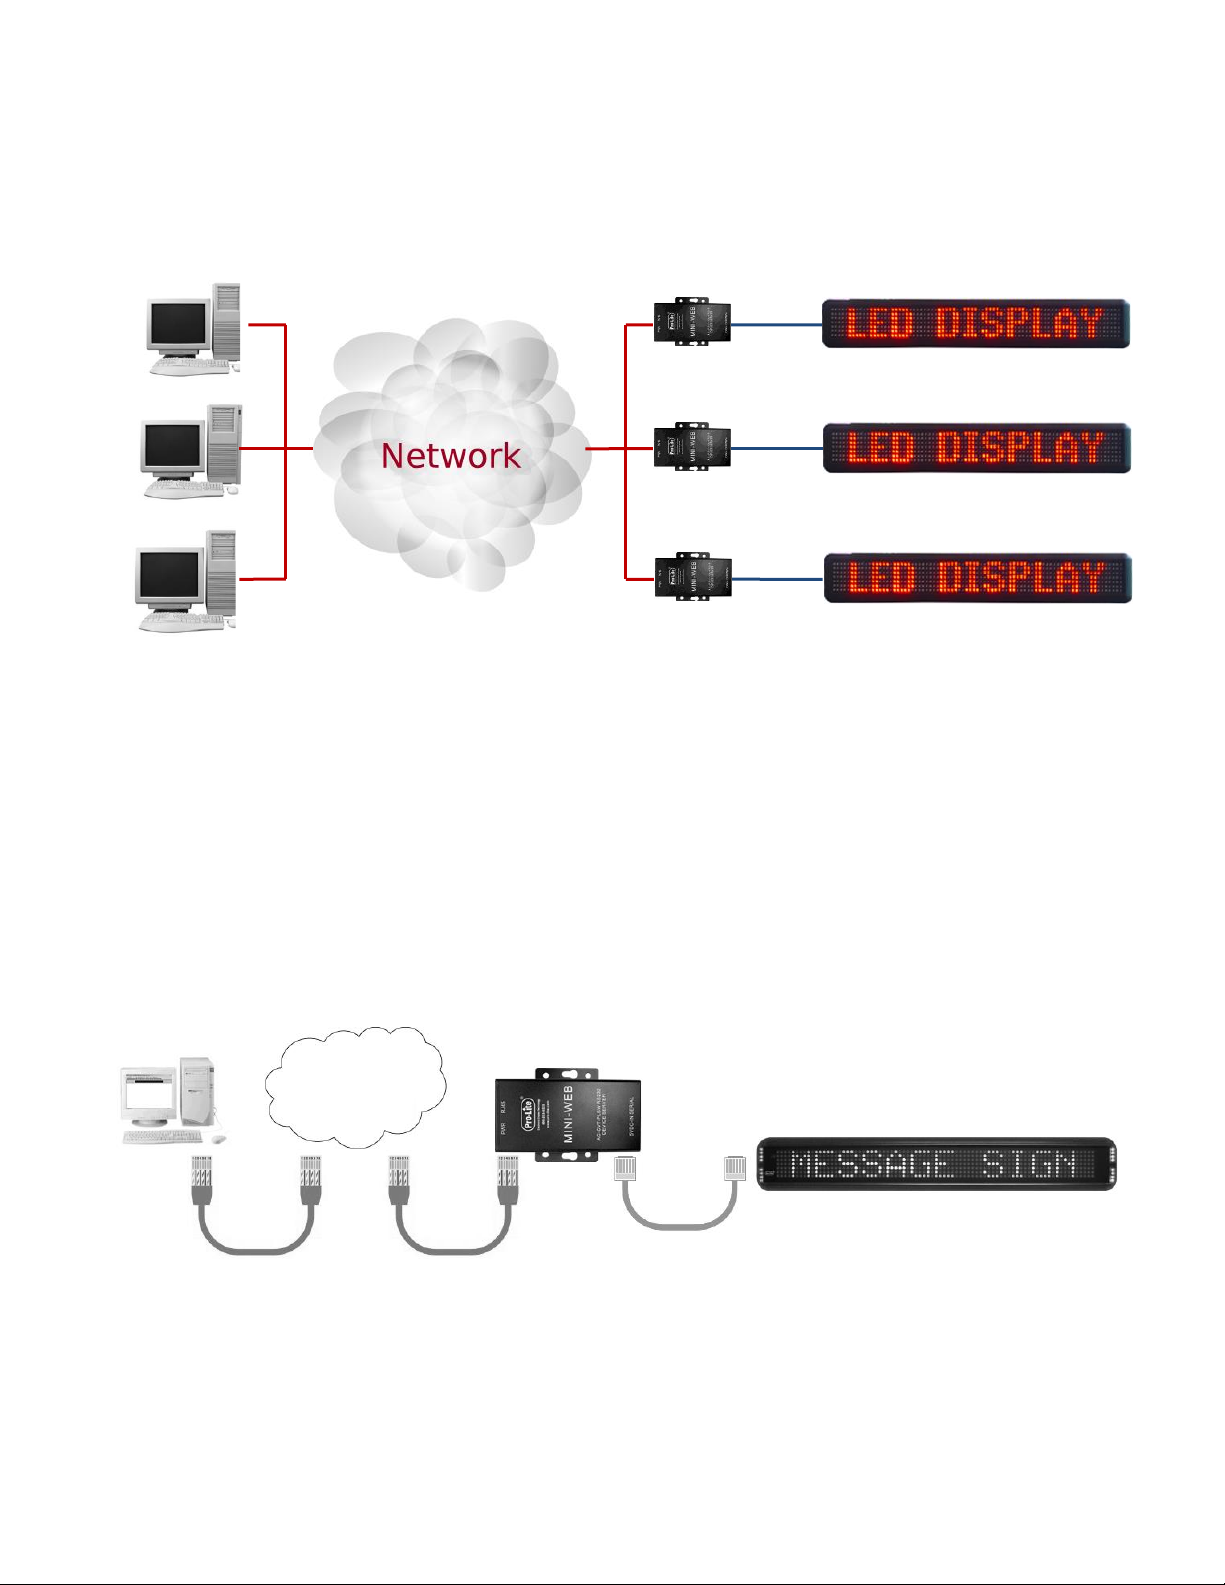
Application Overview
Any computer in the network will have access to the advertising unit via the BF-430. In order to achieve
communication, the computer(s) will require the advertising software to be installed. Since the
advertising unit(s) require serial communication, the VCOM Tool software must also be installed so that
a virtual COM port can be created.
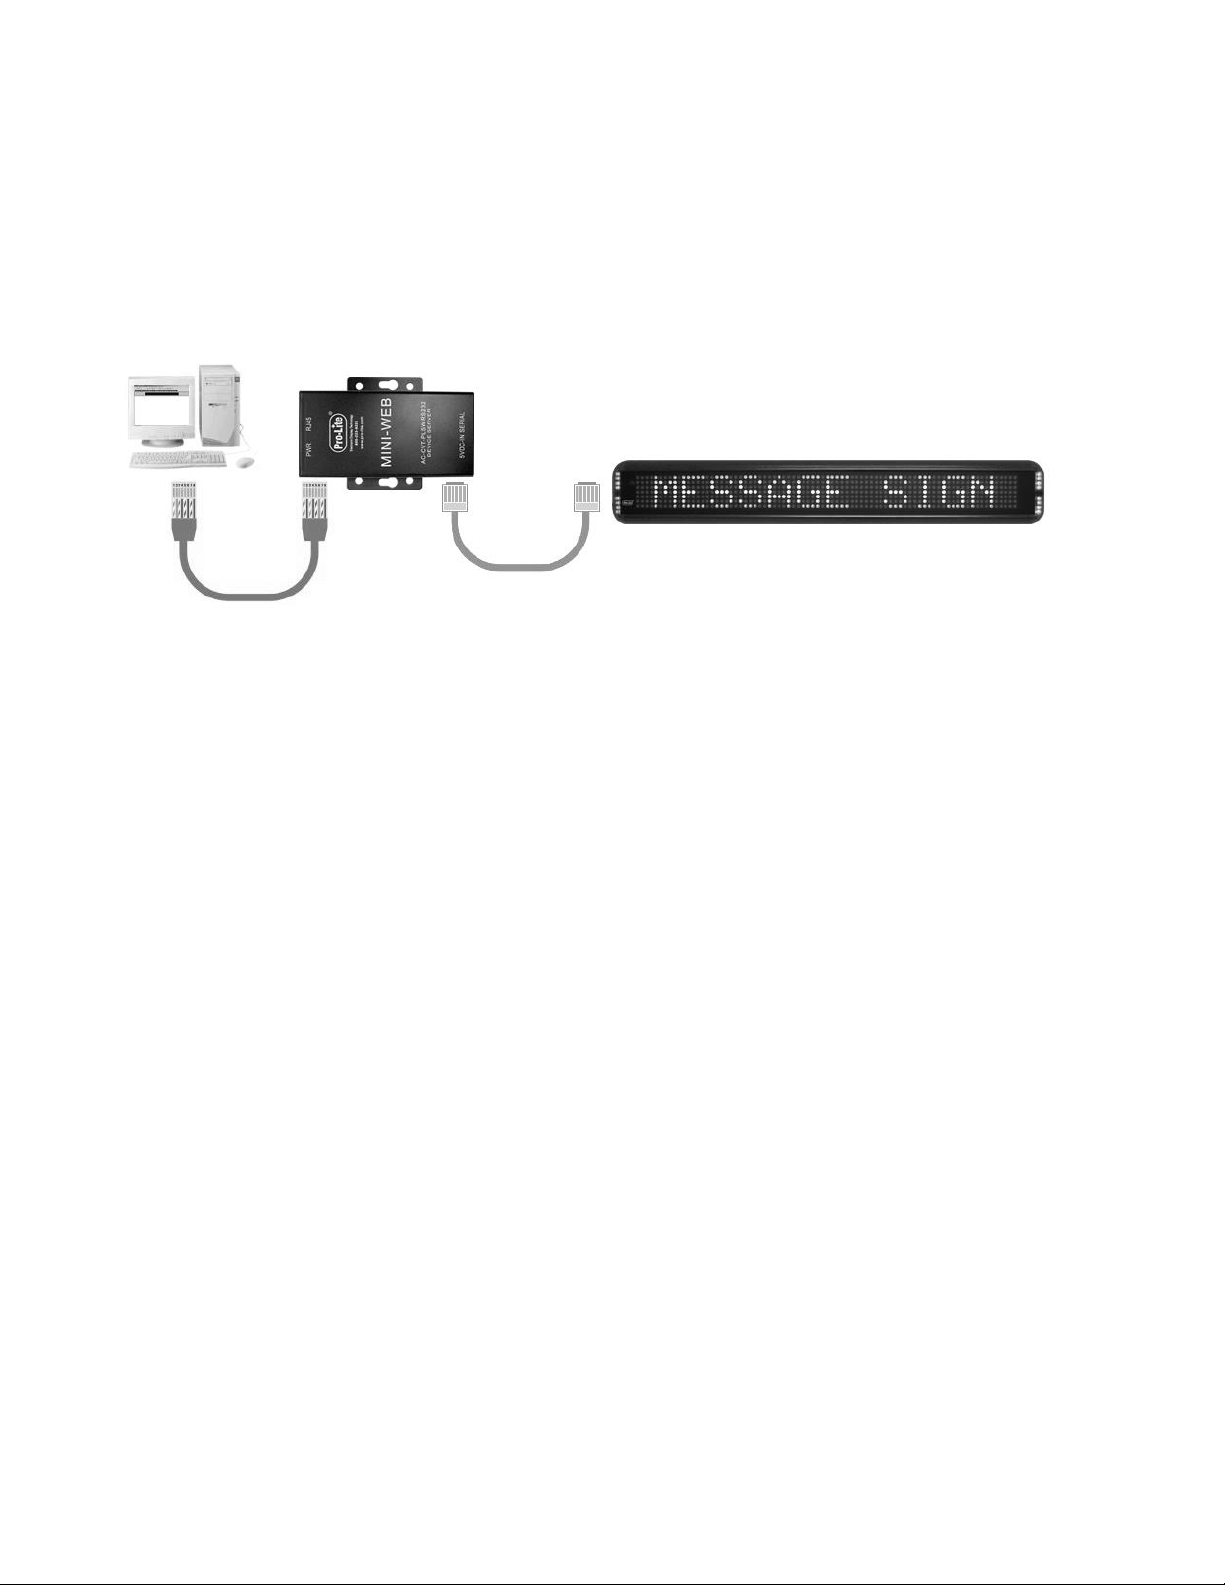
Installing the Mini-Web
1) Make sure sign power is disconnected.
2) Connect a LAN cable from your network to the RJ45 port on the Mini-Web.
3) Connect the provided COMM CABLE from the sign to the SERIAL port on the Mini-Web.
4) Connect power to sign and make sure the red light on the Mini-Web is ON.
NOTE: No connection is necessary for the 5VDC port on Mini-Web. Power comes directly from
the sign.
RS232
LAN
NETWORK
MINI-WEB
COMM CABLE
Page | 3
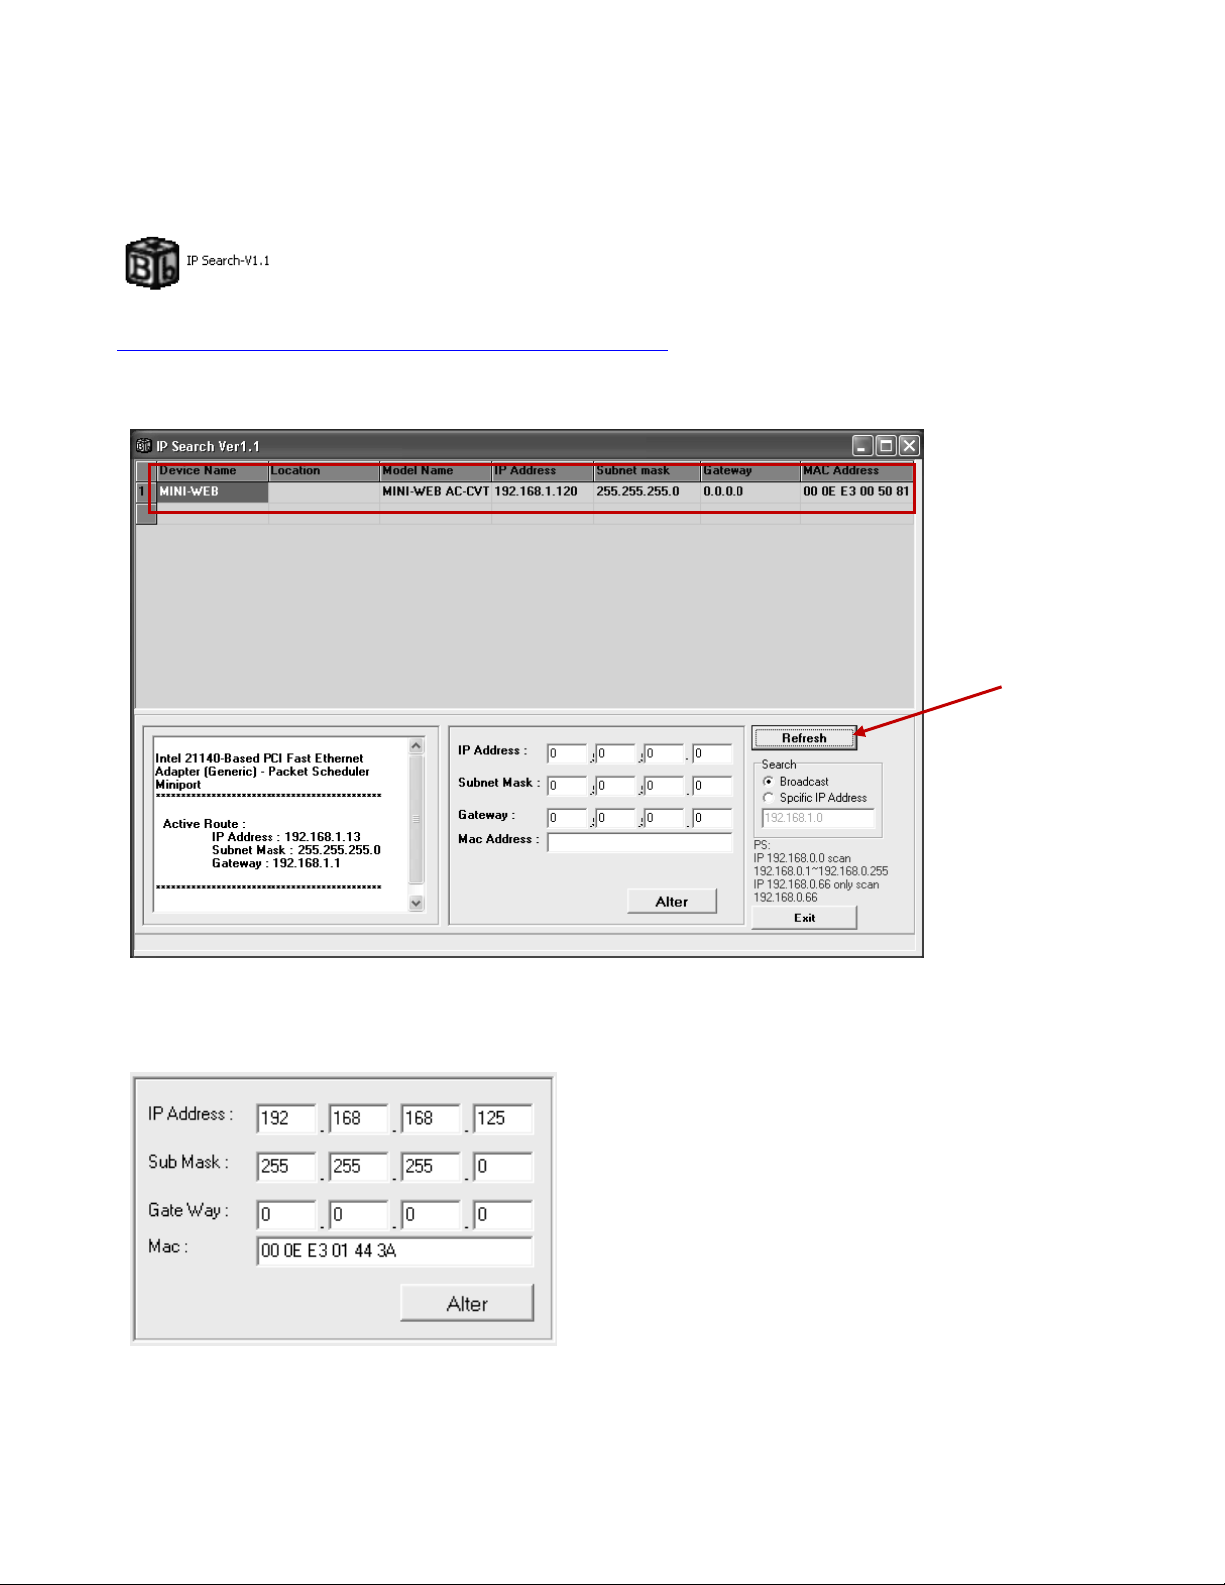
Use IP Search to Locate/Modify Mini-Web Settings
1) Insert the supplied CD into your CD-ROM drive.
2) Run the file IP Search-V1.1.
You can also download IP search from the following web link:
http://03be17e.netsolhost.com/ZIP_folder/IP Search-V1.1.zip
3) If IP Search does not automatically locate the Mini-Web, click on Refresh.
4) Click on the Mini-Web you would like to configure and the settings will automatically appear in the
modifications window.
5) Proceed to change the IP, Sub Mask, and Gateway to allow for operation in your network
environment and click Alter to save your settings onto the Mini-Web.
3
NOTE
Clicking twice on the Mini-Web that appears in
IP Search will automatically open your web
browser and prompt you to enter a User Name
and Password to enter the advanced setting
section. This area has additional settings to tailor
the Mini-Web for specific networks or
applications. For additional information, please
refer to Advanced Settings.
Page | 4
6) After 5 seconds, click on Refresh and IP Search will bring up the new settings of the Mini-Web.
7) Exit IP Search.
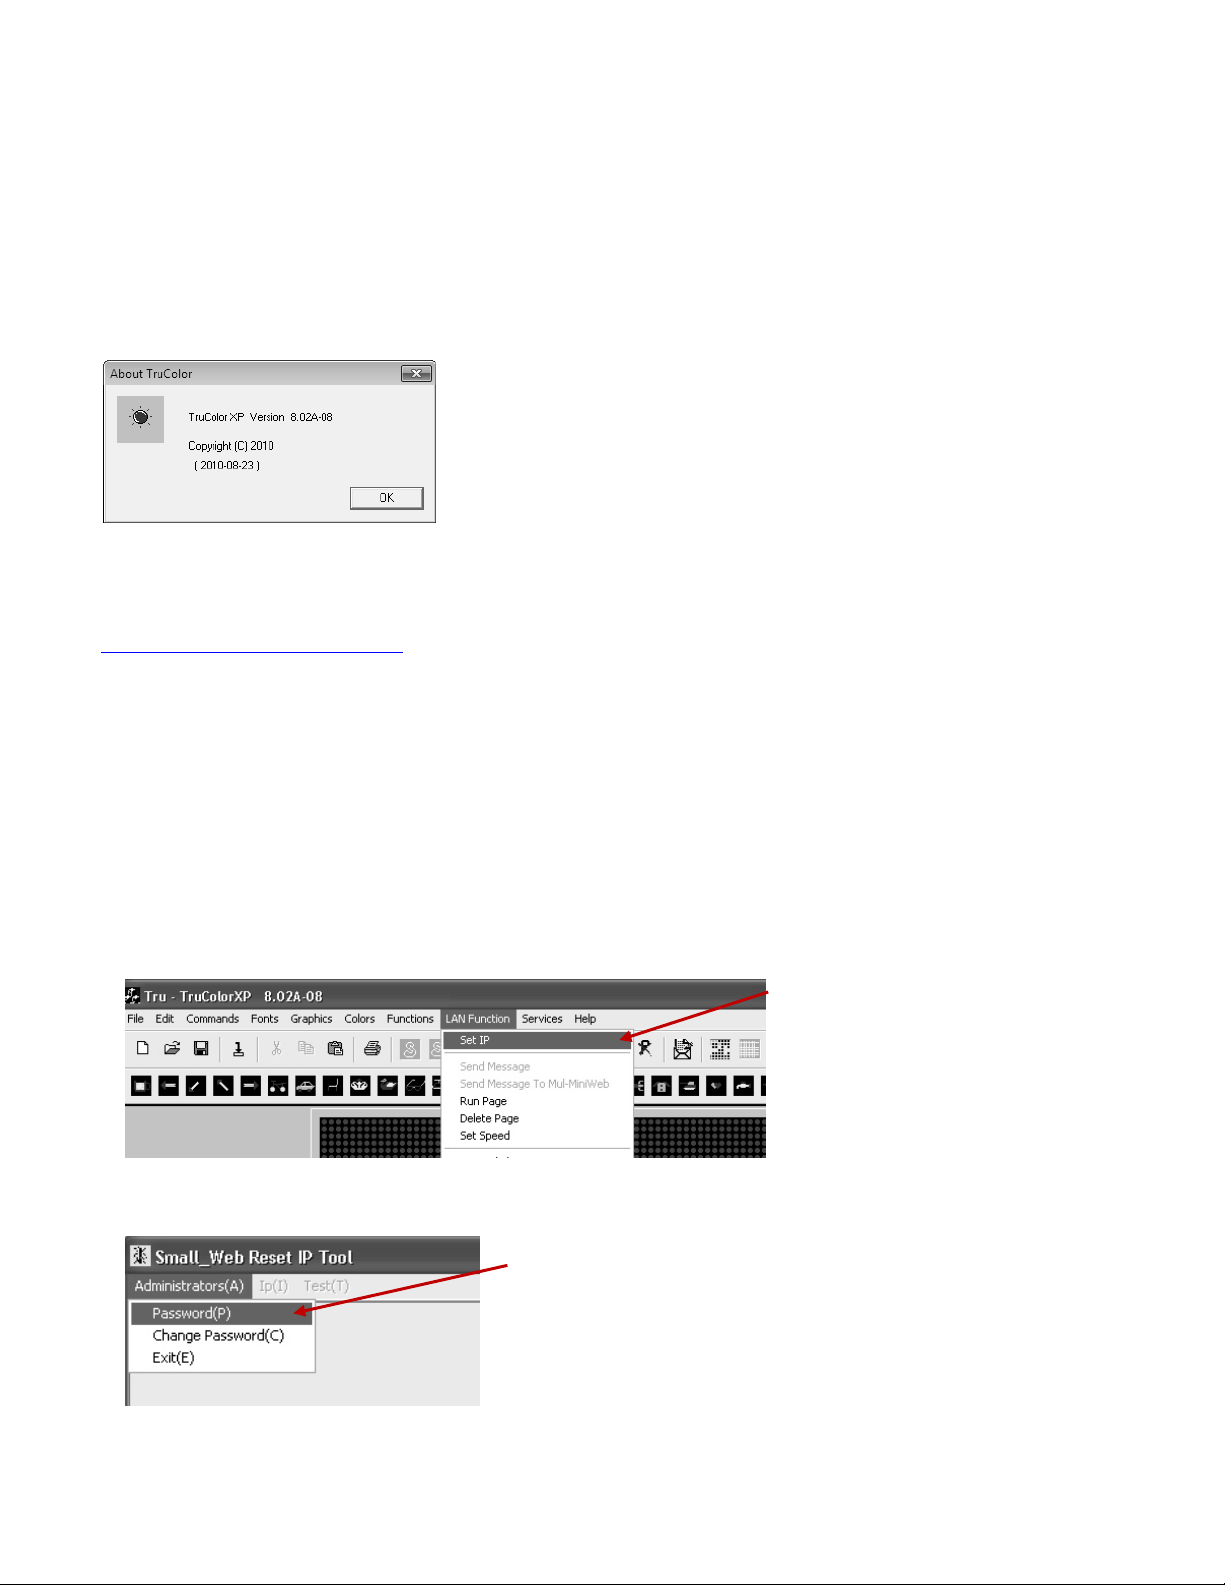
Install the TruColorXP Software
If you have a previously installed TruColorXP software on your computer, click on HELP and ABOUT.
Confirm that the software version is 8.02A-08.
Upgrading to the latest TruColor XP version
If your software version is not 8.02A-08, you will have to download the latest version from our website:
http://www.pro-lite.com/support
Click User Installation Guides and Software Downloads, TruColor, and TruColorXP Version 8.
Make sure and uninstall the previous version before installing the newer version. Do not change any
settings during the installation process. All installation options must remain at the default settings.
TruColorXP Software Setup
1) Launch the TruColorXP Software.
2) Click on LAN Function then SET IP.
3) Click on ADMINISTRATORS(A) then PASSWORD.
2
3

Page | 5
4) For password, enter “222222”
5) Click on IP(I) then ADD NEW IP(N)
6) Enter the information of the Mini-Web.
7) Click ADD to save your settings.
9) The ADD NEW IP SUCCESSFUL window will appear.
10) Close all IP modification windows.
5
4
User Code: enter any name up to 5 characters
Ethernet Address: enter the MAC Address of the
Mini-Web
New IP Address: enter the IP address associated
with the Mini-Web
Detect Hardware: select NO

Page | 6
Sign Communication
1) Type a short message in the text area of the software screen.
2) Click on LAN FUNCTION then SEND MESSAGE.
3) Enter the SIGN ID and PAGE the message will be sent to and click on OK.
4) From the SELECT OBJECT drop-down menu, select your Mini-Web and click OK.
5) The SENDING MESSAGE TO SERVER window will appear followed by SUCCESSFUL TRANSMISSION.
6) Your message should now be showing on the sign.
The default sign ID is 01 and PAGE A is the first
memory slot on the sign.
Page | 7
Troubleshooting
The Mini-Web will not power on.
Make sure and use the provided COMM CABLE. The provided COMM CABLE is a 6 wire configuration,
not a 4 or 2 wire configuration found on standard home phones.
IP Search does not find the Mini-Web.
Bypass the network and setup a local connection instead. Once configured and tested, move to LAN
environment.
I configured the Mini-Web successfully, but when I select SEND via LAN, I get an error message.
Possibility 1: Make sure you are running the latest TruColorXP Software. Refer to the TruColorXP
installation section.
Possibility 2: A computer security program is interfering with the communication. Try turning off any
firewalls or anti-virus programs.
I configured the Mini-Web successfully and use the SEND via LAN function, but the sign does not show
my updated message.
Make sure the communication port on the sign is working by sending a message directly from the
computer Com Port to sign. In the Sign Accessories bag, a Serial Comm Cable (9pin to RJ11) was
provided.

Page | 8
Advanced Settings Section
For most applications, the Mini-Web is ready to go and has already been preconfigured to work with
your sign. The beginning of this guide outlines the few setup requirements necessary for the Mini-Web
to work in most standard network environments. For the advanced user, the Advanced Settings Section
provides additional settings to tailor the Mini-Web to meet unique applications and network
environments.
The default IP Address for the Mini-Web is 192.168.168.125
The default User Name and Password are “admin”.
One Page Quick Setup (options)
STATIC IP
DHCP CLIENT
PPOE
►IP Address
►Host Name
►User Name
►Subnet Mask
►Serial Type
►Password
►Gateway
►Baud Rate
►Service Name
►Primary DNS
►Connection Mode
►Close Connection when Idle
►Serial Type
►Connection Port Number
►PPOE with Fixed Address
►Baud Rate
►Remote Host IP (for Client only)
►Serial Type
►Connection Mode
►Baud Rate
►Connection Port Number
►Connection Mode
►Remote Host IP (for Client only)
►Connection Port Number
►Remote Host IP (for Client only)
Operation Mode (options)
TCP Server
TCP CLIENT
►Local Listen Port Number
►Remote Connection Port Number
►Close Connection When Idle
►Remote Host IP Address
►Access Password
►Keep Alive Check
UDP Server
UDP CLIENT
►Local Listen Port Number
►Remote Connection Port Number
►Remote Host IP Address
Serial Type (options)
►Serial Type
►Baud Rate
►Data Bits
►Parity Check
►Stop Bits
►Flow Control
►Force Packet Transmit Time
►Force Packet Transmit Length

Page | 9
►RS485 Transmission Delay Time
Dynamic DNS (options)
Disabled
TZO
DYNDNS
►Status
►Email Address
►User Name
►Password Key
►Password
►Device DNS Name
►Device DNS Name
►Registry IP Address
►Registry IP Address
►Status
►Status
Device Administration (options)
►Block HTTP Ports
►Device Management IP Address
►Device Host Name
►Device Location
►Administrator Password
►Block Ping Request
►MAC Address Change
►Factory RESET Button
System Status (options)
►BF-430 Status Monitor
Backup & Restore (options)
►Backup
►Restore
Upgrade Firmware (options)
►File Select
Ping (options)
►Source IP Address
►Destination IP Address
►Packet Number
►Packet Size
►Ping Result

Table of contents


