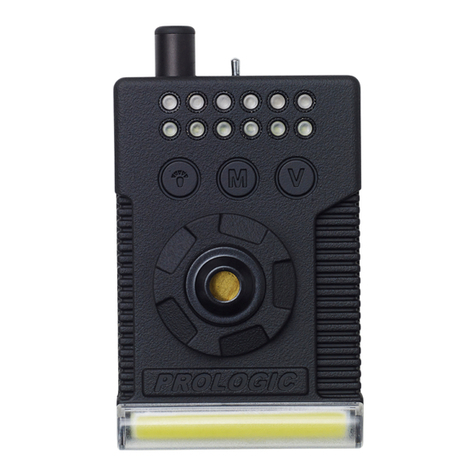
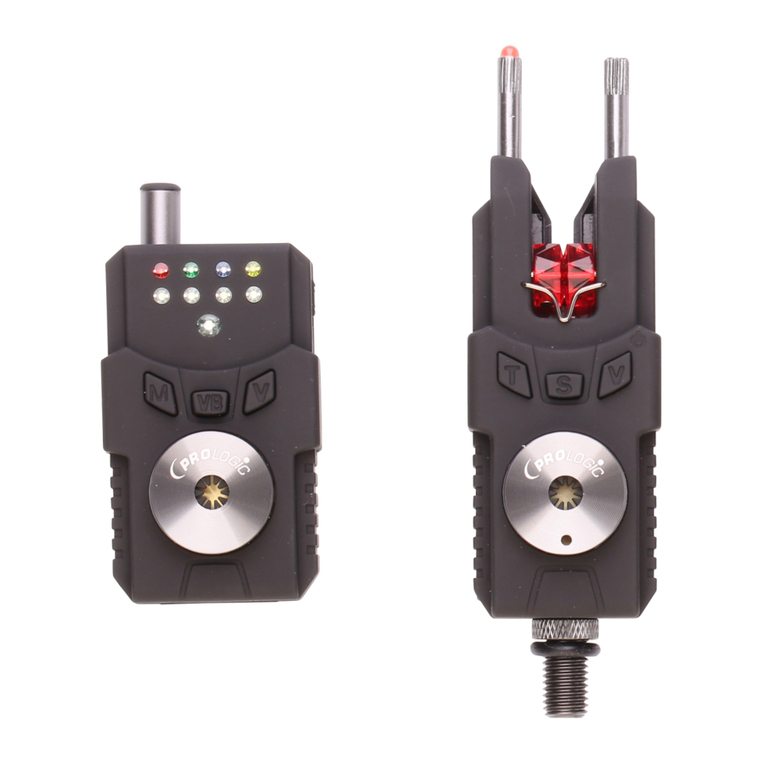
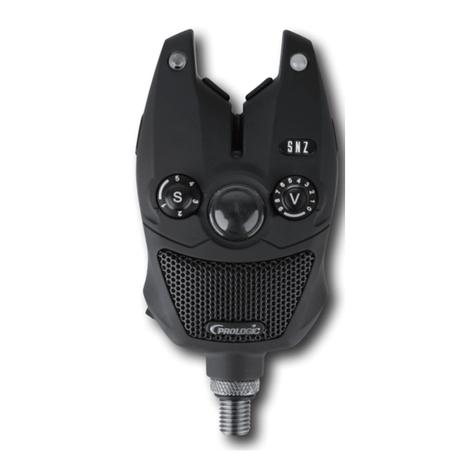
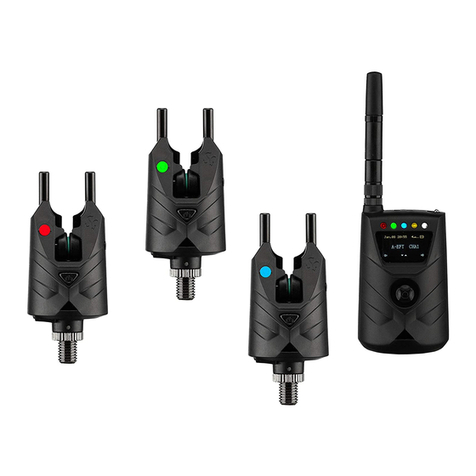
ProLogic BITE ALARM K3 User manual

BITE ALARM FOR RECREATIONAL - SPORT FISHING
BISSANZEIGER ZUM FREIZEITANGELN
DÉTECTEUR DE TOUCHE POUR PÊCHES SPORTIVES
BEET ALARM VOOR RECREATIEF SPORT VISSEN
SYGNALIZATOR BRAŃ DLA WĘDKARZY
SIGNALIZÁTORY PRO REKREAČNÍ - SPORTOVNÍ RYBAŘENÍ
BITE ALARM
INSTRUCTIONS
BEDIENUNGSANLEITUNG
NOTICE D’UTILISATION
GEBRUIKSAANWIJZING
INSTRUKCJA OBSŁUGI
UŽIVATELSKÁ PŘÍRUČKA
User Manual
User Manual
Manual K3 Bite Alarm.indd 1 19/06/18 12:15

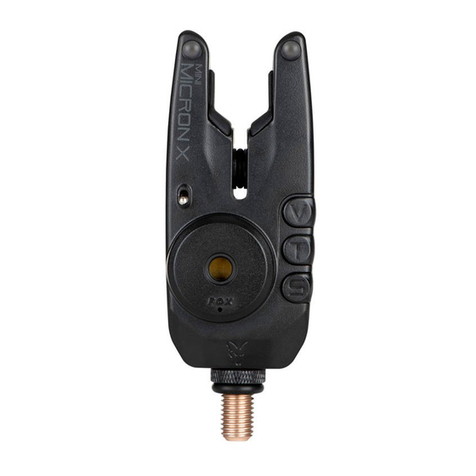
K3 ALARM
1.Two places for isotope
2.Rubble plate for rod
3.Left button:
Short press:Volume:0(silence) to 3
Long press:Mute 30 seconds
4.Bite Light:
Run=Left+right flash,continue 15 seconds
5.Battery:CR2*1
6.Low power warning(2.4V)
10 minutes warning 3 times ;stop after 1 hrs
7.Range:150M~300M
8.Drop back=right flash,continue 15 seconds
9.Right button:
Short press:sensitivity 1-5
Long press:Power off/on
10.Green,yellow,red,blue,purple,white
11.Carbon shell
12.Small size (Φ32*79mm)
13.Rubber ring on the boby:
Extra increase Green/Yellow/Red/Blue/
Purple/White in a plastic bag
14.TPR case for bite alarm
K3R RECEIVER
1 2
1
4
5
8
9
11
2
3
6
10
7
12
14
13
R1
R2
R3
R4
R5
R6
R7
R8
R9
R10
R1.Multinmedia speaker
R2.Bite lights:
Green,Yellow,Red,Blue,Purple,White
R3.Carbon shell
R4.Battery:3*AAA
R5.Bivvy light
A)Clour:White
B)Mode:Always on,Always off,
Automatic(trigger when continuous bites)
R6.Collapsible antenna
R7.Low power warning(4V)
10 minutes warning 3 times ;stop after 1 hrs
R8.Buttons
A)First button:Long press for power on/off;
Short press for Bivvy light on/off
B)Middle button:Long press for Tone(1-4);
Short press for Volume(0-4)
C)Bottom button:Short press for memory(last
bite light);Long press for register
R9.Sling with buckle
R10.Rubber base (magnet) with Metal plate.
It can fix on the bivvy,also available on Bivvy
table
Battery Type:CR2*1 PCS for Alarm Battery Type :AAA*3 PCS for Receiver
K3 ALARM
1. Isotope slots ( 2pcs 6mm x 2mm)
2. Anti scratch / slip plate
3. Left function button: volume and mute
Short press: Volume (4 levels including
silent)
Long press: mute 30 seconds
4. Bite Light
Run:left+rightash15seconds
5. Battery:1XCR2(notsupplied)
6. Low power warning ( 2.4V )
In a ten minute period waring beep 3 times,
stops after one hour
7. Range150/250m
8. Dropback:rightlightash15seconds
9. Right function button: ON/OFF and
sensitivity
Long press: ON/OFF
Shortpress:sensitivity(5levels)
10. ColouredLEDdependingonoption
purchased
11. CarbonJacket
12. Small and compact design
( 32mm Dia. 79mm height )
13. Interchangeable colour coded water seal
ring options
( supplied depending on colour
oftheLED)
14. Though shock absorbent TPR alarm cover
( supplied )
1. Beta-Light Slots (2pcs 6mm x 2mm)
2. Gummi-RutenauagezurVermeidungvonKratzern
3. LinkerKnopf:Lautstärkeeinstellungen
KurzesAntippen:Lautstärkeeinstellung(4Stärken,inklusiveLautlosmodus)
Langes Antippen: 3 Sekunden Lautlosmodus
4. LEDs(Run:LinkeundrechteLEDleuchten,Nachleuchtezeit15Sekundenblinkend)
5. Batterietyp:1xCR2(NichtimLieferumfangenthalten)
6. Batteriewarnung (2.4V)
In einem 10 minütigen Abstand ertönen 3 Pieptöne. Nach einer Stunde endet die Warnung.
7. Funkreichweite150/250m
8. Fallbissanzeige:RechteLEDblinkt15Sekundennach
9. RechterKnopf:AN/AUSundSensibilitätseinstellung
Langesdrücken:AN/AUS
KurzesDrücken:Sensibilität(5Stufen)
10. FarbigeLEDindergewähltenFarbe
11. Carbonhülle
12. Schmales und kompaktes Design (32mm Durchmesser, 79mm Höhe)
13. FarbigerDichtring(wirdindergewähltenLED-Farbegeliefert)
14. RobustesCoverfürdenBissanzeiger(imLieferumfang)
1. Encoches(2pcs6mmx2mm)
2. Gorge antidérapante
3. Bouton de gauche: volume et mode silencieux
Pression courte: Volume (4 niveaux sonores dont silencieux)
Pression longue: 30 secondes de silence
4. Voyantsdedépart
Encasdetouche:legaucheetledroits’illuminent15secondes
5. Pile:1CR2(nonfournie)
6. Alarme de batterie faible ( 2.4V )
3signauxsonorestouteslesdixminutes,quicessentauboutd’uneheure
7. Portée:150à250m
8. Toucheàrevenir:levoyantdroits’illumine15seconds
9. Bouton droit: ON/OFF et sensibilité
Pression longue: ON/OFF
Pressioncourte:sensibilité(5niveaux)
10. LacouleurdeLEDdépenddel’optionchoisie
11. Corpsencarbone
12. Design compact ( 32mm de diamètre et 79mm de hauteur)
13. Codecouleursinterchangeableetjointsétanchesenoption
(ceuxfournisdépendentdescouleursdeLEDchoisis)
14. Housse antichoc TPR fournie
UK
Manual K3 Bite Alarm.indd 2 19/06/18 12:15

1. Isotope slots ( 2pcs 6mm x 2mm)
2. Anti scratch / slip plate
3. Left function button: volume and mute
Short press: Volume (4 levels including
silent)
Long press: mute 30 seconds
4. Bite Light
Run:left+rightash15seconds
5. Battery:1XCR2(notsupplied)
6. Low power warning ( 2.4V )
In a ten minute period waring beep 3 times,
stops after one hour
7. Range150/250m
8. Dropback:rightlightash15seconds
9. Right function button: ON/OFF and
sensitivity
Long press: ON/OFF
Shortpress:sensitivity(5levels)
10. ColouredLEDdependingonoption
purchased
11. CarbonJacket
12. Small and compact design
( 32mm Dia. 79mm height )
13. Interchangeable colour coded water seal
ring options
( supplied depending on colour
oftheLED)
14. Though shock absorbent TPR alarm cover
( supplied )
1. Beta-Light Slots (2pcs 6mm x 2mm)
2. Gummi-RutenauagezurVermeidungvonKratzern
3. LinkerKnopf:Lautstärkeeinstellungen
KurzesAntippen:Lautstärkeeinstellung(4Stärken,inklusiveLautlosmodus)
Langes Antippen: 3 Sekunden Lautlosmodus
4. LEDs(Run:LinkeundrechteLEDleuchten,Nachleuchtezeit15Sekundenblinkend)
5. Batterietyp:1xCR2(NichtimLieferumfangenthalten)
6. Batteriewarnung (2.4V)
In einem 10 minütigen Abstand ertönen 3 Pieptöne. Nach einer Stunde endet die Warnung.
7. Funkreichweite150/250m
8. Fallbissanzeige:RechteLEDblinkt15Sekundennach
9. RechterKnopf:AN/AUSundSensibilitätseinstellung
Langesdrücken:AN/AUS
KurzesDrücken:Sensibilität(5Stufen)
10. FarbigeLEDindergewähltenFarbe
11. Carbonhülle
12. Schmales und kompaktes Design (32mm Durchmesser, 79mm Höhe)
13. FarbigerDichtring(wirdindergewähltenLED-Farbegeliefert)
14. RobustesCoverfürdenBissanzeiger(imLieferumfang)
1. Encoches(2pcs6mmx2mm)
2. Gorge antidérapante
3. Bouton de gauche: volume et mode silencieux
Pression courte: Volume (4 niveaux sonores dont silencieux)
Pression longue: 30 secondes de silence
4. Voyantsdedépart
Encasdetouche:legaucheetledroits’illuminent15secondes
5. Pile:1CR2(nonfournie)
6. Alarme de batterie faible ( 2.4V )
3signauxsonorestouteslesdixminutes,quicessentauboutd’uneheure
7. Portée:150à250m
8. Toucheàrevenir:levoyantdroits’illumine15seconds
9. Bouton droit: ON/OFF et sensibilité
Pression longue: ON/OFF
Pressioncourte:sensibilité(5niveaux)
10. LacouleurdeLEDdépenddel’optionchoisie
11. Corpsencarbone
12. Design compact ( 32mm de diamètre et 79mm de hauteur)
13. Codecouleursinterchangeableetjointsétanchesenoption
(ceuxfournisdépendentdescouleursdeLEDchoisis)
14. Housse antichoc TPR fournie
DE
FR
Manual K3 Bite Alarm.indd 3 19/06/18 12:15

1. Bevestigingspunten voor betalights ( 2pcs 6mm x 2mm)
2. Anti scratch / anti slip plaat
3. Linker functie knop: volume en stil functie
Kortindrukken:Volume(4niveausinclusiefstilmode)
Lang indrukken: stil gedurende 3 seconden
4. Aanbeet verlichting
Run:LinksenRechtsknipperengedurende15seconden
5. Batterij:1XCR2(nietinbegrepen)
6. Lagebatterijspanning(2.4V)
Gedurende10minutenworden3waarschuwingspiepjesgegeven.Dittotmaximal1uurlang
7. Bereik:150/250mtr.
8. Terugloopindicatie:rechterLEDknippert15seconden
9. Rechterfunctieknop:AAN/UITengevoeligheid
Langindrukken:AAN/UIT
Kortindrukken:gevoeligheid(5niveaus)
10. KleurvandeLEDisafhankelijkvanwelkekleurbeetmelderaangeschaftis
11. Carbonbuitenmantel
12. Dun en compact design ( 32mm dia. 79mm hoog )
13. Uitwisselbaregekleurdewatersealring(Kleurenafhankelijkvandeaangeschaftekleurvan
deLED/beetmelder)
14. StevigeschokabsorberendeTPRbeetmelderhoes(bijgeleverd)
1. Gniazdanaświetliki(2pcs6mmx2mm)
2. Platformaantypoślizgowa–chroniącaprzedzarysowaniem
3. Lewyprzyciskfunkcyjny:regulacjagłośności,wyciszenie
Krótkienaciśnięcie:regulacjagłośności(4poziomy,wrazztrybemcichym)
Długienaciśnięcie:wyciszenie–przytrzymaj3sekundy
4. Sygnalizacjaświetlna
Odjazd:lewaiprawadiodamigaprzez15sekund
5. Bateria:1xCR2(niedołączona)
6. Sygnałniskiegopoziomunaładowaniabaterii(2,4V)
W10minutowychodstępach3sygnałydźwiękowe,zatrzymaniepojednejgodzinie
7. Zasięg150/250m
8. Braniedobrzegu:prawadiodabłyskaprzez15sekund
9. Prawyprzyciskfunkcyjny:Włączenie/Wyłączenie,regulacjaczułości
Długienaciśnięcie:Włączenie/Wyłączenie
Krótkienaciśnięcie:regulacjaczułości(5poziomów)
10. KolordiodLEDzależnyodwybranejopcji
11. Obudowazwłóknawęglowego
12. Niewielkaikompaktowakonstrukcja(Szer.:32mm,Wys.:79mm)
13. Opcjawymiennychkolorowychuszczelek
(DołączonykolorzależnyodopcjikolorystykidiodLED(wzestawie)
NL
PL
Manual K3 Bite Alarm.indd 4 19/06/18 12:15

1. Otvorynaisotop(2pcs6mmx2mm)
2. Protiskluznémístoproprut
3. Levétlačítko:hlasitostatichýrežim
Krátkéstisknutí:Hlasitost(4úrovněvčetnětichéhorežimu)
Dlouhéstisknutí:tichýrežim3sekundy
4. Světlozáběru
Záběr(jízda):levá+pravádiodabliká15sekund
5. Baterie:1xCR2(nenísoučástíbalení)
6. Upozorněnínaslaboubaterii(2,4V)
Vdesetiminutovýchintervalech3xvarovnězapípá,pojednéhodiněvýstrahaskončí
7. Dosah150/250m
8. Zpětnýzáběr(padák):pravádiodabliká15sekund
9. Pravétlačítko:ON/OFFacitlivost
Dlouhéstisknutí:ON/OFF
Krátkéstisknutí:citlivost(5úrovní)
10. BarevnéLEDdiody
11. Karbonovýkryt
12. Malékompaktnírozměry(průměr32mm,výška79mm)
13. VyměnitelnýgumovývodotěsnýkroužekvbarvěLEDdiod
14. PevnéTPRpouzdro(jesoučástíbalení)
CZ
Manual K3 Bite Alarm.indd 5 19/06/18 12:15

FITTING BATTERY
ON THE K3 BITE
ALARM
3 4
FITTING THE BATTERY FOR K3 ALARM FITTING THE BATTERY FOR K3R RECEIVER
2. Using the screwdriver unscrew the two screws on the bottom of alarm
4.Remove the battery and insert new battery and ensure correct polarity
3. Take care removing the Aluminum base,rubber ring,carbon tube
1.Turn off the K3 alarm
5.Re-fit carbon tube,rubber ring,Aluminum base
2. Unscrew the bivvy light cover
3. Take care removeing the rubber ring,carbon tube
4. Remove three batteries and insert new batteries
1.Turn off the K3R receiver
5.Re-fit carbon tube,rubber ring,Aluminum base
1. Turn off the alarm
2. Usingthescrewdriver(supplied)unscrewthetwo
screws on the bottom of the alarm
3. Removecarefullythealuminiumbase,thewater
sealringandthecarbonjacket
4. Insertnewbatteryandmakesurethepolarityis
correct(alwaysusegoodqualitybatteries)
5. Re-tcarbonjacket,watersealringandaluminium
base
6. Secure screws with the provided screwdriver
UK
K3 ALARM
1.Two places for isotope
2.Rubble plate for rod
3.Left button:
Short press:Volume:0(silence) to 3
Long press:Mute 30 seconds
4.Bite Light:
Run=Left+right flash,continue 15 seconds
5.Battery:CR2*1
6.Low power warning(2.4V)
10 minutes warning 3 times ;stop after 1 hrs
7.Range:150M~300M
8.Drop back=right flash,continue 15 seconds
9.Right button:
Short press:sensitivity 1-5
Long press:Power off/on
10.Green,yellow,red,blue,purple,white
11.Carbon shell
12.Small size (Φ32*79mm)
13.Rubber ring on the boby:
Extra increase Green/Yellow/Red/Blue/
Purple/White in a plastic bag
14.TPR case for bite alarm
K3R RECEIVER
1 2
1
4
5
8
9
11
2
3
6
10
7
12
14
13
R1
R2
R3
R4
R5
R6
R7
R8
R9
R10
R1.Multinmedia speaker
R2.Bite lights:
Green,Yellow,Red,Blue,Purple,White
R3.Carbon shell
R4.Battery:3*AAA
R5.Bivvy light
A)Clour:White
B)Mode:Always on,Always off,
Automatic(trigger when continuous bites)
R6.Collapsible antenna
R7.Low power warning(4V)
10 minutes warning 3 times ;stop after 1 hrs
R8.Buttons
A)First button:Long press for power on/off;
Short press for Bivvy light on/off
B)Middle button:Long press for Tone(1-4);
Short press for Volume(0-4)
C)Bottom button:Short press for memory(last
bite light);Long press for register
R9.Sling with buckle
R10.Rubber base (magnet) with Metal plate.
It can fix on the bivvy,also available on Bivvy
table
Battery Type:CR2*1 PCS for Alarm Battery Type :AAA*3 PCS for Receiver
K3 ALARM
1.Two places for isotope
2.Rubble plate for rod
3.Left button:
Short press:Volume:0(silence) to 3
Long press:Mute 30 seconds
4.Bite Light:
Run=Left+right flash,continue 15 seconds
5.Battery:CR2*1
6.Low power warning(2.4V)
10 minutes warning 3 times ;stop after 1 hrs
7.Range:150M~300M
8.Drop back=right flash,continue 15 seconds
9.Right button:
Short press:sensitivity 1-5
Long press:Power off/on
10.Green,yellow,red,blue,purple,white
11.Carbon shell
12.Small size (Φ32*79mm)
13.Rubber ring on the boby:
Extra increase Green/Yellow/Red/Blue/
Purple/White in a plastic bag
14.TPR case for bite alarm
K3R RECEIVER
1 2
1
4
5
8
9
11
2
3
6
10
7
12
14
13
R1
R2
R3
R4
R5
R6
R7
R8
R9
R10
R1.Multinmedia speaker
R2.Bite lights:
Green,Yellow,Red,Blue,Purple,White
R3.Carbon shell
R4.Battery:3*AAA
R5.Bivvy light
A)Clour:White
B)Mode:Always on,Always off,
Automatic(trigger when continuous bites)
R6.Collapsible antenna
R7.Low power warning(4V)
10 minutes warning 3 times ;stop after 1 hrs
R8.Buttons
A)First button:Long press for power on/off;
Short press for Bivvy light on/off
B)Middle button:Long press for Tone(1-4);
Short press for Volume(0-4)
C)Bottom button:Short press for memory(last
bite light);Long press for register
R9.Sling with buckle
R10.Rubber base (magnet) with Metal plate.
It can fix on the bivvy,also available on Bivvy
table
Battery Type:CR2*1 PCS for Alarm Battery Type :AAA*3 PCS for Receiver
Manual K3 Bite Alarm.indd 6 19/06/18 12:15

1. Turn off the alarm
2. Usingthescrewdriver(supplied)unscrewthetwo
screws on the bottom of the alarm
3. Removecarefullythealuminiumbase,thewater
sealringandthecarbonjacket
4. Insertnewbatteryandmakesurethepolarityis
correct(alwaysusegoodqualitybatteries)
5. Re-tcarbonjacket,watersealringandaluminium
base
6. Secure screws with the provided screwdriver
EINSETZEN VON BATTERIEN IN DEN K3 BISSANZEIGER
1. SchaltensiedenBissanzeigeraus.
2.
Lösensiemitdem(mitgelieferten)SchraubendreherdiezweiSchraubenamBodendes
Bissanzeigers.
3. EntfernensievorsichtigdieBodenplatte,denDichtungsringunddieCarbonhülle.
4. LegensieneueBatterieein,kontrollierensiedierichtigePolarität(verwendensiebittenur
hochertige Batterien).
5. SetzensiedieCarbonhülle,denDichtungsringunddieBodenplatteein.
6. FixierensiezuletztdieSchraubenanderBodenplatte.
CHANGER LA BATTERIE DU DÉTECTEUR 3K
1. Eteindreledétecteur
2. Utiliserletournevisfournipourretirerlesdeuxvisenbasdudétecteur
3. Retirerprécautionneusementlabaseenalu,lejointtoriqueetlecorpsencarbone
4.
Insérerlesnouvellespilesens’assurantquelapolaritéestrespectée(toujoursutiliserdespilesde
qualité )
5. Réinstallerlecorpsencarbone,lejointtoriqueetlabaseenalu
6. Bien revisser
PLAATSEN/VERWISSELEN VAN BATTERIJ IN DE BEETMELDER
1. Zet de beetmelder uit
2. Metbehulpvandeschroevendraaier(bijgeleverd)de2schroefjesaandeonderkant
losdraaien
3. Verwijdervoorzichtigdealuminiumvoet,dewatersealendecarbonbuitenbehuizing
4. Plaatsnieuwebatterijmetdejuistepolariteit(Gebruikalleengoedekwaliteitbatterijen)
5. Plaatsdecarbonbehuizing,watersealenaluminiumvoetterug
6. Zet de schroeven weer vast met de schroevendraaier
MONTAŻ BATERII W SYGNALIZATORZE K3
1. Wyłączsygnalizator
2. Korzystajączdołączonegośrubokrętaodkręćdwieśrubynatylnejścianiesygnalizatora
3. Ściągnijostrożniealuminiowąpłytkę,uszczelkęiobudowęzwłóknawęglowego
4. Zamontujnowąbaterięsprawdzającczybiegunysąustawionewłaściwie
(Należykorzystaćzbateriisprawdzonegoproducenta)
5. Ponowniezmontujobudowęzwłóknawęglowego,uszczelkęialuminiowąpłytkę
6. Ostrożniewkręćśrubydołączonymśrubokrętem
VKLÁDÁNÍ BATERIE DO HLÁSIČE K3
1. Vypnětehlásič
2. Pomocíšroubováku(jesoučástíbalení)odšroubujtedvašroubynaspodnístraněhlásiče
3. Opatrněvyjmětehliníkovouzákladnu,vodotěsnýkroužekakarbonovýkryt
4. Vložtenovoubateriiaujistěteseosprávnépolaritě(Vždypoužívejtebateriedobrékvality)
5. Vložtezpátkykarbonovýkryt,vodotěsnýkroužekahliníkovouzákladnu
6. Pomocíšroubovákunašroubujtezpátkyšrouby
DE
FR
NL
PL
CZ
Manual K3 Bite Alarm.indd 7 19/06/18 12:15

PAIRING ALARM
HEADS TO RECEIVER
1. OnthereceiverpressandholdMbutton,therst
lightonthereceiverwillbeactivatedandash
2. ShortpressMbuttontoselectthecolourofLEDof
yourchoice
3. OnceyouhaveselectedyourcolourchoiceLED
conrmbypressingtheON/OFFbutton
4. Triggerabiteonyourpreferredalarmheadto
registerandconrmthelink
5. Oncethereceiverbeepstheoperationisnow
complete
To relocate any pre-programmed alarm heads, you
mustrstwipe/clearthereceivermemory.
To wipe/clear the memory on the receiver press and
hold M button for 8 seconds, the receiver will sound
with5beepstoconrmallthelinkshasbeencanceled.
UK
K3 ALARM
1.Two places for isotope
2.Rubble plate for rod
3.Left button:
Short press:Volume:0(silence) to 3
Long press:Mute 30 seconds
4.Bite Light:
Run=Left+right flash,continue 15 seconds
5.Battery:CR2*1
6.Low power warning(2.4V)
10 minutes warning 3 times ;stop after 1 hrs
7.Range:150M~300M
8.Drop back=right flash,continue 15 seconds
9.Right button:
Short press:sensitivity 1-5
Long press:Power off/on
10.Green,yellow,red,blue,purple,white
11.Carbon shell
12.Small size (Φ32*79mm)
13.Rubber ring on the boby:
Extra increase Green/Yellow/Red/Blue/
Purple/White in a plastic bag
14.TPR case for bite alarm
K3R RECEIVER
1 2
1
4
5
8
9
11
2
3
6
10
7
12
14
13
R1
R2
R3
R4
R5
R6
R7
R8
R9
R10
R1.Multinmedia speaker
R2.Bite lights:
Green,Yellow,Red,Blue,Purple,White
R3.Carbon shell
R4.Battery:3*AAA
R5.Bivvy light
A)Clour:White
B)Mode:Always on,Always off,
Automatic(trigger when continuous bites)
R6.Collapsible antenna
R7.Low power warning(4V)
10 minutes warning 3 times ;stop after 1 hrs
R8.Buttons
A)First button:Long press for power on/off;
Short press for Bivvy light on/off
B)Middle button:Long press for Tone(1-4);
Short press for Volume(0-4)
C)Bottom button:Short press for memory(last
bite light);Long press for register
R9.Sling with buckle
R10.Rubber base (magnet) with Metal plate.
It can fix on the bivvy,also available on Bivvy
table
Battery Type:CR2*1 PCS for Alarm Battery Type :AAA*3 PCS for Receiver
K3 ALARM
1.Two places for isotope
2.Rubble plate for rod
3.Left button:
Short press:Volume:0(silence) to 3
Long press:Mute 30 seconds
4.Bite Light:
Run=Left+right flash,continue 15 seconds
5.Battery:CR2*1
6.Low power warning(2.4V)
10 minutes warning 3 times ;stop after 1 hrs
7.Range:150M~300M
8.Drop back=right flash,continue 15 seconds
9.Right button:
Short press:sensitivity 1-5
Long press:Power off/on
10.Green,yellow,red,blue,purple,white
11.Carbon shell
12.Small size (Φ32*79mm)
13.Rubber ring on the boby:
Extra increase Green/Yellow/Red/Blue/
Purple/White in a plastic bag
14.TPR case for bite alarm
K3R RECEIVER
1 2
1
4
5
8
9
11
2
3
6
10
7
12
14
13
R1
R2
R3
R4
R5
R6
R7
R8
R9
R10
R1.Multinmedia speaker
R2.Bite lights:
Green,Yellow,Red,Blue,Purple,White
R3.Carbon shell
R4.Battery:3*AAA
R5.Bivvy light
A)Clour:White
B)Mode:Always on,Always off,
Automatic(trigger when continuous bites)
R6.Collapsible antenna
R7.Low power warning(4V)
10 minutes warning 3 times ;stop after 1 hrs
R8.Buttons
A)First button:Long press for power on/off;
Short press for Bivvy light on/off
B)Middle button:Long press for Tone(1-4);
Short press for Volume(0-4)
C)Bottom button:Short press for memory(last
bite light);Long press for register
R9.Sling with buckle
R10.Rubber base (magnet) with Metal plate.
It can fix on the bivvy,also available on Bivvy
table
Battery Type:CR2*1 PCS for Alarm Battery Type :AAA*3 PCS for Receiver
K3 ALARM
1.Two places for isotope
2.Rubble plate for rod
3.Left button:
Short press:Volume:0(silence) to 3
Long press:Mute 30 seconds
4.Bite Light:
Run=Left+right flash,continue 15 seconds
5.Battery:CR2*1
6.Low power warning(2.4V)
10 minutes warning 3 times ;stop after 1 hrs
7.Range:150M~300M
8.Drop back=right flash,continue 15 seconds
9.Right button:
Short press:sensitivity 1-5
Long press:Power off/on
10.Green,yellow,red,blue,purple,white
11.Carbon shell
12.Small size (Φ32*79mm)
13.Rubber ring on the boby:
Extra increase Green/Yellow/Red/Blue/
Purple/White in a plastic bag
14.TPR case for bite alarm
K3R RECEIVER
1 2
1
4
5
8
9
11
2
3
6
10
7
12
14
13
R1
R2
R3
R4
R5
R6
R7
R8
R9
R10
R1.Multinmedia speaker
R2.Bite lights:
Green,Yellow,Red,Blue,Purple,White
R3.Carbon shell
R4.Battery:3*AAA
R5.Bivvy light
A)Clour:White
B)Mode:Always on,Always off,
Automatic(trigger when continuous bites)
R6.Collapsible antenna
R7.Low power warning(4V)
10 minutes warning 3 times ;stop after 1 hrs
R8.Buttons
A)First button:Long press for power on/off;
Short press for Bivvy light on/off
B)Middle button:Long press for Tone(1-4);
Short press for Volume(0-4)
C)Bottom button:Short press for memory(last
bite light);Long press for register
R9.Sling with buckle
R10.Rubber base (magnet) with Metal plate.
It can fix on the bivvy,also available on Bivvy
table
Battery Type:CR2*1 PCS for Alarm Battery Type :AAA*3 PCS for Receiver
CONNECT THE ALARM TO THE RECEIVER
5 6
A)Long press the bottom button on the receiver
B)Short press the bottom buttonthe receiver to choose which
colour you want to register
C)Press the first button on the receiver to confirm
D)Turn the roller on the bite alarm
E)You head “BIBIBI”form receiver ,It means success
for register
VERBINDEN DES BISSANZEIGERS MIT DEM K3
RECEIVER
1. DrückensiedenMKnopfaufdemReciever,bis
dieersteLEDanfängtzublinken.
2. DrückensiedenMKnopfsooft,bissiedie
gewünschteLEDFarbeerreichthaben.
3. WennsiediepassendeLEDausgewählthaben,
drückensiedenAN/AUSKnopf.
4. BringensienundenBissanzeiger,densiefür
dieseLEDauswählenmöchtenzumPiepen,um
dieVerbindungherzustellen.
5. SobaldderRecieveranfängtzupiepenistdie
Programmierung abgeschlossen.
Um bereits zuvor eingespeicherte Bissanzeiger auf
andere LEDs zu verlegen, müssen sie zunächst den
Recieverspeicher löschen.
UmdenSpeicherzulöschen,drückensiedenMKnopf
für 8 Sekunden. Der Reciever wird nun 5 Pieptöne
vonsichgeben.Diesbestätigt,dassalleregistrierten
Bissanzeigergelöschtwurden.
DE
Manual K3 Bite Alarm.indd 8 19/06/18 12:16

1. OnthereceiverpressandholdMbutton,therst
lightonthereceiverwillbeactivatedandash
2. ShortpressMbuttontoselectthecolourofLEDof
yourchoice
3. OnceyouhaveselectedyourcolourchoiceLED
conrmbypressingtheON/OFFbutton
4. Triggerabiteonyourpreferredalarmheadto
registerandconrmthelink
5. Oncethereceiverbeepstheoperationisnow
complete
To relocate any pre-programmed alarm heads, you
mustrstwipe/clearthereceivermemory.
To wipe/clear the memory on the receiver press and
hold M button for 8 seconds, the receiver will sound
with5beepstoconrmallthelinkshasbeencanceled.
VERBINDEN DES BISSANZEIGERS MIT DEM K3
RECEIVER
1. DrückensiedenMKnopfaufdemReciever,bis
dieersteLEDanfängtzublinken.
2. DrückensiedenMKnopfsooft,bissiedie
gewünschteLEDFarbeerreichthaben.
3. WennsiediepassendeLEDausgewählthaben,
drückensiedenAN/AUSKnopf.
4. BringensienundenBissanzeiger,densiefür
dieseLEDauswählenmöchtenzumPiepen,um
dieVerbindungherzustellen.
5. SobaldderRecieveranfängtzupiepenistdie
Programmierung abgeschlossen.
Um bereits zuvor eingespeicherte Bissanzeiger auf
andere LEDs zu verlegen, müssen sie zunächst den
Recieverspeicher löschen.
UmdenSpeicherzulöschen,drückensiedenMKnopf
für 8 Sekunden. Der Reciever wird nun 5 Pieptöne
vonsichgeben.Diesbestätigt,dassalleregistrierten
Bissanzeigergelöschtwurden.
COUPLER DES DÉTECTEURS À LA CENTRALE
1. Sur la centrale, presser et maintenir enfoncé le bouton M : la première diode de la centrale
s’activeetclignote
2. PresserbrièvementMpoursélectionnerlacouleurdeLEDvoulue
3. Unefoislacouleurchoisie,conrmerenpressantsurleboutonON/OFF
4. Simulerunetouchesurundétecteurpourenregistreretconrmerlecouplage
5. Unefoisquelacentraleaémisunbip,l’opérationestcomplète
Pour changer une pré-programmation entre centrale et détecteur, vous devez préalablement
effacer la mémorisation de la centrale
Pour effacer la mémorisation de la centrale, presser et maintenir le bouton M 8 secondes, alors la
centraleémettra5bipspourconrmerquetouslesliensontétéannulés
PAREN VAN BEETMELDERS AAN/MET DE ONTVANGER
1. Opdeontvanger,deMknopindrukkenenvasthouden.DeeersteLEDwordtgeactiveerden
gaat knipperen
2. DrukkortopdeMknopomdekleurvandeLEDtekiezen
3. AlsdejuistekleurLEDgekozeniskandezekeuzewordenbevestigddoordeAAN/UITknop
in te drukken
4. Imiteer een aanbeet op de beetmelder om de verbinding te registreren en op te slaan
5.Zodradeontvangerpieptisdeverbindingopgeslagen
Om reeds geregistreerde beetmelders op een andere positie op te slaan moet eerst het geheugen
in de ontvanger worden gewist. Om het geheugen van de ontvanger te kunnen wissen dient de M
knopgedurende8secondentewordenvastgehouden.Deontvangergeeft5piepjesomhetwissen
van het geheugen te bevestigen.
PAROWANIE SYGNALIZATORA Z CENTRALKĄ
1. NacentralcenaciśnijiprzytrzymajprzyciskM,ażpierwszadiodazaczniemigać
2. KrótkienaciśnięcieprzyciskuMpozwalawybraćdiodę(kolor)dlasygnalizatorajakichcemy
sparować
3. Powybraniuodpowiedniejdiody(koloru)zatwierdźwybórnaciśnięciemprzyciskuON/OFF
4. Wywołajalarmnaparowanymsygnalizatorzebyzatwierdzićprocesparowania
5. Podźwiękucentralkiprocesparowaniazostaniezakończonypomyślnie
By zmienić diodę (kolor) na centralce dla już sparowanego sygnalizatora, należy uprzednio
skasowaćaktualneparowaniedlawszystkichsygnalizatorówwcentralce.
AbyskasowaćaktualneparowaniesygnalizatorówwcentralcenaciśnijiprzytrzymajprzyciskM
przez8sekund,centralkawyda5sygnałówdźwiękowych,copotwierdziusunięcieparowań.
PÁROVÁNÍ HLÁSIČŮ S PŘÍPOSLECHEM
1. NapříposlechustiskněteadržtetlačítkoM,aktivujeseprvnísvětlonapříposlechuazačne
blikat
2. KrátcestisknětetlačítkoMprovýběrbarvyLEDdiodydlevašehovýběru
3. JakmilebudetemítvybranoubarvuLEDdiody,potvrďtevolbustisknutímtlačítkaON/OFF
4. Aktivujtevybranýhlásičpronavázáníspojení
5. Jakmilepříposlechjednouzapípá,párováníjeúspěšněhotové
Chcete-lizměnitspárovanéhlásičespříposlechem,jetřebanejdřívevymazatpaměťpříposlechu.
ProvymazánípamětivpříposlechustisknětěadržtetlačítkoMpodobu8sekund,příposlech5x
zapípá,cožpotvrzuje,vymazánípaměti.
FR
NL
PL
CZ
Manual K3 Bite Alarm.indd 9 19/06/18 12:16

WARNINGS
• DONOTTRIGGERALARMORRECEIVERINCLOSE
PROXIMITYTOHUMANEYESANDEARS;
• STORETHISEQUIPENTINADRYPLACE,OUTOF
REACHFROMCHILDRENANDINFANTS;
• AVOIDHIGHIMPACTSANDDROPPINGATALL
TIMES;
• USEONLYRECOMMENDEDBATTERIESAND
REMOVEFORLONGPERIODSOFSTORAGE
WARRANTY
• PLEASEKEEPYOURRECEIPT,THISISYOUR
PROOFOFPURCHASE
• PLEASECONTACTYOURLOCALRETAILEROR
SVENDSEN-SPORTCOUNTRYOFFICE
Manual K3 Bite Alarm.indd 10 19/06/18 12:16

SVENDSEN SPORT A/S
Erhvervsparken, 14
DK-4621 Gadstrup - Denmark
T +45 46 19 19 13 F +45 46 19 19 23
Manual K3 Bite Alarm.indd 11 19/06/18 12:16

BITE ALARM
User Manual
User Manual
Manual K3 Bite Alarm.indd 12 19/06/18 12:16
Other manuals for BITE ALARM K3
1
Table of contents
Other ProLogic Fishing Equipment manuals
