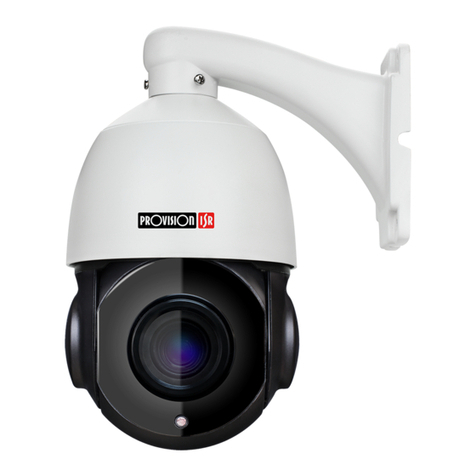
Provision ISR I3-330WIP536 User manual


Notes
Before operating the camera, we strongly advise users to read this manual and keep it
for later use.
Please use the specified power supply to connect.
Avoid incorrect operation, shock vibration, heavy pressing which can cause damage to
the product.
Do not use corrosive detergent to clean the body of the camera. If necessary, please use
a soft dry cloth to wipe dirt; for hard contamination, use neutral detergent. Any
cleanser for high-grade furniture is applicable.
Avoid aiming the camera directly towards extremely bright objects, such as the sun, as
this may damage the image sensor.
Please follow the instructions to install the camera. Do not reverse the camera, or the
reversing image will be received.
Do not operate the camera in extreme temperatures or extreme humidity conditions.
Use the power supply supplied authorized by a PROVISION-ISR technician.
Keep away from heat sources such as radiators, heat registers, stove, etc.
The instructions in this manual could be outdated; if you need any clarifications you can
contact an authorized PROVISION-ISR technician. PROVISION-ISR reserves the
right to add changes to this manual and publish it online on our website
(www.provision-isr.com): there may be inconsistencies with the latest version. This
applies to any and all software upgrades and product improvements, interpretation and
modification added. These changes will be published in the latest version without
prior notification.
When this product is in use, the relevant contents of Microsoft, Apple and Google will
be involved in. The pictures and screenshots in this manual are only used to explain
the usage of our product. The ownership of trademarks, logos and other intellectual
properties related to Microsoft, Apple and Google belong to the above-mentioned
companies.
All pictures and examples used in the manual are for reference only.

Page 1 IP CAMERA USER MANUAL
Introduction
This IPC (short for IP Camera) is designed for high-performance CCTV solutions. It adopts
the state of the art video processing chips and utilizes most advanced technologies, such as
video encoding and decoding technology, complies with the TCP/IP protocol, SoC, etc to
ensure that this system will be extremely stable and reliable. The IPC device should be used
together with Provision-ISR’s IP manager to enable the quick setting and full utilization of the
camera.
1IE Remote Access
You may connect IPC via LAN or WAN. In this manual, we will use IE v11 for example. The
details are as follows:
2.1 Access through IP-Manager
①Make sure the PC and IPC are connected to the LAN and that the IP-Manager is installed
on the PC. You can install the IP manager form the disc provided with the camera or
download it by clicking here.
②Double-click the IP-Manager icon on the desktop to run this software as shown below:
③The device type will be display as “ONVIF”.

Page 2 IP CAMERA USER MANUAL
④Double click on the IP address of the system will pop up IE browser and connect to the
IPC. IE browser will auto download the Active X control. You must install it in order for the
camera to work. After successful installation, a login window will appear as shown below.
Input the username and password to log in.
1.1 WAN
Allows you to access the camera using a router or virtual server.
①Make sure the camera is well connected and configured via LAN. Log in the camera via
LAN and go to the SetupNetwork SetupLocal Setup tabPort to set up the port number.
②In the menu modify the IP according to your needs.
The default username is “admin”; the default password is “123456”.

Page 3 IP CAMERA USER MANUAL
Port and IP setup
④Go to the router’s management interface through IE browser to forward the IP address and
port of the camera to the “Virtual Server”. In the picture example below you will see an
example of the setting as if the IPC IP address is “192.168.6.6” and the ports are default (9008
& 80)
Router Setup
④Open the IE browser and input your WAN IP and HTTP port to access the camera.
2IPC Configuration
In this chapter, we will go through the configurations of the IPC.
2.1 Video Configuration
Camera Configuration includes five submenus: Image Setup, Video Stream, OSD Config,
Video Mask and Motion Detection area configuration.
2.1.1 Video Setup
Go to “Media” “Video Setup” interface as shown below.

Page 4 IP CAMERA USER MANUAL
You will see the following options:
Power Frequency: Choose between NTSC (60HZ) or PAL(50HZ)
Stream: Choose between main stream and sub stream
Channel name: Choose the camera name
Resolution: The higher the resolution is, the bigger the image is.
Bitrate Control Type: CBR (Constant) and VBR (Variable) are available. CBR (Constant
Bit-Rate) means that no matter how what the video resources are, the compression bitrate will
be constant as configured. This will not only facilitate the image quality better in a constant
bitrate but also help to calculate the capacity of the recording. VBR (Variable Bit-Rate) means
that the compression bitrate can be automatically adjusted according to the change of the
video resources with the configured bit-rate as the maximum value. This will help to optimize
the storage network bandwidth.
Bitrate Per Second (BPS): Please set it according to your needs while taking in consideration
the bandwidth and storage limits.
Frame rate (FPS): The higher the frame rate is, the more fluent the video is. However, more
storage room will be taken up.
2.1.2 Image Setup
Setting steps:
Go to “Media” “Image Setup” interface as shown below.

Page 5 IP CAMERA USER MANUAL
The display parameters are as follows:
Parameter
Meaning
Contrast Set the image contrast
Brightness Set the image brightness
Saturation Set the image saturation
Hue
Set the image hue
Sharpness Enable/Disable the sharpness and set its level
Image Mirror
Mirror the image horizontally
Image Flip Flip the image vertically

Page 6 IP CAMERA USER MANUAL
2.1.3 Image Setting
Go to “Media” “Image Setting” interface as shown below.
Scene Mode
Choose between Auto/Indoor/Outdoor
White Balance Set the white balance of the camera
IR Cut Mode Set the day/night mode
WDR
Set WDR to deal with advanced light conditions
WDR Range Set the WDR level
Frequency Set the frequency to 50/60Hz
3D Denoise Strength Set the 3D noise reduction level

Page 7 IP CAMERA USER MANUAL
2.1.4 Privacy Mask
You can set 4 mask areas at most.
To set up video mask
1. Enable video mask.
2. draw the mouse to draw the video mask area.
3. Click Save button to save the settings.
4. Return to the live to see the following picture.
To clear the video mask:
Uncheck the Enable box.

Page 8 IP CAMERA USER MANUAL
2.1.5 OSD Configuration
Go to “Video Config” “OSD” menu to display the interface as shown below.
You may set the device name, time stamp and custom OSDs here. Drag the time stamp and
custom OSD over the image on the left side to set their position. Then press the Save button to
save the settings.

Page 9 IP CAMERA USER MANUAL
2.1.6 Motion Detection Area
Go to “Media””Motion Detection Area”
1. Drag the mouse to “draw” the area that you wish to motion detection will be applied in.
2. Click the Save button to save the settings.
3. Click on “Clear Area” to clear the detection area.
2.2 System Setup
The “System Configuration” includes four submenus: Basic Information, Date & Time and
Local Config.

Page 10 IP CAMERA USER MANUAL
2.2.1 Date & Time Configuration
Setting steps:
1. Go to System Configuration Date & Time menu as shown below.
2. Set the time zone.
3. Change the time zone according to your location. You may synchronize the camera time
with an NTP server (Internet connection required) or synchronize the camera time with the
time of the computer you are using.
2.2.2 12BSystem Initialization
1. Go to System Configuration Initialization menu as shown below.
2. Reboot Now – Reboot the camera
3. Restore – restore the system to it’s default configuration.
4. Upgrade – Choose an upgrade file to locally upgrade the camera.

Page 11 IP CAMERA USER MANUAL
2.2.3 Device Info
In the “Basic Information” interface, you can view all the necessary information related to the
IPC, as seen below:
The following table will explain the available detail field.
Parameter
Meaning
Device name Name of the device – can be modified from
the OSD settings
Device Model The model of the device
Software version
The current software version
Hardware version The hardware version of the device
Release Time
The software build-date
5Q & A
1. Q: How to find my password if I forget it?
A:The default username is “admin” and the default password is “123456”.
If you have changed the password and you can’t remember it, use the physical reset
button on the camera (Press and hold for few second).
User name: admin
Password: 123456
2. Q:IP tool cannot search for devices, why?
A:It may be caused by the anti-virus/firewall software on your computer. Please disable
it and try to search device again.

Page 12 IP CAMERA USER MANUAL
3. Q:IE cannot download ActiveX control. How can I do?
a. Your IE browser probably set to block ActiveX controls. Please perform the
following steps:
①Open IE browser. Click Tools-----Internet Options….
②Select Security------Custom Level….Refer to Fig 4-1
③Enable all the sub-options under “ActiveX controls and plug-ins”. Refer to Fig 4-2
Fig 4-1 Fig 4-2
④Click ok to finish setup.
b. Other plug-ins or anti-virus blocks ActiveX. Please uninstall or close them.
Table of contents
Other Provision ISR Digital Camera manuals
Provision ISR
Provision ISR Effio-E Dome User manual

Provision ISR
Provision ISR DI-390AHD36+ User manual

Provision ISR
Provision ISR Ultra-AHD Series User manual
Provision ISR
Provision ISR DI-380A-MVF User manual

Provision ISR
Provision ISR MZ-10A-2(IR) User manual

Provision ISR
Provision ISR DI-390AHDE36+ User manual
Provision ISR
Provision ISR EFFIO-E Series User manual

Provision ISR
Provision ISR S3 User manual
Provision ISR
Provision ISR DI-390AEVF User manual