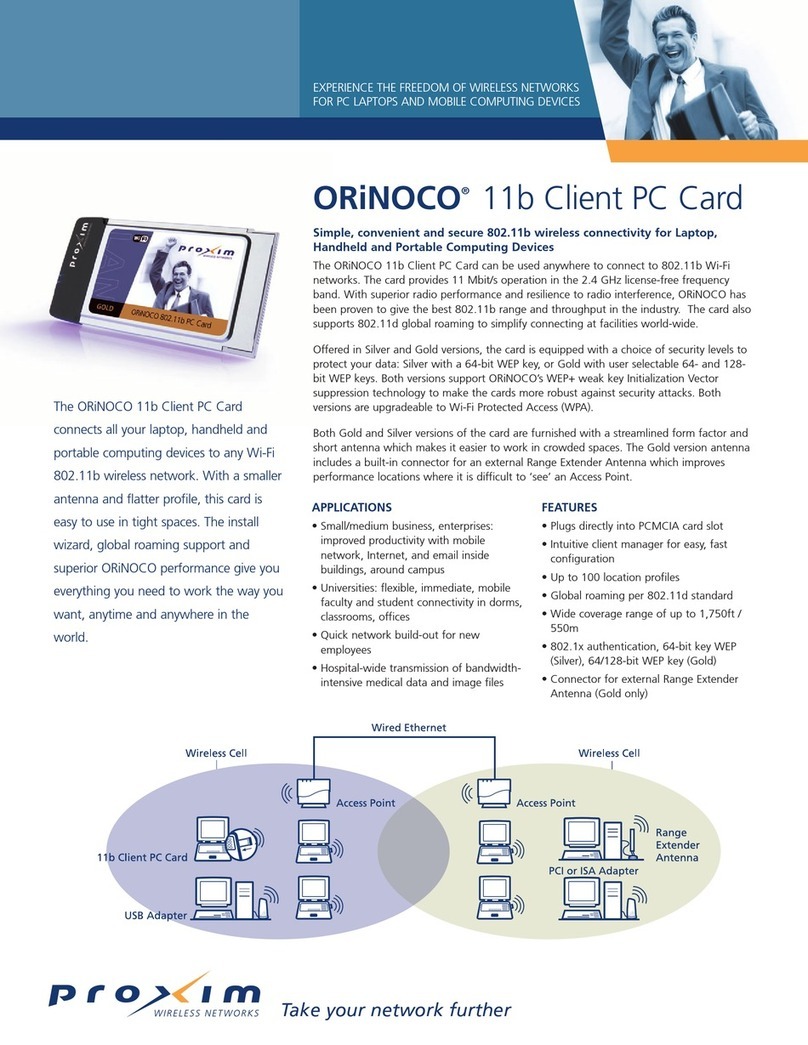
Proxim Skyline User manual

Quick Start Guide
Getting Help
Proxim is committed to providing its
customers with reliable products and
excellent technical support. We
encourage you to register your Skyline
11Mb Wireless PC Card.
Please be sure to read the complete
Skyline User uide available on the
Skyline CD-ROM as well as any release
notes or electronic Read Me files that
you receive from Proxim. If you have
questions about using your Skyline
11Mb Wireless PC Card, please contact
Proxim directly:
Proxim Technical Support:
Phone:
(800) 613-4954
E-mail:
www:
www.proxim.com
802.11b Wireless PC Card
Proxim’s Skyline 11Mb Wireless PC Card allows a Macintosh PowerBook or Windows notebook computer
equipped with a PC Card (PCMCIA) slot to join an IEEE 802.11b compliant DSSS wireless local network. This
Setup uide covers the most common situations for installing and configuring your Skyline 11Mb PC Card.
It is important that you read the complete Skyline 11Mb PC Card manual on the Skyline CD-ROM for further
configuration and operation information.
The basic steps for installing the card are:
➤Installing the software
➤Installing the card
➤Configuring the card and networking software
This guide offers basic installation steps for Macintosh and Windows:
➤Installation for Windows, see page 2 of this guide.
➤Installation for Macintosh, see page of this guide.
The Skyline 11Mb PC Card can be configured for use with an Ad Hoc network using peer-to-peer wireless
connections, or for an Infrastructure network that uses an access point or base station to connect wireless
computers to a local Ethernet network. If you are connecting to an access point or base station you will need the
following information to configure your Skyline PC Card:
➤SSID (Service Set Identification) – the SSID of the access point in use.
➤Encryption – any passwords or keys used by your access point for Wireless Encryption (WEP).
IMPORTANT! The complete Skyline User uide is on the Skyline CD-ROM in your Skyline package. This user
guide contains important instructions for configuring and operating your Skyline PC Card. Acrobat Reader 4.0, the
software necessary to read the user guide, is also on the CD.
6150287-00-01 SHORT 9/10/01 11:18 AM Page 1

WINDOWS
Windows 98
1. Insert the Skyline CD-ROM into the CD
drive of your computer. Select Run from
the Start menu, and type x:setup.exe
where x is the designation of your CD
ROM drive. Click OK.
2. Select Next at each screen to install the
software, and Yes to accept the software
agreement.
3. When prompted, enter the SSID of your
access point. This name must be the
same for all computers on the wireless
network. The SSID name is case and
space sensitive.
4. When prompted, select Ad Hoc or
Infrastructure network mode. An
Infrastructure network uses an access
point to connect the wireless network to
a wired network.
5. Put the driver files into the default or
specified directory location. Select Yes if
prompted to overwrite any files. Select
Finished and Yes when prompted to
restart the computer.
6. After installation is complete, shut down
your computer.
7. With your computer powered down,
insert the Skyline 11Mb Wireless PC Card
into a PCMCIA slot on your notebook.
➤ DDiiaaggrraamm aa..
8. Turn on the computer. A found new
hardware message appears when the
system detects the card.
If prompted for the location of the win-
dows system files or the location of the
Skyline driver, insert the Skyline CD into
the CD ROM drive and locate the
CW10.sys file on the CD. If prompted for
the Windows CD, insert it into the into
the CD ROM drive and locate the system
files on the CD.
9. After restart, you should see the Skyline
monitor icon in the Windows taskbar.
See SStteepp 22for instructions on configuring
your Skyline PC Card.
NOTE: If you plan to use Windows 98 peer-
to-peer networking, you must have the Client
for Microsoft Networks, NetBEUI and TCP/IP
protocols in your Network Control Panel.
Step 1 Windows Installation
Have your original Windows system software CD-ROM or diskettes on hand
when you begin installation.
Windows 2000/ME
1. Insert the Skyline CD into your note-
book’s CD-ROM drive.
➤ SSeeee ddiiaaggrraamm aa..
Select Run from the Start menu, and
type x:setup.exe where x is your CD
ROM drive. Click OK.
2. Answer the questions presented by the
setup application. Enter the SSID of
your access point in the SSID panel and
select Ad Hoc or Infrastructure mode for
your network. An Infrastructure net-
work uses an access point to connect
the wireless network to a wired network.
3. Restart the system when prompted,
and insert the Skyline Wireless Card
into a PCMCIA slot on your notebook
while the system is restarting.
4. After logging into the Windows system,
you will see the Found New Hardware
message. You must have Network
Administrator privileges to install the
driver software.
5. When prompted, specify the location of the
driver files for the Skyline wireless card.
6. When the Wizard finds the driver, a mes-
sage may appear indicating that the driver
does not have the Windows 2000 digital
signature. Click Yes to continue.
7. The Found New Hardware Wizard will
complete installation. Restart when
prompted. After restart, you should see
the Skyline monitor icon in the Windows
taskbar.
➤ Next, see SStteepp 22.
Windows NT .0
1. With your computer powered down,
insert the Skyline 11Mb Wireless PC Card
into a PCMCIA slot on your notebook.
➤ SSeeee ddiiaaggrraamm aa..
2. Power the computer on, and insert the
Skyline CD-ROM into the CD drive of
your computer. Select Run from the
Start menu, and type x: setup.exe
where x is the designation of your CD
ROM drive. Click OK.
3. The installer will offer a series of
screens and prompts. Select Next at
each screen to install the Skyline soft-
ware and Yes to accept the software
agreement.
4. When prompted, enter the SSID of your
access point. This name must be the
same for all computers on the network.
The SSID name is case and space sensi-
tive.
5. When prompted, select Ad Hoc or
Infrastructure network mode. An
Infrastructure network uses an access
point or base station to connect the
wireless network to a wired network.
6. Put the driver files into the default or
specified directory destination.
7. Select Finished and Yes when prompted
to restart the computer. After restart,
you should see the Skyline monitor icon
in the Windows taskbar.
➤ Next, see SStteepp 22.
a
6150287-00-01 SHORT 9/10/01 11:18 AM Page 2

After you have completed configuration, test
your network by double clicking the Network
Neighborhood icon. You will see the other
computers in your workgroup.
Encryption screen
Click on the Encryption tab to access the
Encryption/WEP settings screen.
If you are not using WEP, leave Disabled
selected.
Select 64 bit or 128 bit WEP from the menu to
enable WEP if you want to use Wireless
Encryption on your network. Use the
passphrase or manual entry keys to generate
WEP keys for your wireless network.
See the complete user guide for more infor-
mation about using WEP.
IMPORTANT! Refer to the complete Skyline
PC Card user guide on the CD-ROM that came
in your Skyline package for additional impor-
tant configuration and operation instructions.
Step 2 Windows Configuration
Use the Wireless Configuration Control Panel to configure your Skyline 11Mb PC Card for use with your wireless net-
work. All wireless devices on the network, including any access points, must have the same configuration settings.
1. Open the Configuration Utility by double
clicking on the Skyline monitor icon locat-
ed in the Windows taskbar. The Skyline
monitor icon in the Windows taskbar will
be green if the computer has link.
2. Use the tabs to select which screen to con-
figure, and then use the drop-down menus
to configure the Skyline PC Card.
Configuration screen
Click on the Configuration tab to access the
Configuration screen.
Mode: Select Infrastructure or Ad Hoc mode. An
Infrastructure network uses an access point to
connect the wireless network to a wired network.
SSID: Enter the SSID for the access point on
your wireless network.
Tx Rate: The default transfer rate setting is
Fully Automatic, allowing the driver to adjust
the data transfer rate automatically.
PS Mode: The power saving mode default is
Disabled.
6150287-00-01 SHORT 9/10/01 11:18 AM Page 3

MACINTOSH
1. Insert the Skyline CD-ROM into the
computer’s CD drive.
2. Double-click the Installer icon. The
Easy Install dialog box appears.
3. Click the Install button. The Installer
places the required networking soft-
ware in your System Folder.
4. After installation, restart your
computer and insert the Skyline 11Mb
Wireless PC Card into a PCMCIA slot
on your PowerBook.
The Farallon Wireless icon will appear
on your desktop.
See SStteepp 22for instructions on configuring
your Skyline PC Card
1. Open the Wireless Configuration Control Panel by
double-clicking the Farallon Wireless icon.
2. Use the Wireless Configuration panel to configure
the PC card.
IMPORTANT! See the complete Skyline user guide
on the Skyline C -ROM for more about the Skyline
Wireless Configuration Control Panel.
The Network (SSID) pop-up menu offers several
methods for connecting to wireless networks:
Select the best automatically scans for available access
points and picks the one with the strongest signal level.
Select from list shows a list of available wireless net-
works. Highlight the name of the desired network and
click Select. Click Re-scan if all of the networks you are
expecting to see do not appear on the list.
Select other allows you to enter the name of the access
point you want to use into the Wireless Base Station
panel. Enter the SSID exactly, and click Select.
Create Ad Hoc allows you to create a peer-to-peer net-
work. Enter a name for the network and click Create. If
the name you choose is already in use, you will auto-
matically join the existing Ad Hoc network with that
name. Start Ad Hoc networks when computers are with-
in range of each other.
Encryption
Select Encryption from the Windows menu to view the
Wireless Encryption panel. Check the Enable Encryption
box and enter the password or hexadecimal keys that
work with the access point in use.
Step 3 Control Panels
After you have configured the Wireless Control panel,
configure the AppleTalk and TCP/IP Control panels of
your Macintosh.
1. Open the Wireless Control Panel. The Windows
menu allows immediate access to your comput-
er’s AppleTalk and TCP/IP Control Panels.
2. Open the AppleTalk Control Panel and select
Farallon Wireless from the Connect via pop-up
menu. When you are finished, close the Control
Panel and save your settings.
3. Open the TCP/IP Control Panel from the Windows
menu and select Farallon Wireless from the
Connect via pop-up menu. Make sure the rest of
your TCP/IP panel is configured correctly for your
wireless network. When you are finished, close
the Control Panel and save your settings.
IMPORTANT! Refer to the complete Skyline PC Card
user guide on the CD-ROM that came in your Skyline
package for additional important configuration and
operation instructions.
Step 2 Macintosh Configuration
Use the Wireless Configuration Control Panel to configure your Skyline 11Mb PC Card for use
with your wireless network. All wireless devices on the network, including any access
points, must have the same configuration settings.
Step 1 Macintosh Installation
Install the driver from the CD-ROM, then insert the PC
Card. The Skyline 11Mb Wireless PC Card requires
Mac OS 7.5.5 or higher.
6150287-00-01
6150287-00-01 SHORT 9/10/01 11:18 AM Page 4
Other manuals for Skyline
2
Table of contents
Other Proxim Computer Hardware manuals
Popular Computer Hardware manuals by other brands

Zikodrive
Zikodrive ZD10UART Series operating manual

Intel
Intel UPI- 41A user manual

Intel
Intel P9500 - Core 2 Duo 2.53 GHz 6M L2 Cache 1066MHz FSB Socket P Mobile... manual

Kontron
Kontron COM Express Extension specification

ANTAIRA
ANTAIRA MSC-302A installation guide

Infineon
Infineon TLD5501-2QV Buck Demo user manual