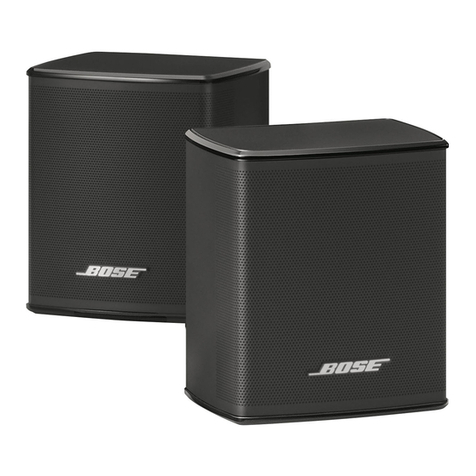
PSB Imagine On-Wall W1 User manual

ENGLISH
Imagine On-Wall
Owner’s Guide

ENGLISH
Thank you for purchasing PSB Speakers Imagine W1 and/or W3 On-Wall Speaker, a highly developed slim
profile speaker engineered for a customi ed home theatre solution. This compact solution captures all thes
sounds from your music and video collections and brings them to life. Producing crystal clear voicing and a
spacious soundstage, the Imagine On-Wall Speakers make motion pictures and music catalogues come to
life.
Engineered with highly acclaimed audio excellence and research, the Imagine W1 and W3 On-Wall
Speakers from PSB Speakers will deliver wide frequency and dynamic range, natural tonal balance and
precise spatial imaging for today's ultra-thin flat panel televisions in all home theatre applications.
By supplying this Owner's , we hope you will read through this booklet to help assure that you areGuide
getting the most out of your PSB product, and your music.
UNPACKING…
The packing materials are designed to protect the speakers from damage during transport, however if visible
or concealed damage is to occur in handling, it should be reported at once to your authorized PSB dealer, or
to the shipping company that delivered your loudspeakers. We highly recommend retaining all packaging, as
it may be needed to transport the speakers in the future.
POSITIONING…
I. The W1 and W3 On-Wall Speakers are designed to be positioned in all indoor environments, and
can be placed in multiple positions for various home theatre applications.
II. The Imagine W1 can be oriented either vertically or horizontally, and can be used as front left or
right, centre or surround channel speakers.
III. The Imagine W3 combines all front channel speakers; left, right, and centre, and can be mounted
or placed on a tabletop as a centre channel speaker for three-dimensional home theatre sound.
For more detailed information about speaker placement, please visit www.psbspeakers.com
2

INSTALLING…
On-Wall Mounting
I. All PSB On-Wall Speakers are supplied with a custom designed wall-mounting bracket for ease
of installation.
II. Wall mounting a speaker will require certain tools and materials, as well as a certain level of
expertise. For example, if wires are to be hidden within the walls of your home, we highly suggest
consulting a local CEDIA certified installer in your area. To find a CEDIA certified installer, please
visit www.cedia.net
III. For successful on-wall mounting, the following tools will be required: tape measure, pencil, level,
screws, anchors, screwdrivers, power drill, and drill bits.
I.V Prior to mounting, it is highly recommended to determine the best location for each on-wall
speaker in relation to your listening position. For proper on-wall positioning, please refer to the
“Positioning” section of this owner's guide.
V. Ensure the selected locations for wall-mounting do not conceal electrical wiring or plumbing.
Ensure the speaker clears surrounding physical structures and electrical fixtures and wiring.
V Using the provided wall bracket template, mark the location of the pilot holes and pre-drill eachI.
hole for the mounting screws (not included) using the correct mounting hardware for the specific
wall material.
V .II If there is no stud behind the chosen location, use wall anchors (not included) to secure the
bracket screws, and follow the wall anchor manufacturer's directions.
Note: It is recommended that you have at least one mounting point
attached into a stud for better holding strength. Use appropriate
hardware depending on the building material.
ENGLISH
3
Imagine W1 Wall Bracket
Imagine W3 Wall Bracket
3

VII For the Imagine W1, line up each mounting screwI.
on the wall-mounting bracket with the keyhole
slots on the speaker, and let the speaker slide
straight down, allowing each screw head to
slide-and-lock into the slot for a secure mount.
I.X For the Imagine W3, fit the speaker's contoured
groove into the mounting edge of the bracket.
Tabletop Feet
I. The provided feet allow for the speaker to be placed on a tabletop below the display in a centre
channel orientation.
II. The rubber boot on the metal bracket is reversible. Depending on the way you install the boot on
the bracket, this will set the speaker at 90 degrees or 75 degrees (tilted back 15 degrees) from
the table surface.
III. To install the tabletop feet, attach the feet to the
threaded inserts on the back of the speaker
using the provided 1/4”-20 threaded bolts.
Careful not to strip the threads.
ENGLISH
4

ENGLISH
5
CONNECTING…
When selecting wire for connecting speakers, highly recommend a minimum of 16-gaugeit is ed that
speaker wire for normal length runs, and up to 12-gauge speaker wire for long runs overis used is used
30 feet.
Before making a connection, ensure that your audio source is powered off as severe damage to
equipment and/or your ears could result.
The Speakers
I. For proper connection, be sure to connect all of the speakers in your system in an identical
manner: Red or (+) amplifier/receiver terminal to Red (+) speaker terminal, Black (-)
amplifier/receiver terminal to Black (-) speaker terminal.
II. A proper connection will ensure that each speaker driver cone on both channels move forward
and backward together (“in-phase”), rather than in opposition (“out-of-phase”).
I . Using the below wire-coding diagrams, ensure you are connecting the same wire of a given pairII
to a like-coded terminal on both ends of the connection.
Bare Wire Connection
Push the top of the binding post
down to line up the two holes.
Insert wire through hole, and
release binding post. This
connection will accept up to
8-gauge wire.
Banana Plug Connection
Remove binding post plugs and
insert the banana plug into the
top of the binding post.
Observe Proper Connection Polarity
Note: The PSB Imagine W1 and W3 perform best when complemented with a powered subwoofer.
PSB Speakers offers a number of suitable subwoofers to pair with your on-wall speakers. To find these
subwoofers, please visit www.psbspeakers.com

ENGLISH
6
The Grilles
I. To remove the grille, use the supplied grille removal tool and insert it into one of the perforated
holes.
II. Using gentle force, insert your fingertip into the centre notch of the lifted end, and pull slightly up
on the grille until it is dislodged from the groove.
III. Once the grille has been partially lifted, gently use your fingers to remove the rest of the grille.
IV. To reattach the grille, fit the lip of the grille into one side of the provided groove first and continue
to work the grille into the other side until it is securely locked in place.
PROTECTING YOUR INVESTEMENT
For long lasting enjoyment of your PSB speakers, you should respect their limits and avoid excessive
volume levels for music or movie playback. Excessive volume levels can damage all types of speakers.
If your speakers are pushed to excessive volume levels, they could be driven into “clipping”, which could
result in severe and/or permanent damage. If listening to your speakers at loud levels, listen carefully for
any signs of harsh, distorted midrange and diminishing precision – if detected, turn the volume down
immediately.
NEVER TEST PEAK LISTENING LEVELS OF YOUR SPEAKERS BY TURNING THE VOLUME UP ALL
THE WAY!

CARING AND CLEANING…
For safe use, it is essential to maintain and clean your speakers periodically. However, excessive
cleaning may cause damage and jeopardize the longevity of the product. When not in use, avoid storing
in extreme hot or cold temperatures and humidity, and avoid exposure to liquids.
I. Cabinet Care
PSB cabinets have varying materials and finishes, including wood veneers, vinyl, anodized aluminium
and high gloss, and should be treated with the same care you would with similar finishes such as on
furniture. Dust lightly with a soft cloth, avoiding abrasive materials that will cause permanent damage to
the cabinet. If necessary, wipe carefully with a cloth slightly dampened with water-based cleaner to
remove heavy soil.
II. Drivers and Port Care
During light cleaning, avoid touching speaker diaphragms as it could cause permanent damage to the
tweeter and/or drivers. If deeper cleaning is required, we suggest using a lint brush to clean the driver
ports.
TROUBLESHOOTING…
Issue: Audible Distortion
I. If a speaker begins to sound distorted or fatigued, check to see whether playing at a lower
volume resolves this issue.
Issue: Low or No Volume Output
I. If there is low or no volume output, check that the audio source is powered “on”, and the audio is
set to a medium volume level and not muted.
II. If audio source is indeed powered “on”, check and ensure that the cable connections to the audio
source and speakers are secure and are “in-phase”. Also, connect a different cable to see if this
resolves the issue.
If you require service, please visit your local authori ed PSB service centre, or our PSB Speakerss
website and open a support ticket in the PSB Lounge www.psbspeakers.com/lounge).(
If you have moved since your purchase, the nearest authori ed PSB dealer will be able to assist you. Ifs
the problem is not resolved, please contact us directly and provide the model name, serial number, date
of purchase, dealer name, and a full detailed description of the issue.
ENGLISH
7

We appreciate your purchase, and hope this owner's guide helps you enjoy the exceptional satisfaction
that PSB speaker systems have to offer. We wish you many years of enjoyable listening!
Environmental Protection
At the end of its useful life, this product must not be disposed of with regular household waste but must
be returned to a collection point for the recycling of electrical and electronic equipment. The symbol on
the product, owner's manual and packaging, point this out.
The materials can be reused in accordance with their markings. Through re-use, recycling of raw
materials, or other forms of recycling of old products, you are making an important contribution to the
protection of our environment.
Your local administrative office can advise you of the responsible waste disposal point.
We appreciate your purchase of our product, and thank you for taking the time to read this owner's
guide. We hope you enjoy the exceptional satisfaction that PSB Speakers have to offer, and wish you
many years of enjoyable listening.
Real Sound for Real People.
ENGLISH
8
This manual suits for next models
1
Table of contents
Other PSB Speakers manuals
PSB
PSB ALPHA PS1 User manual
PSB
PSB CHS60 User manual

PSB
PSB ALPHA PS1 User manual

PSB
PSB CustomSound CW88R User manual
PSB
PSB THECUSTOMSOUND SERIES User manual
PSB
PSB CS500 User manual
PSB
PSB CW170FR User manual
PSB
PSB CHS40 Quick start guide
PSB
PSB imagine XA User manual
PSB
PSB Synchrony Series User manual
PSB
PSB Alpha Alpha LR1 User manual

PSB
PSB CHS212 User manual
PSB
PSB GB1 User manual

PSB
PSB ALPHA User manual
PSB
PSB CWS8 Quick start guide
PSB
PSB the CustomSound Series User manual
PSB
PSB the CustomSound Series User manual

PSB
PSB CustomSound CW60R User manual
PSB
PSB Custom Sound m6x6.1 User manual
PSB
PSB ALPHA AM5 User manual
