26
Questions? Call Product Support Toll-Free at 1-844-787-3148
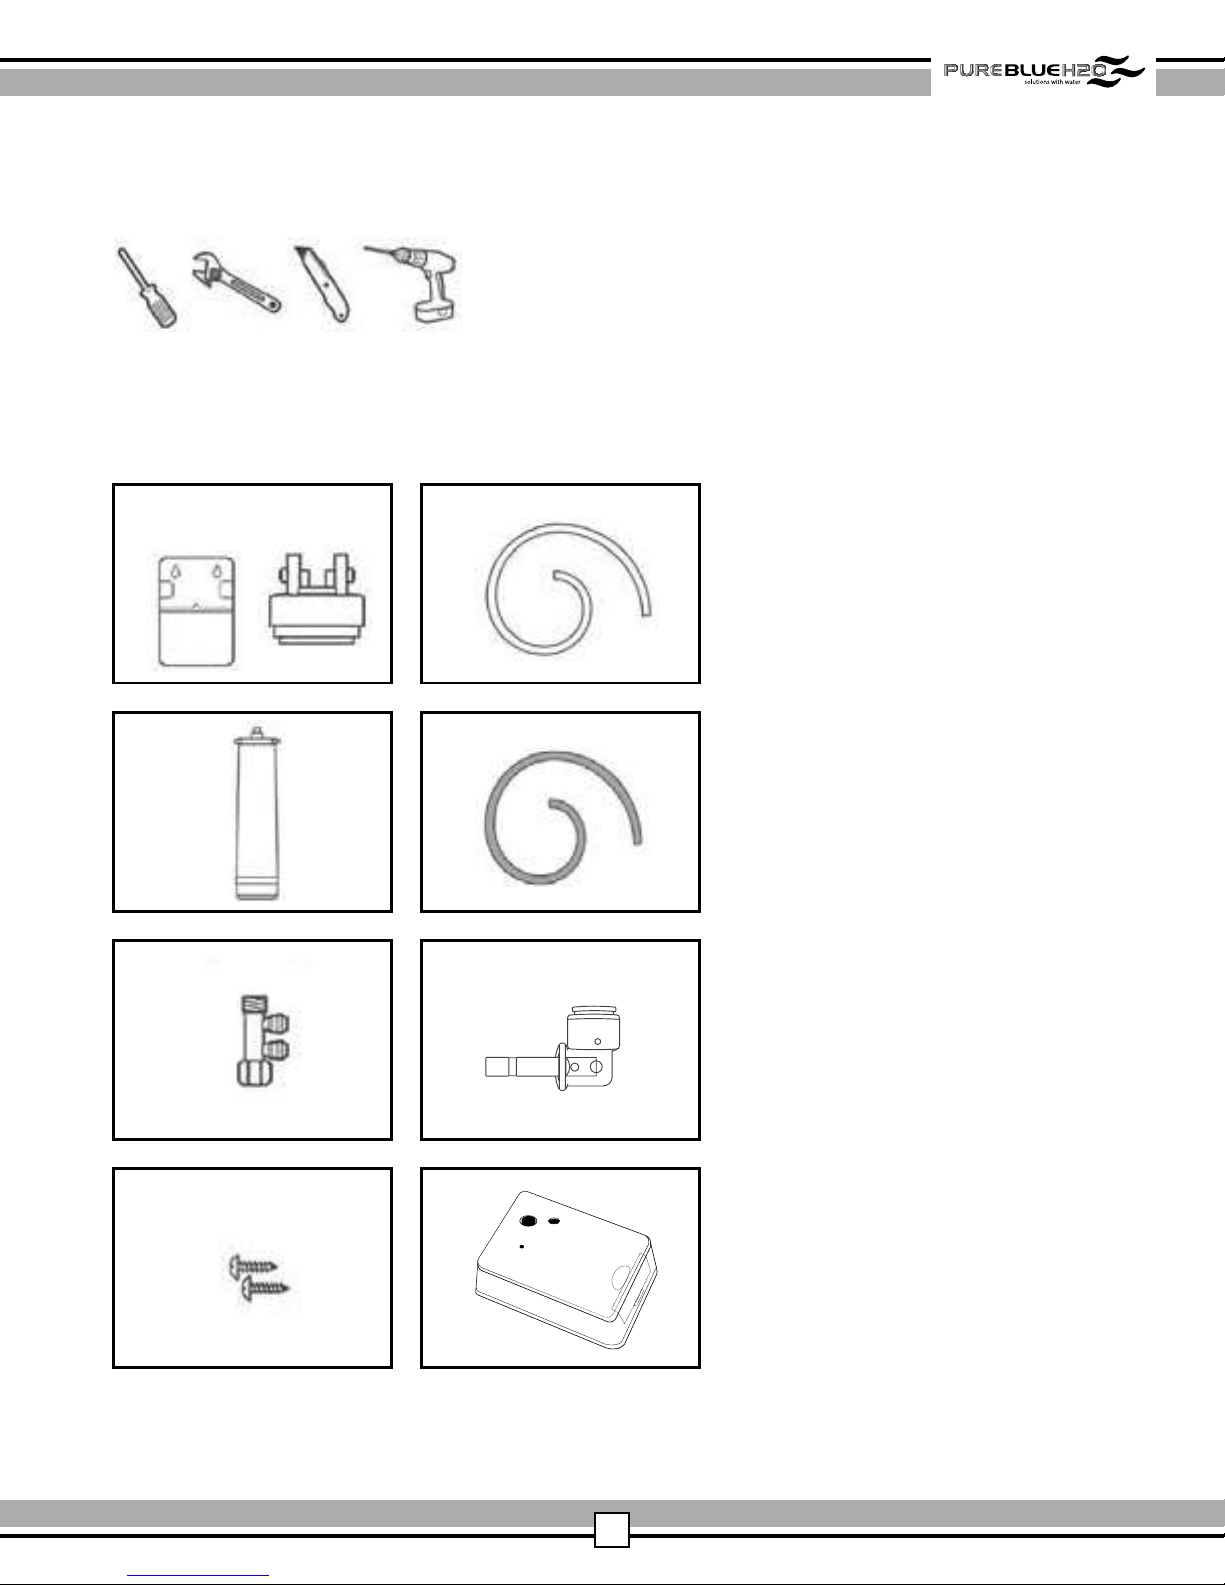
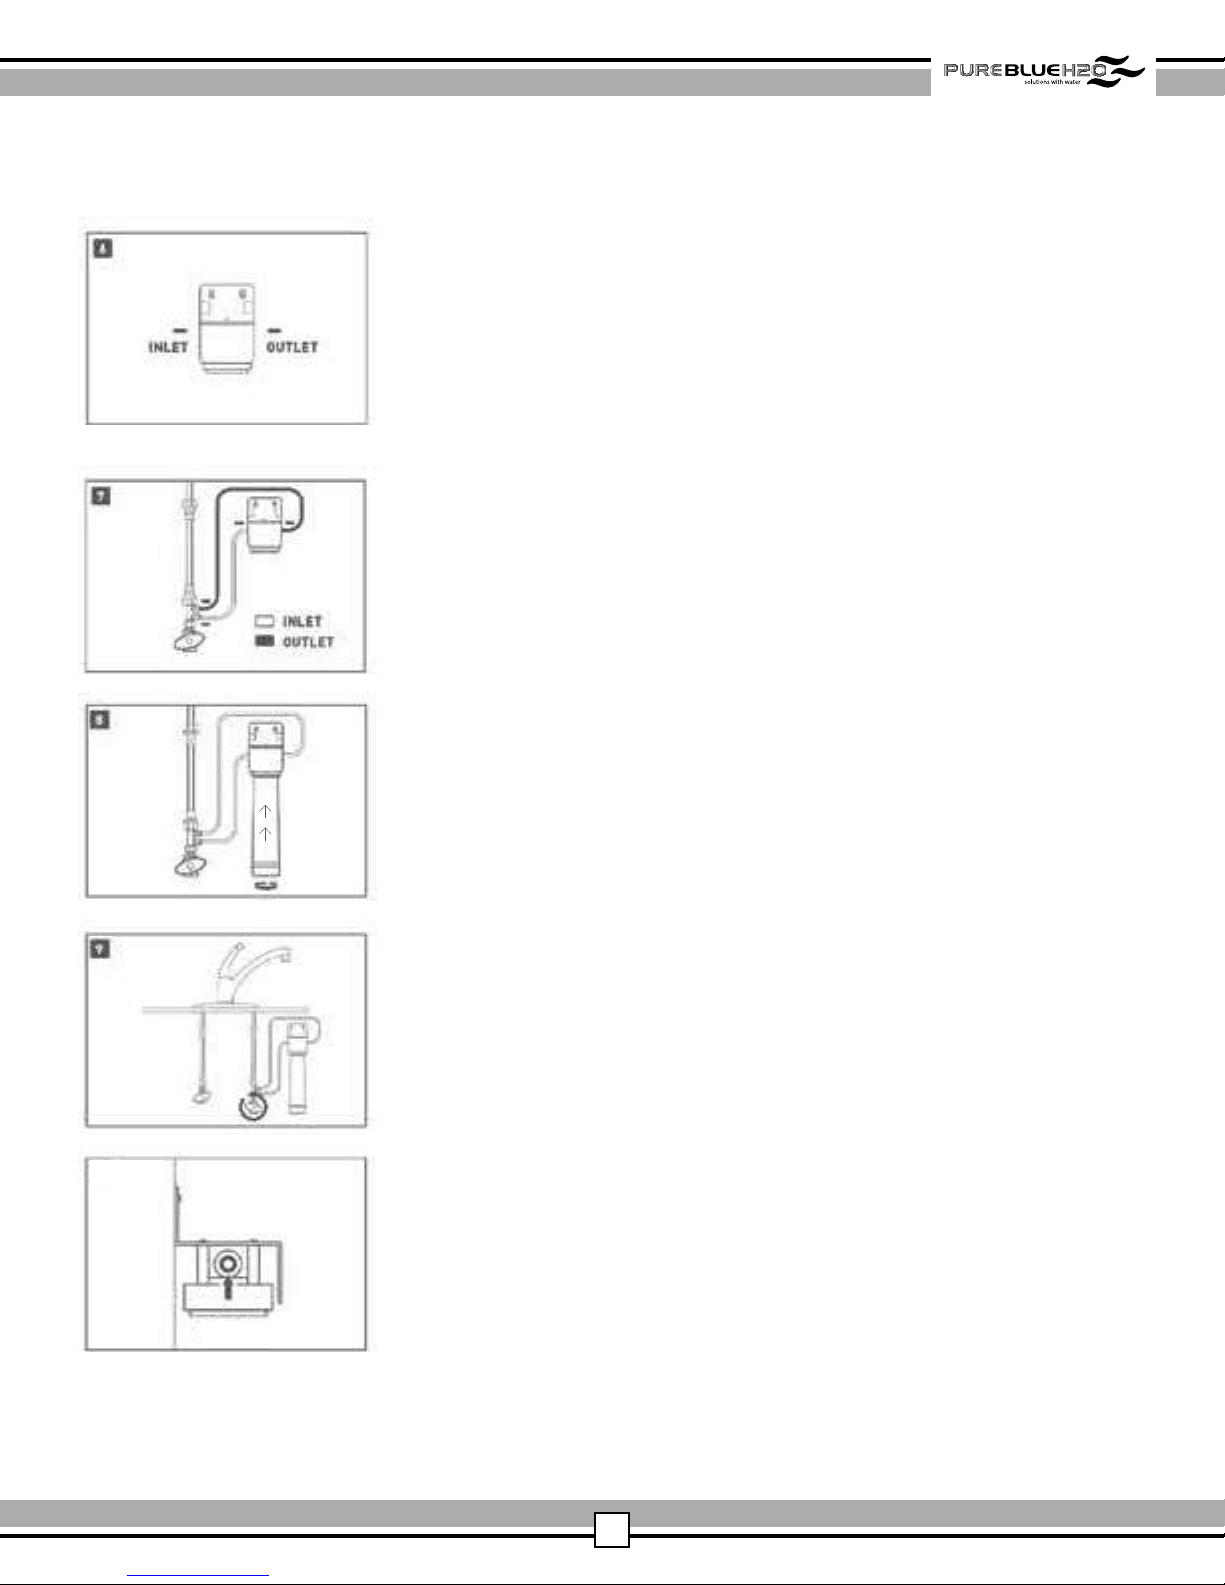
(A)
(F)
(A)
(E)
(C)
NOTE A.
COLLAR
COLLET/PORT
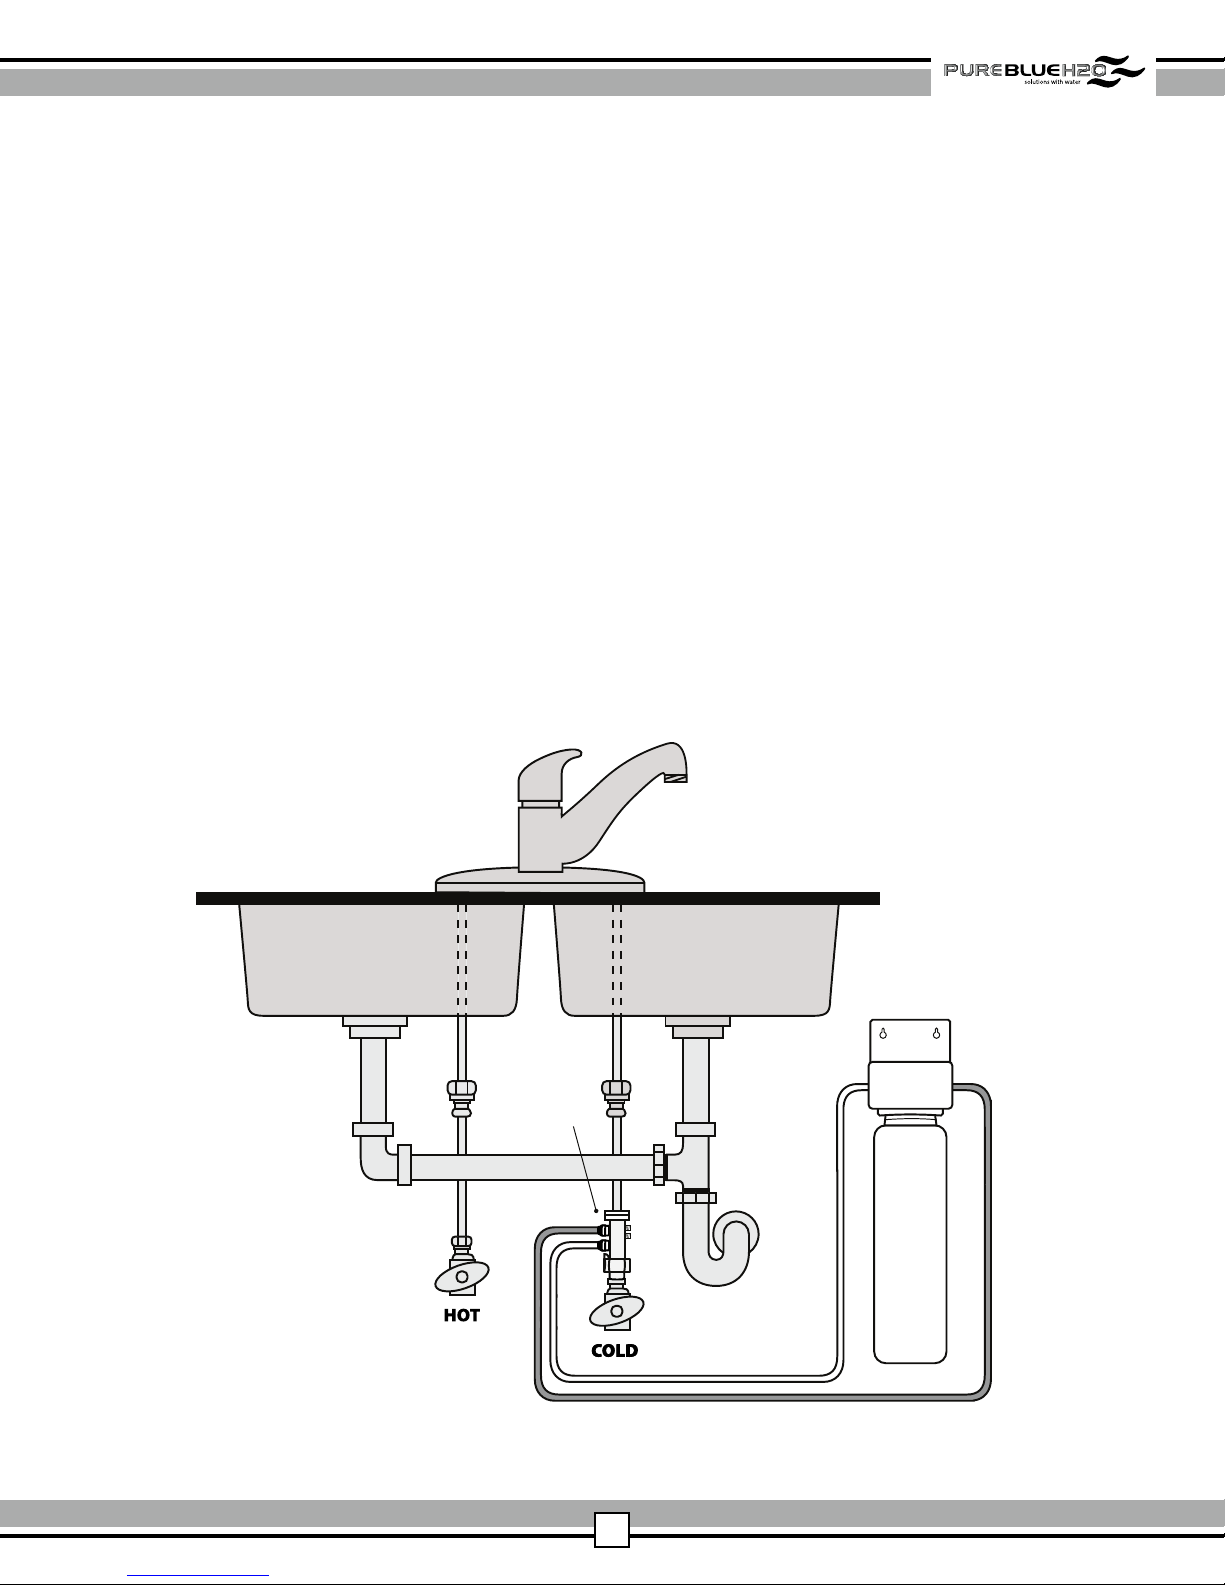
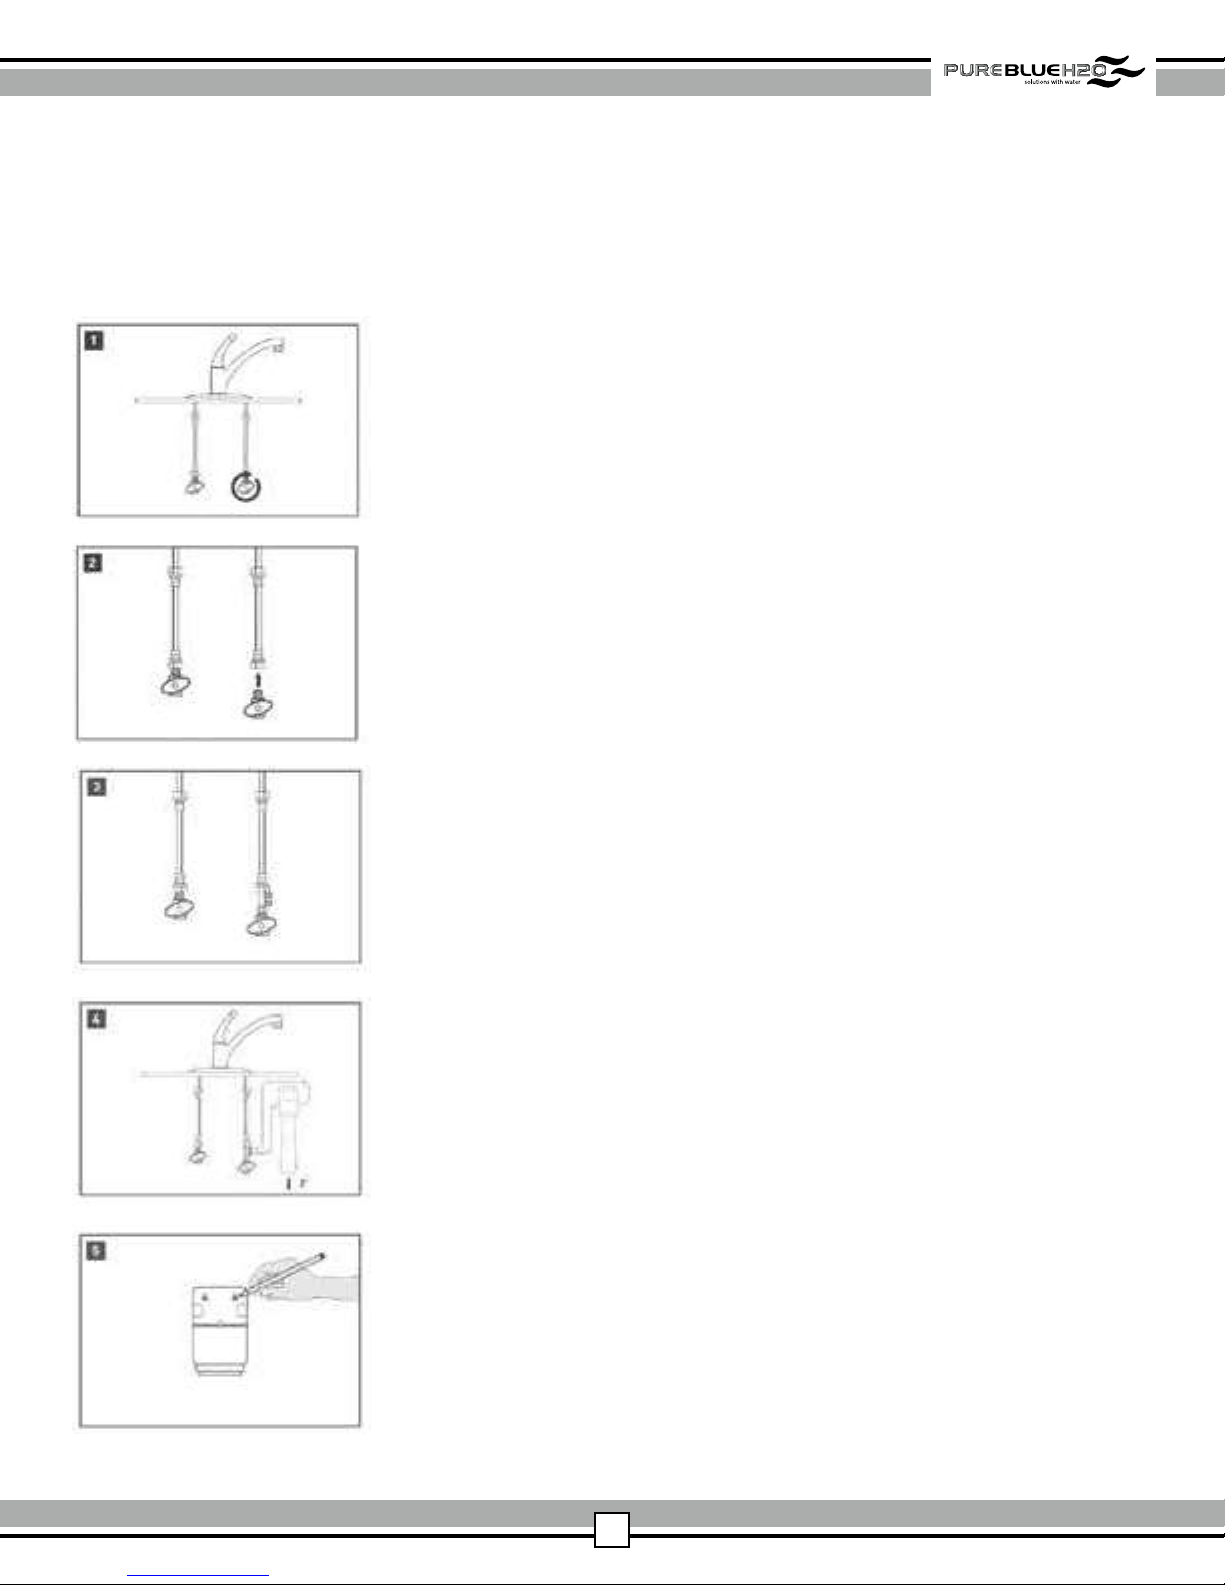
6. Determine lengths of 3/8” tubing needed to connect the System Head
inlet (white collet/tubing) and outlet (blue collet/tubing) to the water
supply adapter (reference image left for inlet (white collet) and outlet
(blue collet) location). Be sure to allow enough tubing to prevent kinking
in the line. If necessary, cut each 3/8” plastic tubing squarely on both
ends with a utility knife, making sure not to crimp the tubing during
cutting. Make sure tube edges are even and smooth. Reference image 6
on left for inlet and outlet location.
7. Insert the 3/8” white tubing into the white inlet port/collet of the System
Head approximately 5/8” until it stops. Connect the other end of the
tubing to the bottom inlet side of the Direct Connect Fitting (C) adapter.
Repeat same process with outlet side (3/8” blue tubing and blue outlet
port/collet). NOTE: 3/8” Elbow adapter (G) has been included to use in
System Head for tubing connection, if necessary.
8. Line up lter head inlet and outlet ports and key with the inlet/outlet
ports on System Head, insert lter by pushing upward, and turning right
until the lter stops in the locked position. The lter should be tight
with no movement. If the lter is dicult to insert into the System Head,
check the lter and head ports for debris and make sure they are clean;
make sure both the inlet/outlet ports and O-rings are clean for easier
insertion and repeat this step.
9. Turn on the cold water supply at angle stop valve. Check for leaks. Turn
on faucet and allow water to run for 5 minutes to ush air and carbon
nes (very ne black powder). Check for leaks before leaving installation.
If problems exist, refer to troubleshooting on page 9.
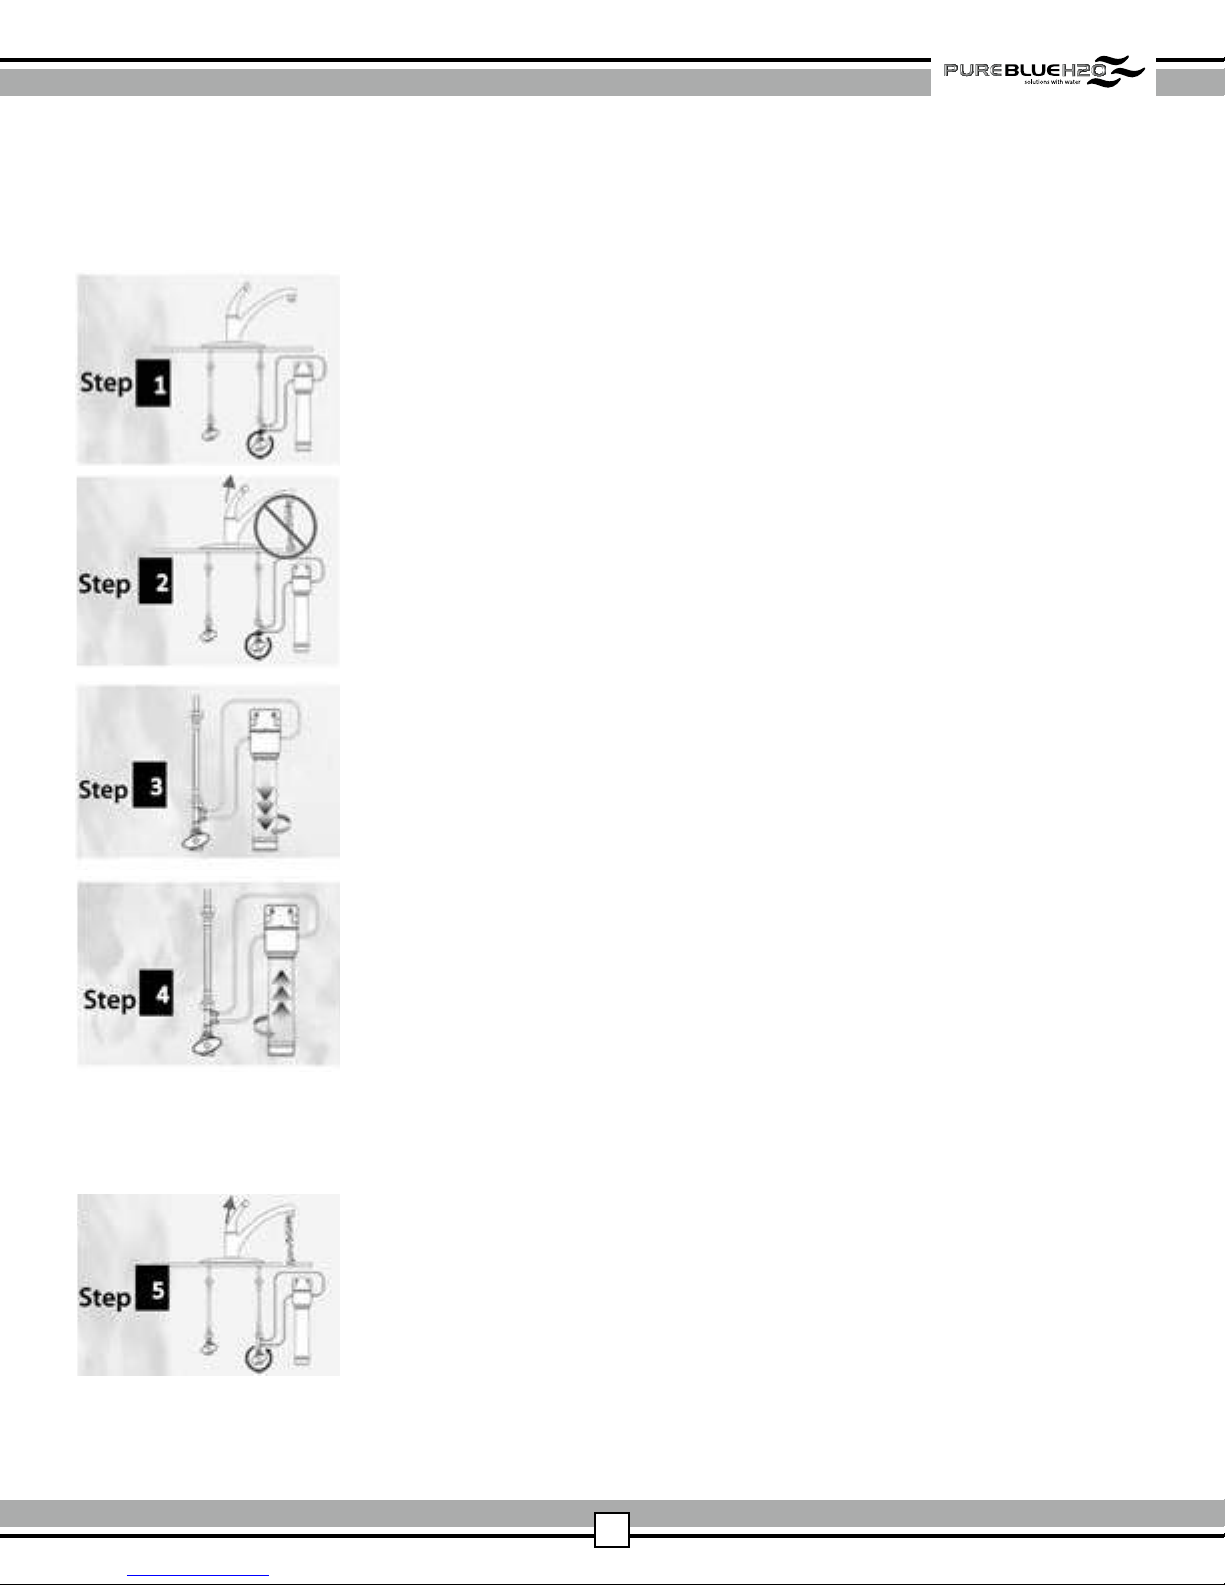
NOTE: Routine maintenance and lter replacement will not require that
you disconnect the tubing from the System Head. If necessary, tubing
may be easily removed from the tting. First turn o the water supply to
the lter. Open the kitchen faucet to release water pressure. Using your
ngers, press in the collet holding it rmly against the tting, with your
other hand pull the tubing out of the collet, away from the head assembly.
See collet/port location in the image on the left, labeled NOTE A.