manuals.online logo
Brands
  1. Home
  2. •
  3. Brands
  4. •
  5. PureAir
  6. •
  7. Water Filtration System
  8. •
  9. PureAir PA-CIR-10 User manual

PureAir PA-CIR-10 User manual

Wiring Instructions
NB This appliance requires a 230-240V ac/50Hz electrical power supply.
Supplied with the appliance is an IEC ‘Free’ Socket. Connect a 3 amp 3 core mains cable, length as required, to this
socket. Removing socket cover connect:
ECOZONE CIRRUS AIR FILTER – MODEL: PA-CIR-10/20
‘Earth' core of cable to ‘Earth’ terminal.
‘Live’ core of cable to ‘Live’ terminal. A qualified engineer must install this unit
‘Neutral’ core of cable to ‘Neutral’ terminal.
The Ecozone Cirrus is designed for use in offices, small restaurants or small bar areas where space is at a premium. It is
designed for installation directly, via its mounting plate, to the ceiling in rooms in excess of 25m3 volume. Other types of
mounting options may be used, see ‘Appliance Installation’ details in this instruction sheet.
Clamp cable into socket and replace socket cover.
Free end of mains cable should be hard wired into a 2 amp fused spur or plug. A 2 amp fuse is supplied with the
appliance for this purpose.
It has an extremely efficient filter that will remove virtually all smoke and tar particles from the atmosphere. Frequency of
filter replacement will depend upon the level of activity within the area. The filter should be examined on a monthly basis
until a pattern is established. The filter pads should be exchanged when they have become clogged. If your model is
fitted with an ozone generator, inside the body of the appliance, the ozone producing ceramic plate should be carefully
wiped clean with a tissue soaked in methylated spirits. Clean ceramic plate as often as filter pads are replaced. To
access the ozone generator plate, remove the filter frame and filter tray as detailed below.
Infra Red Remote Control
Fit 9 volt high capacity battery into control unit. (If not already
fitted).
Before undertaking filter pad replacement or ceramic plate cleaning – DISCONNECT ELECTRICAL SUPPLY.
Point infrared hand control at the appliance, towards the clear
lens on the front of the appliance. After undertaking any appliance maintenance, switch ON appliance and check unit is functioning correctly.
When installing the Ecozone the unit must be firmly fixed. Horizontal or vertical movement could cause the unit
to vibrate.
Select the fan speed required.
(appliance has 3 red neons, on front edge, to indicate the fan
speed to which the appliance has been set)
If packing box or appliance show any visible signs of damage, contact your supplier immediately.
0 = Off ................ (3 red neons – All OFF) Check the following items were contained in the component bag with these instructions:
1 = Low .............. (1 red neon - ON) • Remote control handset and battery (if appliance is remote control model).
2 = Medium ........ (2 red neons - ON) • Cable socket (IEC ‘Free’ Socket).
3 = High ............. (3 red neons - ON) • 2 amp mains fuse.
Press selected button on controller.
Remember, to switch appliance OFF press ‘O’.
ECOZONE CIRRUS SPECIFICATIONS
Dimensions 475 x 475 x 180 mm (includes mounting plate)
Weight 18 kg (includes mounting plate)
Voltage Consumption
Maximum Power
230-240V ac 50Hz
180 Watt
Colours Brown/Grey
Airflow 800 m3/hour (28,270 ft3/hr) Reverse curve fan
Air cleaning capacity based on 6 air changes per hour
(see Ecozone Cirrus for smaller areas)
Heavy smoke up to 100 m3. Light smoke up to 150 m3.
For larger areas see Ecozone Cumulus
Manufactured to CE standards EN60335-1, EN60335-2-6S, EN50081 part 1, EN55014
Ecozone Cirrus – Filter Frame Removal
• Isolate appliance from mains power supply
• It is best to clean and vacuum accumulated dust from the appliance exterior before opening the appliance lid.
Due to our continued policy of research and development specifications can change without notice. • Unlock and open the appliance lid.
• It is best to clean and vacuum accumulated dust from the appliance interior as soon as appliance lid is opened.
Failure to change dirty filters may impair the Ecozone performance and invalidate the warranty. • Unplug the filter frame power lead located at frame corner, close to hinge.
• Remove filter frame by slackening both screws of the frame retaining brackets. Pivot/turn brackets to release frame.
Be careful as frame drops out. Remove filter frame.
This warranty period is one year from the date of supply or installation.
• To replace filters within the filter frame read the instructions supplied with replacement filter pads.
Consort Equipment Products Ltd • Replace the filter frame by relocating the filter frame into the filter tray, held by the frame retaining brackets. Screw
retaining brackets secure.
Thornton Industrial Estate, Milford Haven, Pembrokeshire, SA73 2RT
Tel: (+44) 01646 602172 Fax: (+44) 01646 695195 • Remember to reconnect the filter power lead. Plug lead into the socket on the filter frame.
Email: [email protected] Web: www.consortepl.com • Close appliance lid and lock with the key.
November 2000© PA990164 Issue 01
Ecozone Cirrus – Filter Tray Removal
Isolate appliance from mains power supply
• Remove filter frame as described above.
• Unscrew and remove filter tray from appliance body. Be careful as tray may drop down out of appliance
body.
• You can now have access to the components within the interior of the appliance body.
• Replace the filter tray and then, with the retaining brackets, the filter frame. Screw tightly into position
these items.
• Close appliance lid and lock with the key.
Appliance Installation
The appliance is designed for installation directly, via its mounting plate, to the ceiling, in rooms in excess of
25 m3volume. The location of the unit should be chosen to maximise airflow through the unit and hence
around its environment. For units controlled by infrared remote control handset, consider in which direction
the front edge of the unit (edge with infra red receiving lens) faces for ease of operation.
NB The unit can be installed without the need to open the appliance body.
Step 1 Remove the ceiling mounting plate from the appliance by unscrewing the M6 screws (4 screws)
securing the plate to the appliance. By sliding the plate slightly forward, to release locking tabs, lift
plate away from appliance. See Fig 2 opposite. Retain screws safely for refitting appliance to plate.
Step 2 Having chosen where to fit the unit on the ceiling, locate position and direction of any ceiling joists to
which the ceiling mounted plate may be secured.
Using a No 10 fixing screw of suitable length, secure mounting plate through hole ‘A’, see Fig 2
opposite, to ceiling. Do not fully tighten. This central fixing will allow easy adjustment of the plate into
its final position. Rotate the plate to align with the ceiling joist one row of holes ‘B’. Using more No 10
fixing screws secure the plate through holes ‘B’ to the same joist as hole ‘A’. Before final position of
plate is selected check upon the direction that the appliance front edge, with infrared receiving lens, will
face, see Fig 2 opposite. Tighten all screws to firmly secure plate to ceiling. The appliance is heavy
and at least 3 screws must be used. If the ceiling is uneven and the mounting plate has a tendency to
rock after being secured to the joist there are 4 holes ‘C’ through which fixings can be fitted, steadying
the plate corners. See Fig 2 opposite. Only after the mounting plate is secure is the appliance to be
refitted onto the plate.
Step 3 Refit appliance onto ceiling mounted plate. The appliance is heavy. Carefully offer the appliance up to
the mounting plate, feeding the locking tabs into the appliance body. Immediately slide the body
forward so that the appliance is supported upon the locking tabs. Refit the 4 M6 screws removed at
Step 1 to lock the appliance onto plate.
Step 4 Connect appliance to mains electrical power – see Wiring Instructions.
Step 5 Switch ON appliance and check unit is functioning correctly.
NB Alternative hanging of appliance.
The mounting plate may be suspended by ‘rod’ or ‘chain’. To achieve this the corner holes ‘C’ are
used. If installed this way, check for any excessive vibration of the appliance when in operation.
Fig 2 Appliance Body & Ceiling Mounting Plate

This manual suits for next models

1

Other PureAir Water Filtration System manuals

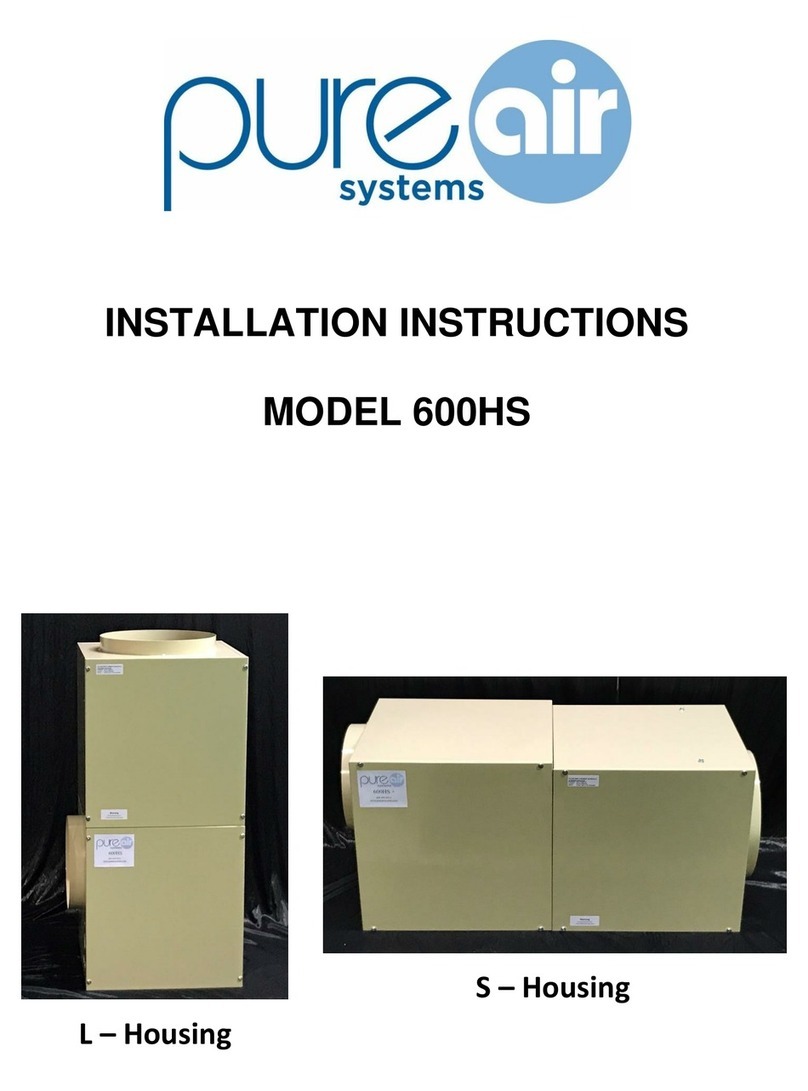
PureAir 600HS User manual

PureAir

PureAir 600HS User manual

PureAir Ecozone Cumulus PA-CUM-10 User manual

PureAir

PureAir Ecozone Cumulus PA-CUM-10 User manual

Popular Water Filtration System manuals by other brands

Vertex Puratek Installation and maintenance manual

Vertex

Vertex Puratek Installation and maintenance manual

Pall Profile Operating and Installation Procedures

Pall

Pall Profile Operating and Installation Procedures

Beretta Connect MIX STAND ALONE INSTRUCTIONS FOR THE INSTALLER AND THE TECHNICAL ASSISTANCE SERVICE

Beretta

Beretta Connect MIX STAND ALONE INSTRUCTIONS FOR THE INSTALLER AND THE TECHNICAL ASSISTANCE SERVICE

Grunbeck GENO-OSMO RO 125K Operation manual

Grunbeck

Grunbeck GENO-OSMO RO 125K Operation manual

amiad EBS 769 Installation, operation and maintenance instructions

amiad

amiad EBS 769 Installation, operation and maintenance instructions

EcoTAC Protector 4 Owner's manual & installation guide

EcoTAC

EcoTAC Protector 4 Owner's manual & installation guide

Blichmann BeerGun Assembly operation maintenance

Blichmann

Blichmann BeerGun Assembly operation maintenance

Alb Filter Element user manual

Alb Filter

Alb Filter Element user manual

Rainfresh R519 Installation & maintenance instructions

Rainfresh

Rainfresh R519 Installation & maintenance instructions

ELTA music POLYVOX PF3 manual

ELTA music

ELTA music POLYVOX PF3 manual

Water Factory Systems SteamerGard WT-400 Use and care instructions, installation

Water Factory Systems

Water Factory Systems SteamerGard WT-400 Use and care instructions, installation

Unilever Pureit PX3000 instruction manual

Unilever

Unilever Pureit PX3000 instruction manual

Steinbach Premium 100 ORIGINAL OWNER'S MANUAL

Steinbach

Steinbach Premium 100 ORIGINAL OWNER'S MANUAL

Levoit True HEPA LV-H133-RF instructions

Levoit

Levoit True HEPA LV-H133-RF instructions

Fresh Water Systems PharMate SQC Series Installation, operation & maintenance manual

Fresh Water Systems

Fresh Water Systems PharMate SQC Series Installation, operation & maintenance manual

Beko OWAMAT 10 Instructions for installation and operation

Beko

Beko OWAMAT 10 Instructions for installation and operation

Trox Technik PFG-E Series Installation and maintenance manual

Trox Technik

Trox Technik PFG-E Series Installation and maintenance manual

Evolution Aqua Nexus Eazy 200 Installation and instruction manual

Evolution Aqua

Evolution Aqua Nexus Eazy 200 Installation and instruction manual

manuals.online logo
manuals.online logoBrands
  • About & Mission
  • Contact us
  • Privacy Policy
  • Terms and Conditions

Copyright 2025 Manuals.Online. All Rights Reserved.