PURSUIT PRO-9776C User manual

128-8786
1 of 12
Page1
Model PRO-9776C
Owner’sManual
5 Button Remote Start Security System With
Plug-In Shock Sensor & Starter Disable
FEATURES:
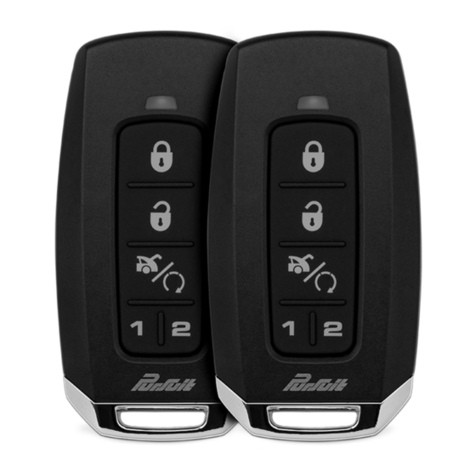
2 Five Button Programmable RF Transmitters
Seven Channel Code Learning Receiver (capable of accepting 4 transmitters)
Code Hopping Technology
Selectable Manual Override Mode
Remote Panic in all modes
Protected Push Button Valet/Override Switch In Windshield Receiver
External Superheterodyne Receiver Antenna w/PushButton Switch & LED
SelectableAutomatic Timed Start Mode
User Programmable Manual Override Code
7 Function LED - Arm / Disarm / Zone 1 / Zone 2 / Zone 3 / Valet / Arming
Intrusion Alert with Memory
Audible Arm / Disarm / Defective Zone / Tamper Confirmation
Instant Siren Activation When Used
Starter Disable When Armed
True Last Door Arming
Defective Zone By-Pass
Active or Passive Arming Selectable
Programmable Auto Lock On / Off
Programmable Auto Unlock / Off/Drivers Door/All Doors
Programmable Door Lock Pulse Duration 1 Second / 3.5 Seconds/1 Sec L/ Dbl. U/L
Channel 4, 5, 6, & 7 Output to Control Optional Accessories
Programmable Active or Passive Door Locks
UserProgrammablePermanent ChirpDelete
On Command RF Chirp Delete from Transmitter Or Selectable Through Software
Car Horn Activation for alarm response
Additional Negative Trigger Input
RF Inhibit with ignition on
Parking Light Flasher
Remote Keyless Entry With Optional Access Guard (must have power door locks)
IlluminatedEntry
Plug In Dual Stage Shock Sensor
Dome Delay Learn Circuitry (Patented)
OPTIONS :
6 Tone Multi Tone Siren
Telematic Upgrade Ready
Plug In Flash Logic By-Pass Capable
Remote Trunk Release (must have electronic trunk release)
Multiple Vehicle Capable
Remote Power Window Roll Up
Remote Garage Door Interface
Multiple Vehicle Capable
WARNING! Be certain that the vehicle is outdoors before using this or any remote vehicle
starting device. Arunning engine produces dangerous carbon monoxide fumes
which can be harmful or fatal if prolonged exposure occurs. DO NOT remote
start the vehicle if it is garaged.

128-8786
2 of 12
Page2
Your RemoteStartAlarmSystem hasmanyfeatures and availableoptionssomeof which
are selected at time of installation. For your reference, the list on page 9 of this manual
shows what features and options have been installed. Consult your installing dealer for
optionsthatmay havebeeninstalled andarenot listed.
YOUR“CODEHOPPING“TRANSMITTERS:
Thetransmitters includedwithyournewremotestart systemusethemost
advancedandsecureform of radio frequency transmissionavailableon
any current automotive remote system. Some of today’s sophisticated
auto thieves use a device known as a code grabber, which will receive
andstorethesignalfromyourkeychain transmitter,andre-transmitata
latertimeto disarmyoursystem.
Your code hopping transmitters will change their signal every time the
buttonispressed, sowhena thiefgrabsthen re-transmitsyoursignal, the
alarmsystemwill not respond.
Ifyourtransmitterbutton is pressed morethanfiftytimes while it isoutof
rangeofthevehicle (children playing withyourkeys),the transmitter will
notoperatewhen you returntothe vehicle, andwillneed to bere-aligned
to the receiver. To do this, simply press the Lock/Unlock button two times within a one
secondtimeperiod.The system willnowrespondto that transmitter eachtimeabutton is
pressed.
NOTE: Your system has the option of using a siren, the vehicle horn, or both for the
soundingdevice. Wherethesirenis referencedbelow,thehornorboth mayinfact
chirp,orbeep.
ARMINGTHESYSTEM-ACTIVE:
1.Turnthe engine off, exitthevehicle, and closealldoors,hood and trunk.
2.Pressand releasetheArmbuttonof yourkeychaintransmitter onetime.
Theparkinglights will flashonce,the siren willchirponce,and thedashmountedLED will
begin to flash slowly confirming the system is armed. If you have the optional door lock/
unlockcircuitinstalled, the doorswilllock.
NOTE: Ifthesiren/hornsounds3 chirps, then youhavelefta door, trunk, or hood lidajar.
Simplyclosetheopened entry point to providefullprotection. Ifthesiren "chirped"
threetimes, sometimeafter arming,theexclusivedelayeddomelightlearncircuithas
beenprogrammed andthe systemdetected aopenentrypointafterthelearneddelay
expired. Again,closingthe hood,trunk,or doorswillcorrect the problemandyou do
notneedtodisarmthe systemtomake thecorrection. If thesiren/horndid notsound
when arming, then the chirps have been turned off and you should refer to the
sectiontitled"ELIMINATINGTHEARM/DISARMCHIRPS"inthismanual.
SILENTARMING -ACTIVE:
1.Turnthe engine off, exitthevehicle, and closealldoors,hood and trunk.
2.PressandholdtheArm button ofyourkeychain transmitter for two seconds.
The parking lights will flash once, and the dash mounted LED will begin to flash slowly
confirmingthesystem is armed.Thesiren willnotchirp.If youhavethe optional doorlock/
unlockcircuitinstalled, the doorswilllock.
NOTE: If the siren/horn sounds 3 chirps, then you have left a door, trunk, or hood lid ajar.
Simplyclosethe opened entry pointtoprovidefull protection. If thesiren"chirped"
threetimes,sometimeafterarming,theexclusivedelayeddomelightlearncircuithas
beenprogrammedandthesystemdetecteda openentrypointafterthelearneddelay
expired. Again,closingthehood,trunk, ordoorswill correcttheproblem andyoudo
notneed todisarmthesystemtomakethe correction. Ifthe siren/horndidnotsound
128-8786
3 of 12
Page3
when arming, then the chirps have been turned off and you should refer to the
sectiontitled"ELIMINATINGTHEARM/DISARMCHIRPS"inthismanual.
ARMINGTHE SYSTEM-PASSIVE (AUTOMATIC)
Ifthepassive arming featurehasbeenselected:
1.Turnthe engine off, exitthevehicle, and closealldoors,hood and trunk.
The dash mounted LED will begin to flash rapidly indicating that the 30 second passive
armingtimer hasbegun.IftheLEDdoesnot beginto flashrapidly,thenyouhavelefta door,
hood,or trunkajar.Closingthisentrypoint willallowthearmingcycle willbegin. If anyentry
pointisopenedduringthe30secondarmingcycle,armingwillbesuspended.Whenallentry
pointsareclosed, the armingcyclewill beginagain.
Atthe endofthe 30seconds,theparkinglights willflashonce, thesiren willchirponce, and
thedash mountedLED willbegintoflashslowlyconfirmingthesystemis armed. Ifthe siren
didnotsoundwhen arming, then the chirps havebeenturnedoff. Refer to the sectionon
"EliminatingtheArm/DisarmChirps"shown laterinthis manual. Passive doorlockingis a
selectablefeature. If youhavethe optionaldoor lock/unlockcircuitinstalled, thedoors may
ormaynot lockpassivelydepending uponthesetup duringinstallation.
PROTECTIONWHILETHESYSTEMISARMED:
Opening any protected entry point, hood, trunk, or doors will cause the alarm to trigger
immediately. The sirenwillsound andthe parkinglightswillflash for30seconds, thenstop
andcontinueto monitor allprotectedentry points. Ifthethiefleft thedooropened, the unit
willsoundforsix30 secondcyclesthen shutdown,isolate thetriggeredzone andcontinue
toprotectall other zones.
Wheneverthesystem is armed, thedashmounted LED willslowlyflash.This serves asa
visualdeterrentto apotentialthief. This LED isavery lowcurrentlight emitting diode,and
willnotcausethe battery to drain evenifleftunattended for long periods oftime.
Whenever the system is triggered, the vehicle's parking lights will flash for the full siren
soundingperiod. Optional -wheneverthesystemis triggered,theinteriorcourtesylight will
flashforthefull siren sounding period.
Wheneverthe systemis armed,the vehiclestarter circuitisdisabled,andthevehiclewillnot
startwith theignitionkey.
Whenever the system is armed, any strong impact to the vehicle will cause the shock
detectorto triggerthealarm. Any lesserimpactwill causethepre-detect stageof theshock
sensor to emit a few short series of warning tones from the siren.
DISARMINGTHESYSTEM
Asyouapproachthevehicle,pressandreleasetheDisarmbuttononthekeychaintransmitter.
Theparkinglightswillflash twotimes,the sirenwillchirp twice,andthedashmounted LED
will turn off.
Ifyouhave the optionaldoorlock/unlock circuit installed,thedoors will unlock.Ifyou have
theoptionalentryilluminationcircuit installed,theinterior lightwillturn onfor30 secondsor
untiltheignition key isswitchedon.
NOTE: Ifthepassivearmingmodewasselectedattimeofinstallation,thedashmountedLED
willstart flashingrapidly indicatingthatthesystemisrearming. Openinganydoorwill
suspendthe automaticarming.
Ifthe parkinglightsflashedthreetimes,andthesirenchirpsfourtimes,thisindicatesthatthe
alarm system was triggered during your absence. Before turning on the ignition key,
examinethedash mounted LED'sflashpattern. Thenumber of flashesidentifiesthetrig-
geredzone. Foradditionalinformation,refertoINTRUSIONWARNINGSIGNALSfoundlater
inthismanual.

128-8786
4 of 12
Page4
If the siren did not sound upon disarm, then the chirps have been turned off. Refer to the
sectiontitledELIMINATINGTHEARM/DISARMCHIRPS.
NOTE: Ifthe optional2stepdoorunlockcircuitisinstalled,whentheunlocktransmitterbutton
is activated, the drivers door only will unlock, pressing the unlock button a second
time will cause all doors to unlock. If your transmitter has a sperate lock unlock
buttons,pressing theunlockbuttonanytimeafterthefirst unlockcommand willcause
allthevehicle doorstounlock.
SILENTDISARMING
1. Asyouapproachthe vehicle, press and holdthedisarmbutton of your key chain
transmitter for two seconds.
Theparking lightswillflashtwice,and thedashmountedLEDwillturnoff confirmingthatthe
systemisdisarmed. Thesirenwill notchirp.If youhavethe optionaldoorlock/unlock circuit
installed,the doorswillunlock. Ifyou havetheoptionalentryillumination circuitinstalled,the
interiorlightwillturn on for 30 secondsoruntilthe ignition key is switchedon.
NOTE: Ifthepassivearmingmodewasselected attimeofinstallation,thedashmountedLED
willstart flashingrapidlyindicatingthatthesystemis rearming. Openingany doorwill
suspendthe automaticarming.
Ifthe parkinglightsflashedthreetimes,andthesirenchirps fourtimes, thisindicates thatthe
alarmsystemhadbeentriggeredinyourabsence.Beforeturningontheignitionkey,examine
thedashmounted LED'sflashpattern. Thenumberof flashesidentifiesthe triggeredzone.
Foradditionalinformation,refertoINTRUSIONWARNINGSIGNALSfoundlaterinthismanual.
NOTE: Ifthe optional2stepdoorunlockcircuitisinstalled,whentheunlocktransmitterbutton
is activated, the drivers door only will unlock, pressing the unlock button a second
time will cause all doors to unlock. If your transmitter has a sperate lock unlock
buttons,pressing theunlockbuttonanytimeafterthefirst unlockcommand willcause
allthevehicle doorstounlock.
WHILETHESYSTEMISSOUNDING
If during a triggered state, you wish to shut off the siren without disarming your security
system,simplypress andreleaseany transmitterbuttonotherthan thedisarmbutton. This
actionwillturnoff the siren yet leavethevehiclefully armed and protected.Thisfeatureis
particularlyusefulif youareaware ofchildrenplaying nearyourvehicle thatmayaccidently
triggeryoursecuritysystem. In this caseyoucancancel the siren sounding.
INTRUSIONWARNINGSIGNAL
This systemwillinform you ifanintrusionattempt hasoccurredwhileyou were awayfrom
thevehicle. Upon disarm,thesiren willchirp 4timesand theparking lightswillflash 3times.
Enterthevehicle and beforeturningon the ignitionswitch,observe the LEDflashpattern.
If the LED flashes one time...pause, one time...pause etc., then an intrusion attempt was
madebyimpact orastrong vibrationthatthe shocksensordetected. Checkthe vehiclefor
possibledamageto theglassor body panels.
IftheLED flashes twotimes...pause,two times...pause etc.,thenan intrusion attemptwas
madetoopen the hood, trunk,orby an accessory triggeringdevice. Checkthe vehicle for
indicationsofforcedentry to these openings.
IftheLEDflashesthree times...pause, three times...pause etc.,thenanintrusionattempt
wasmadetothevehicledoors. Checkall doors for indications of forced entry.
NOTE: TheLEDintrusionwarningindications arestoredin thesystem'smemoryandwill be
erasedwhentheignitionswitch is turned on.
PUSH-BUTTONLEDRECEIVERVALET/OVERRIDE/SAFETYCONTROLSWITCH
The Push-Button LED switch located in the receiver allows you to temporarily bypass all
alarmfunctions,eliminatingtheneedtohandyourtransmittertoparkingattendants orgarage

128-8786
5 of 12
Page5
mechanics.Whenthe system is invaletmode, all alarm functionsarebypassed, however
the remote panic feature and remote door locks will remain operational.To use the valet
mode, the system must first be disarmed either by using your keychain transmitter, or by
activatingyourpersonalized manualoverride code.
1. Enterthevehicle, andturnthe ignitionkeyto theonposition.
2. Pressandhold the Push-Buttonswitchswitch until theLEDturnson solid. The system
willremain inthevalet mode.
3. To return to normal operation, press and release the Push-Button switch any time the
ignitionis on.
NOTE: Alwaysrememberto returnthevehicle to thevaletoff position. Thiswillensure that
thevehicleremainsprotectedat alltimes.
MANUALLYOVERRIDINGYOURSYSTEM:
Using The Receivers Push-Button Override Switch
Your SecuritySystemcan be disarmed withouttheuseof the keychaintransmitter.Thisis
necessary, since youwillneedthe ability tooperateyourvehicle if thetransmitterislost or
its battery fails. If your system has been selected for Valet Switch manual override as
indicatedonthe lastpageofthis manual,tobypass the alarmsystem;
1. Open the vehicledoor. Thealarmwillsound.
2. Turntheignition keytothe onposition.
3. Within 5 seconds, pressand release the push-button overrideswitch.
The alarm system will stop sounding and enter the (bypassed) mode. You can now start
andoperate thevehiclenormally.
Typically thisoverridemode isusedonly if thetransmitterhas becomeinoperative.
Programming Your Custom Override Code:
Unlikeoverrideswitcheseasilyfound,anddefeated,this security system allows the con-
sumer to program a personal override code, offering a higher level of security. To take
advantageof thisoption,programmablefeature# 10must beselectedfortheCustomCode
Option. Consultyourinstallationcenterfor programmingdetails.Thesystem comesfrom the
factorywithapre-programmed override code of 11.To changethisdefaultoverridecode,
dothefollowing:
1. Disarm the system by use of the transmitter, or by use of the emergency override
sequence.Turn theignitionswitch to theonposition.
2. Within10seconds, press andreleasethe Receivers Push-buttonswitch,3 times.
3. Within 10 seconds turn the ignition switch off, on, off, on, off, on.
(Thesirenorhorn will beepandthelights will flash onetime.)
4. Within10seconds,beginto enteryourchosen 10thsdigit bypressingand releasingthe
ReceiversPush-buttonswitch from 1 upto9 times.
5. Within10seconds of the lastentered10thsdigit, turn the ignitionswitchoffthen on.
6. Within10seconds, begintoenter yourchosenunits digit bypressingand releasingthe
ReceiversPush-buttonswitch from 1 upto9 times.
7. Finishbyturning the ignitionswitchtothe off position.
Ifthenew code wasaccepted,the unit willreportback the newlyenteredcode,by flashing
theLED, firstindicatingthe 10thsdigit, pauseandthentheunits digit.Theunitwillreport the
new code three times with a one second pause between each code, then the system will
beginarming.IftheLED flashpatternreports thepreviously storedcode,the newcodewas
notenteredcorrectly. Pleaserepeatsteps1through 7 above consideringthefollowing.
NOTE: Acceptabledigits 10thsor unitsare1through9.Theunitwillnotrecognizea0(Zero),
ornodigit entered inanyplace,units or tenths.

128-8786
6 of 12
Page6
NOTE: If15secondsofinactivityexpire, or if the ignition switch is turnedoffformorethan
5 seconds during any of the above steps, the unit will revert back to the last
successfully stored code.
Custom Code Programming Example:
To Change the code from the factory pre-assigned code of 11 to “52” you would do the
following:
1. Disarm the system by use of the transmitter, or by use of the emergency override
sequence.
2. Turntheignition switchtotheon position.
3. Within10seconds, press andreleasethe Receivers Push-buttonswitch,3 times.
4. Within 10 seconds turn the ignition switch off, on, off, on, off, on.
(Thesirenorhorn will beepandthelights will flash onetime.)
5. Within10seconds, begintopress andreleasethe ReceiversPush-buttonswitch toset
thetenthsdigit. (Asperthe example,pressand release 5timesto setthetenths digitto
5)
6. Within10seconds ofthe lastpressofthepushbutton,turnthe ignitionswitch offthen on.
7. Within10seconds,beginto pressandrelease theReceiversPush-button switchtoset
theunitsdigit.
(Aspertheexample, press andrelease2times to set theunitsdigitto 2).
8. Turntheignition switch totheoff position. Immediatelyobservethe LED flashpattern.
YouwillnotetheLEDflashingfivetimes,pause,andthenflashtwotimes,pause.Thispatternwillbe
repeatedthreetimesindicatingthenewcode(52)hasbeenacceptedandstoredinmemory.
NOTE: If after step 7, the LED flashes a code other than what was just entered, this
indicates that the code has not been changed. You will have to repeat steps 1
through7above being certaintonotethe following:
Acceptabledigits10ths orunitsare1through 9.Theunit willnotrecognize a0(Zero), orno
digitenteredin any place,unitsor tenths.
NOTE: If15secondsofinactivityexpire,oriftheignitionswitchisturnedoffformorethen5seconds
duringanyoftheabovesteps,theunitwillrevertbacktothelastsuccessfullystoredcode.
MANUALLYOVERRIDINGYOURSYSTEM:
USINGTHECUSTOMCODEOVERRIDE
Assumingtheoverride code programmedhasnot been changed,andthe default override
codeof11 is inthesystem's memory.
1) Enterthe vehicle andturnthe ignition switchtothe on position.
NOTE:The sirenwillsound.
2) Within5 seconds, pressandreleasethe Receivers Push-buttonswitch1 time.
3) Within5 seconds, turn the ignitionswitchoffthen on.
4) Within5 seconds, pressandreleasethe Receivers Push-buttonswitch1 time.
5) Turnthe ignition switch off then onandstartthe vehicle.
NOTE: Ifyouhave changed theprogrammedoverridecode then substituteyournewcode
tenths for step 2 above, and units for step 5 above.
ELIMINATINGTHENORMAL ARM/DISARM CHIRPS
Youcanselectivelyeliminatethenormalarm &disarmchirpsbyholdingthetransmitterbutton
slightlylongerwhenarmingor disarming. This will prevent thesirenchirpsforone arm or
disarmcycle. Ifyou find thisinconvenientand wish toeliminatethesechirps permanently,
1.Turntheignitionswitch 'on" then 'off".
2.Within 10seconds ofturningofftheignition,pressandreleasetheReceiversPush-button
switch 3 times.

128-8786
7 of 12
Page7
4.Ifthe chirps were onbeforeyoustarted, the siren willemit2short chirps indicating that
the chirps are now off. If the chirps were off before you started, the siren will emit one
shortchirpindicatingthat the chirps are nowon.
NOTE: If the vehicle battery is disconnected then reconnected, the unit will return to the
defaultsetting ofchirpson. Repeattheaboveprocedureto eliminatethe arm/disarm
chirps.
REMOTEPANICOPERATION
TheLockor Unlockbuttononyourkeychain transmitteralsofunctions asapanic switchfor
useinemergency situations.Touseremote panic,
1. Press and hold the Lock or Unlock button on the keychain transmitter for 3 or more
seconds.The alarmwillimmediatelysound.
2.Tostopthealarm,press andholdthe LockorUnlock buttononthetransmitteragain for3
seconds. Ifthebuttonisnot pressed,thealarm willautomaticallystop after30seconds.
Also if any transmitter button other than the Lock or Unlock button is pressed and
released, the Panic mode will be turned off immediately. The normal function of this
transmitterbuttonwill besuspended duringthePanic soundingperiod.
NOTE: Whilein thePanicmode, pressingand releasingtheLock, orthe Unlockbuttonswill,
if the option is installed, lock and unlock the doors respectively. While in the panic
mode,anytimetheunlockbutton is pressed, the panic featurewillcontinueforthe
allotted 30 seconds, however, the security system will be disarmed allowing the
vehicletostart.
PUSH-BUTTONLEDRECEIVERSAFETYCONTROLSWITCH
The Push-Button LED control switch allows you to temporarily disable the remote starting
function of the system. This recommended whenever the vehicle is being serviced. To place
the system in the service mode:
1)Withthe systemdisarmed/unlocked,and the ignitionswitchoff Press andHoldthe
Push-Button,foundon thewindsheildreceiver,in.
2) Turn the ignition switch on, off, on, off, on, off.
3) The LED begins to flash two short flashes followed by one long flashes and continues
this pattern until returned to normal mode of operation.
This puts the unit into the R/S Override mode indicating that the remote start is in the
service mode and will not start from RF or any other input Posse or otherwise.
To Exit R/S Override Mode
1)Withthe systemdisarmed,Press andHoldthe Push-Button,foundon thewindsheild
receiver,in.
2) Turn the ignition switch on, off, on, off, on, off.
3) The LED turns off indicating that the R/S unit is fully functional one again.
TURBO TIMER MODE
This system provides a means to cool down the vehicles turbo charger, if so equipped, by
allowing the vehicle to continue to run for a prescribed period of time every time the vehicle's
engine is turned off. This feature requires the system to be set up for turbo timer during
installation. Consult with your installation center to be certain this feature was activated and
how long the vehicle will continue to run, 3, 5, or 10 minutes after the ignition switch is turned
off.
To activate the turbo timer:
Anytime the ignition key is in the on position for more than 15 seconds:
1) Place the gear selector in park.
2) Set the parking, (hand), brake.

128-8786
8 of 12
Page8
3) Be certain your foot is off the brake pedal.
4) Press the receiver's program/Push-Button switch 2 times within 5 seconds.
The parking lights will flash two times indicating the mode was successfully entered.
If your parking lights flashed four times, this indicates the turbo mode was on and is now
turned off.
With the turbo timer mode selected on, after you've arrived at your destination, while the
engine is still running, set the parking brake, pause 2 seconds, then turn the ignition switch
to the off position. The engine will continue to run the allotted time according to the selection
during installation.
If you do not want the vehicle to continue to run for one cycle, simply step on the vehicle's
brake, or release the parking brake, or activate the transmitter's start button two times in
succession. Any of these will cause the engine to turn off.
REMOTESTARTINGTHEVEHICLE
TheunitWILL NOT startthevehicleif any oneofthe following conditionsexists:
1.TheVehicleHoodIsOpened.
2.TheGearSelector IsInAnyGear OtherThenPark.
3.The BrakeIsDepressed.
4. The System is in the Remote Start Override mode
WARNING! Be certainthatthevehicle is outdoorsbefore usingthisor any remotevehicle
startingdevice. Arunningengine producesdangerouscarbonmonoxidefumes
whichcanbe harmful orfatalifprolonged exposure occurs. DONOTremote
startthevehicleif it is garaged.
To Remote Start The Vehicle:
Press and release the trunk/key button of your keychain transmitter two times within 2
seconds.Thevehicle willstartandremain runningforthe pre-programmed 5,10,15, or20
minutes. As a visual indication, the parking lights will flash or turn on depending on the
programmingsetupbyyour installationcenter.
When you arrive at your vehicle, disarm the alarm system by pressing and releasing the
Disarmbutton ofyourkeychain transmitter. Enter thevehicleand turnthe ignitionkeyto the
onposition.
Note: This system has the ability to be configured to a single press start if you so desire.
Please check with your installation center if your system was changed from the default safe
start setting of two press start or if you wish to change your configuration.
CAUTION! Do not turn the key to the start position. This will cause the starter motor to
engagewith thealreadyrunning enginewhichcouldresultin damage. Stepon
thebrakepedal todisengagethe remotestartunit.The vehiclewillcontinue to
run but now on it's own power.
NOTE: Theenginewillstoprunning beforetheexpiration ofthe pre-programmedruntimer if
youcompleteanyof the following:
1. Press and release trunk/key button of your keychain transmitter two times within 2
seconds.
2.Depressthe brakepedal.
3.Open thehood.
4.Place thesystemisinRemote StartOverrideMode.
5.Race theengine toabove 4000RPM.
OPERATINGONAUTOMATICSTARTUPTIMERMODE
Thissystem hasthe abilityto automaticallystart thevehicle every2 or4 hoursover a48 hour
period.Thisfeatureis especially usefulincoldclimates where the onlymeanstokeep the
engineandengine fluids warmisto periodicallystarttheengine.

128-8786
9 of 12
Page9
WARNING! Becertainthatthe vehicle isoutdoorsbefore using thisoranyremote vehicle
startingdevice. Arunningengine producesdangerous carbonmonoxidefumes
whichcanbeharmfulor fatal if prolonged exposureoccurs.DONOTremote
startthevehicleif it is garaged.
TOBEGIN THEAUTOMATIC START UPTIMER
1. Turntheignitionkey on thenoff.
2. Within10 seconds,activatetheRFstartcommandtwotimes.(Push thetrunk/key button
ofyourkeychain transmitter4times).
Theparkinglightswillflash andthesiren willchirp4timesindicating thetimedstart modeis
activated.
The vehicle, on a 2 or 4 hour interval basis, will automatically start, run for the pre-pro-
grammedtime(5,10,15 or 20minutes),and then shutoff.This will continuefor48 hours.
NOTE: Theautomaticstartuptimer canalsobe initiatedfromthe keychaintransmitter.
Todothis:
1. Start thevehicleusingthe keychaintransmitterbypressing andreleasingthetrunk/key
button2 times.
2. Shut off the vehicle using the keychain transmitter by pressing and releasing the
trunk/keybutton 2times.
3. Within 10 seconds of step 2, activate the RF start command two times. (Push the
trunk/keybuttonof yourkeychaintransmitter 4 times).
Theparkinglightswillflash andthesiren willchirp4timesindicating thetimedstart modeis
activated.
CANCELINGTHEAUTOMATICSTARTUPTIMER
Tocancelthe automatic startuptimer do oneofthe following:
1.Startthevehiclemanually withtheuseof theignitionkeyand depressthebrakepedal.
2.Remotestartthevehicle usingyourkeychain RFtransmitter.
ADDITIONAL REMOTE FUNCTION (CHANNEL 3)
This system has an additional feature that can be connected to a number of different
optional accessories. Some of the more common uses for this channel are:
Remote Trunk Release
Remote Window Closure
Remote Garage Door Interface
To activate the optional accessory, press and hold the trunk/key button on the keychain
transmitter for four seconds.
NOTE: The feature that has been added to channel 3 will always be activated using the
same transmitter button that remotely starts the vehicle. There is no way to move
the channel 3 function to a different transmitter button.
ADDITIONAL REMOTE FUNCTION (CHANNEL 4)
This system has an additional feature that can be connected to a number of different
optional accessories. Some of the more common uses for this channel are:
Can Be Set Up To Activate Rear Window Defogger During Remote
Start If Vehicle Is So Equipped
Remote Window Closure
Rear Hatch Release
Right Or Left Slider Doors in An Equipped Van
To activate the optional accessory, press the option button on the keychain transmitter.
The optional accessory will immediately engage.
ADDITIONAL REMOTE FUNCTION (CHANNEL 5)
This system has an additional feature that can be connected to a number of different
optional accessories. Some of the more common uses for this channel are:

128-8786
10 of 12
Page10
Remote Trunk Release
Remote Window Closure
Rear Hatch Release
Right Or Left Slider Doors in An Equipped Van
To activate the optional accessory, press the option button on the keychain transmitter.
The optional accessory will immediately engage.
ADDITIONAL REMOTE FUNCTION (CHANNEL 6)
This system has an additional feature that can be connected to a number of different
optional accessories. Some of the more common uses for this channel are:
Rear Hatch Release
Right Or Left Slider Doors in An Equipped Van
Driver Priority Settings In Vehicles So Equipped
To activate the optional accessory, press the option button on the keychain transmitter.
The optional accessory will immediately engage.
ADDITIONAL REMOTE FUNCTION (CHANNEL 7)
This system has an additional feature that can be connected to a number of different
optional accessories. Some of the more common uses for this channel are:
Rear Hatch Release
Right Or Left Slider Doors in An Equipped Van
Driver Priority Settings In Vehicles So Equipped
Second Driver Priority Settings In Vehicles So Equipped
To activate the optional accessory, press the option button on the keychain transmitter.
The optional accessory will immediately engage.
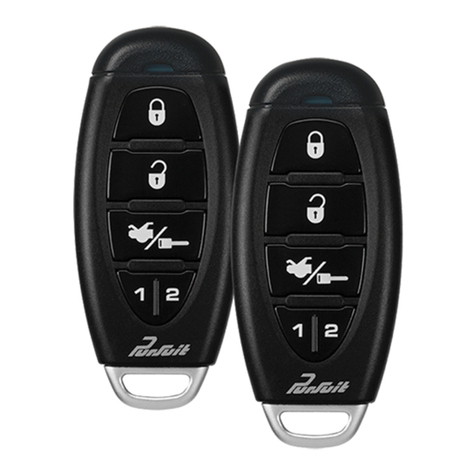
NOTE: If your system utilizes the transmitter shown, the second option button may be
configured to operate additional accessories. Please consult your installing
retailer for more information concerning the options available.
TELEMATICUPGRADE:
This system has the ability to have a telematic upgrade module connected to it.
This is an upgrade that can give you control of certain functions of your vehicle
from a Telephone, or in some cases a computer interface. Please check with
your installation center for most recent Telematic Upgrades. If you had a Telematic
Upgrade installed, the manual supplied with the upgrade unit will provide a op-
erators manual advising of the features of the system and means available to
control these features of your vehicle.
PROGRAMMEDTRANSMITTERNOTIFICATION(PTN)
Every time after Disarm when the ignition key is turned on, the unit's LED will
report the number of transmitters programmed into the system. This safety
feature will alert you if an unauthorized transmitter has been programmed into
your vehicle's security system without your knowledge. Typical from the factory,
there will be a 2 flash, pause, repeated 3 times indicating that two transmitters
are programmed into the system. If you note additional flashes, there may
heve been an additional transmitter added without your knowledge or authori-
zation. If you notice a change in the transmitter LED report pattern, you can
correct this by looking up how to erase and reprogram your transmitters found
in the transmitter programming guide. This reprogram operation will erase all
unauthorized or unwanted transmitters.

128-8786
11 of 12
Page11

128-8786
12 of 12
Page12
ALARMDASH LED INDICATORS
RAPIDFLASHING = PASSIVEARMING
SLOWFLASHING = ARMED
OFF = DISARMED
ONSOLID = VALETMODE
3 FLASH... PAUSE = INTRUSIONZONE3
2 FLASH...PAUSE = INTRUSIONZONE2
1 FLASH...PAUSE = INTRUSIONZONE1
ALARMSIREN CHIRPINDICATION
1CHIRP* = ARM
2CHIRPS* = DISARMED
3CHIRPS = ARMINGWITHENTRY POINTOPENED
4CHIRPS = DISARMAFTERINTRUSION
5CONTINUOUS = TRIGGERED/PANIC
ALARMPARKING LAMPINDICATIONS
1FLASH = ARM
2FLASH = DISARM
3FLASH = DISARMAFTERINTRUSION
CONTINUOUSFLASH = TRIGGERED/PANIC
REMOTESTARTSIREN INDICATIONS
1LONG/1SHORT = RF STARTCOMMAND ISSUED
(IFSELECTEDON)
REMOTESTART PARKING LAMPINDICATIONS
1FLASH = RFSTARTCOMMANDISSUED
ON = RUNNINGUNDERREMOTESTART
CONTROL(IFSELECTED)
CONTINUOUSFLASH = RUNNINGUNDERREMOTESTART
CONTROL(IFSELECTED)
© 2010 Audiovox Electronics Corporation, Hauppauge, NY 11788 128-8786
PRO-9776C
SYSTEM FUNCTIONS AT A GLANCE
Table of contents
Other PURSUIT Car Alarm manuals

PURSUIT
PURSUIT PRO-94FR User manual

PURSUIT
PURSUIT PRO 9244 User manual

PURSUIT
PURSUIT PR1BTWZ User manual

PURSUIT
PURSUIT PRO9776E Manual

PURSUIT
PURSUIT PRO-9642 User manual

PURSUIT
PURSUIT PR1BZLR User manual

PURSUIT
PURSUIT PRO-9800 User manual

PURSUIT
PURSUIT PRO-9649b User manual

PURSUIT
PURSUIT PRO-9344FT User manual

PURSUIT
PURSUIT PRO 9644N User manual