Pyroistech MUSTANG User manual

www.pyroistech.com
info@pyroistech.com 2
All rights reserved. No part of this publication may be reproduced, stored in a retrieval
system, or transmitted, by any means, electronic, mechanical, photocopying, recording, or
otherwise, without written permission from Pyroistech S.L.
This manual accompanies a product order and is subjected to the condition that it shall
not, by way of trade or otherwise, be lent, re-sold, hired out or otherwise circulated
without the prior consent of Pyroistech S.L. in any form of binding or cover other than
that in which it is published.
The specifications indicated in this manual are subject to change without prior notice.
Disclaimer
Every effort has been made to make this manual as complete and as accurate as possible,
but no warranty is implied on it. The information provided is on an “as is” basis. Pyroistech
S.L. shall have neither liability nor responsibility to any person or entity with respect to any
loss or damages arising from the information contained in this manual.

www.pyroistech.com
info@pyroistech.com 3
Índice
0. Introduction...…………………………...…………………...
1. Package content…...…..……………………………...…….
2. Operation..……………………………………...……………..
2.1 Blocks diagram………..…………………………………………………….
2.2 Instructions for use…..……………………………………………………
2.3 Maintenance….………………………………………………………………
2.4 Device parts…………….…………………………………………………….
2.5 Pyrometer Spectroscopy Software…………………………………
2.5.1 Screen description…………………………………………………………..
2.5.2 Spectra acquisition…………...………………..........……………………..
2.5.3 Other aspects about the software..…………………….................
3. Important Notes……………………………..……............
4. Warrant...……………………………………………………..
5. Compliance………………...………………………………...
5
5
6
6
6
6
7
8
8
10
12
13
14
14

www.pyroistech.com
info@pyroistech.com
0. Introduction
Thank you for purchasing the MUSTANG optical interrogator developed by
Pyroistech S.L. This document describes the equipment and provides you with instructions
questions or concerns about this manual.
The equipment integrates an SLD light source, an optical circulator and a
spectrometer to measure the power reflected by the sensor connected to the output of
the device. The equipment also has a processor in charge of managing both the light
source and the spectrometer as well as the graphical interface. The end user can connect
a screen, a keyboard, a mouse and a USB memory to the equipment, as well as the
desired sensor to the FC / APC output of the device and have the values measured by the
spectrometer through the software.
1. Package content
The shipment contains the following items:
•MUSTANG Optical interrogator
•Power source
•Power cord
•Keyboard and mouse
•User manual
Carefully inspect the device and other items in the shipment and make sure there is
no damage. Otherwise, do not use the equipment and contact us through
5

www.pyroistech.com
info@pyroistech.com 6
2. Operation
2.1 Blocks diagram
2.2 Instructions for use
Insert the power cord plug into the power source and connect the power cord to the
outlet. Then insert the plug of the power source into the device's power connector
(female type DC connector).
Insert the screen's HDMI connector into the device's HDMI input, as well as the
provided keyboard and mouse into a USB connection.
Unscrew the protective cap from the FC/APC connector on the front face of the
device and connect the fiber. Then press the button on the front of the device and wait
afew seconds for the button indicator light to come on. The Pyrometer Spectroscopy
Software program will launch on the screen. If you want to save files, connect a USB
memory to the device.
IMPORTANT: To turn off the device, click on the off button on the screen, wait at
least 10 seconds, and then press the same button used to turn on the device. Wait at
least another 10 seconds before unplugging the power cord or turning the device on
again.
If the device hangs, it is recommended to try turning the device off and on.If the
blockage persists, repeat the same steps but also disconnecting the power.
2.3 Maintenance
The output connector of the device should be periodically cleaned using
compressed air to remove dust. It is recommended to have the output connector with
the dust cap on whenever the device is not in use. The fiber connector that connects to
the output of the device must also be clean to ensure the best possible performance of
the equipment.
Output
(FC/APC)
SLD
Source
Spectrometer
USB
Connection
ON/OFF
button
HDMI
Connection
Power Processor
2x
Optical
Circulator

www.pyroistech.com
info@pyroistech.com
2.4 Device parts
7
4. HDMI female connector: connector for connection with the screen.
5. Female DC power connector
6. RJ45 female connector: connector for ethernet communication with
the device, it is currently disabled.
21 3
5
4
6
1. ON/OFF button: pressing the button turns the device on and starts
the program. Similarly, it can be pressed again in order to turn off
the device, having to wait 10 seconds before disconnecting the
power or turning it on again.
2. FC/APC output connector: device optical fiber output
3. USB connectors: connectors for USB communication with the
device, where the screen and the mouse are connected.
Front face
Rear face

www.pyroistech.com
info@pyroistech.com
5
2.5 Pyrometer Spectroscopy Software
8
1. Spectrometer control area
2. SLD control area
2.5.1 Screen description
1. Spectrometer control area
To modify the value of the parameters, the arrows can be used and the change
will be made automatically, or a value can be entered with the keyboard. In the
latter case, it is necessary to press enter for the change to be effective.
a) Temperature: spectrometer temperature in degrees Celsius (ºC).
b) Integration Time (ms): integration time of the spectrometer in ms.It can take
a value between 1 and 65.536 ms.
c) Scans to average: number of spectra that are averaged.
d) Boxcar width: filter parameter. It can take odd values between 1 and 15.If an
even value is entered, the program will replace it with the odd number
immediately above it.If a value greater than 15 is entered, the value sent to
the spectrometer will be 15.
3. Chart control area
4. Chart
5. Off button: closes the application. Once closed, the device must be
switched off with the button located on the front face.
Areas 1-3 are described in detail below
1
24
3
5
d
ab
c

www.pyroistech.com
info@pyroistech.com 9
a) Slider: control of the power of the SLD by means of a slider that allows
selecting between 13 fixed positions, where the first corresponds to the
SLD in off state and the last to the SLD in on state at 100%.
Note: The SLD is in ACC mode (Automatic Current Control).
a) Full screen: resets the y-axis between 0 and 65.536.To zoom, place the
cursor on the graph and draw a rectangle over the area to be enlarged.
b) Black spectrum: enables/disables the black spectrum subtraction. When
activated, the current spectrum is saved as the black spectrum and the
button is highlighted in blue. Once the black spectrum is acquired, the
spectrum displayed on the screen corresponds to the difference between
the measured spectrum and the black spectrum.
c) Capture spectrum: freezes the current spectrum on the graph in blue.
d) Remove capture: removes the spectrum frozen with 'Capture spectrum’.
e) Configure data acquisition: opens the menu in which you configure the
directory in which the spectra data are saved, the name of the files
generated, as well as the frequency with which they are saved. For more
details, see section 2.5.2 Spectra acquisition.
f) Start/End data acquisition: starts/ends the process of saving the data.
When data acquisition is activated, the button will remain blue.
2. SLD control area
3. Chart control area
ab c d e f g
a
Freezes the current spectrum on the graph in blue.

www.pyroistech.com
info@pyroistech.com 10
2.5.2 Spectra acquisition
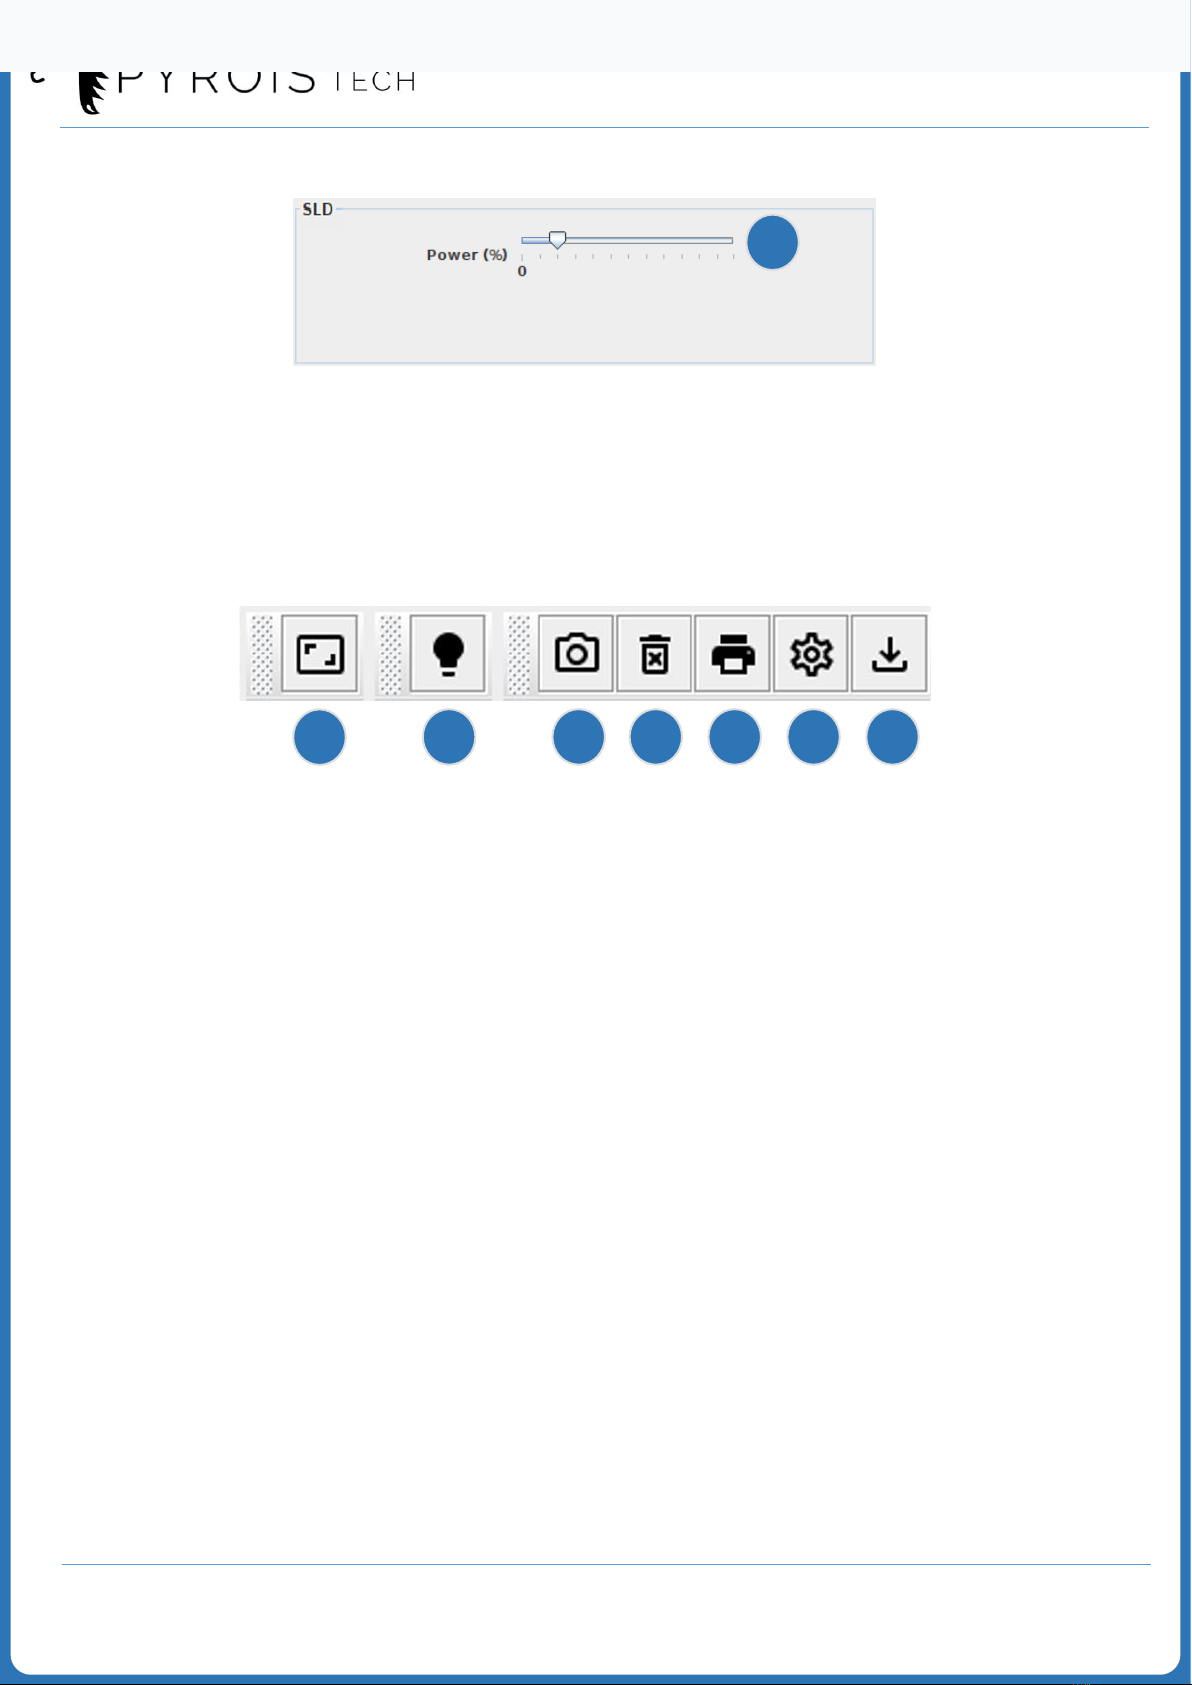
To configure the spectra acquisition, press the button
The following menu will open:
a
b
c
d
a) File format: ASCII without header ('ASCII (plain)') or ASCII with header ('ASCII
(with header data)'). Each spectrum is saved in a .txt file. The header includes
the date and time, user, device identity, spectrometer settings, graph units, start
and end wavelengths (see example on next page).
b) Output Directory: enables to select the directory in which the spectra are
saved. By default, when you click on , the /home/pi directory will open,
from where you can access the desktop (‘Desktop’ folder) or the ‘USBs’ folder. In
the ‘USBs’ folder, folders will appear with the names of the USBs that are
connected to the device (see example on the next page). The selected directory
must be /home/pi, the desktop or the inserted USB.
c) Filename: enter the name you want for the files in which the spectra are saved,
and press enter. The name entered must appear in 'Preview Output'. The full
name with which each of the spectra is saved will be this name plus the
timestamp (date plus time including min, s and ms).
d) Save Options: There is the option of saving each one of the spectra ('Save
every scan') or saving one every certain number of spectra ('Save after every:'). If
the latter option is selected, enter the desired number and press enter.
Once all the menu options have been configured, click on 'Apply' and then on
'Exit' or on the cross in the upper right corner to close the menu.
To start the spectra acquisition, press the button

www.pyroistech.com
info@pyroistech.com 12
2.5.3 Other aspects about the software
File
manager App
Directory
/home/pi
Spectra saved
in .txt
Safe removal
of USB
In the upper bar you can find the tabs of all the windows that are currently open,
which is useful if any of them have been minimized. In the upper left corner is
located the file manager icon, which allows access to the /home/pi directory
On the desktop you will find the application icon, the connected USBs and the bin.
If you want to open the application, double click on the icon and click on 'Run' in the
menu that opens. Do not open the application if it is already open because an error will
occur.
Regularly empty the recycle bin to prevent deleted files from saturating the processor
memory.
App icon
USB
Recycle Bin

www.pyroistech.com
info@pyroistech.com 13
3. Important Notes
Before operation
•Please read carefully all the manual if you are using the equipment for the first time.
•Do not remove or alter any installed safety device on this equipment. Doing so will
cancel your warranty and create an unsafe operating environment.
•There are NO user serviceable parts inside. Dangerous currents are present in this
device. Only allow qualified personnel to service this unit.
•Inspect this unit and its power supply before using it for the first time. Do not use the
unit if it is damaged in any way. Contact us for repair or replacement information.
During operation
•Do not cover the equipment. Avoid exposure to direct sun light. A rise in the light
source’s temperature could affect its operation or even damage its components.
•The equipment should not be used adjacent to or stacked with other equipment. If
adjacent or stacked use is necessary, the equipment should be observed to verify
normal operation in the configuration in which it will be used.
Eye safety
•Optical radiation can damage your eyes. Do NOT stare directly at the light beam.
•The equipment emits infrared light, not visible to the human eye, which can be
dangerous depending on the mounting configuration (including, but not limited to,
optics, current, and temperature). Follow the safety recommendations given in IEC 62471
when working with these light sources.
Electromagnetic Compatibility
•Portable RF communications equipment (including peripherals such as antenna cables
and external antennas) should be used no closer than 30 cm (12 inches) to any part of
this equipment. Otherwise, degradation of the performance of this equipment could
result.
•The use of cables, power supplies, transformers and accessories other than those
specified by Pyroistech S.L., in addition to not being covered by the warranty, may lead
to increased emissions and/or decreased electromagnetic compatibility.
CAUTION !
Do NOT stare directly
at the light beam

www.pyroistech.com
info@pyroistech.com 14
4. Warranty
Pyroistech’s general warranty for a product has a 1-year duration.
This warranty includes repairs and replacement of damaged parts due to a malfunction
of the source, as long as said malfunction can be attributed to errors made in the
manufacture of it by Pyroistech SL, not to a punctual misuse of the source or to a
continued incorrect employment of it by the user, whether conscious or unconscious,
due to not having followed the operation recommendations indicated by Pyroistech SL
There is the possibility of extending this guarantee. For more information, contact
Pyroistech S.L
5. Compliance
This device complies the following standards:
EMC 2014/30/EU
RoHS-compliant
Federal
Communications
Commision
Contact Pyroistech S.L. if you
require more information about
the electromagnetic compatibility
of the product.
If you consider that the product has reached the end of its
useful life and you want to dispose of it, you can contact
Pyroistech S.L. so that it is in charge of its management.
WEEE
Compliance
Table of contents
Popular Laboratory Equipment manuals by other brands

Hameg
Hameg HM 8122 user manual

Drucker Diagnostics
Drucker Diagnostics Horizon 6 FA Service manual

IKA
IKA RO 5 operating instructions

Metrohm
Metrohm 863 manual

Linkam Scientific Instruments
Linkam Scientific Instruments FDCS196 user guide

Velp Scientifica
Velp Scientifica MST DIGITAL F203A0450 instruction manual