3
4
5
6
Using the Battery Pack
Using the Headlight
Using the Power Supply
Cleaning and Care
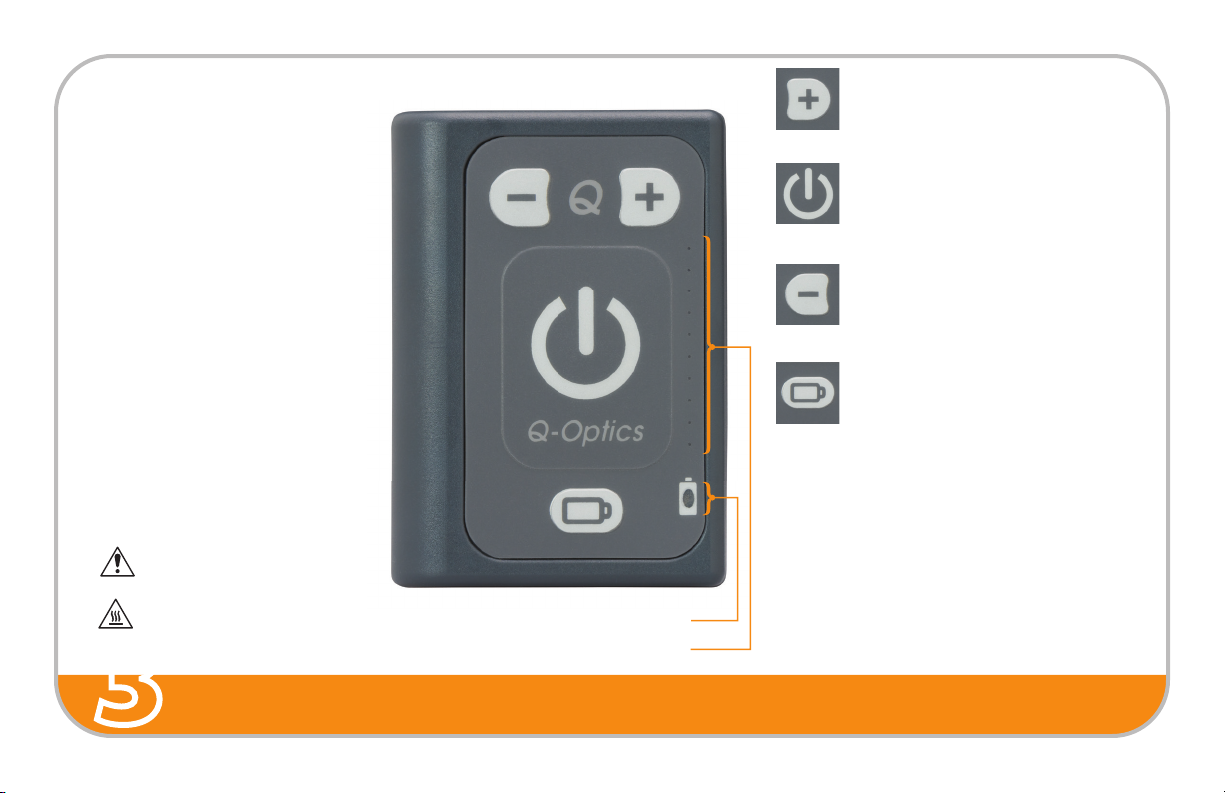
Battery Pack Operation
Operating the system is simple and
intuitive by way of visual indication, which
occur upon pressing a control button.
Pressing the increase/decrease intensity
buttons will be accompanied by a visual
LED display of the current light level
(1-10).
Suggestions
Longer battery life – Decrease intensity to
increase battery life.
Anti-curing – Use included anti-curing
filter or decrease intensity to prevent fast
curing of composite material.
Increase intensity button:
10 positions, LED display indicates current
light level. Will also turn on headlight if it is
currently off *.
On/Off button:
Turns the headlight on and indicates
current light level using LED display, or
turns the headlight off *.
Decrease intensity button:
10 positions, LED display indicates current
light level. Will also turn on headlight if it is
currently off *.
Battery Status button:
LED display indicates current battery level.
Battery LED indicates battery status.
GREEN - Battery can run headlight.
RED - Battery needs charging - headlight
may not turn on.
Battery LED
LED display
1
Become familiar with the safety symbols presented in this
section. These symbols will alert you to safety hazards
and conditions that may result in personal injury, death, or
property and equipment damage.
WARNING: Failure to observe this warning may
result in personal injury, death, or equipment
damage.
WARNING: Risk of electrical shock. Failure to
observe this warning may result in personal
injury, death, or equipment damage.
WARNING: Disconnect equipment from line
voltage. Failure to observe this warning may
result in personal injury, death, or equipment
damage.
WARNING: Risk of explosion or fire. Fire, open
flames, and smoking prohibited.
WARNING: Wear protective clothing, safety
goggles, and approved respiratory protection.
Failure to observe may result in serious injury.
WARNING: Hot! Risk of burns. Wear
heat-protective clothing, safety goggles with side
shields and/or heat-protective gloves depending
on the symbol shown.
WARNING: System or material pressurized.
Relieve pressure. Failure to observe this
warning may result in serious injury or death.
1. Safety Symbols
RED
RED
Green
Voltage {V}
Charge Current
Current {A}
Charge
termination
Current
80-95%
Fast charge
Indication:
Final charge
Charge voltage
Charging Diagram
Charge completed
GREENREDRED
100% Capacity
Warnings
• Do not disassemble battery pack
• Do not dispose of battery pack in fire
• Do not heat battery pack above 60oCelsius (140oFahrenheit)
Warning
• Headlight heats up during use
Touch with Caution
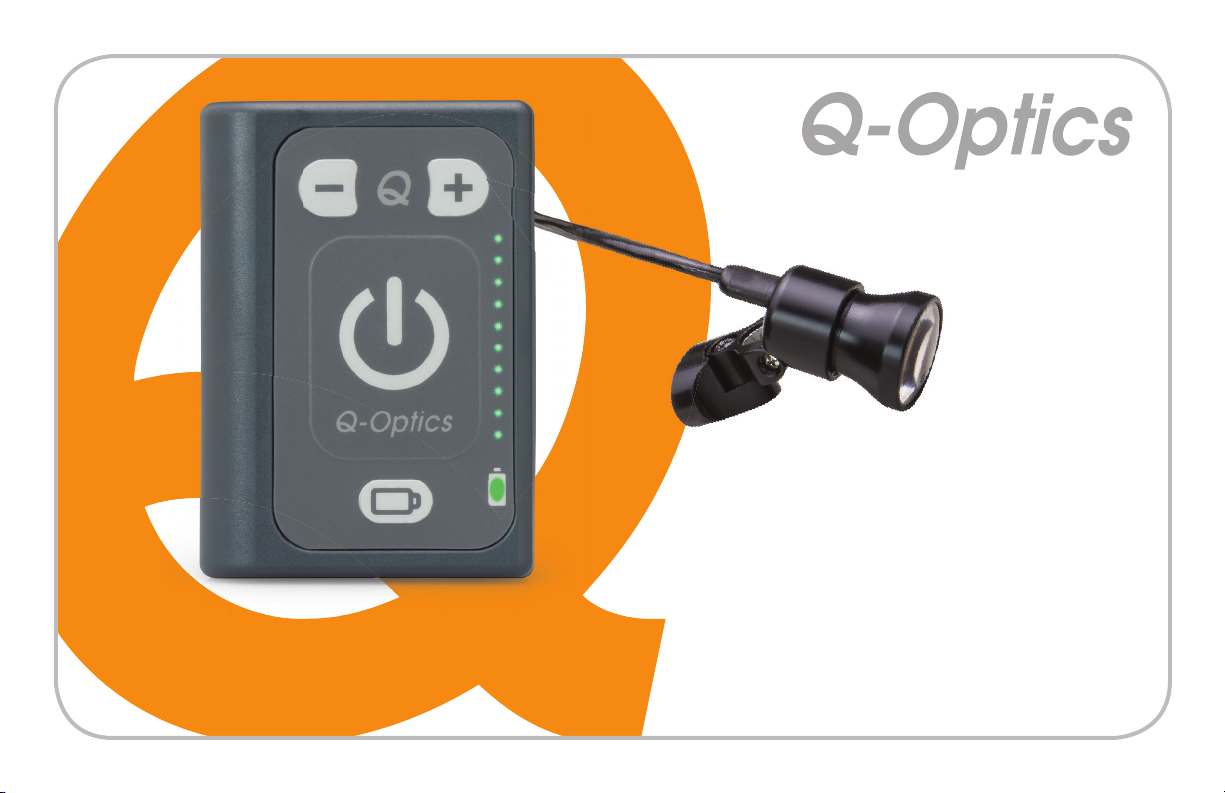
Headlight
The Q-Optics Radiant™Light System Headlight
mounts easily via the “Quick Connect Mount”
enabling use with the Q-Optics Headband, most
brands custom TTL style loupes, most brands flip
style loupes, eyeglasses, and safety glasses.
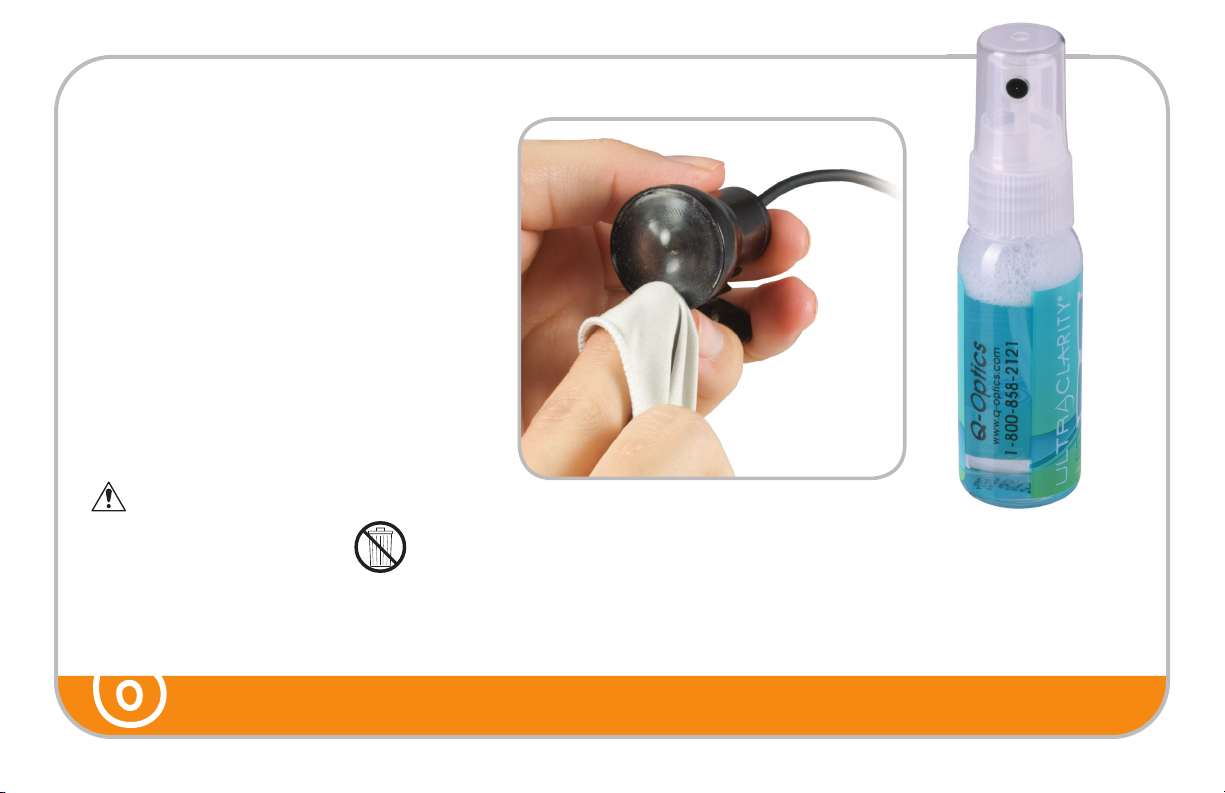
Cleaning and Care
The Q-Optics Radiant™headlight is a fine optical
instrument and should be handled with care.
1. Do not submerge headlight into water or any type of
sterilization fluid. The headlight is not water proof.
2. Basic cleaning may be done with a clean dry
micro fiber cloth or the lens can be sprayed lightly
with Q-Optics Optical Lens Cleaner. Use a light
pressured circular motion to clean or dry the
headlight lens.
3. It is OK to disinfect headlight using alcohol, Lysol®
spray, Cavi-Wipes or other surface disinfectant.
4. Do not use solvents or cleaning solutions other than
those listed above on the headlight or battery pack.
Disposal Instructions
1. Do not throw headlight, battery pack or charger in the trash.
2. Contact your local authorities for disposal or return to Q-Optics for free disposal.
Attach mounting clip (if necessary) using
instructions included with clip. Headbands and
some loupes come with clip already mounted.
Remove name plate (if necessary) by pressing
upward from the bottom and off to reveal the
mounting screws as shown above.
Mounting clip styles will vary.
Power supply styles and indicator
light position will vary.
Attach the headlight by sliding the quick
disconnect onto the mounting screws as shown.
Install spiral wrap using instructions included
with clips. For headbands use the clips on
the side of the band. Attach the headlight
cable to the side clips.
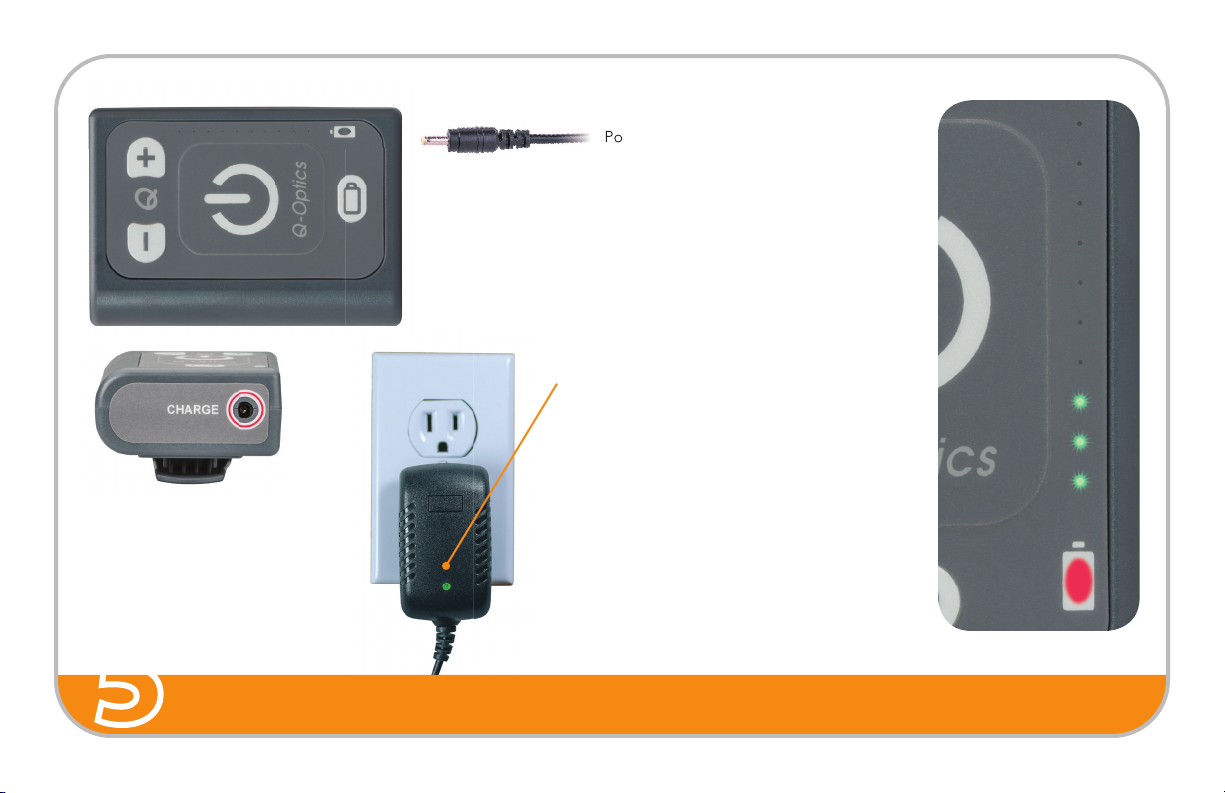
1. Plug power supply into bottom
of the battery pack.
2. Plug power supply into
electrical outlet.
3. Battery LED will be RED to
indicate battery is charging. LED
display will pulse to indicate
current level of battery. When
Battery LED is no longer RED
battery is fully charged.
GREEN Light –
Indicates power supply is on.
Does NOT indicate charge status.
Install anti-curing filter using the steps below.
Connect headlight cable to battery
pack and enjoy your Q-Optics
Radiant™Light System.
1. Align filter with front
of headlight as shown.
Attach shirt clip to headlight cable. Connect
clip to the desired position on your clothing
to keep cable out of your work area.
Snap clip onto
headlight cable
Do not spray cleaning or disinfecting solutions into open
electrical areas on the battery pack. Damage may occur.
1
Become familiar with the safety symbols presented in this
section. These symbols will alert you to safety hazards
and conditions that may result in personal injury, death, or
property and equipment damage.
WARNING: Failure to observe this warning may
result in personal injury, death, or equipment
damage.
WARNING: Risk of electrical shock. Failure to
observe this warning may result in personal
injury, death, or equipment damage.
WARNING: Disconnect equipment from line
voltage. Failure to observe this warning may
result in personal injury, death, or equipment
damage.
WARNING: Risk of explosion or fire. Fire, open
flames, and smoking prohibited.
WARNING: Wear protective clothing, safety
goggles, and approved respiratory protection.
Failure to observe may result in serious injury.
WARNING: Hot! Risk of burns. Wear
heat-protective clothing, safety goggles with side
shields and/or heat-protective gloves depending
on the symbol shown.
WARNING: System or material pressurized.
Relieve pressure. Failure to observe this
warning may result in serious injury or death.
1. Safety Symbols
RED
RED
Green
Voltage {V}
Charge Current
Current {A}
Charge
termination
Current
80-95%
Fast charge
Indication:
Final charge
Charge voltage
Charging Diagram
Charge completed
GREENREDRED
100% Capacity
Using the Power Supply MODEL# FY0503000
READ THESE INSTRUCTIONS BEFORE USING POWER SUPPLY
Power Supply
Q-Optics • 1419 Godwin Ln • Duncanville, TX 75116 USA
Install spiral wrap using instructions included
Low Battery Warning:
If the headlight is on it will toggle from bright to
dim for about 1 second four or five times to indicate
a critical battery, charge battery. The Battery LED
will flash red every four seconds to indicate a critical
battery, charge battery.
* Headlight will only turn on if fully plugged in.
Install anti-curing filter using the steps below.
1. Align filter with front
2. Snap filter
onto front of
headlight.