manuals.online logo
Brands
  1. Home
  2. •
  3. Brands
  4. •
  5. Quantum
  6. •
  7. Server
  8. •
  9. Quantum Scalar i6000 User manual

Quantum Scalar i6000 User manual

QUANTUM SCALAR I6000 & SAFENET KEYSECURE QUICK START GUIDE 4
Quantum Scalar i6000 & SafeNet KeySecure Quick Start
Guide
SafeNet’s KeySecure k460 servers work with Quantum’s Scalar i6000 appliance server to create a KMIP-
compliant encryption system. The Key Management Interoperability Protocol (KMIP®) is a specification
developed by OASIS®. Its function is to standardize communication between enterprise key management
systems and encryption systems.
Details about the Quantum Scalar i6000/SafeNet k460 KMIP-compliant implementation include:
•A minimum of two SafeNet KeySecure servers are required for failover purposes. A total of 10 SafeNet
encryption servers are allowed, for increased failover capability.
•Data encryption keys are generated one at a time, as needed, upon request.
This document summarizes the information available in the quick start and user guides that accompany
your Quantum Scalar i6000 library and SafeNet KeySecure appliances and provides step-by-step
instruction for configuring the devices for combined use. For detailed information about each individual
product, such as feature configuration instructions and hardware specifics, consult the following
documents:
•Scalar i6000 User’s Guide
•Scalar i6000 User’s Guide Addendum
•KeySecure v6.0.0 Installation Guide
•KeySecure v6.0.0 User Guide
Step 1: Install and Configure the SafeNet KeySecure
You will need the following equipment for each KeySecure:
•Null modem cable.
•Ethernet cable.
•KeySecure power cable.
•Console terminal or PC.
•Phillips Screwdriver.
•SafeNet Pin Entry Device (PED).
•9-pin Micro-D data cable (included with the PED).
•3 SafeNet iKeys. Apply the labels so that there is one blue, one red, and one black iKey.
QUANTUM SCALAR I6000 & SAFENET KEYSECURE QUICK START GUIDE 5
During the initialization process, you must have the following information:
•An IP address for the KeySecure.
•An IP address for the SSKM. This must be on the same subnet as the KeySecure IP.
•The subnet mask for the network.
•The gateway for the network.
•A hostname for the KeySecure.
•A port on the KeySecure on which the web administration occurs. The default port is 9443.
•A port on the KeySecure on which KMIP communication occurs. We recommend port 5696, as this is
the standard created by IANA.
Secure the KeySecure in a standard 19-inch rack that provides sufficient space at the front and rear for
cabling, airflow, and maintenance.
To mount the KeySecure:
1Open the bezel.
2Position the rack mount brackets to align with holes in the rack posts.
3Use a screwdriver to start the screws into the mounting brackets. Do not tighten.
4Properly align the device in the rack.
5Use a screwdriver to tighten the screws. This should securely attach the mounting brackets to the
rack posts.
6Connect the null modem cable to the serial port on the back panel of the KeySecure. Plug the other
end of the null modem cable into the serial port of your console terminal or PC.
7Connect the ethernet cable to the ethernet interface on the back panel of the KeySecure. Plug the
other end of the ethernet cable to your network.
8Connect the 9-pin Micro-D data cable to the PED port on the back of the KeySecure. Plug the other
end of the data cable to the top of the PED.
9Connect the power cable from the power supply on the back panel of the KeySecure to an AC
power source. Unscrew the front plate to access the front panel components. Press the power switch
on the front panel. Reattach the front plate. The initial boot sequence and internal configuration can
take several minutes.
10 While the KeySecure performs the initial boot sequence, start a terminal emulation session using an
application such as HyperTerminal or Minicom. Use the following port settings:
-VT100/ANSI
-19200 bps
-8 data bits
-No parity
QUANTUM SCALAR I6000 & SAFENET KEYSECURE QUICK START GUIDE 6
-1 stop bit
-Hardware flow control
11 The initialization process begins after you power up the KeySecure.
System starting up...
Release 6.0.0
Are you ready to begin setup? (y/halt): y
Enter yto continue or halt to abort the process. Entering halt shuts down the machine.
12 Create the admin account. You use this account to log in to the Management Console and the CLI.
You can modify this account and create additional users later.
For further administrative access to this device you will
need an administrative account. An account called 'admin' will
be created and will be the primary administrative account.
Please enter a password for the admin account:
Please enter password again:
User 'admin' has been created.
Enter and confirm the password. The system creates the user if the password entries are successful.
WARNING: Remember the admin password. An administrator password can only be reset by another
administrator with the appropriate access privileges. This is a fundamental security precaution. If all
administrator passwords are lost, you cannot re-configure the KeySecure. All keys and configuration
data will be unrecoverable and you must return the device to have the software reinstalled.
13 Set the system time zone, date, and time.
Please select your time zone:
1: Samoa Time Zone
2: Hawaii Time Zone
...
Enter time zone [5]:
Enter the local date (MM/DD/YYYY) [03/02/2011]:
Enter the local time (HH:MM:SS) [15:40:23]:
The time and date have now been set.
You can view the full list of time zones on the console. The script displays default values for the time
zone, date, and time in brackets. You can accept those defaults by pressing Enter, or you can enter
specific values.
14 Set the network addresses for the KeySecure.
To support network based configuration, a single IP address
is needed to bind to. Once an IP address is provided all further
configuration can be done remotely using SSH or using the Web
administration site.
Note that this will configure Ethernet #1 on your device.
Please enter the following information:
QUANTUM SCALAR I6000 & SAFENET KEYSECURE QUICK START GUIDE 7
IP address:
Subnet mask [255.255.255.0]:
Default gateway [10.20.30.1]:
Hostname:
You have entered the following configuration:
IP address: 192.168.15.25
Subnet mask: 255.255.255.0
Default gateway: 192.168.15.1
Hostname: box1.company.com
Is this correct? (y/n): y
Network settings have been successfully configured.
Enter and confirm the IP address, Subnet mask, Default gateway, and Hostname of your KeySecure.
The script displays default values for the Subnet mask, and Default gateway in brackets. You can
accept those defaults by pressing Enter, or you can enter specific values.
Note: This procedure configures ethernet port 1.
15 Set the port number for the Management Console.
Further administration of this device can be done remotely.
Please enter the port number you wish the Web administration tool
to run from. The default value is recommended.
Enter the port number [9443]:
Enter the port number. The script displays the default port of 9443. You can accept this default by
pressing Enter, or you can enter another value.
16 Initialize the hsm. This requires physical access to the PED and the 3 iKeys.
Do you want to initialize the HSM now? (y/n): y
Luna PED operation required to initialize HSM - use Security Officer (blue)
PED key.
Important! When prompted to insert iKeys, there is a limited time (approx. 3 minutes) in which
to insert the token. After this time period, the operation times out and the HSM initialization must
occur separately from the KeySecure installation.
Note: The instructions below assume that you are using new iKeys. If overwriting or reusing existing
keys, the installation options will differ, slightly, from those listed below.
17 Insert the SO/HSM Admin (blue) iKey into the PED. The PED displays and the corresponding
actions are shown below.
SETTING SO PIN...
Would you like to reuse an existing keyset? (Y/N)
aPress No.
QUANTUM SCALAR I6000 & SAFENET KEYSECURE QUICK START GUIDE 8
SETTING SO PIN...
M value? (1-16)
>01
bPress 1 and press Enter.
SETTING SO PIN...
N value? (M-16)
>01
cPress 1 and press Enter.
SETTING SO PIN...
Insert a SO / HSM Admin PED Key. Press ENTER.
dInsert the SO/HSM Admin (blue) iKey and press Enter.
SETTING SO PIN...
Enter new PED PIN:
eEnter a PIN value.
SETTING SO PIN...
Confirm new PED PIN:
fConfirm the same PIN value.
SETTING SO PIN...
Are you duplicating this keyset? (Y/N)
gPress No.
The KeySecure CLI displays the following message:
Luna PED operation required to login as HSM Administrator - use Security
Officer (blue) PED key.
The PED displays the following text:
SO LOGIN
Insert a SO / HSM Admin PED Key. Press ENTER.
hKeep the blue iKey inserted in the PED and press Enter.
SO LOGIN
Enter PED PIN:
iEnter the PIN for the SO/HSM Admin (blue) iKey and press Enter.
The KeySecure CLI displays the following message:
Luna PED operation required to generate cloning domain - use Domain (red)
key.
QUANTUM SCALAR I6000 & SAFENET KEYSECURE QUICK START GUIDE 9
The PED displays the following text:
SETTING DOMAIN...
Would you like to reuse an existing keyset? (Y/N)
jPress No.
SETTING DOMAIN...
M value? (1-16)
>00
kPress 1 and press Enter.
SETTING DOMAIN...
N value? (M-16)
>01
lPress 1 and press Enter.
SETTING DOMAIN...
Insert a DOMAIN PED Key. Press ENTER.
mInsert the Domain (red) iKey and press Enter.
SETTING DOMAIN...
Enter new PED PIN:
nEnter a PIN value.
SETTING DOMAIN...
Confirm new PED PIN:
oConfirm the same PIN value.
SETTING DOMAIN...
Are you duplicating this keyset? (Y/N)
pPress No.
The KeySecure CLI displays the following message:
Luna PED operation required to create a partition - use User or
Partition Owner (black) PED key.
The PED displays the following text:
SETTING USER PIN...
Would you like to reuse an existing keyset? (Y/N)
qPress No.
SETTING USER PIN...
M value? (1-16)
>00
QUANTUM SCALAR I6000 & SAFENET KEYSECURE QUICK START GUIDE 10
rPress 1 and press Enter.
SETTING USER PIN...
N value? (M-16)...
>00
sPress 1 and press Enter.
SETTING USER PIN...
Insert a USER / Partition Owner PED Key. Press ENTER.
tInsert the User/Partition (black) iKey and press Enter.
SETTING USER PIN...
Enter new PED PIN:
uEnter a PIN value.
SETTING USER PIN...
Confirm new PED PIN:
vConfirm the same PIN value.
SETTING USER PIN...
Are you duplicating this keyset? (Y/N)
wPress No.
USER LOGIN...
Insert a USER / Partition Owner PED Key. Press ENTER.
xKeep the User/Partition (black) iKey inserted in the PED and press Enter.
USER LOGIN...
Enter PED PIN:
yEnter the PIN for the User/Partition (black) iKey and press Enter.
The KeySecure CLI displays the following message:
Luna PED operation required to generate cloning domain on the
partition - use Domain (red) PED key.
The PED displays the following text:
SETTING DOMAIN...
Would you like to reuse an existing keyset? (Y/N)
zPress Yes. You will reuse the Domain (red) iKey you created above.
READING DOMAIN...
Insert a Domain PED Key. Press ENTER.
QUANTUM SCALAR I6000 & SAFENET KEYSECURE QUICK START GUIDE 11
aa Insert the Domain (red) iKey and press Enter.
READING DOMAIN...
Enter PED PIN:
ab Enter the PIN for the Domain (red) iKey and press Enter.
READING DOMAIN...
Are you duplicating this keyset? (Y/N)
ac Press No
LOGIN SECRET VALUE...
MxCT-c7F9-HHX5-YtH3
Please write it down. Press Enter.
ad Write down the password displayed on the PED.
The KeySecure CLI displays the following message:
Do you want to set the HSM password now? (y/n): y
The KeySecure CLI displays the following message:
Luna PED operation required for crypto user login on HSM - use User or
Partition Owner (black) PED key.
The PED displays the following text:
USER LOGIN...
Insert a USER / Partition Owner PED Key. Press ENTER.
ae Insert the User/Partition (black) iKey and press Enter.
USER LOGIN...
Enter PED PIN.
af Enter the PIN for the User/Partition Owner (black) iKey and press Enter.
The KeySecure CLI displays the following message:
Crypto user successful logged into the HSM
18 Configure the SSKM network interface. Alternatively, you can configure the SSKM network interface
later, using the CLI or the management console. For information about configuring the SSKM network
interface after installing the KeySecure, see Chapter 3, “SSKM Interface Configuration”.
Do you want to configure the SSKM Network Interface now (y/n): y
IP Address (in same subnet as IP of physical interface): 192.168.15.125
Netmask: 255.255.255.0
You have entered the following configuration:
IP address: 192.168.15.125
Subnet mask: 255.255.255.0
Is this correct? (y/n): y
Network Templates generated OK
IP address 192.168.15.125 scheduled for assignment to SSKM
QUANTUM SCALAR I6000 & SAFENET KEYSECURE QUICK START GUIDE 12
Warning: If SSKM is not started soon, IP 192.168.15.125 may become stale
SUCCESS: Configured network interface with ip=192.168.15.125,
netmask=255.255.255.0 and interface=eth0
Start SSKM now? (y/n): y
SUCCESS: SSKM Started OK
Note: The SSKM can only be started when the HSM is initialized. If you defer the HSM initialization,
you can configure the SSKM interface, but you must start the SSKM after initializing the HSM. To start
the SSKM use the you cannot start the SSKM, though you can configure it.
At this point, you’ve given the installation program everything it needs.
The KeySecure creates a DSA key, an RSA key, and a Web Admin certificate. These keys are used to
authenticate the KeySecure to users making SSH and Web Admin connections to the KeySecure.
Because the actual key is fairly large, the KeySecure displays the key fingerprint on the console.
Creating certificate for Web administration server...
Creating certificate for signing logs...
Creating SSH host keys...
SSH RSA key fingerprint:
2048 41:63:d3:ca:c9:ea:1f:f7:a1:84:8b:05:b4:a6:3b:64
SSH DSA key fingerprint:
2048 1d:04:d7:02:60:d5:f2:11:30:12:0a:d9:bb:19:c2:fe
Webadmin certificate fingerprint (SHA-256):
1024 ad:8b:9f:79:5f:de:88:a0:89:36:d6:51:cd:0a:7f:ff:
d3:88:cd:7a:4a:f0:95:b8:21:b7:19:21:3c:71:39:c1
Initializing the key store. This could take several minutes.
waiting for the server to shut down.... done
server stopped
Starting services...
The Web-based Management Console will now be available at this URL:
<https://192.168.15.25:9443>
This device has now been configured.
Press Enter to continue.
Tip: To prevent a “man in the middle” attack when connecting to the KeySecure, we recommend that
you write down these fingerprints and compare them with what is presented when you connect to the
KeySecure via SSH or HTTPS.
19 At the end of this configuration process, setup is complete and you can log into the KeySecure via
the Management Console or the CLI.
YourDevice login: admin
Password: ******
YourDevice#
Use your admin username and password to log in to the system.
QUANTUM SCALAR I6000 & SAFENET KEYSECURE QUICK START GUIDE 13
Step 2: Create a Local CA on the KeySecure
Because the KMIP Interface operates over SSL, KMIP server configuration is done in three parts. First,
you must configure a local CA on the KeySecure. Second, you must create a server certificate signed by
that local CA. Third, you must configure the KMIP server settings.
To create a local certificate authority:
1Log in to the Management Console as an administrator with Certificate Authorities access control.
2Navigate to the Create Local Certificate Authority section of the Certificate and CA Configuration page
(Security >> Local CAs).
3Enter the Certificate Authority Name, Common Name, Organization Name, Organizational Unit
Name, Locality Name, State or Province Name, Country Name, Email Address, and Key Size.
Note: To integrate with the Quantum Scalar i6000, the CA’s Key Size must be 2048.
4Select either Self-signed Root CA or Intermediate CA Request as the Certificate Authority Type.
When you create a self-signed root CA, you must also specify a CA Certificate Duration and a
Maximum User Certificate Duration, which become valid once you click Create. Once you create a
self-signed root CA, you must add it to the trusted CA list for it to be recognized by the Key Server.
When you create an intermediate CA request, you must sign it with either an existing intermediate CA
or your organization’s root CA. Certificates signed by the intermediate CA can be verified by that same
intermediate CA, by the root itself, or by any intermediate CAs that link the signing CA with the root.
This enables you to de-centralize certificate signing and verification.
When creating an intermediate CA request, you must also specify a Maximum User Certificate
Duration when installing the certificate response. This duration cannot be longer than the signing CA’s
duration.
5Click Create to create the KeySecure’s local CA.
QUANTUM SCALAR I6000 & SAFENET KEYSECURE QUICK START GUIDE 14
Step 3: Create a Server Certificate on the KeySecure
To create a server certificate, you must create a certificate request and sign it with the local CA:
1Navigate to the Create Certificate Request section of the Certificate and CA Configuration page
(Security >> SSL Certificates).
2Enter the Certificate Name, Common Name, Organization Name, Organizational Unit Name,
Locality Name, State or Province Name, Country Name, Email Address, and Key Size for the
certificate. The KeySecure supports 768-bit, 1024-bit, and 2048-bit key sizes.
3Click Create Certificate Request. The request appears in the list with a status of Request Pending.
4Select the request and click Properties to access the Certificate Request Information section.
QUANTUM SCALAR I6000 & SAFENET KEYSECURE QUICK START GUIDE 15
5Copy the certificate request text. The certificate text looks similar, but not identical, to the following text.
-----BEGIN CERTIFICATE REQUEST-----
MIIBmzCCAQQCAQAwWzEPMA0GA1UEAxMGZmxldGNoMQkwBwYDVQQKEwAxCTAHBgNVBAsTADEJM
AcGA1UEBxMAMQkwBwYDVQQIEwAxCzAJBgNVBAYTAlVTMQ8wDQYJKoZIhvcNAQkBFgAwgZ8wDQ
YJKoZIhvcAYBABTUxxgY0AMIGJAoGBAMUqA1t4m&Nm0sCcUqnt5Yug+qTSbgEFnvnYWUApHKD
lx5keC1lguQDU1ol2Xcc3YGrUviGCe4y0JIMK2giQ5b+ABQDemRiD11vInQqkhV6ngWBRD0lp
KCjU6QXDEE9KGCKBRh5uqL70rr2LErqxUuYwOu50Tfn4T3tKb1HGgfdzAgMBAAGgADANBgkqh
kiG9w0BAQQFAAOBgQCuYnv8vBzXEZpgLD71FfeDK2Zqh0FnfTHXAkHrj4JP3MCMF5nKHgOSRV
mImNHHy0cYKTDP+hor68R76XhLVapKMqNuUHUYf7CTB5JNHHy0cYKTNHHy0cYKTuV1Ce8nvvU
G+yp2Eh8aJ7thaua41xDFXPmIEXTqzXi1++DCWAdWaysojPCZugY7jNWXmg==
-----END CERTIFICATE REQUEST-----
Important! Be sure to include the first and last lines (-----BEGIN CERTIFICATE REQUEST-----
and -----END CERTIFICATE REQUEST-----), and copy only the text in the certificate. Do not copy
any extra white space.
6Navigate to the Local Certificate Authority List section (Security >> Local CAs).
7Select a CA and click Sign Request.
8Paste the certificate request into the Certificate Request field.
9Select Server as the Certificate Purpose, specify a Certificate Duration and click Sign Request.
The newly-activated certificate displays on a new page.
10 Copy the certificate text.
11 Navigate back to the Certificate List section. (Security >> SSL Certificates)
12 Select the certificate request and click Properties to access the Certificate Request Information
section.
QUANTUM SCALAR I6000 & SAFENET KEYSECURE QUICK START GUIDE 16
13 Click Install Certificate.
14 Paste the text of the signed certificate into the Certificate Response field.
15 Click Save. When you return to the main Certificate Configuration page, the certificate request is now
an active certificate. It can be used in to establish SSL connections with client applications.
Step 4: Create a Client Certificate for the i6000
Note: The i6000’s client certificate must be a RSA-1024 certificate for which the i6000 must have the
private key. Because the client must have the private key, the certificate request can’t be created on the
KeySecure. Below are the instructions for creating the certificate request in OpenSSL, though you may
use another certificate creation tool if desired. The certificate request must be signed by the KeySecure’s
CA, as described in the steps below.
To create a client certificate for the i6000 using OpenSSL:
1In OpenSSL, execute the following command:
openssl req -newkey rsa:1024 -keyout qtmkey.pem -out qtmkey.csr -outform PEM
2Respond to the prompts to complete the certificate request.
Generating a 1024 bit RSA private key
..++++++
............................++++++
writing new private key to 'ClientKey.pem'
Enter PEM pass phrase:
Verifying - Enter PEM pass phrase:
-----
You are about to be asked to enter information that will be incorporated
into your certificate request.
QUANTUM SCALAR I6000 & SAFENET KEYSECURE QUICK START GUIDE 17
What you are about to enter is what is called a Distinguished Name or a DN.
There are quite a few fields but you can leave some blank
For some fields there will be a default value,
If you enter '.', the field will be left blank.
-----
Country Name (2 letter code) [GB]:US
State or Province Name (full name) [Berkshire]:California
Locality Name (eg, city) [Newbury]:Redwood City
Organization Name (eg, company) [My Company Ltd]:SafeNet
Organizational Unit Name (eg, section) []:DEC
Common Name (eg, your name or your server's hostname) []:Tycho Brahe
Email Address []:[email protected]
Please enter the following 'extra' attributes
to be sent with your certificate request
A challenge password []:asdf1234
An optional company name []:
3Open the certificate request in a text editor. Copy the text.
4Copy the certificate request text. The certificate text looks similar, but not identical, to the following text.
-----BEGIN CERTIFICATE REQUEST-----
MIIBmzCCAQQCAQAwWzEPMA0GA1UEAxMGZmxldGNoMQkwBwYDVQQKEwAxCTAHBgNVBAsTADEJM
AcGA1UEBxMAMQkwBwYDVQQIEwAxCzAJBgNVBAYTAlVTMQ8wDQYJKoZIhvcNAQkBFgAwgZ8wDQ
YJKoZIhvcAYBABTUxxgY0AMIGJAoGBAMUqA1t4m&Nm0sCcUqnt5Yug+qTSbgEFnvnYWUApHKD
G+yp2Eh8aJ7thaua41xDFXPmIEXTqzXi1++DCWAdWaysojPCZugY7jNWXmg==
-----END CERTIFICATE REQUEST-----
Important! Be sure to include the first and last lines (-----BEGIN CERT... and -----END CERT...),
and copy only the text in the certificate. Do not copy any extra white space.
5Navigate to the Local Certificate Authority List section in the KeySecure’s Management Console
(Security >> Local CAs).
6Select a CA and click Sign Request.
QUANTUM SCALAR I6000 & SAFENET KEYSECURE QUICK START GUIDE 18
7Paste the certificate request into the Certificate Request field. Select Client as the Certificate
Purpose, specify a Certificate Duration and click Sign Request. The newly-activated certificate
displays on a new page.
8Click Download to download the certificate to your client. The file will be named signed.crt.
9Click Back to return to the Local Certificate Authority List, select the CA and click Download to
download a copy of the CA certificate to your client. In this example, the file will be named
KeySecure_CA.crt.
10 Bundle the client certificate in PKCS12 format using the following openssl command:
openssl pkcs12 -export -in signed.crt -inkey qtmkey.pem -out qtmbundle.p12
Enter pass phrase for qtmkey.pem:
Enter Export Password:
Verifying - Enter Export Password:
The client certificate and the Local CA certificate will be imported to the Scalar i6000 library in step 8.
Step 5: Configure the KMIP Server on the KeySecure
To configure the KMIP server settings:
1Navigate to the Cryptographic Key Server Configuration page (Device >> Key Server).
2Click Add in the Cryptographic Key Server Settings section.
3Select KMIP for Protocol.
4Select either [All] or a specific IP address for IP.
5Select the Port. We recommend 5696.
6Select Use SSL. SSL is required for KMIP.
7Select a Server Certificate from the drop-down list. The certificate you just created should be
available for selection.
8Click Save.
QUANTUM SCALAR I6000 & SAFENET KEYSECURE QUICK START GUIDE 19
9Select the KMIP link.
10 View the Cryptographic Key Server Properties. Click Edit to alter any values.
The available fields are:
-IP - IP address(es) on which the key server is enabled on the KeySecure. We strongly recommend
that you select a specific IP address rather than using [All]. If you have multiple IP addresses
available, using a single address here enables the key server to listen for traffic on only one IP
address. This can greatly reduce system vulnerability to outside attacks.
-Port - port on which the key server is listening for client requests. We recommend 5696 for KMIP.
-Use SSL - required for KMIP.
-Server Certificate - must point to a server certificate signed by a local CA.
-Connection Timeout (sec) - specifies how long a client connect can remain idle before the key
server begins closing them. The default value is 3600, which is also the maximum.
-Allow Key and Policy Configuration Operations - when enabled, the key server allows the
following actions:
•key creation and deletion
•key import
-Allow Key Export - when enabled, the key server allows key export.
11 View the Authentication Settings. Click Edit to alter any values. KMIP clients must provide certificates
to connect to the KeySecure, which means the KeySecure must have access to signing CA to verify
the certificate.
QUANTUM SCALAR I6000 & SAFENET KEYSECURE QUICK START GUIDE 20
The available fields are:
-Password Authentication - determines whether you require users to provide a username and
password to access the key server when using KMIP. There are two options:
•Optional - (default) no password authentication is required; global sessions are allowed;
unauthenticated users can create global keys; all users can access global keys; only authenticated
users can create and access non-global keys.
•Required - password authentication is required; global sessions are not allowed; only non-global
keys can be created; authenticated users can access global and non-global keys.
-Client Certificate Authentication - You must enable this feature to comply with the KMIP standard.
there are two options.
•Used for SSL session only - clients must provide a certificate signed by a CA trusted by the
KeySecure in order to establish an SSL connection. When you select this option, you must also
select a Trusted CA List Profile.
•Used for SSL session and username - clients must provide a certificate signed by a CA trusted by
the KeySecure in order to establish an SSL connection; additionally, a username is derived from
the client certificate. That username is the sole means of authentication if password authentication
is optional and the client does not provide a username and password. If the client does provide a
username, the key server compares the username derived from the certificate against the
username in the authentication request. If the usernames match and the password is valid, the
user is authenticated. If the usernames are not the same, the connection is closed immediately.
When you select this option, you must also select a Trusted CA List Profile, and you must choose
the field from which the username is derived.
-Trusted CA List Profile - select a profile to use to verify that client certificates are signed by a CA
trusted by the KeySecure. This field is only used if you select Used for SSL session only or Used for
SSL session and username above. As delivered, the default Trusted CA List profile contains no CAs.
You must either add CAs to the default profile or create a new profile and populate is with at least
one trusted CA before the key server can authenticate client certificates.
-Username Field in Client Certificate - specify the field from which to derive the username. This
field is only used if you select Used for SSL session and username above. The username can come
from the UID (user ID), CN (Common Name), SN (Surname), E(Email address), E_ND (Email
without domain), or OU (Organizational Unit) field.
If you select E_ND, the key server matches against the data to the left of the @ symbol in the email
address in the certificate request. For example, if the certificate request contains the email address
User1@company.com, then the key server matches against User1.
-Require Client Certificate to Contain Source IP - determines if the key server expects that the
client certificate presented by the client application has an IP address in the subjectAltName field.
The key server obtains the IP address from the subjectAltName and compares that the source IP
address of the client application; if the two IP addresses match, the key server authenticates the
user. If the two IP addresses do not match, the key server closes the connection with the client.
The KeySecure is now ready to manage keys and can handle requests that come through the KMIP
Interface.
QUANTUM SCALAR I6000 & SAFENET KEYSECURE QUICK START GUIDE 21
Step 6: Install the Encryption Key Management License
To install the encryption key management license:
1Log on to the Scalar i6000 library as an administrator, if you are not currently viewing the physical
library.
2Click Setup > Licenses.
The Licenses dialog box appears.
This dialog box lists the licensed features for your library, plus Status, Expiration, and Quantity.
Quantity refers to the number drives licensed to use this feature.
3In the Enter License Key box, type the appropriate license key.
-License keys are not case sensitive and are all-inclusive. For example, J2BGL-22622-52C22 can be
entered as j2bgl-22622-52c22.
-If you are using the library’s touch screen, enter the library key from the lowercase keyboard, which
gives you access to the dash (-) character.
-If you cannot locate the license keys shipped with the library, you can obtain them by contacting
technical support or, if you are an end user, by contacting your inside sales representative.
4Click OK.
QUANTUM SCALAR I6000 & SAFENET KEYSECURE QUICK START GUIDE 22
Step 7: Install Required Drives and Drive Firmware
To install the required drive firmware:
1If not already installed, install HP LTO-4 and/or LTO-5 Fibre Channel tape drives in the partition(s) you
will be using for library-managed encryption.
2Unload all tape cartridges from these tape drives.
3On the tape drives, install the latest version of firmware that is qualified for the library firmware installed
on your library. Refer to the Scalar i6000 Release Notes for the correct version of tape drive firmware.
Step 8: Install the Root and Client Certificates in the Library
Transport Layer Security (TLS) communication certificates are unique certificates that must be installed on
the library in order for the library to communicate securely with attached SafeNet KeySecures. TLS
certificates (the client and CA certificates) will be provided by your SafeNet server administrator.
Your server administrator should provide the following certificates:
•Root Certificate, also called the CA certificate, or Certificate Authority Certificate (KeySecure_CA.crt
from the example above)
•Client Certificate (qtmbundle.p12 from the example above)
These files must be in the proper format, as follows. If any of the following requirements is not met, neither
of the certificates will be imported.
•The Root Certificate must be 2048 bits and be in PEM format.
•The Client certificate must be 1024 bits and be in pkcs12 (.p12) format.
Note: The .p12 format combines the public/private key pair files in .pem file format and password
protects access to such .pem certificate files.
•The Client certificate must be signed by the Root Certificate.
•Certificates must have the Organization name (O) set in their Issuer and Subject info.
•The same Root Certificate must be installed on the encryption key servers and the library.
•All the certificates must have a valid validity period according to the date and time settings on the
encryption key server.
Follow the steps below to install the certificates.
1Place the certificate files in an accessible location on your computer.
2From the library Tools menu, select EKM Management > Import Communication Certificates.
The Communication Certificate Import dialog box appears. If no certificates are installed, then
nothing will be listed under Current Certificates. If certificates are already installed, then any
certificates you install will overwrite the currently installed certificates.
QUANTUM SCALAR I6000 & SAFENET KEYSECURE QUICK START GUIDE 23
3From the Key Server Type drop-down list, select KMIP Key Manager.
Note: Some of the fields will be disabled.
4Click Browse to retrieve the Root Certificate File.
5Click Browse to retrieve the Client Certificate File.
6In the Client Certificate Password field, type the password used when generating the certificate files
(your server administrator should provide this).
7Click OK.
8Verify that the certificates are installed. They will be listed in the table under Current Certificates. (You
may need to go back to the screen by selecting Tools > EKM Management > Import
Communication Certificates).

Other manuals for Scalar i6000

6

Other Quantum Server manuals

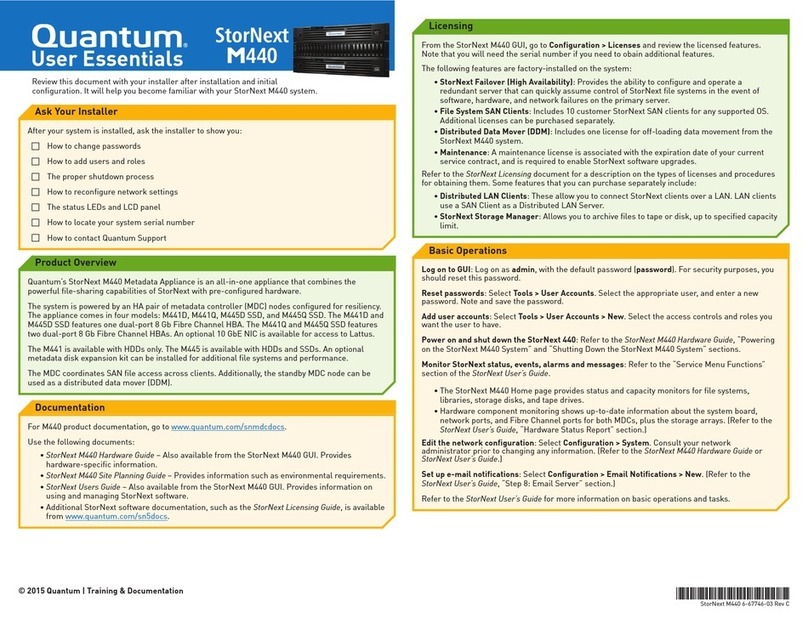
Quantum StorNext M440 User manual

Quantum

Quantum StorNext M440 User manual

Quantum NDX Series User manual

Quantum

Quantum NDX Series User manual

Quantum NDX Series User manual

Quantum

Quantum NDX Series User manual

Quantum Snap! Server 4000 User manual

Quantum

Quantum Snap! Server 4000 User manual

Quantum NDX Series User manual

Quantum

Quantum NDX Series User manual

Quantum NDX Series User manual

Quantum

Quantum NDX Series User manual

Quantum NDX Series User manual

Quantum

Quantum NDX Series User manual

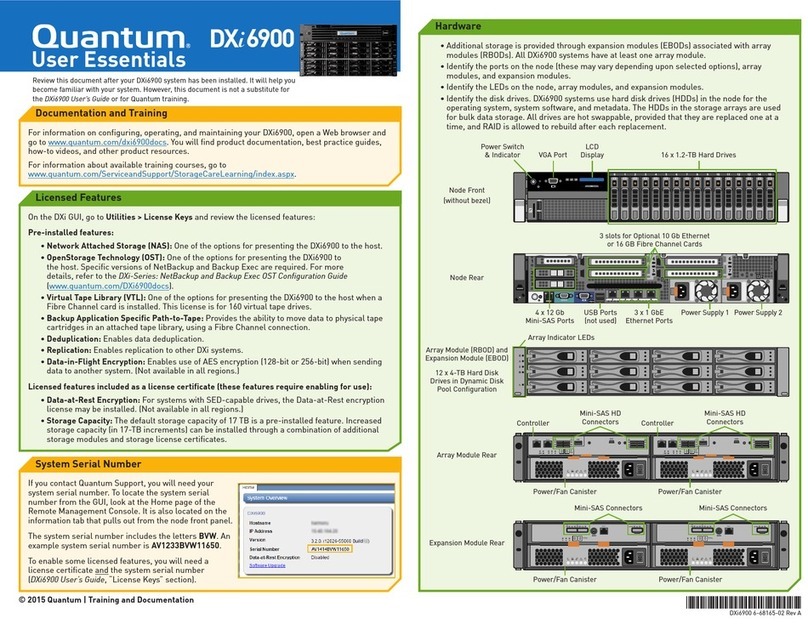
Quantum DXi6900 User manual

Quantum

Quantum DXi6900 User manual

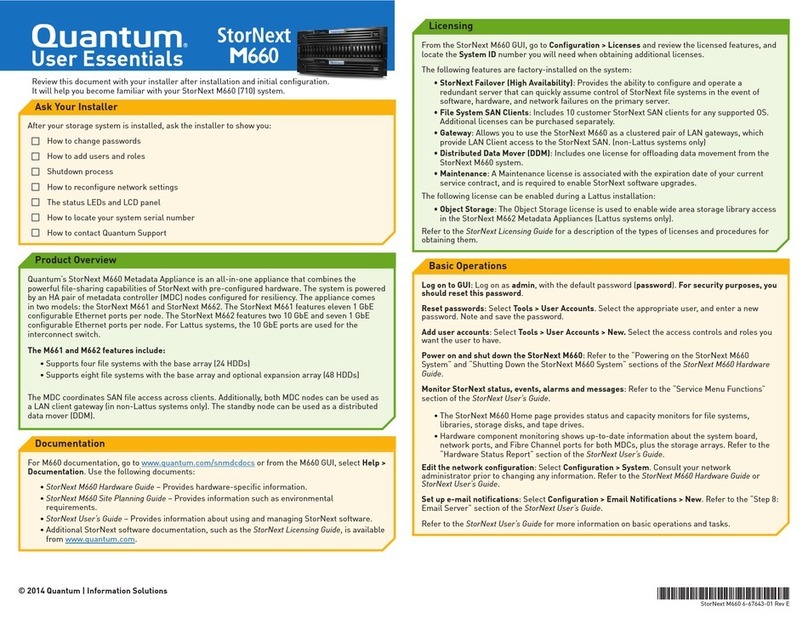
Quantum StorNext M660 User manual

Quantum

Quantum StorNext M660 User manual

Popular Server manuals by other brands

Asus RS500A-E10 Series user guide

Asus

Asus RS500A-E10 Series user guide

HP D Series Upgrade guide

HP

HP D Series Upgrade guide

Dell EMC PowerEdge T340 Installation and service manual

Dell EMC

Dell EMC PowerEdge T340 Installation and service manual

HP D7171A - NetServer - LPr Reference

HP

HP D7171A - NetServer - LPr Reference

Sun Microsystems Sun Enterprise 10000 Upgrade instructions

Sun Microsystems

Sun Microsystems Sun Enterprise 10000 Upgrade instructions

Lantronix DeviceLinx EDS00812N-01 quick guide

Lantronix

Lantronix DeviceLinx EDS00812N-01 quick guide

Dell EMC PowerEdge R7515 Installation and service manual

Dell

Dell EMC PowerEdge R7515 Installation and service manual

Asus RS162-E4 RX4 user guide

Asus

Asus RS162-E4 RX4 user guide

IBM System x3250 4364 Problem determination and service guide

IBM

IBM System x3250 4364 Problem determination and service guide

HP t5515 - Thin Client Update

HP

HP t5515 - Thin Client Update

Lenovo ThinkServer RD120 user guide

Lenovo

Lenovo ThinkServer RD120 user guide

Dell PowerEdge T410 Getting started with

Dell

Dell PowerEdge T410 Getting started with

HP PROLIANT BL45P Quickspecs

HP

HP PROLIANT BL45P Quickspecs

HP 3000/9x9KS Series Site preparation and requirements guide

HP

HP 3000/9x9KS Series Site preparation and requirements guide

NEC NEC Express5800 Series Guide

NEC

NEC NEC Express5800 Series Guide

ClearCube I8330 release note

ClearCube

ClearCube I8330 release note

Intel R1000BB Family Service guide

Intel

Intel R1000BB Family Service guide

3Com SuperStack 3C16115 user guide

3Com

3Com SuperStack 3C16115 user guide

manuals.online logo
manuals.online logoBrands
  • About & Mission
  • Contact us
  • Privacy Policy
  • Terms and Conditions

Copyright 2025 Manuals.Online. All Rights Reserved.