Quanturi HAYTECH User manual

Temperature monitoring system
with base staon QNT300-10
User manual
Manuel d‘ulisaon
Gebrauchsanweisung
HAYTECH
Tango M
Tango XN

2
In case of problems please
contact:
Find more instrucons at:
www.quanturi.com/resources
Support
© 2020 Quanturi Oy.
All rights reserved. Reproducon,
transmion or transcripon of this
manual are not permied without
Quanturi's prior consent. Quanturi
reserves the right to change the content
of this manual at any me and without
prior noce.

3
EN
FR
DE
Content
English 4
Base staon 6
Troubleshoong 8
HAYTECH probes 10
Tango and Tango XN probes 13
Français 16
Lecteur 18
Problèmes techniques 20
Sondes HAYTECH 22
Sondes Tango et Tango XN 25
Deutsch 28
Basisstaon 30
Problembehebung 32
HAYTECH Sensoren 34
Tango und Tango XN Sensoren 37

4
English
User Manual
EN
Usage and precauons
The User is expected to thoroughly familiarize themselves with the
HAYTECH system usage instrucons, and then use the product with
care and diligence.
The User's installaon of the HAYTECH system is not to replace the
normal usage and safety precauons that the User should connue
to take to avoid a re breaking out. The HAYTECH system acts as an
addional tool to safeguard hay, but under no circumstances should
it be used as the sole surveillance system. Quanturi cannot be held
responsible for a re breaking out nor for any of the consequences of
this.
The User undertakes to regularly check that the whole HAYTECH
system works properly, and to take all necessary precauons with
respect to the material’s upkeep.
The HAYTECH monitoring system is used for wireless temperature
monitoring of square and round bales during the storage period.
The HAYTECH monitoring system is composed of temperature probes,
a base staon and repeater(s). The temperature probes are placed
inside the bales before storage. When taking a bale out of the storage
for use, the probe should be removed and stored for the next cut or
the next season. The repeater is used to transmit the temperature
values from the probes to the base staon. The base staon sends the
measurement data to Quanturi.app.
This manual walks you through the installaon and setup procedure.
Aer going through all the steps in this manual, the HAYTECH
monitoring system is ready for use.

5
EN
The User hereby notes that each temperature probe is to be used to
measure the temperature of only one single hay bale, and may not be
used to measure several enes.
Furthermore, the User undertakes to remove the temperature probes
from the hay bales before they are used for any purpose other than
conservaon.
Quanturi may not under any circumstances be held liable for any
damages arising from the User's negligent use of the material whether
this be directly or indirectly, including – but not limited to – loss of
prots, loss of savings or any other damages or expense.
For more informaon about the terms of use, please visit:
hps://quanturi.com/pages/terms

6
EN
200 m
50 m
1
1
1
3 Mount the base staon
vercally and do not mount the
it on a metallic surface. Keep the
base staon at least 10 cm away
from any solid metal objects.
2 Mount the base staon at
a minimum height of 2 meters,
so that no major obstacles are
in between it and the sensor
probes.
Do not mount the base staon
directly above the probes.
Base staon
2
1 The base staon
communicates wirelessly with
the temperature probes in the
storage. The distance between
the probes and the base staon
is ideally less than 50 meters.
200 m
200 m
50 m
1
3 Create an account by
specifying your username,
password, company, address,
and phone number. You will
receive an SMS to conrm your
phone number. Alerts will be
sent to this phone number.
4 Upon your rst login, you will
be promted to add your probes
to the system, using code 2 from
your probe package.
1 Go to the web address:
www.quanturi.app/acvaon
to start the acvaon.
2 Acvate your system by
entering code 1 from your base
staon package.
Acvaon
1
QNT100-00
CODE-1234
EFGH-5678
HAYTECH System 10
www.quanturi.app/activation
Activation code 2 / Code d’activation 2
PRODUCT STICKER
ACTIVATION STICKER
PROBE ID X00001, X000002, X000003, X000004,
X000005, X000006, X000007, X000008, X000009,
X000010
BS ID X0000001
MADE IN FINLAND
20
PAP
1
2
2 m
200 m 200 m
200 m
1
1

7
EN
Indicator Lights
79°C
74°C
68°C
62°C
55°C
49°C
45°C
38°C
38°C
TemperatureID
1321
1232
1234
2223
1112
2333
2096
2124
2243
220V
NETWORK
AC
ADAPTER
5V
2 m
The DATA indicator is on, when the base staon has stored new data
to be sent to the Quanturi server. The indicator light is blinking when
the base staon is receiving data from the sensors.
DATA
4 Connect the base staon
with the included power supply
to an electrical outlet.
220V
AC
ADAPTER
5V
200 m
min. 2 m
1
5 Wait for the base staon to
inialize. Aer a few minutes the
NETWORK light in the middle
turns on. It indicates that the
base staon is connected to the
network and operaonal.
220V
AC
ADAPTER
5V
200 m
min. 2 m
1
6The temperature probes start
sending temperature data within
1 hour from the base staon
start-up. Login to:
www.quanturi.app
for the data visualizaon.
79°C
74°C
68°C
62°C
55°C
49°C
45°C
38 °C
38°C
TemperatureID
1321
1232
1234
2223
1112
2333
2096
2124
2243
220V
NETWORK
AC
ADAPTER
5V
2 m
If the "NETWORK" LED does not light up:
B Repeat step 4 of the
installaon by unplugging and
reconnecng the cable.
C If the problem persists, contact: [email protected]
A Make sure to register to the
Quanturi.app service before
installing the base staon.
NETWORK
The NETWORK indicator is on when the network connecon is
79°C
74°C
68°C
62°C
55°C
49°C
45°C
38°C
38°C
TemperatureID
1321
1232
1234
2223
1112
2333
2096
2124
2243
220V
NETWORK
AC
ADAPTER
5V
2 m

8
EN
ALERT
The ALERT indicator is on when one or more sensors have measured
temperatures above the alert level. You will receive SMS alert
messages in alert situaons.
79°C
74°C
68°C
62°C
55°C
49°C
45°C
38°C
38°C
TemperatureID
1321
1232
1234
2223
1112
2333
2096
2124
2243
220V
NETWORK
AC
ADAPTER
5V
2 m
Quanturi.app
3
Quanturi.app is the service
applicaon for visualizing the
sensor temperatures and for
customizing your account
sengs. The applicaon is
available under the web address:
hps://www.quanturi.app.
79°C
74°C
68°C
62°C
55°C
49°C
45°C
38 °C
38°C
TemperatureID
1321
1232
1234
2223
1112
2333
2096
2124
2243
220V
NETWORK
AC
ADAPTER
5V
2 m
Login to the applicaon with the credenals you created during your
Quanturi system acvaon.
27.6.2018
ALARM
Sensor 5498 73°C
12.7.2018
ALARM
Sensor 5487 71°C
79°C
74°C
68°C
62°C
55°C
49°C
45°C
38 °C
38°C
35°C
Quanturi
79°C
74°C
68°C
62°C
55°C
49°C
45°C
38 °C
38°C
TemperatureID
1321
1232
1234
2223
1112
2333
2096
2124
2243
Connecon symbols
Excellent Signal - Probes are sending data every hour
Good Signal - Probes are sending data every hour
Weak Signal - Probes are sending data less than every hour
Very Weak Signal - Probes are not sending data
Please refer to the steps below to solve this problem
220V
NETWORK
AC
ADAPTER
5V
200 m
200 m 200 m
200 m
!
1
220V
NETWORK
AC
ADAPTER
5V
200 m
200 m 200 m
200 m
!
1
220V
NETWORK
AC
ADAPTER
5V
200 m
200 m 200 m
200 m
!
1
220V
NETWORK
AC
ADAPTER
5V
200 m
200 m 200 m
200 m
!
1
If you don't receive any data in your dashboard:
1 Make sure you wait for at least one hour aer installing the base
staon unl the probes send the rst data.
established. The indicator is blinking when the base staon is sending
data to the Quanturi.app server. If the indicator is o, there is a
problem with the mobile GPRS data network connecon.

9
If one of your probes is not sending data:
1 Check that you have connected the baeries of the probes
properly. (HAYTECH probes only)
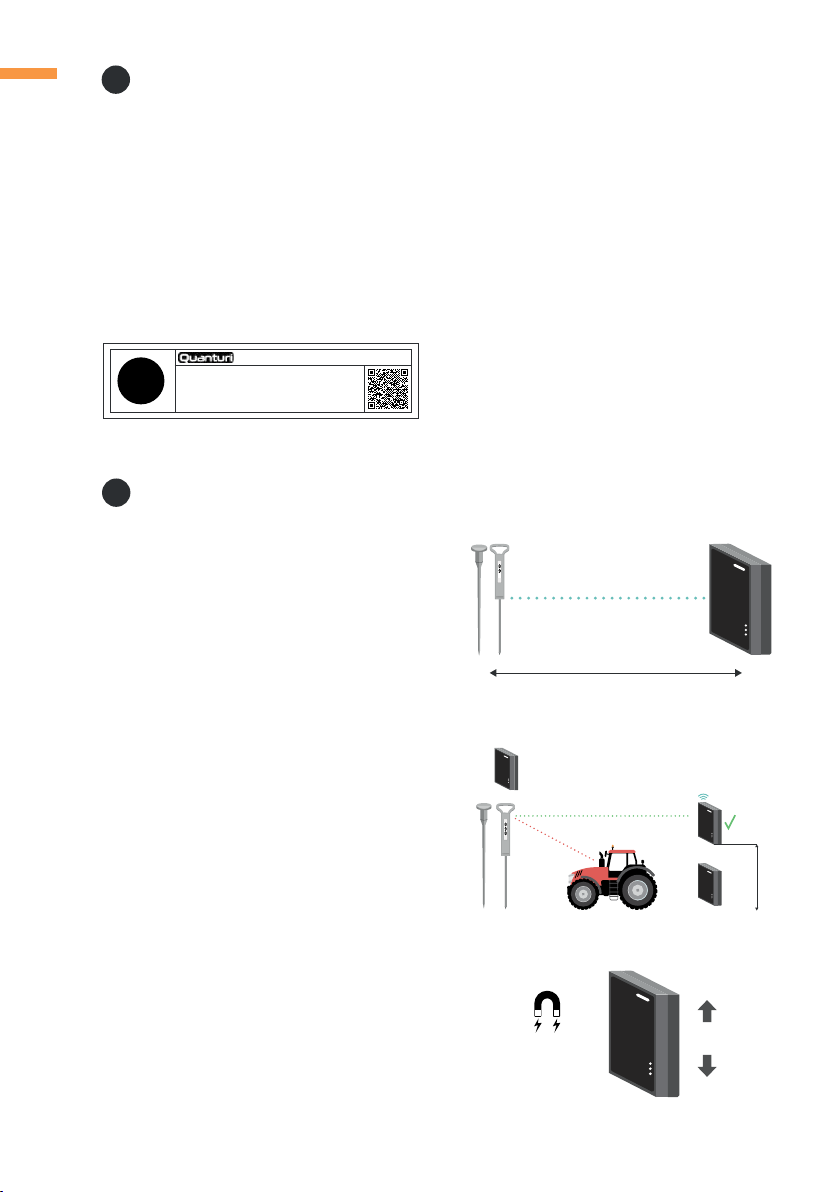
2 If you have a repeater, place the probe closer to the repeater and
wait for 2-3h.
A) If you receive some data, it means that your probe is too far
from the repeater. Move it closer.
3 If you don't have a repeater, move the probe closer to the base
staon and wait for 2-3h.
A) If you receive some data, it means that your probe is too far
from the base staon. Move it closer.
2 Check that you have connected the baeries of the probes
properly. (HAYTECH probes only)
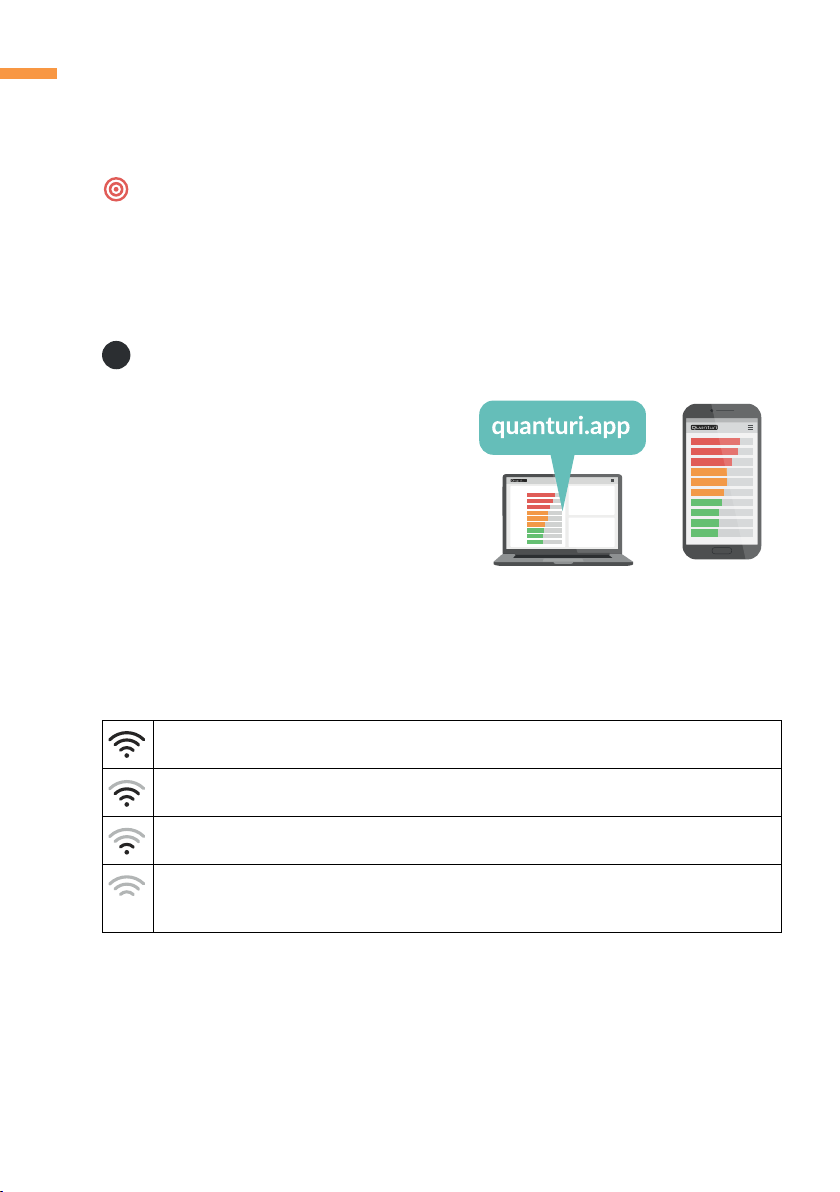
3 Check that the base staon is connected to the internet (the green
NETWORK indicator should be on).
4 Check that the base staon is within the specied range from the
probes. (This also applies to the repeater, if installed.)
5 To check if the probes are working, move some of them closer to
the base staon and wait for 2-3h.
A) If you receive some data, it means that your base staon is
too far away from the other probes in the storage.
6 If you have a repeater, place some of the probes closer to the
repeater and wait for 2-3h.
A) If you receive some data, it means that your repeater is too
far away from the other probes in the storage. Move it closer
to the probes in the storage.
B) If you don't receive any data, it means that your repeater is
too far away from the base staon. Move it closer.
7 If you sll don't receive any data at this point, contact us at

10
EN
Repeater (oponal)
1
A repeater can be placed to cover probes in a second hay storage. The
distance between the base staon and the repeater is ideally less than
200 meters.
1
1
1
1
For professional
use only
Store at room
temperature
Do not store the
probes up-side down
Sharp spike, please
handle with care
Safety instrucons
Follow the safety instrucons to prevent harm or injury to yourself and
people near you when using the Quanturi System.
HAYTECH probes

11
EN
200 m
200 m
50 m
1
200 m
200 m
50 m
1
200 m
2 m
200 m 200 m
200 m
1
1
200 m
200 m
50 m
1
50 m 50 m
The distance depends on the landscape. On open space the distance
can be longer, but having hills or buildings in between will reduce the
maximum distance.
200 m
200 m
1
50 m
Install the repeater vercally. Do
not install it horizontally.
Install the repeater within
or near the hay storage, for
example hanging on the wall
of the shed. The distance from
the repeater to the haystack is
ideally less than 50 m.
200 m
50 m
1
1
1
Do not install the repeater
directly on a metallic structure.
Keep it at least 10 cm away from
solid metallic structures.
200 m
200 m
1
50 m
79°C
74°C
68°C
62°C
55°C
49°C
45°C
38°C
38°C
TemperatureID
1321
1232
1234
2223
1112
2333
2096
2124
2243
220V
NETWORK
AC
ADAPTER
5V
2 m
Mount the repeater at a
minimum height of 2 meters, so
that there are no big obstacles,
like tractors, between the
repeater and haystack.
Do not mount the repeater
directly above the haystack.

12
EN
200 m
200 m
1
50 m
To verify that the repeater is
working, the green light will turn
on aer you have plugged the
power cord into an electrical
outlet.
79°C
74°C
68°C
62°C
55°C
49°C
45°C
38 °C
38°C
TemperatureID
1321
1232
1234
2223
1112
2333
2096
2124
2243
220V
NETWORK
AC
ADAPTER
5V
2 m
79°C
74°C
68°C
62°C
55°C
49°C
45°C
38 °C
38°C
TemperatureID
1321
1232
1234
2223
1112
2333
2096
2124
2243
220V
NETWORK
AC
ADAPTER
5V
2 m
79°C
74°C
68°C
62°C
55°C
49°C
45°C
38 °C
38°C
TemperatureID
1321
1232
1234
2223
1112
2333
2096
2124
2243
220V
NETWORK
AC
ADAPTER
5V
2 m
2 Aer baling hay and before
storing the hay bales, place the
probe in the center of the bale.
Mark the hay bale with spray
paint for easier recognion.
3Note the ID of the probe
together with the locaon of
the hay bale on a table. You can
also upgrade to the Quanturi
PREMIUM service plan to
register the probe locaons in
your virtual storage.
4 Before using the hay bale,
remove the probe and store it
in the box for the next season.
Each probe has a specic ID.
Remember to put the right
cap on the right spike with the
matching ID number.
Do not mix the caps!
Ne mélangez pas les bouchons !
Deckel nicht vertauschen!
1
2
3
4
001
002
Do not mix the caps!
Ne mélangez pas les bouchons !
Deckel nicht vertauschen!
1
2
3
4
001
002
1 Follow the instrucons in your probe package to assemble the
probes and connect their baeries.
Wireless probes
2
Do not mix the caps of the probes!
200 m
200 m
1
50 m

13
EN
Tango M and Tango XN probes
1
1
1
1
1
1
Do not open any of
the products
For professional
use only
Store at room
temperature
Do not store the
probes up-side down
Sharp spike, please
handle with care
Do not bend the
sha of the probe
Safety instrucons
Follow the safety instrucons to prevent harm or injury to yourself and
people near you when using the Quanturi System.

14
3 Then, simply insert your
probes into the bulk material.
Make sure to note the locaon
of the probes in order to nd
them easily in an alert situaon.
If the material is moved, simply
insert the probe into another
pile.
1 If delivered in parts, assemble the spike of the probe according to
the instrucons in your probe package.
2 When screwing ght, pay
aenon not to squeeze the
cable between the two ends of
the tube.
220V
AC
ADAPTER
5V
200 m
min. 2 m
1
Wireless probes
2
2 m
200 m
200 m
1
50 m
Install the repeater vercally. Do
not install the it horizontally or
directly on a metallic structure.
Keep the repeater at least 10
cm away from solid metallic
structures.
Repeater (oponal)
To extend the reach between the base staon and the probes (200m),
a repeater can be placed to double the distance (400m). Install the
repeater on a wall and connect it to an electrical outlet with the power
cord. The green LED will light up to signal the repeater is on and
working.
1

15
This product should
not be disposed of
with household waste.
Please bring this product
to the appropriate electronic
waste collecon center in your
region.
This product contains
Lithium metal baeries.
Please do not dispose
of these baeries with your
household waste. Please bring
the baeries at their end of life
to an appropriate collecon
point in your area.
The packaging of this
product, as well as this
manual can be recycled
with cardboard or paper waste
respecvely.
Recycling
EN
This product complies
with the European EMC
and RoHS Direcve.
Compliance
This product complies
with the Australian and
New Zealand ACMA regulaons.
Repair and Maintenance
Quanturi products are designed so that they do not need any
maintenance operaons during normal use. If you sll nd something
that requires our aenon or your product(s) need(s) repair, please
contact Quanturi support for further informaon.
For more informaon about our product warranty, please refer to our
terms and condions: hps://quanturi.com/pages/terms
For replacement baeries please contact: [email protected]

16
Français
Manuel d‘ulisaon
Usage et précauons
L’Ulisateur est tenu de prendre pleinement connaissance des noces
d’ulisaon du système HAYTECH puis d’uliser le matériel avec
prudence et diligence.
L’installaon par l’Ulisateur du système HAYTECH ne remplace pas
les précauons d’usage et de sécurité usuelles que l’Ulisateur doit
connuer à mere en œuvre pour éviter le déclenchement d’un feu. Le
système HAYTECH constue un oul supplémentaire pour assurer la
sécurité du foin mais ne doit en aucun cas constuer l’unique système
de surveillance. Quanturi ne pourra être responsable en cas de
déclenchement d’un feu et de l’ensemble de ses conséquences.
L’Ulisateur s’engage à vérier régulièrement le bon fonconnement
de l’ensemble du système HAYTECH et à prendre toutes les
précauons nécessaires à l’entreen du matériel.
Le système HAYTECH est un système de sondes thermométriques
connectées pour la surveillance de balles carrées ou rondes pendant
la période de stockage. Le système HAYTECH est composé de sondes
thermométriques sans-l, d’un lecteur et d’un ou plusieurs répéteurs.
Les sondes thermométriques sont insérées dans les balles avant de les
stocker. Au moment de l’ulisaon des balles, les sondes sont rerées,
rangées et réulisées pour la prochaine coupe ou la prochaine saison.
Le répéteur est ulisé pour transmere les données en température
au lecteur. Le lecteur envoie ensuite les données à l’interface de
visualisaon Quanturi.app.
Ce manuel vous guide tout au long de la procédure d'installaon et de
conguraon du système HAYTECH. Une fois les étapes de ce manuel
accomplies, vous serez prêt à uliser le système HAYTECH.
FR

17
FR
Par les présentes, l’Ulisateur prend note que chacune des sondes de
température n’est desnée à mesurer la température que de la balle de
foin et ne pourra pas être ulisée pour mesurer plusieurs objets.
Par ailleurs, l’Ulisateur s’engage à rerer les sondes de température
des balles de foin avant qu’elles soient ulisées à d’autres ns que
celle de conservaon.
La responsabilité de Quanturi ne pourra en aucun cas être engagée
en raison des dommages consécufs à la négligence du Client dans
l’ulisaon du matériel qu’ils soient directs ou indirects, y compris,
mais sans s’y limiter, la perte de prots, la perte d’épargne et tout autre
dommage ou dépens.
Pour plus d’informaons sur les condions d’usage, vous pouvez
consulter :
hps://quanturi.com/pages/terms

18
1 Ouvrez le site
www.quanturi.app/acvaon
pour démarrer l‘installaon.
3 Créez un compte avec nom
d’ulisateur, mot de passe,
société, adresse et numéro de
téléphone. Vous recevrez un
SMS pour conrmer le numéro
de téléphone ulisé pour les
alertes.
Acvaon
1
200 m
50 m
1
1
1
3 Placez le lecteur à la vercale.
N’installez pas le lecteur sur une
surface métallique. Placez le
lecteur à plus de 10 cm de tout
métal.
2 Placez le lecteur à une
hauteur minimum de 2 m de
sorte qu'il n'y ait pas d’obstacles,
comme un tracteur entre le
lecteur et le tas de foin. Ne
placez pas le lecteur au dessus
du stock de foin.
Lecteur
2
1 Le lecteur communique avec
les sondes connectées placées
dans le fourrage. La distance
entre les sondes connectées
et le lecteur est idéalement
inférieure à 50 mètres.
200 m
200 m
50 m
1
FR
4 Lors de votre première
connexion, vous serez invité à
entrer le code 2 trouvé à
l’intérieur de la boîte de sondes.
2 Acvez votre système en
entrant le code 1 trouvé à
l’intérieur de la boîte de votre
système.
QNT100-00
CODE-1234
EFGH-5678
HAYTECH System 10
www.quanturi.app/activation
Activation code 2 / Code d’activation 2
PRODUCT STICKER
ACTIVATION STICKER
PROBE ID X00001, X000002, X000003, X000004,
X000005, X000006, X000007, X000008, X000009,
X000010
BS ID X0000001
MADE IN FINLAND
20
PAP
1
2
2 m
200 m 200 m
200 m
1
1

19
FR
Voyants lumineux
79°C
74°C
68°C
62°C
55°C
49°C
45°C
38°C
38°C
TemperatureID
1321
1232
1234
2223
1112
2333
2096
2124
2243
220V
NETWORK
AC
ADAPTER
5V
2 m
Le voyant DONNÉES est allumé lorsque le lecteur a emmagasiné des
données à envoyer à Quanturi.app. Le voyant clignote à chaque fois
que le lecteur reçoit une donnée d’une sonde.
DONNÉES
Si le voyant “réseau” n’est pas allumé :
B Recommencez l’étape 4 en
débranchant et en rebranchant
le cordon.
C Si le problème perdure, contactez le 09 80 80 18 12 (du lundi au
vendredi de 10h à 12h et de 14h à 16h)
A Assurez-vous de vous avoir
enregistré au service Quanturi.app
avant d‘installer le lecteur.
4 Branchez le câble
d’alimentaon.
220V
AC
ADAPTER
5V
200 m
min. 2 m
1
5 Le lecteur s’inialise. Au bout
de quelques minutes, la lumière
verte « RÉSEAU » du milieu
s’allume. Elle indique alors que le
lecteur est connecté au réseau
et qu’il est opéraonnel.
220V
AC
ADAPTER
5V
200 m
min. 2 m
1
6Les sondes commencent à
être visibles dans l’heure qui
suit l’installaon du lecteur.
Connectez-vous à
www.quanturi.app pour visualiser
vos sondes.
79°C
74°C
68°C
62°C
55°C
49°C
45°C
38°C
38°C
TemperatureID
1321
1232
1234
2223
1112
2333
2096
2124
2243
220V
NETWORK
AC
ADAPTER
5V
2 m
RÉSEAU
Le voyant RÉSEAU indique une connexion au réseau. Le voyant clignote
lorsque le lecteur envoie des données au serveur Quanturi.app. Si le
voyant n’est pas allumé, veuillez vérier la connexion Internet.
79°C
74°C
68°C
62°C
55°C
49°C
45°C
38°C
38°C
TemperatureID
1321
1232
1234
2223
1112
2333
2096
2124
2243
220V
NETWORK
AC
ADAPTER
5V
2 m

20
ALERTE
Le voyant ALERTE est allumé quand une ou plusieurs sondes indiquent
des températures supérieures au seuil d’alerte. Dans une telle
situaon, vous recevrez un SMS d’alerte.
79°C
74°C
68°C
62°C
55°C
49°C
45°C
38°C
38°C
TemperatureID
1321
1232
1234
2223
1112
2333
2096
2124
2243
220V
NETWORK
AC
ADAPTER
5V
2 m
FR
Quanturi.app
3
Quanturi.app est l‘applicaon
qui permet de visualiser les
températures des sondes et de
personnaliser les paramètres de
votre compte. L‘applicaon est
disponible à parr de l‘adresse
web : hps://www.quanturi.app
79°C
74°C
68°C
62°C
55°C
49°C
45°C
38 °C
38°C
TemperatureID
1321
1232
1234
2223
1112
2333
2096
2124
2243
220V
NETWORK
AC
ADAPTER
5V
2 m
27.6.2018
ALARM
Sensor 5498 73°C
12.7.2018
ALARM
Sensor 5487 71°C
79°C
74°C
68°C
62°C
55°C
49°C
45°C
38 °C
38°C
35°C
Quanturi
79°C
74°C
68°C
62°C
55°C
49°C
45°C
38 °C
38°C
TemperatureID
1321
1232
1234
2223
1112
2333
2096
2124
2243
Connectez-vous à l‘applicaon avec votre nom d’ulisateur et votre
mot de passe dénis lors de l‘acvaon du système Quanturi.
Symboles de connexion
Signal excellent - Les sondes envoient leurs données toutes les heures.
Signal fort - Les sondes envoient leurs données toutes les heures.
Signal faible - Les sondes peuvent parfois échouer à envoyer leurs données
régulièrement.
Signal très faible – Il est possible que les sondes n’envoient pas leurs données
régulièrement, et ce, même pendant de longues périodes.
220V
NETWORK
AC
ADAPTER
5V
200 m
200 m 200 m
200 m
!
1
220V
NETWORK
AC
ADAPTER
5V
200 m
200 m 200 m
200 m
!
1
220V
NETWORK
AC
ADAPTER
5V
200 m
200 m 200 m
200 m
!
1
220V
NETWORK
AC
ADAPTER
5V
200 m
200 m 200 m
200 m
!
1
Si vous ne recevez aucune donnée sous votre interface
de visualisaon :
1 Aendez au moins une heure que les sondes aient envoyé leurs
données.
2 Vériez que vous avez connecté la pile des sondes correctement.
(s’applique uniquement aux sondes HAYTECH)
3 Vériez que le lecteur est connecté à Internet (le voyant vert
Other manuals for HAYTECH
1
This manual suits for next models
3
Table of contents
Languages:
Other Quanturi Farm Equipment manuals