Quictent 1116 User manual

User Manual
for Quictent Storage Shelter
Please read, understand, and practice the guidelines in this user manual before
use, and keep it for future reference.
6’ x 6’ 7’ x 12’
8’ x 8’ 10’ x 10’

Tableof Contents
About Quictent
...........................................................................
2
.......................................................................
2
Safety Instructions
....................................................................
3
6’ x 6’ (Model #1116)
....................................
7
8’ x 8’ (Model #1118) &10’ x 10’ (Model #1119)
...................................................................
12
7’ x 12’ (Model #1120)
1
..................................................................................
17
Warranty
..................................................................................
17
Appendix
.............................................................................
16
Maintenance
IMPORTANT
We’d love to hear from our customers. If you have any questions about the manual or would like
us to help in any way, please feel free to contact the support team. We will reply in 12 hours
(business days).
Check the Spam and your email Settings if you do not receive a reply in time as it is probably
blocked because our support team will always get back to you no later than the timeframe.
Add the following email address to your CONTACT LIST in case of any blocking.
This user manual applies to Quictent Storage Shelter. It will help you to get to know your Quictent
storage shelter. Please read the guidelines in this manual and keep the manual for future reference.
We may update the manual without notice in advance. You can always search “Quictent
Instructions” online for the latest version.

2
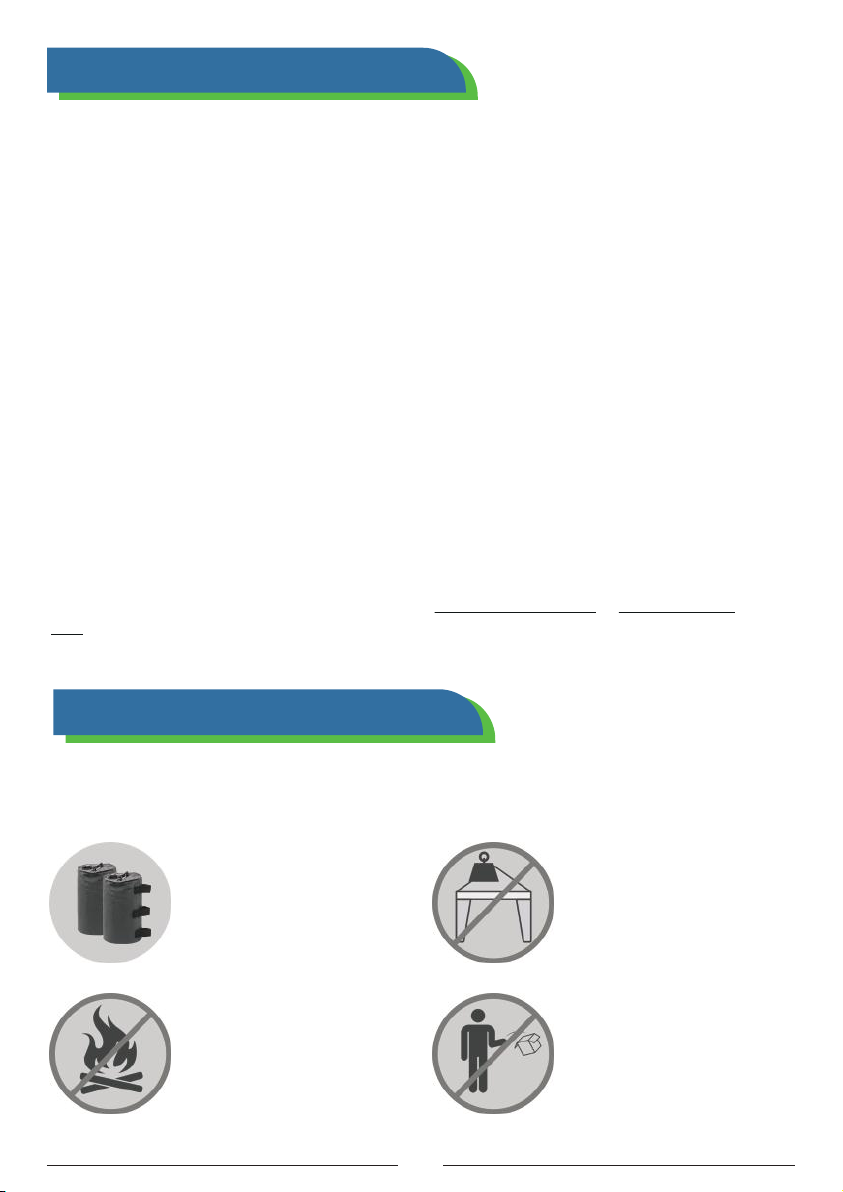
Please ALWAYS weigh down
your storage shelter with
sandbags, auger anchors,
and (or) pegs.
Please do NOT place
something heavy on the top
as the shelter is designed to
be a temporary structure.
Please do NOT light a fire
inside and keep any heat
source away from your
storage shelter.
Do NOT throw away the
original packaging cartons
in case of a return or an
exchange.
Safety Instructions
You should read, understand, and practice safety instructions in this chapter. For any damages
due to not obeying guidelines as instructed, the owner (user) should take full responsibility.
Our Vision
Creating unique spaces to meet every specific need, and become a part of America's landscape.
Our Mission
To keep innovating and provide a wide range of reliable shelters and shades at consumer-grade
prices with customer-first service.
Our Service
The customer-centric services are what we at Quictent take great pride in. In addition to the
hassle-free warranty covering all Quictent products, an industrial-leading support team is
standing behind at all times. Whenever you need help or have any suggestions and comments
mail.com. You’re sure to get a to-the-point reply in 12 hours.
Founded in the early 21st century, Quictent has grown into a popular brand with reliable
products and excellent customer services during the past decades. We started with pop up
canopies, and then expanded to other 6 categories for shelters and the like including party tents,
carports, greenhouses, shade sails, patio umbrellas and grow tents. Driven by the vision to create
unique spaces to meet every specific need and become a part of America's landscape, we at
Quictent would spare no effort to keep innovating.
About Quictent

Reminder
Do not use and leave the shelter outside in inclement weather. The owner (or user) should take
down the structure for any potential inclement weather, including high winds, heavy rains, sleet,
snow, and the like, or he (she) should take the loss.
3
Parts List
You’ll receive one (1) box for this model. Please pay particular attention to making sure all parts are
numbered and graphically indexed as shown on the Parts List, so does the quantity for each part.
with the ORDER NUMBER, REQUIRED PARTS (NAME, QUANTITY, AND PART NUMBER),
PICTURES (OR VIDEO CLIPS, IF APPLICABLE), we’ll get back to help out soon.
6’ x 6’ (Model #1116)
A
A
3
3
3
4
4
3
1
22
2
2
1A
A
A
A

Before the assembly, please check to make sure that you have all the parts listed on the Parts
List above.
Please use the Wrench (#F) whenever you need to tighten/loosen the screws
4
#G
#I
#H
Steel Pole
Zipper Door
Auger Anchor 8
1
2
#J Ratchet Clamp 4
#1 Steel Pole 3
#2
Steel Pole
4
#3
Part Number DescriptionDiagram Quantity (PCS)
Cover
4
Bungee Cord
#E
Wrench
38
#F 2
Curved Foot Base
#B
Metal Clip
4
#D 8
Screw (M6 x 45 mm)
#C 8
Steel Pole
#4
3-Way Corner Connector
2
#A 6
Assembly Steps
Step 1 Layout and assemble the roof frame as instructed with the poles (3 x part #1, 4 x part #2)
and the connectors (6 x part #A).
A A
A
A A
22
2
1
1
1
1
1
1
2
A
AA A
A
A
A
A
1
2
2
2
2
2

The built-in webbing should face down on the front and rear of the corner of the
structure.
Please make sure the cover hangs at all four corners equally.
55
Attach 2 x poles (#3) to the connectors (#A) on one side, then lift the structure from
another side.
Attach another 2 x poles (#3) to the connectors (#A) on the other side.
Align the two ends of 2 x Ground Bars (#4) with the poles (#3), then reinforce each of their
joints with 2 x Metal Clips (#D), and finally insert & tighten each joint with a Screw (M6 x 45
mm, #C).
a)
Attach the 4 x Curved Foot Bases (#B) to the poles (#3) with the Screws (M6 x 45 mm, #C).
d)
b)
c)
Step 2 Assemble the mainframe.
Step 3 Put the Cover (#H) on the roof frame.
IMPORTANT
3 3
3 3
A
A
3
3
3
4
4
3
1
22
22
1A
A
A
A

56
Thread the built-in webbing of the roof cover into the Ratchet Clamp (#J).
Adjust the webbing until the roof cover is properly tightened.
Hook the Ratchet Clamp (#J) with the Curved Foot Bases (#B).
a)
b)
c)
Step 4 Assemble the 4 x Ratchet Clamps (#J) at the four corners.
We always recommend you secure the structure by slowly screwing the Auger Anchors
(#G) into the ground.
Step 5 Attach the 2 x Zipper Doors (#I) to the poles (#2) with Bungee Cords (#E).
Reminder
1
2

7
Parts List
Model #1118 & Model #1119 share the same structure as below. You’ll receive one (1) box for
each. Please pay particular attention to making sure all parts are numbered and graphically
indexed as shown on Parts List 1 & Parts List 2, so does the quantity for each part. If you need
ORDER NUMBER, REQUIRED PARTS ((NAME, QUANTITY, AND PART NUMBER), PICTURES
(OR VIDEO CLIPS, IF APPLICABLE), we’ll get back to help out soon.
8’ x 8’ (Model #1118) &10’ x 10’ (Model #1119)
Parts List 1. For Model #1118
Applicable Models: Model #1118 & Model #1119
Steel Pole
#1 Steel Pole 6
#2
Steel Pole
6
#3
Part Number DescriptionDiagram Quantity (PCS)
6
Steel Pole
#4 4
A A
A
3
3
4 4
4 4
5
5
1
2222
3 3
3 3
2
2
1 1
1
1 1
B
BB
AA
A

8
#H
#J
#I
Zipper Door
3-Way Metal Clip 8
1
2
#K Bungee Cord
4-Way Metal Clip
40
#N Ratchet Clamp
Wrench
4
#M 2
#L 4
Part Number DescriptionDiagram Quantity (PCS)
Cover
Auger Anchor
#F
Screw (M6x 45 mm)
8
#G 16
Curved Foot Base
#C
L-Shaped Peg
4
#E 2
Foot Base
#D 2
3-Way Corner Connector
#A 6
4-Way Corner Connector
#B 3
Steel Pole
#5 2
Curved Foot Base
#C 4
3-Way Corner Connector
#A 6
4-Way Corner Connector
#B 3
Steel Pole
#5 2
Parts List 2. For Model #1119
Steel Pole
#1 Steel Pole 6
#2
Steel Pole
6
#3
Part Number DescriptionDiagram Quantity (PCS)
6
Steel Pole
#4 4

59
Reminder
Before the assembly, please check to make sure that you have all the parts listed on the Parts
Lists above.
The assembly steps for model #1118 & model #1119 are the same.
Please use the Wrench (#M) whenever you need to tighten/loosen the screws
Assembly Steps
Step 1 Layout and assemble the roof frame as instructed with the poles (6 x part #1 & 6 x part #2)
and the connectors (6 x part #A & 3 x part #B).
#H
#J
#I
Zipper Door
3-Way Metal Clip 8
1
2
#K Bungee Cord
4-Way Metal Clip
46
#N Ratchet Clamp
Wrench
4
#M 2
#L 4
Part Number DescriptionDiagram Quantity (PCS)
Cover
Auger Anchor
#F
Screw (M6x 45 mm)
8
#G 16
L-Shaped Peg
#E 2
Foot Base
#D 2
A B
B
B
A
A
AA
2
2
22
1
1 1
1 1
1 1
1 1
1
1
1 1
2
A
A
A
A
A
A
A
B
B
B
A
A
2
2
22
222
2

510
Form a middle supporting pole by connecting a pole (#3) with a pole (#5), then repeat what
you’ve done to form another middle supporting pole.
On one side, attach a middle pole to the connectors (#B) on the top frame and attach 2 x
poles (#3) to the connectors (#A), then lift the structure from another side.
On the other side, repeat what you’ve done to attach the left poles (a middle pole & 2 x #3)
to the connectors (#A & #B).
a)
b)
c)
e)
Step 2 Assemble the mainframe.
The built-in webbing should face down on the front and rear of the corner of the
structure.
Please make sure the cover hangs at all four corners equally.
Step 3 Put the Cover (#I) on the roof frame.
IMPORTANT
3 3 3
3 3 3
A A
A
3
3
4 4
44
5
5
1
2222
3 3
3 3
2
2
1 1
1
1 1
B
BB
AA
A
d) Align the two ends of 4 x Ground Bars (#4) with the poles (#3 & #5), then reinforce each joint
of poles (#3 & #4) with 2 x 3-Way Metal Clips (#H) and each joint of poles (#4 & the middle
pole) with 2 x 4-Way Metal Clips (#L). Please remember that you’ll use Screws (M6 x 45 mm,
#G) to fix all the joints.
Attach the 4 x Curved Foot Bases (#C) to the poles (#3) with the Screws (M6 x 45 mm, #G)
and 2 x Foot Bases (#D) to the poles (#5) with the Screws (M6 x 45 mm, #G).
.

511
Thread the built-in webbing of the roof cover into the Ratchet Clamp (#J).
Adjust the webbing until the roof cover is properly tightened.
Hook the Ratchet Clamp (#J) with the Curved Foot Bases (#B).
a)
b)
c)
Step 4 Assemble the 4 x Ratchet Clamps (#J) at the four corners.
Slowly screw the Auger Anchors (#G) into the ground.
Insert the L-Shaped Pegs (#E) into the Foot Bases (#D).
Step 5 Attach the 2 x Zipper Doors (#I) to the poles (#2) with Bungee Cords (#E).
We always recommend you secure the structure with the auger anchors and pegs & foot bases.
Reminder
1
2

Parts List
You’ll receive two (2) boxes for this model. You can identify the packages by referring to (Table B)
below. Please also pay particular attention to making sure all parts are numbered and graphically
indexed as shown on the Parts List (Table A), so does the quantity for each part. If you need any
ORDER NUMBER, REQUIRED PARTS (NAME, QUANTITY, AND PART NUMBER), PICTURES
(OR VIDEO CLIPS, IF APPLICABLE), we’ll get back to help out soon.
7’ x 12’ (Model #1120)
12
Table A. Parts List for Model #1120
Steel Pole
#1 Steel Pole 6
#2
Steel Pole
6
#3
Part Number DescriptionDiagram Quantity (PCS)
2
Steel Pole
#4 4
6
6
6
6
9
9
9
4
2
2
7
7
7
1
1
1
22
2
2
6
6
4
4
3

13
#D
#F
#E
Zipper Door
L-Shaped Peg
Screw (M6 x 40 mm)
12
8
32
#G
Bungee Cord
4-Way Metal Clip
1
Ratchet Clamp
#H 2
Part Number DescriptionDiagram Quantity (PCS)
Cover
#B
3-Way Metal Clip
4
#C 8
Curved Foot Base
#8 2
#A 4
Foot Base
#9 4
3-Way Corner Connector
#6 6
4-Way Corner Connector
#7 3
Steel Pole
#5 4
Part Number Parts Included
Table B. Package Contents for Shipping Cartons
Box #1
Box #2
6 x Part #6 (3-Way Corner Connector)
3 x Part #7 (4-Way Corner Connector)
2 x Part #8 (Foot Base)
4 x Part #9 (Curved Foot Base)
4 x Part #A (Ratchet Clamp)
4 x Part #B (4-Way Metal Clip)
8 x Part #C (3-Way Metal Clip)
12 x Part #D (L-Shaped Peg)
8 x Part #E (M6 x 40 mm Screw)
32 x Part #F (Bungee Cord)
1 x Part #G (Cover)
2 x Part #H (Zipper Door)
6 x Part #1 (Steel Pole)
6 x Part #2 (Steel Pole)
2 x Part #3 (Steel Pole)
4 x Part #4 (Steel Pole)
4 x Part #5 (Steel Pole)

14
Before the assembly, please check to make sure that you have all the parts listed on the Parts
Lists.
Assembly Steps
Step 1 Layout and assemble the roof frame as instructed with the poles (6 x part #1 & 6 x part #2)
and the connectors (6 x part #6 & 3 x part #7).
6
61 1
1 1
1 1
1
66
6
6
7
7 7
2
2
22
2
2
2
66
6
66
6
6
22
2
22
2
1
1
1
1
1
1
67
7
7
On one side, attach 1 x pole (#3) to the connectors (#7) and 2 x pole (#4) to the
connectors (#6), then lift the structure from another side.
On the other side, repeat what you’ve down to attach the rest poles (1 x #3 & 2 x #4) to
the connectors (#6 & #7).
a)
b)
Step 3 Assemble the mainframe.
The built-in webbing should face down on the front and rear of the corner of the
structure.
Please make sure the cover hangs at all four corners equally.
Step 2 Put the Cover (#G) on the roof frame.
IMPORTANT
6
6 6
66
22
2
22
2
1
1
1
1 1
1
67
7
7

15
Thread the built-in webbing of the roof cover into the Ratchet Clamp (#A).
Adjust the webbing until the roof cover is properly tightened.
Hook the Ratchet Clamp (#A) with the Curved Foot Bases (#9).
a)
b)
c)
Step 4 Assemble the 4 x Ratchet Clamps (#A) at the four corners.
1
2
Align the two ends of 4 x Ground Bars (#5) with the poles (#3 & #4), then reinforce
each joint of the poles (#3 & #5) with 2 x 4-Way Metal Clips (#B) and each joint of the
poles (#4 & #5) with 2 x 3-Way Metal Clips (#C). Please remember that you’ll use the
Screws (M6 x 40 mm, #E) to fix all the joints and the Ground Bars need to pass
through the cloth cover at the bottom of the tarp.
c)
Attach the 4 x Curved Foot Bases (#9) to the poles (#4) with the Screws (M6 x 40 mm,
#E) and 2 x Foot Bases (#8) to the poles (#3) with the Screws (M6 x 40 mm, #E).
d)
3 3 3
3 3 3
6
6
6
6
9
9
9
4
2
2
7
7
7
1
1
1
22
2
2
6
6
4
4
3

M6X40MM

Warning
Restructuring the product without written permission from Quictent in advance would VOID the
warranty.
Damages due to improper use in severe weather conditions, including but not limited to high
winds, heavy rain, sleet, snow, etc., will NOT be covered by the warranty.
17
Warranty
The 12-month limited warranty covering the materials and the craftsmanship under normal use and
service conditions takes effect from the purchase date (on the invoice). Please note that the order
purchase proof (order number or shipping information on the shipping carton) is the only valid
evidence to claim for warranty.
Order number
Part number
Quantity required for each part
Pictures (or video clips, if applicable)
Reminder
In the event that you failed to access your order information online, we strongly advise you to keep
the original packaging and shipping carton(s) because they are treated as a proof of purchase.
1.
To get what you need as soon as possible, we strongly suggest you provide all of the following
information at your first inquiry :
2.
Shelter for Backyard, Party, Event
Pop up Canopy
Appendix

18
Quictent pop up canopies serve perfectly for your outdoor events, both personally and commercially.
They always provide shades for outdoor activities such as parties, picnics, outings, etc, turning
everywhere into a perfect place to relax. When it comes to selling at outdoor events, they are easy
to handle in all aspects – unfolding (and folding), transporting, and storing. Rich in styles, sizes, and
colors, you can always find one that goes well with your needs.
Party Tent
Preparing for parties and events? We've got your back. Quictent party tents in different sizes are
available. From a small-sized one in 10' x 8' to some regular sizes in 10' x 20' or 10' x 30' to a large
one in 20' x 40', you can always find a perfect solution matching your demands. What’s more, they
span a wide range of styles.
Metal Gazebo
Owning a Quictent metal gazebo is just like having another beautiful room in your backyard! The
powder-coated steel frame is heavy-duty and can stand firmly outdoors for a long time. The
mosquito netting adds privacy and protects you from bugs. The tan ones go with the surroundings
well while the red ones are eye-catching.

19
Patio Umbrella
Quictent patio umbrellas turn anywhere in the open
air into a perfect site to "take a breath". They are a
must-have for small businesses such as an outdoor
café! For homeowners, they make your backyard the
best place to relax, especially when you're looking
for an escape from the heavy work or energy-taking
daily travails.
Shade Sail
Why Quictent provides so many choices for shade
sails in colors and shapes? For aesthetics. Your patio
would be pleasing to the eye if you mix shades in
different colors and shapes, or overlap one a little
while mounting others several feet higher or lower.
Carport
Shelter for Vehicle
The Quictent carports share something in common: They are heavy-duty, easy-to-assemble, and of
the most importance, supported by an industrial-leading after-sales service. You can choose from
the ones with or without sidewalls depending on your needs.
This manual suits for next models
3
Table of contents
Other Quictent Storage manuals