manuals.online logo
Brands
  1. Home
  2. •
  3. Brands
  4. •
  5. Quoizel
  6. •
  7. Outdoor Light
  8. •
  9. Quoizel SNNL8411K Mounting instructions

Quoizel SNNL8411K Mounting instructions

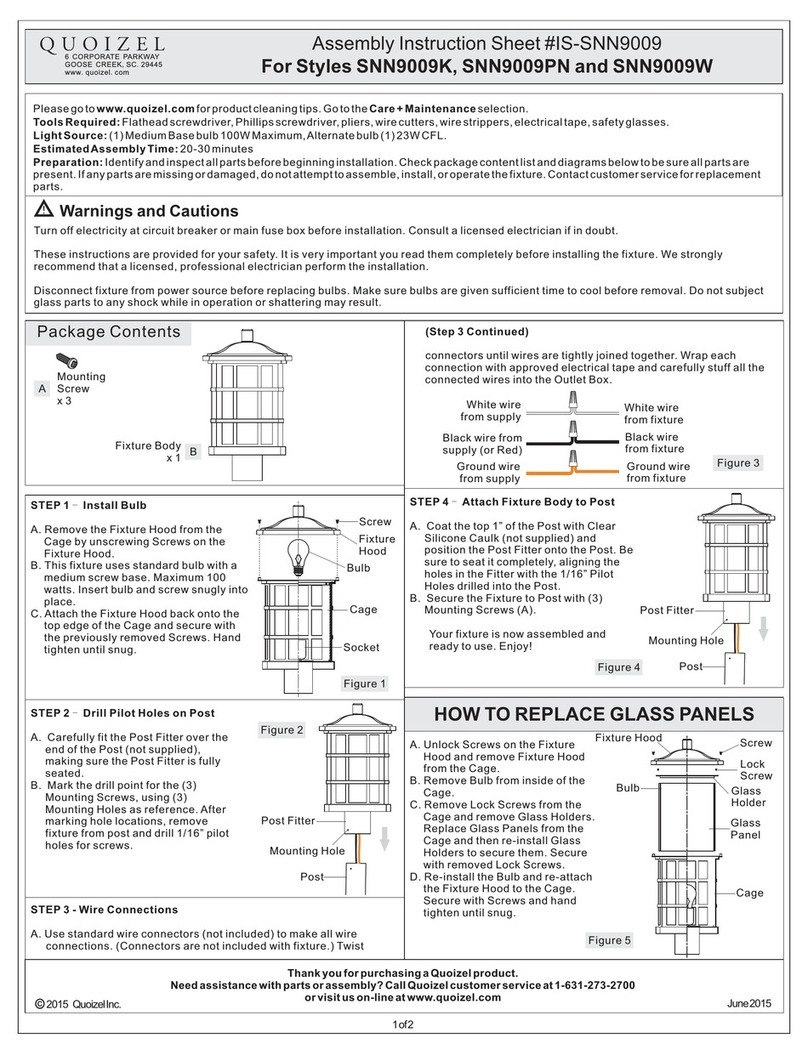
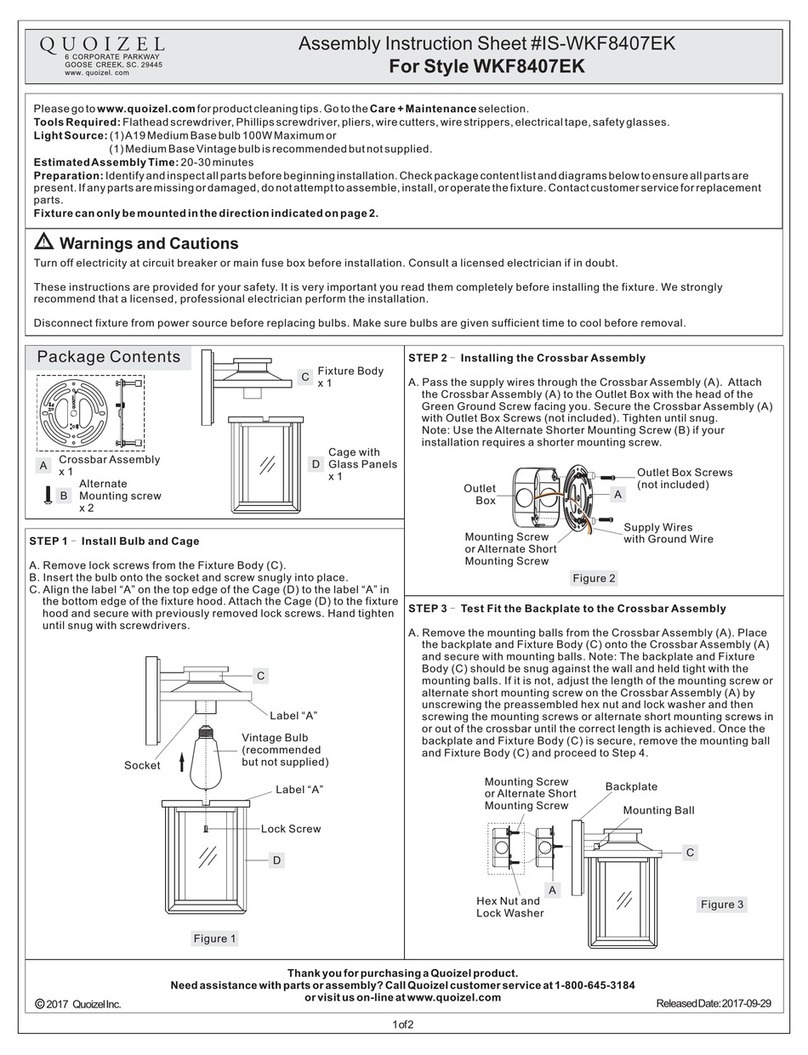
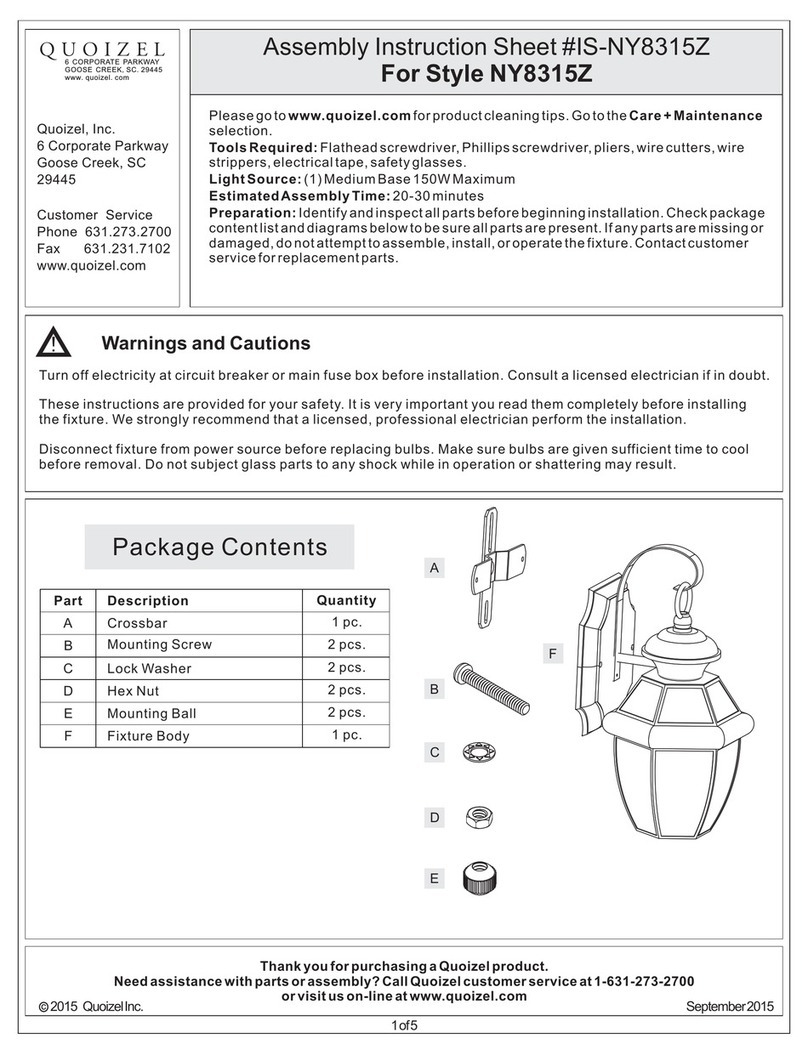
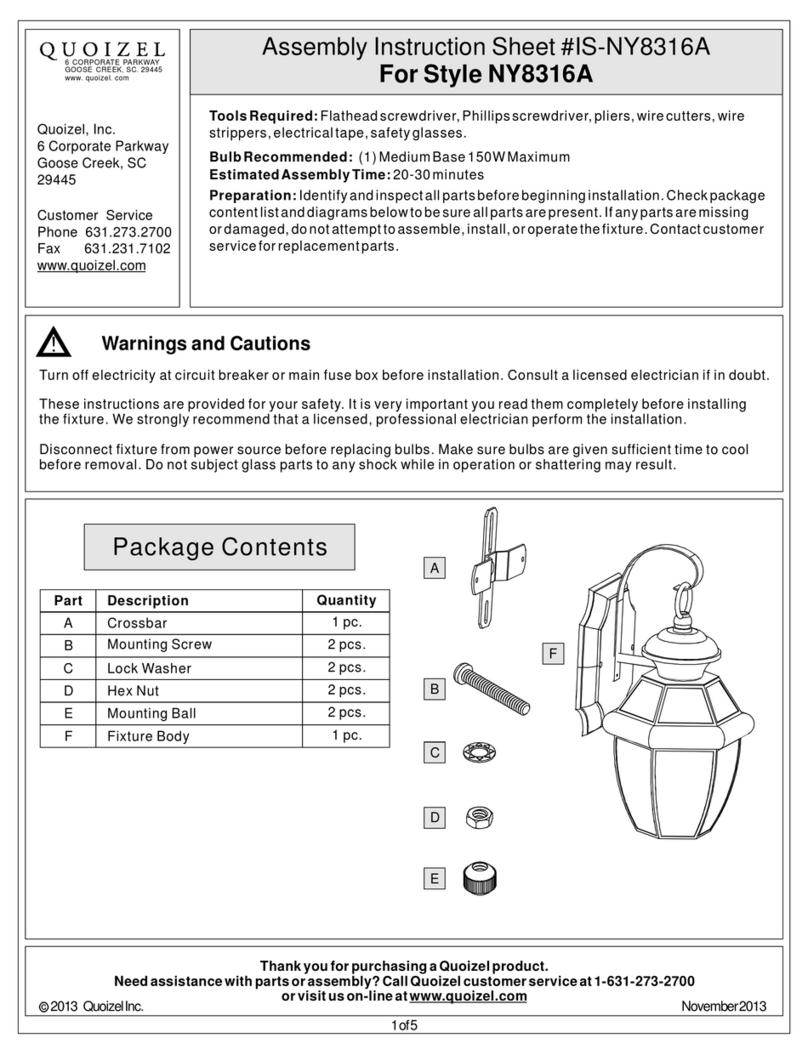
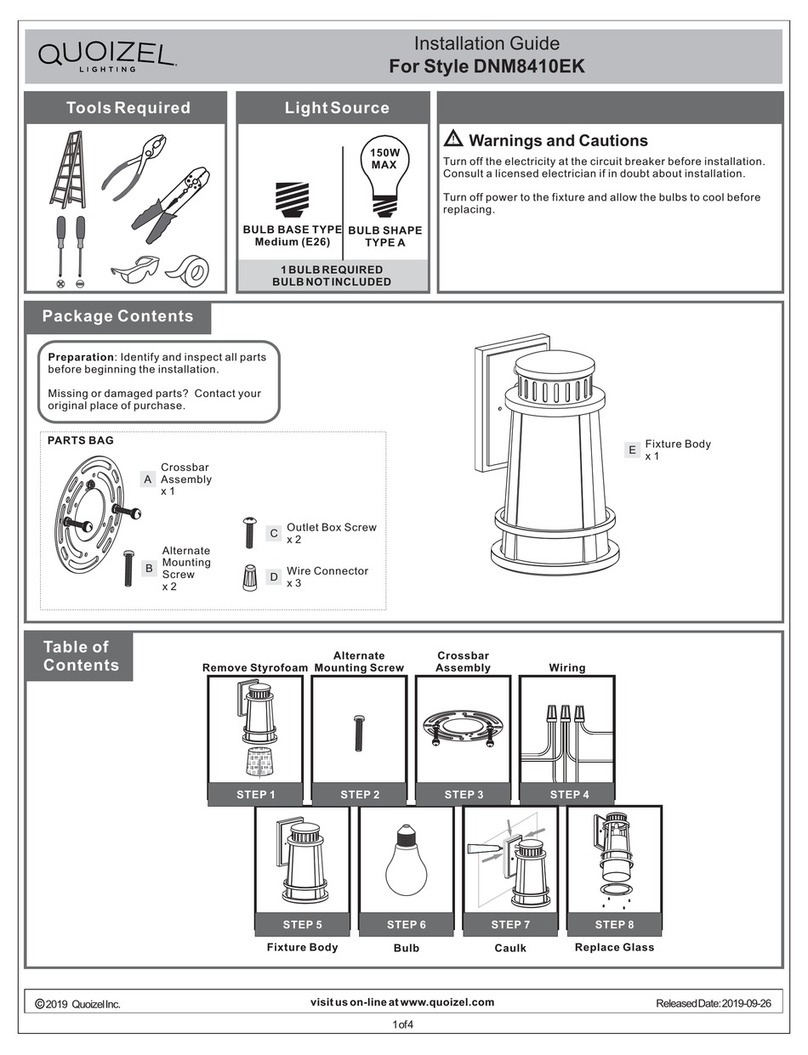
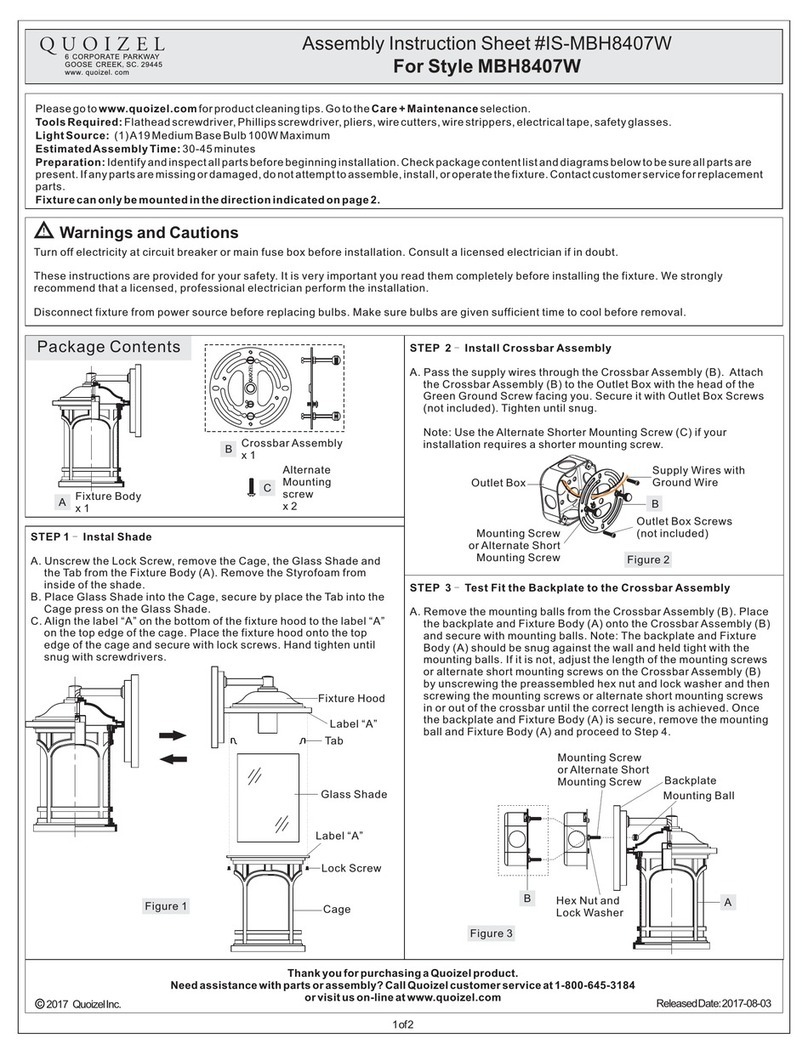
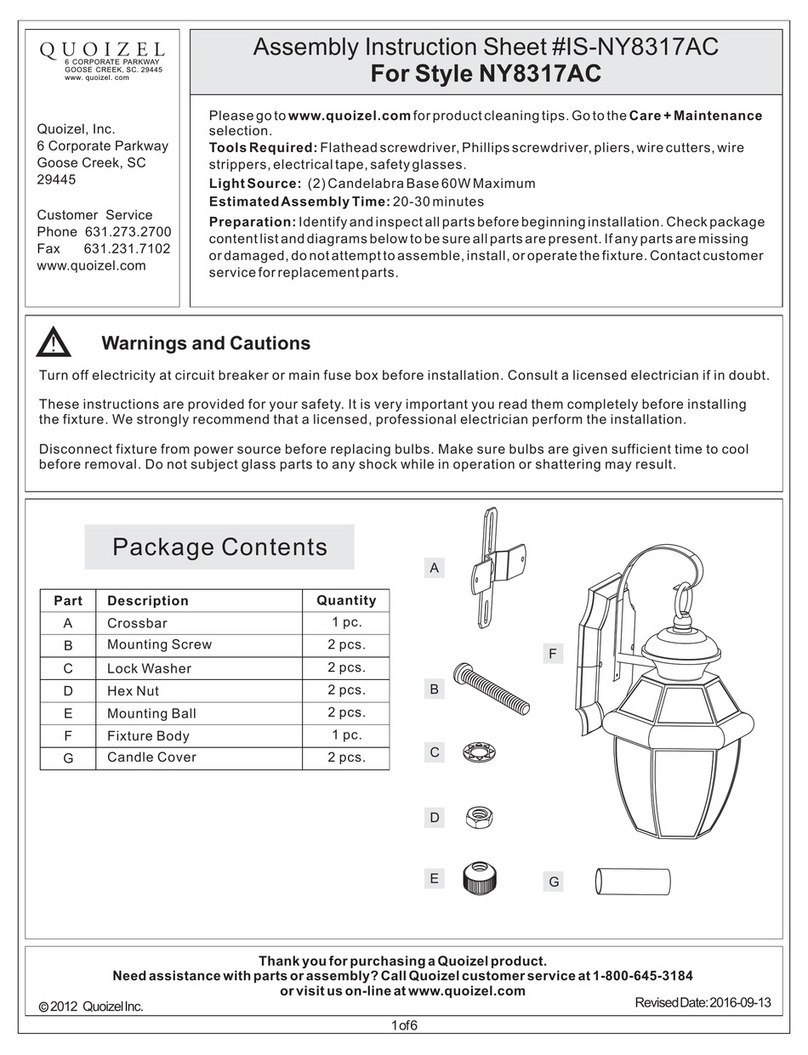
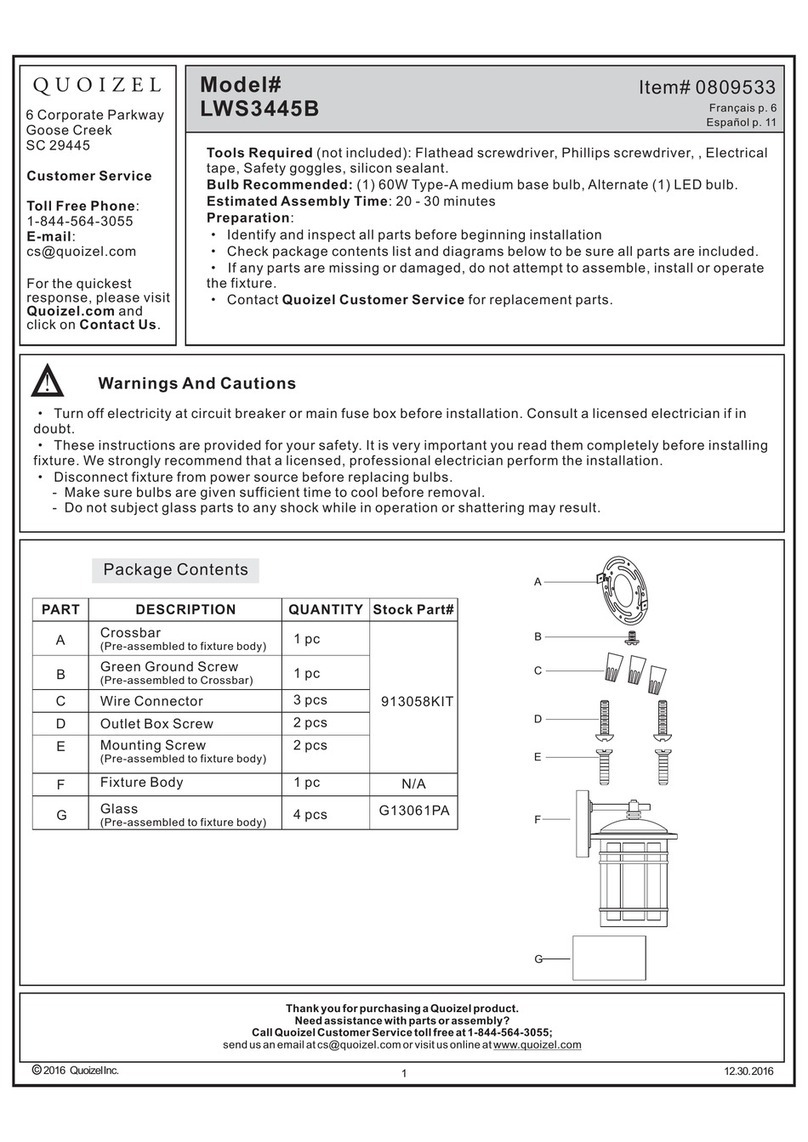
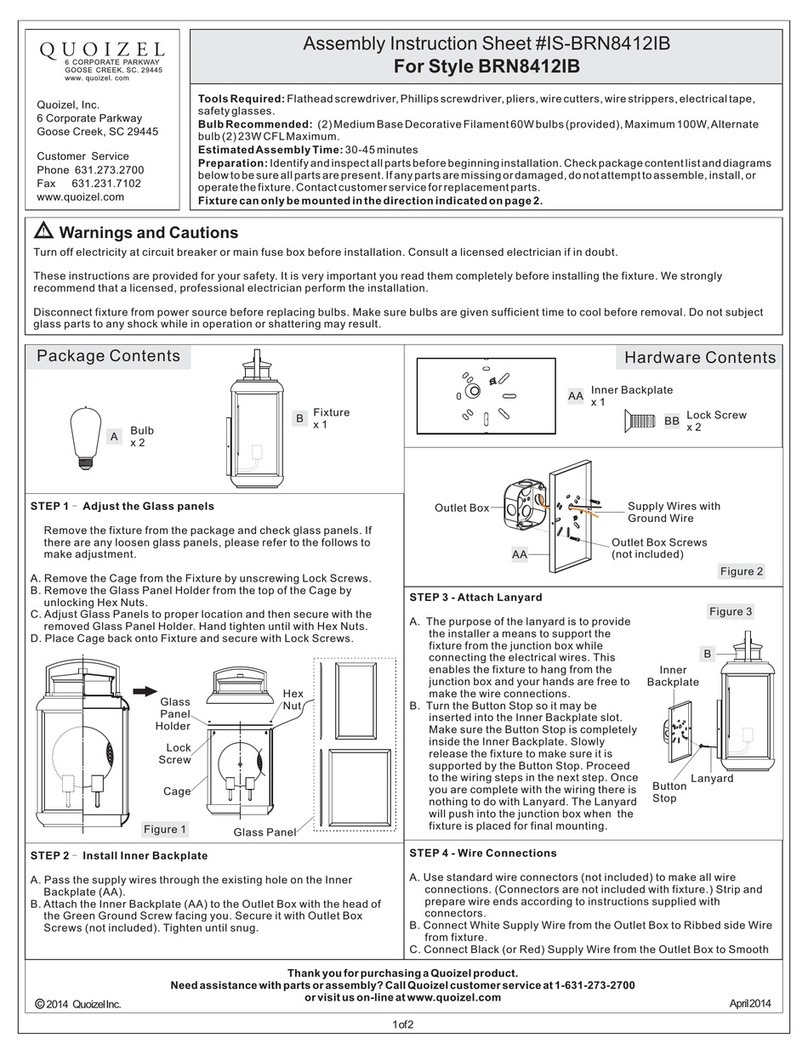
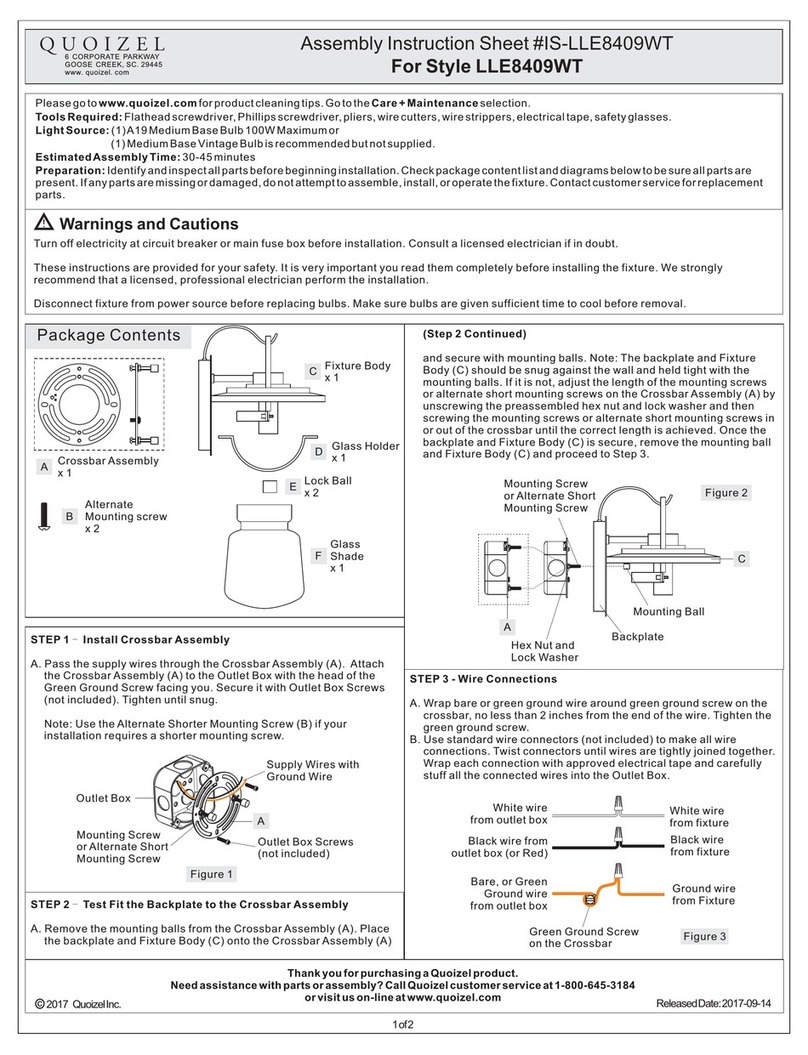
Package Contents
Warnings and Cautions
1of2
Assembly Instruction Sheet #IS-SNNL8411
For Styles SNNL8411K and SNNL8411PN
Thank you for purchasing a Quoizel product.
Need assistance with parts or assembly? Call Quoizel customer service at 1-631-273-2700
or visit us on-line at www.quoizel.com
Turn off electricity at circuit breaker or main fuse box before installation. Consult a licensed electrician if in doubt.
These instructions are provided for your safety. It is very important you read them completely before installing the fixture. We strongly
recommend that a licensed, professional electrician perform the installation.
Disconnect fixture from power source before replacing bulbs. Make sure bulbs are given sufficient time to cool before removal. Do not subject
glass parts to any shock while in operation or shattering may result.
A
Crossbar
Assembly
x1
Pleasegoto forproductcleaningtips.Gotothe selection.
LED22W
20-30minutes
Identifyandinspectallpartsbeforebeginninginstallation.Checkpackagecontentlistanddiagramsbelowtobesureallpartsare
present.Ifanypartsaremissingordamaged,donotattempttoassemble,install,oroperatethefixture.Contactcustomerserviceforreplacement
parts.
www.quoizel.com Care + Maintenance
EstimatedAssemblyTime:
Preparation:
Fixturecanonlybemountedinthedirectionindicatedonpage2.
ToolsRequired: Flathead screwdriver, Phillips screwdriver, pliers, wire cutters, wire strippers, electrical tape, safety glasses.
Integrated
BFixture Body
x1
STEP 1 Install Crossbar Assembly-
A. Pass the supply wires through the Crossbar Assembly (A). Attach
the Crossbar Assembly (A) to the Outlet Box with the head of the
Green Ground Screw facing you. Secure it with Outlet Box Screws
(not included). Tighten until snug.
Supply Wires
with Ground Wire
Outlet Box Screws
(not included)
Outlet
Box
Figure 1
A
STEP 2 Fit Backplate to
Crossbar Assembly
-
A.
on Fixture Body (B) to
the
Remove mounting balls from the
Crossbar Assembly (A). Fit the
backplate
Crossbar Assembly (A) and
secure with mounting balls.
Note: The backplate
should be snug against
the wall and the mounting balls.
If
on Fixture
Body (B)
not, adjust the length of the
mounting screw on the Crossbar
Assembly (A) by unscrewing the
preassembled hex nut and lock
washer and then screwing the
Figure 2
mounting screws in or out of the crossbar until the correct length is
achieved. Once the backplate on Fixture Body (B) is secure, remove
the mounting ball and Fixture Body (B) and proceed to Step 3.
Mounting
Screw
B
Mounting Ball
A
Backplate
Hex Nut and
Lock Washer
STEP 3 - Wire Connections
A. Use standard wire connectors (not included) to make all wire
connections. (Connectors are not included with fixture.) Twist
connectors until wires are tightly joined together. Wrap each
connection with approved electrical tape and carefully stuff all the
connected wires into the Outlet Box.
White wire
from supply White wire
from fixture
Black wire from
supply (or Red)
Black wire
from fixture
Ground wire
from supply
Ground wire
from fixture
Figure 3
Figure 4
STEP 4 Install Fixture Body-
A. Carefully tuck all wires into the
outlet box and position the
backplate of Fixture Body (B)
over the outlet box. Align the
holes in the backplate with the
mounting screws. Place caulk
(not supplied) into the
previously removed mounting
balls and then attach Fixture
Body (B) using the mounting
balls. Hand tighten until snug.
Mounting Screw
B
Mounting Ball
A
Backplate
Figure 5
STEP 5 -Apply Silicone Sealer
A. Make sure exterior wall surface and
fixture backplate are free of dirt
before applying caulk. Using
exterior grade caulk, caulk over top
of backplate and down other side.
Do not caulk bottom of fixture
backplate to ensure proper moisture
drainage.
Your fixture is now assembled and
ready to use. Enjoy!
Exterior
Grade
Caulk
Backplate
2016 QuoizelInc. January2016
2of2
Thank you for purchasing a Quoizel product.
Need assistance with parts or assembly? Call Quoizel customer service at 1-631-273-2700
or visit us on-line at www.quoizel.com
2016 QuoizelInc.
HOW TO REPLACE GLASS PANELS
Allen Screw
Glass Panel
Cage
A. Fixture Hood. Separate Quick
Connector and then remove Cage with Glass Panels from the
fixture.
B. Unscrew Screws from the Cage and remove LED Module and Heat
Unlock Allen Screws on the
Figure 6
Glass Holder
Fixture Hood
Sink, Glass Holders.
Replace Glass Panels from
the Cage and then re-install
Glass Holders, LED Module
and Heat Sink . Secure with
removed Screws.
C. Connect Quick Connectors.
Attach Cage with Glass
Panels back onto the Fixture
Hood and secure with Allen
Screws.
LED Module
and Heat Sink
Quick
Connector
Screw
HOW TO REPLACE LED MODULE
A. Fixture Hood. Separate Quick
Connector and then remove Cage with Glass Panels from the
fixture.
B. Unscrew Screws from the Cage and remove LED Module and Heat
Sink.
C. Unscrew Lock Screws on the LED Module. Replace the LED Module
Unlock Allen Screws on the
SNNL8411K
FINISH: MYSTIC BLACK
SNNL8411PN
FINISH: PALLADIAN BRONZE
PART NUMBER
1
NO. PART NUMBER
G12673PA
REPLACEMENT PART
GLASS PANEL
QTY.
4NOTE: ALL DIMENSIONS ARE ROUNDED UP TO THE NEAREST 1/4"
Fixture can only be
mounted in the
direction indicated
with the replacement.
Pass Lock Screws
through the replacement
LED Module, the Heat
Sinks as shown and
thread Hex Nuts onto
Lock Screws to secure
them together. Hand
tighten until snug.
D. Pass the Quick
Connector from the LED
Module through the hole
on the Heat Sink.
E. Re-install LED Module
and Heat Sink onto the
top edge of the Cage.
Secure with Screws.
Connect Quick
Connectors. Attach
Cage with Glass Panels
back onto the Fixture
Hood and secure with
Allen Screws.
17”
8”
6.5”
12” 11”
4.5”
January2016
Allen Screw
Fixture Hood
Screw
LED Module
Quick
Connector
Cage with
Glass Panels
Lock Screw
Heat Sink
Figure 7
Hex
Nut
Upper
Heat Sink
1

This manual suits for next models

1

Other Quoizel Outdoor Light manuals

Quoizel GRD8405W User manual

Quoizel

Quoizel GRD8405W User manual

Quoizel Style OAS8411Z Mounting instructions

Quoizel

Quoizel Style OAS8411Z Mounting instructions

Quoizel ASH28858A0 User manual

Quoizel

Quoizel ASH28858A0 User manual

Quoizel MBH8407PN Mounting instructions

Quoizel

Quoizel MBH8407PN Mounting instructions

Quoizel Newbury NY8316Z Mounting instructions

Quoizel

Quoizel Newbury NY8316Z Mounting instructions

Quoizel SAT9009MBK User manual

Quoizel

Quoizel SAT9009MBK User manual

Quoizel HRT8701MBK User manual

Quoizel

Quoizel HRT8701MBK User manual

Quoizel Marblehead MBH8407W Mounting instructions

Quoizel

Quoizel Marblehead MBH8407W Mounting instructions

Quoizel CRN9009IA User manual

Quoizel

Quoizel CRN9009IA User manual

Quoizel RNL8408WT Mounting instructions

Quoizel

Quoizel RNL8408WT Mounting instructions

Quoizel NY8318A Mounting instructions

Quoizel

Quoizel NY8318A Mounting instructions

Quoizel MRL9009SU User manual

Quoizel

Quoizel MRL9009SU User manual

Quoizel BURD8413AC User manual

Quoizel

Quoizel BURD8413AC User manual

Quoizel TF6150MBK User manual

Quoizel

Quoizel TF6150MBK User manual

Quoizel TRE8407K Mounting instructions

Quoizel

Quoizel TRE8407K Mounting instructions

Quoizel Style NY8315Z Mounting instructions

Quoizel

Quoizel Style NY8315Z Mounting instructions

Quoizel RPT8411PN User manual

Quoizel

Quoizel RPT8411PN User manual

Quoizel MRL9009BBR User manual

Quoizel

Quoizel MRL9009BBR User manual

Quoizel LaSalle LLE8409WT Mounting instructions

Quoizel

Quoizel LaSalle LLE8409WT Mounting instructions

Quoizel HC8411IB Mounting instructions

Quoizel

Quoizel HC8411IB Mounting instructions

Quoizel PRV8408K User manual

Quoizel

Quoizel PRV8408K User manual

Quoizel SNN8411K Mounting instructions

Quoizel

Quoizel SNN8411K Mounting instructions

Quoizel RO8418AC User manual

Quoizel

Quoizel RO8418AC User manual

Quoizel CKME1723T Mounting instructions

Quoizel

Quoizel CKME1723T Mounting instructions

Popular Outdoor Light manuals by other brands

RZB Lighting DIN 4844 Instruction

RZB Lighting

RZB Lighting DIN 4844 Instruction

Philips 15213/**/16 user manual

Philips

Philips 15213/**/16 user manual

alverlamp LEX90030 manual

alverlamp

alverlamp LEX90030 manual

LIGMAN ECO 2 installation manual

LIGMAN

LIGMAN ECO 2 installation manual

Feiss OL13507 installation instructions

Feiss

Feiss OL13507 installation instructions

ABBA CDPS71 installation guide

ABBA

ABBA CDPS71 installation guide

Home Zone Security ELI0989V installation instructions

Home Zone Security

Home Zone Security ELI0989V installation instructions

LightAccents 69400 quick start guide

LightAccents

LightAccents 69400 quick start guide

Romus 96205 Instructions for use

Romus

Romus 96205 Instructions for use

nordlux CHRISTINA Mounting instructions

nordlux

nordlux CHRISTINA Mounting instructions

LIGMAN COLUMBUS 8 user manual

LIGMAN

LIGMAN COLUMBUS 8 user manual

WE-EF DOC100 LED Series Installation and maintenance instructions

WE-EF

WE-EF DOC100 LED Series Installation and maintenance instructions

Maxim Lighting Dover VX 40096CDBZ installation instructions

Maxim Lighting

Maxim Lighting Dover VX 40096CDBZ installation instructions

Meyer Fluxa BG LED Mounting instructions

Meyer

Meyer Fluxa BG LED Mounting instructions

Thorn ORUS LED installation instructions

Thorn

Thorn ORUS LED installation instructions

LUTEC GHOST SOLAR 6901401337 user manual

LUTEC

LUTEC GHOST SOLAR 6901401337 user manual

Coopers of Stortford Pre Lit Autumn Wreath Instructions for use

Coopers of Stortford

Coopers of Stortford Pre Lit Autumn Wreath Instructions for use

Licatec Edgelight PLM III Series Assembly instruction

Licatec

Licatec Edgelight PLM III Series Assembly instruction

manuals.online logo
manuals.online logoBrands
  • About & Mission
  • Contact us
  • Privacy Policy
  • Terms and Conditions

Copyright 2025 Manuals.Online. All Rights Reserved.